- 2003 Toyota Sienna Owners Manuals
- Toyota Sienna Owners Manuals
- 1999 Toyota Sienna Owners Manuals
- Toyota Sienna Owners Manuals
- 2005 Toyota Sienna Owners Manuals
- Toyota Sienna Owners Manuals
- 2010 Toyota Sienna Owners Manuals
- Toyota Sienna Owners Manuals
- 2014 Toyota Sienna Owners Manuals
- Toyota Sienna Owners Manuals
- 1998 Toyota Sienna Owners Manuals
- Toyota Sienna Owners Manuals
- 2004 Toyota Sienna Owners Manuals
- Toyota Sienna Owners Manuals
- 2001 Toyota Sienna Owners Manuals
- Toyota Sienna Owners Manuals
- 2006 Toyota Sienna Owners Manuals
- Toyota Sienna Owners Manuals
- 2009 Toyota Sienna Owners Manuals
- Toyota Sienna Owners Manuals
- 2000 Toyota Sienna Owners Manuals
- Toyota Sienna Owners Manuals
- 2012 Toyota Sienna Owners Manuals
- Toyota Sienna Owners Manuals
- 2008 Toyota Sienna Owners Manuals
- Toyota Sienna Owners Manuals
- 2007 Toyota Sienna Owners Manuals
- Toyota Sienna Owners Manuals
- 2002 Toyota Sienna Owners Manuals
- Toyota Sienna Owners Manuals
- 2011 Toyota Sienna Owners Manuals
- Toyota Sienna Owners Manuals
- 2015 Toyota Sienna Owners Manuals
- Toyota Sienna Owners Manuals
- Download PDF Manual
-
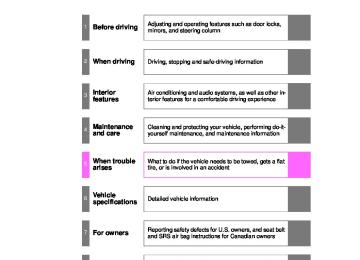
Armrests........................... 616
Assist grips....................... 618
Rear side sunshades ....... 619
Grocery bag hooks........... 620
Floor mat.......................... 622
Luggage compartment features.......................... 624
Garage door opener......... 626
Compass.......................... 634
Safety Connect ................ 639395
SIENNA_OM_OM45483U_(U)
3-1. Using the air conditioning system and defogger Front manual air conditioning system
Driver’s side temperature control dial
Front fan speed
Air outlet selector buttons
Rear temperature control dial
Front air conditioning on/off switch
Off
Windshield defogger
Passenger’s side temperature control dial
Rear fan speed
Outside air or recirculated air mode
Adjusting the settings
■ Basic setting STEP 1
To turn on the air conditioning system and adjust the fan
speed, press “” on
to increase the fan speed and “” to
decrease the fan speed. The fan speed is shown on the control panel. (6 levels) Press
to turn the fan off.
396
: If equipped
SIENNA_OM_OM45483U_(U)
3-1. Using the air conditioning system and defogger
STEP 2
Driver’s side temperature control dial Turn the temperature control dial clockwise (warm) or coun- terclockwise (cool).
If
is not pressed, the system will blow ambient temperature air
or heated air. For quick cooling, turn the temperature control dial to the “MAX A/C” position. The air conditioning will automatically turn on and the air circulation mode will be set to recirculated air mode. When the dial is in the “MAX A/C” position, the air conditioning sys-
tem cannot be turned off even if
is pressed.
Front passenger’s side temperature control dial Turn the temperature control dial clockwise (warm) or counter clockwise (cool).
397
SIENNA_OM_OM45483U_(U)
3-1. Using the air conditioning system and defogger
STEP 3
To change the air outlets, press
or
Air flows as shown below according to the mode selected.
Air flows to the upper body.
Air flows to the upper body and feet.
Air flows mainly to the feet.
398
SIENNA_OM_OM45483U_(U)
3-1. Using the air conditioning system and defogger
Air flows to the feet and the windshield defogger operates.
■ Switching between outside air and recirculated air modes
Press
The mode switches between outside air mode (introduces air from out- side the vehicle) (indicator off) and recirculated air mode (recycles air inside the vehicle) (indicator on) each time the button is pressed.
Changing the rear setting
■ Adjusting the temperature setting
Turn the rear temperature control dial clockwise (increase) or counterclockwise (decrease).
When the rear temperature control dial is turned to “REAR CTRL”, the rear temperature and fan speed can be operated from the rear air conditioning control panel. (P. 414)
399
SIENNA_OM_OM45483U_(U)
3-1. Using the air conditioning system and defogger
■ Adjusting rear fan speed
Press “” on
to increase the fan speed and “” to decrease
the fan speed. The fan speed is shown on the control panel. (4 levels)
Press
to turn the fan off.
Defogging the windshield
Press
The air conditioning system oper- ates automatically. Recirculated air mode will auto- matically switch to outside air mode. It is not possible to return to recirculated air mode when the switch is on.
Pressing
again will revert
to the previous air outlet mode.
400
SIENNA_OM_OM45483U_(U)
3-1. Using the air conditioning system and defogger
Adjusting the position of and opening and closing the air outlets
Center outlets
Direct air flow to the left or right, up or down.
Right and left side outlets
Adjusting: Direct air flow to the left or right, up or down.
Opening and closing:
Close the vent. Open the vent.
401
SIENNA_OM_OM45483U_(U)
3-1. Using the air conditioning system and defogger
■Using the system in recirculated air mode
The windows will fog up more easily if the recirculated air mode is used for an extended period.
■When
is selected for the air outlets used
For your driving comfort, air flowing to the feet may be warmer than air flow- ing to the upper body depending on the temperature setting.
■When the indicator light on
flashes
Press and turn off the air conditioning system before turning it on once more. There may be a problem in the air conditioning system if the indicator light continues to flash. Turn the air conditioning system off and have it inspected by your Toyota dealer.
■Air conditioning odors
●During use, various odors from inside and outside the vehicle may enter into and accumulate in the air conditioning system. This may then cause odor to be emitted from the vents.
●To reduce potential odors from occurring:
It is recommended that the air conditioning system be set to outside air mode prior to turning the vehicle off.
402
SIENNA_OM_OM45483U_(U)
3-1. Using the air conditioning system and defogger
CAUTION
■To prevent the windshield from fogging up
Do not use during cool air operation in extremely humid weather. The difference between the temperature of the outside air and that of the wind- shield can cause the outer surface of the windshield to fog up, blocking your vision.
NOTICE
■To prevent battery discharge
Do not leave the air conditioning system on longer than necessary when the engine is stopped.
403
SIENNA_OM_OM45483U_(U)
3-1. Using the air conditioning system and defogger Front automatic air conditioning system
Airflow and outlets are automatically adjusted according to the tem- perature setting. Control panel
Changes the front air outlets used
Front air conditioning on/off switch Rear fan speed
Driver’s side temperature control dial
Changes the rear air outlets used Simultaneous mode
Automatic mode
Passenger’s side temperature control
Front fan speed
Windshield defogger
Off
Rear temperature control
Rear air conditioning on/off switch
Outside air or recirculated air mode
404
: If equipped
SIENNA_OM_OM45483U_(U)
3-1. Using the air conditioning system and defogger
Multi-information display
Front Airflow display
Driver’s side temperature setting display
Air conditioning on indicator
Rear fan speed display
Automatic mode indicator
Passenger’s side temperature setting display
Front fan speed display
Rear airflow display
Rear temperature setting display
Using the automatic mode
STEP 1
Press
The air conditioning system will begin to operate. In outside air or recirculated air mode, air outlets, fan speed and air conditioning on/ off are automatically adjusted according to the temperature setting. “AUTO” will be displayed on the multi-information display. Turn the temperature control dial clockwise (warm) or coun- terclockwise (cool). The temperature for the driver and passenger seat can be set sepa- rately.
STEP 2
405
SIENNA_OM_OM45483U_(U)
3-1. Using the air conditioning system and defogger
Adjusting the settings
■ Adjusting the temperature setting
Turn the temperature control dial clockwise (warm) or counter- clockwise (cool). The air conditioning system switches between individual and simulta-
neous modes each time
is pressed.
Individual mode: The temperature for the driver’s, passenger’s and rear seats can be set separately. Operating the passenger’s side or rear temperature control will enter individual mode.
Simultaneous mode: Only the temperature control dial (driver’s side) can
be used to adjust the temperature for all seats.
■ Adjusting the fan speed
Press “” (increase) or “” (decrease) on
The fan speed is shown on the display. (7 levels)
Press
to turn the fan off.
406
SIENNA_OM_OM45483U_(U)
3-1. Using the air conditioning system and defogger
Adjusting the settings manually
■ Basic setting STEP 1
To turn on the air conditioning system and adjust the fan
speed, press “” on
to increase the fan speed and “” to
decrease the fan speed.
Press
to turn the fan off.
STEP 2
To adjust the temperature setting, turn the temperature control dial (driver’s side) clockwise to increase the temperature and turn the temperature control dial (driver’s side) counterclock- wise to decrease the temperature.
When
is pressed or the passenger’s side temperature
control is pressed, the temperature for the driver and passen- ger seats can be adjusted separately.
STEP 3
Press
407
SIENNA_OM_OM45483U_(U)
3-1. Using the air conditioning system and defogger
The air outlets switch each time shown on the display indicates the following.
is pressed. The air flow
Air flows to the upper body.
Air flows to the upper body and feet.
Air flows mainly to the feet.
408
SIENNA_OM_OM45483U_(U)
3-1. Using the air conditioning system and defogger
Air flows to the feet and the windshield defogger operates.
■ Switching between outside air and recirculated air modes
Press
The mode switches between outside air mode (introduces air from out- side the vehicle) (indicator off) and recirculated air mode (recycles air inside the vehicle) (indicator on) each time the button is pressed.
Changing the rear setting
■ Adjusting the temperature setting
STEP 1
Press
(indicator on).
STEP 2
Press “
” on
to increase the temperature and “
” to
decrease the temperature. The air conditioning system switches between individual and simul-
taneous modes each time
is pressed.
409
SIENNA_OM_OM45483U_(U)
3-1. Using the air conditioning system and defogger
■ Adjusting the fan speed
Press “” on
to increase the fan speed and “” to decrease
the fan speed.
Press
to turn the fan off.
■ Changing the air outlets
Press
The air outlets switch each time the button is pressed. (P. 418)
Defogging the windshield
Press
The air conditioning system oper- ates automatically. Recirculated air mode will auto- matically switch to outside air mode. It is not possible to return to recirculated air mode when the switch is on.
Pressing to the previous air outlet mode.
again will revert
410
SIENNA_OM_OM45483U_(U)
3-1. Using the air conditioning system and defogger
Adjusting the position of and opening and closing the air outlets
Center outlets
Direct air flow to the left or right, up or down.
Right and left side outlets
Adjusting: Direct air flow to the left or right, up or down.
Opening and closing:
Close the vent. Open the vent.
411
SIENNA_OM_OM45483U_(U)
3-1. Using the air conditioning system and defogger
■Using the automatic mode
Fan speed is adjusted automatically in accordance with the temperature set- ting and ambient conditions. As a result, the following may occur.
●Immediately after
is pressed, the fan may stop for a while until
warm or cool air is ready to flow.
●Cool air may flow to the area around the upper body when the heater is
on.
■Using the system in recirculated air mode
The windows will fog up more easily if the recirculated air mode is used
■Switching between outside air and recirculated air modes
Recirculated air mode or outside air mode may be automatically switched in accordance with the temperature setting and the inside temperature.
■Window defogger feature
Recirculated air mode may automatically switch to outside air mode in situa- tions where the windows need to be defogged.
■Temperature display
The temperature display (English/U.S. Customary System and metric units) on the trip information display can be changed. (P. 260)
■When
is selected for the air outlets used
For your driving comfort, air flowing to the feet may be warmer than air flow- ing to the upper body depending on the temperature setting.
■When outside temperature approaches 32F (0C)
The air conditioning system may not operate even when
is pressed.
412
SIENNA_OM_OM45483U_(U)
3-1. Using the air conditioning system and defogger
■When the “A/C ON” in the multi-information display flashes
Press and turn off the air conditioning system before turning it on once more. There may be a problem in the air conditioning system if the indi- cator light continues to flash. Turn the air conditioning system off and have it inspected by your Toyota dealer.
■Air conditioning odors
●During use, various odors from inside and outside the vehicle may enter into and accumulate in the air conditioning system. This may then cause odor to be emitted from the vents.
●To reduce potential odors from occurring:
• It is recommended that the air conditioning system be set to outside air
mode prior to turning the vehicle off.
• The start timing of the blower may be delayed for a short period of time immediately after the air conditioning system is started in automatic mode.
CAUTION
■To prevent the windshield from fogging up
during cool air operation in extremely humid weather. The Do not use difference between the temperature of the outside air and that of the wind- shield can cause the outer surface of the windshield to fog up, blocking your vision.
NOTICE
■To prevent battery discharge
Do not leave the air conditioning system on longer than necessary when the engine is stopped.
413
SIENNA_OM_OM45483U_(U)
3-1. Using the air conditioning system and defogger Rear manual air conditioning system
Changes the air outlet used
Fan speed control dial
Temperature control dial
Adjusting the settings
■ Adjusting the temperature setting
Turn the temperature control dial clockwise (warm) or counter- clockwise (cool).
■ Adjusting the fan speed
Turn the fan speed control dial clockwise (increase) or counter- clockwise (decrease).
■ The temperature setting and fan speed will only function
If the rear temperature dial on the front air conditioning controls is in the “REAR CTRL” position.
414
: If equipped
SIENNA_OM_OM45483U_(U)
3-1. Using the air conditioning system and defogger
■ Changing the air outlets
Press the desired
Air flows as shown below according to the mode selected.
Air flows to the upper body.
Air flows to the upper body and feet.
Air flows to the feet.
415
SIENNA_OM_OM45483U_(U)
3-1. Using the air conditioning system and defogger
Adjusting the position of and opening and closing the air outlets
Direct air flow to the front or rear, up or down.
NOTICE
■To prevent battery discharge
Do not leave the air conditioning system on longer than necessary when the engine is off.
416
SIENNA_OM_OM45483U_(U)
3-1. Using the air conditioning system and defogger Rear automatic air conditioning system
Airflow and outlets are automatically adjusted according to the tem- perature setting.
Fan speed display
Temperature setting display
Simultaneous mode indicator
Fan speed control
Airflow display
Temperature setting
Automatic mode
Off
Changes the air outlet used
Automatic mode indicator
Using the automatic mode
STEP 1
Press
The air conditioning system begins to operate. Air outlets and fan speed are automatically adjusted according to the temperature set- ting.
STEP 2
Press “” on
to increase the temperature and “” to
decrease the temperature.
: If equipped 417
SIENNA_OM_OM45483U_(U)
3-1. Using the air conditioning system and defogger
Adjusting the settings
■ Adjusting the temperature setting
Press “” on
to increase the temperature and “” to
decrease the temperature. ■ Changing the air outlets
Press the desired
Air flows as shown below according to the mode selected.
Air flows to the upper body.
Air flows to the upper body and feet.
418
SIENNA_OM_OM45483U_(U)
3-1. Using the air conditioning system and defogger
Air flows to the feet.
■ Adjusting the fan speed
Press “” on
to increase the fan speed and “” to decrease
the fan speed.
Press
to turn the fan off.
Adjusting the position of the air outlets
Direct air flow to the front or rear, up or down.
419
SIENNA_OM_OM45483U_(U)
3-1. Using the air conditioning system and defogger
■Temperature display
The temperature display (English/U.S. Customary System and metric units) on the trip information display can be changed. (P. 260)
■When the front air conditioning system is in simultaneous mode
“SYNC” is shown on the display. The rear air conditioning system controls will continue to function. (P. 406)
NOTICE
■To prevent battery discharge
Do not leave the air conditioning system on longer than necessary when the engine is off.
420
SIENNA_OM_OM45483U_(U)
3-1. Using the air conditioning system and defogger Rear window and outside rear view mirror defoggers, and windshield wiper de-icer
The rear window defogger is used to defog the rear window. The out- side rear view mirror defoggers*1 are used to remove frost, dew or raindrops from the outside rear view mirrors. The windshield wiper de-icer*2 is used to prevent ice from building up on the windshield and wiper blades. Vehicles with manual air conditioning system
Turns the rear window and outside rear view mirror defog- gers and windshield wiper de- icer on/off.
The defoggers and de-icer will automatically turn off after approximately 15 minutes. If outside temperature is below 32F (0C), this will extend by 45 minutes.
Vehicles with automatic air conditioning system
*1: Vehicles with outside rear view mirror defoggers *2: Vehicles with windshield wiper de-icer
421
SIENNA_OM_OM45483U_(U)
3-1. Using the air conditioning system and defogger
■The defogger can be operated when Vehicles without a smart key system The engine switch is in the “ON” position. Vehicles with a smart key system The “ENGINE START STOP” switch is IGNITION ON mode.
■Outside rear view mirror defoggers (vehicles with outside rear view
mirror defoggers) Turning the rear window defogger on will turn the outside rear view mirror defoggers on.
■The outside rear view mirror defoggers and windshield wiper de-icer
(vehicles with windshield wiper de-icer) Turning the rear window defogger on will turn the outside rear view mirror defoggers and windshield wiper de-icer on.
CAUTION
■Outside rear view mirror defoggers (vehicles with outside rear view
mirror defoggers) The surfaces of the outside rear view mirrors become hot. Do not touch them to prevent from burning yourself.
■When the windshield wiper de-icer is on (vehicles with windshield
wiper de-icer) Do not touch the glass at the lower part of the windshield or to the side of the front pillars as the surfaces can become very hot and burn you.
422
SIENNA_OM_OM45483U_(U)
3-2. Using the audio system Audio system type
With navigation system
Owners of models equipped with a navigation system should refer to the “NAVIGATION SYSTEM OWNER’S MANUAL”.
Without navigation system
Type A and B: CD player with AM/FM radio Type C: CD player with changer and AM/FM radio.
Type A
: If equipped 423
SIENNA_OM_OM45483U_(U)
3-2. Using the audio system
Type B
Type C
424
SIENNA_OM_OM45483U_(U)
3-2. Using the audio system
Title
Using the radio Using the CD player Playing back MP3 and WMA discs Operating an iPod Operating a USB memory Optimal use of the audio system Using the AUX port Using the steering switches
Page P. 428
P. 438
P. 447
P. 458
P. 465
P. 473
P. 478
P. 479Language settings (type B and C)
The language used for all voice guidance, voice recognition and mes- sages may be changed.
STEP 1
Press
STEP 2
Press
that corresponds to “MORE”.
STEP 3
Press
that corresponds to “LANG”.
STEP 4
Press
that corresponds to the desired language.
For vehicles sold in the U.S.A. “ENG” (English) or “ESP” (Spanish) For vehicles sold in the Canada “ENG” (English) or “FRAN” (French)
425
SIENNA_OM_OM45483U_(U)
3-2. Using the audio system
■Using cellular phones
Interference may be heard through the audio system’s speakers if a cellular phone is being used inside or close to the vehicle while the audio system is operating.
CAUTION
■For vehicles sold in the U.S.A.
●Part 15 of the FCC Rules
FCC Warning: Any unauthorized changes or modifications to this equipment will void the user’s authority to operate this device. This device complies with part 15 of the FCC Rules. Operation is subject to the following two conditions: (1) This device may not cause harmful interference, and (2) this device must accept any interference received, including interference that may cause undesired operation.
●Laser products
• Do not take this unit apart or attempt to make any changes yourself.
This is an intricate unit that uses a laser pickup to retrieve information from the surface of compact discs. The laser is carefully shielded so that its rays remain inside the cabinet. Therefore, never try to disas- semble the player or alter any of its parts since you may be exposed to laser rays and dangerous voltages.
• This product utilizes a laser.
Use of controls or adjustments or performance of procedures other than those specified herein may result in hazardous radiation expo- sure. The use of optical instruments with this product will increase eye haz- ard.
426
SIENNA_OM_OM45483U_(U)
3-2. Using the audio system
NOTICE
■To prevent battery discharge
Do not leave the audio system on longer than necessary with the engine off.
■To avoid damaging the audio system
Take care not to spill drinks or other fluids over the audio system.
427
SIENNA_OM_OM45483U_(U)
3-2. Using the audio system Using the radio
Type A
Power
Volume
Station selector
Adjusting the frequency (AM, FM mode) or channel (SAT mode)
Seeking the frequency
Changing the channel
AM•SAT/FM mode buttons
Scanning for receivable stations
Displaying radio text messages
428
SIENNA_OM_OM45483U_(U)
3-2. Using the audio system
Adjusting the frequency (AM, FM mode) or channel (SAT mode)
Changing the channel
Type B and C
Power
Volume
Station selector
Seeking the frequency
Silencing the sound
Scanning for receivable stations
Displaying radio text messages
Selecting the preset station pages
AM/FM/SAT mode button
SIENNA_OM_OM45483U_(U)
429
3-2. Using the audio system
Setting station presets (excluding XM® Satellite Radio)
STEP 1
Search for desired stations by turning
or
or
pressing “” or “” on
STEP 2
to
Press and hold the button (from until you hear a beep. Type B and C: Each time are 6 sets of 6 presets. There is a total of 36 presets.
is pressed, station pages are changed. There
or one of
430
SIENNA_OM_OM45483U_(U)
3-2. Using the audio system
Scanning radio stations (excluding XM® Satellite Radio)
■ Scanning the preset radio stations
STEP 1
STEP 2
Press and hold until you hear a beep. Preset stations will be played for 5 seconds each. When the desired station is reached, press again.
■ Scanning all radio stations within range
once
STEP 1
Press All stations with reception will be played for 5 seconds each.
STEP 2
When the desired station is reached, press again.
once
■ Displaying radio text messages (for type B and C, FM mode
only) When a new radio text message is received, “MSG” is shown on the display. To display the message, press
If the text continues past the end of the display, “
” is displayed.
Press and hold until you hear a beep. Text messages are not displayed while driving.
431
SIENNA_OM_OM45483U_(U)
3-2. Using the audio system
XM® Satellite Radio (if equipped)
■ Receiving XM® Satellite Radio
STEP 1
Press
or
The display changes as follows each time the button is pressed. Type A AM SAT1 SAT2 SAT3
Type B and C AM FM SATSTEP 2
Turn
or
to select a desired channel in all the
categories or press “” or “” on channel in the current category.
to select the desired
■ Setting XM® Satellite Radio channel presets
Select the desired channel. Press and hold a button (from
to
or one of
) until you hear a beep.
Type B and C: Each time total of 6 sets of 6 presets.
is pressed, station pages are changed. There is a
432
SIENNA_OM_OM45483U_(U)
3-2. Using the audio system
■ Changing the channel category
Press “” or “” on
■ Scanning XM® Satellite Radio channels
● Scanning channels in the current category
STEP 1
Press
STEP 2
When the desired channel is reached, press the button again.
● Scanning preset channels
STEP 1
Press and hold
until you hear a beep.
STEP 2
When the desired channel is reached, press the button again.
■ Displaying text information
Press
is pressed, the display changes in the following
Each time order: Type A Channel name Title (song/program title) Name (artist name/ feature) Channel number. Type B and C Title (song/ program title) Title (song/program title)/Name (artist name/ feature).
433
SIENNA_OM_OM45483U_(U)
3-2. Using the audio system
Silencing the sound (type B and C)
Press
Press the button again to turn the system back on.
■When the battery is disconnected (type A only)
All preset stations are erased.
■Radio antenna type
●Detachable antenna (type A and B)
To remove a detachable antenna, carefully turn it counterclockwise.
●Wire antenna (type C)
The radio antenna is mounted inside the rear quarter window.
■Reception sensitivity
●Type B and C Cargo loaded on the roof luggage carrier, especially metal objects, may adversely affect the reception of XM® Satellite Radio. ●Maintaining perfect radio reception at all times is difficult due to the con- tinually changing position of the antenna, differences in signal strength and surrounding objects, such as trains, transmitters, etc.
●Type C The radio antenna is mounted inside the rear quarter window. To maintain clear radio reception, do not attach metallic window tinting or other metallic objects to the antenna wire mounted inside the rear quarter window.
434
SIENNA_OM_OM45483U_(U)
3-2. Using the audio system
■Receiving XM® Satellite Radio
An XM® Satellite Radio is a tuner designed exclusively to receive broadcasts provided under a separate subscription. Availability is limited to the 48 con- tiguous states and 10 Canadian provinces. ●XM® subscriptions
For detailed information about XM® Satellite Radio or to subscribe: U.S.A.– Visit on the web at www.xmradio.com or call 1-800-967-2346. Canada– Visit on the web at www.xmradio.ca or call 1-877-209-0079.
●Radio ID
You will need the radio ID when activating XM® service or reporting a
problem. Select “CH000” using 8-character ID number will appear.
or
, and the receiver’s
●Satellite tuner
The tuner supports only Audio Services (Music and Talk) and the accom- panying Text Information of XM® Satellite Radio.
435
SIENNA_OM_OM45483U_(U)
3-2. Using the audio system
■If the satellite radio does not operate normally
If a problem occurs with the XM® tuner, a message will appear on the dis- play. Refer to the table below to identify the problem, and take the suggested corrective action.
ANTENNA
or
CHECK ANTENNA
UPDATING
or
CHANNEL NOT AUTHORIZED
NO SIGNAL
LOADING
OFF AIR
or
AIR
CHANNEL OFF
The XM® antenna is not connected. Check whether the XM® antenna cable is attached securely. There is a short-circuit in the antenna or the sur- rounding antenna cable. See a Toyota certified dealer. You have not subscribed to XM® Satellite Radio. The radio is being updated with the latest encryp- tion code. Contact XM® Satellite Radio for sub- scription information. When a contract is canceled, you can choose “CH000” and all free-to-air chan- nels. The premium channel you selected is not autho- rized. Wait for about 2 seconds until the radio returns to the previous channel or “CH001”. If it does not change automatically, select another channel. If you want to listen to the premium chan- nel, contact XM® Satellite Radio. The XM® signal is too weak at the current location. Wait until your vehicle reaches a location with a stronger signal. The unit is acquiring audio or program information. Wait until the unit has received the information.
The channel you selected is not broadcasting any programming. Select another channel.
436
SIENNA_OM_OM45483U_(U)
3-2. Using the audio system
There is no song/program title or artist name/fea- ture associated with the channel at that time. No action needed. The channel you selected is no longer available. Wait for about 2 seconds until the radio returns to the previous channel or “CH001”. If it does not change automatically, select another channel.
-----
--- or
CHANNEL NOT
AVAILABLE
Contact the XM® Listener Care Center at 1-800-967-2346 (U.S.A.) or 1-877- 209-0079 (Canada).
■Certifications for the radio tuner
This equipment has been tested and found to comply with the limits for a class B digital device, pursuant to Part 15 of the FCC Rules. These limits are designed to provide reasonable protection against harmful interference in a residential installation. This equipment generates, uses and can radiate radio frequency energy and, if not installed and used in accordance with the instructions, may cause harmful interference to radio communications. How- ever, there is no guarantee that interference will not occur in a particular installation. If this equipment does cause harmful interference to radio or television reception, which can be determined by turning the equipment off and on, the user is encouraged to try to correct the interference by trying one or more of the following: ●Reorienting or relocating the receiving antenna. ●Increasing the separation between the equipment and receiver. ●Connecting the equipment into an outlet on a circuit different from that to
which the receiver is connected.
●Consulting the dealer or an experienced radio/TV technician for help.
437
SIENNA_OM_OM45483U_(U)
3-2. Using the audio system Using the CD player
CD eject
Reverse
Selecting a track
Fast-forward
Selecting a track
Type A
Power
Volume
Searching playback
Random playback
Playback
Repeat play
Displaying text messages
438
SIENNA_OM_OM45483U_(U)
3-2. Using the audio system
CD eject
Selecting a track/fast-forwarding and reversing
CD load (type C only)
Selecting a track
Type B and C
Power
Volume
Playback/ pause
Playback
Searching playback
Repeat play
Displaying text messages
CD selection
Random play
Loading CDs
■ Loading a CD (type A and B)
Insert a CD.
■ Loading a CD (type C) STEP 1
STEP 2
Press Insert a CD when the indicator on the slot turns from amber to green.
439
SIENNA_OM_OM45483U_(U)
3-2. Using the audio system
■ Loading multiple CDs (type C only) STEP 1
STEP 2
STEP 3
until you hear a beep.
Press and hold Insert a CD when the indicator on the slot turns from amber to green. The indicator on the slot turns to amber when the CD is inserted. Insert the next CD when the indicator on the slot turns from amber to green again. Repeat the procedure for the remaining CDs.
To cancel the operation, press within 15 seconds, loading will be canceled automatically.
. If you do not insert a CD
Ejecting CDs
■ Ejecting a CD (type A and B)
Press
and remove the CD.
■ Ejecting a CD (type C) STEP 1
To select the CD to be ejected, press “DISC The selected CD number is shown on the display.
DISC”.
” or “
that corresponds to
Press
STEP 2
■ Ejecting all CDs (type C only)and remove the CD.
Press and hold CDs.
until you hear a beep, then remove the
440
SIENNA_OM_OM45483U_(U)
3-2. Using the audio system
Selecting a track
Turn desired track.
or
or press “” or “” on
to select the
Fast forwarding and rewinding tracks
Type A or Press Type B and C Press and hold “” or “” on
Scanning tracks
STEP 1
Press The first 10 seconds of each track will be played.
To cancel, press
again.
STEP 2
Press
again when the desired track is reached.
441
SIENNA_OM_OM45483U_(U)
3-2. Using the audio system
Selecting a CD (type C only)
■ Selecting a CD to play
Press
that corresponds to “DISC
” or “
DISC”.
■ Scanning loaded CDs
STEP 1
until you hear a beep.
Press and hold The first 10 seconds of the first track on each CD will be played. To cancel, press
again.
STEP 2
Press
again when the desired CD is reached.
Playing and pausing tracks (type B and C)
Press
Random playback
■ Current CD
that corresponds to “RDM”.
or
Press Songs are played in random order. To cancel, press the button again.
■ All CDs (type C only)
Press
that corresponds to “RDM” twice.
Tracks on all loaded CDs are played in random order. To cancel, press the button again.
442
SIENNA_OM_OM45483U_(U)
3-2. Using the audio system
Repeat play
■ Repeating a track
Press
or
that corresponds to “RPT”.
To cancel, press the button again.
■ Repeating all of the tracks on a CD (type C only)
that corresponds to “RPT” twice.
Press To cancel, press the button again.
Switching the display
Press
Each time
is pressed, the display changes in the following order:
Type A Track no./Elapsed time CD title Track name. Type B and C Track title Track name/Artist name Track name/Elapsed time.
■Display (type A only)
Up to 12 characters can be displayed at a time. If there are 13 characters or more, pressing and holding or more will display the remaining characters. A maximum of 24 characters can be displayed. If seconds or more, the display will return to the first 12 characters. Depending on the contents recorded, the characters may not be displayed properly or may not be displayed at all.
is pressed for 1 second or more again or has not been pressed for 6
for 1 second