- 2009 Toyota 4runner Owners Manuals
- Toyota 4runner Owners Manuals
- 2005 Toyota 4runner Owners Manuals
- Toyota 4runner Owners Manuals
- 2002 Toyota 4runner Owners Manuals
- Toyota 4runner Owners Manuals
- 2010 Toyota 4runner Owners Manuals
- Toyota 4runner Owners Manuals
- 2012 Toyota 4runner Owners Manuals
- Toyota 4runner Owners Manuals
- 2001 Toyota 4runner Owners Manuals
- Toyota 4runner Owners Manuals
- 2015 Toyota 4runner Owners Manuals
- Toyota 4runner Owners Manuals
- 2006 Toyota 4runner Owners Manuals
- Toyota 4runner Owners Manuals
- 2004 Toyota 4runner Owners Manuals
- Toyota 4runner Owners Manuals
- 2003 Toyota 4runner Owners Manuals
- Toyota 4runner Owners Manuals
- 2008 Toyota 4runner Owners Manuals
- Toyota 4runner Owners Manuals
- 2014 Toyota 4runner Owners Manuals
- Toyota 4runner Owners Manuals
- 2000 Toyota 4runner Owners Manuals
- Toyota 4runner Owners Manuals
- 2011 Toyota 4runner Owners Manuals
- Toyota 4runner Owners Manuals
- 2007 Toyota 4runner Owners Manuals
- Toyota 4runner Owners Manuals
- Download PDF Manual
-
Pictorial index
Interior
Seat belts P. 63
Head restraints P. 60
Bottle holders P. 321
Console box P. 312
Horn P. 147
SRS driver airbag P. 95
SRS front passenger airbag P. 95Rear seats∗ P. 45
Rear seats P. 44
Glove box P. 310
Floor mats P. 337
SRS side airbags P. 95
Front seats P. 41
4RUNNER_U_(L/O_0808)
4RUNNER_U.book Page 9 Wednesday, July 30, 2008 3:00 PM
Personal lights P. 306
Garage door opener switches∗ P. 345
Moon roof switch∗ P. 82Interior lights∗ Personal/interior lights∗ P. 307
Rear seat entertainment system∗ P. 274SRS curtain shield airbags P. 95
Interior lights P. 307
Overhead console P. 316
Rear side-view mirrors∗ P. 328
Sun visors P. 323
Anti-glare inside rear view mirror P. 70
Compass∗ P. 350Vanity mirror P. 324
∗: If equipped
4RUNNER_U_(L/O_0808)
4RUNNER_U.book Page 10 Wednesday, July 30, 2008 3:00 PM
Pictorial index
Interior
Outside rear view mirror switches P. 73
Door lock switch P. 33
Inside door lock button P. 34
Window lock switch P. 77
Power window switches P. 76
10
4RUNNER_U_(L/O_0808)
4RUNNER_U.book Page 11 Wednesday, July 30, 2008 3:00 PM
Height control switch∗ A-TRAC switch∗ P. 182
P. 169
Shift lever P. 143
Shift lock override button P. 457
Cup holders P. 316
HEIGHT CONTROL OFF switch∗ RR DIFF LOCK switch∗
P. 169
P. 184
Coin holder P. 311
AUX adapter P. 269
Power outlets P. 329
Power back window switch P. 79
Seat heater switch∗ P. 334Power outlet∗ P. 329
A/V input adapter∗ P. 294
Seat heater switch∗ P. 334
DAC switch∗ P. 186
∗: If equipped
11
4RUNNER_U_(L/O_0808)
4RUNNER_U.book Page 12 Wednesday, July 30, 2008 3:00 PM
Pictorial index
Interior
Trash holder P. 314
12
4RUNNER_U_(L/O_0808)
4RUNNER_U.book Page 13 Wednesday, July 30, 2008 3:00 PM
Armrest P. 336
Rear cup holders∗ P. 316
Rear cup holders and tray∗P. 316
∗: If equipped
13
4RUNNER_U_(L/O_0808)
4RUNNER_U.book Page 14 Wednesday, July 30, 2008 3:00 PM
Pictorial index
Instrument panel
Headlight switch P. 158
Turn signal lever P. 145
Fog light switch∗ P. 162Gauges and meters P. 148
Windshield wipers and
washer switch P. 163 Rear window wiper and washer switch P. 165
Auxiliary box P. 322
Hood lock release lever P. 372
Fuel filler door opener P. 85
Parking brake pedal P. 146
14
4RUNNER_U_(L/O_0808)
4RUNNER_U.book Page 15 Wednesday, July 30, 2008 3:00 PM
Accessory meter P. 155
Clock P. 325
Emergency flasher switch P. 426
Audio system P. 241
Navigation system*Security indicator P. 88
Back window defogger/ Back window and outside rear view mirror defoggers∗ P. 240
Air conditioning system P. 230
∗: If equipped *: Refer to “Navigation System Owner’s Manual” 15
4RUNNER_U_(L/O_0808)
4RUNNER_U.book Page 16 Wednesday, July 30, 2008 3:00 PM
Pictorial index
Instrument panel
Engine (ignition) switch P. 140
Four-wheel drive control switch∗ P. 177
16
4RUNNER_U_(L/O_0808)
4RUNNER_U.book Page 17 Wednesday, July 30, 2008 3:00 PM
Audio remote control switches∗ P. 271
Telephone switches*
Talk switch*
Cruise control switch P. 166
∗: If equipped *: Refer to “Navigation System Owner’s Manual” 17
4RUNNER_U_(L/O_0808)
4RUNNER_U.book Page 18 Wednesday, July 30, 2008 3:00 PM
Pictorial index
Instrument panel
Driving position memory switches∗ P. 58
Instrument panel light control dial P. 149
Tilt steering lock release lever P. 69
Telescopic steering lock release lever∗ P. 69
Power outlet main switch∗ P. 329
Center differential lock switch∗ P. 179
VSC OFF switch∗ P. 175, 190, 192, 195, 194RSCA OFF switch P. 107
18
4RUNNER_U_(L/O_0808)
4RUNNER_U.book Page 19 Wednesday, July 30, 2008 3:00 PM
Pictorial index
Luggage compartment
Child restraint anchor brackets P. 117
Double deck∗ P. 342
Back door strap P. 39
Tie-down hooks P. 338
Cargo net hooks P. 339
Tie-down hooks P. 338
∗: If equipped
19
4RUNNER_U_(L/O_0808)
4RUNNER_U.book Page 20 Wednesday, July 30, 2008 3:00 PM
Pictorial index
Luggage compartment
Cargo net hooks P. 339
Luggage cover∗ P. 341
Auxiliary box∗ P. 322
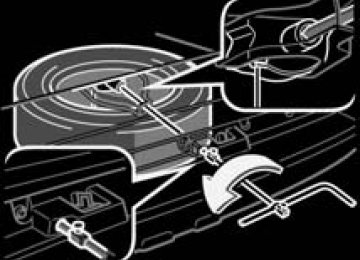
Shopping bag hooks∗ P. 340Jack P. 445
Tools P. 445
20
4RUNNER_U_(L/O_0808)
4RUNNER_U.book Page 21 Wednesday, July 30, 2008 3:00 PM
Cargo net hooks P. 339
Auxiliary box∗ P. 343
Auxiliary box∗ P. 322
Shopping bag hooks∗ P. 340
Power outlet P. 329
∗: If equipped
21
4RUNNER_U_(L/O_0808)
4RUNNER_U.book Page 28 Wednesday, July 30, 2008 3:00 PM
1-1. Key information Keys
The following keys are provided with the vehicle.
Master keys Valet key Key number plate
n When required to leave a key to the vehicle with a parking attendant
Lock the glove box as circumstances demand. (→P. 310) Carry the master key for your own use and leave the valet key only with the attendant.
n Key number plate
Keep the plate in a safe place such as your wallet, not in the vehicle. In the event that a key is lost, a new key can be made by your Toyota dealer using the key number plate. (→P. 458)
NOTICE
n To prevent key damage
l Do not subject the keys to strong shocks, expose them to high tempera-
tures by placing them in direct sunlight, or get them wet.
l Do not expose the keys to electromagnetic materials or attach any mate-
rial that blocks electromagnetic waves to the key surface.
28
4RUNNER_U_(L/O_0808)
1
4RUNNER_U.book Page 29 Wednesday, July 30, 2008 3:00 PM
1-2. Opening, closing and locking the doors Wireless remote control
The wireless remote control can be used to lock and unlock the vehi- cle from outside the vehicle.
Locks all doors Unlocks all doors Pressing the button unlocks the driver’s door. Pressing the button again within 3 seconds unlocks the other doors. Open the back window (push and hold) Sounds alarm (push and hold)
n Operation signals
Doors: A buzzer sounds and the emergency flashers flash to indicate that the doors have been locked/unlocked. (Locked: Once; Unlocked: Twice)
Back window: A buzzer sounds to indicate that the back window has been
opened.
n Panic mode
When PANIC switch is pushed for longer than about one second, an alarm will sound for about 60 seconds and the vehi- cle lights will flash to deter any person from trying to break into or damage your vehicle. To stop the alarm, push any button on the wireless remote control.
29
4RUNNER_U_(L/O_0808)
4RUNNER_U.book Page 30 Wednesday, July 30, 2008 3:00 PM
1-2. Opening, closing and locking the doors
n Door lock buzzer
If a door is not fully closed, a buzzer sounds continuously if an attempt to lock the door is made. Fully close the door to stop the buzzer, and lock the vehicle once more.
n Wireless remote control battery depletion
The standard battery life is 1 to 2 years. (The battery becomes depleted even if the wireless remote control is not used.) If the wireless remote control function does not operate, the battery may be depleted. Replace the battery when necessary. (→P. 402)
n If the wireless remote control does not operate
Locking and unlocking the doors: Use the key. (→P. 33)
n Security feature
If a door is not opened within approximately 30 seconds after the vehicle is unlocked, the security feature automatically locks the vehicle again.
n Alarm
Using the wireless remote control to lock the door will set the alarm system. (→P. 90)
n Conditions affecting operation
The wireless remote control function may not operate normally in the follow- ing situations. l Near a TV tower, radio station, electric power plant, airport or other facil-
ity that generates strong radio waves
l When carrying a portable radio, cellular phone or other wireless commu-
nication device
l When multiple wireless keys are in the vicinity l When the wireless key has come into contact with, or is covered by a
metallic object
l When a wireless key (that emits radio waves) is being used nearby l When the wireless key has been left near an electrical appliance such as
a personal computer
30
4RUNNER_U_(L/O_0808)
4RUNNER_U.book Page 31 Wednesday, July 30, 2008 3:00 PM
1-2. Opening, closing and locking the doors
n Customization that can be configured at Toyota dealer
Settings (e.g. wireless remote control) can be changed. (Customizable features →P. 495)
n Certification for wireless remote control
For vehicles sold in U.S.A.
NOTE: This device complies with Part 15 of the FCC Rules. Operation is subject to the following two conditions: (1) This device may not cause harmful interference, and (2) this device must accept any interference received, including interference that may cause undesired operation. NOTICE: This equipment has been tested and found to comply with the limits for a Class B digital device, pursuant to Part 15 of the FCC Rules. These limits are designed to provide reasonable protection against harmful interference in a residential installation. This equipment generates, uses and can radiate radio frequency energy and, if not installed and used in accordance with the instructions, may cause harmful interference to radio communications. How- ever, there is no guarantee that interference will not occur in a particular installation. If this equipment does cause harmful interference to radio or television reception, which can be determined by turning the equipment off and on, the user is encouraged to try to correct the interference by one or more of the following measures: l Reorient or relocate the receiving antenna. l Connect the equipment into an outlet on a circuit different from that to
Increase the separation between the equipment and receiver.
which the receiver is connected.
l Consult the dealer or an experienced radio/TV technician for help.
31
4RUNNER_U_(L/O_0808)
4RUNNER_U.book Page 32 Wednesday, July 30, 2008 3:00 PM
1-2. Opening, closing and locking the doors
FCC WARNING: Changes or modifications not expressly approved by the party respon- sible for compliance could void the user’s authority to operate the equipment.
For vehicles sold in Canada
NOTE: Operation is subject to the following two conditions: (1) this device may not cause interference, and (2) this device must accept any interference, including interference that may cause undesired operation of the device.
32
4RUNNER_U_(L/O_0808)
4RUNNER_U.book Page 33 Wednesday, July 30, 2008 3:00 PM
1-2. Opening, closing and locking the doors Side doors
The vehicle can be locked and unlocked using the wireless remote control, key or door lock switch. n Wireless remote control
→P. 29
n Key
Locks all doors Unlocks all doors Turning the key a single time in the driver’s door unlocks the driver’s door and turning the key again unlocks the other doors.
Locks all doors Unlocks all doors
n Door lock switch
Driver’s door lock switch
4RUNNER_U_(L/O_0808)
33
4RUNNER_U.book Page 34 Wednesday, July 30, 2008 3:00 PM
1-2. Opening, closing and locking the doors
Passenger’s door lock switch
Locks all doors Unlocks all doors
n Inside lock button
Locks the door Unlocks the door Pulling the inside handle can open the front door even if the inside door lock button is in the lock position.
Locking the front doors from the outside without a key
Move the inside door lock button to the lock position. Close the door.
The front door cannot be locked if a front door is open and the key is in the engine switch.
34
4RUNNER_U_(L/O_0808)
4RUNNER_U.book Page 35 Wednesday, July 30, 2008 3:00 PM
Rear door child-protector lock
1-2. Opening, closing and locking the doors
The door cannot be opened from inside the vehicle when the lock is set.
These locks can be set to prevent children from opening the rear doors. Push down on each rear door switch to lock both rear doors.
Automatic door locking and unlocking systems
The following functions can be set or canceled:
Function
Shift position linked door locking function Shift position linked door unlocking function
Speed linked door lock- ing function
Engine switch linked door unlocking function
Operation
Shifting the shift lever out of P locks all doors.
Shifting the shift lever to P unlocks all doors.
All doors are locked when the vehicle speed is approximately 12 mph (20 km/h) or higher. All doors are unlocked when the driver’s door is opened within 10 seconds after turn- ing the engine switch to the ACC or LOCK position or the key is removed.
35
4RUNNER_U_(L/O_0808)
4RUNNER_U.book Page 36 Wednesday, July 30, 2008 3:00 PM
1-2. Opening, closing and locking the doors
n Setting and canceling the functions
To switch between setting and canceling, follow the procedure below:
Close all the doors and turn the engine switch to the ON posi- tion. (Perform step 2 within 10 seconds.) Set the parking brake.
Shift the shift lever to P or N, press and hold the driver’s door ) for approx- lock switch ( imately 5 seconds and then release.
or
corresponding
The shift lever and switch posi- tions the desired function to be set or can- celed are shown as follows.
to
Function
Shift lever position
Switch position
Shift position linked door locking function Shift position linked door unlock- ing function Speed linked door locking func- tion Engine switch linked door unlocking function When the setting or canceling operation is complete, all doors are locked and then unlocked.
36
4RUNNER_U_(L/O_0808)
1
4RUNNER_U.book Page 37 Wednesday, July 30, 2008 3:00 PM
1-2. Opening, closing and locking the doors
n When locking the doors using the key
The door cannot be locked if the key is in the engine switch.
n Key reminder buzzer
A buzzer sounds if the driver’s door is opened, while the engine switch is in the ACC or LOCK position to remind you to remove the key.
n Customization that can be configured at Toyota dealer
Settings (e.g. unlocking function using a key) can be changed. (Customizable features →P. 495)
CAUTION
n To prevent an accident
Observe the following precautions while driving the vehicle. Failing to do so may result in a door opening and an occupant falling out, resulting in death or serious injury. l Always use a seat belt. l Always lock the doors. l Ensure that all doors are properly closed. l Do not pull the inside handle of the doors while driving.
The doors may be opened and the passengers are thrown out of the vehi- cle and it may result in serious injury or death.
l Be especially careful for the front doors, the doors may be opened even if
the inside lock buttons are in locked position.
l Set the rear door child protector locks when children are seated in the rear
seats.
37
4RUNNER_U_(L/O_0808)
4RUNNER_U.book Page 38 Wednesday, July 30, 2008 3:00 PM
1-2. Opening, closing and locking the doors Back door
The back door can be opened using the back door opener. The back door can be locked/unlocked using a key, wireless remote control or door lock switch. n Back door opener
Push up Raise
the back window
Unlocks all doors Opens (turn and hold) (→P. 79) Locks all doors Closes (turn and hold) (→P. 79)
the back window
n Wireless remote control
→P. 29
n Key
n Door lock switches
→P. 33
38
4RUNNER_U_(L/O_0808)
4RUNNER_U.book Page 39 Wednesday, July 30, 2008 3:00 PM
Rear step bumper
1-2. Opening, closing and locking the doors
For rear end protection and eas- ier step-up loading.
To get on the rear step bumper, use the shaded area in the illus- tration.
n Back door strap
Use the strap when closing.
n Back door easy closer
In the event that the back door is left slightly open, the back door easy closer will automatically close it to the fully closed position.
n When the battery is disconnected
The back door must be initialized. To initialize the back door, unlock it with the key, wireless remote control or power door lock switch.
n If the battery is disconnected or reconnected
The back door will be automatically locked. Be careful not to lock your keys in the vehicle.
39
4RUNNER_U_(L/O_0808)
4RUNNER_U.book Page 40 Wednesday, July 30, 2008 3:00 PM
1-2. Opening, closing and locking the doors
CAUTION
Observe the following precautions. Failing to do so may result in death or serious injury. n Caution while driving
l Keep the back door and back window closed.
If the back door and back window are open, the luggage will be thrown out and exhaust gases will enter the vehicle.
l Do not get on the rear step bumper.
n Back door easy closer
When the back door is not completely closed, the back door easy closer will automatically close it. Be careful not to catch fingers or anything else in the back door. Failure to do so may result in serious injury.
n Closing the back door
l Do not allow children to close the back door.
Closing the back door on someone can cause serious injury, and in some instances, even death.
NOTICE
n To prevent damage to the back door components
l Do not apply any force, paint or let any other foreign matter on the damper. l Do not apply excessive force when the back door closer is operating. l Make sure there is nothing in the doorway before closing. l Do not allow more than one person to get on the rear step bumper at a
time.
40
4RUNNER_U_(L/O_0808)
4RUNNER_U.book Page 41 Wednesday, July 30, 2008 3:00 PM
1-3. Adjustable components (seats, mirrors, steering wheel) Front seats
Manual seat
Seat position adjustment lever Seat cushion angle adjust- ment knob (driver’s side only) Seat height adjustment lever (driver’s side only) Seatback angle adjustment lever Seat lumbar support adjust- ment switch (driver’s side only)
Seat position adjustment switch Seatback angle adjustment switch Seat cushion angle adjust- ment switch (driver’s side only) Seat height adjustment switch (driver’s side only) Seat lumbar support adjust- ment switch (driver’s side only)
Power seat
4RUNNER_U_(L/O_0808)
41
4RUNNER_U.book Page 42 Wednesday, July 30, 2008 3:00 PM
1-3. Adjustable components (seats, mirrors, steering wheel)
Flattening seatback
n When flattening the seatbacks (vehicles with manual seat)
Remove the head restraint. (→P. 61) Move the seat to the front- most lock position.
Pull the seatback angle adjust- ment lever to unlock the seat- back and then push down the seatback.
n When flattening the seatbacks (vehicles with power seat)
Remove the head restraint. (→P. 61) Move the seat to the front- most lock position.
42
4RUNNER_U_(L/O_0808)
4RUNNER_U.book Page 43 Wednesday, July 30, 2008 3:00 PM
1-3. Adjustable components (seats, mirrors, steering wheel)
Move the seatback angle adjust- ment switch backward to flatten the seatback.
n Waterproof and water-repellent seats (vehicles with off-road package) Waterproof and water-repellent seats are installed in your vehicle; however, the water-repellent effect does not last forever.
n When returning the seatback upright (vehicles with manual seat)
Be careful not to make yourself hit by the seatback which will bound with considerable spring force.
CAUTION
n Seat adjustment
l Be careful that the seat does not hit passengers or luggage. l Do not recline the seat more than necessary when the vehicle is in motion
to reduce the risk of sliding under the lap belt. If the seat is too reclined, the lap belt may slide past the hips and apply restraint forces directly to the abdomen or your neck may contact the shoulder belt, increasing the risk of death or serious injury in the event of an accident.
l Manual seat only: After adjusting the seat, make sure that the seat is
locked in position.
n While driving
l Do not allow passengers to ride on the flattened seat. l Do not drive with the head restraints removed.
43
4RUNNER_U_(L/O_0808)
4RUNNER_U.book Page 44 Wednesday, July 30, 2008 3:00 PM
1-3. Adjustable components (seats, mirrors, steering wheel) Rear seats
n Second seats (vehicles without third seats)
The second seats do not have a seat adjustment function.
n Second seats (vehicles with third seats)
Seatback angle adjustment lever
44
4RUNNER_U_(L/O_0808)
4RUNNER_U.book Page 45 Wednesday, July 30, 2008 3:00 PM
1-3. Adjustable components (seats, mirrors, steering wheel)
n Third seats (if equipped)
Seatback angle adjustment lever
Folding down the second seats (vehicles without third seats)
n Before folding down the second seats
Adjust the head restraint to the downmost position.
45
4RUNNER_U_(L/O_0808)
4RUNNER_U.book Page 46 Wednesday, July 30, 2008 3:00 PM
1-3. Adjustable components (seats, mirrors, steering wheel)
the second seat belt
Stow buckle.
Lower the trash holder.
n Folding down the second seats
Swing the bottom cushion up by pulling the lock release strap.
46
4RUNNER_U_(L/O_0808)
4RUNNER_U.book Page 47 Wednesday, July 30, 2008 3:00 PM
1-3. Adjustable components (seats, mirrors, steering wheel)
Push the lock release button and fold down the seatback.
Tumbling the second seats (vehicles with third seats)
n Before tumbling second seats
Adjust the head restraint to the downmost position.
Stow the second seat belt buck- les.
47
4RUNNER_U_(L/O_0808)
4RUNNER_U.book Page 48 Wednesday, July 30, 2008 3:00 PM
1-3. Adjustable components (seats, mirrors, steering wheel)
n Tumbling the second seats
Pull the lever to unlock the seat- back and then fold the seatback down.
Swing the whole seat up and for- ward until they are locked.
n When returning the second seats
Push the knob to unlock the seat and swing the whole seat down.
48
4RUNNER_U_(L/O_0808)
4RUNNER_U.book Page 49 Wednesday, July 30, 2008 3:00 PM
1-3. Adjustable components (seats, mirrors, steering wheel)
Swing the seatback up.
Folding up the third seats (vehicles with third seats)
n Before folding up the third seats
Adjust the head restraint to the downmost position.
Stow the third seat belt buckles.
49
4RUNNER_U_(L/O_0808)
4RUNNER_U.book Page 50 Wednesday, July 30, 2008 3:00 PM
1-3. Adjustable components (seats, mirrors, steering wheel)
n Folding up the third seats
Pass the seat belts through the seat belt hangers.
This prevents the shoulder belt from being damaged. Make sure that the seat belts are removed from the hangers before using them.
Fold down third seat by pushing the lock release lever forward.
Unlock the seat leg by pulling the handle. Swing the whole seat up and sideward.
50
4RUNNER_U_(L/O_0808)
4RUNNER_U.book Page 51 Wednesday, July 30, 2008 3:00 PM
1-3. Adjustable components (seats, mirrors, steering wheel)
Retract the seat leg. Take the holding strap out and attach the strap to the assist grip.
Pull the free end of the strap then fix it with the hook-and-loop fastener.
Remove the seat anchor cov- ers from the back of the seat cushion. Install the seat anchor covers over the seat anchors.
n Returning the third seats
Reverse the steps of folding up the third seats. (→P. 49)
51
4RUNNER_U_(L/O_0808)
4RUNNER_U.book Page 52 Wednesday, July 30, 2008 3:00 PM
1-3. Adjustable components (seats, mirrors, steering wheel)
Removing the third seats (vehicles with third seats)
n Before removing the third seats
Adjust the head restraint to the downmost position.
Stow the third seat belt buckles.
Pass the seat belts through the seat belt hangers.
This prevents the shoulder belt from being damaged. Make sure that the seat belts are removed from the hangers before using them.
52
4RUNNER_U_(L/O_0808)
4RUNNER_U.book Page 53 Wednesday, July 30, 2008 3:00 PM
1-3. Adjustable components (seats, mirrors, steering wheel)
n Removing the third seats
Fold down the third seat by pushing the lock release lever forward.
Unlock the seat leg by pulling the handle. Lift the whole seat up. Retract place the seat on the floor.
the seat
then
leg,
Remove the seat lock cover. Push the seat lock release lever outward to unlock the seat lock. Pull up the whole seat and remove it. Reinstall the seat lock cover.
Remove the seat anchor cov- ers from the back of the seat cushion. Install the seat anchor covers over the seat anchors.
53
4RUNNER_U_(L/O_0808)
4RUNNER_U.book Page 54 Wednesday, July 30, 2008 3:00 PM
1-3. Adjustable components (seats, mirrors, steering wheel)
n Reinstalling the third seat (vehicles with third seat)
Remove the seat anchor cov- ers. Install the seat anchor covers in the back of the seat cush- ion.
Hold the seat and engage the seat striker to the seat lock, then place the seat on the floor. Press down the seatback to securely lock the seat to the body.
Reinstall the seat lock cover. Reverse STEP1 and STEP2 of removing the third seat. (→P. 53)
54
4RUNNER_U_(L/O_0808)
4RUNNER_U.book Page 55 Wednesday, July 30, 2008 3:00 PM
1-3. Adjustable components (seats, mirrors, steering wheel)
n If you cannot raise the seatback (second seats)
Vehicles without third seats
Release the seat belt lock by:
Pushing on the lower front edge of the seatback to slacken the seat belt. Let the seat belt retract a little.
Vehicles with third seats
Release the seat belt lock by:
Pushing on the lower front edge of the seatback to slacken the seat belt. Let the seat belt retract a little.
n Waterproof and water-repellent seats (vehicles with off-road package) Waterproof and water-repellent seats are installed in your vehicle; however, the water-repellent effect does not last forever.
CAUTION
n Reclining adjustment (vehicles with third seats)
Do not recline the seat more than necessary when the vehicle is in motion, to reduce the risk of sliding under the lap belt. If the seat is too reclined during an accident, the lap belt may slide past the hips and apply restraint forces directly to the abdomen or your neck may contact the shoulder belt, increasing the risk of death or serious injury.
n Before folding down or tumbling a rear seats
Do not fold down a rear seat when there are passengers sitting in the rear seats or when there is luggage placed on/under the rear seats.
55
4RUNNER_U_(L/O_0808)
4RUNNER_U.book Page 56 Wednesday, July 30, 2008 3:00 PM
1-3. Adjustable components (seats, mirrors, steering wheel)
CAUTION
n When the seatback is folded
Do not sit on or place anything on the seatback while driving.
n When folding down, tumbling, folding up or removing the seats
l Do not fold down, tumble, fold up or remove the seat while the vehicle is
moving.
l Be careful not to get your hands or feet pinched in the seat. l Make sure the seats are securely locked. Failure to do so will prevent the
seat belt from operating properly.
When removing the third seats: l Do not leave the removed seat loose in the vehicle. l Be careful not to hit a person with the removed seat or drop it on yourself. l Do not sit on or place anything on the removed seat.
n When returning or reinstalling the seats
l Do not return or reinstall the seat while the vehicle is moving. l Be careful not to get your hands or feet pinched in the seat. l Make sure the seats are securely locked. Failure to do so will prevent the
seat belt from operating properly.
l Check that the seat belts are not twisted or caught under the seat. l Arrange the seat belts in the proper positions for ready use. When reinstalling the third seats:
Install each seat in the same position from which it was removed. Failure to do so will prevent third seat occupants from using the seat belts prop- erly.
n When removing or folding up the third seats
Be sure to install the seat anchor covers on the seat anchors, or you may get burned when they become hot.
n When folding up the third seats
Fix the seats securely by adjusting the length of the holding strap. Failure to do so may cause death or serious injury in the event of an accident or sud- den braking.
56
4RUNNER_U_(L/O_0808)
4RUNNER_U.book Page 57 Wednesday, July 30, 2008 3:00 PM
1-3. Adjustable components (seats, mirrors, steering wheel)
NOTICE
n Before tumbling, folding up or removing the seats
The seat belts and buckles must be stowed.
n Removed third seats (vehicles with third seats)
Avoid putting heavy loads on the seat. The metallic tips of the seat leg may be damaged, and you may be unable to correctly reinstall the seat.
57
4RUNNER_U_(L/O_0808)
4RUNNER_U.book Page 58 Wednesday, July 30, 2008 3:00 PM
1-3. Adjustable components (seats, mirrors, steering wheel) Driving position memory system (if equipped)
Your preferred driving position (the position of the driver’s seat) can be entered into the computer’s memory and recalled with the touch of a button. Two different driving positions can be entered into memory. n Entering a position into memory
Check that the shift lever is set in P.
Turn the engine switch to the ON position. Adjust the driver’s seat to the desired positions.
While pushing the SET button, push button “1” or “2” until the signal beeps.
If the selected button has already been preset, the previ- ously recorded position will be overwritten.
n Recalling the memorized position
Check that the shift lever is set in P.
Turn the engine switch to the ON position.
Push button “1” or “2” to recall the desired position.
58
4RUNNER_U_(L/O_0808)
1
4RUNNER_U.book Page 59 Wednesday, July 30, 2008 3:00 PM
1-3. Adjustable components (seats, mirrors, steering wheel)
n Retained accessory power
Each memorized position can be activated within 30 seconds after the driver’s door is opened, even if the key is not in the engine switch.
n If any position memory button is pushed while the adjustments are
being made The operation will stop. To reactivate the system, push the button (“1” or “2”) again.
n If the battery is disconnected
The memorized positions must be reset because the computer’s memory is erased when the battery is disconnected.
CAUTION
n Seat adjustment caution
Take care during seat adjustment that the seat does not strike the rear pas- senger or squeeze your body against the steering wheel. If this happens, you can stop the movement by pressing another seat posi- tion memory button.
59
4RUNNER_U_(L/O_0808)
4RUNNER_U.book Page 60 Wednesday, July 30, 2008 3:00 PM
1-3. Adjustable components (seats, mirrors, steering wheel) Head restraints
n Adjusting the head restraints
Front seats
Vertical adjustment
Up Down Push and hold the lock release button when lowering the head restraint.
Angle adjustment
Lock release button
Second seats (vehicles without third seats)
Vertical adjustment
Up Down Push and hold the lock release button when lowering the head restraint.
Lock release button
60
4RUNNER_U_(L/O_0808)
1
4RUNNER_U.book Page 61 Wednesday, July 30, 2008 3:00 PM
1-3. Adjustable components (seats, mirrors, steering wheel)
Second seats (vehicles with third seats)
Vertical adjustment
Up Down Push and hold the lock release button when lowering the head restraint.
Vertical adjustment
Up Down Push and hold the lock release button when lowering the head restraint.
Pull the head restraint up while pushing the lock release button.
Lock release button
Third seats
Lock release button
n Removing the head restraints
61
4RUNNER_U_(L/O_0808)
4RUNNER_U.book Page 62 Wednesday, July 30, 2008 3:00 PM
1-3. Adjustable components (seats, mirrors, steering wheel)
n Adjusting the height of the head restraints
Make sure that the head restraints are adjusted so that the center of the head restraint is closest to the top of your ears.
n Adjusting the rear seat head restraints (vehicles without third seats) or center second seat head restraint and third seat head restraints (vehi- cles with third seats) Always raise the head restraint one level from the stowed position when using.
CAUTION
n Head restraint precautions
Observe the following precautions regarding the head restraints. Failure to do so may result in death or serious injury. l Use the head restraints designed for each respective seat. l Adjust the head restraints to the correct position at all times. l Do not drive with the head restraints removed.
62
4RUNNER_U_(L/O_0808)
4RUNNER_U.book Page 63 Wednesday, July 30, 2008 3:00 PM
1-3. Adjustable components (seats, mirrors, steering wheel) Seat belts
Make sure that all occupants are wearing their seat belts before driv- ing the vehicle. n Correct use of the seat belts
l Extend the shoulder belt so that it comes fully over the shoulder, but does not come into contact with the neck or slide off the shoul- der.
l Position the lap belt as low
as possible over the hips.
l Adjust the position of the seatback. Sit up straight and well back in the seat. l Do not twist the seat belt.
n Fastening and releasing the seat belt
Fastening the belt
Push the tab into the buckle until a clicking sound is heard.
4RUNNER_U_(L/O_0808)
63
4RUNNER_U.book Page 64 Wednesday, July 30, 2008 3:00 PM
1-3. Adjustable components (seats, mirrors, steering wheel)
n Adjusting the height of the belt
Releasing the belt
Press the release button.
Down Push the lock release knob and slide the height adjuster down. Up Move the height adjuster up as needed until you hear a click.
Seat belt pretensioners (front seats)
The pretensioner helps the seat belt to quickly restrain the occu- pant by retracting the seat belt when the vehicle is subjected to certain types of severe frontal collision or a vehicle rollover.
The pretensioner may not acti- vate in the event of a minor frontal impact, a side impact or a rear impact.
64
4RUNNER_U_(L/O_0808)
4RUNNER_U.book Page 65 Wednesday, July 30, 2008 3:00 PM
1-3. Adjustable components (seats, mirrors, steering wheel)
n Emergency locking retractor (ELR)
The retractor will lock the belt during a sudden stop or on impact. It may also lock if you lean forward too quickly. A slow, easy motion will allow the belt to extend so that you can move around fully.
n Automatic locking retractor (ALR)
When a passenger’s shoulder belt is completely extended and then retracted even slightly, the belt is locked in that position and cannot be extended. This feature is used to hold the child restraint system (CRS) firmly. To free the belt again, fully retract the belt and then pull the belt out once more. (→P. 117)
n Pregnant women
Obtain medical advice and wear the seat belt in the proper way. (→P. 63) Women who are pregnant should position the lap belt as low as possible over the hips in the same manner as other occu- pants. Extend the shoulder belt com- pletely over the shoulder and position the belt across the chest. Avoid belt contact over the rounding of the abdominal area. If the seat belt is not worn properly, not only a pregnant woman, but also the fetus could suffer death or serious injury as a result of sudden braking or a collision.
n People suffering illness
Obtain medical advice and wear the seat belt in the proper way.
65
4RUNNER_U_(L/O_0808)
4RUNNER_U.book Page 66 Wednesday, July 30, 2008 3:00 PM
1-3. Adjustable components (seats, mirrors, steering wheel)
n Child seat belt usage
The seat belts of your vehicle were principally designed for persons of adult size. l Use a child restraint system appropriate for the child, until the child become large enough to properly wear the vehicle’s seat belt. (→P. 113) l When the child becomes large enough to properly wear the vehicle’s
seat belt, follow the instructions on P. 63 regarding seat belt usage.
n Replacing the belt after the pretensioner has been activated
If the vehicle is involved in multiple collisions, the pretensioner will activate for the first collision, but will not activate for the second or subsequent colli- sions.
n Seat belt extender
If your seat belts cannot be fastened securely because long enough, a personalized seat belt extender is available from your Toyota dealer free of charge.
they are not
CAUTION
Observe the following precautions to reduce the risk of injury in the event of sudden braking or an accident. Failing to do so may cause death or severe injury. n Wearing a seat belt
l Ensure that all passengers wear a seat belt. l Always wear a seat belt properly. l Each seat belt should be used by one person only. Do not use a seat belt
for more than one person at once, including children.
l Toyota recommends that children be seated in the rear seat and always
use a seat belt and/or an appropriate child restraint system.
66
4RUNNER_U_(L/O_0808)
4RUNNER_U.book Page 67 Wednesday, July 30, 2008 3:00 PM
1-3. Adjustable components (seats, mirrors, steering wheel)
CAUTION
n Wearing a seat belt
l Do not recline the seat any more than necessary to achieve a proper seat- ing position. The seat belt is most effective when the occupants are sitting up straight and well back in the seats.
l Do not wear the shoulder belt under your arm. l Always wear your seat belt low and snug across your hips.
n Adjustable shoulder anchor
Always make sure the shoulder belt is positioned across the center of your shoulder. The belt should be kept away from your neck, but not falling off your shoulder. Failure to do so could reduce the amount of protection in an accident and cause death or serious injuries in a collision. (→P. 64)
n Seat belt pretensioners
l Do not place anything, such as a cushion, on the front passenger’s seat. Doing so will disperse the passenger’s weight, which prevents the sensor from detecting the passenger’s weight properly. As a result, the seat belt pretensioner for the front passenger’s seat may not activate in the event of a collision. If the pretensioner has activated, the seat belt becomes locked: it cannot be further extended, nor will it return to the stowed position. The seat belt cannot be used again and must be replaced at your Toyota dealer.
n Child restraint lock function belt precaution
Do not allow children to play with the child restraint lock function belt. If the belt becomes twisted around a child’s neck, it will not be possible to pull the belt out leading to choking or other serious injuries that could result in death. If this occurs and the buckle cannot be unfastened, scissors should be used to cut the belt.
n Seat belt damage and wear
l Do not damage the seat belts by allowing the belt, plate, or buckle to be
jammed in the door. Inspect the seat belt system periodically. Check for cuts, fraying, and loose parts. Do not use a damaged seat belt until it is replaced. Damaged seat belt cannot protect an occupant from death or serious injury.
67
4RUNNER_U_(L/O_0808)
4RUNNER_U.book Page 68 Wednesday, July 30, 2008 3:00 PM
1-3. Adjustable components (seats, mirrors, steering wheel)
CAUTION
n Seat belt damage and wear
l Ensure that the belt and tab are locked and the belt is not twisted.
If the seat belt does not function correctly, immediately contact your Toyota dealer.
l Replace the seat assembly, including the belts, if your vehicle has been
involved in a serious accident, even if there is no obvious damage.
l Do not attempt to install, remove, modify, disassemble or dispose of the seat belts. Have any necessary repairs carried out by your Toyota dealer. Inappropriate handling of the pretensioner may prevent it from operating properly resulting in death or serious injury.
n Using a seat belt extender
l Do not wear the seat belt extender if you can fasten the seat belt without
the extender.
l Do not use the seat belt extender when installing a child restraint system because the belt will not securely hold the child restraint system, increas- ing the risk of death or serious injury in the event of an accident.
l The personalized extender may not be safe on another vehicle, when used by another person, or at a different seating position other than the one originally intended.
NOTICE
n When using a seat belt extender
When releasing the seat belt, press on the buckle release button on the extender, not on the seat belt. This helps prevent damage to the vehicle interior and the extender itself.
68
4RUNNER_U_(L/O_0808)
1
4RUNNER_U.book Page 69 Wednesday, July 30, 2008 3:00 PM
1-3. Adjustable components (seats, mirrors, steering wheel) Steering wheel
The steering wheel can be adjusted to a comfortable position. n Tilt steering wheel
to
the
steering the
Hold wheel and pull lever. Adjust ideal position by moving the steering wheel verti- cally. Release the lever.
the
n Telescopic steering wheel (if equipped)
the
Hold steering wheel and press the lever down. Adjust ideal to position by moving the steering wheel hori- zontally. Pull the lever up.
the
CAUTION
n Caution while driving
Do not adjust the steering wheel while driving. Doing so may cause the driver to mishandle the vehicle and an accident, resulting in death or serious injury.
n After adjusting the steering wheel
Make sure that the steering wheel is securely locked. Otherwise, the steering wheel may move suddenly, possibly causing an accident and resulting in death or serious injury.
69
4RUNNER_U_(L/O_0808)
4RUNNER_U.book Page 70 Wednesday, July 30, 2008 3:00 PM
1-3. Adjustable components (seats, mirrors, steering wheel) Anti-glare inside rear view mirror
Glare from the headlights of vehicles behind can be reduced by using the following functions.
Manual anti-glare inside rear view mirror
Normal position Anti-glare position
70
4RUNNER_U_(L/O_0808)
1
4RUNNER_U.book Page 71 Wednesday, July 30, 2008 3:00 PM
1-3. Adjustable components (seats, mirrors, steering wheel)
Auto anti-glare inside rear view mirror In automatic mode, sensors are used to detect the headlights of vehicles behind and automatically reduces the reflected light.
Press the button for longer than 3 seconds to turn auto mode ON/OFF.
The indicator comes on when automatic mode is turned on. The mirror will revert to the automatic mode each time the engine switch is turned on.
n To prevent sensor error (vehicles with auto anti-glare inside rear view
mirror)
To ensure that the sensors operate prop- erly, do not touch or cover them.
71
4RUNNER_U_(L/O_0808)
4RUNNER_U.book Page 72 Wednesday, July 30, 2008 3:00 PM
1-3. Adjustable components (seats, mirrors, steering wheel)
CAUTION
n Caution while driving
Do not adjust the position of the mirror while driving. Doing so may lead to mishandling of the vehicle and an accident, resulting in death or serious injury.
72
4RUNNER_U_(L/O_0808)
4RUNNER_U.book Page 73 Wednesday, July 30, 2008 3:00 PM
1-3. Adjustable components (seats, mirrors, steering wheel) Outside rear view mirrors
Mirror angle can be adjusted.
Select a mirror to adjust.
(L: left or R: right)
Adjust the mirror up, down, in or out using the switch.
Folding back the mirrors
Push backward to fold the mir- rors.
73
4RUNNER_U_(L/O_0808)
4RUNNER_U.book Page 74 Wednesday, July 30, 2008 3:00 PM
1-3. Adjustable components (seats, mirrors, steering wheel)
n Mirror operating conditions
The engine switch is in the ACC or ON position.
n When the mirrors are fogged up (vehicles with outside rear view mirror
defoggers) Turn on the mirror defoggers to defog the mirrors. (→P. 240)
n Rain clearing mirrors
The rain clearing mirrors have been coated to spread the raindrops evenly into a thin film (hydrophilic effect) when they adhere to the mirror surface, clearing the driver’s rear view.
n In the following cases, the rain clearing effect will be reduced tempo- rarily, but will recover by exposing the mirrors to bright direct sunlight for 1 or 2 days l After wiping dirt off the mirrors l When the mirrors fog up l After waxing your vehicle in an automatic car wash l After your vehicle has been parked for a long period in a place with no
direct sunlight, such as under ground parking lots
CAUTION