- 2009 Toyota 4runner Owners Manuals
- Toyota 4runner Owners Manuals
- 2005 Toyota 4runner Owners Manuals
- Toyota 4runner Owners Manuals
- 2002 Toyota 4runner Owners Manuals
- Toyota 4runner Owners Manuals
- 2010 Toyota 4runner Owners Manuals
- Toyota 4runner Owners Manuals
- 2012 Toyota 4runner Owners Manuals
- Toyota 4runner Owners Manuals
- 2001 Toyota 4runner Owners Manuals
- Toyota 4runner Owners Manuals
- 2015 Toyota 4runner Owners Manuals
- Toyota 4runner Owners Manuals
- 2006 Toyota 4runner Owners Manuals
- Toyota 4runner Owners Manuals
- 2004 Toyota 4runner Owners Manuals
- Toyota 4runner Owners Manuals
- 2003 Toyota 4runner Owners Manuals
- Toyota 4runner Owners Manuals
- 2008 Toyota 4runner Owners Manuals
- Toyota 4runner Owners Manuals
- 2014 Toyota 4runner Owners Manuals
- Toyota 4runner Owners Manuals
- 2000 Toyota 4runner Owners Manuals
- Toyota 4runner Owners Manuals
- 2011 Toyota 4runner Owners Manuals
- Toyota 4runner Owners Manuals
- 2007 Toyota 4runner Owners Manuals
- Toyota 4runner Owners Manuals
- Download PDF Manual
-
4RUNNER_U.book Page 177 Wednesday, July 30, 2008 3:00 PM
2-4. Using other driving systems Four-wheel drive system (4WD models)
Use the four-wheel drive control switch and center differential lock switch to select the following transfer and center differential modes. n Four-wheel drive control switch
Multi-mode 4WD models
H2 (high speed position, two-wheel drive) Normal driving H4 (high speed position, four-wheel drive) Greater traction than two wheel drive. When you experience a loss of power, such as wheel slipping.
The four-wheel drive indi- cator will come on. (low speed position,
L4 four-wheel drive) Driving requiring maximum power and traction such as climbing or descending steep hills, off-road driving, and hard pulling in sand or mud, etc.
The four-wheel drive and 4LO indicators will come on.
177
4RUNNER_U_(L/O_0808)
4RUNNER_U.book Page 178 Wednesday, July 30, 2008 3:00 PM
2-4. Using other driving systems
Full-time 4WD models
H4 (high speed position) Normal driving on all types of roads. L4 (low speed position) Driving requiring maximum power and traction such as climbing or descending steep hills, off-road driving, and hard pulling in sand or mud, etc.
The 4LO come on.
indicator will
178
4RUNNER_U_(L/O_0808)
2
4RUNNER_U.book Page 179 Wednesday, July 30, 2008 3:00 PM
n Center differential lock switch
2-4. Using other driving systems
Use the center differential lock system when the wheels get stuck in a ditch, or when driv- ing on a slippery or bumpy surface.
Unlock the center differen- tial after the wheels have been freed, or after moving to a flat, non-slippery sur- face. To unlock the center differ- ential, push the switch again.
Shifting between H4 and L4
n Shifting from H4 to L4
Stop the vehicle completely. Shift the shift lever to N. Push and turn the four-wheel drive control switch fully clock- wise. Maintain this condition until the 4LO indicator turns on.
n Shifting from L4 to H4
Stop the vehicle completely. Shift the shift lever to N. Turn the four-wheel drive control switch counterclockwise. Maintain this condition until the 4LO indicator turns off.
179
4RUNNER_U_(L/O_0808)
4RUNNER_U.book Page 180 Wednesday, July 30, 2008 3:00 PM
2-4. Using other driving systems
n Shifting between H2 and H4
l Shifting from H2 to H4
Reduce the vehicle speed to less than 62 mph (100 km/h) and turn the four-wheel drive control switch fully clockwise.
l Shifting from H4 to H2
Turn the four-wheel drive control switch fully counterclockwise. This can be done at any speed.
n If the four-wheel drive indicator or the 4LO indicator blinks
l Shifting from H2 to H4
• If the four-wheel drive indicator continues to blink, drive straight ahead
while accelerating or decelerating.
• If the four-wheel drive indicator continues to blink and the buzzer sounds, stop the vehicle or reduce the vehicle speed to less than 62
mph (100 km/h). Operate the switch again.l Shifting from H4 to H2
• If the four-wheel drive indicator continues to blink, drive straight ahead while accelerating or decelerating, or drive forward or backward in a short distance.
l Shifting to H4 or L4
If the 4LO indicator continues to blink when you operate the four-wheel drive control switch to the H4 or L4 position, drive forward or backward in a short distance, then stop the vehicle completely, shift the shift lever securely into N and operate the switch again.
If the indicators continue to blink even if doing so, contact your Toyota dealer as soon as possible. There may be a trouble in the four-wheel drive system.
n Four-wheel drive usage frequency (Multi-mode 4WD models)
You should drive in four-wheel drive for at least 10 miles (16 km) each month. This will assure that the front drive components are lubricated.
180
4RUNNER_U_(L/O_0808)
4RUNNER_U.book Page 181 Wednesday, July 30, 2008 3:00 PM
2-4. Using other driving systems
n Limited slip center differential
If one wheel begins to spin, the limited slip center differential (transfer) is designed to aid traction by automatically transmitting driving force to the wheels on the other drive axle. It transmits driving force to the front wheels if a rear wheel spins, and to the rear wheels if a front wheel spins.
n The center differential lock switch can be operated when The four-wheel drive control switch is in the H4 or L4 position.
n Center differential lock system
l When the center differential is locked, the VSC system is automatically turned off and the center differential lock and VSC OFF indicators come on.
l When the four-wheel drive control switch is turned to the H2 position, the
center differential is automatically unlocked. If the operation is not completed, the center differential lock indicator blinks. If the indicator does not go off when unlocking the center differen- tial, drive straight ahead while accelerating or decelerating, or drive in reverse.
NOTICE
n When shifting the four-wheel drive control switch
Never operate the four-wheel drive control switch if the wheels are slipping. Stop the slipping or spinning before shifting.
n To prevent damage to the center differential
l For normal driving on dry and hard surface roads, unlock the center differ-
ential.
l Unlock the center differential after the wheels are out of the ditch or off the
loose or bumpy surface.
l Do not push the center differential lock switch when the vehicle is corner-
ing or when its wheels are spinning freely off the ground.
181
4RUNNER_U_(L/O_0808)
4RUNNER_U.book Page 182 Wednesday, July 30, 2008 3:00 PM
2-4. Using other driving systems Active traction control system (L4 mode on 4WD models)
The active traction control system automatically helps prevent the spinning of 4 wheels when the vehicle is started or accelerated on slippery road surfaces. n System operation
Vehicles without the A-TRAC switch
Stop the vehicle, shift the shift lever to N and turn the four-wheel drive control switch to the L4 position. Then the system will auto- matically activate.
Vehicles with the A-TRAC switch
l When activating the system with the center differential lock
unlocked Stop the vehicle, shift the shift lever to N and turn the four-wheel drive control switch to the L4 position. Then the system will auto- matically activate.
l When activating the system with the center differential lock
locked
Stop the vehicle, shift the shift lever to N and turn the four- wheel drive control switch to the L4 position. Then press the center differential lock switch.
Press the A-TRAC switch to activate the system.
At this time, the active traction control indicator will come on. To cancel the system, push the switch again.
182
4RUNNER_U_(L/O_0808)
4RUNNER_U.book Page 183 Wednesday, July 30, 2008 3:00 PM
2-4. Using other driving systems
When the active traction control system is operating
If all wheels spin, the slip indica- tor flashes to indicate that the active traction control system have been engaged.
n When the rear differential is locked (vehicles with the rear differential
lock system) The active traction control system is activated only when the vehicle speed is less than 4 mph (6 km/h).
n Sounds and vibrations caused by the active traction control system
l A sound may be heard from the engine compartment when the engine is started or just after the vehicle begins to move. This sound does not indi- cate that a malfunction has occurred in the system.
l Vibrations may be felt through the vehicle body and steering. It may
occur when the system is operating.
n If the brake system overheats
The system will cease operation and a buzzer will sound to alert the driver. Stop the vehicle in a safe place. (There is no problem with continuing normal driving.)
CAUTION
n The active traction control system may not operate effectively when
Directional control and power may not be achievable while driving on slip- pery road surfaces, even if the active traction control system is operating. Do not drive the vehicle in conditions where stability and power may be lost.
183
4RUNNER_U_(L/O_0808)
4RUNNER_U.book Page 184 Wednesday, July 30, 2008 3:00 PM
2-4. Using other driving systems Rear differential lock system (if equipped)
The rear differential lock system is provided for use only when wheel spinning occurs in a ditch or on a slippery or rugged surface. The rear differential lock system is effective in case one of the rear wheels is spinning.
Press the RR DIFF LOCK switch to lock the rear differen- tial.
At this time, the rear differential lock indicator will blink. Wait a few seconds for the system to complete operation. After the rear differential is locked, the indicator will stop blinking and remain on. To unlock the rear differential, push the switch again.
Using the rear differential lock system
Before using the rear differential lock system. Stop the vehicle, shift the shift lever to N and turn the four- wheel drive control switch to the L4 position to see if this is sufficient. If this has no effect, additionally use the rear differ- ential lock system. Be sure to stop the wheels. Press the RR DIFF LOCK switch. After the rear differential is locked, the rear differential lock indicator will come on.
184
4RUNNER_U_(L/O_0808)
2
4RUNNER_U.book Page 185 Wednesday, July 30, 2008 3:00 PM
2-4. Using other driving systems
Gently depress the accelerator pedal.
Unlock the rear differential as soon as the vehicle moves out. To unlock the rear differential, push the switch again.
n Locking the rear differential
l When the rear differential is locked, VSC is automatically turned off.
(The rear differential lock and VSC OFF indicators come on.)
l The following systems do not operate when the rear differential is locked. It is normal operation for the ABS warning light, VSC OFF indicator and slip indicator to be on at this time. • ABS • Brake assist system • VSC • TRAC
n The rear differential lock is disengaged when
l Turn the four-wheel drive control switch to the H2 or H4 position. Never forget to turn off the switch after using this feature.
n After unlocking the rear differential
Check that the indicator goes off.
CAUTION
n To avoid an accident
l Do not use the rear differential lock system except when wheel spinning occurs in a ditch or on a slippery or ragged surface. Large steering effort and careful cornering control will be required.
l Do not lock the rear differential until the wheels have stopped spinning.
Otherwise, the vehicle may move in an unexpected direction when the dif- ferential lock is engaged, resulting in an accident. This may also lead to possible damage to rear differential lock component parts.
l Do not drive over 5 mph (8 km/h) when the rear differential is locked. l Do not keep driving with the RR DIFF LOCK switch on.
185
4RUNNER_U_(L/O_0808)
4RUNNER_U.book Page 186 Wednesday, July 30, 2008 3:00 PM
2-4. Using other driving systems Downhill Assist Control (if equipped)
The downhill assist control system helps to prevent excessive speed on steep downhill descents. n System operation
The system will operate when the vehicle is traveling under 15
mph (25 km/h) and the four-wheel drive control switch is in the L4 position.Press the DAC switch. The downhill assist control indica- tor will come on, and the sys- tem will operate. With the vehicle traveling at a speed of 15 mph (25 km/h) or less, release your foot from the accelerator or brake pedal to activate the system.
the
stop
When the system is in opera- tion, the slip indicator will flash, and lights/high mounted stop light will come on. A sound may also occur during the operation. This does not indicate a malfunction.
n Turning off the system
Press the DAC switch while the system is in operation. The downhill assist control indicator will flash as the system gradu- ally ceases operation, and will turn off when the system is fully off. Pressing the DAC switch while the downhill assist control indica- tor is flashing will start the system again.
186
4RUNNER_U_(L/O_0808)
2
4RUNNER_U.book Page 187 Wednesday, July 30, 2008 3:00 PM
2-4. Using other driving systems
n Operating tips
The system will operate when the shift lever is in a position other than P. However, to make effective use of the system it is recommended that the shift lever be shifted to 2 or L.
n The system will not operate when
The four-wheel drive control switch is in the H2 or H4 position.
n The downhill assist control indicator flashes when
l The shift lever is in N. l The four-wheel drive control switch is in the H2 or H4 position.
n If the brake system overheats
The system will cease operation and a buzzer will sound to alert the driver. Stop the vehicle in a safe place. (There is no problem with continuing normal driving.)
n System malfunction
l The downhill assist control indicator does not come on when the engine
switch is turned to the ON position.
l The downhill assist control indicator does not come on when the DAC
switch is pressed. In the above cases have your vehicle checked by your Toyota dealer.
CAUTION
n Do not rely excessively on the downhill assist control system
It may not be able to maintain a low speed over road surfaces on which slid- ing can easily occur, such as extremely steep slopes or icy or muddy roads.
187
4RUNNER_U_(L/O_0808)
4RUNNER_U.book Page 188 Wednesday, July 30, 2008 3:00 PM
2-4. Using other driving systems Driving assist systems
To help enhance driving safety and performance, the following sys- tems operate automatically in response to various driving situations. Be aware, however, that these systems are supplementary and should not be relied upon too heavily when operating the vehicle. n ABS (Anti-lock Brake System)
Helps to prevent wheel lock when the brakes are applied suddenly, or if the brakes are applied while driving on a slippery road surface.
n Brake Assist
Generates an increased level of braking force after the brake pedal is depressed, when the system detects a panic stop situation.
n VSC (Vehicle Stability Control)
Helps the driver to control skidding when swerving suddenly or turning on slippery road surfaces.
n TRAC (Traction Control)
Maintains drive power and prevents the rear wheels (2WD models and H2 mode on Multi-mode 4WD models) or all wheels (4WD models except on L4 mode) from spinning when starting the vehicle or acceler- ating on slippery roads.
n A-TRAC (Active Traction Control) for L4 mode on 4WD mod- els (vehicles with the A-TRAC switch except when the cen- ter differential lock is locked) Maintains drive power and prevents the all wheels from spinning when starting the vehicle or accelerating on slippery roads.
n Hill-start assist control (if equipped)
Helps prevent the vehicle from rolling backwards when starting on an incline or slippery slope. It operates for approximately 5 seconds at maximum.
188
4RUNNER_U_(L/O_0808)
2
4RUNNER_U.book Page 189 Wednesday, July 30, 2008 3:00 PM
2-4. Using other driving systems
When the VSC/TRAC/A-TRAC/hill-start assist control system are operating
four wheels
If the vehicle is in danger of slip- ping, the rear wheels (2WD mod- els) or (4WD models) spin, the vehicle starts to roll backwards when starting on an incline, the slip indicator flashes to indicate that the VSC/ TRAC/A-TRAC/hill-start assist control have been engaged.
A buzzer (intermittent) sounds to indicate that VSC/hill-start assist control is operating. The stop lights and high mounted stoplight turn on when the hill- start assist control system is operating.
189
4RUNNER_U_(L/O_0808)
4RUNNER_U.book Page 190 Wednesday, July 30, 2008 3:00 PM
2-4. Using other driving systems
To disable TRAC, AUTO LSD and/or VSC (2WD models and H2
mode on Multi-mode 4WD models)If the vehicle gets stuck in fresh snow or mud, TRAC or VSC may reduce power from the engine to the wheels. You may need to turn the system off to enable you to rock the vehicle in order to free it. n TRAC OFF mode
the VSC OFF switch
Press briefly.
The slip and AUTO LSD indica- tors will come on. The system is in TRAC off, AUTO LSD on and VSC on mode. Push the switch again to turn the system back on.
190
4RUNNER_U_(L/O_0808)
4RUNNER_U.book Page 191 Wednesday, July 30, 2008 3:00 PM
n VSC OFF mode
2-4. Using other driving systems
Stop the vehicle completely, and press the VSC OFF switch for more than 3 seconds.
The slip and VSC OFF indicators will come on. The system is in TRAC off, AUTO LSD off and VSC off mode.
191
4RUNNER_U_(L/O_0808)
4RUNNER_U.book Page 192 Wednesday, July 30, 2008 3:00 PM
2-4. Using other driving systems
To disable TRAC and/or VSC (H4 mode on 4WD models)
If the vehicle gets stuck in fresh snow or mud, TRAC or VSC may reduce power from the engine to the wheels. You may need to turn the system off to enable you to rock the vehicle in order to free it. n TRAC OFF mode
the VSC OFF switch
Press briefly.
The slip indicator will come on. The system is in TRAC off and VSC on mode. Push the switch again to turn the system back on.
192
4RUNNER_U_(L/O_0808)
4RUNNER_U.book Page 193 Wednesday, July 30, 2008 3:00 PM
n VSC OFF mode
2-4. Using other driving systems
Stop the vehicle completely, and press the VSC OFF switch for more than 3 seconds.
The slip and VSC OFF indicators will come on. The system is in TRAC off and VSC off mode.
193
4RUNNER_U_(L/O_0808)
4RUNNER_U.book Page 194 Wednesday, July 30, 2008 3:00 PM
2-4. Using other driving systems
To disable TRAC (four-wheel drive control switch is in H4 mode and center differential lock is locked on 4WD models)
If the vehicle gets stuck in fresh snow or mud, TRAC may reduce power from the engine to the wheels. You may need to turn the sys- tem off to enable you to rock the vehicle in order to free it. n VSC OFF mode
Stop the vehicle completely, and press the VSC OFF switch for more than 3 seconds.
The slip indicator will come on. The system is in TRAC off mode.
194
4RUNNER_U_(L/O_0808)
4RUNNER_U.book Page 195 Wednesday, July 30, 2008 3:00 PM
2-4. Using other driving systems
To disable A-TRAC and VSC (L4 mode on 4WD models)
If the vehicle gets stuck in fresh snow or mud, A-TRAC or VSC may reduce power from the engine to the wheels. You may need to turn the system off to enable you to rock the vehicle in order to free it. n VSC OFF mode
Stop the vehicle completely, and press the VSC OFF switch for more than 3 seconds.
The slip and VSC OFF indicators will come on. The system is in A-TRAC off and VSC off mode.
195
4RUNNER_U_(L/O_0808)
4RUNNER_U.book Page 196 Wednesday, July 30, 2008 3:00 PM
2-4. Using other driving systems
n Sounds and vibrations caused by the ABS, TRAC, A-TRAC, VSC and
brake assist system l A sound may be heard from the engine compartment when the engine is started or just after the vehicle begins to move. This sound does not indi- cate that a malfunction has occurred in any of these systems.
l Any of the following conditions may occur when the above systems are
operating. None of these indicates that a malfunction has occurred. • Vibrations may be felt through the vehicle body and steering. • A motor sound may be heard after the vehicle comes to a stop. • The brake pedal may pulsate slightly after the ABS is activated. • The brake pedal may move down slightly after the ABS is activated.
n If the brake system overheats
TRAC will cease operation and a buzzer will sound to alert the driver. Stop the vehicle in a safe place. (There is no problem with continuing normal driv- ing.)
196
4RUNNER_U_(L/O_0808)
2
4RUNNER_U.book Page 197 Wednesday, July 30, 2008 3:00 PM
2-4. Using other driving systems
CAUTION
n The ABS does not operate effectively when
l The limits of the gripping performance have been exceeded. l The vehicle hydroplanes while driving at high speed on the wet or slick
road.
n Stopping distance when the ABS is operating will exceed that of nor-
mal conditions The ABS is not designed to shorten the vehicle’s stopping distance. Always maintain a safe distance from the vehicle in front of you in the following situ- ations. l When driving on dirt, gravel or snow-covered roads l When driving with tire chains l When driving over bumps in the road l When driving over roads with potholes or roads with uneven roads
n When VSC is activated
The slip indicator flashes and a warning buzzer sounds. Always drive care- fully. Reckless driving may cause an accident. Exercise particular care when the indicator flashes and a buzzer sounds.
n TRAC/A-TRAC may not operate effectively when
Directional control and power may not be achievable while driving on slip- pery road surfaces, even if TRAC/A-TRAC is operating. Do not drive the vehicle in conditions where stability and power may be lost.
n Replacing tires
Make sure that all tires are of the same size, brand, tread pattern and total load capacity. In addition, make sure that the tires are inflated to the appro- priate tire pressure level. The ABS and VSC will not function correctly if different tires are fitted on the vehicle. Contact your Toyota dealer for further information when replacing tires or wheels.
n Handling of tires and suspension
Using tires with any kind of problem or modifying the suspension will affect the driving assist systems, and may cause the system to malfunction.
197
4RUNNER_U_(L/O_0808)
4RUNNER_U.book Page 198 Wednesday, July 30, 2008 3:00 PM
2-5. Driving information Off-road precautions
This vehicle belongs to the utility vehicle class, which has higher ground clearance and narrower tread in relation to the height of its center of gravity to make it capable of performing in a wide variety of off-road applications.
Off-road vehicle feature
l Specific design characteristics give it a higher center of gravity than ordinary passenger cars. This vehicle design feature causes this type of vehicle to be more likely to rollover. And, utility vehicles have a significantly higher rollover rate than other types of vehi- cles.
l An advantage of the higher ground clearance is a better view of the
road allowing you to anticipate problems. It is not designed for cornering at the same speeds as ordinary passenger cars any more than low-slung sports cars designed to perform satisfactorily under off-road conditions. Therefore, sharp turns at excessive speeds may cause rollover.
198
4RUNNER_U_(L/O_0808)
2
4RUNNER_U.book Page 199 Wednesday, July 30, 2008 3:00 PM
2-5. Driving information
CAUTION
n Off-road vehicle precautions
Always observe the following precautions to minimize the risk of serious per- sonal injury or damage to your vehicle:
In a rollover crash, an unbelted person is significantly more likely to die than a person wearing a seat belt. Therefore, the driver and all passengers should fasten their seat belts whenever the vehicle is moving.
l Avoid sharp turns or abrupt maneuvers, if at all possible.
Failure to operate this vehicle correctly may result in loss of control or vehicle rollover causing death or serious injury.
l Loading cargo on the roof luggage carrier will make the center of the vehi- cle gravity higher. Avoid high speeds, sudden starts, sharp turns, sudden braking or abrupt maneuvers, otherwise it may result in loss of control or vehicle rollover due to failure to operate this vehicle correctly.
l Always slow down in gusty crosswinds. Because of its profile and higher center of gravity, your vehicle is more sensitive to side winds than an ordi- nary passenger car. Slowing down will allow you to have better control.
l When driving off-road or in rugged terrain, do not drive at excessive speeds, jump, make sharp turns, strike objects, etc. This may cause loss of control or vehicle rollover causing death or serious injury. You are also risking expensive damage to your vehicle’s suspension and chassis.
l Do not drive horizontally across steep slopes. Driving straight up or straight down is preferred. Your vehicle (or any similar off-road vehicle) can tip over sideways much more easily than forward or backward.
199
4RUNNER_U_(L/O_0808)
4RUNNER_U.book Page 200 Wednesday, July 30, 2008 3:00 PM
2-5. Driving information
Off-road driving
When driving your vehicle off-road, please observe the following pre- cautions to ensure your driving enjoyment and to help prevent the closure of areas to off-road vehicles. l Drive your vehicle only in areas where off-road vehicles are permit-
ted to travel.
l Respect private property. Get owner’s permission before entering
private property.
l Do not enter areas that are closed. Honor gates, barriers and signs
that restrict travel.
l Stay on established roads. When conditions are wet, driving tech- niques should be changed or travel delayed to prevent damage to roads.
n Additional information for off-road driving
For owners in U.S. mainland, Hawaii and Puerto Rico:
To obtain additional information pertaining to driving your vehicle off-road, consult the following organizations. l State and Local Parks and Recreation Departments l State Motor Vehicle Bureau l Recreational Vehicle Clubs l U.S. Forest Service and Bureau of Land Management
200
4RUNNER_U_(L/O_0808)
4RUNNER_U.book Page 201 Wednesday, July 30, 2008 3:00 PM
2-5. Driving information
CAUTION
n Off-road driving precautions
Always observe the following precautions to minimize the risk of serious per- sonal injury or damage to your vehicle: l Drive carefully when off the road. Do not take unnecessary risks by driving
in dangerous places.
l Do not grip the steering wheel spokes when driving off-road. A bad bump could jerk the wheel and injure your hands. Keep both hands and espe- cially your thumbs on the outside of the rim.
l Always check your brakes for effectiveness immediately after driving in
sand, mud, water or snow.
l After driving through tall grass, mud, rock, sand, rivers, etc., check that there is no grass, bush, paper, rags, stone, sand, etc. adhering or trapped on the underbody. Clear off any such matter from the underbody. If the vehicle is used with these materials trapped or adhering to the underbody, a breakdown or fire could occur. In a rollover crash, an unbelted person is significantly more likely to die than a person wearing a seat belt. Therefore, the driver and all passengers should fasten their seat belts whenever the vehicle is moving.
l When driving off-road or in rugged terrain, do not drive at excessive speeds, jump, make sharp turns, strike objects, etc. This may cause loss of control or vehicle rollover causing death or serious injury. You are also risking expensive damage to your vehicle’s suspension and chassis.
201
4RUNNER_U_(L/O_0808)
4RUNNER_U.book Page 202 Wednesday, July 30, 2008 3:00 PM
2-5. Driving information
NOTICE
n To prevent the water damage
l Take all necessary safety measures to ensure that water damage to the
engine or other components does not occur.
l Water entering the engine air intake will cause severe engine damage. l Water entering the automatic transmission will cause deterioration in shift quality, locking up of your transmission accompanied by vibration, and ulti- mately damage.
l Water can wash the grease from wheel bearings, causing rusting and pre- mature failure, and may also enter the differentials, transmission and transfer case, reducing the gear oil’s lubricating qualities.
n When you drive through water
If driving through water, such as when crossing shallow streams, first check the depth of the water and the bottom of the river bed for firmness. Drive slowly and avoid deep water.
n Inspection after off-road driving
l Sand and mud that has accumulated in brake drums and around brake discs may affect braking efficiency and may damage brake system compo- nents.
l Always perform a maintenance inspection after each day of off-road driv- ing that has taken you through rough terrain, sand, mud, or water. For scheduled maintenance information, refer to the “Scheduled Maintenance Guide” or “Owner’s Manual Supplement”.
202
4RUNNER_U_(L/O_0808)
4RUNNER_U.book Page 203 Wednesday, July 30, 2008 3:00 PM
2-5. Driving information Cargo and luggage
Take notice of the following information about storage precau- tions, cargo capacity and load. l Stow cargo and luggage in the luggage compartment whenever
possible.
l Be sure all items are secured in place. l Be careful to keep the vehicle level. Placing the weight as far for-
ward as possible helps maintain vehicle balance.
l For better fuel economy, do not carry unnecessary weight. n Roof luggage carrier (if equipped)
Roof rails Cross rails
203
4RUNNER_U_(L/O_0808)
4RUNNER_U.book Page 204 Wednesday, July 30, 2008 3:00 PM
2-5. Driving information
Adjustment the position of cross rails
Turn the knobs counterclockwise to loosen the cross rails.
Slide the cross rails to the appro- priate position for loading lug- gage.
After adjusting, be sure to tighten the cross rails by turning knobs clockwise.
204
4RUNNER_U_(L/O_0808)
4RUNNER_U.book Page 205 Wednesday, July 30, 2008 3:00 PM
2-5. Driving information
Capacity and distribution
Cargo capacity depends on the total weight of the occupants. (Cargo capacity) = (Total load capacity) − (Total weight of occupants) Steps for Determining Correct Load Limit— (1)Locate the statement “The combined weight of occupants and cargo should never exceed XXX kg or XXX lbs.” on your vehicle’s placard.
(2)Determine the combined weight of the driver and passengers that
will be riding in your vehicle.
(3)Subtract the combined weight of the driver and passengers from
XXX kg or XXX lbs.
(4)The resulting figure equals the available amount of cargo and lug-
gage load capacity. For example, if the “XXX” amount equals 1400 lbs. and there will be five 150 lb passengers in your vehicle, the amount of available cargo and luggage load capacity is 650 lbs. (1400 − 750 (5 × 150) = 650 lbs.)
(5)Determine the combined weight of luggage and cargo being loaded on the vehicle. That weight may not safely exceed the avail- able cargo and luggage load capacity calculated in Step 4.
(6)If your vehicle will be towing a trailer, load from your trailer will be transferred to your vehicle. Consult this manual to determine how this reduces the available cargo and luggage load capacity of your vehicle.
205
4RUNNER_U_(L/O_0808)
4RUNNER_U.book Page 206 Wednesday, July 30, 2008 3:00 PM
2-5. Driving information
Example on your vehicle
Cargo capacity Total load capacity
When 2 people with the combined weight of 366 lb. (166 kg) are riding in your vehicle, the available amount of cargo and luggage load capacity will be as follows:
Without third seats — total load capacity: 950 lb. (431 kg) 950 lb. − 366 lb. = 584 lb. (431 kg − 166 kg = 265 kg) With third seats — total load capacity: 1050 lb. (477 kg) 1050 lb. − 366 lb. = 684 lb. (477 kg − 166 kg = 311 kg) In this condition, if 3 more passengers with the combined weight of 388 lb. (176 kg) get on, the available cargo and luggage load will be reduced as follows: Without third seats 584 lb. − 388 lb. = 196 lb. (265 kg − 176 kg = 89 kg) With third seats 684 lb. − 388 lb. = 296 lb. (311 kg − 176 kg = 135 kg)
As shown in the above example, if the number of occupants increases, the cargo and luggage load will be reduced by an amount that equals the increased weight due to the additional occupants. In other words, if an increase in the number of occupants causes an excess of the total load capacity (combined weight of occupants plus cargo and luggage load), you must reduce the cargo and luggage on your vehicle.
206
4RUNNER_U_(L/O_0808)
4RUNNER_U.book Page 207 Wednesday, July 30, 2008 3:00 PM
Seating configuration variation
2-5. Driving information
Cargo capacity Weight of removed third seat
If removing the third seat, it is possible to load extra cargo equal to the weight of the removed seats. (Cargo capacity) = (Total load capacity) − (Total weight of occupants) + (Weight of the removed third seats) Third seat weight:
Each seat 24 lb. (11 kg)
207
4RUNNER_U_(L/O_0808)
4RUNNER_U.book Page 208 Wednesday, July 30, 2008 3:00 PM
2-5. Driving information
CAUTION
n Things that must not be carried in the luggage compartment
The following things may cause a fire if loaded in the luggage compart- ment. l Receptacles containing gasoline l Aerosol cans
n Storage precautions
l Do not stack anything in the luggage compartment higher than the
seatbacks. Such items may be thrown about and possibly injure people in the vehicle during sudden braking or in an accident.
l Do not drive with objects on top of the instrument panel.
They may interfere with the driver’s field of view or move during sharp acceleration or turning, thus impairing the driver’s control of the vehi- cle. In an accident they may injure the vehicle occupants.
l Secure all items in the occupant compartment, as they may shift and
injure someone during an accident or sudden braking.
l Never allow anyone to ride in the luggage compartment. It is not designed for passengers. They should ride in their seats with their seat belts properly fastened. Otherwise, they are much more likely to suffer death or serious bodily injury, in the event of sudden braking or an accident.
n Capacity and distribution
l Do not exceed the maximum axle weight rating or the total vehicle
weight rating.
l Even if the total load of occupant’s weight and the cargo load is less than the total load capacity, do not apply the load unevenly. Improper loading may cause deterioration of steering or braking control which may cause death or serious injury.
208
4RUNNER_U_(L/O_0808)
2
4RUNNER_U.book Page 209 Wednesday, July 30, 2008 3:00 PM
2-5. Driving information
CAUTION
n Roof luggage carrier precautions
To use the roof rails as a roof luggage carrier, you must fit the roof rails with two or more genuine Toyota cross rails or their equivalent. When you load cargo on the roof luggage carrier, observe the following:
l Place the cargo so that its weight is distributed evenly between the front and rear axles. If loading long or wide cargo never exceed the vehicle overall length or width. (→P. 470)
l Before driving, make sure the cargo is securely fastened on the roof
luggage carrier.
l Loading cargo on the roof luggage carrier will make the center of the vehicle gravity higher. Avoid high speeds, sudden starts, sharp turns, sudden braking or abrupt maneuvers, otherwise it may result in loss of control or vehicle rollover due to failure to operate this vehicle correctly and result in death or serious injury. If driving for a long distance, on rough roads, or at high speeds, stop the vehicle now and then during the trip to make sure the cargo remains in its place.
l Do not exceed 120 lb. (54 kg) cargo weight on the roof luggage carrier.
n Cross rail adjustment
Make sure the cross rails are locked securely by pushing forward and rear- ward them. Failure to do so may cause an unexpected accident or severe injury in the event of emergency braking or a collision.
209
4RUNNER_U_(L/O_0808)
4RUNNER_U.book Page 210 Wednesday, July 30, 2008 3:00 PM
2-5. Driving information
NOTICE
n Cross rail adjustment
Do not remove the cross rail stoppers, or the moon roof may be damaged when it is tilted.
n When loading the luggage
Be careful not to scratch the surface of the moon roof.
210
4RUNNER_U_(L/O_0808)
4RUNNER_U.book Page 211 Wednesday, July 30, 2008 3:00 PM
2-5. Driving information Vehicle load limits
Vehicle load limits include total load capacity, seating capacity, towing capacity and cargo capacity. n Total load capacity:
Without third seats — 950 lb. (431 kg) With third seats — 1050 lb. (477 kg) Total load capacity means the combined weight of occupants, cargo and luggage.
n Seating capacity:
Without third seats — 5 occupants (Front 2, Rear 3) With third seats — 7 occupants (Front 2, Rear 5) Seating capacity means the maximum number of occupants whose estimated average weight is 150 lb. (68 kg) per per- son. Even if the number of occupants are within the seating capac- ity, do not exceed the total load capacity.
n Towing capacity:
For weight carrying hitch 5000 lb. (2268 kg) For weight distributing hitch (4.7 L V8 [2UZ-FE] engine only) 2WD models — 7300 lb. (3311 kg) 4WD models — 7000 lb. (3175 kg) Towing capacity means the maximum gross trailer weight (trailer weight plus its cargo weight) that your vehicle is able to tow.
n Cargo capacity
Cargo capacity may increase or decrease depending on the weight and the number of occupants.
211
4RUNNER_U_(L/O_0808)
4RUNNER_U.book Page 212 Wednesday, July 30, 2008 3:00 PM
2-5. Driving information
n Total load capacity and seating capacity
These details are also described on the tire and loading information label.(→P. 395)
CAUTION
n Overloading the vehicle
Do not overload the vehicle. It may not only cause damage to the tires, but also degrade steering and braking ability, resulting in an accident.
212
4RUNNER_U_(L/O_0808)
2
4RUNNER_U.book Page 213 Wednesday, July 30, 2008 3:00 PM
2-5. Driving information Winter driving tips
Carry out the necessary preparations and inspections before driving the vehicle in winter. Always drive the vehicle in a manner appropri- ate to the prevailing weather conditions. n Pre-winter preparations
l Use fluids that are appropriate to the prevailing outside tem-
peratures. • Engine oil • Engine coolant • Washer fluid
l Have a service technician inspect the level and specific grav-
ity of battery electrolyte.
l Have the vehicle fitted with four snow tires or purchase a set
of tire chains for the rear tires. Ensure that all tires are the same size and brand, and that chains match the size of the tires. n Before driving the vehicle
Perform the following according to the driving conditions. l Do not try to forcibly open a window, scrape an outside rear view mirror surface or move a wiper or outside rear view mir- ror that is frozen. Pour warm water over the frozen area to melt the ice. Wipe away the water immediately to prevent it from freezing.
l To ensure proper operation of the climate control system fan, remove any snow that has accumulated on the air inlet vents in front of the windshield.
l Remove any ice that has accumulated on the vehicle chassis. l Periodically check for and remove any excess ice or snow that may have accumulated in the wheel well or on the brakes.
213
4RUNNER_U_(L/O_0808)
4RUNNER_U.book Page 214 Wednesday, July 30, 2008 3:00 PM
2-5. Driving information
n When driving the vehicle
Accelerate the vehicle slowly and drive at a reduced speed suit- able to road conditions.
n When parking the vehicle
Park the vehicle and move the shift lever to P without setting the parking brake. The parking brake may freeze up, preventing it from being released.
Regulations on the use of snow chains
l Regulations regarding the use of tire chains vary according to loca- tion and type of road. Always check local regulations before install- ing chains. Install the chains on the rear tires.
l Retighten the chains after driving 1/4 - 1/2 mile (0.5 - 1.0 km).
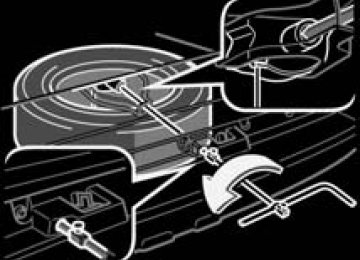
n Snow chain installation
Observe the following precautions when installing and removing chains.
Install and remove tire chains in a safe location. Install tire chains on the rear tires only. Do not install tire chains on the front tires. Install tire chains following the instructions provided in the accompanying instructions.
214
4RUNNER_U_(L/O_0808)
4RUNNER_U.book Page 215 Wednesday, July 30, 2008 3:00 PM
2-5. Driving information
CAUTION
n Driving with snow tires
Observe the following precautions to reduce the risk of accidents. Failing to do so may result in a loss of vehicle control and cause death or serious injury. l Use tires of the size specified for your vehicle. l Maintain the recommended level of air pressure. l Do not drive in excess of 75 mph (120 km/h) regardless of the type of
snow tires being used.
l Snow tires should be installed on all wheels. l 4WD models:
Do not mix tires of different makes, models, tread patterns or treadwear.
n Driving with snow chains
Observe the following precautions to reduce the risk of accidents. Failing to do so may result in the vehicle being unable to be driven safely, and may cause death or serious injury. l Do not drive in excess of the speed limit specified for the tire chains being
used or 30 mph (50 km/h), whichever is lower.
l Avoid driving on bumpy road surfaces or over potholes. l Avoid sudden turns and braking. l Slow down sufficiently before entering a curve to ensure that vehicle con-
trol is maintained.
NOTICE
n Repairing or replacing snow tires
Request repairs of and obtain replacement snow tires from Toyota dealers or legitimate tire retailers. This is because the removal and attachment of snow tires affects the opera- tion of the tire pressure warning valves and transmitters.
n Fitting tire chains
The tire pressure warning valves and transmitters may not function correctly when tire chains are fitted.
215
4RUNNER_U_(L/O_0808)
4RUNNER_U.book Page 216 Wednesday, July 30, 2008 3:00 PM
2-5. Driving information Trailer towing
Your vehicle is designed primarily as a passenger-and-load carrying vehicle. Towing a trailer will have an adverse effect on handling, per- formance, braking, durability, and fuel consumption. For your safety and the safety of others, do not overload the vehicle or trailer. To tow a trailer safely, use extreme care and drive the vehicle in accordance with the trailer’s characteristics and operating condi- tions. The vehicle stability and braking performance are affected by trailer stability, brake setting and performance, and the hitch. Toyota warranties do not apply to damage or malfunction caused by towing a trailer for commercial purposes. Contact your Toyota dealer for further information about additional requirements such as a towing kits, etc.
Weight limits
Confirm that the gross trailer weight, gross combination weight, gross vehicle weight, gross axle weight and trailer tongue load are all within the limits. n Towing capacity
For weight carrying hitch 5000 lb. (2268 kg) For weight distributing hitch (4.7 L V8 [2UZ-FE] engine only) 2WD models — 7300 lb. (3311 kg) 4WD models — 7000 lb. (3175 kg)
l The gross trailer weight must never exceed towing capacity
described above.
216
4RUNNER_U_(L/O_0808)
4RUNNER_U.book Page 217 Wednesday, July 30, 2008 3:00 PM
2-5. Driving information
n GCWR
For weight carrying hitch 4.0 L V6 (1GR-FE) engine — 9600 lb. (4354 kg) 4.7 L V8 (2UZ-FE) engine — 9750 lb. (4422 kg) For weight distributing hitch (4.7 L V8 [2UZ-FE] engine only) 12000 lb. (5443 kg)
l The gross combination weight must never exceed the GCWR
above.
l The gross vehicle weight must never exceed the GVWR indi- cated the Certification Label.
l The gross axle weight on each axle must never exceed the GAWR indicated the Certifica- tion Label.
217
4RUNNER_U_(L/O_0808)
4RUNNER_U.book Page 218 Wednesday, July 30, 2008 3:00 PM
2-5. Driving information
Towing related term
Towing related term
Meaning
GVWR (Gross Vehicle Weight Rating)
GAWR (Gross Axle Weight Rating)
GCWR (Gross Combination Weight Rating)
Gross trailer weight
Towing capacity
Tongue load
The maximum allowable gross vehicle weight. The gross vehicle weight is the total weight of the vehicle. When towing a trailer, it is the sum of the vehicle weight (including the occupants, cargo and any optional equipment installed on the vehicle) and the tongue load. The maximum allowable gross axle weight. The gross axle weight is the load placed on each axle (front and rear). The maximum allowable gross combination weight. The gross combination weight is the sum of the total vehicle weight (including the occupants, cargo and any optional equipment installed on the vehicle) and the weight of the trailer being towed (including the cargo in the trailer). The sum of the trailer weight and the weight of the cargo in the trailer. The maximum allowable gross trailer weight. Towing capacity is calculated considering base vehicle with necessary vehicle equipment and 150 pound driver. Additional optional equipment, passengers and cargo in the vehicle will reduce the towing capacity, gross trailer weight includes the trailer, cargo and necessary equipment for towing. The load placed on the trailer hitch ball.
218
4RUNNER_U_(L/O_0808)
4RUNNER_U.book Page 219 Wednesday, July 30, 2008 3:00 PM
2-5. Driving information
Trailer tongue load
l A recommended tongue load varies in accordance with the types
of trailers or towing as described below. In order to ensure the recommended values shown below, the trailer must be loaded by referring to the following instructions. The trailer cargo load should be distributed so that the tongue load is 10% of the gross trailer weight, not exceeding the following. (Tongue load /Gross trailer weight x 100 = 10%) If the gross trailer weight is over 2000 lbs. (907 kg), it is necessary to use a sway control device with sufficient capacity. If the gross trailer weight is over 5000 lbs. (2268 kg), it is neces- sary to use a weight distributing hitch with sufficient capacity. If using a weight distributing hitch when towing, keep your vehicle level with the ground.
The gross trailer weight and tongue load can be measured with plat- form scales found at a highway weighing station, building supply company, trucking company, junk yard, etc.
Gross trailer weight Tongue load
Hitch
Trailer hitch assemblies have different weight capacities established by the hitch manufacturer. Even though the vehicle may be rated for towing a higher weight, the operator must never exceed the maxi- mum weight rating specified for the trailer hitch.
219
4RUNNER_U_(L/O_0808)
4RUNNER_U.book Page 220 Wednesday, July 30, 2008 3:00 PM
2-5. Driving information
Selecting trailer ball
Use the correct trailer ball for your application.
Trailer ball load rating Matches or exceeds the gross trailer weight rating of the trailer. Ball diameter Matches the size of the trailer coupler. Most couplers are stamped with the required trailer ball size.
Trailer class
Typical trailer ball size
IV
2 5/16 in.
II and III
2 in.
1 7/8 in.
Shank length Protrudes beyond the bottom of the lock washer and nut at least 2
threads. Shank diameter Matches diameter size.the ball mount hole
220
4RUNNER_U_(L/O_0808)
4RUNNER_U.book Page 221 Wednesday, July 30, 2008 3:00 PM
2-5. Driving information
Connecting trailer lights
Use the wire harness stored in the rear end under body.
Trailer towing tips
Your vehicle will handle differently when towing a trailer. The three main causes of vehicle-trailer accidents are driver error, excessive speed and improper trailer loading. Keep the following in mind when towing. l Before starting out, check the trailer’s light and the vehicle-trailer
connections. Recheck after driving a short distance.
l Practice turning, stopping and reversing with the trailer attached in an area away from traffic until you become accustomed to the feel of the vehicle.
l Reversing with a trailer attached is difficult and requires practice. Grip the bottom of the steering wheel and move your hand to the left to move the trailer to the left. Move your hand to the right to move the trailer to the right. (This is generally opposite to reversing without a trailer attached.) Avoid sharp or prolonged turning. Have someone guide you when reversing to reduce the risk of an acci- dent.
l As stopping distance is increased when towing a trailer, vehicle-to- vehicle distance should be increased. For each 10 mph (16 km/h) of speed, allow at least one vehicle and trailer length.
221
4RUNNER_U_(L/O_0808)
4RUNNER_U.book Page 222 Wednesday, July 30, 2008 3:00 PM
2-5. Driving information
l Avoid sudden braking as you may skid, resulting in jackknifing and
loss of control. This is especially true on wet or slippery surfaces.
l Avoid jerky starts or sudden acceleration. l Avoid jerky steering and sharp turns, and slow down before mak-
ing a turn.
l Note that when making a turn, the trailer wheels will be closer than the vehicle wheels to the inside of the turn. Compensate by making a larger than normal turning radius.
l Crosswinds and rough roads will adversely affect handling of your vehicle and trailer, causing sway. Periodically check the rear to prepare for being passed by large trucks or buses, which may cause your vehicle and trailer to sway. If swaying occurs, firmly grip the steering wheel, reduce speed immediately but gradually, and steer straight ahead. Never increase speed. If you make no extreme correction with the steering or brakes, your vehicle and trailer will stabilize.
l Take care when passing other vehicles. Passing requires consider- able distance. After passing a vehicle, do not forget the length of your trailer, and be sure you have plenty of room before changing lanes. In order to maintain engine braking efficiency when driving on a long steep downgrade, do not use the transmission in D. Transmission shift position must be in 4.
l Due to the added load of the trailer, your vehicle’s engine may overheat on hot days (at temperatures over 85°F [30°C]) when driving up a long or steep grade. If the engine coolant temperature gauge indicates overheating, immediately turn off the air condition- ing (if in use), pull your vehicle off the road and stop in a safe spot. (→P. 463)
222
4RUNNER_U_(L/O_0808)
2
4RUNNER_U.book Page 223 Wednesday, July 30, 2008 3:00 PM
2-5. Driving information
l Always place wheel blocks under both the vehicle and the trailer wheels when parking. Apply the parking brake firmly, and put the transmission in P. Avoid parking on a slope, but if unavoidable, do so only after performing the following:
Apply the brakes and keep them applied. Have someone place wheel blocks under both the vehicle and trailer wheels. When the wheel blocks are in place, release the brakes slowly until the blocks absorb the load. Apply the parking brake firmly. Shift into P and turn off the engine. l When restarting after parking on a slope:
With the transmission in P, start the engine. Be sure to keep the brake pedal pressed. Shift into a forward gear. If reversing, shift into R. Release the parking brake and brake pedal, and slowly pull or back away from the wheel blocks. Stop and apply the brakes. Have someone retrieve the blocks.
n Service connector for towing brake controller (if equipped)
Your vehicle is equipped with a service connector for the trailer brake controller as shown.
223
4RUNNER_U_(L/O_0808)
4RUNNER_U.book Page 224 Wednesday, July 30, 2008 3:00 PM
2-5. Driving information
n Matching trailer ball height to trailer coupler height
No matter which class of tow hitch applies, for a safe trailer hookup, the trailer ball setup on must be the proper height for the coupler on the trailer.
Coupler Trailer ball
n Before towing
Check that the following conditions are met: l Ensure that your vehicle’s tires are properly inflated. (→P. 479) l Trailer tires should be inflated according to the trailer manufacturer’s rec-
ommendation.
l All trailer lights work to be legal. l All lights work each time you connect them. l The trailer ball is set up at the proper height for the coupler on the trailer. l The vehicle remains level when a loaded or unloaded trailer is hitched. Do not drive if the vehicle is not level, and check for improper tongue load, overloading, worn suspension, or other possible causes.
l The trailer cargo is securely loaded. l The rear view mirrors conform to all applicable federal, state/provincial or local regulations. If they do not, install rear view mirrors appropriate for towing purposes.
224
4RUNNER_U_(L/O_0808)
4RUNNER_U.book Page 225 Wednesday, July 30, 2008 3:00 PM
2-5. Driving information
n When connecting and disconnecting a trailer
Set the electronically modulated air suspension system to LO mode and push the HEIGHT CONTROL OFF switch to turn off the rear height control air suspension. (if equipped)
n Break-in schedule
If your vehicle is new or equipped with any new power train components (such as an engine, transmission, differential and wheel bearing), Toyota recommends that you do not tow a trailer until it has been driven for over 500
miles (800 km). However, avoid full throttle acceleration.n Maintenance
If you tow a trailer, your vehicle will require more frequent maintenance due to the additional load. (See “Scheduled Maintenance Guide” or “Owner’s Manual Supplement”.)
l Retighten the fixing bolts of the towing ball and bracket after approxi-
mately 600 miles (1000 km).
CAUTION
n Trailer towing precautions
l Follow all the instructions described in this section. Failure to do so could
cause an accident resulting in death or serious injury.
l Exceeding the towing capacity, GVWR, GCWR or GAWR can cause an
accident resulting in death or serious injuries.
n To avoid accident or injury
l Do not exceed the trailer hitch assembly weight, gross vehicle weight,
gross axle weight and trailer tongue load capacities.
l Do not exceed 45 mph (72 km/h) or the posted towing speed limit, which- ever is lower. As instability (swaying) of the towing vehicle-trailer combina- tion increases as speed increases, exceeding 45 mph (72 km/h) may cause loss of control.
l Do not use cruise control when you are towing. l Slow down and downshift before descending steep or long downhill
grades. Do not make sudden downshifts.
225
4RUNNER_U_(L/O_0808)
4RUNNER_U.book Page 226 Wednesday, July 30, 2008 3:00 PM
2-5. Driving information
CAUTION
n To avoid accident or injury
l Avoid holding the brake pedal down too long or applying the brakes too frequently. This could cause the brakes to overheat and result in reduced braking efficiency.
n Hitches
If you wish to install a trailer hitch, contact your Toyota dealer.
l Use only a hitch that conforms to the gross trailer weight requirement. l Follow the directions supplied by the hitch manufacturer. l Lubricate the hitch ball with a light coat of grease. l Remove the trailer hitch whenever you are not towing a trailer. After removing the hitch, seal any mounting hole in the vehicle body to prevent entry of any substances into the vehicle.
n When towing a trailer
If the gross trailer weight exceeds 1000 lb. (453 kg), trailer brakes are required. Toyota recommends trailers with brakes that conform to all appli- cable federal and state/provincial regulations.
l Never tap into your vehicle’s hydraulic system, as this will lower the vehi-
cle’s braking effectiveness.
l Never tow a trailer without using a safety chain securely attached to both the trailer and the vehicle. If damage occurs to the coupling unit or hitch ball, there is danger of the trailer wandering into another lane.
226
4RUNNER_U_(L/O_0808)
2
4RUNNER_U.book Page 227 Wednesday, July 30, 2008 3:00 PM
2-5. Driving information
NOTICE
n When installing a trailer hitch
l Use only the position recommended by your Toyota dealer. Do not install
the trailer hitch on the bumper; this may cause body damage.
l Do not use axle-mounted hitches, as they can cause damage to the axle
housing, wheel bearing, wheels or tires.
n Safety chain
A safety chain must always be used between the towing vehicle and the trailer. Leave sufficient slack in the chain for turns. The chain should cross under the trailer tongue to prevent the tongue from dropping to the ground in the case that it becomes damaged or separated. For the correct safety chain installation procedure, ask your Toyota dealer.
n Do not directly splice trailer lights
Directly splicing trailer lights may damage your vehicle’s electrical system and cause a malfunction.
227
4RUNNER_U_(L/O_0808)
4RUNNER_U.book Page 228 Wednesday, July 30, 2008 3:00 PM
2-5. Driving information Dinghy towing
Your vehicle is not designed to be dinghy towed (with 4 wheels on the ground) behind a motor home.
NOTICE
n To avoid serious damage to your vehicle
Do not tow your vehicle with four wheels on the ground.
228
4RUNNER_U_(L/O_0808)
4RUNNER_U.book Page 230 Wednesday, July 30, 2008 3:00 PM
3-1. Using the air conditioning system and defogger Air conditioning system
Airflow and outlets are automatically adjusted according to the tem- perature setting.
Control panel (vehicles without DUAL button)
Temperature control switch
Automatic mode
Fan speed selector switches
Air conditioning ON/OFF switch
Windshield defogger
Fan OFF switch
Air flow selector switches
Temperature control switch
Air intake mode switch
230
4RUNNER_U_(L/O_0808)
4RUNNER_U.book Page 231 Wednesday, July 30, 2008 3:00 PM
3-1. Using the air conditioning system and defogger
Control panel (vehicles with DUAL button)
Automatic mode
Individual mode
Driver’s side temperature control switch
Fan speed selector switches
Passenger’s side temperature control switch Windshield defogger