- 2011 Ford Ranger Owners Manuals
- Ford Ranger Owners Manuals
- 2004 Ford Ranger Owners Manuals
- Ford Ranger Owners Manuals
- 1997 Ford Ranger Owners Manuals
- Ford Ranger Owners Manuals
- 2007 Ford Ranger Owners Manuals
- Ford Ranger Owners Manuals
- 2008 Ford Ranger Owners Manuals
- Ford Ranger Owners Manuals
- 2005 Ford Ranger Owners Manuals
- Ford Ranger Owners Manuals
- 2006 Ford Ranger Owners Manuals
- Ford Ranger Owners Manuals
- 2009 Ford Ranger Owners Manuals
- Ford Ranger Owners Manuals
- 1998 Ford Ranger Owners Manuals
- Ford Ranger Owners Manuals
- 2001 Ford Ranger Owners Manuals
- Ford Ranger Owners Manuals
- 1999 Ford Ranger Owners Manuals
- Ford Ranger Owners Manuals
- 2003 Ford Ranger Owners Manuals
- Ford Ranger Owners Manuals
- 2010 Ford Ranger Owners Manuals
- Ford Ranger Owners Manuals
- 2002 Ford Ranger Owners Manuals
- Ford Ranger Owners Manuals
- Download PDF Manual
-
NOT accurate as a measure of fuel economy. We do not recommend taking fuel economy measurements during the first 1,600 km (1,000 miles) of driving (engine break-in period). You will get a more accurate measurement after 3,000 km–5,000 km (2,000 miles-3,000 miles).
Filling the tank The advertised fuel capacity of the fuel tank on your vehicle is equal to the rated refill capacity of the fuel tank as listed in the Refill capacities section of this chapter. The advertised capacity is the amount of the indicated capacity and the empty reserve combined. Indicated capacity is the difference in the amount of fuel in a full tank and a tank when the fuel gauge indicates empty. Empty reserve is the small amount of fuel remaining in the fuel tank after the fuel gauge indicates empty. The amount of usable fuel in the empty reserve varies and should not be relied upon to increase driving range. When refueling your vehicle after the fuel gauge indicates empty, you might not be able to refuel the full amount of the advertised capacity of the fuel tank due to the empty reserve still present in the tank.
213
Maintenance and Specifications
the tank is filled.
an error in the reading will result if the engine is left running.
For consistent results when filling the fuel tank: • Turn the engine/ignition switch to the off position prior to refueling, • Use the same filling rate setting (low — medium — high) each time • Allow no more than 2 automatic click-offs when filling. • Always use fuel with the recommended octane rating. • Use a known quality gasoline, preferably a national brand. • Use the same side of the same pump and have the vehicle facing the • Have the vehicle loading and distribution the same every time. Your results will be most accurate if your filling method is consistent.
same direction each time you fill up.
Calculating fuel economy 1. Fill the fuel tank completely and record the initial odometer reading (in kilometers or miles). 2. Each time you fill the tank, record the amount of fuel added (in liters or gallons). 3. After at least three to five tank fill-ups, fill the fuel tank and record the current odometer reading. 4. Subtract your initial odometer reading from the current odometer reading. 5. Follow one of the simple calculations in order to determine fuel economy:
Calculation 1: Multiply liters used by 100, then divide by total kilometers traveled. Calculation 2: Divide total miles traveled by total gallons used.
Keep a record for at least one month and record the type of driving (city or highway). This will provide an accurate estimate of the vehicle’s fuel economy under current driving conditions. Additionally, keeping records during summer and winter will show how temperature impacts fuel economy. In general, lower temperatures give lower fuel economy.
Driving style — good driving and fuel economy habits Give consideration to the lists that follow and you may be able to change a number of variables and improve your fuel economy.
214
Maintenance and Specifications
fuel.
economy.
Habits • Smooth, moderate operation can yield up to 10% savings in fuel. • Steady speeds without stopping will usually give the best fuel • Idling for long periods of time (greater than one minute) may waste • Anticipate stopping; slowing down may eliminate the need to stop. • Sudden or hard accelerations may reduce fuel economy. • Slow down gradually. • Driving at reasonable speeds (traveling at 88 km/h [55 mph] uses 15% • Revving the engine before turning it off may reduce fuel economy. • Using the air conditioner or defroster may reduce fuel economy. • You may want to turn off the speed control in hilly terrain if unnecessary shifting between third and fourth gear occurs. Unnecessary shifting of this type could result in reduced fuel economy.
less fuel than traveling at 105 km/h [65 mph]).
• Warming up a vehicle on cold mornings is not required and may • Resting your foot on the brake pedal while driving may reduce fuel • Combine errands and minimize stop-and-go driving. Maintenance • Keep tires properly inflated and use only recommended size. • Operating a vehicle with the wheels out of alignment will reduce fuel • Use recommended engine oil. Refer to Lubricant specifications in • Perform all regularly scheduled maintenance items. Follow the
reduce fuel economy.
this chapter.
economy.
economy.
recommended maintenance schedule and owner maintenance checks found in your vehicle scheduled maintenance guide.
Conditions • Heavily loading a vehicle or towing a trailer may reduce fuel economy • Carrying unnecessary weight may reduce fuel economy (approximately
at any speed.
0.4 km/L [1 mpg] is lost for every 180 kg [400 lb] of weight carried).
215
Maintenance and Specifications • Adding certain accessories to your vehicle (for example bug
driving on hilly terrain.
deflectors, rollbars/light bars, running boards, ski/luggage racks) may reduce fuel economy.
12–16 km (8–10 miles) of driving.
cruise gear and with steady pressure on the gas pedal.
• Using fuel blended with alcohol may lower fuel economy. • Fuel economy may decrease with lower temperatures during the first • Driving on flat terrain offers improved fuel economy as compared to • Transmissions give their best fuel economy when operated in the top • Four-wheel-drive operation (if equipped) is less fuel efficient than • Close windows for high speed driving. EPA window sticker Every new vehicle should have the EPA window sticker. Contact your dealer if the window sticker is not supplied with your vehicle. The EPA window sticker should be your guide for the fuel economy comparisons with other vehicles. It is important to note the box in the lower left corner of the window sticker. These numbers represent the Range of L/100 km (MPG) expected on the vehicle under optimum conditions. Your fuel economy may vary depending upon the method of operation and conditions.
two-wheel-drive operation.
EMISSION CONTROL SYSTEM Your vehicle is equipped with various emission control components and a catalytic converter which will enable your vehicle to comply with applicable exhaust emission standards. To make sure that the catalytic converter and other emission control components continue to work properly: • Use only the specified fuel listed. • Avoid running out of fuel. • Do not turn off the ignition while your vehicle is moving, especially at • Have the items listed in your scheduled maintenance guide performed
high speeds.
according to the specified schedule.
The scheduled maintenance items listed in the scheduled maintenance guide are essential to the life and performance of your vehicle and to its emissions system.
216
Maintenance and Specifications
If other than Ford, Motorcraft or Ford-authorized parts are used for maintenance replacements or for service of components affecting emission control, such non-Ford parts should be equivalent to genuine Ford Motor Company parts in performance and durability.
Do not park, idle, or drive your vehicle in dry grass or other dry ground cover. The emission system heats up the engine
compartment and exhaust system, which can start a fire.
Illumination of the “Check Engine” light, charging system warning light or the temperature warning light, fluid leaks, strange odors, smoke or loss of engine power, could indicate that the emission control system is not working properly.
Exhaust leaks may result in entry of harmful and potentially lethal fumes into the passenger compartment.
Do not make any unauthorized changes to your vehicle or engine. By law, vehicle owners and anyone who manufactures, repairs, services, sells, leases, trades vehicles, or supervises a fleet of vehicles are not permitted to intentionally remove an emission control device or prevent it from working. Information about your vehicle’s emission system is on the Vehicle Emission Control Information Decal located on or near the engine. This decal identifies engine displacement and gives some tune up specifications. Please consult your “Warranty Guide” for complete emission warranty information.
On board diagnostics (OBD-II) Your vehicle is equipped with a computer that monitors the engine’s emission control system. This system is commonly known as the On Board Diagnostics System (OBD-II). This OBD-II system protects the environment by ensuring that your vehicle continues to meet government emission standards. The OBD-II system also assists the service technician in properly servicing your vehicle. When the Check Engine/Service Engine Soon light illuminates, the OBD-II system has detected a malfunction. Temporary malfunctions may cause your Check Engine/Service Engine Soon light to illuminate. Examples are: 1. The vehicle has run out of fuel. (The engine may misfire or run poorly.) 2. Poor fuel quality or water in the fuel.
217
Maintenance and Specifications
3. The fuel cap may not have been securely tightened. These temporary malfunctions can be corrected by filling the fuel tank with good quality fuel and/or properly tightening the fuel cap. After three driving cycles without these or any other temporary malfunctions present, the Check Engine/Service Engine Soon light should turn off. (A driving cycle consists of a cold engine startup followed by mixed city/highway driving.) No additional vehicle service is required. If the Check Engine/Service Engine Soon light remains on, have your vehicle serviced at the first available opportunity.
Readiness for Inspection/Maintenance (I/M) testing In some localities, it may be a legal requirement to pass an I/M test of the on-board diagnostics system. If your “Check Engine/Service Engine Soon” light is on, refer to the description in the Warning lights and chimes section of the Instrument cluster chapter. Your vehicle may not pass the I/M test with the “Check Engine/Service Engine Soon” light on. If the vehicle’s powertrain system or its battery has just been serviced, the on-board diagnostics system is reset to a “not ready for I/M test” condition. To ready the on-board diagnostics system for I/M testing, a minimum of 30 minutes of city and highway driving is necessary as described below: • First, at least 10 minutes of driving on an expressway or highway. • Next, at least 20 minutes driving in stop-and-go, city-type traffic with
at least four idle periods.
Allow the vehicle to sit for at least eight hours without starting the engine. Then, start the engine and complete the above driving cycle. The engine must warm up to its normal operating temperature. Once started, do not turn off the engine until the above driving cycle is complete.
218
Maintenance and Specifications
CHECKING AND ADDING POWER STEERING FLUID • 2.3L I4 engine
• 3.0L V6 engine
• 4.0L V6 engine
D O NOT E R FILL
O V
RI
FLUID ERSTEE
POW
219
Maintenance and Specifications
Check the power steering fluid. Refer to the scheduled maintenance guide for the service interval schedules. If adding fluid is necessary, use only MERCON威 ATF. 1. Start the engine and let it run until it reaches normal operating temperature (the engine coolant temperature gauge indicator will be near the center of the normal area between H and C). 2. While the engine idles, turn the steering wheel left and right several times. 3. Turn the engine off. 4. If your vehicle is equipped with a 3.0L V6 engine, check the fluid level on the dipstick. It should be within the FULL HOT range. Do not add fluid if the level is within this range. 5. If your vehicle is equipped with a 4.0L SOHC V6 or 2.3L I4
engine, check the fluid level in the reservoir. It should be between the MIN and MAX lines. Do not add fluid if the level is within this range. 6. If the fluid is low, add fluid in small amounts, continuously checking the level until it reaches the FULL HOT range. Be sure to put the dipstick back in the reservoir.BRAKE FLUID RESERVOIR The fluid level will drop slowly as the brakes wear, and will rise when the brake components are replaced. Fluid levels below the “MAX” line that do not trigger the brake system warning lamp are within the normal operating range, there is no need to add fluid. If the fluid levels are outside of the normal operating range, the performance of your brake system could be compromised, seek service from your dealer immediately.
MAX
CLUTCH FLUID (IF EQUIPPED) Check the fluid level. Refer to the scheduled maintenance guide for the service interval schedules. During normal operation, the fluid level in the clutch reservoir should remain constant. If the fluid level drops, refill the fluid level to the step in the reservoir. Use only a DOT 3 brake fluid designed to meet Ford specification ESA-M6C25–A. Refer to Lubricant Specifications in this chapter.
220
Maintenance and Specifications
Brake fluid is toxic. If brake fluid contacts the eyes, flush eyes with running water for 15 minutes. Seek medical attention if
irritation persists. If taken internally, drink water and induce vomiting. Seek medical attention immediately.
1. Clean the reservoir cap before removal to prevent dirt and water from entering the reservoir. 2. Remove cap and rubber diaphragm from reservoir. 3. Add fluid until the level reaches the step in the reservoir. 4. Reinstall rubber diaphragm and cap onto reservoir.
TRANSMISSION FLUID
Checking automatic transmission fluid (if equipped) Refer to your scheduled maintenance guide for scheduled intervals for fluid checks and changes. Your transmission does not consume fluid. However, the fluid level should be checked if the transmission is not working properly, i.e., if the transmission slips or shifts slowly or if you notice some sign of fluid leakage. Automatic transmission fluid expands when warmed. To obtain an accurate fluid check, drive the vehicle until it is at normal operating temperature (approximately 30 km [20 miles]). If your vehicle has been operated for an extended period at high speeds, in city traffic during hot weather or pulling a trailer, the vehicle should be turned off for about 30
minutes to allow fluid to cool before checking. 1. Drive the vehicle 30 km (20 miles) or until it reaches normal operating temperature. 2. Park the vehicle on a level surface and engage the parking brake.221
Maintenance and Specifications
3. With the parking brake engaged and your foot on the brake pedal, start the engine and move the gearshift lever through all of the gear ranges. Allow sufficient time for each gear to engage. 4. Latch the gearshift lever in P (Park) and leave the engine running. 5. Remove the dipstick, wiping it clean with a clean, dry lint free rag. If necessary, refer to Identifying components in the engine compartment in this chapter for the location of the dipstick. 6. Install the dipstick making sure it is fully seated in the filler tube. 7. Remove the dipstick and inspect the fluid level. The fluid should be in the designated area for normal operating temperature or ambient temperature. Low fluid level Do not drive the vehicle if the fluid level is at the bottom of the dipstick and the ambient temperature is above 10°C (50°F).
Correct fluid level The transmission fluid should be checked at normal operating temperature 66°C-77°C (150°F-170°F) on a level surface. The normal operating temperature can be reached after approximately 30 km (20 miles) of driving. You can check the fluid without driving if the ambient temperature is above 10°C (50°F). However, if fluid is added at this time, an overfill condition could result when the vehicle reaches normal operating temperature. The transmission fluid should be in this range if at normal operating temperature (66°C-77°C [150°F-170°F]). The transmission fluid should be in this range if at ambient temperature (10°C-35°C [50°F-95°F]).
222
Maintenance and Specifications
High fluid level Fluid levels above the safe range may result in transmission failure. An overfill condition of transmission fluid may cause shift and/or engagement concerns and/or possible damage. High fluid levels can be caused by an overheating condition. Adjusting automatic transmission fluid levels Before adding any fluid, make sure the correct type is used. The type of fluid used is normally indicated on the dipstick and also in the Lubricant specifications section in this chapter. Use of a non-approved automatic transmission fluid may cause internal transmission component damage. If necessary, add fluid in 250 ml (1/2 pint) increments through the filler tube until the level is correct. If an overfill occurs, excess fluid should be removed by a qualified technician. An overfill condition of transmission fluid may cause shift and/or engagement concerns and/or possible damage. Do not use supplemental transmission fluid additives, treatments or cleaning agents. The use of these materials may affect transmission operation and result in damage to internal transmission components.
223
Maintenance and Specifications
Checking and adding manual transmission fluid (if equipped) 1. Clean the filler plug. 2. Remove the filler plug and inspect the fluid level.
3. Fluid level should be at the bottom of the opening. 4. Add enough fluid through the filler opening so that the fluid level is at the bottom of the opening. 5. Install and tighten the fill plug securely.
Use only fluid that meets Ford specifications. Refer to Lubricant Specifications in this chapter.
224
Maintenance and Specifications
Checking and adding transfer case fluid (if equipped) 1. Clean the filler plug. 2. Remove the filler plug and inspect the fluid level.
3. Add only enough fluid through the filler opening so that the fluid level is at the bottom of the opening.
Use only fluid that meets Ford specifications. Refer to Lubricant Specifications in this chapter.
DRIVELINE UNIVERSAL JOINT AND SLIP YOKE Your vehicle may be equipped with universal joints that require lubrication. Refer to the scheduled maintenance guide for maintenance intervals. If the original universal joints are replaced with universal joints equipped with grease fittings, lubrication will also be necessary.
225
Maintenance and Specifications
INFORMATION ABOUT UNIFORM TIRE QUALITY GRADING New vehicles are fitted with tires that have a rating on them called Tire Quality Grades. The Quality grades can be found where applicable on the tire sidewall between tread shoulder and maximum section width. For example: • Treadwear 200 Traction AA Temperature A These Tire Quality Grades are determined by standards that the United States Department of Transportation has set. Tire Quality Grades apply to new pneumatic tires for use on passenger cars. They do not apply to deep tread, winter-type snow tires, space-saver or temporary use spare tires, tires with nominal rim diameters of 10 to 12 inches or limited production tires as defined in Title 49 Code of Federal Regulations Part 575.104(c)(2). U.S. Department of Transportation-Tire quality grades: The U.S. Department of Transportation requires Ford to give you the following information about tire grades exactly as the government has written it.
Treadwear The treadwear grade is a comparative rating based on the wear rate of the tire when tested under controlled conditions on a specified government test course. For example, a tire graded 150 would wear one and one-half (1 1/2) times as well on the government course as a tire graded 100. The relative performance of tires depends upon the actual conditions of their use, however, and may depart significantly from the norm due to variations in driving habits, service practices, and differences in road characteristics and climate.
Traction AA A B C The traction grades, from highest to lowest are AA, A, B, and C. The grades represent the tire’s ability to stop on wet pavement as measured under controlled conditions on specified government test surfaces of asphalt and concrete. A tire marked C may have poor traction performance.
226
Maintenance and Specifications
The traction grade assigned to this tire is based on straight-ahead braking traction tests, and does not include
acceleration, cornering, hydroplaning or peak traction characteristics.
Temperature A B C The temperature grades are A (the highest), B and C, representing the tire’s resistance to the generation of heat and its ability to dissipate heat when tested under controlled conditions on a specified indoor laboratory test wheel. Sustained high temperature can cause the material of the tire to degenerate and reduce tire life, and excessive temperature can lead to sudden tire failure. The grade C corresponds to a level of performance which all passenger car tires must meet under the Federal Motor Vehicle Safety Standard No. 109. Grades B and A represent higher levels of performance on the laboratory test wheel than the minimum required by law.
The temperature grade for this tire is established for a tire that is properly inflated and not overloaded. Excessive speed,
underinflation, or excessive loading, either separately or in combination, can cause heat buildup and possible tire failure.
SERVICING YOUR TIRES
Checking the tire pressure • Use an accurate tire pressure gauge. • Check the tire pressure when tires are cold, after the vehicle has been • Adjust tire pressure to recommended specifications found on the Certification Label. Tire pressure information can also be found on the Tire Information label located on the inside of the fuel filler door.
parked for at least one hour or has been driven less than 5 km (3 miles).
Improperly inflated tires can affect vehicle handling and can fail suddenly, possibly resulting in loss of vehicle control, vehicle
rollover and/or personal injury.
227
Maintenance and Specifications
Tire rotation Because your vehicle’s tires perform different jobs, they often wear differently. To make sure your tires wear evenly and last longer, rotate them as indicated in the scheduled maintenance guide. If you notice that the tires wear unevenly, have them checked. • Four tire rotation
• Five tire rotation
Note: Do not use a temporary spare tire for a five tire rotation.
228
Maintenance and Specifications
Replacing the tires Replace the tires when the wear band is visible through the tire treads. Due to exposure to the elements and exhaust you should replace the spare tire when you replace the other tires.
When replacing full size tires, never mix radial bias-belted, or bias-type tires. Use only the tire sizes that are listed on the
Certification Label. Make sure that all tires are the same size, speed rating, and load-carrying capacity. Use only the tire combinations recommended on the label. If you do not follow these precautions, your vehicle handling may be affected which can lead to loss of vehicle control, vehicle rollover and/or personal injury.
Make sure that all replacement tires are of the same size, type, speed rating, load-carrying capacity and tread design (e.g., “All
Terrain”, “Touring”, etc.), as originally offered by Ford.
Do not replace your tires with “high performance” tires or larger size tires.
Failure to follow these precautions may adversely affect the handling of the vehicle, and increase the risk of loss of vehicle
control, vehicle rollover and/or personal injury.
Tires that are larger or smaller than your vehicle’s original tires may also affect the accuracy of your speedometer.
229
Maintenance and Specifications
SNOW TIRES AND CHAINS
Driving too fast for conditions creates the possibility of loss of vehicle control. Driving at very high speeds for extended periods
of time may result in damage to vehicle components.
Snow tires must be the same size and grade as the tires you currently have on your vehicle.
The tires on your vehicle have all weather treads to provide traction in rain and snow. However, in some climates, you may need to use snow tires and chains. If you need to use snow tires and chains, it is recommended that steel wheels are used of the same size and specifications as those originally installed. Follow these guidelines when using snow tires and chains: • Do not use tire chains on aluminum wheels. Chains may chip the • Use only SAE Class S chains. • Install chains securely, verifying that the chains do not touch any • Drive cautiously. If you hear the chains rub or bang against your
wiring, brake lines or fuel lines.
wheels.
vehicle, stop and re-tighten the chains. If this does not work, remove the chains to prevent damage to your vehicle.
• If possible, avoid fully loading your vehicle. • Remove the tire chains when they are no longer needed. Do not use • The suspension insulation and bumpers will help prevent vehicle damage. Do not remove these components from your vehicle when using snow tires and chains.
tire chains on dry roads.
230
Maintenance and Specifications
2.3L I4
engine FA-1658MOTORCRAFT PART NUMBERS Component
3.0L V6 engine
4.0L V6 engine
FA-1658
FA-1658
FG–1002
BXT-59
FL-400S EV-130FG–1002
BXT-59
FL-400S EV-227
AWSF-32FEM AWSF-32PP**Air filter element Fuel filter Battery Oil filter PCV valve Spark plugs* * Refer to Vehicle Emissions Control Information (VECI) decal for spark plug gap information. *** If any spark plug needs to be removed for inspection, it must be re-installed in the same cylinder. Cylinders No.1, 2 and 3 have a “PG” suffix. Cylinders No. 4, 5 and 6 have a “P” suffix. If any spark plug needs to be replaced, use only spark plugs with the service part number suffix letters “PP” as shown on the engine decal.
FG–1002
BXT-59
FL-820S EV-225
AGSF-34FPMOTORCRAFT PART NUMBERS
Component
2.3L
I4engine
3.0 L V6
engine3.0L V6
FFV engine
4.0L V6
engineFA-1658
FA-1658
FA-1658
FA-1658
FG-1002
BXT-59
FL-400S EV-130FG-1002
BXT-59
FL-400S EV-130FG-1002
BXT-59
FL-400S EV-227Air filter element Fuel filter Battery Oil filter PCV valve Spark plugs* AWSF-32FEM AWSF-32PP** AGSF-22PP** AGSF-34FP * Refer to Vehicle Emissions Control Information (VECI) decal for spark plug gap information. ** If any spark plug needs to be removed for inspection, it must be re-installed in the same cylinder. Cylinders No.1, 2 and 3 have a “PG” suffix. Cylinders No. 4, 5 and 6 have a “P” suffix. If any spark plug needs to be replaced, use only spark plugs with the service part number suffix letters “PP” as shown on the engine decal.
FG-1002
BXT-59
FL-820S EV-225231
Maintenance and Specifications
REFILL CAPACITIES Fluid
Ford Part Name Motorcraft SAE 5W- 20 Premium Synthetic Blend Motor Oil (US) Motorcraft SAE 5W-20 Super Premium Motor Oil (Canada) Motorcraft SAE 5W- 30 Super Premium Motor Oil Motorcraft High Performance DOT 3 Motor Vehicle Brake Fluid Motorcraft MERCON威 ATF
Application
Capacity
2.3L engine
3.0L V6 engine
4.0L V6 engine
3.8L (4.0
quarts)4.3L (4.5
quarts)4.7L (5.0
quarts)All
All
Fill to line or step (for clutch) on reservoir
Fill to range on dipstick or reservoir
Engine oil (includes filter change)7
Brake fluid and Clutch fluid
Power steering fluid
232
Maintenance and Specifications
Fluid
Transmission fluid 1
Ford Part Name Motorcraft MERCON威 ATF Motorcraft MERCON威V ATF
Engine coolant 4 Motorcraft
Premium Gold Engine Coolant (yellow-colored)
Application
Capacity
5-speed manual
4x2 vehicles with automatic and 2.3L I4
engine 4x2 vehicles with automatic and 3.0L or 4.0L engines 4x4 vehicles with automatic and 3.0L or 4.0L 2.3 L I4 engine with manual transmission 2.3L I4 engine with automatic transmission 3.0L V6 engine with manual transmission 3.0L V6 engine with automatic transmission 4.0L V6 engine with manual transmission 4.0L V6 engine with automatic transmission2.65L (2.8
quarts) 3
9.4L (9.9
quarts) 29.5L (10.0
quarts)29.8L (10.3
quarts) 210.0L (10.5
quarts)9.7L (10.2
quarts)14.3L (15.1
quarts)14.0L (14.8
quarts)13.0L (13.7
quarts)12.5L (13.2
quarts)233
Maintenance and Specifications
Fluid
Fuel tank
Ford Part Name N/A
Transfer case Fluid Front axle lubricant
Rear axle lubricant5, 6
Rear axle lubricant (FX4
only)6Windshield washer fluid
Motorcraft MERCON威 ATF Motorcraft SAE 80W-90
Premium Rear Axle Lubricant Motorcraft SAE 80W-90
Premium Rear Axle Lubricant Motorcraft SAE 75W-140
Synthetic Rear Axle Lubricant Motorcraft Premium Windshield Washer ConcentrateApplication
Capacity
Regular cab (Short wheel base) Regular cab (Long wheel base) SuperCab
4x4 Vehicles
4x4 Vehicles
62.4L (16.5
gallons)75.7L (20.0
gallons)73.8L (19.5
gallons) 1.2L (1.25
quarts) 1.7L (3.6 pints)All (except FX4)
2.4-2.5L (5.0-5.3
pints)FX4 only
2.5-2.6L (5.25-5.5 pints)
All
2.6L (2.75
quarts)1Ensure the correct automatic transmission fluid is used. Transmission fluid requirements are indicated on the dipstick or on the dipstick handle. MERCON威 and MERCON威 V are not interchangeable. DO NOT mix MERCON威 and MERCON威V. Refer to the scheduled maintenance guide to determine the correct service interval.
234
Maintenance and Specifications
2Indicates only approximate dry-fill capacity. Some applications may vary based on cooler size and if equipped with an in-tank cooler. The amount of transmission fluid and fluid level should be set by the indication on the dipstick’s normal operating range. 3Service refill capacity for the manual transmission is determined by filling the transmission to the bottom of the filler hole with the vehicle on a level surface. 4Add the coolant type originally equipped in your vehicle. 5Traction-Lok axles use 2.2–2.4L (4.75–5.0 pints) of rear axle lubricant. 6Add 118 ml (4 oz.) of Additive Friction Modifier XL–3 or equivalent meeting Ford specification EST-M2C118–A for complete refill of Traction-Lok axles. Service refill capacities are determined by filling the rear axle 6 mm to 14 mm (1/4 inch to 9/16 inch) below the bottom of the filler hole. 7Use of sythetic or sythetic blend motor oil is not mandatory. Engine oil need only meet the requirements of Ford specification WSS-M2C153–H and the API Certification mark.
LUBRICANT SPECIFICATIONS
Item
Front axle (4X4)
Rear axle
Rear axle (FX4
only)Ford part name or equivalent Motorcraft SAE 80W-90
Premium Rear Axle Lubricant Motorcraft SAE 80W-90
Premium Rear Axle Lubricant1
Motorcraft SAE 75W-140
Synthetic Rear Axle Lubricant1Ford part number
Ford specification
XY-80W90-QL
WSP-M2C197-A
XY-80W90-QL
WSP-M2C197-A
XY-75W140–QL WSL-M2C192–A
235
Maintenance and Specifications
Ford part number
PM-1
Ford specification
ESA-M6C25-A and DOT 3
F5AZ-19553–AA ESR-M13P4-A
VC-7–A
WSS-M97B51-A1
XO-5W20-QSP (US) CXO-5W20–LSP12
(Canada)WSS-M2C153-H and API Certification Mark
XO-5W30-QSP WSS-M2C205–A
and API Certification Mark
XG-4 or XL-5
ESB-M1C159-A or ESB-M1C93-B
Item
Brake fluid and clutch fluid (if equipped)
Ford part name or equivalent Motorcraft High Performance DOT 3 Motor Vehicle Brake Fluid Silicone Door weather strips Lubricant Engine coolant Motorcraft
Premium Gold Engine Coolant (yellow-colored) 2.3L and 3.0L engines Motorcraft SAE 5W-20 Premium Synthetic Blend Motor Oil (US) Motorcraft SAE 5W-20 Super Premium Motor Oil (Canada) 4.0L engines Motorcraft SAE 5W-30 Super Premium Motor Oil Multi-Purpose Grease
Engine oil
Hinges, door checks, latches, striker plates, fuel filler door hinge and seat tracks
236
Item
Transmission /steering/parking brake linkages and pivots, brake and clutch pedal shaft, clutch pilot bearing and. input shaft spline (manual transmission) Power steering fluid, transfer case fluid (4X4) and transmission fluid (manual) Automatic transmission (5R44E and 5R55E)
Windshield washer fluid
Maintenance and Specifications
Ford part name or equivalent Motorcraft Premium Long-Life Grease
Ford part number
XG-1-C or XG-1-K
Ford specification
ESA-M1C75-B
Motorcraft MERCON威 ATF
XT-2-QDX
MERCON威
XT-5-QM
MERCON威V
ZC-32–A
WSB-M8B16–A2
Motorcraft MERCON威V ATF 2
Motorcraft Premium Windshield Washer Concentrate
1Add 118 ml (4 oz.) of Additive Friction Modifier XL-3 or equivalent meeting Ford specification EST-M2C118–A for complete refill of Traction-Lok axles. 2Ensure the correct automatic transmission fluid is used. Transmission fluid requirements are indicated on the dipstick or on the dipstick handle. MERCON威 and MERCON威 V are not interchangeable. DO NOT mix MERCON威 and MERCON威 V. Refer to your scheduled maintenance guide to determine the correct service interval.
237
Maintenance and Specifications
ENGINE DATA Engine Cubic inches Required fuel Firing order
2.3L I4 engine 3.0L V6 engine 4.0L V6 engine 138
87 octane 1-3-4-2
1.04-1.19 mm (0.041-0.047
inch) Ignition system EDIS Compression ratio182
87 octane 1-4-2-5-3-6
1.07-1.1 7mm (0.042-0.046
inch) EDIS 9.7:1245
87 octane 1-4-2-5-3-6
1.3-1.4 mm (0.052-0.056
inch) EDIS 9.0:1Spark plug gap
9.7:1
VEHICLE DIMENSIONS Vehicle dimensions
Regular Cab Short Wheel Base (SWB) mm (in) 4763 (187.5)
Regular Cab Long Wheel Base (LWB) mm (in) 5093 (200.5)
Supercab mm (in)
5153 (202.9)
1785 (70.3)
1785 (70.3)
1785 (70.3)
1 593.5 (62.7) / 1655 (65.2) 2831 (111.4) 1486 (58.5)
1596 (62.8) / 1 655 (65.2) 2983 (117.4) 1486 (58.5)
1599 (62.9) / 1 657 (65.2) 3192 (125.7) 1485 (58.5)
1455 (57.3)
1455 (57.3)
1455 (57.3)
(1) Overall length (2) Overall width (3) Overall height 4x2/4x4
(4) Wheelbase (5) Track - Front (5) Track - Rear238
Maintenance and Specifications
239
Maintenance and Specifications
IDENTIFYING YOUR VEHICLE
Certification label The National Highway Traffic Safety Administration Regulations require that a Certification label be affixed to a vehicle and prescribe where the Certification label may be located. The Certification label is located on the front door latch pillar on the driver’s side.
240
Maintenance and Specifications
Vehicle identification number (VIN) The vehicle identification number is attached to a metal tag and is located on the driver side instrument panel. (Please note that in the graphic XXXX is representative of your vehicle identification number.)
XXXXXXXXXXXXXXXXX
Engine number The engine number (the last eight numbers of the vehicle identification number) is stamped on the engine block, transmission, frame and transfer case (if equipped).
241
Accessories
Accessories
FORD ACCESSORIES FOR YOUR VEHICLE A wide selection of genuine Ford accessories are available for your vehicle through your local authorized Ford, Lincoln, Mercury or Ford of Canada dealer. These quality accessories have been specifically engineered to fulfill your automotive needs; they are custom designed to complement the style and aerodynamic appearance of your vehicle. In addition, each accessory is made from high quality materials and meets or exceeds Ford’s rigorous engineering and safety specifications. Ford Motor Company will repair or replace any properly dealer-installed Ford accessory found to be defective in factory-supplied materials or workmanship during the warranty period, as well as any component damaged by the defective accessory. The accessory will be warranted for whichever provides you the greatest benefit: • 12 months or 20,000 km (12,000 miles) (whichever occurs first), or • the remainder of your new vehicle limited warranty. This means that genuine Ford accessories purchased along with your new vehicle and installed by the dealer are covered for the full length of your New Vehicle’s Limited Warranty — 3 years or 60,000 km (36,000 miles) (whichever occurs first). Contact your dealer for details and a copy of the warranty. Not all accessories are available for all models. Following is a list of several Ford Genuine Accessory products. Not all accessories are available for all models. To find out what accessories are available for your vehicle, please contact your dealer or visit our online store at: www.fordaccessories.com.
Vehicle Security Cargo security shade Keyless entry system Styled wheel protector locks Vehicle security systems
242
Comfort and convenience Cargo cage / bed extender Cargo organizers Cargo retainer net Engine block heaters Manual sliding rear window Remote start Tire step
Travel equipment Automatic headlamp system with DRL Bed rail caps Bed tent (Short bed, Styleside only) Cellular phone holder Compass mirror Compass mirror with outside temperature reading Daytime running lights First aid kit Fog lights Peace of mind kit Pickup box rails (tubular) Removable bike carrier (bed mount/hitch mount) Running boards/bars Speed control Trailer hitch (Class III) Trailer hitch bars and balls Trailer hitch wiring adaptor Trailgate table
Accessories
243
Accessories
Protection and appearance equipment Air bag anti-theft locks Bed mats Bedliners Bull bars (chrome & black) Carpeted floor mats with logo Door edge guards Front end covers (full and sport) Bug deflectors Cap (hard — color keyed — Leer supplier branded) Locking gas cap Rear window deflector Removable tailgate lock Retractable bed hooks Running boards and bars Side window air deflectors Skid plate (4x4 only) Spare tire lock Tailgate protector Tail lamp surrounds (chrome & black) Tonneau covers — soft (snap and snapless) Tonneau cover (hard 2 piece) Tonneau cover (color keyed-Leer supplier branded) Universal floor mats Wheels Wheel locks
244
Accessories
For maximum vehicle performance, keep the following information in mind when adding accessories or equipment to your vehicle: • When adding accessories, equipment, passengers and luggage to your vehicle, do not exceed the total weight capacity of the vehicle or of the front or rear axle (GVWR or GAWR as indicated on the Safety compliance certification label). Consult your dealer for specific weight information. • The Federal Communications Commission (FCC) and Canadian Radio Telecommunications Commission (CRTC) regulate the use of mobile communications systems - such as two-way radios, telephones and theft alarms - that are equipped with radio transmitters. Any such equipment installed in your vehicle should comply with FCC or CRTC regulations and should be installed only by a qualified service technician.
• Mobile communications systems may harm the operation of your
vehicle, particularly if they are not properly designed for automotive use or are not properly installed. When operated, such systems may cause the engine to stumble or stall or cause the transmission to be damaged or operate improperly. In addition, such systems may be damaged or their performance may be affected by operating your vehicle. (Citizens band [CB] transceivers, garage door openers and other transmitters with outputs of five watts or less will not ordinarily affect your vehicle’s operation.) • Ford cannot assume responsibility for any adverse effects or damage
that may result from the use of such equipment.
245
Index
Index
Air bag supplemental restraint system ..........................................86
and child safety seats ..............88
description ................................86
disposal ......................................91
driver air bag ............................89
indicator light ...........................91
operation ...................................89
passenger air bag .....................89
passenger deactivation switch ........................................92
Air cleaner filter .......................231
Ambulance packages ....................7
Antifreeze (see Engine coolant) .....................................202
Anti-lock brake system (see Brakes) ..............................115
Audio systemAM/FM .......................................16
Single CD ..................................18Audio system (see Radio) ....16, 18, 21, 24, 30, 34
Automatic transmission ............118driving an automatic overdrive .................................119
fluid, adding ............................221
fluid, checking ........................221
fluid, refill capacities ..............232
fluid, specification ..................238
Auxiliary power point .................52
Axlelubricant specifications ..235, 238
refill capacities ........................232
traction lok ..............................117Battery .......................................200
246
acid, treating emergencies .....200
jumping a disabled battery ....167
maintenance-free ....................200
replacement, specifications ...231
servicing ..................................200
Bed extender ..............................58
BeltMinder ...................................81
Brakes ........................................115
anti-lock ...................................115
anti-lock brake system (ABS) warning light ...........................115
fluid, checking and adding ....220
fluid, refill capacities ..............232
fluid, specifications .........235, 238
lubricant specifications ..235, 238
parking ....................................116
shift interlock ..........................118
Bulbs ............................................45Calculating load ........................136
Capacities for refilling fluids ....232
Cargo area shade ........................57
Cargo net .....................................57
Cassette tape player .............18, 21
CD-single premium ...16, 24, 30, 34
Cell phone use ............................57
Certification Label ....................240
Changing a tire .........................161
Child safety restraints ................97
child safety belts ......................97
Child safety seats ................99–100
attaching with tether straps ..103
in front seat ............................101
in rear seat ..............................101Cleaning your vehicle
engine compartment ..............184
instrument panel ....................187
interior .....................................187
plastic parts ............................186
safety belts ..............................187
washing ....................................183
waxing .....................................183
wheels ......................................184
wiper blades ............................186Clock adjust
AM/FM .......................................16
Single CD ..................................18Clutch
fluid ..........................................220
operation while driving ..........121
recommended shift speeds ....122
Console ........................................57
Coolantchecking and adding ..............202
refill capacities ................206, 232
specifications ..................235, 238Cruise control (see Speed control) ....................54
Customer Assistance ................149Ford accessories for your vehicle .....................................188
Ford Extended Service Plan ..........................................176
Getting assistance outside the U.S. and Canada .....................180
Getting roadside assistance ...149
Getting the service you need .........................................174
Ordering additional owner’s literature .................................181
The Dispute Settlement Board .......................................176Index
Utilizing the Mediation/Arbitration Program ...................................179
Daytime running lamps (see Lamps) ................................42
Dipstickautomatic transmission fluid ..........................................221
engine oil .................................195Doors
lubricant specifications ..........235
Driveline universal joint and slip yoke ....................................225
Driving under special conditions ..................123, 127, 130
sand .........................................129
snow and ice ...........................131
through water .................130, 134Emergencies, roadside
jump-starting ..........................167
Emergency Flashers .................150
Emission control system ..........216
Engine ........................................238
cleaning ...................................184
coolant .....................................202
idle speed control ...................200
lubrication specifications ..................235, 238
refill capacities ........................232
service points ..................191–193
starting after a collision .........150
Engine block heater .................114
Engine oil ..................................195247
Index
checking and adding ..............195
dipstick ....................................195
filter, specifications ........199, 231
recommendations ...................199
refill capacities ........................232
specifications ..................235, 238
Exhaust fumes ..........................114Flexible Fuel Vehicle (FFV) ....207
Fluid capacities .........................232
Foglamps .....................................42
Four-Wheel Drive vehicles .......123
driving off road .......................126
electronic shift ........................125
indicator light .........................123
lever operated shift ................124
preparing to drive your vehicle .....................................117
Fuel ............................................207
calculating fuel economy .......213
cap ...........................................210
capacity ...................................232
choosing the right fuel ...........211
comparisons with EPA fuel economy estimates .................216
detergent in fuel .....................212
filling your vehicle with fuel ...........................207, 210, 213
filter, specifications ........213, 231
fuel pump shut-off switch .....150
improving fuel economy ........213
octane rating ...................211, 238
quality ......................................212
running out of fuel .................212
safety information relating to automotive fuels .....................207Fuel - flex fuel vehicle (FFV) .................................207, 211
248
Fuel pump shut-off switch .......150
Fuses ..................................151–152Gas cap (see Fuel cap) ............210
Gas mileage (see Fuel economy) ...................................213
Gauges .........................................13
GAWR (Gross Axle Weight Rating) .......................................134
calculating ...............................136
definition .................................134
driving with a heavy load ......134
location ....................................134GVWR (Gross Vehicle Weight Rating) .......................................134
calculating .......................134, 136
definition .................................134
driving with a heavy load ......134
location ....................................134Hazard flashers .........................150
Headlamps ...................................42
aiming ........................................43
bulb specifications ....................45
daytime running lights .............42
flash to pass ..............................43
high beam .................................43
replacing bulbs .........................47
turning on and off ....................42Heating
heating and air conditioning system .................................39–40
Hood ..........................................190Ignition ...............................110, 238
Infant seats (see Safety seats) ...............99–100
Inspection/maintenance (I/M) testing ........................................218
Instrument panelcleaning ...................................187
cluster ........................................10
lighting up panel and interior .......................................43Jack ............................................161
positioning .......................161, 164
storage .............................161–163
Jump-starting your vehicle ......167Keys
positions of the ignition .........110
Lamps
bulb replacement specifications chart ..................45
cargo lamps ...............................43
daytime running light ...............42
fog lamps ...................................42
headlamps .................................42
headlamps, flash to pass ..........43
instrument panel, dimming .....43
interior lamps .....................45–46
replacing bulbs .............45, 47–50Lane change indicator (see Turn signal) ........................45
Lights, warning and indicator ....10
anti-lock brakes (ABS) ..........115
Load limits .................................134Index
GAWR ......................................134
GVWR ......................................134
trailer towing ..........................134
Loading instructions .................136
Lubricant specifications ...235, 238
Lumbar support, seats ...............73Manual transmission .................121
fluid capacities ........................232
lubricant specifications ..........238
reverse .....................................122Mirrors
side view mirrors (power) .......53
Motorcraft parts ................213, 231Octane rating ............................211
Oil (see Engine oil) ..................195Parking brake ............................116
Parts (see Motorcraft parts) ....231
Power distribution box (see Fuses) ...............................155
Power door locks ........................63
Power mirrors .............................53
Power point .................................52
Power steering ..........................116
fluid, checking and adding ....219
fluid, refill capacity ................232
fluid, specifications .........235, 238
Power Windows ...........................53249
Index
Preparing to drive your vehicle ........................................117
Radio ..............16, 18, 21, 24, 30, 34
AM/FM .......................................16
Single CD ..................................18
Relays ........................................151
Remote entry system .................65
illuminated entry ......................68
locking/unlocking doors .....63, 65
Roadside assistance ..................149Safety Belt Maintenance ............85
Safety belts (see Safety restraints) ..............................74–78
Safety defects, reporting ..........182
Safety restraints ....................74–78
belt minder ...............................81
extension assembly ..................80
for adults .............................75–78
for children .........................96–97
lap belt ......................................79
safety belt maintenance ...........85
warning light and chime ..........81
Safety seats for children ....99–100
Seat belts (see Safety restraints) ....................................74
Seats ............................................72
child safety seats ..............99–100
Servicing your vehicle ..............189
Snowplowing .................................7
Spare tire (see Changing the Tire) ...................................161–162250
Spark plugs, specifications .....................231, 238
Special noticeambulance conversions ..............7
utility-type vehicles ....................6Specification chart, lubricants ...........................235, 238
Speed control ..............................54
Starting a flex fuel vehicle .......114
Starting your vehicle .......110–111, 113
jump starting ..........................167Steering wheel
tilting .........................................52
Stereo
AM/FM .......................................16
Single CD ..................................18Tilt steering wheel ......................52
Tires ...........................161, 226–227
changing ..................161–162, 164
checking the pressure ............227
replacing ..................................229
rotating ....................................228
snow tires and chains ............230
tire grades ...............................227
treadwear ................................226
Tonneau cover .............................59
Towing .......................................136
recreational towing .................146
trailer towing ..........................136
wrecker ....................................173
Traction-lok rear axle ...............117
Transfer casefluid checking .........................225
Index
Transmission
automatic operation ...............118
fluid, checking and adding (automatic) .............................221
fluid, checking and adding (manual) .................................224
fluid, refill capacities ..............232
lubricant specifications ..235, 238
manual operation ....................121
Trunk ...........................................63
..................................45
Turn signalVehicle dimensions ...................238
Vehicle Identification Number (VIN) ..........................................241
Vehicle loading ..........................134camper bodies ........................148
Ventilating your vehicle ...........115Warning lights (see Lights) .......10
Washer fluid ..............................194
Water, Driving through .............134
Windows power .........................................53
Windshield washer fluid and wipers ..........................................51
checking and adding fluid .....194
replacing wiper blades .............51
Wrecker towing .........................173251
252
253
254
255
256
Table of Contents
Table of Contents
Introduction
Instrument Cluster
Warning and control lights Gauges
Entertainment Systems
AM/FM stereo AM/FM stereo with CD AM/FM stereo cassette with CD
Climate Controls
Manual heating and air conditioning
Lights
Headlamps Turn signal control Bulb replacement Driver Controls
Windshield wiper/washer control Steering wheel adjustment Power windows Mirrors Speed control
Locks and Security
Keys Locks Anti-theft system
Seating and Safety Restraints
Seating Safety restraints Air bags Child restraints
10
10
13
1616
18
30
3939
4242
45
45
5151
52
53
53
54
6363
63
65
7272
74
86
96Table of Contents
Driving
Starting Brakes Transmission operation Trailer towing
Roadside Emergencies Getting roadside assistance Hazard flasher switch Fuel pump shut-off switch Fuses and relays Changing tires Jump starting Wrecker towing
Customer Assistance
Reporting safety defects (U.S. only)
Cleaning
Maintenance and Specifications
Engine compartment Engine oil Battery Fuel information Part numbers Refill capacities Lubricant specifications
Accessories
Index
110
110
115
118
136
149
149
150
150
151
161
167
173
174
182
183189
191
195
200
207
231
232
235
242246
All rights reserved. Reproduction by any means, electronic or mechanical including photocopying, recording or by any information storage and retrieval system or translation in whole or part is not permitted without written authorization from Ford Motor Company. Ford may change the contents without notice and without incurring obligation.
Copyright © 2002 Ford Motor Company
Introduction
Introduction
CALIFORNIA Proposition 65 Warning
WARNING: Engine exhaust, some of its constituents, and certain vehicle components contain or emit chemicals known to
the State of California to cause cancer and birth defects or other reproductive harm. In addition, certain fluids contained in vehicles and certain products of component wear contain or emit chemicals known to the State of California to cause cancer and birth defects or other reproductive harm.
CONGRATULATIONS Congratulations on acquiring your new Ford. Please take the time to get well acquainted with your vehicle by reading this handbook. The more you know and understand about your vehicle the greater the safety and pleasure you will derive from driving it. For more information on Ford Motor Company and its products visit the following website: • In the United States: www.ford.com • In Canada: www.ford.ca • In Australia: www.ford.com.au • In Mexico: www.ford.com.mx Additional owner information is given in separate publications. This Owner’s Guide describes every option and model variant available and therefore some of the items covered may not apply to your particular vehicle. Furthermore, due to printing cycles it may describe options before they are generally available. Remember to pass on the Owner’s Guide when reselling the vehicle. It is an integral part of the vehicle.
Fuel pump shut-off switch In the event of an accident the safety switch will automatically cut off the fuel supply to the
engine. The switch can also be activated through sudden vibration (e.g. collision when parking). To reset the switch, refer to the Fuel pump shut-off switch in the Roadside emergencies chapter.
Introduction
SAFETY AND ENVIRONMENT PROTECTION
Warning symbols in this guide
How can you reduce the risk of personal injury and prevent possible damage to others, your vehicle and its equipment? In this guide, answers to such questions are contained in comments highlighted by the warning triangle symbol. These comments should be read and observed.
Warning symbols on your vehicle
When you see this symbol, it is imperative that you consult the relevant section of this guide before touching or attempting adjustment of any kind.
Protecting the environment We must all play our part in protecting the environment. Correct vehicle usage and the authorized disposal of waste cleaning and lubrication materials are significant steps towards this aim. Information in this respect is highlighted in this guide with the tree symbol.
BREAKING-IN YOUR VEHICLE Your vehicle does not need an extensive break-in. Try not to drive continuously at the same speed for the first 1,600 km (1,000 miles) of new vehicle operation. Vary your speed to allow parts to adjust themselves to other parts. Drive your new vehicle at least 800 km (500 miles) before towing a trailer. Do not add friction modifier compounds or special break-in oils during the first few thousand kilometers (miles) of operation, since these additives may prevent piston ring seating. See Engine oil in the Maintenance and specifications chapter for more information on oil usage.
Introduction
SPECIAL NOTICES
Emission warranty The New Vehicle Limited Warranty includes Bumper-to-Bumper Coverage, Safety Restraint Coverage, Corrosion Coverage, and 7.3L Power Stroke Diesel Engine Coverage. In addition, your vehicle is eligible for Emissions Defect and Emissions Performance Warranties. For a detailed description of what is covered and what is not covered, refer to the Warranty Guide that is provided to you along with your Owner’s Guide.
Data Recording Computers in your vehicle are capable of recording detailed data potentially including but not limited to information such as: • the use of restraint systems including seat belts by the driver and • information about the performance of various systems and modules in • information related to engine, throttle, steering, brake or other system
the vehicle, and
passengers,
status.
Any of this information could potentially include information regarding how the driver operates the vehicle potentially including but not limited to information regarding vehicle speed, brake or accelerator application or steering input. This information may be stored during regular operation or in a crash or near crash event. This stored information may be read out and used by: • Ford Motor Company. • service and repair facilities. • law enforcement or government agencies. • others who may assert a right or obtain your consent to know such
information.
Introduction
Special instructions For your added safety, your vehicle is fitted with sophisticated electronic controls.
Please read the section Supplemental Restraint System (SRS) in the Seating and safety restraints chapter. Failure to follow the specific warnings and instructions could result in personal injury.
Front seat mounted rear facing child or infant seats should NEVER be used in front of a passenger side air bag unless the
air bag can be and is turned OFF.
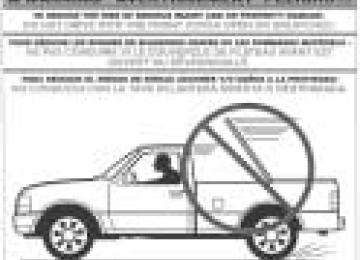
Notice to owners of pickup trucks and utility type vehicles
Utility vehicles have a significantly higher rollover rate than other types of vehicles.
Before you drive your vehicle, please read this Owner’s Guide carefully. Your vehicle is not a passenger car. As with other vehicles of this type, failure to operate this vehicle correctly may result in loss of vehicle control, vehicle rollover, personal injury or death. Be sure to read Driving off road in the Driving chapter.
Introduction
Using your vehicle with a snowplow
Do not use this vehicle for snowplowing.
Using your vehicle as an ambulance
Do not use this vehicle as an ambulance.
Your vehicle is not equipped with the Ford Ambulance Preparation Package.
Electric vehicles For specific information regarding the operation of your electric vehicle, refer to the Electric Vehicle Owner’s Guide Supplement.
Middle East/North Africa vehicle specific information For your particular global region, your vehicle may be equipped with features and options that are different from the ones that are described in this Owner Guide; therefore, a supplement has been supplied that complements this book. By referring to the pages in the provided supplement, you can properly identify those features, recommendations and specifications that are unique to your vehicle. Refer to this Owner Guide for all other required information and warnings.
Introduction
These are some of the symbols you may see on your vehicle.
Vehicle Symbol Glossary
Safety Alert
See Owner’s Guide
Fasten Safety Belt
Air Bag-Front
Air Bag-Side
Child Seat
Child Seat Installation Warning
Child Seat Tether Anchor
Anti-Lock Brake System
Child Seat Lower Anchor
Brake System
Brake Fluid - Non-Petroleum Based
Traction Control
AdvanceTrac娂
Master Lighting Switch
Hazard Warning Flasher
Fog Lamps-Front
Fuse Compartment
Fuel Pump Reset
Windshield Wash/Wipe
Windshield Defrost/Demist
Rear Window Defrost/Demist
Introduction
Vehicle Symbol Glossary
Power Windows Front/Rear
Child Safety Door Lock/Unlock
Power Window Lockout
Interior Luggage Compartment Release Symbol
Panic Alarm
Engine Oil
Engine Coolant
Engine Coolant Temperature
Do Not Open When Hot
Battery
Avoid Smoking, Flames, or Sparks
Battery Acid
Explosive Gas
Fan Warning
Power Steering Fluid