- 2006 Subaru Legacy Owners Manuals
- Subaru Legacy Owners Manuals
- 2004 Subaru Legacy Owners Manuals
- Subaru Legacy Owners Manuals
- 2008 Subaru Legacy Owners Manuals
- Subaru Legacy Owners Manuals
- 2005 Subaru Legacy Owners Manuals
- Subaru Legacy Owners Manuals
- 2007 Subaru Legacy Owners Manuals
- Subaru Legacy Owners Manuals
- 2000 Subaru Legacy Owners Manuals
- Subaru Legacy Owners Manuals
- 2003 Subaru Legacy Owners Manuals
- Subaru Legacy Owners Manuals
- 2012 Subaru Legacy Owners Manuals
- Subaru Legacy Owners Manuals
- 2001 Subaru Legacy Owners Manuals
- Subaru Legacy Owners Manuals
- 2010 Subaru Legacy Owners Manuals
- Subaru Legacy Owners Manuals
- 2011 Subaru Legacy Owners Manuals
- Subaru Legacy Owners Manuals
- 2009 Subaru Legacy Owners Manuals
- Subaru Legacy Owners Manuals
- 2002 Subaru Legacy Owners Manuals
- Subaru Legacy Owners Manuals
- Download PDF Manual
-
2010 LEGACY/OUTBACK Owner Reference Guide
y.
y.
fi
y,
y.
fi
’s
’s
P.
Y.
199379_10a_LegOutback_ORG_072709.indd 1-2
7/27/09 10:40:32 AM
MSA5B1005A Printed in USA 07/09
Issued 04/09Instrument panel shown with optional accessories.
Dynamic, progressiVe, real WorlD Versatility Your 2010 Legacy/Outback offers the rugged, go-anywhere attitude that’s essential to an active lifestyle, as well as the refined performance that’s equally at home on city streets or highways. The Legacy/Outback models offer intelligent design and practicality, while the Legacy 2.5GT combines the confidence and safety of All-Wheel Drive in a package that does not compromise on performance. Available with a 6-speed manual transmission (6MT), LineartronicTM Continuously Variable Transmission (CVT) or the 5-speed Automatic Transmission (5AT), depending on the model . Whether you’ve set the cruise control for a long, highway straightaway, or you are steering your way through winding roads, we’ll be there for the journey ahead. We wish you many happy miles in your new Subaru and look forward to providing you with a satisfying owner experience.
199379_10a_LegOutback_ORG_072709.indd 3-4
Instrument panel
Vehicle Dynamics control Pressing the switch deactivates the Vehicle Dynamics Control system. The indicator light comes on. With the Vehicle Dynamics Control system deactivated, the vehicle will behave like a model without it. Press the switch again to reactivate the system. The indicator light will go off. light controls To turn on the headlights, twist the end of the turn signal lever forward. Push the turn signal lever up to activate the right signal; push down for left signal. To change headlights from low beam to high beam, push the lever forward and release. To turn on the fog lights, move the fog light switch forward to the position. To turn off, move the switch to the “OFF” position. When the dial on the lower left dash is turned downward, illumination becomes dim. When the dial is turned upward, illumination becomes bright. When the dial is fully turned upward while the light switch is on, instrument panel illumination becomes full bright. Daytime running lights Daytime running lights are standard on your vehicle. A reduced brightness high beam will be automatically turned on by the daytime running light system when the engine has started and the parking brake is fully released or the light switch is in the “OFF” or “ ” position. The brightness of the illumination of the high beam
headlights is reduced by the daytime running light system. You must always switch on your headlights when it’s dark outside by turning the light switch to the position. check engine light If this light comes on and stays on, see your Subaru dealer as soon as possible. There may be a problem with your emission control system. NOTE: If you have recently fueled your vehicle, the “CHECK ENGINE” light may stay on due to a missing or loose fuel filler cap. (The cap should be tightened until a click is heard.) srs airbag system Warning light The SRS airbag system warning light “AIRBAG” will illuminate for about 6 seconds and then go off when the ignition key is turned to the “ON” position. If the warning light continuously illuminates, there may be a malfunction in the seatbelt pretensioners and/or the SRS airbag system. Immediately take your vehicle to your nearest Subaru dealer to have the system checked. loW Fuel Warning light If this light appears, refuel promptly; your tank is nearly empty. Approximately 2.6 U.S. gallons of fuel remain. abs Warning light If the ABS (Anti-lock Brake System) light comes on and stays on after the vehicle speed exceeds approximately 8 mph, the ABS system may not be working properly. (The conventional brake system will continue to operate normally.) Have the ABS system checked by your Subaru dealer at the first available opportunity.
WinDshielD Wipers To turn wipers on, press the wiper control lever down one level for intermittent, two levels for low, or three levels for high speed. Return the lever to the “OFF” position to stop wipers. For a single wipe / mist, pull the lever toward you. To spray washer fluid, press the washer button at the end of the wiper control lever. To operate the rear wiper, turn the knob on the end of the control lever forward to intermittent, continuous, or wash position. Turn the end of the lever backward for wash operation when the rear wiper is not in use. When the transmission is placed in reverse, the rear wiper will operate continuously even if the rear wiper switch is in the “INT” position. clock WITHOUT NAVIGATION Press the “+” button to advance time or the “–” button to reverse the time. WITH NAVIGATION Refer to the separate “Operating Instructions for Navigation System.”
cruise control SET Push the main “CRUISE” switch located on the steering wheel. The “CRUISE” indicator light on the instrument panel will turn on. Press the accelerator pedal until your vehicle reaches the desired speed. Push the “RES/SET” switch to the “SET” side and release. Ease off the accelerator pedal. Your vehicle will maintain the desired speed. TEMPORARY CANCEL There are four ways to temporarily cancel cruise control: depress the brake pedal; push the “CANCEL” button; press the clutch pedal (manual transmission); or, shift the selector lever into the “N” position (AT, CVT and MT models). RESUME Push the “RES/SET” switch to the “RES” side. SHUT OFF To quit cruise control, push the main “CRUISE” switch again, or, when the vehicle is stopped, turn the ignition switch to the “ACC” or “LOCK” position. INCREASE SPEED Push the “RES/SET” switch to the “RES” side, hold until your vehicle reaches the desired speed, and release. To increase speed using the accelerator pedal, press the pedal until you reach the desired speed. Push the “RES/SET” switch to the “SET” side to set the speed. DECREASE SPEED Push the “RES/SET” switch to the “RES” side, hold until your vehicle slows to the desired speed, and release. To decrease the speed using the brake pedal, press the pedal to release cruise control temporarily. When the speed decreases to the desired rate, push the “RES/ SET” switch to the “SET” side to set the speed.
7/27/09 10:40:49 AM
Additional features
12
poWer DriVer’s seat: 10-Way (iF equippeD) To adjust the seat forward or backward, move the switch 1 forward or backward. To adjust the angle and height of the seat cushion, move the switch 2 or 3 in the corresponding direction. To adjust the seatback, move switch 4 in the corresponding direction. To adjust the lumbar, press the switch 5 in the corresponding direction.
heateD seats (iF equippeD) To warm the seat, press the switch to the “LOW” or “HIGH” position for the desired temperature. To turn off the seat heater slightly press in the opposite direction of the current position.
tilt anD telescopic steering column The tilt and telescopic lever is underneath the steering wheel on the lower left side of the steering column. Push the lever down firmly to adjust the vertical and lengthwise position of the column; push it back up firmly to lock the column in place. When adjusting the steering column, there are cases in which the lever cannot be pushed back to the fixed position. In such cases, readjust the steering position and push the lever back to the fixed position again. Do not adjust while driving.
poWer exterior mirrors Turn the knob to the “L” side to adjust the left-hand mirror or to the “R” side to adjust the right-hand mirror. Move the knob in the direction you want to move the mirror, then return the knob to the neutral position. The mirrors can also be adjusted manually.
trunk liD opener sWitch With the trunk lid opener switch on, the trunk lid cannot be opened with the trunk lid release or with the key. To lock the trunk lid opener switch, press the trunk lid opener lock button, located in the glove box. To unlock the trunk lid opener switch, press the switch again.
hooD release To open your hood, pull the hood release knob located under the left side of the instrument panel.
199379_10a_LegOutback_ORG_072709.indd 5-6
electronic parking brake To apply, push down the brake pedal and press the parking brake switch firmly. The brake system warning light and the indicator light on the parking brake switch illuminate. To release pull the parking brake switch toward you while the ignition switch is in the ON position and the brake pedal and the clutch pedal (MT models only) are pushed down. hill holDer Function With the Hill Holder function is activated, the parking brake will be automatically applied
when stopping on an uphill slope with the brake pedal pushed down. The brake system warning light and the indicator light on the parking brake switch will illuminate. To activate press the Hill Holder switch. To deactivate press the Hill Holder switch again.
poWer moonrooF (iF equippeD) With the moonroof in the fully closed position press the switch 2 to tilt the moonroof up. Press and hold the switch 1 to lower the moonroof. Press the switch 4 to fully open the moonroof (for the Outback, you must press the switch again to completely open the moonroof). Press the switch 3 to close the moonroof. To stop the moonroof in a midway position while opening or closing, momentarily press the switch to the 4 side or 3 side.
remote keyless entry to lock all Doors (anD rear gate) Briefly press “LOCK / ARM.” An electronic chirp will sound one time and the hazard lights will flash one time. If any of the doors (or the rear gate) are not fully closed, an electronic chirp will sound five times and the hazard lights will flash five times to alert you that the doors (or the rear gate) are not properly closed. If all doors
DriVer’s Door Briefly press “UNLOCK are properly closed, the system will automatically lock the vehicle. unlock / DISARM.” An electronic chirp will sound two times, the hazard lights will flash two times, and the security system will be disarmed. To unlock all doors and the rear gate, briefly press the “UNLOCK / DISARM” button a second time within five seconds. illuminateD entry When the “UNLOCK / DISARM” button is pressed, the dome and map lights will illuminate if the dome light switch is in the middle position. panic alarm Press the “PANIC” button located on the back of the transmitter. The horn will sound and the hazard lights will flash. To deactivate, press the button again. unlocking the trunk liD/rear gate Push the “TRUNK” button to unlock the trunk lid/rear gate. The electronic chirp will sound twice and the hazard lights will flash twice. Vehicle FinDer Function This function can help you find your vehicle when it is parked among many vehicles in a large parking lot, provided you are within 30 feet of the vehicle. Press the “LOCK / ARM” button three times within five seconds. The horn will sound one time and the hazard lights will flash three times. immobilizer When the security alarm is activated, the immobilizer interrupts the starter motor to prevent an intruder from starting your vehicle without a registered key.
Safety features
chilD saFety locks The child safety locks are located on the inside edges of the rear doors. In the locked position, the rear doors can only be opened from the outside.
chilD restraint system For maximum safety, first carefully read and follow the instructions from the device manufacturer, as well as the installation instructions in your Owner’s Manual to properly install the restraint system. Use the appropriate seatbelts or anchorages provided in your vehicle. Children age 12 and under must properly occupy the rear seat at all times.
hazarD Warning Flashers Press the hazard button to turn the flashers on and warn other drivers when you are experiencing emergency conditions. Press again to turn the flashers off.
internal trunk liD release hanDle In the event that children or adults become locked inside the trunk, this luminescent handle allows them to open the lid from inside the trunk. To open, simply press the yellow handle downward as indicated by the arrow on the handle, and then push up on the lid.
seatbelts Seatbelts must be worn at all times. To fasten your seatbelt, adjust your seatback to the upright position and properly position yourself in front of the steering wheel to fully maintain vehicle control. Sit well back in the seat. Pull the seatbelt across your body, then insert the tongue plate into the buckle until you hear a click. Adjust the shoulder belt anchor height to the position best suited for your comfort. To unfasten your seatbelt, push the button on the buckle.
location oF spare tire anD Jack A jack and other maintenance tools are stored in the tool bucket in the center of the spare tire, located in the trunk or cargo area. Open the center lid and remove the bucket from the center of the spare tire. Take the jack out of the bucket. The jack handle is stowed on the back of the floor cover of the trunk or on the back of the center lid of the cargo area.
passenger Frontal air bag on anD oFF inDicators These indicators, located next to the clock in the center of the dashboard, show the status of the front seat passenger’s frontal air bag. If the air bag is enabled, the frontal air bag ON indicator light will illuminate. If the air bag is disabled (that is, not activated to deploy in an accident), the OFF indicator will illuminate. See your Owner’s Manual for complete details.
Front passenger seatbelt Warning light anD chime The seatbelt warning device (a light and chime) will activate when a passenger is occupying the front seat without buckling the seatbelt. The device may also activate if an object of sufficient weight is placed on the front seat. If this device operates when the passenger seat is empty, consult your Owner’s Manual.
tire pressure monitoring system (tpms) When the tire pressure monitoring system detects that one or more of your tires is significantly under-inflated, the warning light will blink, then illuminate steadily. You should stop and check your tires as soon as possible, and inflate them to the proper pressure. If the tire pressure is set in a warm garage and the vehicle is moved to a cold temperature, the tire pressure drops, which could cause the tire pressure warning light to illuminate. Under these circumstances, increase the tire pressure by 1 psi for every 10˚F. Tire pressure should be checked after tires cool down from driving.
toWing your all-Wheel DriVe Vehicle Since all-wheel drive distributes engine power to all four wheels, improper towing will severely damage your AWD system. A flatbed truck is the only way to properly transport your AWD vehicle. If towing is necessary, it is best done by your Subaru dealer or a commercial towing service.
7/27/09 10:41:48 AM
hours oF listening at your Fingertips Your Legacy/Outback may be equipped with one of two audio sets. The standard system includes an AM / FM stereo, a single disc in-dash CD/MP3/WMA player and six speakers. An optional 6 CD/MP3/WMA player allows you to store hours of listening at your fingertips. Audio buttons on the spokes of the steering wheel (if equipped) offer a safer alternative to control volume, mode, and CD functions without taking your hands off the wheel.
11
15
13
13
199379_10a_LegOutback_ORG_072709.indd 7-8
16
17
14
10
12
Audio controls
to use your radio FuNCtioNs poWer/Volume control Push the “POWER-VOL” knob for on or off; turn the knob to control volume. bass, treble, balance anD FaDer Each press of the “TUNE/TRACK/CH” button will cycle you through Bass, Midrange, Treble, Fade or Balance. Use the “TUNE/TRACK/CH” knob to adjust the desired level. Fm / am Push the “FM” button to choose FM1, FM2 or FM3 reception. Push the “AM” button to choose AM reception. tune / track Turn the “TUNE/TRACK/CH” knob clockwise to increase the tuning frequency; turn the knob counter-clockwise to decrease it. seek Press the right or left arrow of the “SEEK” button to pick up the next highest or lowest frequency. presets You can save up to six favorite stations for each band – FM1, FM2, FM3 and AM. Select a frequency and press one of the preset buttons for more than 1.5 seconds to store it. satellite raDio An optional satellite radio tuner and antenna can be connected to this audio unit. You can hear satellite radio programs by pressing the “SAT” button after connecting optional
10
11
1213
equipment. To receive satellite radio service, it is necessary to enter into a separate contract with a satellite radio provider.
to use your Cd PLayer loaD Insert disc in to the slot and the player will automatically be drawn in and will begin play at the first track. play cD Press the “CD/AUX” button and the desired preset button (1-6) and playback will begin. repeat / ranDom Press the “RPT/RDM” button once will repeat the current track, two presses will repeat the current folder and a third press will turn off repeat. Press and hold the “RPT/RDM” button once to hear all the tracks on the disc in random order. Two presses will randomize folders on a CD, a third press will randomize the entire disc and a fourth press will turn off random. eJect Press the ForWarD / reVerse Turn the “TUNE/TRACK/CH” knob clockwise to skip to the beginning of the next track; turn the knob counter-clockwise to skip to the beginning of the current track. Turn knob counter-clockwise again to go to the previous selection. Fast ForWarD / Fast reVerse Press the right arrow of “SEEK” button for more than one second to fast forward. Release the button to stop. To fast reverse, press the left
button to eject the disc.
14
arrow for more than one second and release the button to stop. scan Press the “SCAN” button to begin previewing the first 10 seconds of each track the disc. Normal playback will resume after all tracks have been scanned. Press the “SCAN” button again to stop scanning and listen to the track being previewed.
15
16
17
to use your MP3/ WMa PLayer / With ForMatted MP3/WMa Cd FolDer selection Press the up arrow of “FOLDER” to select the next folder. Press the down arrow to go back to the first music file. Quickly press the down arrow again to go back to previous folder. page scroll Press the “TEXT” button to select title display. Press again for 0.5 second or longer to scroll through the title, 8 characters at a time. The display is designed to show titles for up to three pages (64 characters). Display Press the “TEXT” button for 0.5 second or less during playback to change the display to show the play time, disc title, artist name and track title. If the disc is formatted with MP3/WMAs, press the “TEXT” button to change the display to show play time, folder name and file name. aux Jack The aux jack is located in the center console. You can connect a portable music player to the
auxiliary jack and hear the music stored on it through the vehicle speakers. Press the “CD/ AUX” button to select the auxiliary mode.
steering Wheel controls auDio control buttons (iF equippeD) Located on the spokes of the steering wheel. Press the “MODE” button to select the desired audio mode – FM, AM, SAT, CD, AUX, MEDIA. With any of the radio modes selected, press the up arrow button to find desired frequency. In CD mode, press up or down to skip forward or back a track. Press “+” button to increase volume. Press “-” button to reduce volume. Press
to shut sound off.
7/27/09 10:41:53 AM
maintain comFort in any conDition For hot and cold and everything in between, Subaru climate control systems allow you to maintain comfort in any condition. With the automatic climate control system, separate temperature settings can be made for the driver’s side and passenger’s side. The “AUTO” feature automatically controls air temperature, fan speed, and distribution of air flow at the touch of a button.
199379_10a_LegOutback_ORG_072709.indd 9-10
Climate controls
automatic climate control (iF equippeD) automatic on anD oFF This system automatically controls outlet air temperature, fan speed, air flow distribution, air inlet control, and air conditioner compressor operation. Press “AUTO” to activate. Press “OFF” to turn the system off.
MaNuaL Mode oPeratioN temperature control buttons Press the blue down arrow (cool) or the red up arrow (warm) to select and maintain a comfortable climate within the driver and passenger compartment. Separate temperature settings can be made for the driver’s side and passenger’s side by adjusting the buttons appropriately.
recirculateD / outsiDe air button Press the air inlet selection button to prevent outside air from being drawn into the passenger compartment. Press the button again to allow outside air into the compartment. TO PREVENT FOGGING, DO NOT STAY IN THE RECIRCULATED MODE FOR AN EXTENDED PERIOD OF TIME.
Fan speeD control buttons Press the fan speed control buttons to select six different fan speed positions.
air FloW moDe selection button Push the button to select the desired air flow mode. The selected air flow mode – either ventilation, bi-level, heat or heat-defrost – is shown on the display.
air conDitioner button Press the “A/C” button to activate the air conditioning. Press it again to turn the air conditioning off.
DeFroster button Push the button to defrost or dehumidify the windshield and front door windows.
rear WinDoW DeFogger button Push the button to turn on the defogger. It will automatically shut off after about 15 minutes. If the window clears before that time, you can push the switch again to turn it off.
10
11
12
manual climate control (iF equippeD) temperature control Dial Turn the temperature control dial to blue for cool; red for warm. air conDitioning button Press the “A/C” button to activate the air conditioning. Press it again to turn air conditioning off. recirculateD / outsiDe air button Press the air inlet selection button to prevent outside air from being drawn into the passenger compartment. If the button is recessed, press it again to draw outside air into the compartment. TO PREVENT FOGGING, DO NOT STAY IN THE RECIRCULATED MODE FOR AN EXTENDED PERIOD OF TIME. Fan speeD control Dial Use the fan speed control dial to select one of four fan speeds.
13
14
15
rear WinDoW DeFogger button Push the button to turn on the defogger. It will automatically shut off after about 15 minutes. If the window clears before that time, you can push the button again to turn it off. DeFrosting / DeFogging To clear the windshield and front door windows of fog or frost, set the air flow control to an orange defrost position, set the temperature control to the red position, and set the fan speed control to the fastest speed. While in defrost mode, the air inlet selection and A/C will operate automatically and cannot be controlled manually (although the A/C indicator will illuminate if the button was depressed prior to or during defrost mode). air FloW control buttons The air flow control buttons allows you to choose the direction of air flow.
15
12
10
11
13
14
14
7/27/09 10:42:03 AM
At shift mode / additional features
Subaru accessories / xtras
sales anD serVice contact
ultimate control The automatic transmission or Continuously Variable Transmission (CVT) gives you ultimate control with two different driving modes: Normal Mode and Manual Mode.
normal moDe When the selector lever is in the “D” position, the transmission is in Normal shift mode. The shift position indicator in the meter cluster shows “D” and the transmission automatically shifts into a suitable forward gear.
manual moDe In Manual Mode, you can select the desired gear position to obtain necessary acceleration and engine braking.
Moving the selector lever left into the manual gate from “D” makes the transmission change into Manual Mode. The shift position indicator shows the selected gear position.
1 upshiFting: Shift to the next higher forward gear by pushing the selector lever forward.
2 DoWnshiFting: Shift to the next lower forward gear by pushing the selector lever rearward.
3 Deselect manual moDe: Exit Manual Mode by returning the selector lever right to the “D” position from the manual gate. Normal Mode is now selected.
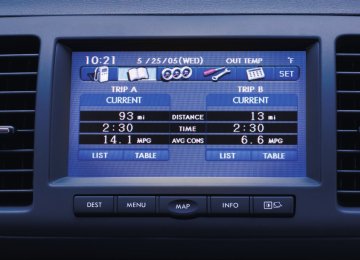
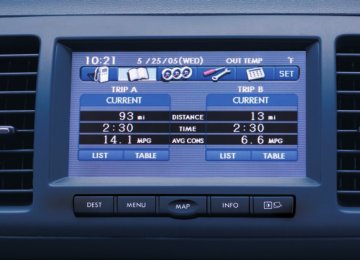
eco gauge The ECO gauge shows the difference between the average rate of fuel consumption and the current rate of fuel consumption, using the average rate of fuel consumption since the trip meter was last reset. See your Owner’s Manual for details.
rear seat release leVer Open the trunk lid. Pull the release lever on the side that you want to fold down. Fold the seatback down. To return the seatback to its original position, raise the seatback until it locks into place and make sure that it is securely locked.
When manual shiFting operation is possible: Arrow-shaped lights in the instrument panel show whether an upshift is possible and whether a downshift is possible. BOTH ARROWS ARE ON: Upshifting and downshifting are both possible. UP ARROW ONLY IS ON: Only upshifting is possible. DOWN ARROW ONLY IS ON: Only downshifting is possible.
paDDle shiFt control sWitches (iF equippeD) When the selector lever is in Manual Mode, shift to the next higher gear by pulling the “+” paddle shift control switch on the steering wheel. Pull the “-” paddle shift control switch to shift into the next lower gear. TEMPORARY USE: Even when the selector is in the “D” position, you can temporarily shift the gear by pulling the “+” or “-” paddle shift control switch. The transmission will automatically switch back to Normal Mode.
all Weather Floor mats Custom-fitted, heavy-gauge protective mats. Helps protect vehicle’s carpet from sand, dirt and moisture. Not intended for use over top of carpeted floor mats.
short throW shiFter Significantly reduces shift throw lengths for crisper shifts and sportier driving feel.
Fog lights Casts a low and wide beam of light to enhance vision in inclement weather.
blueconnect Bluetooth wireless technology combined with advanced voice recognition software allow you to make & receive calls, store phonebook information, and recognize up to seven different cell phones. Voice recognition supports English, North American Spanish and Canadian French. Some phones may not be compatible. Details at subaru.com/bluetooth.
trunk tray Helps protect the trunk area from stains and dirt while providing a surface that helps to reduce shifting of cargo while driving.
puDDle lights LED lights illuminate when vehicle doors are unlocked using the keyless entry. A soft glow shines on the ground and aids entering and exiting the vehicle.
sales contact
If you have any questions or need additional assistance regarding your
new Subaru, please contact your
Subaru Sales Representative.
serVice contact
To make a service appointment,
please contact your Subaru
Service Representative.
10
199379_10a_LegOutback_ORG_072709.indd 11-12
11
7/27/09 10:42:57 AM
al.
r’s M
r O ult y
y.
y.
fi
y,