- 1997 GMC Sierra Owners Manuals
- GMC Sierra Owners Manuals
- 2016 GMC Sierra Owners Manuals
- GMC Sierra Owners Manuals
- 2012 GMC Sierra Owners Manuals
- GMC Sierra Owners Manuals
- 2001 GMC Sierra Owners Manuals
- GMC Sierra Owners Manuals
- 2015 GMC Sierra Owners Manuals
- GMC Sierra Owners Manuals
- 2013 GMC Sierra Owners Manuals
- GMC Sierra Owners Manuals
- 2003 GMC Sierra Owners Manuals
- GMC Sierra Owners Manuals
- 2008 GMC Sierra Owners Manuals
- GMC Sierra Owners Manuals
- 2005 GMC Sierra Owners Manuals
- GMC Sierra Owners Manuals
- 1999 GMC Sierra Owners Manuals
- GMC Sierra Owners Manuals
- 2010 GMC Sierra Owners Manuals
- GMC Sierra Owners Manuals
- 2009 GMC Sierra Owners Manuals
- GMC Sierra Owners Manuals
- 1996 GMC Sierra Owners Manuals
- GMC Sierra Owners Manuals
- 2000 GMC Sierra Owners Manuals
- GMC Sierra Owners Manuals
- 2014 GMC Sierra Owners Manuals
- GMC Sierra Owners Manuals
- 2004 GMC Sierra Owners Manuals
- GMC Sierra Owners Manuals
- 2007 GMC Sierra Owners Manuals
- GMC Sierra Owners Manuals
- 1994 GMC Sierra Owners Manuals
- GMC Sierra Owners Manuals
- 2002 GMC Sierra Owners Manuals
- GMC Sierra Owners Manuals
- 2011 GMC Sierra Owners Manuals
- GMC Sierra Owners Manuals
- 1993 GMC Sierra Owners Manuals
- GMC Sierra Owners Manuals
- 2006 GMC Sierra Owners Manuals
- GMC Sierra Owners Manuals
- 1998 GMC Sierra Owners Manuals
- GMC Sierra Owners Manuals
- 1995 GMC Sierra Owners Manuals
- GMC Sierra Owners Manuals
- Download PDF Manual
-
over-the-phone roadside repairs or towing service for disabled vehicles. This service combines the efforts of technically trained telephone representatives with a network of GMC Truck’s dealer services. Just dial GMC Truck Roadside Assistance at 1-800-GMC TRUCK (1-800-462-8782, Roadside Assistance prompt) to reach a qualified representative who can assist you in repair or arrange a tow. Other recommended services can also be arranged for situations such as retrieving locked-in keys, changing a tire, or delivering gasoline, at a charge to the owner. We also provide dealer information at no charge such as location of the nearest GMC Truck dealer and their hours of operation. Roadside Assistance is available 24 hours a day, seven days a week, 365 days a year, including weekends and holidays. Should you have any questions about roadside assistance, call the GMC Truck Roadside Assistance Center or contact your dealer. Courtesy Transportation
The GMC Truck Commitment Plus Program offers courtesy transportation for customers when obtaining warranty service. The Courtesy Transportation Program is available to retail purchasers of Commitment Plus eligible 1994 GMC light duty trucks. This program is offered in conjunction with the 36 month/36,000 mile BUMPER TO BUMPER New Vehicle Limited Warranty.
0 In Canada, please consult your GM Dealer for information on
courtesy transportation.
COURTESY TRANSPORTATION INCLUDES
0 One way SHUTTLE RIDE from the dealership (up to 10 miles) for
same-day warranty repairs.
0 A loaner vehicle will be made available for overnight warranty repairs
up to a 5 day maximum, or a $30 allowance for a rental vehicle, cab, bus or other transportation in lieu of a loaner. (Bringing vehicles in late in the day, for service on the next day, does not constitute overnight repairs .)
0 GAS allowance of $10 a day for rides provided by another person (i.e., friend, neighbor, etc.) in lieu of rental for overnight warranty repair up to 5 day maximum.
Note: All Courtesy Transportation arrangements will be administered by your GMC Truck dealership service management. All requests should reflect actual costs up to and not to exceed the maximum allowable dollar limits.
8-6
0 The Commitment Plus Courtesy Transportation Program is not part of the BUMPER TO BUMPER Limited Warranty. GMC Truck reserves the right to make any changes or discontinue the Courtesy Transportation Program at any time without notification. For additional program details contact your GMC Truck dealer.
Note: Because of insurance liability considerations, age restrict.ions exist in some states when loaning dealer owned vehicles or obtaining vehicles from rental establishments. See your dealer for details. Service Publications Information on how to obtain Product Service Publications (PSP’s), Subscriptions, Indexes and Summaries as described below is applicable only in the fifty U.S. States (and the District of Columbia) and only for light trucks with GVWR less than 10,000 pounds (4536 kg). In Canada, information pertaining to Product Service Bulletins and Indexes can be obtained by writing to:
General Motors of Canada Limited Service Publications Department 1908 Colonel Sam Dr. Oshawa, Ontario L1H 8P7 GMC Truck regularly sends its dealers useful service bulletins about GMC Truck products. GMC Truck monitors product performance in the field. We then prepare bulletins for servicing our products better. Now, you can get these bulletins too. Bulletins cover various subjects. Some pertain to the proper use and care of your vehicle. Some describe costly repairs. Others describe inexpensive repairs which, if done on time with the latest parts, may avoid future costly repairs. Some bulletins tell a technician how to repair a new or unexpected condition. Others describe a quicker way to fix your vehicle. They can. help a technician service your vehicle better. Most bulletins apply to conditions affecting a small number of cars or trucks. Your GMC Truck dealer or a qualified technician may have to determine if a specific bulletin applies to your vehicle.
Individual PSP’s If you don’t want to buy all the PSP’s issued by GMC Truck for all models in the model year, you can buy individual PSP’s, such as those which may pertain to a particular model. To do this, you will first need to see our index of PSP’s. It provides a variety of information. Here’s what you’ll find in the index and how you can get one:
8-7
What You’// Find in the Index;
A list of all PSP’s published by GMC Truck in a model year. PSP’s covering all models of GMC light trucks are listed in the same index. Ordering information so you can buy the specific PSP’s you may want. Price information for the PSP’s you may want to buy.
How You Can Get an Index: Indexes are published periodically. Most of the PSP’s which could potentially apply to the most recent GMC Truck models will be listed in the most recent publication for that model year. This means you may want to wait until the end of the model year before ordering an index, if you are interested in buying PSP’s pertaining to a current model year car or truck. Some PSP’s pertaining to a particular model year vehicle may be published in later years, and these would be listed in the later year’s index. When you order an index for a model year that is not over yet, we’ll send you the most recently published issue. Check the ordering form for indexes for earlier model years. Cut out the ordering form, fill it out, and mail it in. We will then see to it that an index is mailed to you. There is no charge for indexes for the 1939-1 994 model years.
Toll-Free Telephone Number If you want an additional ordering form for an index or a subscription, just call toll-free and we’ll be happy to send you one. Automated recording equipment will take your name and mailing address. The number to call is 1-800-551-4123.
Copies at Participating Dealers Copies of Indexes and individual PSP’s are at your participating GMC Truck dealer. You can ask to see them.
A Very lmportant Reminder These PSP’s are meant for technicians. They are not meant for the “do-it-yourselfer”. Technicians have the equipment, tools, safety instructions, and know-how to do a job quickly and safely. GMC Truck reserves the right to change these procedures without notice after November, 1992. GMC Truck Service Publications You can get these Product Service Publications by using the order form. You can also get Service Manuals and Owner Publications.
8-8
Notes
8-9
1994 SERVICE PUBLICATIONS
ORDERING INFORMATION
You can get manuals that tell how to operate and service your vehicle. To order them, fill out the order form on the next page and send it to the address below.
GMC Truck Service Publications
Post Office Box 436006
Pontiac, MI 48343
If you have questions or would
like to order using your credit card,
us TOLL FREE at 1-800-627-5699.
call
From outside the Continental United States, please call 1-31 3-455-8016
GLOVE BOX LITERATURE FOR YOUR
$1
SIERRA Form Number
X-9404 x-01 01
Price 0.00 $ 3.00
the Glove Box Literature
these publications. Ask for form
in a vinyl portfolio which
number 15958964-it
X-941
Manual Owner’s Manual Warranty
Manual
Vehicle Manual Storage
You can also order includes all of costs $1 5.00.
SERVICE MANUALS FOR ALL LIGHT DUTY TRUCKS
$1
NATP-9430K
NATP-9457K
Number
Model 1994 C/K Models 1994 G Van 1994 P3 & P/G Models 1994 Safari 1994 Sm Models Includes: Service Manual, Unit Repair Manual, Driveability, Emissions, and Electrical Diagnosis Manual.
Price* $1 20.00 $1 20.00 20.00 20.00 20.00
Kit NATP-9431 K
NATP-9429K $1
NATP-9432K
$1
Description
Form Number
PRODUm SERVICE PUBLICATIONS
1991 Model Year Index 1992 Model Year Index 1993 Model Year Index
For 1994 Call 1-800-782-4356
1994 Model Year Index 1994 Model Year Product Service Publication Subscription Above Subscription With Binder Binder Only
PSP I 91 PSP I 92 PSP I 93
PSP I 94
PSP 94 PSP 948 PSP B
Prices subject to change without notice.
Price Free Free Free
Free
TBD TBD TBD
I I
e..
v)
..
.. I-
Index
3.5.
3.97, 6.94
Aircleaner . . . . . . . . . . . . . . . . . . . . . . . . . . . . . . . . . . . . . . . . . . . . . . . . . . . . . 6-29 Air Conditioning ............................................ 6.S0 Aircontrols . . . . . . . . . . . . . . . . . . . . . . . . . . . . . . . . . . . . . . . . . . . . . . . . . . 3-7 Low Refrigerant Change Detection . . . . . . . . . . . . . . . . . . . . . . . . . . . . . . . . 3-8 Refrigerant Capacity . . . . . . . . . . . . . . . . . . . . . . . . . . . . . . . . . . . . . . SystemControls . . . . . . . . . . . . . . . . . . . . . . . . . . . . . . . . . . . . . . . . . . . . . . . 3-6 Antenna, FixedMast . . . . . . . . . . . . . . . . . . . . . . . . . . . . . . . . . . . . . . . . . . . . . 3-18 Anti-Lock Brakes (See “Brakes”) Appearancecare ................................................ 6-80 Materials Chart . . . . . . . . . . . . . . . . . . . . . . . . . . . . . . . . . . . . . . . . . . . . . . . 6-87 Arbitration Program . . . . . . . . . . . . . . . . . . . . . . . . . . . . . . . . . . . . . . . . . . . . . . . 8-3 Audiosystems . . . . . . . . . . . . . . . . . . . . . . . . . . . . . . . . . . . . . . . . . . . . . . . . . . . 3-9 AMRadio . . . . . . . . . . . . . . . . . . . . . . . . . . . . . . . . . . . . . . . . . . . . . . . . . . . 3-10 AM-FM Stereo Audio System with Cassette Deck . . . . . . . . . . . . . . . . . . . 3-12 AM-FM Stereo Audio System with Cassette Deck and Equalizer . . . . . . . . 3-16 Cassette Deck . . . . . . . . . . . . . . . . . . . . . . . . . . . . . . . . . . . . . . . . . . . . . . . . 3-14 Cassette Tape Player Care . . . . . . . . . . . . . . . . . . . . . . . . . . . . . . . . . . . . . . . 3-30 .......................................... 2-21 Fluid . . . . . . . . . . . . . . . . . . . . . . . . . . . . . . . . . . . . . . . . . . . . . . . . . . . . . . . 6-30 Front . . . . . . . . . . . . . . . . . . . . . . . . . . . . . . . . . . . . . . . . . . . . . . . . . . . . . . . 6-37 Front Locking Feature . . . . . . . . . . . . . . . . . . . . . . . . . . . . . . . . . . . . . . . . . . 2-36 Rear . . . . . . . . . . . . . . . . . . . . . . . . . . . . . . . . . . . . . . . . . . . . . . . . . . . . . . . . 6-39 RearLocking .................................................. 6-39
Automatic Transmission
Axle
Battery . . . . . . . . . . . . . . . . . . . . . . . . . . . . . . . . . . . . . . . . . . . . . . . . . . . . . . . . 6-52 Belts (See “Safety Belts”) Better Business Bureau Mediation . . . . . . . . . . . . . . . . . . . . . . . . . . . . . . . . . . . . 8-3 Blizzard . . . . . . . . . . . . . . . . . . . . . . . . . . . . . . . . . . . . . . . . . . . . . . . . . . . . . . . 4-35 Brakes
Anti-Lock . . . . . . . . . . . . . . . . . . . . . . . . . . . . . . . . . . . . . . . . . . . . . . . . . . . . 4-6 Fluid . . . . . . . . . . . . . . . . . . . . . . . . . . . . . . . . . . . . . . . . . . . . . . . . . . . . . . . 6-47 Leakcheck . . . . . . . . . . . . . . . . . . . . . . . . . . . . . . . . . . . . . . . . . . . . . . . . . . 6-47 Master Cylinder . . . . . . . . . . . . . . . . . . . . . . . . . . . . . . . . . . . . . . . . . . . . . . 6-46 Parking . . . . . . . . . . . . . . . . . . . . . . . . . . . . . . . . . . . . . . . . . . . . . . . . . . . . . 2-28 PedalTravel . . . . . . . . . . . . . . . . . . . . . . . . . . . . . . . . . . . . . . . . . . . . . . . . . 6-48 Replacing Parts . . . . . . . . . . . . . . . . . . . . . . . . . . . . . . . . . . . . . . . . . . . . . . . 6-49 . . . . . . . . . . . . . . . . . . . . . . . . . . . . . . . . . . . . . . . . . 2-70 System Warning Light Trailer . . . . . . . . . . . . . . . . . . . . . . . . . . . . . . . . . . . . . . . . . . . . . . . . . . . . . . 4 4 1 Braking . . . . . . . . . . . . . . . . . . . . . . . . . . . . . . . . . . . . . . . . . . . . . . . . . . . . . . . . . 4-5 In Emergencies ................................................ 4-7 . . . . . . . . . . . . . . . . . . . . . . . . . . . . . . . . . . . . . . . . . . . Break-In, New Vehicle 2- IO Bulb Replacement . . . . . . . . . . . . . . . . . . . . . . . . . . . . . . . . . . . . . . . . . . . . . . . 6-97 Replacement Chart . . . . . . . . . . . . . . . . . . . . . . . . . . . . . . . . . . . . . . . . . . . . 6-97
C
Camper Wiring Harness ........................................... Capacities/Specification Charts ..................................... CarbonMonoxide ............................................... CargoLamp .................................................... Cassette Tape Player (see “Audio Systems” ) Catalyticconverter .............................................. Certificationire Label ........................................... Changing a Flat Tire ......................................... Chemical Paint Spotting ........................................... Child Restraints (See “Safety Belts”) CHMSLFeedWire .............................................. Cigarette LightedAshtrays . . . . . ................................... Circuit Breakers (See “Fuses”) Cleaning
2-83 6-91 2-33 2-52
6-64 6-65
2-82 2-52
5-26, 5-32 6-87
Finishcare .................................................. 6-85 Glass ....................................................... 6-84 Insideofvehicle .............................................. 6-81 Instrumentpanel. Top .......................................... 6-83 Outsideofvehicle ............................................. 6-84 Special Problems .............................................. 6-82 VinylorLeather .............................................. 6-83 Wheels and Tires .............................................. 6-86 Windshield .................................................. 6-84 Clock ......................................................... 3-18 AM-FM Stereo Audio System with Cassette Deck . . . . . . . . . . . . . . . . . . . 3-11 AM-FM Stereo Audio System with Cassette Deck and Equalizer . . . 3-14. 3-18
........................................ Conversion to Chassis Cab Coolant (See “Engine”) Cooling System Capacity .......................................... 5-17 Crankcase Capacity .............................................. 6-93 CruiseControl .................................................. 2-44 EraseSpeedMemory .......................................... 2-48 Increasespeed ............................................... 2-46 OnHills ..................................................... 2-48 Passing ..................................................... 2 4 7 Reducespeed ................................................ 2-47 Resume ..................................................... 2-46 Set ......................................................... 2-45 ToGetOutOf ................................................ 2-48 Customer Assistance for the Hearing or Speech Impaired . . . . . . . . . . . . . . . . . 8-3 Customer Satisfaction Procedure ..................................... 8-2
6-70
Indicator Light
Daytime Running Lights (Canada Only) ......................... ..........................................
2.50, 2.75 2.50. 2.75 Diesel Fuel (See “Fuel”) DomeLights .................................................... Doors .......................................................... Driving
2-51 2-7 Locks ........................................................ 2-5 4-21 Across an Incline 4-22 After Off-Road Driving
............................................. ........................................
Driving (continued)
4-24. 4.38
AtNight ............................................... BackingUp .................................................. Defensive .................................................... Downhill .................................................... Freeway ...................................................... Highway Hypnosis ............................................ Hydroplaning ................................................ InBlizzard ................................................... InCity ...................................................... InRain ...................................................... In Sand, Mud, Ice, Or Snow ........................... InWater ..................................................... Nightvision ................................................. Off-Roading ................................................. OnGrades ................................................... On Hill and Mountain Roads .................................... ............................................ On Off-Road Hills On Snow or Ice ..................................... Skidding .................................................... Stuck in Deep Snow ...................................... Throughwater .......................................... Uphill ...................................................... Winter ...................................................... WithaTrailer ................................................ DrunkenDriving .................................................
4-42 4-2 4-19 4-29 4-30 4-27 4-35 4-28 4-26 2-15,4-22, 5-40 4-23 4-25 4-13 4-43 4-31 4-16 2-15,433, 4-55 4-12 4-40, 5-40 2-15, 4-23 4-17 4-33 4-41 4-2
Electronic Heating/Air Conditioning (See “Heating”) Engine
Adding Coolant ..................................... 5.14.5.17. Aircleaner .................................................. Coolant (Block) Heater ................................ 2.19.3-4. Cold Weather Starting (Diesel) ................................... Coolant ...................................... 5.13.5.20.6-92. 6.98 Coolant Temperature Gage ...................................... Diesel .................................................. 2.16. Crankcase .............................................. 2.96. 6.93 Exhaust ................................................ 2.33. 6.64 FanNoise ................................................... Noise Control System .......................................... Identification ................................................. Oil (See “Oil”) Overheating .................................................. RunningWhileParked ......................................... starting ................................................ ............................................. Equipment. Add-on Exhaustsystem ............................................ 2.33.
2.12. 2.16
6-41 6-29 6.23 2-17
2-79 6-5
5-25 6-16 6-89
5-11 2-33
6-68 6-64
F
Fluid
5-25 6-94
FanNoise ...................................................... Filter Replacement Chart .......................................... Finish Care ........................................................ 6-85 Damage . . . . . . . . . . . . . . . . . . . . . . . . . . . . . . . . . . . . . . . . . . . . . . . . . . . . . 6-86 Automatic Transmission . . . . . . . . . . . . . . . . . . . . . . . . . . . . . . . . . . . . . . . . 6-30 Brake ....................................................... 6 4 7 Coolant ..................................................... 5-17 Capacities . . . . . . . . . . . . . . . . . . . . . . . . . . . . . . . . . . . . . . . . . . . . . . 6-92, 6-93 FrontAxle ................................................... 6-37 Hydraulicclutch . . . . . . . . . . . . . . . . . . . . . . . . . . . . . . . . . . . . . . . . . . . . . . 6-35 LeakCheck ............................................. 6-47. 6-51 ManualTransmission .......................................... 6-33 Power Steering ............................................... 6-43 Radiator . . . . . . . . . . . . . . . . . . . . . . . . . . . . . . . . . . . . . . . . . . . . . . . . . . . . . 5-17 Rear Axle ................................................... 6-39 Recommended Fluids . . . . . . . . . . . . . . . . . . . . . . . . . . . . . . . . . . . . . . . . . . 7-25 Transfer Case . . . . . . . . . . . . . . . . . . . . . . . . . . . . . . . . . . . . . . . . . . . . . . . . 6-36 Windshield Washer . . . . . . . . . . . . . . . . . . . . . . . . . . . . . . . . . . . . . . . . . . . . 6-45 Four-WheelDrive ............................................... 2 4 4 Transfer Case ........................................... 2-35, 6-36 Front Axle . . . . . . . . . . . . . . . . . . . . . . . . . . . . . . . . . . . . . . . . . . . . . . . . . . . 6-37 Fuel (Diesel Engines) . . . . . . . . . . . . . . . . . . . . . . . . . . . . . . . . . . . . . . . . . . . . . 6-11 Cold Weather Operation ......................................... 6-6 Filter Replacement ............................................ 6-11 Fuel Requirements ............................................. 6-4 Gage . . . . . . . . . . . . . . . . . . . . . . . . . . . . . . . . . . . . . . . . . . . . . . . . . . . . . . . 2-78 RunningOutOf . . . . . . . . . . . . . . . . . . . . . . . . . . . . . . . . . . . . . . . . . . . . . . 6-10 Tankcapacity . . . . . . . . . . . . . . . . . . . . . . . . . . . . . . . . . . . . . . . . . . . . . . . . 6-93 WaterinFuel ................................................. 2-71 Fuel (Gasoline Engines) . . . . . . . . . . . . . . . . . . . . . . . . . . . . . . . . . . . . . . . . . . . . 6-4 FillingYourTank ............................................. 6-13 Foreign Countries ............................................. 6-12 Gage . . . . . . . . . . . . . . . . . . . . . . . . . . . . . . . . . . . . . . . . . . . . . . . . . . . . . . . 2-78 Gasolines for Cleaner Air . . . . . . . . . . . . . . . . . . . . . . . . . . . . . . . . . . . . . . . . 6-5 Tankcapacity . . . . . . . . . . . . . . . . . . . . . . . . . . . . . . . . . . . . . . . . . . . . . . . . 6-93 Fuses and Circuit Breakers ................................... 6-64. 6-96 FuseBlock . . . . . . . . . . . . . . . . . . . . . . . . . . . . . . . . . . . . . . . . . . . . . 6-63, 6-95 Headlights . . . . . . . . . . . . . . . . . . . . . . . . . . . . . . . . . . . . . . . . . . . . . . 6-62-6-97 Power Windows and Other Power Options ......................... 6-62 Trailer Wiring Harness ......................................... 6-62 Windshield Wipers ....................................... 6-45, 6-96
Gages . . . . . . . . . . . . . . . . . . . . . . . . . . . . . . . . . . . . . . . . . . . . . . . . . . . . . . . . . 2-78 Coolant Temperature Gage ...................................... 2-79 FuelGage ................................................... 2-78 Odometer . . . . . . . . . . . . . . . . . . . . . . . . . . . . . . . . . . . . . . . . . . . . . . . . . . . 2-68 Oil Pressure Gage . . . . . . . . . . . . . . . . . . . . . . . . . . . . . . . . . . . . . . . . . . . . . 2-80 Speedometer . . . . . . . . . . . . . . . . . . . . . . . . . . . . . . . . . . . . . . . . . . . . . . . . . 2-68
Gages (continued)
Tachometer .................................................. Trip Odometer . . . . . . . . . . . . . . . . . . . . . . . . . . . . . . . . . . . . . . . . . . . . . . . . Voltmeter . . . . . . . . . . . . . . . . . . . . . . . . . . . . . . . . . . . . . . . . . . . . . . . . . . . .
2-69 2-68 2-82
HalogenBulbs . . . . . . . . . . . . . . . . . . . . . . . . . . . . . . . . . . . . . . . . . . . . . . . . . . 6-54 Hazard Warning Flashers . . . . . . . . . . . . . . . . . . . . . . . . . . . . . . . . . . . . . . . . . . . 5-2 Head Restraints .................................................. 1-5 Headlights ........................................... 2-49,6-53, 6-62 Composite . . . . . . . . . . . . . . . . . . . . . . . . . . . . . . . . . . . . . . . . . . . . . . . . . . . 6-54 Halogen . . . . . . . . . . . . . . . . . . . . . . . . . . . . . . . . . . . . . . . . . . . . . . . . . . . . . 6-54 High Beam Indicator Light . . . . . . . . . . . . . . . . . . . . . . . . . . . . . . . . . . . . . . 2-76 Hi~h-LowBeam . . . . . . . . . . . . . . . . . . . . . . . . . . . . . . . . . . . . . . . . . . . . . . 2 4 1 SealedBeam . . . . . . . . . . . . . . . . . . . . . . . . . . . . . . . . . . . . . . . . . . . . . . . . . 6-53 Heating System (with A/C) . . . . . . . . . . . . . . . . . . . . . . . . . . . . . . . . . . . . . . . . . 3-6 Rear Window Defogger ......................................... 3-8 System Controls . . . . . . . . . . . . . . . . . . . . . . . . . . . . . . . . . . . . . . . . . . . . . . . 3-6 Heating System (without A/C) ....................................... 3-5 FanKnob . . . . . . . . . . . . . . . . . . . . . . . . . . . . . . . . . . . . . . . . . . . . . . . . . . . . . 3-5 FunctionLever . . . . . . . . . . . . . . . . . . . . . . . . . . . . . . . . . . . . . . . . . . . . . . . . 3-5 Rear Window Defogger ......................................... 3-8 Temperature Lever ............................................. 3-5 Highway Hypnosis . . . . . . . . . . . . . . . . . . . . . . . . . . . . . . . . . . . . . . . . . . . . . . . 4-30 Hitches . . . . . . . . . . . . . . . . . . . . . . . . . . . . . . . . . . . . . . . . . . . . . . . . . . . . . . . . 4-40 Hood
CheclungUnder .............................................. 6-15 LatchesandHinge ............................................ 6-51 Horn .......................................................... 2-39 Hydraulicclutch . . . . . . . . . . . . . . . . . . . . . . . . . . . . . . . . . . . . . . . . . . . . . . . . 6-34 Grease Fitting . . . . . . . . . . . . . . . . . . . . . . . . . . . . . . . . . . . . . . . . . . . . . . . . 6-35 Hydroplaning ................................................... 4-27
If You’re Stuck in Sand. Mud. Ice. or Snow . . . . . . . . . . . . . . . . . . . . . . . . . . . 5-40 Ignitionswitch . . . . . . . . . . . . . . . . . . . . . . . . . . . . . . . . . . . . . . . . . . . . . . . . . . 2-11 Inflation-Tire Pressure ............................................ 6-71 Instrument Panel . . . . . . . . . . . . . . . . . . . . . . . . . . . . . . . . . . . . . . . . . . . . . . . . 2-67 Cluster . . . . . . . . . . . . . . . . . . . . . . . . . . . . . . . . . . . . . . . . . . . . . . . . . . . . . . 2-67 Tachometer Cluster . . . . . . . . . . . . . . . . . . . . . . . . . . . . . . . . . . . . . . . . . . . . 2-67
Jack Storage ............................................... 5.29, Jumpstarting . . . . . . . . . . . . . . . . . . . . . . . . . . . . . . . . . . . . . . . . . . . . . . . . . . . .
5.39 5-3
Key ReleaseLever ............................................... Keys . . . . . . . . . . . . . . . . . . . . . . . . . . . . . . . . . . . . . . . . . . . . . . . . . . . . . . . . . . .
2-12 2-3
L
Labels
2-52.6-53. 6-98
6-65 6-68 2-70 2-70
2-73 2-75 2-82 2-51 6-58 6-55 2-72
2-77 2-73
2.58. 6.60
............................................
Certificatioflire .............................................. Truck-Camper ............................................... Lights ......................................................... BrakeSystemWarning ......................................... Bulb Replacement ................................... Cargo Lamp Charging System Light ......................................... Check Gages Light ............................................ CHMSL ..................................................... DomeLights ................................................. Fender ...................................................... Front Parking/Turn Signal ....................................... GlowPlugsLight ............................................. Headlights (See “Headlights”) Indicator .................................................... Low Coolant Warning .......................................... Malfunction Indicator ..................................... 2.74. 6.66 Operation ................................................... Reading ..................................................... Service Engine Soon ........................................... Service Throttle Soon .......................................... SideMarker .................................................. Rear .................................................... Replacementchart ............................................ RoofMarker ................................................. TailgateMarker ................................................ Underhood Reel Lamp ......................................... WaterInFuel ................................................. LoadingYourVehicle ............................................ Lubrication ..................................................... ..................................... Accelerator Control System Body ....................................................... ........................................ Constant Velocity Joints FrontAxle ................................................... Front Shock Absorbers ......................................... Front Suspension and Steering Linkage ............................ FrontWheelBearings .......................................... TailgateHandle ............................................... Hood Latches and Hinge ........................................ Hydraulic Clutch Grease Fitting .................................. Lockcylinders ............................................... ..................................... Propeller Shaft Slip Splines RearAxle ................................................... ...................................... Recommended Lubricants ................................................ Transfer Case
2 4 9 2-51 2-74 2-72 6-58 6-60. 6-61 6-98 6-59 6-59 2-53 2-71 6-65 6-51 6-51 6-51 6-51 6-37 6-49 6-49 6-49 6-52 6-51 6-35 6-52 6-51 6-35 7-25 6-36
M
Maintenance
OtherItems .................................................. Periodic Inspections ........................................... Record ...................................................... Scheduled Maintenance .................................... 7.3. 7.18 Underbody .................................................. 6-87 When Towing a Trailer ......................................... 4-44
6-49 7-24 7-27
Master Cylinder (See “Brakes”) Mirrors ........................................................ Convexoutside ............................................... Electric Outside ............................................... Inside ....................................................... Outside ..................................................... Vanity ......................................................
ModelReference ..................................................
Odometer ...................................................... Off-Road Driving (See “Driving”) Off-RoadRecovery .............................................. Oil (Except Diesel) ............................................... Additives .................................................... DisposalofUsed .............................................. Pressure Gage ................................................ To(3lheck .................................................... WhatKindtoUse ............................................. WhentoAdd ................................................. Whentochange .............................................. Oil(Diese1) ..................................................... Additives .................................................... DisposalofUsed .............................................. ToCheck .................................................... WhatKindtoUse ............................................. WhentoAdd ................................................. Whentochange .............................................. Owner Checks and Services ........................................
2-54 2-55 2-54 2-54 2-54 2-56 ... 111
2-68
4-10 6-17 6-23 6-28 2-80 6-18 6-19 6-18 6-28 6-24 6-28 6-28 6-25 6-26 6-28 6-28 7-22
Parking
OnHills ..................................................... Over Things That Burn ......................................... Torque Lock (Automatic Transmission) ............................ .............................. Your Vehicle (Manual Transmission) ParkingBrake ................................................... Passing Other Vehicles ....................................... Periodic Maintenance Inspections ...................................
4-43 2-32 2-29 2-32 2-28
7-24
4-10. 4-60
Power
DoorLocks . . . . . . . . . . . . . . . . . . . . . . . . . . . . . . . . . . . . . . . . . . . . . . . . . . . 2-6 Steering ...................................................... 4-8 Steering Fluid ................................................ 6-43 Winches ..................................................... 4-36 Power Take-Off (PTO) . . . . . . . . . . . . . . . . . . . . . . . . . . . . . . . . . . . . . . . . . . . 4-37 Product Service Publications ........................................ 8-6
Radiator Pressure Cap . . . . . . . . . . . . . . . . . . . . . . . . . . . . . . . . . . . . . . . . . . . . 6-42 Radio (see “Audio Systems”) Recommended Fluids and Lubricants ................................ 7-25 Recovery Hooks . . . . . . . . . . . . . . . . . . . . . . . . . . . . . . . . . . . . . . . . . . . . . . . . . 5-41 Replacement Parts ............................................... 6-91 Reporting Safety Defects . . . . . . . . . . . . . . . . . . . . . . . . . . . . . . . . . . . . . . . . . . . 8-5 Roadside Assistance . . . . . . . . . . . . . . . . . . . . . . . . . . . . . . . . . . . . . . . . . . . . . . . 8-5 RockingYourVehicle . . . . . . . . . . . . . . . . . . . . . . . . . . . . . . . . . . . . . . . . . . . . 5-41
Safety Belts
.................................................... 1-10 Adults . . . . . . . . . . . . . . . . . . . . . . . . . . . . . . . . . . . . . . . . . . . . . . . . . . . . . . 1-15 Center Passenger Position . . . . . . . . . . . . . . . . . . . . . . . . . . . . . . . . . . . . . . . 1-24 Cleaning . . . . . . . . . . . . . . . . . . . . . . . . . . . . . . . . . . . . . . . . . . . . . . . . . . . . 6-84 Checking Restraint System . . . . . . . . . . . . . . . . . . . . . . . . . . . . . . . . . . . . . . 1 4 4 Child Restraints ............................................... 1-32 Children . . . . . . . . . . . . . . . . . . . . . . . . . . . . . . . . . . . . . . . . . . . . . . . . . . . . 1-30 DriverPosition ............................................... 1-16 Extender . . . . . . . . . . . . . . . . . . . . . . . . . . . . . . . . . . . . . . . . . . . . . . . . . . . . 1-43 Lapshoulder . . . . . . . . . . . . . . . . . . . . . . . . . . . . . . . . . . . . . . . . . . . . . . . . . 1-16 Large Children . . . . . . . . . . . . . . . . . . . . . . . . . . . . . . . . . . . . . . . . . . . . . . . 1-41 Properwear . . . . . . . . . . . . . . . . . . . . . . . . . . . . . . . . . . . . . . . . . . . . . . . . . 1-15 Questions and Answers ......................................... 1-14 Rearseatpassengers . . . . . . . . . . . . . . . . . . . . . . . . . . . . . . . . . . . . . . . . . . . 1-25 ReminderLight . . . . . . . . . . . . . . . . . . . . . . . . . . . . . . . . . . . . . . . . . . . . . . . 1-15 Replacing After a Crash . . . . . . . . . . . . . . . . . . . . . . . . . . . . . . . . . . . . . . . . 1-44 Right Front Passenger Position ................................... 1-23 Small Children and Babies . . . . . . . . . . . . . . . . . . . . . . . . . . . . . . . . . . . . . . 1-30 Use During Pregnancy . . . . . . . . . . . . . . . . . . . . . . . . . . . . . . . . . . . . . . . . . 1-23 WhyTheyWork .............................................. 1-11 SafetyChains . . . . . . . . . . . . . . . . . . . . . . . . . . . . . . . . . . . . . . . . . . . . . . . . . . . 4-41 Safety Warnings and Symbols . . . . . . . . . . . . . . . . . . . . . . . . . . . . . . . . . . . . . . . . vi Scheduled Maintenance Services . . . . . . . . . . . . . . . . . . . . . . . . . . . . . . . . . . . . . 7-3 Seats Controls . . . . . . . . . . . . . . . . . . . . . . . . . . . . . . . . . . . . . . . . . . . . . . . . . . . . . . 1-2 Easy Entry Seat ................................................ 1-6 Latches . . . . . . . . . . . . . . . . . . . . . . . . . . . . . . . . . . . . . . . . . . . . . . . . . . 1-5, 1-9 ManualFront . . . . . . . . . . . . . . . . . . . . . . . . . . . . . . . . . . . . . . . . . . . . . . . . . . 1-2 PowerDriver’s . . . . . . . . . . . . . . . . . . . . . . . . . . . . . . . . . . . . . . . . . . . . . . . . 1-3 Rear . . . . . . . . . . . . . . . . . . . . . . . . . . . . . . . . . . . . . . . . . . . . . . . . . . . . . . . . . 1-8 Reclining . . . . . . . . . . . . . . . . . . . . . . . . . . . . . . . . . . . . . . . . . . . . . . . . . . . . . 1-3
Service
6-94
7-28
2.26, 2.76
2.74. 6-65
6-3 6-90
....... ........................................ Do-It-Yourself ....................................... Parts Identification Label .................................... Publications . . . . . . . . . . 8.6, 8.8 ter Recommendations ..................... Replacement Parts and Fj 1 1 .................................. Service Engine Soon Light Service Station Checks .... ....................................... Shift Indicator Light ......................................... ShiftingIntoPark ................................................ Sliding Rear Window ............................................. SpareTire ...................................................... Pickup Bed Mounting ..................................... 5.31. Removal .................................................... Storage ..................................................... Specification Charts .............................................. Speedometer .................................................... Starting your Diesel Engine ........................................ Starting your Gasoline Engine ...................................... Steering ........................................................ Column Shift Lever ............................................ InEmergencies ................................................ Storage Compartments ............................................ Console ................................................ GarageDoorOpener ........................................... GloveBox ................................................... Other ....................................................... SunVisors ..................................................... Swing-Outwindows .............................................
2-30 2-38 5-29 5-40 5-29 5-39 6-91 2-68 2-16 2-12 4-8 2-30 4-9 2-58 2-59. 2-61 2-61 2-58 2-65 2-55 2-38
Tachometer ..................................................... Tailgate ......................................................... Theft ........................................................... Tiltwheel ...................................................... Tires .......................................................... Balancing ................................................... Chains ...................................................... Changing a Flat .......................................... Flat ........................................................ Hub CapsNVheel Nut Caps ...................................... InspectionRotation ....................................... Loading ..................................................... New ........................................................ Pressure ..................................................... Spare (See “Spare Tire”) Underbodycarrier ............................................ ................................... Uniform Tire Quality Grading 2.29. 2.31
TorqueLock ............................................... Towing ATrailer ............................................... Following Distance ............................................ Maintenance ................................................. Recommendations ............................................. Turnsignals .................................................
2-69 2-8 2-9 2-39 6-71 6-78 6-79
5.25, 5.32
5-26 5-32 6-73. 6-75 2-39 6-76 6-71
5-29 6-77
4-42 4-44 6-70 4-42
4-38. 6.67
TrailerBrakes . . . . . . . . . . . . . . . . . . . . . . . . . . . . . . . . . . . . . . . . . . . . . . . . . . . Wiring Harness . . . . . . . . . . . . . . . . . . . . . . . . . . . . . . . . . . . . . . . . . . TraileringPackage . . . . . . . . . . . . . . . . . . . . . . . . . . . . . . . . . . . . . . . . . . . . . . . Transfer Case . . . . . . . . . . . . . . . . . . . . . . . . . . . . . . . . . . . . . . . . . . . . . . Transmission
Automatic . . . . . . . . . . . . . . . . . . . . . . . . . . . . . . . . . . . . . . . . . . . . . . . . . . . . . . . . . . . . . . . . . . . . . . . . . . . . . . . . . . . . . . . . . Five-Speed Manual Fluid . . . . . . . . . . . . . . . . . . . . . . . . . . . . . . . . . . . . . . . . . . . . . . . . . . . . . . . . . . . . . . . . . . . . . . . . . . . . . . . . . . . . . . . . . . . . . Fluid, To Add Four-wheel (See “Four-wheel Drive”) Manual-Shift Speeds . . . . . . . . . . . . . . . . . . . . . . . . . . . . . . . . . . . . . . . . . . ShiftLight . . . . . . . . . . . . . . . . . . . . . . . . . . . . . . . . . . . . . . . . . . . . . . . . . . . Torque Lock (Automatic Transmission) ............................ Trip Odometer . . . . . . . . . . . . . . . . . . . . . . . . . . . . . . . . . . . . . . . . . . . . . . . . . . Turn Signal/Multifunction Lever . . . . . . . . . . . . . . . . . . . . . . . . . . . . . . . . . . . .
Turn Signal/Lane Change Indicator ..........................
4 4 1
2-83, 6-63 6-67
2-35, 6-37
2-21
2-24, 2-25 6-30, 6-33 6-33, 6-34
2-27 2-26 2-31 2-68 2-40 2-43, 2-86
Vehicle
Damage Warnings . . . . . . . . . . . . . . . . . . . . . . . . . . . . . . . . . . . . . . . . . . . . . . . Identification Number . . . . . . . . . . . . . . . . . . . . . . . . . . . . . . . . . . . . . . . . . . Loading . . . . . . . . . . . . . . . . . . . . . . . . . . . . . . . . . . . . . . . . . . . . . . . . Storage . . . . . . . . . . . . . . . . . . . . . . . . . . . . . . . . . . . . . . . . . . . . . . . . . . . . . Symbols . . . . . . . . . . . . . . . . . . . . . . . . . . . . . . . . . . . . . . . . . . . . . . Ventilation System . . . . . . . . . . . . . . . . . . . . . . . . . . . . . . . . . . . . . . . . . . . . . . . . AirVents . . . . . . . . . . . . . . . . . . . . . . . . . . . . . . . . . . . . . . . . . . . . . . . . . . . . . Tips . . . . . . . . . . . . . . . . . . . . . . . . . . . . . . . . . . . . . . . . . . . . . . . . . . . . . . . . . Voltmeter . . . . . . . . . . . . . . . . . . . . . . . . . . . . . . . . . . . . . . . . . . . . . . . . . . . . . .
vii 6-88 4-26, 6-68 6-52 . . . . . . vu. ~ 1 1 1 . IX. x 3-2 3-3 3-2 2-82
Warning and Indicator Lights . . . . . . . . . . . . . . . . . . . . . . . . . . . . . . . . . . . . . . . 2-69 Devices. Other . . . . . . . . . . . . . . . . . . . . . . . . . . . . . . . . . . . . . . . . . . . . . . . . 5-3 Wheels Alignment and Tire Balance . . . . . . . . . . . . . . . . . . . . . . . . . . . . . . . . . 6-78 Aluminum . . . . . . . . . . . . . . . . . . . . . . . . . . . . . . . . . . . . . . . . . . . . . . . . . . . 6-86 Hub Caps and Wheel Nut Caps . . . . . . . . . . . . . . . . . . . . . . . . . . . . . . . . . . 5-32 NutTorque . . . . . . . . . . . . . . . . . . . . . . . . . . . . . . . . . . . . . . . . . . . . . . . . . . 6-92 Replacement . . . . . . . . . . . . . . . . . . . . . . . . . . . . . . . . . . . . . . . . . . . . . . . . . 6-78 Used Replacement . . . . . . . . . . . . . . . . . . . . . . . . . . . . . . . . . . . . . . . . . . . . 6-79 Windows . . . . . . . . . . . . . . . . . . . . . . . . . . . . . . . . . . . . . . . . . . . . . . . . . . . . . . 2-37 SlidingRear . . . . . . . . . . . . . . . . . . . . . . . . . . . . . . . . . . . . . . . . . . . . . . . . . 2-38 Swing.- Out . . . . . . . . . . . . . . . . . . . . . . . . . . . . . . . . . . . . . . . . . . . . . . . . . . 2-38 Windshield Washer . . . . . . . . . . . . . . . . . . . . . . . . . . . . . . . . . . . . . . . . . . . . . . 2-43 WasherFluid . . . . . . . . . . . . . . . . . . . . . . . . . . . . . . . . . . . . . . . . . . . . . . . . . 6 4 5 Winter Driving . . . . . . . . . . . . . . . . . . . . . . . . . . . . . . . . . . . . . . . . . . . . . . . . . . 4-33 Wipers, Windshield . . . . . . . . . . . . . . . . . . . . . . . . . . . . . . . . . . . . . . . . . 2-42, 6-96 RiadeInserts . . . . . . . . . . . . . . . . . . . . . . . . . . . . . . . . . . . . . . . . . . . . . . . . . 6-50 Bladechatter . . . . . . . . . . . . . . . . . . . . . . . . . . . . . . . . . . . . . . . . . . . . . . . . 6-84 BladeCleaning . . . . . . . . . . . . . . . . . . . . . . . . . . . . . . . . . . . . . . . . . . . . . . . 6-84
10
X-9404
WE SUPPORT
VOLUNTARY TECHNICIAN CERTIFICATION THROUGH
National Institute for AUTOMOTIVE
SERVICE
EXCELLENCE
Keep with vehicle at all times.
Contains Important Operating, Safety,
and Maintenance Instructions.
THE STRENWH uk oaraRIENCE.
I 191
O w n e r ' s M a n u a l
INTRODUCTION 1994 GMC Sierra Owner’s Manual Welcome This manual was prepared to acquaint you with the operation and maintenance of your 1994 GMC Sierra and to provide important safety information. There is also a GMC Truck Warranty and Owner Assistance Information booklet. In some vehicles, there can be information manuals from other manufacturers like body builders or special equipment companies. We urge you to review all these publications carefully. This will help you enjoy safe and trouble-free operation of your vehicle. When it comes to service, keep in mind that your dealer knows your vehicle best and is interested in your complete satisfaction. Your dealer invites you to return for all of your service needs both during and after the warranty period. Remember, if you have a concern and need help handling it to your satisfaction, see the procedure in the GMC Truck Warranty and Owner Assistance Information booklet. Thanks for choosing a GMC Truck product. We value you as a member of the GMC Truck family. We want to assure you of our continuing interest in your pleasure and satisfaction with your vehicle.
GMC Truck Division
General Motors Corporation
Pontiac, Michigan
@Copyright 1993 General Motors Corporation, GMC Truck Division.
All Rights Reserved
Second Edition
Printed in U.S.A.
Important Notes to Owners and Drivers . . . .About This Manual:
Please keep this manual in your vehicle so it will be there if you ever need it when you’re on the road. If you sell the vehicle, please leave this manual in it so the new owner can use it. This manual includes the latest information at the time it was printed. We reserve the right to make changes in the product after that time without further notice. For vehicles first sold in Canada, substitute the name “General Motors of Canada Limited” for GMC Truck Division whenever it appears in this manual.
For Canadian Owners Who Prefer a French Language Manual: Aux proprietaires canadiens: Vous pouvez vous procurer un exemplaire de ce guide en francais chez votre concessionaire ou au DGN Marketing Services Ltd., 1500 Bonhill Rd., Mississauga, Ontario L5T 1 C7.
I_ =l
GMCTRUCK
General Motors, GM, the GM Emblem, GMC and Sierra are registered trademarks of General Motors Corporation.
.. 11
Model Reference This manual covers these models:
REGULAR CAB PICKUP
EXTENDED CAB PICKUP
CREW CAB
CHASSIS CAB
3500 HD CHASSIS CAB
... 111
Table of Contents Introduction - How to Use this Manual
This section tells you how to use your manual and includes safety and vehicle damage warnings and symbols.
Section 1 - Seats and Safety Restraints
This section tells you how to use your seats and safety restraints properly.
Section 2 - Features & Controls
This section explains how to start and operate your Vehicle. Section 3 - Comfort Controls & Audio Systems
This section tells you how to adjust the ventilation and comfort controls and how to operate your audio system. Section 4 - Your Driving and the Road
Here you’ll find helpful information and tips about the road and how to drive under different conditions. Section 5 - Problems on the Road
This section tells you what to do if you have a problem while driving, such as a flat tire or engine overheating. Section 6 - Service & Appearance Care
Here the manual tells you how to keep your Vehicle running properly and looking good.
Section 7- Schedule Maintenance Services
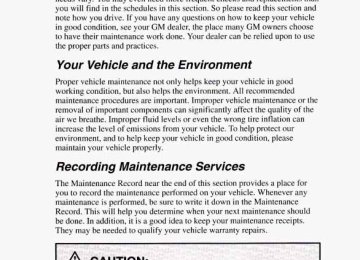
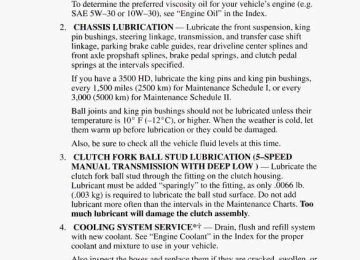
This section tells you when to perform vehicle maintenance and what fluids and lubricants to use.
Section 8 - Customer Assistance Information
This section tells you how to contact your GM division for assistance and how to get service publications. It also gives you information on “Reporting Safety Defects” on page 8-4.
Index
Here’s an alphabetical listing of almost every subject in this manual. You can use it to quickly find something you want to read.
iv
How to Use This Manual Many people read their owner’s manual from beginning to end when they first receive their new vehicle. This will help you learn about the features and controls for- your vehicle. In this manual, you’ll find that pictures and words work together to explain things quickly. INDEX: A good place to look for what you need is the Index in back of the manual. It’s an alphabetical list of all that’s in the manual, and the page number where you’ll find it. SECTION 1-6: Each section of this manual begins with a brief list of its contents, so you can often find at a glance if a section contains the information you want. SECTION 7: This section of the manual covers the maintenance required for your vehicle. SECTION 8 CUSTOMER ASSISTANCE: This section includes important information about reporting safety defects and gives you details about the “Roadside Assistance” program. You will also find customer satisfaction phone numbers (including customer satisfaction numbers for the hearing and speech impaired) as well as the mediation/arbitration procedure. We’ve also included ordering information for service publications in this part. Safety Warnings and Symbols You will find a number of safety cautions in this book. We use a box with gray background and the word CAUTION to tell you about things that could hurt you if you were to ignore the warning.
A CAUTION:
These mean there is something that could hurt you or other people.
In the gray caution area, we tell you what the hazard is. Then we tell you what to do to help avoid or reduce the hazard. Please read these cautions. If you don’t, you or others could be hurt. You will also find a circle with a slash through it in this book. This safety symbol means “Don’t,’’ “Don’t do this,” or “Don’t let this happen.’’
Vehicle Damage Warnings Also, in this book you will find these notices:
NOTICE: These mean there is something that could damage your vehicle.
In the notice area, we tell you about something that can damage your vehicle. Many times, this damage would not be covered by your warranty, and it could be costly. But the notice will tell you what to do to help avoid the damage. When you read other manuals, you might see CAUTION and NOTICE warnings in different colors or in different words. You’ll also see warning labels on your vehicle. They use yellow for cautions, blue for notices and the words CAUTION or NOTICE.
vi
Vehicle Symbols These are some of the symbols you will find on your vehicle. For example, these symbols are used on an original battery:
el
Caution
Possible Injury
Protect Eyes by Shielding
Caustic Battery Acid Could Cause Burns
Spark or Name Could
Explode Battery
Avoid Sparks or Flames
These symbols are important for you and your passengers whenever your vehicle is driven:
--
fasten Safety
Belts
Door LocWUnlock
vii
These symbols have to do with your lights:
Master Lighting
Switch
Turn Signal Direction
Hazard Warning
Flasher
Headlight High Beam
Parking Lights
Fog Lights
Daytime
Running Lights
Off
These symbols are on some of your controls:
Windshield
Wiper
Windshield
Washer
Windshield Defroster
Rear Window
Defogger
Ventilating Fan
Air Vents
... Vlll
These symbols are used on warning and indicator lights:
Engine Coolant Temperature
Battery Charging
System
Fuel
Engine Oil Pressure
RELEASE
Parking Brake
Release
SHIFT
Shift Light
Brake
Low
Coolant
Here are some other symbols you may see:
Fuse
Hood Release
Lighter
Horn
ix
Notes
Seats and Safety Belts
Section
Here you’ll find information about the seats in your vehicle and how to use your safety belts properly . You can also learn about some things you should not do with safety belts . Seats and Seat Controls . . . . . . . . . . . . . . . . . . . . . . . . . . . . . . . . . . . . . . Frontseats . . . . . . . . . . . . . . . . . . . . . . . . . . . . . . . . . . . . . . . . . . . . . Head Restraints . . . . . . . . . . . . . . . . . . . . . . . . . . . . . . . . . . . . . . . . . . RearSeats . . . . . . . . . . . . . . . . . . . . . . . . . . . . . . . . . . . . . . . . . . . . . . Safety Belts: They’re For Everyone . . . . . . . . . . . . . . . . . . . . . . . . . . . Why Safety Belts Work . . . . . . . . . . . . . . . . . . . . . . . . . . . . . . . . . . Questions Many People Ask About Safety Belts
. . . . . .
. . . . . . . . . . . . . . . . . . . . . . . . . . . How To Wear Safety Belts Properly Adults . . . . . . . . . . . . . . . . . . . . . . . . . . . . . . . . . . . . . . . . . . . . . . . . . . . Driver Position . . . . . . . . . . . . . . . . . . . . . . . . . . . . . . . . . . . . . . . . . . . . . . . . . . . . . . . . . . . . . . . . . . . . . . . . . . . . . . . Lap-Shoulder Belt Safety Belt Use During Pregnancy .......................... Passenger Positions . . . . . . . . . . . . . . . . . . . . . . . . . . . . . . . . . . . . . . Children . . . . . . . . . . . . . . . . . . . . . . . . . . . . . . . . . . . . . . . . . . . . . . . . . Smaller Children and Babies . . . . . . . . . . . . . . . . . . . . . . . . . . . . . . Child Restraints . . . . . . . . . . . . . . . . . . . . . . . . . . . . . . . . . . . . . . . . Larger Children . . . . . . . . . . . . . . . . . . . . . . . . . . . . . . . . . . . . . . . . . Safety Belt Extender . . . . . . . . . . . . . . . . . . . . . . . . . . . . . . . . . . . . . . . Checking Your Restraint Systems . . . . . . . . . . . . . . . . . . . . . . . . . . . . . Replacing Your Safety Belts After a Crash . . . . . . . . . . . . . . . . . . . . . .
1-2 1-2 1-5 1-8 1-10 1-11 . . . . . . . 1-14 1-15 1-15 1-16 1-16 1-23 1-23 1-30 1-30 1-32 1-41 1-43 1-44 1-44
1-1
Seats and Seat Controls This section tells you about the seats - how to adjust them, and fold them up and down. It also tells you about reclining front seatbacks and head restraints.
Front Seats
Manual Front Seat
If your vehicle has a manual bucket, split bench, or full bench seat, you can adjust it with this lever at the front of the seat.
Slide the lever at the front of the seat toward the outer seat support to unlock it. Using your body, slide the seat to where you want it. Then, release the lever and try to move the seat with your body, to make sure the seat is locked into place.
1-2
Power Seat
If your vehicle has a power seat on the driver's side, you can adjust it with this switch at the front of the seat.
You can use the center switch knob to move the seat where you want it. To raise the seat, move the center switch knob up. To lower the seat, move the center switch knob down. To move the seat forward, move the center switch knob toward the inside of the vehicle. To move the seat rearward, move the center knob toward the outside of the vehicle. You can also raise and lower the front and rear of the sear. I'o raise the front of the seat, move the inner switch lever up. To lower the .front of the seat, move the inner switch lever down. To raise the rear of the seat, move the outer switch lever up. To lower the rear of the seat, move the outer switch lever down.
Reclining Front Seatback (Bucket or Split Bench Seat)
To adjust the seatback. lift the front of this lever.
Release the lever to lock the seatback where you want it. Pull up on the front of the lever and the seatback will go to a11 upright position. Don't have a seatback reclined if your vehicle is moving.
1-3
1-4
Head Restraints
d the top of your ears.
This position reduces the chance of a neck injury in a crash.
Seatback Latches (Full Bench Seat) The front seatback folds forward to let you access the rear of the cab. Your seatback will move back and forth freely, unless you come to a sudden stop. Then it will lock in place. If you have a Crew Cab, your front seatback is designed not to fold forward. Access to the rear of the cab is available by using the rear doors.
Seatback Latches (Bench Seat With Armrest) The front seatback folds forward to let you access the rear of the cab. If you have a Crew Cab, your front seatback is designed not to fold forward. Access to the rear of the cab is available by using the rear doors.
To fold a seatback forward, pull this lever up and fold the seatback forward.
To return the seatback to the upright position, just push the seatback r e w a r d until it latches.
1-5
After returning the seatback to its upright position, pull the seatback forward to make sure it is locked.
Seatback Latches (Reclining Split Bench and Reclining Bucket Seafs) The front seatback folds forward to let you access the rear of the cab.
To fold the seatback forward, lift this lever. Lift the front of the lever and the seatback will fold forward. To return the seatback to the upright position, push the seatback rearward until it latches.
After returning the seatback to its upright position, pull the seatback forward to make sure it is locked.
Easy Entry Seat (Extended Cab Only) The driver and passenger front bucket seat and the 40/60 split bench seat of your vehicle has an easy entry feature. This makes it easy to get i n and out of the rear seat.
To operate the seat pull forward on the top of the lever, located at the side of the seatback, and tilt the back forward toward the front of the vehicle.
When you do the seat bottom will release. Just pull or push the seat forward until it stops.
To return the seat to its regular position, return the seatback to its upright position, then push the whole seat rearward until it latches. After returning the seat to its regular position, try to move the seat with your body, to make sure the seat is locked into place.
1-7
Rear Seats
Rear Folding Seat (Extended Cab Models) The extended cab may have a rear folding seat which can be folded down for more seating space.
until it latches. .
To use the seat, pull the entire seat forward until it is flat. Pull forward on the RELEASE lever, under the right-hand side of the seat cushion. Push the seatback rearward
After pushing the seatback upright into position, pull the seatback forward to make sure it is locked.
To store the seat, pull forward on the RELEASE lever, under the right-hand side of the seat cushion. Fold the seatback forward until it latches with the seat cushion. Lift the entire seat and push it rearward into place.
Make sure the seat is secure.
1-8
Rear Seat (Crew Cab) You can adjust the seat by sliding the adjuster lever at the front of the seat toward the seat support to unlock it. Slide the seat to where you want it. Then release the lever and try to move the seat with your body, to make sure the seat is locked into place.
Rear Seat Seatback Latch (Except Bench With Armrest) The rear seatback can be folded forward to let you reach the area behind it. Your seatback will move back and forth freely, unless you come to a sudden stop. Then, it will lock into place.
Rear Seat Seatback Latch (Bench Seat With Armrest) The rear seatback folds forward to let you access the area behind it.
To fold a seatback forward, pull this lever up and fold the seatback forward.
To return the seatback to the upright position, just push the seatback rearward until it latches. After returning the seatback to its upright position, pull the seatback forward to make sure it is locked.
1-9
Safety Belts: They’re For Everyone This part of the manual tells you how to use safety belts properly. It also tells you some things you should not do with safety belts.
This figure lights up as a reminder to buckle up. (See “Safety Belt Reminder Light” in the Index.) It will light when you turn the key to RUN or START when your safety belt isn’t buckled, and you’ll hear a tone or buzzer, too. In many states and Canadian provinces, the law says to wear safety belts. Here’s why: They work. You never know if you’ll be in a crash. If you do have a crash, you don’t know if it will be a bad one.
1-10
A few crashes are mild, and some crashes can be so serious that even buckled up a person wouldn’t survive. But most crashes are in between. In many of them, people who buckle up can survive and sometimes walk away. Without belts they could have been badly hurt or killed. After more than 25 years of safety belts in vehicles, the facts are clear. In most crashes buckling up does matter ... a lot!
Why Safety Belts Work When you ride in or on anything, you go as fast as it goes.
For example, if the bike is going 10 mph (16 lun/h), so is the child.
1-11
When the bike hits the block, it stops. But the child keeps going!
Take the simplest “vehicle.” Suppose it’s just a seat on wheels.
Put someone on it.
1-12
3 Get it up to speed. Then stop the “vehicle.” The rider doesn’t stop.
The person keeps going until stopped by something. In a real vehicle, it could be the windshield . . .
or the instrument panel ...
1-13
or the safety belts i
With safety belts, you slow down as the vehicle does. You get more time to stop. You stop over more distance, and your strongest bones take the forces. That’s why safety belts make such good sense. Here Are Questions Many People Ask About Safety Belts - and the Answers Q: Won’t I be trapped in the vehicle after an accident ifI’m wearing a
safety belt?
A: You could be - whether you’re wearing a safety belt or not. But you can easily unbuckle a safety belt, even if you’re upside down. And your chance of being conscious during and after an accident, so you can unbuckle and get out, is much greater if you are belted.
Q Why don’t they just put in air bags so people won’t have to wear
safety belts?
A: Air bags are in some vehicles today and will be in more of them in the future. But they are supplemental systems only - so they work with safety belts, not instead of them. Every air bag system ever offered for sale has required the use of safety belts. Even if you’re in a vehicle that has air bags. you still have to buckle up to get the most protection. That’s true not only in frontal collisions, but especially in side and other collisions.
1-14
Q : If I ’rn a good driver, and I never drive farjrom home, why should I
wear safety belts?
A: You may be an excellent driver, but if you’re in an accident - even
one that isn’t your fault - you and your passengers can be hurt. Being a good driver doesn’t protect you from things beyond your control, such as bad drivers. Most accidents occur within 25 miles (40 km) of home. And the greatest number of serious injuries and deaths occur at speeds of less than 40 mph (65 km/h). Safety belts are for everyone.
Safety Beit Reminder Light
When the key is turned to “Run” or “Start,” a light will come on for about eight seconds to remind people to fasten their safety belts.
Unless the driver’s safety belt is already buckled, a tone will also sound. How To Wear Safety Belts Properly Adults This section is only for people of adult size. Be aware that there are special things to know about safety belts and children. And there are different rules for smaller children and babies. If a child will be riding in your vehicle, see the section after this one, called “Children.” Follow those rules for everyone’s protection. First, you’ll want to know which restraint systems your vehicle has. We’ll start with the driver position.
1-15
Driver Position This section describes the driver’s restraint system.
Lap-Shoulder Belt
The driver has a lap-shoulder belt. Here’s how to wear it properly.
1. Close and lock the door. 2. Adjust the seat (to see how, see “Seats” in the Index) so you can sit up
straight.
1-16
3. Pick up the latch plate and pull the belt across you. (On some models, you may hear a clicking sound as the belt is pulled out. The clicking sound is the shoulder belt tension feature operating properly.) Don’t let the belt get twisted.
4. Push the latch plate into the buckle until it clicks. Pull up on the latch
plate to make sure it is secure. If the belt isn’t long enough, see “Safety Belt Extender” at the end of this section.
Make sure the release button on the buckle is positioned so you would be able to unbuckle the safety belt quickly if you ever had to. The lap part of the belt SI nould be worn low and snug on the hips, just touching the thighs. In a crash, this applies force to the strong pelvic bones. And you’d be less likely to slide under the lap belt. If you slid under it, the belt would apply force at your abdomen. This could cause serious or even fatal injuries. The shoulder belt should go over the shoulder and across the chest. These parts of the body are best able to take belt restraining forces. The safety belt locks if there’s a sudden stop or a crash.
1-17
Q: What’s wrong with this?
A: The shoulder belt is too loose. It won’t give nearly as much protection
this way.
Q: What’s wrong with this?
A: The belt is buckled in the wrong place.
1-19
Q: What’s wrong with this?
A: The belt is over an armrest.
1-20
Q: What's wrong with this?
A: The shoulder belt is worn under the arm. It should be worn over the
shoulder at all times.
1-21
Q: What's wrong with this?
A: The belt is twisted across the body.
To unlatch the belt, just push the button on the buckle. The belt should go back out of the way.
Before you close the door, be sure the belt is out of the way. If you slam the door on it, you can damage both the belt and your vehicle.
1-22
Safety Belt Use During Pregnancy
The best way to protect the fetus is to protect the mother. When a safety belt is worn properly, it’s more likely that the fetus won’t be hurt in a crash. For pregnant women, as for anyone, the key to making safety belts effective is wearing them properly. Right Front Passenger Position
The right front passenger’s safety belt works the same way as the driver’s safety belt. See “Driver Position,” earlier in this part. When the lap portion of the belt is pulled out all the way, it will lock. If it does, let it go back all the way and start again.
1-23
Center Passenger Position
Lap Belt If your vehicle has front and rear bench seats, someone can sit in the center positions.
When you sit in a center seating position, you have a lap safety belt, which has no retractor. To make the belt longer, tilt the latch plate and pull it along the belt.
I
To make the belt shorter, pull its free end as shown until the belt is snug.
Buckle, position and release it the same way as the lap part of a lapshoulder belt. If the belt isn’t long enough, see “Safety Belt Extender” at the end of this section. Make sure the release button on the buckle is positioned so you would be able to unbuckle the safety belt quickly if you ever had to. Rear Seat Passengers (Extended Cab and Crew Cab) It’s very important for rear seat passengers to buckle up! Accident statistics show that unbelted people in the rear seat are hurt more often in crashes than those who are wearing safety belts. Rear passengers who aren’t safety belted can be thrown out of the vehicle in a crash. And they can strike others in the vehicle who are wearing safety belts.
Rear Seat Outside Passenger Positions (Extended Cab)
1-25
Lap-Shoulder Belt The positions next to the windows have lap-shoulder belts. Here’s how to wear one properly.
1. Pick up the latch plate and pull the belt across you. (On some models, you may hear a clicking sound as the belt is pulled out. The clicking sound is the shoulder belt tension feature operating properly.) Don’t let the belt get twisted.
2. Push the latch plate into the buckle until it clicks. If the belt stops
before it reaches the buckle, tilt the latch plate and keep pulling until you can buckle it. Pull up on the latch plate to make sure it is secure. If the belt is not long enough, see “Safety Belt Extender” at the end of this section. Make sure the release button on the buckle is positioned so you would be able to unbuckle the safety belt quickly if you ever had to.
1-26
To make the lap part tight, pull down on the buckle end of the belt as you pull up on the shoulder part.
The lap part of the belt should be worn low and snug on the hips, just touching the thighs. In a crash, this applies force to the strong pelvic bones. And you’d be less likely to slide under the lap belt. If you slid under it, the belt would apply force at your abdomen. This could cause serious or even fatal injuries. The shoulder belt should go over the shoulder and across the chest. These parts of the body are best able to take belt restraining forces. The safety belt locks if there’s a sudden stop or a crash.
To unlatch the belt, just push the button on the buckle.
, . .
1-27
Rear Seat Outside Passenger Positions (Crew Cab)
Lap-Shoulder Belt
belts. Here ’s how to
1. Pick up the latch plate and pull the belt across you. (On some models,
you may hear a clicking sound as the belt is pulled out. The clicking sound is the shoulder belt tension feature operating properly.) Don’t let the belt get twisted.
2. Push the latch plate into the buckle until it clicks. Pull up on the latch plate to make sure it is secure. When the lap belt is pulled out all the way, it will lock. If it does, let it go back all the way and start again. If the belt is not long enough, see “Safety Belt Extender” at the end of this section. Make sure the release button on the buckle is positioned so you would be able to unbuckle the safety belt quickly if you ever had to.
1-28
The lap part of the belt should be worn low and snug on the hips, just touching the thighs. In a crash, this applies force to the strong pelvic bones. And you’d be less likely to slide under the lap belt. If you slid under it, the belt would apply force at your abdomen. This could cause serious or even fatal injuries. The shoulder belt should go over the shoulder and across the chest. These parts of the body are best able to take belt restraining forces. The safety belt locks only if there’s a sudden stop or a crash.
To unlatch the belt, just push the button on the buckle.
1-29
Children
Everyone in a vehicle needs protection! That includes infants and all children smaller than adult size.
In fact, the law in every state in the United States and in every Canadian province says children up to some age must be restrained while in a vehicle.
Smaller Children and Babies
1-31
Child Restraints Be sure to follow the instructions for the restraint. You may find these instructions on the restraint itself or in a booklet, or both. These restraints use the belt system in your vehicle, but the child also has to be secured within the restraint to help reduce the chance of personal injury. The instructions that come with the infant or child restraint will show you how to do that.
Where to Put the Restraint (Except Extended Cab and Crew Cab) The child restraint must be secured properly in the center or right front passenger seat.
Where to Put the Restraint (Extended Cab and Crew Cab) Accident statistics show that children are safer if they are restrained in the rear rather than the front seat. We at General Motors therefore recommend that you put your child restraint in the rear seat unless the child is an infant and you’re the only adult in the vehicle. In that case, you might want to secure the restraint in the front seat where you can keep an eye on the baby. Wherever you install it, be sure to secure the child restraint properly. Keep in mind that an unsecured child restraint can move around in a collision or sudden stop and injure people in the vehicle. Be sure to properly secure any child restraint in your vehicle - even when no child is in it. Top Strap
If your child restraint has a top strap, it should be anchored.
1-32
. .
. .
If you need to have an anchor installed, you can ask your dealer to put it in for you. If you want to install an anchor yourself, your dealer can tell you how to do it.
Securing a Child Restraint in a Rear Outside Position (Extended Cab)
You'll be using the lapshoulder belt. See the earlier section about the top strap if the child restraint has one. 1. Put the restraint on the seat. Follow the instructions for the child
restraint.
2. Secure the child in the child restraint as the instructions say. 3. Pull out the vehicle's safety belt. Make the belt as long as possible by
tilting the latch plate and pulling it along the belt.
4. Run the lap and
shoulder portions through or around the restraint. The child restraint instructions will show you how. If the shoulder belt goes in front of the child's face or neck, put it behind the child restraint.
1-33
5.
Buckle the belt. Make sure the release button is positioned so you would be able to unbuckle the safety belt quickly if you ever had to.
6.
To tighten the belt, pull up on the shoulder belt while you push down on the child restraint. Make sure the buckle end of the belt is pulled out all the way.
7.
Push and pull the child restraint in different directions to be sure it is secure.
To remove the child restraint, just unbuckle the vehicle’s safety belt and let it go back all the way. The safety belt will move freely again and be ready to work for an adult or larger child passenger.
1-34
Securing a Child Restraint in a Rear Outside Position (Crew Cab)
You’ll be using the lap-shoulder belt. See the earlier section about the top strap if the child restraint has one. 1. Put the restraint on the seat. Follow the instructions for the child
restraint.
2. Secure the child in the child restraint as the instructions say. 3. Pick up the latch plate, and run the lap and shoulder portions of the
vehicle’s safety belt through or around the restraint. The child restraint instructions will show you how. If the shoulder belt goes in front of the child’s face or neck, put it behind the child restraint.
4. Buckle the belt. Make sure the release button is positioned so you would be able to unbuckle the safety belt quickly if you ever had to.
1-35
5. Pull the rest of
the lap belt all the way out of the retractor to set the lock.
6. To tighten the
belt, feed the lap belt back into the retractor while you push down on the child restraint.
7. Push and pull the child restraint in different directions to be sure it is secure.
To remove the child restraint, just unbuckle the vehicle's safety belt and let it go back all the way. The safety belt will move freely again and be ready to work for an adult or larger child passenger.
1-36