- 2016 GMC Acadia Owners Manuals
- GMC Acadia Owners Manuals
- 2010 GMC Acadia Owners Manuals
- GMC Acadia Owners Manuals
- 2007 GMC Acadia Owners Manuals
- GMC Acadia Owners Manuals
- 2013 GMC Acadia Owners Manuals
- GMC Acadia Owners Manuals
- 2012 GMC Acadia Owners Manuals
- GMC Acadia Owners Manuals
- 2014 GMC Acadia Owners Manuals
- GMC Acadia Owners Manuals
- 2009 GMC Acadia Owners Manuals
- GMC Acadia Owners Manuals
- 2008 GMC Acadia Owners Manuals
- GMC Acadia Owners Manuals
- 2011 GMC Acadia Owners Manuals
- GMC Acadia Owners Manuals
- 2015 GMC Acadia Owners Manuals
- GMC Acadia Owners Manuals
- Download PDF Manual
-
control places the fan speed under manual control.
The air delivery mode remains in automatic control. The fan setting still displays, but the word AUTO no longer displays, and the AUTO button indicator light turns off.
H / G (Air Delivery Mode Control): Press to change the direction of the airflow in the vehicle. Repeatedly press H or G until the desired mode appears on the display. Pressing a mode button while the system is off changes the air delivery mode without turning the system on. Press a mode button while in automatic control to place the system into manual control.
The air delivery mode setting still displays, but the word AUTO no longer displays, and the AUTO button indicator light turns off. H (Vent): Air is directed to the instrument panel outlets.
Instrument Panel
3-27
) (Bi-Level): Air is divided between the instrument panel and floor outlets. Some air is directed towards the windshield and side window outlets. Cooler air is directed to the upper outlets and warmer air to the floor outlets. 6 (Floor): Air is directed to the floor outlets, with some of the air directed to the windshield, side window, and second row floor outlets. In this mode, the system uses outside air. - (Defog): This mode clears the windows of fog or moisture. Air is directed to the windshield, floor outlets, and side window vents. When this mode is selected, the system turns off recirculation and runs the air conditioning compressor unless the outside temperature is less than 40°F (4°C). Do not drive the vehicle until all the windows are clear.
3-28
Instrument Panel
0 (Defrost): Press to turn the defrost on or off. This mode quickly clears the windshield of fog or frost. Air is directed to the windshield, side window, and floor vents. In this mode, outside air is pulled inside the vehicle. The air conditioning system runs automatically in this setting, unless the outside temperature is less than 40°F (4°C).
Do not drive the vehicle until all the windows are clear.
While in defrost mode, if the PASS button is pressed, the PASS button indicator flashes three times to show that the passenger climate control system cannot be activated. If the passenger temperature buttons are adjusted while in defrost mode, the driver temperature indicator will change. The passenger temperature will not be displayed.
Air Conditioning # (Air Conditioning): Press to turn the air conditioning (A/C) on and off. An indicator light comes on when A/C is on.
The A/C does not work when the outside temperature is below 40°F (4°C). If # is pressed the indicator flashes three times and turns off to show that the A/C mode is not available. If the A/C is on and the outside temperature drops below a temperature which is too cool for air conditioning to be effective, the A/C indicator turns off to show that the A/C mode has been canceled. On hot days, open the windows briefly to let hot inside air escape. This helps reduce the time it takes for the interior of the vehicle to cool down.
The air conditioning system removes moisture from the air, so a small amount of water might drip under the vehicle while idling or after turning off the engine. This is normal. @ (Recirculation): Press to turn the recirculation mode on or off. An indicator light comes on when recirculation is on. When the engine is turned off, the recirculation mode automatically turns off and must be re-selected when the engine is turned on again.
This mode recirculates and helps to quickly cool the air inside the vehicle. It can be used to prevent outside air and odors from entering the vehicle.
Instrument Panel
3-29
Sensors
The solar sensor, located in the defrost grille in the middle of the instrument panel, monitors the solar heat. Do not cover the solar sensor or the system will not work properly.
The recirculation mode cannot be used with floor, defog, or defrosting modes. If recirculation is selected in these modes, the indicator flashes three times and turns off. The air conditioning compressor also comes on when this mode is activated. While in recirculation mode the windows can fog when the weather is cold and damp. To clear the fog, select either the defog or defrost mode and increase the fan speed. REAR: Press to turn the rear heating and air conditioning on or off. See Rear Air Conditioning and Heating System on page 3-31
or Rear Air Conditioning and Heating System and Electronic Climate Controls on page 3-32.Rear Window Defogger The rear window defogger uses a warming grid to remove fog from the rear window. < (Rear Window Defogger): Press to turn the rear window defogger on or off. The rear window defogger stays on for about 10 minutes, before turning off. The defogger also turns off when the engine is turned off. Do not drive the vehicle until all the windows are clear. For vehicles with heated outside rearview mirrors, fog or frost is cleared from the surface of the mirror when the rear window defog button is pressed. Notice: Do not use a razor blade or sharp object to clear the inside rear window. Do not adhere anything to the defogger grid lines in the rear glass. These actions may damage the rear defogger. Repairs would not be covered by your warranty.
3-30
Instrument Panel
The interior temperature sensor located on the instrument panel to the right of the steering column, measures the temperature of the air inside the vehicle. There is also an exterior temperature sensor located behind the front grille. This sensor reads the outside air temperature and helps maintain the temperature inside the vehicle. Any cover on the front of the vehicle could cause a false reading in the displayed temperature.
The climate control system uses the information from these sensors to maintain comfort settings by adjusting the temperature, fan speed, and the air delivery mode. The system may also supply cooler air to the side of the vehicle facing the sun. The recirculation mode will also be used as needed to maintain cool outlet temperatures.
Outlet Adjustment Use the slider switch in the center of the outlet, to change the direction of the air flow. Use the thumbwheel near the outlet to control the amount of air flow or to shut off the airflow. Keep all outlets open whenever possible for best system performance.
Operation Tips (cid:129) Clear away any ice, snow, or leaves from the air inlets at the base of the windshield that can block the flow of air into the vehicle.
(cid:129) Use of non-GM approved hood deflectors can adversely affect the performance of the system.
(cid:129) Keep the path under all seats
clear of objects to help circulate the air inside the vehicle more effectively. If fogging reoccurs while in vent or bi-level modes with mild temperature throughout the vehicle, turn on the air conditioner to reduce windshield fogging.
(cid:129) Rear Air Conditioning and Heating System
A. Fan Control B. Temperature Control C. Air Delivery Mode Control
For vehicles with the rear climate control system, the controls are located on the rear of the center console. The system can also be controlled with the front controls. Press the REAR button on the front climate control system to turn the rear climate control system on or off.
An indicator comes on when the rear system is on. The system also turns on if any of the rear controls are adjusted. Mimic Mode: This mode matches the rear climate control to the front climate control settings. It comes on when REAR is pressed. Independent Mode: This mode directs rear seating airflow according to the settings of the rear controls. It comes on when any rear control is adjusted.
Instrument Panel
3-31
Fan Control: Turn clockwise or counterclockwise to increase or decrease the fan speed. Turn the knob to 9 to turn the fan off. Temperature Control: Turn clockwise or counterclockwise to increase or decrease the airflow temperature. Air Delivery Mode Control: Turn to the desired mode to change the airflow direction. H (Vent): Air is directed through the overhead outlets. ) (Bi-Level): Air is directed through the rear floor outlets, as well as the overhead outlets. 6 (Floor): Air is directed through the floor outlets. The rear system floor outlets are located under the third row seats.
3-32
Instrument Panel
Rear Air Conditioning and Heating System and Electronic Climate Controls
Rear Climate Control with Rear Seat Audio Controls
A. Fan Control B. Air Delivery Mode Control C. Temperature Control
For vehicles with the rear climate control system, the controls are located on the rear of the center console.
Press the REAR button on the front climate control system to turn the rear climate control system on or off. The system also turns on if any of the rear controls, except for the C are pressed. An indicator comes on when the rear system is on. The system can also be turned off, by pressing and holding the C button.
Mimic Mode: This mode matches the rear climate control to the front climate control settings. It comes on when REAR is pressed. Independent Mode: This mode directs rear seating airflow according to the settings of the rear controls. It comes on when any rear control is adjusted.
D C (Fan Control): Press the fan up or down buttons to increase or decrease the fan speed. Temperature Control: Press + or − to increase or decrease the air temperature. The temperature settings will display in 0-12
increments, going from the coolest (0) to the warmest (12) setting.N (Air Delivery Mode Control): Press to manually change the direction of the airflow. Repeatedly press the button until the desired mode appears on the display. H (Vent): Air is directed through the overhead outlets. ) (Bi-Level): Air is directed through the rear floor outlets, as well as the overhead outlets. 6 (Floor): Air is directed through the floor outlets. The rear system floor outlets are located under the third row seats.
Warning Lights, Gages, and Indicators Warning lights and gages can signal that something is wrong before it becomes serious enough to cause an expensive repair or replacement. Paying attention to the warning lights and gages could prevent injury. Warning lights come on when there may be or is a problem with one of the vehicle’s functions. Some warning lights come on briefly when the engine is started to indicate they are working.
Instrument Panel
3-33
Gages can indicate when there may be or is a problem with one of the vehicle’s functions. Often gages and warning lights work together to indicate a problem with the vehicle. When one of the warning lights comes on and stays on while driving, or when one of the gages shows there may be a problem, check the section that explains what to do. Follow this manual’s advice. Waiting to do repairs can be costly and even dangerous.
3-34
Instrument Panel
Instrument Panel Cluster The instrument cluster is designed to show how the vehicle is running. It shows how fast the vehicle is going, about how much fuel has been used, and many other things needed to drive safely and economically.
United States version shown, Canada similar
Speedometer and Odometer The speedometer shows the vehicle’s speed in both miles per hour (mph) and kilometers per hour (km/h). The odometer shows how far the vehicle has been driven, in either miles or kilometers. This vehicle has a tamper-resistant odometer. If the vehicle needs a new odometer installed, the new one is set to the mileage total of the old odometer. If this is not possible, it is set at zero and a label is put on the driver’s door to show the old mileage reading when the new odometer was installed. If the mileage is unknown, the label should then indicate “previous mileage unknown”.
Tachometer The tachometer displays the engine speed in revolutions per minute (rpm).
Safety Belt Reminders Driver Safety Belt Reminder Light The driver safety belt reminder light on the instrument panel cluster.
When the engine is started this light and the chime come on and stay on for several seconds to remind the driver to fasten the safety belt. The light also begins to flash. This cycle repeats if the driver remains unbuckled and the vehicle is moving. If the driver safety belt is already buckled, neither the light nor chime comes on.
Instrument Panel
3-35
Passenger Safety Belt Reminder Light
When the engine is started this light and the chime come on and stay on for several seconds to remind the passenger to fasten their safety belt. The light also begins to flash. This cycle repeats if the passenger remains unbuckled and the vehicle is moving. If the passenger safety belt is buckled, neither the chime nor the light comes on. The front passenger safety belt warning light and chime may turn on if an object is put on the seat such as a briefcase, handbag, grocery bag, laptop or other electronic device. To turn off the warning light and or chime, remove the object from the seat or buckle the safety belt.
3-36
Instrument Panel
Airbag Readiness Light This light shows if there is an electrical problem. The system check includes the airbag sensor, the pretensioners, the airbag modules, the wiring and the crash sensing and diagnostic module. For more information on the airbag system, see Airbag System on page 1-50.
This light will come on and stay on for several seconds when the vehicle is started. Then the light should go out.
If the airbag readiness light stays on after the vehicle has been started or comes on when while driving, the airbag system may not work properly. Have the vehicle serviced right away.
{ CAUTION
Passenger Airbag Status Indicator The vehicle has a passenger sensing system. See Passenger Sensing System on page 1-57
for important safety information. The instrument panel has a passenger airbag status indicator.If the airbag readiness light stays on after the vehicle is started or comes on while driving, it means the airbag system might not be working properly. The airbags in the vehicle might not inflate in a crash, or they could even inflate without a crash. To help avoid injury, have the vehicle serviced right away.
United States
Canada
When the vehicle is started, the passenger airbag status indicator will light ON and OFF, or the symbol for on and off, for several seconds as a system check.
If you are using remote start to start the vehicle from a distance, if equipped, you may not see the system check. Then, after several more seconds, the status indicator will light either ON or OFF, or either the on or off symbol to let you know the status of the right front passenger frontal airbag. If the word ON or the on symbol is lit on the passenger airbag status indicator, it means that the right front passenger frontal airbag is enabled (may inflate). If the word OFF or the off symbol is lit on the passenger airbag status indicator, it means that the passenger sensing system has turned off the right front passenger frontal airbag. If, after several seconds, both status indicator lights remain on, or if there are no lights at all, there may be a problem with the lights or the passenger sensing system. See your dealer/retailer for service.
{ CAUTION
If the airbag readiness light ever comes on and stays on, it means that something may be wrong with the airbag system. To help avoid injury to yourself or others, have the vehicle serviced right away. See Airbag Readiness Light on page 3-36 for more information, including important safety information.
Charging System Light
The charging system light comes on briefly when the ignition is turned on, but the engine is not running, as a
Instrument Panel
3-37
check to show the light is working. It should go out when the engine is started. If the light stays on, or comes on while driving, there may be a problem with the electrical charging system. Have it checked by your dealer/retailer. Driving while this light is on could drain the battery. When this light comes on, the Driver Information Center (DIC) also displays the SERVICE BATTERY CHARGING SYSTEM message. See DIC Warnings and Messages on page 3-58 for more information. If a short distance must be driven with the light on, be sure to turn off all accessories, such as the radio and air conditioner.
3-38
Instrument Panel
Voltmeter Gage
When the engine is not running, but the ignition is turned on, this gage shows the battery’s state of charge in DC volts. When the engine is running, this gage shows the condition of the charging system. The vehicle’s charging system regulates voltage based on the state of charge of the battery. The voltmeter may fluctuate. This is normal. Readings between the low and high warning zones indicate the normal operating range.
Readings in the low warning zone may occur when a large number of electrical accessories are operating in the vehicle and the engine is left idling for an extended period. If there is a problem with the battery charging system, a SERVICE BATTERY CHARGING SYSTEM message will appear in the Driver Information Center (DIC) and/or the charging system light will come on. See DIC Warnings and Messages on page 3-58 and Charging System Light on page 3-37 for more information. However, readings in either warning zone may indicate a possible problem in the electrical system. Have the vehicle serviced as soon as possible.
Brake System Warning Light This vehicle’s hydraulic brake system is divided into two parts. If one part is not working, the other part can still work and stop the vehicle. For good braking both parts need to be working. If the warning light comes on, there is a brake problem. Have the brake system inspected right away.
United States
Canada
This light should come on briefly when the ignition key is turned to ON/RUN. If it does not come on then, have it fixed so it will be ready to warn if there is a problem.
This light may also come on due to low brake fluid. See Brakes on page 5-27 for more information. When the ignition is on, the brake system warning light will also come on when the parking brake is set. The light will stay on if the parking brake does not release fully. If it stays on after the parking brake is fully released, it means there is a brake problem. If the light comes on while driving, pull off the road and stop carefully. Make sure the parking brake is fully released. The pedal may be harder to push or, the pedal may go closer to the floor. It may take longer to stop. If the light is still on, have the vehicle towed for service. See Towing Your Vehicle on page 4-20.
{ CAUTION
The brake system might not be working properly if the brake system warning light is on. Driving with the brake system warning light on can lead to a crash. If the light is still on after the vehicle has been pulled off the road and carefully stopped, have the vehicle towed for service.
Antilock Brake System (ABS) Warning Light
For vehicles with the Antilock Brake System (ABS), this light comes on briefly when the engine is started.
Instrument Panel
3-39
If the light does not come on, have it fixed so it will be ready to warn if there is a problem. If the ABS light stays on, turn the ignition off. If the light comes on while driving, stop as soon as it is safely possible and turn the ignition off. A chime may also sound when the light comes on steady. Then start the engine again to reset the system. If the ABS light stays on, or comes on again while driving, the vehicle needs service. If the regular brake system warning light is not on, the vehicle still has brakes, but not antilock brakes. If the regular brake system warning light is also on, the vehicle does not have antilock brakes and there is a problem with the regular brakes. See Brake System Warning Light on page 3-38. For vehicles with a Driver Information Center (DIC), see DIC Warnings and Messages on page 3-58 for all brake related DIC messages.
3-40
Instrument Panel
StabiliTrak® Indicator Light
This light comes on briefly while starting the engine. If it does not, have the vehicle serviced by your dealer/retailer. If the system is working normally the indicator light goes off. If it stays on, or comes on while driving, there could be a problem with the StabiliTrak system and the vehicle might need service. When this warning light is on, the system is off and will not limit wheel spin.
This light flashes when the StabiliTrak system is active. If the StabiliTrak system warning light comes on and stays on for an extended period of time when the system is turned on, the vehicle needs service. See StabiliTrak® System on page 4-5 for more information.
Engine Coolant Temperature Warning Light
The engine coolant temperature warning light comes on when the engine has overheated.
If this happens pull over and turn off the engine as soon as possible. See Engine Overheating on page 5-24 for more information. Notice: Driving with the engine coolant temperature warning light on could cause the vehicle to overheat. See Engine Overheating on page 5-24. The vehicle’s engine could be damaged, and it might not be covered by the vehicle warranty. Never drive with the engine coolant temperature warning light on. This light also comes on briefly when starting the vehicle. If it does not, see your dealer/retailer.
Engine Coolant Temperature Gage
Tire Pressure Light
Canada
United States This gage shows the engine coolant temperature. Under normal driving conditions the gage will read approximately 210°F (100 °C) or less. If the gage pointer is near 260°F (125 °C), the engine is too hot. It means that the engine coolant has overheated. If the vehicle has been operating under normal driving conditions, pull off the road, stop the vehicle and turn off the engine as soon as possible. See Engine Overheating on page 5-24 for more information.
If the vehicle has a tire pressure monitoring system, the tire pressure light provides information about tire pressures and the Tire Pressure Monitoring System. The light should come on briefly as the engine is started. If it does not, have the vehicle serviced by your dealer/ retailer.
When the Light is On Steady This indicates that one or more of the tires are significantly underinflated.
Instrument Panel
3-41
A tire pressure message in the Driver Information Center (DIC), can accompany the light. See DIC Warnings and Messages on page 3-58 for more information. Stop and check the tires as soon as it is safe to do so. If underinflated, inflate to the proper pressure. See Tires on page 5-37 for more information. When the Light Flashes First and Then is On Steady This indicates that there could be a problem with the Tire Pressure Monitor System. The light flashes for about a minute and stays on steady for the remainder of the ignition cycle. This sequence repeats with every ignition cycle. See Tire Pressure Monitor System on page 5-44 for more information.
3-42
Instrument Panel
Malfunction Indicator Lamp Check Engine Light A computer system called OBD II (On-Board Diagnostics-Second Generation) monitors operation of the fuel, ignition, and emission control systems. It ensures that emissions are at acceptable levels for the life of the vehicle, helping to produce a cleaner environment.
This light comes on when the ignition is on, but the engine is not running, as a check to show it is working. If it does not, have the vehicle serviced by your dealer/ retailer.
Notice: Modifications made to the engine, transmission, exhaust, intake, or fuel system of the vehicle or the replacement of the original tires with other than those of the same Tire Performance Criteria (TPC) can affect the vehicle’s emission controls and can cause this light to come on. Modifications to these systems could lead to costly repairs not covered by the vehicle warranty. This could also result in a failure to pass a required Emission Inspection/Maintenance test. See Accessories and Modifications on page 5-3.
If the check engine light comes on and stays on, while the engine is running, this indicates that there is an OBD II problem and service is required. Malfunctions often are indicated by the system before any problem is apparent. Being aware of the light can prevent more serious damage to the vehicle. This system assists the service technician in correctly diagnosing any malfunction. Notice: continually driven with this light on, after a while, the emission controls might not work as well, the vehicle’s fuel economy might not be as good, and the engine might not run as smoothly. This could lead to costly repairs that might not be covered by the vehicle warranty.
If the vehicle is
This light comes on during a malfunction in one of two ways: Light Flashing: A misfire condition has been detected. A misfire increases vehicle emissions and could damage the emission control system on the vehicle. Diagnosis and service might be required.
The following can prevent more serious damage to the vehicle: (cid:129) Reduce vehicle speed. (cid:129) Avoid hard accelerations. (cid:129) Avoid steep uphill grades.
If towing a trailer, reduce the amount of cargo being hauled as soon as it is possible.
If the light continues to flash, when it is safe to do so, stop the vehicle. Find a safe place to park the vehicle. Turn the key off, wait at least 10 seconds, and restart the engine. If the light is still flashing, follow the previous steps and see your dealer/ retailer for service as soon as possible.
Light On Steady: An emission control system malfunction has been detected on the vehicle. Diagnosis and service might be required. An emission system malfunction might be corrected by checking the following items: (cid:129) Make sure the fuel cap is fully
installed. See Filling the Tank on page 5-8. The diagnostic system can determine if the fuel cap has been left off or improperly installed. A loose or missing fuel cap allows fuel to evaporate into the atmosphere. A few driving trips with the cap properly installed should turn the light off. If the vehicle has been driven through a deep puddle of water, the vehicle’s electrical system might be wet. The condition is usually corrected when the electrical system dries out. A few driving trips should turn the light off.
Instrument Panel
3-43
(cid:129) Make sure to fuel the vehicle
with quality fuel. Poor fuel quality causes the engine not to run as efficiently as designed and may cause: stalling after start-up, stalling when the vehicle is changed into gear, misfiring, hesitation on acceleration, or stumbling on acceleration. These conditions might go away once the engine is warmed up. If one or more of these conditions occurs, change the fuel brand used. It will require at least one full tank of the proper fuel to turn the light off. See Gasoline Octane on page 5-5.
If none of the above have made the light turn off, your dealer/retailer can check the vehicle. The dealer/retailer has the proper test equipment and diagnostic tools to fix any mechanical or electrical problems that might have developed.
(cid:129) (cid:129) 3-44
Instrument Panel
Emissions Inspection and Maintenance Programs Some state/provincial and local governments have or might begin programs to inspect the emission control equipment on the vehicle. Failure to pass this inspection could prevent getting a vehicle registration. Here are some things to know to help the vehicle pass an inspection:
The vehicle will not pass this inspection if the check engine light is on with the engine running, or if the key is in ON/RUN and the light is not on.
The vehicle will not pass this inspection if the OBD II (on-board diagnostic) system determines that critical emission control systems have not been completely diagnosed by the system. The vehicle would be considered not ready for inspection. This can happen if the battery has recently been replaced or if the battery has run down. The diagnostic system is designed to evaluate critical emission control systems during normal driving. This can take several days of routine driving. If this has been done and the vehicle still does not pass the inspection for lack of OBD II system readiness, your dealer/ retailer can prepare the vehicle for inspection.
Oil Pressure Light { CAUTION
Do not keep driving if the oil pressure is low. The engine can become so hot that it catches fire. Someone could be burned. Check the oil as soon as possible and have the vehicle serviced.
Notice: Lack of proper engine oil maintenance can damage the engine. The repairs would not be covered by the vehicle warranty. Always follow the maintenance schedule in this manual for changing engine oil.
(cid:129) (cid:129) Security Light
The oil pressure light should come on briefly as the engine is started. If it does not come on have the vehicle serviced by your dealer/retailer. If the light comes on and stays on, it means that oil is not flowing through the engine properly. The vehicle could be low on oil and might have some other system problem.
This light flashes when the security system is activated. For more information, see Theft-Deterrent Systems on page 2-16.
Fog Lamp Light
Instrument Panel
3-45
The light goes out when the fog lamps are turned off. See Fog Lamps on page 3-13 for more information.
Cruise Control Light
This light comes on whenever the cruise control is set. The light goes out when the cruise control is turned off. See Cruise Control on page 3-9 for more information.
The fog lamp light comes on when the fog lamps are in use.
3-46
Instrument Panel
Highbeam On Light
Fuel Gage
United States
Canada
When the ignition is on, the fuel gage shows how much fuel is left in the tank. An arrow in the fuel gage indicates the side of the vehicle the fuel door is on. The gage will first indicate empty before the vehicle is out of fuel, the vehicle’s fuel tank should be filled soon.
The highbeam on light comes on when the high-beam headlamps are in use. See Headlamp High/Low-Beam Changer on page 3-7 for more information.
Tow/Haul Mode Light
This light comes on when the Tow/Haul mode has been activated. For more information, see Tow/Haul Mode on page 2-26.
When the fuel tank is low on fuel, the FUEL LEVEL LOW message will appear on the Driver Information Center (DIC). For more information see DIC Warnings and Messages on page 3-58. Here are some situations that may occur with the fuel gage. None of these indicate a problem with the fuel gage. (cid:129) At the gas station, the fuel
pump shuts off before the gage reads full. It takes a little more or less fuel to fill up than the fuel gage indicated. For example, the gage may have indicated the tank was half full, but it actually took a little more or less than half the tank’s capacity to fill the tank. The gage goes back to empty when the ignition is turned off.
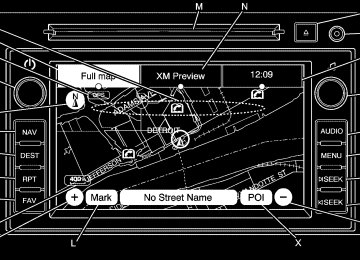
(cid:129) (cid:129) Driver Information Center (DIC) Your vehicle has a Driver Information Center (DIC). The DIC displays information about your vehicle. It also displays warning messages if a system problem is detected. All messages will appear in the DIC display located at the top of the instrument panel cluster. The DIC comes on when the ignition is on. After a short delay, the DIC will display the information that was last displayed before the engine was turned off. The DIC also displays a shift lever position indicator on the bottom line of the display. See Automatic Transmission Operation on page 2-24 for more information. The outside air temperature and compass, if equipped, also displays on the DIC when viewing the trip and fuel information.
The outside air temperature automatically appears in the top right corner of the DIC display. If there is a problem with the system that controls the temperature display, the numbers will be replaced with dashes. If this occurs, have the vehicle serviced. The compass will be shown in the bottom right corner of the DIC display. See DIC Compass on page 3-56 for more information. If your vehicle has DIC buttons, see “DIC Operation and Displays (With DIC Buttons)” later in this section and DIC Vehicle Customization (With DIC Buttons) on page 3-67
for the displays available. If your vehicle does not have DIC buttons, see “DIC Operation and Displays (Without DIC Buttons)” later in this section for the displays available.Instrument Panel
3-47
DIC Operation and Displays (With DIC Buttons) If your vehicle has DIC buttons, the information below explains the operation of this system. The DIC has different displays which can be accessed by pressing the DIC buttons located on the instrument panel. See Instrument Panel Overview on page 3-4
for more information. The DIC displays trip, fuel, and vehicle system information, and warning messages if a system problem is detected. The DIC also allows some features to be customized. See DIC Vehicle Customization (With DIC Buttons) on page 3-67 for more information. If your vehicle has DIC buttons, you can also use the trip odometer reset stem to view the odometer and trip odometers.3-48
Instrument Panel
DIC Buttons
The buttons are the set/reset, customization, vehicle information, and trip/fuel buttons. The button functions are detailed in the following pages.
V (Set/Reset): Press this button to set or reset certain functions and to turn off or acknowledge messages on the DIC.
U (Customization): Press this button to customize the feature settings on your vehicle. See DIC Vehicle Customization (With DIC Buttons) on page 3-67 for more information.
T (Vehicle Information): Press this button to display the oil life, park assist on vehicles with this feature, units, tire pressure readings on vehicles with the Tire Pressure Monitor System (TPMS), Remote Keyless Entry (RKE) transmitter programming, and compass calibration and zone setting on vehicles with this feature. 3 (Trip/Fuel): Press this button to display the odometer, trip odometers, fuel range, average economy, timer, fuel used, and average speed.
Vehicle Information Menu Items
T (Vehicle Information): Press this button to scroll through the following menu items:
OIL LIFE Press the vehicle information button until OIL LIFE REMAINING displays. This display shows an estimate of the oil’s remaining useful life. If you see 99% OIL LIFE REMAINING on the display, that means 99% of the current oil life remains. The engine oil life system will alert you to change the oil on a schedule consistent with your driving conditions. When the remaining oil life is low, the CHANGE ENGINE OIL SOON message will appear on the display. See “CHANGE ENGINE OIL SOON” under DIC Warnings and Messages on page 3-58. You should change the oil as soon as you can.
See Engine Oil on page 5-13. In addition to the engine oil life system monitoring the oil life, additional maintenance is recommended in the Maintenance Schedule in this manual. See Scheduled Maintenance on page 6-3 for more information. Remember, you must reset the OIL LIFE display yourself after each oil change. It will not reset itself. Also, be careful not to reset the OIL LIFE display accidentally at any time other than when the oil has just been changed. It cannot be reset accurately until the next oil change. To reset the engine oil life system, see Engine Oil Life System on page 5-15.
PARK ASSIST If your vehicle has the Ultrasonic Rear Parking Assist (URPA) system, press the vehicle information button until PARK ASSIST displays. This display allows the system to be turned on or off. Once in this display, press the set/reset button to select between ON or OFF. If you choose ON, the system will be turned on. If you choose OFF, the system will be turned off. The URPA system automatically turns back on after each vehicle start. When the URPA system is turned off and the vehicle is shifted out of P (Park), the DIC will display the PARK ASSIST OFF message as a reminder that the system has been turned off. See DIC Warnings and Messages on page 3-58 and Ultrasonic Rear Parking Assist (URPA) on page 2-34
for more information.Instrument Panel
3-49
UNITS Press the vehicle information button until UNITS displays. This display allows you to select between English or Metric units of measurement. Once in this display, press the set/reset button to select between ENGLISH or METRIC units. All of the vehicle information will then be displayed in the unit of measurement selected.
FRONT TIRES or REAR TIRES On vehicles with the Tire Pressure Monitor System (TPMS), the pressure for each tire can be viewed in the DIC. The tire pressure will be shown in either pounds per square inch (psi) or kilopascals (kPa). Press the vehicle information button until the DIC displays FRONT TIRES PSI (kPa) LEFT ## RIGHT ##. Press the vehicle information button again until the DIC displays REAR TIRES PSI (kPa) LEFT ## RIGHT ##.
3-50
Instrument Panel
If a low or high tire pressure condition is detected by the system while driving, a message advising you to check the pressure in a specific tire will appear in the display. See Inflation - Tire Pressure on page 5-43 and DIC Warnings and Messages on page 3-58 for more information. If the tire pressure display shows dashes instead of a value, there may be a problem with your vehicle. If this consistently occurs, see your dealer/retailer for service.
RELEARN REMOTE KEY This display allows you to match Remote Keyless Entry (RKE) transmitters to your vehicle. This procedure will erase all previously learned transmitters. Therefore, they must be relearned as additional transmitters.
To match an RKE transmitter to your vehicle: 1. Press the vehicle information
button until PRESS V TO RELEARN REMOTE KEY displays.
2. Press the set/reset button until
REMOTE KEY LEARNING ACTIVE is displayed.
3. Press and hold the lock and
unlock buttons on the first transmitter at the same time for about 15 seconds. On vehicles with memory recall seats, the first transmitter learned will match driver 1 and the second will match driver 2. A chime will sound indicating that the transmitter is matched. 4. To match additional transmitters
at this time, repeat Step 3. Each vehicle can have a maximum of eight transmitters matched to it.
5. To exit the programming mode,
you must cycle the key to LOCK/OFF.
COMPASS ZONE SETTING This display will be available if the vehicle has a compass. See DIC Compass on page 3-56
for more information. COMPASS RECALIBRATION This display will be available if the vehicle has a compass. See DIC Compass on page 3-56 for more information. Blank Display This display shows no information. Trip/Fuel Menu Items 3 (Trip/Fuel): Press this button to scroll through the following menu items: ODOMETER Press the trip/fuel button until ODOMETER displays. This display shows the distance the vehicle has been driven in either miles (mi) or kilometers (km). Pressing the trip odometer reset stem will also display the odometer.To switch between English and metric measurements, see “UNITS” earlier in this section. TRIP A and TRIP B Press the trip/fuel button until TRIP A or TRIP B displays. This display shows the current distance traveled in either miles (mi) or kilometers (km) since the last reset for each trip odometer. Both trip odometers can be used at the same time. Pressing the trip odometer reset stem will also display the trip odometers. Each trip odometer can be reset to zero separately by pressing the set/reset button or the trip odometer reset stem while the desired trip odometer is displayed. The trip odometer has a feature called the retro-active reset. This can be used to set the trip odometer to the number of miles (kilometers) driven since the ignition was last turned on. This can be used if the trip odometer is not reset at the beginning of the trip.
To use the retro-active reset feature, press and hold the set/reset button for at least four seconds. The trip odometer will display the number of miles (mi) or kilometers (km) driven since the ignition was last turned on and the vehicle was moving. Once the vehicle begins moving, the trip odometer will accumulate mileage. For example, if the vehicle was driven 5 miles (8 km) before it is started again, and then the retro-active reset feature is activated, the display will show 5 miles (8 km). As the vehicle begins moving, the display will then increase to 5.1 miles (8.2 km), 5.2 miles (8.4 km), etc. If the retro-active reset feature is activated after the vehicle is started, but before it begins moving, the display will show the number of miles (mi) or kilometers (km) that were driven during the last ignition cycle.
Instrument Panel
3-51
RANGE Press the trip/fuel button until RANGE displays. This display shows the approximate number of remaining miles (mi) or kilometers (km) the vehicle can be driven without refueling. The display will show LOW if the fuel level is low. The fuel range estimate is based on an average of the vehicle’s fuel economy over recent driving history and the amount of fuel remaining in the fuel tank. This estimate will change if driving conditions change. For example, if driving in traffic and making frequent stops, this display may read one number, but if the vehicle is driven on a freeway, the number may change even though the same amount of fuel is in the fuel tank. This is because different driving conditions produce different fuel economies. Generally, freeway driving produces better fuel economy than city driving. Fuel range cannot be reset.
3-52
Instrument Panel
AVG (Average) ECONOMY Press the trip/fuel button until AVG ECONOMY displays. This display shows the approximate average miles per gallon (mpg) or liters per 100 kilometers (L/100 km). This number is calculated based on the number of mpg (L/100 km) recorded since the last time this menu item was reset. To reset AVG ECONOMY, press and hold the set/reset button.
TIMER Press the trip/fuel button until TIMER displays. This display can be used as a timer. To start the timer, press the set/reset button while TIMER is displayed. The display will show the amount of time that has passed since the timer was last reset, not including time the ignition is off.
Time will continue to be counted as long as the ignition is on, even if another display is being shown on the DIC. The timer will record up to 99 hours, 59 minutes and 59 seconds (99:59:59) after which the display will return to zero. To stop the timer, press the set/reset button briefly while TIMER is displayed. To reset the timer to zero, press and hold the set/reset button while TIMER is displayed.
FUEL USED Press the trip/fuel button until FUEL USED displays. This display shows the number of gallons (gal) or liters (L) of fuel used since the last reset of this menu item. To reset the fuel used information, press and hold the set/reset button while FUEL USED is displayed.
AVG (Average) SPEED Press the trip/fuel button until AVG SPEED displays. This display shows the average speed of the vehicle in miles per hour (mph) or kilometers per hour (km/h). This average is calculated based on the various vehicle speeds recorded since the last reset of this value. To reset the value to zero, press and hold the set/reset button.
Blank Display This display shows no information.
DIC Operation and Displays (Without DIC Buttons) If your vehicle does not have DIC buttons, the information below explains the operation of this system. The DIC has different displays which can be accessed by pressing the trip odometer reset stem located on the instrument panel cluster. Pressing the trip odometer reset stem will also turn off, or acknowledge, DIC messages. The DIC displays trip and vehicle system information, and warning messages if a system problem is detected. If your vehicle does not have DIC buttons, you can use the trip odometer reset stem to view the following displays: odometer, trip
odometers, oil life, park assist menu for vehicles with the Ultrasonic Rear Parking Assist (URPA) system, Remote Keyless Entry (RKE) transmitter programming, units, and display language. If your vehicle has DIC buttons, you can use the trip odometer reset stem to view the following displays: odometer and trip odometers. Trip Odometer Reset Stem Menu Items ODOMETER Press the trip odometer reset stem until ODOMETER displays. This display shows the distance the vehicle has been driven in either miles (mi) or kilometers (km). To switch between English and metric measurements, see “UNITS” later in this section.
Instrument Panel
3-53
TRIP A or TRIP B Press the trip odometer reset stem until TRIP A or TRIP B displays. This display shows the current distance traveled in either miles (mi) or kilometers (km) since the last reset for each trip odometer. Both trip odometers can be used at the same time. Each trip odometer can be reset to zero separately by pressing and holding the trip odometer reset stem while the desired trip odometer is displayed. The trip odometer has a feature called the retro-active reset. This can be used to set the trip odometer to the number of miles (kilometers) driven since the ignition was last turned on. This can be used if the trip odometer is not reset at the beginning of the trip.
3-54
Instrument Panel
To use the retro-active reset feature, press and hold the trip odometer reset stem for at least four seconds. The trip odometer will display the number of miles (mi) or kilometers (km) driven since the ignition was last turned on and the vehicle was moving. Once the vehicle begins moving, the trip odometer will accumulate mileage. For example, if the vehicle was driven 5 miles (8 km) before it is started again, and then the retro-active reset feature is activated, the display will show 5 miles (8 km). As the vehicle begins moving, the display will then increase to 5.1 miles (8.2 km), 5.2 miles (8.4 km), etc. If the retro-active reset feature is activated after the vehicle is started, but before it begins moving, the display will show the number of miles (mi) or kilometers (km) that were driven during the last ignition cycle.
OIL LIFE To access this display, the vehicle must be in P (Park). Press the trip odometer reset stem until OIL LIFE REMAINING displays. This display shows an estimate of the oil’s remaining useful life. If you see 99% OIL LIFE REMAINING on the display, that means 99% of the current oil life remains. The engine oil life system will alert you to change the oil on a schedule consistent with your driving conditions. When the remaining oil life is low, the CHANGE ENGINE OIL SOON message will appear on the display. See “CHANGE ENGINE OIL SOON” under DIC Warnings and Messages on page 3-58. You should change the oil as soon as you can. See Engine Oil on page 5-13. In addition to the engine oil life system monitoring the oil life, additional maintenance is recommended in the Maintenance Schedule in this manual. See Scheduled Maintenance on page 6-3 for more information.
Remember, you must reset the OIL LIFE display yourself after each oil change. It will not reset itself. Also, be careful not to reset the OIL LIFE display accidentally at any time other than when the oil has just been changed. It cannot be reset accurately until the next oil change. To reset the engine oil life system, see Engine Oil Life System on page 5-15.
PARK ASSIST To access this display, the vehicle must be in P (Park). If your vehicle has the Ultrasonic Rear Parking Assist (URPA) system, press the trip odometer reset stem until PARK ASSIST displays. This display allows the system to be turned on or off. Once in this display, press and hold the trip odometer reset stem to select between ON or OFF. If you choose ON, the system will be turned on.
Instrument Panel
3-55
If you choose OFF, the system will be turned off. The URPA system automatically turns back on after each vehicle start. When the URPA system is turned off and the vehicle is shifted out of P (Park), the DIC will display the PARK ASSIST OFF message as a reminder that the system has been turned off. See DIC Warnings and Messages on page 3-58 and Ultrasonic Rear Parking Assist (URPA) on page 2-34
for more information.RELEARN REMOTE KEY To access this display, the vehicle must be in P (Park). This display allows you to match Remote Keyless Entry (RKE) transmitters to your vehicle. This procedure will erase all previously learned transmitters. Therefore, they must be relearned as additional transmitters.
To match an RKE transmitter to your vehicle: 1. Press the trip odometer reset
stem until RELEARN REMOTE KEY displays.
4. To match additional transmitters
at this time, repeat Step 3. Each vehicle can have a maximum of eight transmitters matched to it.
2. Press and hold the trip odometer
reset stem until REMOTE KEY LEARNING ACTIVE is displayed.
5. To exit the programming mode,
you must cycle the key to LOCK/OFF.
3. Press and hold the lock and
unlock buttons on the first transmitter at the same time for about 15 seconds. On vehicles with memory recall seats, the first transmitter learned will match driver 1 and the second will match driver 2. A chime will sound indicating that the transmitter is matched.
UNITS To access this display, the vehicle must be in P (Park). Press the trip odometer reset stem until UNITS displays. This display allows you to select between English or Metric units of measurement. Once in this display, press and hold the trip odometer reset stem to select between ENGLISH or METRIC units. All of the vehicle information will then be displayed in the unit of measurement selected.
3-56
Instrument Panel
DISPLAY LANGUAGE To access this display, the vehicle must be in P (Park). This display allows you to select the language in which the DIC messages will appear. To select a language: 1. Press the trip odometer reset
stem until DISPLAY LANGUAGE displays.
2. Continue to press and hold the
trip odometer reset stem to scroll through all of the available languages. The available languages are ENGLISH (default), FRANCAIS (French), ESPANOL (Spanish), and NO CHANGE.
3. Once the desired language is displayed, release the trip odometer reset stem to set your choice.
DIC Compass Your vehicle may have a compass in the Driver Information Center (DIC).
Compass Zone The zone is set to zone eight upon leaving the factory. Your dealer/ retailer will set the correct zone for your location. Under certain circumstances, such as during a long distance cross-country trip or moving to a new state or province, it will be necessary to compensate for compass variance by resetting the zone through the DIC if the zone is not set correctly. Compass variance is the difference between the earth’s magnetic north and true geographic north. If the compass is not set to the zone where you live, the compass may give false readings. The compass must be set to the variance zone in which the vehicle is traveling.
To adjust for compass variance, use the following procedure: Compass Variance (Zone) Procedure 1. Do not set the compass zone
when the vehicle is moving. Only set it when the vehicle is in P (Park). Press the vehicle information button until PRESS V TO CHANGE COMPASS ZONE displays.
2. Find the vehicle’s current
location and variance zone number on the map. Zones 1 through 15 are available.
3. Press the set/reset button to scroll through and select the appropriate variance zone.
4. Press the trip/fuel button until
the vehicle heading, for example, N for North, is displayed in the DIC.
5. If calibration is necessary,
calibrate the compass. See “Compass Calibration Procedure” following.
Compass Calibration The compass can be manually calibrated. Only calibrate the compass in a magnetically clean and safe location, such as an open parking lot, where driving the vehicle in circles is not a danger. It is suggested to calibrate away from tall buildings, utility wires, manhole covers, or other industrial structures, if possible. If CAL should ever appear in the DIC display, the compass should be calibrated.
If the DIC display does not show a heading, for example, N for North, or the heading does not change after making turns, there may be a strong magnetic field interfering with the compass. Such interference may be caused by a magnetic CB or cell phone antenna mount, a magnetic emergency light, magnetic note pad holder, or any other magnetic item. Turn off the vehicle, move the magnetic item, then turn on the vehicle and calibrate the compass. To calibrate the compass, use the following procedure:
Compass Calibration Procedure 1. Before calibrating the compass,
make sure the compass zone is set to the variance zone in which the vehicle is located. See “Compass Variance (Zone) Procedure” earlier in this section.
Instrument Panel
3-57
Do not operate any switches such as window, sunroof, climate controls, seats, etc. during the calibration procedure.
2. Press the vehicle information
button until PRESS V TO CALIBRATE COMPASS displays.
3. Press the set/reset button to start
the compass calibration.
4. The DIC will display
CALIBRATING: DRIVE IN CIRCLES. Drive the vehicle in tight circles at less than 5 mph (8 km/h) to complete the calibration. The DIC will display CALIBRATION COMPLETE for a few seconds when the calibration is complete. The DIC display will then return to the previous menu.
3-58
Instrument Panel
DIC Warnings and Messages Messages are displayed on the DIC to notify the driver that the status of the vehicle has changed and that some action may be needed by the driver to correct the condition. Multiple messages may appear one after another. Some messages may not require immediate action, but you can press any of the DIC buttons on the instrument panel or the trip odometer reset stem on the instrument panel cluster to acknowledge that you received the messages and to clear them from the display. Some messages cannot be cleared from the DIC display because they are more urgent. These messages require action before they can
be cleared. You should take any messages that appear on the display seriously and remember that clearing the messages will only make the messages disappear, not correct the problem. The following are the possible messages that can be displayed and some information about them.
ALL WHEEL DRIVE OFF If your vehicle has the All-Wheel Drive (AWD) system, this message displays when there is a compact spare tire on the vehicle, when the Antilock Brake System (ABS) warning light comes on, or when the rear differential fluid is overheating. This message turns off when the differential fluid cools. The AWD system is disabled until the compact spare tire is replaced by a full-size tire. If the warning
message is still on after putting on the full-size tire, you need to reset the warning message. To reset the warning message, turn the ignition off and then back on again after 30 seconds. If the message stays on, see your dealer/retailer right away. See All-Wheel Drive (AWD) System on page 4-7 for more information. AUTOMATIC LIGHT CONTROL OFF This message displays when the automatic headlamps are turned off. This message clears itself after 10 seconds. AUTOMATIC LIGHT CONTROL ON This message displays when the automatic headlamps are turned on. This message clears itself after 10 seconds.
Instrument Panel
3-59
CHECK TIRE PRESSURE On vehicles with the Tire Pressure Monitor System (TPMS), this message displays when the pressure in one or more of the vehicle’s tires needs to be checked. This message also displays LEFT FRONT, RIGHT FRONT, LEFT REAR, or RIGHT REAR to indicate which tire needs to be checked. You can receive more than one tire pressure message at a time. To read the other messages that may have been sent at the same time, press the set/reset button or the trip odometer reset stem. If a tire pressure message appears on the DIC, stop as soon as you can. Have the tire pressures checked and set to those shown on the Tire Loading Information label. See Tires on page 5-37, Loading the Vehicle on page 4-16, and Inflation - Tire Pressure on page 5-43. The DIC
also shows the tire pressure values. See “DIC Operation and Displays (With DIC Buttons)” earlier in this section. If the tire pressure is low, the low tire pressure warning light comes on. See Tire Pressure Light on page 3-41.
CRUISE SET TO XXX This message displays whenever the cruise control is set. See Cruise Control on page 3-9 for more information.
DRIVER DOOR OPEN This message displays and a chime sounds if the driver door is not fully closed and the vehicle is shifted out of P (Park). Stop and turn off the vehicle, check the door for obstructions, and close the door again. Check to see if the message still appears on the DIC.
BATTERY SAVER ACTIVE This message displays when the system detects that the battery voltage is dropping below expected levels. The battery saver system starts reducing certain features of the vehicle that you may be able to notice. At the point that the features are disabled, this message is displayed. It means that the vehicle is trying to save the charge in the battery. Turn off all unnecessary accessories to allow the battery to recharge. The normal battery voltage range is 11.5 to 15.5 volts. CHANGE ENGINE OIL SOON This message displays when the engine oil needs to be changed. When you change the engine oil, be sure to reset the CHANGE ENGINE OIL SOON message. See Engine Oil Life System on page 5-15 for information on how to reset the message. See Engine Oil on page 5-13 and Scheduled Maintenance on page 6-3 for more information.
3-60
Instrument Panel
ENGINE HOT A/C (Air Conditioning) OFF This message displays when the engine coolant becomes hotter than the normal operating temperature. See Engine Coolant Temperature Gage on page 3-41. To avoid added strain on a hot engine, the air conditioning compressor automatically turns off. When the coolant temperature returns to normal, the air conditioning compressor turns back on. You can continue to drive your vehicle. If this message continues to appear, have the system repaired by your dealer/retailer as soon as possible to avoid damage to the engine.
If you drive your vehicle
ENGINE OVERHEATED IDLE ENGINE Notice: while the engine is overheating, severe engine damage may occur. If an overheat warning appears on the instrument panel cluster and/or DIC, stop the vehicle as soon as possible. Do not increase the engine speed above normal idling speed. See Engine Overheating on page 5-24
for more information. This message displays when the engine coolant temperature is too hot. Stop and allow the vehicle to idle until it cools down. See Engine Coolant Temperature Gage on page 3-41. See Overheated Engine Protection Operating Mode on page 5-25
for information on driving to a safe place in an emergency.If you drive your vehicle
ENGINE OVERHEATED STOP ENGINE Notice: while the engine is overheating, severe engine damage may occur. If an overheat warning appears on the instrument panel cluster and/or DIC, stop the vehicle as soon as possible. See Engine Overheating on page 5-24 for more information. This message displays and a continuous chime sounds if the engine cooling system reaches unsafe temperatures for operation. Stop and turn off the vehicle as soon as it is safe to do so to avoid severe damage. This message clears when the engine has cooled to a safe operating temperature.
FUEL LEVEL LOW This message displays and a chime sounds if the fuel level is low. Refuel as soon as possible. See Fuel Gage on page 3-46
and Fuel on page 5-5 for more information. HEATED WASH (Washer) FLUID SYSTEM OFF This message displays when you manually turn off the heated windshield washer fluid system or when the system automatically turns off. See “Heated Windshield Washer” under Windshield Washer on page 3-8 for more information. This message clears itself after 10 seconds.ENGINE POWER IS REDUCED This message displays and a chime sounds when the cooling system temperature gets too hot and the engine further enters the engine coolant protection mode. See Engine Overheating on page 5-24 for further information. This message also displays when the vehicle’s engine power is reduced. Reduced engine power can affect the vehicle’s ability to accelerate. If this message is on, but there is no reduction in performance, proceed to your destination. The performance may be reduced the next time the vehicle is driven. The vehicle may be driven at a reduced speed while this message is on, but acceleration and speed may be reduced. Anytime this message stays on, the vehicle should be taken to your dealer/ retailer for service as soon as possible.
Instrument Panel
3-61
HEATING WASH (Washer) FLUID WASH (Washer) WIPES PENDING This message displays when you turn on the heated windshield washer fluid system. See “Heated Windshield Washer” under Windshield Washer on page 3-8
for more information.HOOD OPEN On some models, this message displays and a chime sounds if the hood is not fully closed. Stop and turn off the vehicle, check the hood for obstructions, and close the hood again. Check to see if the message still appears on the DIC. ICE POSSIBLE DRIVE WITH CARE This message displays when the outside air temperature is cold enough to create icy road conditions. Adjust your driving accordingly.
3-62
Instrument Panel
LEFT REAR DOOR OPEN This message displays and a chime sounds if the driver side rear door is not fully closed and the vehicle is shifted out of P (Park). Stop and turn off the vehicle, check the door for obstructions, and close the door again. Check to see if the message still appears on the DIC.
LIFTGATE OPEN This message displays and a chime sounds if the liftgate is open while the ignition is in ON/RUN. Turn off the vehicle and check the liftgate. Restart the vehicle and check for the message on the DIC display.
If you drive your vehicle
OIL PRESSURE LOW STOP ENGINE Notice: while the engine oil pressure is low, severe engine damage may occur. If a low oil pressure warning appears on the Driver Information Center (DIC), stop the vehicle as soon as possible. Do not drive the vehicle until the cause of the low oil pressure is corrected. See Engine Oil on page 5-13 for more information. This message displays if low oil pressure levels occur. Stop the vehicle as soon as safely possible and do not operate it until the cause of the low oil pressure has been corrected. Check the oil as soon as possible and have your vehicle serviced by your dealer/retailer. See Engine Oil on page 5-13.
PARK ASSIST OFF If your vehicle has the Ultrasonic Rear Parking Assist (URPA) system, after the vehicle has been started and shifted out of P (Park), this message displays to remind the driver that the URPA system has been turned off. Press the set/reset button or the trip odometer reset stem to acknowledge this message and clear it from the DIC display. To turn the URPA system back on, see Ultrasonic Rear Parking Assist (URPA) on page 2-34.
PASSENGER DOOR OPEN This message displays and a chime sounds if the passenger door is not fully closed and the vehicle is shifted out of P (Park). Stop and turn off the vehicle, check the door for obstructions, and close the door again. Check to see if the message still appears on the DIC.
REMOTE KEY LEARNING ACTIVE This message displays while you are matching a Remote Keyless Entry (RKE) transmitter to your vehicle. See “Matching Transmitter(s) to Your Vehicle” under Remote Keyless Entry (RKE) System Operation on page 2-4 and DIC Operation and Displays (With DIC Buttons) on page 3-47 or DIC Operation and Displays (Without DIC Buttons) on page 3-53 for more information. REPLACE BATTERY IN REMOTE KEY This message displays if a Remote Keyless Entry (RKE) transmitter battery is low. The battery needs to be replaced in the transmitter. See “Battery Replacement” under Remote Keyless Entry (RKE) System Operation on page 2-4.
RIGHT REAR DOOR OPEN This message displays and a chime sounds if the passenger side rear door is not fully closed and the vehicle is shifted out of P (Park). Stop and turn off the vehicle, check the door for obstructions, and close the door again. Check to see if the message still appears on the DIC. SERVICE A/C (Air Conditioning) SYSTEM This message displays when the electronic sensors that control the air conditioning and heating systems are no longer working. Have the climate control system serviced by your dealer/retailer if you notice a drop in heating and air conditioning efficiency.
Instrument Panel
3-63
SERVICE AIR BAG This message displays if there is a problem with the airbag system. Have your dealer/retailer inspect the system for problems. See Airbag Readiness Light on page 3-36 and Airbag System on page 1-50 for more information.
SERVICE ALL WHEEL DRIVE If your vehicle has the All-Wheel Drive (AWD) system, this message displays if there is a problem with this system. If this message appears, stop as soon as possible and turn off the vehicle. Restart the vehicle after 30 seconds and check for the message on the DIC display. If the message is still displayed or appears again when you begin driving, the AWD system needs service. See your dealer/retailer.
3-64
Instrument Panel
SERVICE BATTERY CHARGING SYSTEM On some vehicles, this message displays if there is a problem with the battery charging system.