- 2016 GMC Acadia Owners Manuals
- GMC Acadia Owners Manuals
- 2010 GMC Acadia Owners Manuals
- GMC Acadia Owners Manuals
- 2007 GMC Acadia Owners Manuals
- GMC Acadia Owners Manuals
- 2013 GMC Acadia Owners Manuals
- GMC Acadia Owners Manuals
- 2012 GMC Acadia Owners Manuals
- GMC Acadia Owners Manuals
- 2014 GMC Acadia Owners Manuals
- GMC Acadia Owners Manuals
- 2009 GMC Acadia Owners Manuals
- GMC Acadia Owners Manuals
- 2008 GMC Acadia Owners Manuals
- GMC Acadia Owners Manuals
- 2011 GMC Acadia Owners Manuals
- GMC Acadia Owners Manuals
- 2015 GMC Acadia Owners Manuals
- GMC Acadia Owners Manuals
- Download PDF Manual
-
to playback by album, press the pushbutton located below the Sort By label. From the sort screen, push one of the buttons below the album button. Press the pushbutton below the back label to return to the main music navigator screen. Now the album name is displayed on the second line between the arrows and songs from the current album begins to play. Once all songs from that album are played, the player moves to the next album in alphabetical order on the CD-R or CD-RW and begins playing MP3/WMA files from that album.
To exit music navigator mode, press the pushbutton below the Back label to return to normal MP3/WMA playback.
Using an MP3 (Radio with CD and DVD Player) MP3/WMA CD-R or CD-RW Disc Compressed Audio or Mixed Mode Discs The radio also plays discs that contain both uncompressed CD audio (.CDA files) and MP3/WMA files depending on which slot the disc is loaded into. By default the radio reads only the uncompressed audio (.CDA) and ignores the MP3/WMA files on the DVD deck. On the CD deck, pressing the CAT (category) button toggles between compressed and uncompressed audio format, the default being the uncompressed format (.CDA).
MP3/WMA Format To create an MP3/WMA disc on a personal computer: (cid:129) Make sure the MP3/WMA files
are recorded on a CD-R or CD-RW disc.
(cid:129) Do not mix standard audio and
MP3/WMA files on one disc. The CD player (lower slot) is able to read and play a maximum combination of 512 files and folders. The DVD player (upper slot) is able to read 255 folders, 15 playlists and 40 sessions. (cid:129) Create a folder structure that
makes it easy to find songs while driving. Organize songs by albums using one folder for each album. Each folder or album should contain 18 songs or less.
(cid:129) Avoid subfolders. The system can
support up to eight subfolders deep, however, keep the total number of folders to a minimum in order to reduce the complexity and confusion in trying to locate a particular folder during playback.
Instrument Panel
3-99
(cid:129) Make sure playlists have
a .m3u, .wpl or .pls extension as other file extensions might not work.
(cid:129) Minimize the length of the file,
folder or playlist names. Long file, folder, or playlist names, or a combination of a large number of files and folders, or playlists could cause the player to be unable to play up to the maximum number of files, folders, playlists, or sessions. To play a large number of files, folders, playlists, or sessions, minimize the length of the file, folder, or playlist name. Long names also take up more space on the display, potentially getting cut off. Finalize the audio disc before burning it. Trying to add music to an existing disc could cause the disc not to function in the player.
(cid:129) (cid:129) 3-100
Instrument Panel
Root Directory The root directory of the CD-R or CD-RW disc is treated as a folder. If the root directory has compressed audio files, the directory is displayed as F1 ROOT. All files contained directly under the root directory are accessed prior to any root directory folders. However, playlists (Px) are always accessed before root folders or files.
Empty Directory or Folder If a root directory or a folder exists somewhere in the file structure that contains only folders/subfolders and no compressed files directly beneath them, the player advances to the next folder in the file structure that contains compressed audio files. The empty folder does not display.
No Folder When the CD-R or CD-RW disc contains only compressed files, the files are located under the root folder. The next and previous folder function does not function on a CD-R or CD-RW that was recorded without folders or playlists. When displaying the name of the folder the radio displays ROOT. When the CD-R or CD-RW disc contains only playlists and compressed audio files, but no folders, all files are located under the root folder. The folder down and the folder up buttons search playlists (Px) first and then goes to the root folder. When the radio displays the name of the folder the radio displays ROOT.
Order of Play Tracks recorded to the CD-R or CD-RW disc are played in the following order: (cid:129) Play begins from the first track in the first playlist and continues sequentially through all tracks in each playlist. When the last track of the last playlist has played, play continues from the first track of the first playlist.
(cid:129) Play begins from the first track in
the first folder and continues sequentially through all tracks in each folder. When the last track of the last folder has played, play continues from the first track of the first folder.
When play enters a new folder, the display does not automatically show the new folder name unless the folder mode has been chosen as the default display. The new track name displays.
File System and Naming The song name that is displayed is the song name that is contained in the ID3 tag. If the song name is not present in the ID3 tag, then the radio displays the file name without the extension (such as .mp3) as the track name. Track names longer than 32 characters or four pages are shortened. Parts of words on the last page of text and the extension of the filename displays.
Preprogrammed Playlists Preprogrammed playlists that were created using WinAmp™, MusicMatch™, or Real Jukebox™ software can be accessed, however, they cannot be edited using the radio. These playlists are treated as special folders containing compressed audio song files.
Playing an MP3/WMA (In Either the DVD or CD Slot) Insert a CD-R or CD-RW disc partway into either the top or bottom slot, label side up. The player pulls it in, and the CD-R or CD-RW should begin playing. Depending on the format of the disc, a softkey menu appears and allows navigation of the disc. The menu reads left to right as RDM (Randomize song play order), a Folder icon with left and right arrows (to move up or down through available folders), a PL tag if the disc has a Playlist available, and a Music Navigator tag. If a Playlist tag is shown, toggling this key brings up a Folder softkey only or the menu as previously described. If the ignition or radio is turned off with a CD-R or CD-RW disc in the player it stays in the player. When the ignition or radio is turned back
Instrument Panel
3-101
on, the CD-R or CD-RW starts to play where it stopped, if it was the last selected audio source. As each new track starts to play, the track number and song title displays. Z CD (Eject): Press and release this button to eject the CD-R or CD-RW that is currently playing in the bottom slot. A beep sounds and Ejecting Disc displays. Once the disc is ejected, Remove Disc displays. The CD-R or CD-RW disc can be removed. If the CD-R or CD-RW disc is not removed, after several seconds, the CD-R or CD-RW disc automatically pulls back into the player.
If loading and reading of a CD cannot be completed, such as unknown format, etc., and the disc fails to eject, press and hold this button for more than five seconds to force the disc to eject.
3-102
Instrument Panel
Z DVD (Eject): Press and release this button to eject the CD-R or CD-RW that is currently playing in the top slot. A beep sounds and Ejecting Disc displays. Once the disc is ejected, Remove Disc displays. The CD-R or CD-RW disc can be removed. If the CD-R or CD-RW disc is not removed, after several seconds, the CD-R or CD-RW disc automatically pulls back into the player. If loading and reading of a CD cannot be completed, such as unknown format, etc., and the disc fails to eject, press and hold this button for more than five seconds to force the disc to eject.
f (Tune): Turn this knob to select MP3/WMA files on the CD-R or CD-RW that is currently playing.
©SEEK ¨: Press the left SEEK arrow to go to the start of the current MP3/WMA file, if more than five seconds have played. If less than five seconds have played, the previous MP3/WMA file plays. Press the right SEEK arrow to go to the next MP3/WMA file. If either SEEK arrow is held, or pressed multiple times, the player continues moving backward or forward through the MP3/WMA files on the CD. S c (Previous Folder): Press the pushbutton positioned under the Folder label to go to the first track in the previous folder. c T (Next Folder): Press the pushbutton positioned under the Folder label to go to the first track in the next folder.
s REV (Reverse): Press and hold this button to reverse playback quickly within an MP3/WMA file. Sound is heard at a reduced volume. Release this button to resume playing the file. The elapsed time of the file displays. \ FWD (Fast Forward): Press and hold this button to advance playback quickly within an MP3/ WMA file. Sound is heard at a reduced volume. Release this button to resume playing the file. The elapsed time of the file displays. RDM (Random): With the random setting, MP3/WMA files on the CD-R or CD-RW can be listened to in random, rather than sequential order. To play MP3/WMA files from the CD-R or CD-RW in random order, press the pushbutton positioned under the RDM label until Random Current Disc displays. Press the same pushbutton again to turn off random play.
h (Music Navigator): Use the music navigator feature to play MP3/WMA files on the CD-R or CD-RW in order by artist or album. Press the pushbutton located below the music navigator label. The player scans the disc to sort the files by artist and album ID3 tag information. It could take several minutes to scan the disc depending on the number of MP3/WMA files recorded to the CD-R or CD-RW disc.
To cancel music navigator while the player is scanning, press the pushbutton located below the music navigator label or eject the disc.
The radio can begin playing while it is scanning the disc in the background. When the scan is finished, the CD-R or CD-RW begins playing again.
Once the disc has been scanned, the player defaults to playing MP3/WMA files in order by artist. The current artist playing is shown on the second
line of the display between the arrows. To listen to MP3/WMA files by another artist, press the pushbutton located below either arrow button. The disc goes to the next or previous artist in alphabetical order. Continue pressing either button until the desired artist is displayed.
To change from playback by artist to playback by album, press the pushbutton located below the Sort By label. From the sort screen, push one of the buttons below the album button. Press the pushbutton below the back label to return to the main music navigator screen. Now the album name displays on the second line between the arrows and songs from the current album begin to play. Once all songs from that album are played, the player moves to the next album in alphabetical order on the CD-R or CD-RW and begins playing MP3/WMA files from that album.
Instrument Panel
3-103
To exit music navigator mode, press the pushbutton below the Back label to return to normal MP3/WMA playback. BAND: Press this button to listen to the radio when a CD or a DVD is playing. The CD or DVD remains inside the radio for future listening or viewing entertainment. DVD/CD AUX (Auxiliary): Press this button to cycle through DVD, CD, or Auxiliary when listening to the radio. The DVD/CD text label and a message showing track or chapter number displays when a disc is in either slot. Press this button again and the system automatically searches for an auxiliary input device, such as a portable audio player. If a portable audio player is not connected, “No Aux Input Device” displays.
3-104
Instrument Panel
If a disc is in both the DVD slot and the CD slot the DVD/CD AUX button cycles between the two sources and does not indicate “No Aux Input Device”. If a front auxiliary device is connected, the DVD/CD AUX button cycles through all available options, such as: DVD slot, CD slot, Front Auxiliary, and Rear Auxiliary (if available). See “Using the Auxiliary Input Jack(s)” later in this section, or “Audio/Video (A/V) Jacks” under, Rear Seat Entertainment (RSE) System on page 3-116 for more information.
If a MP3/WMA is inserted into top DVD slot, the rear seat operator can turn on the video screen and use the remote control to navigate the CD (tracks only).
XM Radio Messages XL (Explicit Language Channels): These channels, or any others, can be blocked at a customer’s request, by calling 1-800-852-XMXM (9696). XM Updating: The encryption code in the receiver is being updated, and no action is required. This process should take no longer than 30 seconds. No XM Signal: The system is functioning correctly, but the vehicle is in a location that is blocking the XM™ signal. When the vehicle is moved into an open area, the signal should return. Loading XM: The audio system is acquiring and processing audio and text data. No action is needed. This message should disappear shortly.
Channel Off Air: This channel is not currently in service. Tune in to another channel. Channel Unauth: This channel is blocked or cannot be received with your XM Subscription package. Channel Unavail: This previously assigned channel is no longer assigned. Tune to another station. If this station was one of the presets, choose another station for that preset button. No Artist Info: No artist information is available at this time on this channel. The system is working properly. No Title Info: No song title information is available at this time on this channel. The system is working properly.
No CAT Info: No category information is available at this time on this channel. The system is working properly. No Information: No text or informational messages are available at this time on this channel. The system is working properly. CAT Not Found: There are no channels available for the selected category. The system is working properly. XM Theftlocked: The XM receiver in the vehicle could have previously been in another vehicle. For security purposes, XM receivers cannot be swapped between vehicles. If this message is received after having the vehicle serviced, check with your dealer/retailer.
XM Radio ID: If tuned to channel 0, this message alternates with the XM™ Radio 8 digit radio ID label. This label is needed to activate the service. Unknown: If this message is received when tuned to channel 0, there could be a receiver fault. Consult with your dealer/retailer. Check XM Receivr: If this message does not clear within a short period of time, the receiver could have a fault. Consult with your dealer/retailer. XM Not Available: If this message does not clear within a short period of time, the receiver could have a fault. Consult with your dealer/retailer.
Instrument Panel
3-105
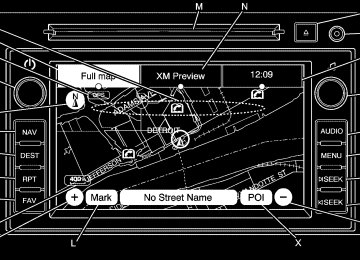
Navigation/Radio System For vehicles with a navigation radio system, see the separate Navigation System manual.
Bluetooth® Vehicles with a Bluetooth system can use a Bluetooth capable cell phone with a Hands Free Profile to make and receive phone calls. The system can be used while the key is in ON/RUN or ACC/ ACCESSORY position. The range of the Bluetooth system can be up to 30 ft. (9.1 m). Not all phones support all functions, and not all phones are guaranteed to work with the in-vehicle Bluetooth system. See gm.com/bluetooth for more information on compatible phones.
3-106
Instrument Panel
Voice Recognition The Bluetooth system uses voice recognition to interpret voice commands to dial phone numbers and name tags. Noise: Keep interior noise levels to a minimum. The system may not recognize voice commands if there is too much background noise. When to Speak: A short tone sounds after the system responds indicating when it is waiting for a voice command. Wait until the tone and then speak. How to Speak: Speak clearly in a calm and natural voice.
Audio System When using the in-vehicle Bluetooth system, sound comes through the vehicle’s front audio system speakers and overrides the audio system. Use the audio system volume knob, during a call, to change the volume level. The adjusted volume level remains in memory for later calls. To prevent missed calls, a minimum volume level is used if the volume is turned down too low.
Bluetooth Controls Use the buttons located on the steering wheel to operate the in-vehicle Bluetooth system. See Audio Steering Wheel Controls on page 3-128 for more information. b g (Push To Talk): Press to answer incoming calls, to confirm system information, and to start speech recognition. c x (Phone On Hook): Press to end a call, reject a call, or to cancel an operation.
Pairing A Bluetooth enabled cell phone must be paired to the in-vehicle Bluetooth system first and then connected to the vehicle before it can be used. See the cell phone manufacturers user guide for Bluetooth functions before pairing the cell phone. If a Bluetooth phone is not connected, calls will be made using OnStar® Hands-Free Calling, if available. Refer to the OnStar owner’s guide for more information. Pairing Information: (cid:129) Up to five cell phones can be paired to the in-vehicle Bluetooth system. The pairing process is disabled when the vehicle is moving. The in-vehicle Bluetooth system automatically links with the first available paired cell phone in the order the phone was paired.
(cid:129) Only one paired cell phone can be connected to the in-vehicle Bluetooth system at a time. (cid:129) Pairing should only need to be completed once, unless changes to the pairing information have been made or the phone is deleted.
To link to a different paired phone, see Linking to a Different Phone later in this section.
Pairing a Phone 1. Press and hold b g for two seconds. The system responds with “Ready” followed by a tone.
2. Say “Bluetooth”. The system
responds with “Bluetooth ready” followed by a tone.
3. Say “Pair”. The system responds with instructions and a four digit PIN number. The PIN number will be used in Step 4.
Instrument Panel
3-107
4. Start the Pairing process on the
cell phone that will be paired to the vehicle. Reference the cell phone manufacturers user guide for information on this process. Locate the device named “General Motors” in the list on the cellular phone and follow the instructions on the cell phone to enter the four digit PIN number that was provided in Step 3.
5. The system prompts for a name
for the phone. Use a name that best describes the phone. This name will be used to indicate which phone is connected. The system then confirms the name provided.
6. The system responds with “
has been successfully paired” after the pairing process is complete. 7. Repeat Steps 1 through 7 for additional phones to be paired.
(cid:129) (cid:129) 3-108
Instrument Panel
Listing All Paired and Connected Phones 1. Press and hold b g for two seconds. The system responds with “Ready” followed by a tone.
2. Say “Bluetooth”. The system
responds with “Bluetooth ready” followed by a tone.
3. Say “List”. The system lists all the paired Bluetooth devices. If a phone is connected to the vehicle, the system will say “Is connected” after the connected phone.
Deleting a Paired Phone 1. Press and hold b g for two seconds. The system responds with “Ready” followed by a tone.
2. Say “Bluetooth”. The system
responds with “Bluetooth ready” followed by a tone.
3. Say “Delete”. The system asks which phone to delete followed by a tone.
4. Say the name of the phone to
be deleted. If the phone name is unknown, use the “List” command for a list of all paired phones. The system responds with “Would you like to delete
? Yes or No” followed by a tone. 5. Say “Yes” to delete the phone. The system responds with “OK, deleting
”. Linking to a Different Phone 1. Press and hold b g for two seconds. The system responds with “Ready” followed by a tone.
2. Say “Bluetooth”. The system
responds with “Bluetooth ready” followed by a tone.
3. Say “Change phone”.
The system responds with “Please wait while I search for other phones”.
If another phone is found, the response will be “
is now connected”. If another phone is not found, the original phone remains connected. Storing Name Tags The system can store up to thirty phone numbers as name tags that are shared between the Bluetooth and OnStar systems. The system uses the following commands to store and retrieve phone numbers: (cid:129) Store (cid:129) Digit Store (cid:129) Directory
(cid:129) (cid:129) Using the Store Command The store command allows a phone number to be stored without entering the digits individually. 1. Press and hold b g for two seconds. The system responds with “Ready” followed by a tone.
2. Say “Store”. The system
responds with “Store, number please” followed by a tone.
3. Say the complete phone number
to be stored at once with no pauses.
If the number is correct, say “Yes”. If the number is not correct, say “No”. The system will ask for the number to be re-entered.
4. After the system stores the phone number, it responds with “Please say the name tag” followed by a tone.
5. Say a name tag for the phone
number. The name tag is recorded and the system responds with “About to store
. Does that sound OK?”. If the system recognizes the number it responds with “OK, Storing” and repeats the phone number. If the system is unsure it recognizes the phone number, it responds with “Store” and repeats the number followed by “Please say yes or no”.
If the name tag does not sound correct, say “No” and repeat Step 5. If the name tag sounds correct, say “Yes” and the name tag is stored. After the number is stored the system returns to the main menu.
Instrument Panel
3-109
Using the Digit Store Command The digit store command allows a phone number to be stored by entering the digits individually. 1. Press and hold b g for two seconds. The system responds with “Ready” followed by a tone.
2. Say “Digit Store”. The system responds with “Please say the first digit to store” followed by a tone.
3. Say the first digit to be stored.
The system will repeat back the digit it heard followed by a tone. Continue entering digits until the number to be stored is complete.
If an unwanted number is recognized by the system, say “Clear” at any time to clear the last number. To hear all of the numbers recognized by the system, say “Verify” at any time and the system will repeat them.
(cid:129) (cid:129) (cid:129) (cid:129) (cid:129) (cid:129) 3-110
Instrument Panel
4. After the complete number
has been entered, say “Store”. The system responds with “Please say the name tag” followed by a tone.
5. Say a name tag for the phone
number. The name tag is recorded and the system responds with “About to store
. Does that sound OK?”. If the name tag does not sound correct, say “No” and repeat Step 5. If the name tag sounds correct, say “Yes” and the name tag is stored. After the number is stored the system returns to the main menu.
Using the Directory Command The directory command lists all of the name tags stored by the system. To use the directory command: 1. Press and hold b g for two seconds. The system responds with “Ready” followed by a tone.
2. Say “Directory”. The system
responds with “Directory” and then plays back all of the stored name tags. When the list is complete, the system returns to the main menu.
Deleting Name Tags The system uses the following commands to delete name tags: (cid:129) Delete (cid:129) Delete all name tags
Using the Delete Command The delete command allows specific name tags to be deleted. To use the delete command: 1. Press and hold b g for two seconds. The system responds with “Ready” followed by a tone.
2. Say “Delete”. The system
responds with “Delete, please say the name tag” followed by a tone. 3. Say the name tag to be deleted. The system responds with “Would you like to delete,
? Please say yes or no”. If the name tag is correct, say “Yes” to delete the name tag. The system responds with “OK, deleting
, returning to the main menu.” If the name tag is incorrect, say “No”. The system responds with “No. OK, let’s try again, please say the name tag.” (cid:129) (cid:129) (cid:129) (cid:129) Using the Delete All Name Tags Command The delete all name tags command deletes all stored phone book name tags and route name tags for OnStar (if present). To use the delete all name tags command: 1. Press and hold b g for two seconds. The system responds with “Ready” followed by a tone.
2. Say “Delete all name tags”. The system responds with “You are about to delete all name tags stored in your phone directory and your route destination directory. Are you sure you want to do this? Please say yes or no.” (cid:129) Say “Yes” to delete all
name tags.
(cid:129) Say “No” to cancel the function and return to the main menu.
Making a Call Calls can be made using the following commands: (cid:129) Dial (cid:129) Digit Dial (cid:129) Call (cid:129) Re-dial
Using the Dial Command 1. Press and hold b g for two seconds. The system responds with “Ready” followed by a tone.
2. Say “Dial”. The system responds with “Dial using
. “Number please” followed by a tone. 3. Say the entire number without
pausing.
If the system recognizes the number, it responds with “OK, Dialing” and dials the number.
Instrument Panel
3-111
If the system does not recognize the number, it confirms the numbers followed by a tone. If the number is correct, say “Yes”. The system responds with “OK, Dialing” and dials the number. If the number is not correct, say “No”. The system will ask for the number to be re-entered.
Using the Digit Dial Command 1. Press and hold b g for two seconds. The system responds with “Ready” followed by a tone.
2. Say “Digit Dial”. The system
responds with “Digit dial using
, please say the first digit to dial” followed by a tone. 3. Say the digit to be dialed one
at a time. Following each digit, the system will repeat back the digit it heard followed by a tone.
(cid:129) (cid:129) 3-112
Instrument Panel
4. Continue entering digits until the number to be dialed is complete. After the whole number has been entered, say “Dial”. The system responds with “OK, Dialing” and dials the number.
If an unwanted number is recognized by the system, say “Clear” at any time to clear the last number. To hear all of the numbers recognized by the system, say “Verify” at any time and the system will repeat them.
Using the Call Command 1. Press and hold b g for two seconds. The system responds with “Ready” followed by a tone.
2. Say “Call”. The system responds with “Call using
. Please say the name tag” followed by a tone. 3. Say the name tag of the person
to call.
If the system clearly recognizes the name tag it responds with “OK, calling,
” and dials the number. If the system is unsure it recognizes the right name tag, it confirms the name tag followed by a tone. If the name tag is correct, say “Yes”. The system responds with “OK, calling, ” and dials the number. If the name tag is not correct, say “No”. The system will ask for the name tag to be re-entered. Once connected, the person called will be heard through the audio speakers.
Using the Re-dial Command 1. Press and hold b g for two seconds. The system responds with “Ready” followed by a tone.
2. After the tone, say “Re-dial”.
The system responds with “Re-dial using
” and dials the last number called from the connected Bluetooth phone. Once connected, the person called will be heard through the audio speakers.
Receiving a Call When an incoming call is received, the audio system mutes and a ring tone is heard in the vehicle. (cid:129) Press b g and begin speaking
to answer the call.
(cid:129) Press c x to ignore a call.
(cid:129) (cid:129) (cid:129) (cid:129) Call Waiting Call waiting must be supported on the Bluetooth phone and enabled by the wireless service carrier to work. (cid:129) Press b g to answer an
incoming call when another call is active. The original call is placed on hold.
(cid:129) Press b g again to return to the
original call. To ignore the incoming call, continue with the original call with no action.
(cid:129) Press c x to disconnect the current call and switch to the call on hold.
Three-Way Calling Three-Way Calling must be supported on the Bluetooth phone and enabled by the wireless service carrier to work. 1. While on a call press b g. The system responds with “Ready” followed by a tone.
2. Say “Three-way call”. The system
responds with “Three-way call, please say dial or call”.
3. Use the dial or call command to dial the number of the third party to be called.
4. Once the call is connected,
press b g to link all the callers together.
Ending a Call Press c x to end a call.
Instrument Panel
3-113
Muting a Call During a call, all sounds from inside the vehicle can be muted so that the person on the other end of the call cannot hear them.
To Mute a call 1. Press b g. The system
responds with “Ready” followed by a tone.
2. Say “Mute Call”. The system responds with “Call muted”.
To Cancel Mute 1. Press b g. The system
responds with “Ready” followed by a tone.
2. After the tone, say “Mute Call”.
The system responds with “Resuming call”.
(cid:129) 3-114
Instrument Panel
Transferring a Call Audio can be transferred between the in-vehicle Bluetooth system and the cell phone. To Transfer Audio to the Cell Phone During a call with the audio in the vehicle: 1. Press b g. The system
responds with “Ready” followed by a tone.
2. Say “Transfer Call.” The system responds with “Transferring call” and the audio will switch from the vehicle to the cell phone.
To Transfer Audio to the In-Vehicle Bluetooth System The cellular phone must be paired and connected with the Bluetooth system before a call can be transferred. The connection process can take up to two minutes after the key is turned to the ON/RUN or ACC/ACCESSORY position. During a call with the audio on the cell phone, press b g for more than two seconds. The audio switches from the cell phone to the vehicle.
Voice Pass-Thru Voice Pass-Thru allows access to the voice recognition commands on the cell phone. See the cell phone manufacturers user guide to see if the cell phone supports this feature. This feature can be used to verbally access contacts stored in the cell phone. 1. Press and hold b g for two seconds. The system responds with “Ready” followed by a tone.
2. Say “Bluetooth”. The system
responds with “Bluetooth ready” followed by a tone. 3. Say “Voice”. The system
responds with “OK, accessing
”. The cell phone’s normal prompt messages will go through its cycle according to the phone’s operating instructions.
(cid:129) Dual Tone Multi-Frequency (DTMF) Tones The in-vehicle Bluetooth system can send numbers and numbers stored as name tags during a call. This is used when calling a menu driven phone system. Account numbers can be programmed into the phonebook for retrieval during menu driven calls.
Sending a Number During a Call 1. Press b g. The system
responds with “Ready” followed by a tone.
2. Say “Dial”. The system responds
with “Say a number to send tones” followed by a tone.
3. Say the number to send.
If the system clearly recognizes the number it responds with “OK, Sending Number” and the dial tones are sent and the call continues. If the system is not sure it recognized the number properly, it responds “Dial Number, Please say yes or no?” followed by a tone. If the number is correct, say “Yes”. The system responds with “OK, Sending Number” and the dial tones are sent and the call continues.
Sending a Stored Name Tag During a Call 1. Press b g. The system
responds with “Ready” followed by a tone.
Instrument Panel
3-115
2. Say “Send name tag.”
The system responds with “Say a name tag to send tones” followed by a tone.
3. Say the name tag to send.
If the system clearly recognizes the name tag it responds with “OK, Sending
” and the dial tones are sent and the call continues. If the system is not sure it recognized the name tag properly, it responds “Dial , Please say yes or no?” followed by a tone. If the name tag is correct, say “Yes”. The system responds with “OK, Sending ” and the dial tones are sent and the call continues. (cid:129) (cid:129) (cid:129) (cid:129) 3-116
Instrument Panel
Clearing the System Unless information is deleted out of the in-vehicle Bluetooth system, it will be retained indefinitely. This includes all saved name tags in the phonebook and phone pairing information. For information on how to delete this information, see the above sections on Deleting a Paired Phone and Deleting Name Tags.
Other Information The Bluetooth® word mark and logos are owned by the Bluetooth® SIG, Inc. and any use of such marks by General Motors is under license. Other trademarks and trade names are those of their respective owners.
This device complies with Part 15 of the FCC Rules. Operation is subject to the following two conditions: 1. This device may not cause
harmful interference.
2. This device must accept any
interference received, including interference that may cause undesired operation.
This device complies with RSS-210
of Industry Canada. Operation is subject to the following two conditions: 1. This device may not causeinterference.
2. This device must accept any
interference received, including interference that may cause undesired operation of the device.
Changes or modifications to this system by other than an authorized service facility could void authorization to use this equipment.
Rear Seat Entertainment (RSE) System The vehicle may have a DVD Rear Seat Entertainment (RSE) system. The RSE system works with the vehicle’s audio system. The DVD player is part of the front radio. The RSE system includes a radio with a DVD player, a video display screen, audio/video jacks, two wireless headphones, and a remote control. See Radio(s) on page 3-77
for more information on the vehicle’s audio/DVD system.Before Driving The RSE is designed for rear seat passengers only. The driver cannot safely view the video screen while driving and should not try to do so.
In severe or extreme weather conditions the RSE system might or might not work until the temperature is within the operating range. The operating range for the RSE system is above −4°F (−20°C) or below 140°F (60°C). If the temperature of the vehicle is outside of this range, heat or cool the vehicle until the temperature is within the operating range of the RSE system.
Parental Control The RSE system may have a Parental Control feature, depending on the radio. To enable Parental Control, press and hold the radio power button for more than two seconds to stop all system features such as: radio, video screen, RSA, DVD and/or CD. While Parental Control is on, Q displays. When the radio is turned back on, Parental Control is unlocked.
Headphones
The RSE includes two 2-channel wireless headphones that are dedicated to this system. Channel 1
is dedicated to the video screen, while Channel 2 is dedicated to RSA selections. These headphones are used to listen to media such as CDs, DVDs, MP3/WMAs, DVD-As, radio, any auxiliary source connected to A/V jacks, or the auxiliary input jack, if the vehicle has this feature. The wireless headphones have an On/Off button, channel 1/2 switch, and a volume control. Switch the headphones to Off when not in use.Instrument Panel
3-117
Push the power button to turn on the headphones. An indicator light located on the headphones comes on. If the light does not come on, the batteries might need to be replaced. Intermittent sound or static on the headphones can also be an indication of weak batteries. See “Battery Replacement” later in this section for more information. The headphones automatically turn off after four hours of continuous use. To adjust the volume on the headphones, use the volume control located on the right side. Infrared transmitters are located at the rear of the RSE overhead console. The headphones shut off automatically to save the battery power if the RSE system and RSA are shut off or if the headphones are out of range of the transmitters for more than three minutes. Moving too far forward or stepping out of the vehicle, can cause the headphones to lose the audio signal.
3-118
Instrument Panel
For optimal audio performance, the headphones must be worn correctly. Headphones should be worn with the headband over the top of the head for best audio reception. The symbol L (Left) appears on the upper left side, above the ear pad and should be positioned on the left ear. The symbol R (Right) appears on the upper right side, above the ear pad and should be positioned on the right ear. Notice: Do not store the headphones in heat or direct sunlight. This could damage the headphones and repairs will not be covered by the warranty. Storage in extreme cold can weaken the batteries. Keep the headphones stored in a cool, dry place. If the foam ear pads attached to the headphones become worn or damaged, the pads can be replaced separately from the headphone set. See your dealer/retailer for more information.
Headphones should be stored in the front floor console and not in the front seat back pocket. Headphone damage can occur when the second row seats are folded forward.
Battery Replacement To change the batteries on the headphones: 1. Turn the screw to loosen the
battery door located on the left side of the headphones. Slide the battery door open.
2. Replace the two batteries in the
compartment. Make sure that they are installed correctly, using the diagram on the inside of the battery compartment.
3. Replace the battery door and
tighten the door screw.
If the headphones are to be stored for a long period of time, remove the batteries and keep them in a cool, dry place.
Audio/Video (A/V) Jacks
The A/V jacks, located on the rear of the floor console, allow audio or video signals to be connected from an auxiliary device such as a camcorder or a video game unit to the RSE system. Adapter connectors or cables (not supplied) might be required to connect the auxiliary device to the A/V jacks. Refer to the manufacturer’s instructions for proper usage.
The A/V jacks are color coded to match typical home entertainment system equipment. The yellow jack (A) is for the video input. The white jack (B) is for the left audio input. The red jack (C) is for the right audio input. Power for auxiliary devices is not supplied by the radio system. To use the auxiliary inputs of the RSE system, connect an external auxiliary device to the color-coded A/V jacks and turn both the auxiliary device and the video screen power on. If the video screen is in the DVD player mode, pressing the AUX (auxiliary) button on the remote control, switches the video screen from the DVD player mode to the auxiliary device. The radio can listen to the audio of the connected auxiliary device by sourcing to auxiliary. See Radio(s) on page 3-77
for more information.How to Change the RSE Video Screen Settings The screen display mode (normal, full, and zoom), screen brightness, and setup menu language can be changed from the on screen setup menu by using the remote control. To change a setting: 1. Press z. 2. Use n, q, p, o and r to
navigate and use the setup menu.
3. Press z again to remove the setup menu from the screen.
Audio Output Audio from the DVD player or auxiliary inputs can be heard through the following sources: (cid:129) Wireless Headphones (cid:129) Vehicle Speakers (cid:129) Vehicle wired headphone jacks on the rear seat audio system, if the vehicle has this feature.
Instrument Panel
3-119
The RSE system always transmits the audio signal to the wireless headphones, if there is audio available. See “Headphones” earlier in this section for more information. The DVD player is capable of outputting audio to the wired headphone jacks on the RSA system, if the vehicle has this feature. The DVD player can be selected as an audio source on the RSA system. See Rear Seat Audio (RSA) on page 3-125
for more information. When a device is connected to the A/V jacks, or the radio’s auxiliary input jack, if the vehicle has this feature, the rear seat passengers are able to hear audio from the auxiliary device through the wireless or wired headphones. The front seat passengers are able to listen to playback from this device through the vehicle speakers by selecting AUX as the source on the radio.3-120
Instrument Panel
Video Screen The video screen is located in the overhead console. When the video screen is not in use, push it up into its locked position. To use the video screen: 1. Push the release button located
on the overhead console.
2. Move the screen to the desired
position.
If a DVD is playing and the screen is raised to its locked position, the screen remains on; this is normal, and the DVD continues to play through the previous audio source. Press P on the remote control or eject the disc to turn off the screen.
The infrared receivers for the wireless headphones and the remote control are located at the rear of the overhead console. Notice: Avoid directly touching the video screen, as damage may occur. See “Cleaning the Video Screen” later in this section for more information.
Remote Control To use the remote control, aim it at the transmitter window at the rear of the overhead console and press the desired button. Direct sunlight or very bright light could affect the ability of the RSE transmitter to receive signals from the remote control. If the remote control does not seem to be working, the batteries might need to be replaced. See “Battery
Replacement” later in this section. Objects blocking the line of sight could also affect the function of the remote control. If a CD or DVD is in the Radio DVD slot, the remote control O button can be used to turn on the video screen display and start the disc. The radio can also turn on the video screen display. See Radio(s) on page 3-77
for more information. Notice: Storing the remote control in a hot area or in direct sunlight can damage it, and the repairs will not be covered by the warranty. Storage in extreme cold can weaken the batteries. Keep the remote control stored in a cool, dry place.Remote Control Buttons
O (Power): Press to turn the video screen on and off. P (Illumination): Press to turn the remote control backlight on. The backlight automatically times out after seven to ten seconds if no other button is pressed while the backlight is on. v (Title): Press to return the DVD to the main menu of the DVD. This function could vary for each disc. y (Main Menu): Press to access the DVD menu. The DVD menu is different on every DVD. Use the navigation arrows to move the cursor around the DVD menu. After making a selection press the enter button. This button only operates when using a DVD. n, q, p, o (Menu Navigation Arrows): Use the arrow buttons to navigate through a menu. r (Enter): Press to select the choice that is highlighted in any menu.
Instrument Panel
3-121
z (Display Menu): Press to adjust the brightness, screen display mode (normal, full, or zoom), and display the language menu. q (Return): Press to exit the current active menu and return to the previous menu. This button operates only when the display menu or a DVD menu is active. c (Stop): Press to stop playing, rewinding, or fast forwarding a DVD. Press twice to return to the beginning of the DVD. s (Play/Pause): Press to start playing a DVD. Press while a DVD is playing to pause it. Press again to continue playing the DVD.
When the DVD is playing, depending on the radio, play may be slowed down by pressing s then [. The DVD continues playing in a slow play mode.
3-122
Instrument Panel
Depending on the radio, perform reverse slow play by pressing s then r. To cancel slow play mode, press s again. t (Previous Track/Chapter): Press to return to the start of the current track or chapter. Press again to go to the previous track or chapter. This button might not work when the DVD is playing the copyright information or the previews. u (Next Track/Chapter): Press to go to the beginning of the next chapter or track. This button might not work when the DVD is playing the copyright information or the previews. r (Fast Reverse): Press to quickly reverse the DVD or CD. To stop fast reversing a DVD video, press s. To stop fast reversing a DVD audio or CD, release r. This button might not work when the DVD is playing the copyright information or the previews.
[ (Fast Forward): Press to fast forward the DVD or CD. To stop fast forwarding a DVD video, press s. To stop fast forwarding a DVD audio or CD, release [. This button might not work when the DVD is playing the copyright information or the previews. e (Audio): Press to change audio tracks on DVDs that have this feature when the DVD is playing. The format and content of this function vary for each disc. { (Subtitles): Press to turn ON/OFF subtitles and to move through subtitle options when a DVD is playing. The format and content of this function vary for each disc. AUX (Auxiliary): Press to switch the system between the DVD player and an auxiliary source.
d (Camera): Press to change camera angles on DVDs that have this feature when a DVD is playing. The format and content of this function vary for each disc. 1 through 0 (Numeric Keypad): The numeric keypad provides the capability of direct chapter or track number selection. \ (Clear): Press within three seconds after entering a numeric selection, to clear all numerical inputs. } 10 (Double Digit Entries): Press to select chapter or track numbers greater than nine. Press this button before entering the number. If the remote control becomes lost or damaged, a new universal remote control can be purchased. If this happens, make sure the universal remote control uses a Toshiba® code set.
Battery Replacement To change the remote control batteries: 1. Slide the rear cover back, on the
remote control.
2. Replace the two batteries in the
compartment. Make sure that they are installed correctly, using the diagram on the inside of the battery compartment.
3. Replace the battery cover. If the remote control is to be stored for a long period of time, remove the batteries and keep them in a cool, dry place.
Problem
No power.
The picture does not fill the screen. There are black borders on the top and bottom or on both sides or it looks stretched out. In auxiliary mode, the picture moves or scrolls. The remote control does not work.
After stopping the player, I push Play but sometimes the DVD starts where I left off and sometimes at the beginning.
The auxiliary source is running but there is no picture or sound.
Instrument Panel
3-123
Recommended Action
The ignition might not be turned ON/RUN or in ACC/ACCESSORY. Check the display mode settings in the setup menu by pressing the display menu button on the remote control. Check the auxiliary input connections at both devices. Check to make sure there is no obstruction between the remote control and the transmitter window. Check the batteries to make sure they are not dead or installed incorrectly. If the stop button was pressed one time, the DVD player resumes playing where the DVD was stopped. If the stop button was pressed two times the DVD player begins to play from the beginning of the DVD. Check that the RSE video screen is in the auxiliary source mode. Check the auxiliary input connections at both devices.
3-124
Instrument Panel
Problem
Sometimes the wireless headphone audio cuts out or buzzes.
I lost the remote and/or the headphones. The DVD is playing, but there is no picture or sound.
DVD Display Error Messages The DVD display error message depends on which radio the vehicle has. The video screen might display one of the following: Disc Load/Eject Error: This message displays when there are disc load or eject problems. Disc Format Error: This message displays if the disc is inserted with the disc label wrong side up, or if the disc is damaged.
Recommended Action
Check for obstructions, low batteries, reception range, and interference from cellular telephone towers or by using a cellular telephone in the vehicle. Check that the headphones are on correctly using the L (left) and R (right) on the headphones. See your dealer/retailer for assistance. Check that the RSE video screen is sourced to the DVD player.
Disc Region Error: This message displays if the disc is not from a correct region. No Disc Inserted: This message displays if no disc is present when the Z EJECT button is pressed on the radio.
DVD Distortion Video distortion can occur when operating cellular phones, scanners, CB radios, Global Position Systems (GPS)*, two-way radios, mobile fax, or walkie talkies. It might be necessary to turn off the DVD player when operating one of these devices in or near the vehicle. *Excludes the OnStar® System. Cleaning the RSE Overhead Console When cleaning the RSE overhead console surface, use only a clean cloth dampened with clean water.
Cleaning the Video Screen Use only a clean cloth dampened with clean water. Use care when directly touching or cleaning the screen, as damage could result.
Instrument Panel
3-125
Audio can be heard through wired headphones (not included) plugged into the jacks on the RSA. If the vehicle has this feature, audio can also be heard on Channel 2 of the wireless headphones. The audio system mutes the rear speakers when the RSA audio is active through the headphones. To listen to an iPod or portable audio device through the RSA, attach the iPod or portable audio device to the front auxiliary input (if available), located on the front audio system. Turn the iPod on, then choose the front auxiliary input with the RSA SRCE button.
Rear Seat Audio (RSA) For vehicles with Rear Seat Audio (RSA), rear seat passengers can listen to and control any of the music sources: radio, CDs, DVDs, or other auxiliary sources. The rear seat passengers can only control the music sources the front seat passengers are not listening to (except on some radios where dual control is allowed). For example, rear seat passengers can control a CD and listen to it through the headphones, while the driver listens to the radio through the front speakers. The rear seat passengers have control of the volume for each set of headphones. The RSA functions operate even when the main radio is off. The front audio system displays X when the RSA is on, and disappears from the display when it is off.
3-126
Instrument Panel
P (Power): Press to turn the RSA on or off. Volume: Turn to increase or to decrease the volume of the wired headphones. The left knob controls the left headphones and the right knob controls the right headphones. SRCE (Source): Press to select between the radio (AM/FM/XM™), CD, and if the vehicle has these features, DVD, front auxiliary, and rear auxiliary.
©¨(Seek): Press to go to the previous or to the next station and stay there. This function is inactive, with some radios, if the front seat passengers are listening to the radio. Press and hold ©or ¨until the display flashes to tune to an individual station. The display stops flashing after the buttons have not been pushed for more than two seconds. This function is inactive, with some radios, if the front seat passengers are listening to the radio.
While listening to a disc, press ¨ to go to the next track or chapter on the disc. Press ©to go back to the start of the current track or chapter (if more than ten seconds have played). This function is inactive, with some radios, if the front seat passengers are listening to the disc.
When a DVD video menu is being displayed, press ©or ¨to perform a cursor up or down on the menu. Hold ©or ¨to perform a cursor left or right on the menu. PROG (Program): Press to go to the next preset radio station or channel set on the main radio. This function is inactive, with some radios, if the front seat passengers are listening to the radio.
When a CD or DVD audio disc is playing, press PROG to go to the beginning of the CD or DVD audio. This function is inactive, with some radios, if the front seat passengers are listening to the disc.
When a disc is playing in the CD or DVD changer, press PROG to select the next disc, if multiple discs are loaded. This function is inactive, with some radios, if the front seat passengers are listening to the disc.
When a DVD video menu is being displayed, press PROG to perform the ENTER menu function. Rear Audio Controller (RAC)
The vehicle may have the Rear Audio Controller (RAC). Certain radio functions can be controlled with RAC.
x w (Next/Previous): Press the down or up arrows to go to the next or to the previous radio station stored as a favorite.
When a CD/DVD is playing, press the down or up arrows to go to the next or previous track or chapter. ©SEEK ¨: Press the SEEK arrows to go to the previous or to the next radio station while in AM, FM, or XM™ (if equipped). Press the SEEK arrows to go to the previous or to the next track or chapter while sourced to a CD or DVD slot. SRCE (Source): Press this button to switch between the radio (AM, FM), XM™ (if equipped), CD, and if the vehicle has these features, DVD, front auxiliary, and rear auxiliary.
Instrument Panel
3-127
> (Mute): Press this button to silence the system. Press this button again, or any other radio button, to turn the sound on. + / − x (Volume): Press the plus or minus volume buttons to increase or to decrease the volume.
Theft-Deterrent Feature THEFTLOCK® is designed to discourage theft of the vehicle’s radio by learning a portion of the Vehicle Identification Number (VIN). The radio does not operate if it is stolen or moved to a different vehicle.
3-128
Instrument Panel
Audio Steering Wheel Controls
Vehicles with audio steering wheel controls could differ depending on the vehicle’s options. Some audio controls can be adjusted at the steering wheel. w (Next): Press to go to the next radio station stored as a favorite, or the next track if a CD/DVD is playing. c x (Previous/End): Press to go to the previous radio station stored as a favorite, the next track if a CD/DVD is playing, to reject an incoming call, or end a current call.
b g (Mute/Push to Talk): Press to silence the vehicle speakers only. Press again to turn the sound on. For vehicles with OnStar® or Bluetooth systems, press and hold for longer than two seconds to interact with those systems. See OnStar® System on page 2-41
and Bluetooth® on page 3-105 in this manual for more information. SRCE (Source): Press to switch between the radio (AM, FM, XM), CD, and for vehicles with, DVD, front auxiliary, and rear auxiliary.For vehicles with the navigation system, press and hold this button for longer than one second to initiate voice recognition. See “Voice Recognition” in the Navigation System manual for more information. + e − e (Volume): Press to increase or to decrease the radio volume.
¨ (Seek): Press to go to the next radio station while in AM, FM, or XM™. Press ¨ to go to the next track or chapter while sourced to the CD or DVD slot. Press the ¨ if multiple discs are loaded to go to the next disc while sourced to a CD player.
Radio Reception Frequency interference and static can occur during normal radio reception if items such as cell phone chargers, vehicle convenience accessories, and external electronic devices are plugged into the accessory power outlet. If there is interference or static, unplug the item from the accessory power outlet.
Instrument Panel
3-129
Multi-Band Antenna The multi-band antenna is located on the roof of the vehicle. This type of antenna is used with the AM/FM radio, as well as OnStar® and the XM™ Satellite Radio Service System, if the vehicle has these features. Keep this antenna clear of snow and ice build up for clear radio reception. If the vehicle has a sunroof, the performance of the radio system may be affected if the sunroof is open. Loading items onto the roof of the vehicle can interfere with the performance of the radio system and, if the vehicle has this feature, OnStar®. Make sure the multi-band antenna is not obstructed.
AM The range for most AM stations is greater than for FM, especially at night. The longer range can cause station frequencies to interfere with each other. For better radio reception, most AM radio stations boost the power levels during the day, and then reduce these levels during the night. Static can also occur when things like storms and power lines interfere with radio reception. When this happens, try reducing the treble on the radio.
FM Stereo FM signals only reach about 10 to 40 miles (16 to 65 km). Although the radio has a built-in electronic circuit that automatically works to reduce interference, some static can occur, especially around tall buildings or hills, causing the sound to fade in and out.
XM™ Satellite Radio Service XM Satellite Radio Service gives digital radio reception from coast-to-coast in the 48 contiguous United States, and in Canada. Just as with FM, tall buildings or hills can interfere with satellite radio signals, causing the sound to fade in and out. In addition, traveling or standing under heavy foliage, bridges, garages, or tunnels may cause loss of the XM signal for a period of time.
Cellular Phone Usage Cellular phone usage may cause interference with the vehicle’s radio. This interference may occur when making or receiving phone calls, charging the phone’s battery, or simply having the phone on. This interference causes an increased level of static while listening to the radio. If static is received while listening to the radio, unplug the cellular phone and turn it off.
3-130
Instrument Panel
✍ NOTES
Driving Your Vehicle
Your Driving, the Road, and the Vehicle Driving for Better Fuel Economy ............................4-1
Defensive Driving ..................4-2
Drunk Driving .......................4-2
Control of a Vehicle ...............4-3
Braking ................................4-3
Antilock Brake System (ABS) .....................4-4
Braking in Emergencies ..........4-5
StabiliTrak® System ...............4-5
All-Wheel Drive (AWD) System ..............................4-7
Steering ...............................4-8
Off-Road Recovery ................4-9
Passing ...............................4-9...................4-10
Loss of Control Driving at Night ...................4-11
Driving in Rain and on Wet Roads .......................4-11
Before Leaving on a Long Trip ..........................4-12
Highway Hypnosis ...............4-12
Hill and Mountain Roads ......4-13
Winter Driving .....................4-13
If Your Vehicle is Stuck in Sand, Mud, Ice, or Snow ......4-15
Rocking Your Vehicle to Get It Out .........................4-16
Loading the Vehicle .............4-16
Towing Towing Your Vehicle ............4-20
Recreational Vehicle Towing .............................4-21
Towing a Trailer ..................4-24Driving Your Vehicle
4-1
Your Driving, the Road, and the Vehicle Driving for Better Fuel Economy Driving habits can affect fuel mileage. Here are some driving tips to get the best fuel economy possible. (cid:129) Avoid fast starts and accelerate
smoothly.
(cid:129) Brake gradually and avoid
abrupt stops.
(cid:129) Avoid idling the engine for long
periods of time.
(cid:129) When road and weather
conditions are appropriate, use cruise control, if equipped.
(cid:129) Always follow posted speed limits
or drive more slowly when conditions require.
4-2
Driving Your Vehicle
(cid:129) Keep vehicle tires properly
inflated.
(cid:129) Combine several trips into a
single trip.
(cid:129) Replace the vehicle’s tires with
the same TPC Spec number molded into the tire’s sidewall near the size. Follow recommended scheduled maintenance.
Defensive Driving Defensive driving means “always expect the unexpected.” The first step in driving defensively is to wear your safety belt — See Safety Belts: They Are for Everyone on page 1-15.
{ CAUTION
Assume that other road users (pedestrians, bicyclists, and other drivers) are going to be careless and make mistakes. Anticipate what they might do and be ready. In addition:
(cid:129) Allow enough following
distance between you and the driver in front of you.
(cid:129) Focus on the task of driving.
Driver distraction can cause collisions resulting in injury or possible death. These simple defensive driving techniques could save your life.
Drunk Driving
{ CAUTION
Drinking and then driving is very dangerous. Your reflexes, perceptions, attentiveness, and judgment can be affected by even a small amount of alcohol. You can have a serious — or even fatal — collision if you drive after drinking. Do not drink and drive or ride with a driver who has been drinking. Ride home in a cab; or if you are with a group, designate a driver who will not drink.
Death and injury associated with drinking and driving is a global tragedy. Alcohol affects four things that anyone needs to drive a vehicle: judgment, muscular coordination, vision, and attentiveness.
(cid:129) Police records show that almost 40 percent of all motor vehicle-related deaths involve alcohol. In most cases, these deaths are the result of someone who was drinking and driving. In recent years,