- 1996 Ford F 150 Owners Manuals
- Ford F 150 Owners Manuals
- 1997 Ford F 150 Owners Manuals
- Ford F 150 Owners Manuals
- 2010 Ford F 150 Owners Manuals
- Ford F 150 Owners Manuals
- 2003 Ford F 150 Owners Manuals
- Ford F 150 Owners Manuals
- 2015 Ford F 150 Owners Manuals
- Ford F 150 Owners Manuals
- 2008 Ford F 150 Owners Manuals
- Ford F 150 Owners Manuals
- 2009 Ford F 150 Owners Manuals
- Ford F 150 Owners Manuals
- 2006 Ford F 150 Owners Manuals
- Ford F 150 Owners Manuals
- 2011 Ford F 150 Owners Manuals
- Ford F 150 Owners Manuals
- 2013 Ford F 150 Owners Manuals
- Ford F 150 Owners Manuals
- 2007 Ford F 150 Owners Manuals
- Ford F 150 Owners Manuals
- 2014 Ford F 150 Owners Manuals
- Ford F 150 Owners Manuals
- 2000 Ford F 150 Owners Manuals
- Ford F 150 Owners Manuals
- 1998 Ford F 150 Owners Manuals
- Ford F 150 Owners Manuals
- Download PDF Manual
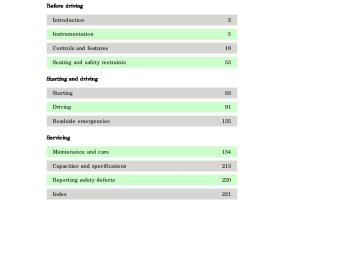
-
Not used
30 Wiper system
On-board diagnostic (OBD II) data link connector Brake ON/OFF switch, rear anti-lock brake module and brake pressure switch Interior lamps and accessory delay relay GEM module/CTM module High beam headlamps Not used Instrument illumination Air bag diagnostic monitor, instrument cluster GEM module/CTM module and powertrain control module (PCM) Starter relay Air bag diagnostic monitor and passenger air bag deactivate switch 4WD clutch relay, electronic flasher, 4WD/2WD vacuum solenoids and trailer tow battery charge relay I/P blower relay 4WABS module and relay Right low beam headlamp and DRL module Foglamp relay Left low beam headlamp Autolamp, instrument cluster, transmission control indicator lamp and switch Ignition coils and PCM relay Not used
15
15
20
1015
1010
10
10
1030
10
11
1213
14
15
16
17
18
19
2021
2223
24
25
26
27
28
2930
31138
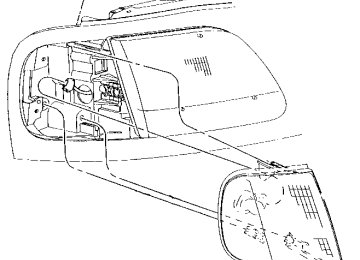
f12_eng_comp_fuses
Roadside emergencies
Relays
Description
Interior lamps relay Battery saver relay Not used One touch down relay Accessory delay relay
Position
Power distribution box Lift cover towards left of vehicle to access the power distribution box.
Always disconnect the battery before servicing
high current fuses.
Always replace the cover to the Power Distribution
Box before reconnecting the battery or refilling fluid reservoirs.
29
28
27
26
25
24
23
22
21
20
19
18
17
16
15
14
13
11
12
10
Position
Amps
Description
Fuses
20
10
15
15
20
15Trailer tow back-up and tail lamps Air bag diagnostic monitor Power locks Air suspension Horn Audio system
139
Roadside emergencies
Position
Amps
Description
Fuses
10
11
12
13
14
15
16
17
18
19
20
21
22
23
24
25
26
27
28
2915
30
15
2560/20
50
40
30
30
20
50
50
50
40
30
30
30Parking and tail lamps Headlamps Daytime running lamps and fog lamps Auxiliary power point Not used Not used Not used 4WABS/rear anti-lock brake Air suspension compressor Trailer tow battery charge and stop/turn lamps 4WD transfer case shift motor and clutch Driver power seat Fuel pump Instrument panel fuse panel ignition switch feed Instrument panel fuse panel ignition switch feed I/P fuse panel battery feed I/P blower PCM power Power windows Not used Not used Trailer tow electronic brake Not used
Position
Diodes
Description
Rear ABS diode PCM diode
140
Roadside emergencies
Position
Relays
Description Windshield wipers HI/LO speed Windshield wipers run/park relay Washer pump relay Fuel pump relay Horn relay PCM power relay
Primary battery fuses (megafuses) Primary battery fuses are located under the PRIMARY BATTERY FUSE cover next to starter relay. Ford recommends that megafuses only be serviced by a qualified service technician.
f12_megafuse
Location Amperage
175
175
20Description Power network box megafuse Alternator megafuse Alternator field minifuse
141
Roadside emergencies
Engineminifusepanel The minifuse panel is located behind the power distribution box.
f12_minifuses
Location Amperage
Description
20
Powertrain control module (PCM) Trailer tow stop/turn lamps Not used Not used Not used Not used
CHANGING FLAT TIRES If you get a flat tire while driving, do not apply the brakes heavily. Instead, gradually reduce the speed while holding the steering wheel firmly. Move the vehicle to a safe spot off to the side of the road.
142
f12_flat_tires
f12_change_proc
Roadside emergencies
Tire change procedure 1. Park on a level surface. 2. Activate the hazard flashers. 3. Set the parking brake. 4. Place the gearshift in P (Park) (automatic transmission) or R (Reverse) (manual transmission). For 4WD vehicles equipped with Lever-operated transfer case, make sure that the lever is not in the N (Neutral) position. 5. Block the diagonally opposite wheel. 6. Remove the jack and lug wrench from under the passenger seat.
On vehicles equipped with Air Suspension, turn OFF the Air Suspension switch prior to jacking, hoisting or towing your vehicle.
To avoid injury, never run the engine with one wheel
off the ground, such as when changing a tire.
f12_removing_spare
143
Roadside emergencies
Removingsparefromstorage Your vehicle is equipped with a full-size spare tire. To remove the spare tire:
1. Carefully remove the jack handle from the retaining clips (above radiator in engine compartment).
144
Roadside emergencies
f12_removing_flat
2. To lower the spare tire, insert the jack handle into the rear bumper opening and turn it counterclockwise. Removingflattireandinstalling spare 1. Use the tip of the lug wrench to remove the wheel ornament. Insert the lug wrench tip into the notch in the wheel ornament. 2. Loosen the wheel nuts with the lug wrench. Do not remove the lug nuts yet. 3. Position the jack as shown for your specific vehicle (4WD or 2WD). Use the thumbwheel to raise the jack to the desired height. • Front (2WD)
145
Roadside emergencies • Front (4WD)
• Rear
Never use the differential as a jacking point.
146
4. Raise the vehicle high enough for the spare tire to clear the ground when installed. 5. Remove the wheel lug nuts. 6. Remove the flat tire and install the spare. 7. Install the lug nuts and tighten until the wheel is seated.
Installing wheels without a good metal-to-metal
contact at the wheel mounting surface can cause the wheel lug nuts to loosen and could allow the wheel to come off while the vehicle is in motion.
If your vehicle is equipped with seven-lug hubs, use the following tightening pattern:
If your vehicle is equipped with five-lug hubs, use the following tightening pattern:
8. Position the wheel ornament on the wheel nuts and secure to the wheel.
Roadside emergencies
147
Roadside emergencies
9. To stow the flat tire, lay the tire on the ground with the inboard side facing up. Install the retainer through the wheel center and slide the wheel under the vehicle. Turn the spare handle clockwise until the tire is raised to its original position underneath the vehicle. The spare handle ratchets when the tire is raised to the stowed position. It will not allow you to overtighten. 10. Unblock the wheel. 11. Stow the jacking equipment under the passenger seat and stow the jack handle in the engine compartment. 12. As soon as possible, tighten the wheel nuts with a torque wrench to 115–165 Nm (85–115 lb-ft).
JUMP STARTING YOUR VEHICLE
The gases around the battery can explode if
exposed to flames, sparks, or lit cigarettes. An explosion could result in injury or vehicle damage.
Do not push-start your vehicle. You could damage
the catalytic converter. For further information, see Jumper Cables in the Index.
148
com_jump-starting.01
Batteries contain sulfuric acid which burns skin,
eyes, and clothing.
CONNECTING THE JUMPER CABLES 1. Position the vehicles so that they do not touch one another. 2. Switch off the engine. Switch off any unnecessary electrical equipment. 3. Connect the positive (+) terminal of the discharged battery (1) to the positive (+) terminal of the booster battery (2). 4. Connect one end of the second lead to the negative (-) terminal of the booster battery (3) and the other end to a metal part of the engine to be started (4), not to the negative (-) terminal of the discharged battery.
5. Make sure that the jump leads are clear of moving parts of the engine.
Do not connect the end of the second cable to the negative ([-]) terminal of the battery to be jumped. A spark may cause an explosion of the gases that surround the battery.
Roadside emergencies
com_connecting_cables.01
–
–
com_jump_starting.01
149
Roadside emergencies
JUMP STARTING 1. Start the booster vehicle and run the engine at moderately increased speed. 2. Start the engine of the vehicle with the discharged battery. 3. Once the engine has been started, run both vehicles for a further three minutes before disconnecting the leads.
REMOVING THE JUMPER CABLES 1. Remove the jumper cables in reverse order. Take the cable off the metallic surface (1) first, followed by the cable on the negative (-) booster battery terminal (2). 2. Remove the cable from the positive (+) terminal of the booster battery (3) and then the discharged battery (4). 3. After the disabled vehicle has been started, allow it to idle for a while so the engine can “relearn” its idle conditions.
WRECKER TOWING It is recommended that your vehicle be towed with wheel lift and dollies or flatbed equipment. Do not tow with slingbelt equipment. Ford Motor Company has not developed or approved a T-hook or slingbelt towing procedure.
150
–
–
com_removing_cables.01
f12_wrecker
Roadside emergencies
Ford recommends using one of the above methods for towing.
Recreational towing (all wheels on the ground) Follow these guidelines for your specific powertrain combination to tow your vehicle with all four wheels on the ground (such as behind a recreational vehicle). These guidelines are designed to ensure that your transmission is not damaged due to insufficient lubrication. 2WD(manualandautomatic transmissions) 1. Place transmission in N (Neutral).
f12_recreational_towing
151
Roadside emergencies
2. Maximum speed is 56 km/h (35
mph). 3. Maximum distance is 80 km (50
miles). If a distance of 80 km (50 miles) or a speed of 56 km/h (35 mph) must be exceeded, you must disconnect the rear driveshaft. With the rear driveshaft disconnected, the maximum speed is 88 km/h (55 mph) and there are no mileage restrictions. See your dealer for help with disconnecting the driveshaft. 4WD–Leveroperatedtransfer case(manualandautomatic transmissions) 1. Place transmission in P (Park). 2. Shift the transfer case to N (Neutral). 3. Lockout the center disconnect by capping off one of the front axle vacuum motor lines. See your Ford dealer for assistance. 4. Vehicle speed should not exceed 88 km/h (55 mph) and there are no mileage restrictions. 4WD–Electronicshifttransfer case 1. Place transmission in N (Neutral). 2. Shift the transfer case to 2H (2WD high). 3. Lockout the center disconnect by capping off one of the front axle vacuum motor lines. See your dealer for assistance.152
Roadside emergencies
4. Maximum speed is 56 km/h (35
mph). 5. Maximum distance is 80 km (50
miles). If a distance of 80 km (50 miles) or a speed of 56 km/h (35 mph) must be exceeded, you must disconnect the rear driveshaft. With the rear driveshaft disconnected, the maximum speed is 88 km/h (55 mph) and there are no mileage restrictions. See your dealer for help with disconnecting the driveshaft.153
com_service_recommendations.01
com_precautions_servicing.02
Maintenance and care
SERVICING YOUR VEHICLE
Service recommendations To help you service your vehicle: • We highlight do-it-yourself items in the engine compartment for easy location.
• As possible, we design parts that can be replaced without tools. • We provide you with a “Service Guide” which makes tracking routine service for your vehicle easy.
If your vehicle requires professional service, your dealership can provide necessary parts and service. Check your “Warranty Information Booklet” to find out which parts and services are covered. Use only recommended fuels, lubricants, fluids and service parts conforming to specifications. Motorcraft parts are designed and built to provide the best performance in your vehicle. Precautionswhenservicing yourvehicle Be especially careful when inspecting or servicing your vehicle. Here are some general precautions for your safety: • Do not work on a hot engine. • If you must work with the
engine running, avoid wearing loose clothing or jewelry that
154
could get caught in moving parts. Take precautions with long hair. • Do not work on a vehicle with the engine running in an enclosed space, unless you are sure you have enough ventilation.
• Keep all lit cigarettes, open flames and other lit material away from the battery and all fuel related parts.
If you disconnect the battery, the engine must “relearn” its idle conditions before your vehicle will drive properly, as explained in Battery in this chapter. Workingwiththeengineoff • Automatic transmission 1. Set the parking brake fully and ensure the gearshift is securely latched in P (Park). 2. Turn off the engine and remove the key. 3. Block the wheels to prevent the vehicle from moving unexpectedly. • Manual transmission 1. Set the parking brake, depress the clutch and place the gearshift in 1 (First). 2. Turn off the engine and remove the key. 3. Block the wheels to prevent the vehicle from moving unexpectedly. Workingwiththeengineon • Automatic transmission
Maintenance and care
com_working_off.02
com_working_on.02
155
Maintenance and care
1. Set the parking brake fully and ensure the gearshift is securely latched in P (Park). 2. Block the wheels to prevent the vehicle from moving unexpectedly.
Do not start your engine with the air cleaner
removed and do not remove it while the engine is running. • Manual transmission 1. Set the parking brake, depress the clutch and place the gearshift in 1 (First). 2. Block the wheels to prevent the vehicle from moving unexpectedly.
156
f12_opening_hood
Maintenance and care
Opening the hood 1. Inside the vehicle, pull the hood release handle located under the bottom left corner of the instrument panel.
H O O D
2. While applying downward pressure on the hood, push the hood latch handle located just left of the center of the hood. 3. Lift the hood.
After closing the hood, try to lift it to be sure that it is closed securely. Lubricate the hood latch every six months to ensure proper operation.
f12_4.2L_engine_components
157
Maintenance and care
12
11
10
4.2L engine 1. Battery 2. Engine oil filler 3. Engine oil dipstick 4. Clutch fluid reservoir (if equipped) 5. Brake master cylinder 6. Power distribution box 7. Engine coolant recovery reservoir 8. Radiator cap 9. Air cleaner 10. Power steering fluid reservoir 11. Automatic transmission fluid dipstick (if equipped)
158
Maintenance and care
12. Windshield washer fluid reservoir
f12_4.6L_5.4L_engine
12
11
10
4.6/5.4L engine 1. Battery 2. Automatic transmission dipstick (if equipped) 3. Engine oil filler 4. Engine oil dipstick 5. Clutch fluid reservoir (if equipped) 6. Brake master cylinder 7. Power distribution box 8. Engine coolant recovery reservoir 9. Air cleaner 10. Radiator cap
159
Maintenance and care
11. Power steering fluid reservoir 12. Windshield washer fluid reservoir
ENGINE OIL
f12_engine_oil
f12_oil_specs
Oil specifications Use WSS-M2C153–F motor oil CERTIFIED FOR GASOLINE ENGINES by the American Petroleum Institute. Engine oils with an SAE 5W-30
viscosity and displaying the American Petroleum Institute certification mark are preferred for your vehicle. They provide the best engine performance, fuel economy and engine protection for all climates down to –25°C (-15°F). Do not use: • “non-detergent” oils • oils labeled API SA, SB, SC, SD, • additional engine oil additives,SE, SF or SG
oil treatments or engine treatments
Additional engine oil additives, oil treatments, or engine treatments are never needed and could, under certain conditions, lead to engine damage which is not covered by your Ford warranty. Synthetic engine oils which are CERTIFIED and of the preferred viscosity may be used in your engine. The engine oil and oil filter must still be changed according to the “Service Guide.”
160
Oilfilters Ford production and aftermarket (Motorcraft) oil filters are designed for added engine protection and long life. If a replacement oil filter is used that does not meet Ford material and design specifications, startup engine noises or knock may be experienced. It is recommended that you use the appropriate Motorcraft oil filter (or another brand meeting Ford specifications) for your engine application. Checkingengineoil Check the engine oil each time you fuel your vehicle. Check the engine oil level more frequently if the vehicle is carrying a heavy load, towing a trailer, idling for extended periods (like police, taxi or shuttle service vehicles) or driven at high speeds for extended periods of time. To check the oil: 1. Make sure the vehicle is on level ground. If the engine is warm, turn the engine off and wait a few minutes for the oil to drain into the oil pan. 2. Set the parking brake and ensure the gearshift is latched in P (Park) (automatic transmission) or 1 (First) (manual transmission). 3. Open the hood. Protect yourself from engine heat. 4. Locate and carefully remove the
Maintenance and care
f12_checking_oil
161
Maintenance and care
engine oil dipstick (4.2L and 4.6L/5.4L engines shown). • 4.2L engine
MIN
MAX
• 4.6L/5.4L engine
MIN
MAX
5. Wipe the dipstick clean. Insert the dipstick fully, then remove it again. The oil level should be in the range shown on the dipstick. 6. If the oil level is below the minimum line, add engine oil as necessary. If the oil level is below the MIN line, add engine oil as necessary. If the oil level is above
162
the MAX line, engine damage or high oil consumption may occur and some oil must be removed from the engine by a service technician. 7. Put the dipstick back in and ensure it is fully seated. Addingengineoil 1. Check the engine oil. 2. If the oil level is below the MIN line, then add engine oil. 3. Remove the yellow oil filler cap. 4. Use a funnel to add oil through the opening.
Make sure you use a certified engine oil of the preferred viscosity. 5. Recheck the oil level. Make sure that the oil level is not above the MAX line on the dipstick.
Continuous contact with used motor oil has caused
cancer in laboratory mice.
Maintenance and care
f12_adding_oil
f12_brake_fluid
163
Maintenance and care
BRAKE FLUID
com_checking-adding_fluid.01
CHECKING AND ADDING BRAKE FLUID Brake fluid should be checked and refilled as needed at least once each year: • Clean the reservoir cap before removal to prevent dirt or water from entering the reservoir. • Visually inspect the fluid level. • If necessary, add brake fluid
until the level reaches MAX. Do not fill above this line.
• Use only a DOT 3 brake fluid
certified to meet Ford specifications. Refer to Lubricant specifications in the Capacities and specifications chapter.
MAX
MIN
Brake fluid is toxic.
If you use a brake fluid that is not DOT 3, you will cause permanent damage to your brakes.
164
Maintenance and care
f12_clutch_fluid
f12_washer_fluid
Do not let the reservoir for the master cylinder run dry. This may cause the brakes to fail.
CHECKING AND ADDING CLUTCH FLUID (IF EQUIPPED) During normal operation, the fluid level in the clutch reservoir will slowly rise. If the fluid level drops, maintain the fluid level at the step in the reservoir. Use only a DOT 3 brake fluid designed to meet Ford specifications. Refer to Capacities and specifications. 1. Clean the reservoir cap before removal to prevent dirt and water from entering the reservoir. 2. Remove cap. 3. Add fluid until the level reaches the FULL line.
165
Maintenance and care
CHECKING AND ADDING WINDSHIELD WASHER FLUID 1. Lift the washer fluid reservoir cover. 2. Add washer fluid intil the level reaches the FULL line. Use only fluid that meets Ford Specifications. Refer to Capacities and specifications. The addition of a bug shield to the front of the vehicle may adversely affect the washer system from delivering fluid to the windshield. Devices such as bug shields are not recommended.
Windshield washer fluid contains methanol and it is poisonous. Follow all instructions on the bottle of washer fluid.
What you should know about washer fluid In freezing weather [temperatures below 0°C (32°F)], use washer fluid containing a small amount of antifreeze, such as methanol. State or local regulations on volatile organic compounds (VOCs) may restrict the use of methanol, a common type of antifreeze. Use a non-methanol antifreeze in freezing weather only if the fluid does not damage the paint finish, wiper blades and washer system.
166
WASHER FLUID
ONLY
f12_wysk_washer_fluid
f12_coolant
CHECKING AND ADDING ENGINE COOLANT
Adding engine coolant
Do not put engine coolant in the container for the
windshield washer fluid.
If sprayed on the windshield, engine coolant could make it difficult to see through the windshield. When the engine is cool, add a 50/50 mixture of engine coolant and water to the engine coolant recovery reservoir – DO NOT ADD DIRECTLY TO THE RADIATOR. Add straight water only in an emergency, but you should replace it with a 50/50 mixture of coolant and distilled water as soon as possible.
Check the coolant level in the coolant recovery reservoir the next few times you drive the vehicle. If necessary, add enough of a 50/50
mixture of coolant and water to bring the liquid level to the fill line on the reservoir.Never remove the coolant recovery cap while the
engine is running or hot.
Maintenance and care
f12_adding_coolant
COOLANT FILL
LEVEL
167
Maintenance and care
If you must remove the coolant recovery cap, follow these steps to avoid personal injury: 1. Before you remove the cap, turn the engine off and let it cool. 2. When the engine is cool, wrap a thick cloth around the cap. Slowly turn cap counterclockwise to the first stop. 3. Step back while the pressure releases. 4. When you are sure that all the pressure has been released, use the cloth to press the cap down, turn it counterclockwise and remove it. Use Ford Premium Cooling System Fluid E2FZ-19549–AA (in Canada, Motorcraft CXC-8–B) or an equivalent premium engine coolant that meets Ford Specification ESE-M97B44–A. Ford Premium Engine Coolant is an optimized formula that will protect all metals and rubber elastomers used in Ford cooling systems for 4 years or 80,000 km (50,000 miles). Do not use alcohol or methanol antifreeze or any engine coolants mixed with alcohol or methanol antifreeze. Do not use supplemental coolant additives in your vehicle. These additives may harm your engine cooling system. The use of an improper coolant may void the warranty of your vehicle’s engine cooling system.
168
f12_recycled_coolant
Recycledenginecoolant Ford Motor Company recommends that Ford and Lincoln-Mercury dealers use recycled engine coolant produced by Ford-approved processes. Not all coolant recycling processes produce coolant which meets Ford specification ESE-M97B44–A, and use of such coolant may harm engine and cooling system components.
Always dispose of used
automotive fluids in a responsible manner. Follow your community’s regulations and standards for recycling and disposing of automotive fluids. Coolantrefillcapacity To find out how much fluid your vehicle’s cooling system can hold, refer to Refill capacities in the Capacities and specifications chapter. Have your dealer check the engine cooling system for leaks if you have to add more than a liter (quart) of engine coolant per month. Severewinterclimate If you drive in extremely cold climates [less than 36°C (34°F)], it may be necessary to increase the coolant concentration above 50%. Refer to the chart on the coolant container to ensure the coolant concentration in your vehicle is such that the coolant will not
Maintenance and care
f12_refill_capacity
f12_winter_climate
169
Maintenance and care
freeze at the temperature level in which you drive during winter months. Never increase the engine coolant concentration above 60%. Leave a 50/50 mixture of engine coolant and water in your vehicle year-round in non-extreme climates.
Checking the cooling system hoses
Inspect all engine and heater system hoses and hose connections for: • deterioration • leaks • loose hose clamps What you should know about fail-safe cooling (if equipped) Vehicles equipped with 4.6L or 5.4L engines have a fail-safe
170
com_checking_hoses.01
f12_wysk_failsafe_cooling
cooling mode. If the engine coolant supply is depleted, this feature allows the driver to drive the vehicle (with limited power) for a short distance in order to get the vehicle to a service facility. Take your vehicle to a service facility as soon as possible to minimize engine damage. The actual distance your vehicle can be driven depends on vehicle load, road conditions and outside temperature. Howfail-safecoolingworks If the engine overheats, the engine will automatically switch from eight to alternating four cylinder operation. Each disabled cylinder acts as an air pump and cools the engine. When this occurs, the engine coolant temperature gauge will move into the red area and the
light illuminates.
The CHECK ENGINE light will illuminate, indicating that vehicle service is required. The vehicle will still operate, but will have limited engine power and no air conditioning capability. Continued operation will increase engine temperature and cause the engine to completely shut down. The vehicle will coast to a stop. As the engine temperature cools, the engine may be re-started. Take your vehicle to a service facility as
Maintenance and care
171
Maintenance and care
soon as possible to minimize engine damage. Whenfail-safemodeis activated • Pull off the road as soon as • Immediately turn the engine off
possible.
to prevent severe engine damage.
• Wait for the engine to cool. • Check the coolant level. CHECKING AND ADDING POWER STEERING FLUID Check the power steering fluid level at least twice a year. 1. Start the engine.
172
f12_power_steering
Maintenance and care
2. When the engine coolant temperature gauge reaches the normal zone, turn the engine off.
MAX MIN
MAX MIN
3. Visually inspect the fluid level in the power steering fluid reservoir. 4. Add power steering fluid until the fluid level reaches MAX. Use only fluid that meets Ford specifications. Refer to Capacities and specifications.
CHECKING AND ADDING TRANSMISSION FLUID
Checking and adding automatic transmission fluid (if equipped) Service the automatic transmission according to the scheduled intervals in the “Service Guide.”
f12_trans_fluid
f12_checking_adding_autotrans
173
Maintenance and care
Before adding any fluid, make sure the correct type will be used. This information is indicated on the dipstick. Do not drive the vehicle if the fluid level is below the bottom hole on the blade type dipstick (4R70W transmission) or below the COLD area on the bullet type dipstick (E4OD transmission) and outside temperatures are above 10°C (50°F). Your vehicle does not use up transmission fluid. However, it is recommended that you check the transmission fluid at least twice a year. The fluid level should be checked if the transmission is not working properly, i.e., if the transmission slips or shifts slowly or if you notice some sign of fluid leakage. It is preferable to check the transmission fluid level at normal operating temperature, after approximately 32 km (20 miles) of driving. However, you can check the fluid level without driving to obtain a normal operating temperature if the outside temperature is above 10°C (50°F). If your vehicle has been operated for an extended period at high speeds, in city traffic during hot weather or pulling a trailer, the vehicle should be turned off for about 30 minutes to allow the fluid to cool before checking.
174
Maintenance and care
1. Park the vehicle on a level surface. 2. Start the engine and move the gearshift lever through all of the gear ranges. Allow sufficient time for each gear to engage. 3. Latch the gearshift lever in P (Park), set the parking brake and leave the engine running. 4. Remove the dipstick, wiping it clean with a clean, dry rag. 5. Install the dipstick. 6. Remove the dipstick and inspect the fluid level. • For 4R70W transmissions, the fluid level should be within the crosshatched area, or if the vehicle has not been driven,
DON'T ADD IF IN CROSSHATCHED AREA • CHECK WHEN HOT
IDLING IN PARK
175
Maintenance and care
between the holes near the bottom of the indicator.
• For E4OD transmissions, the fluid level should be within the HOT area, or if the vehicle has not been driven, within the COLD area.
7. If necessary, add fluid in .25L (1/2 pint) increments through the filler tube until the level is at the correct area on the dipstick. If an overfill occurs, excess fluid should be removed by a qualified technician.
176
f12_check_add_man_trans_fluid
Maintenance and care
Checking and adding manual transmission fluid (if equipped) 1. Clean the filler plug. 2. Remove the filler plug and inspect the fluid level.
3. Fluid level should be at bottom of the opening. 4. Add only enough fluid through the filler opening so that the fluid level is 6 mm (3/8 in) from the bottom of the opening.
Use only fluid that meets Ford specifications. Refer to the Capacities and specifications chapter.
f12_check_add_tcase_fluid
177
Maintenance and care
Checking and adding transfer case fluid 1. Clean the filler plug. 2. Remove the filler plug and inspect the fluid level.
3. Add only enough fluid through the filler opening so that the fluid level is at the bottom of the opening.
Use only fluid that meets Ford specifications. Refer to the Capacities and specifications chapter.
BATTERY If the original equipment maintenance-free battery needs
178
f12_battery
replacing, it may be replaced with a low-maintenance battery. For information on replacement batteries, refer to Motorcraft part numbers in the Capacities and specifications chapter.
The gases around the battery can explode if
exposed to flames, sparks, or lit cigarettes. An explosion could result in injury or vehicle damage.
Batteries contain sulfuric acid which burns skin,
eyes, and clothing.
Servicing your battery A low-maintenance replacement battery has removable vent caps for checking the electrolyte level and adding water. Check the electrolyte level every 24 months or 40,000 km (24,000 miles) in average temperatures below 32°C (90°F).
Keep the electrolyte level in each cell up to the level indicator. Do not overfill. If the level gets low, refill the battery with distilled water. If the battery needs water quite often,
Maintenance and care
f12_servicing_battery
179
Maintenance and care
have the charging system checked for a possible malfunction. Your vehicle is equipped with a battery saver feature designed to prevent your battery from accidental wear down due to doors left ajar. For information on this system, refer to the Controls and features chapter. Relearningidleconditions Because your vehicle’s engine is electronically controlled by a computer, some control conditions are maintained by power from the battery. When the battery is disconnected or a new battery is installed, the computer must “relearn” its idle conditions before your vehicle will drive properly. To complete this process: 1. Put the gearshift in P (Park)(automatic transmission) or N (Neutral)(manual transmission). 2. Turn off all accessories, and start the engine. 3. Let the engine idle for at least one minute. 4. The relearning process will automatically complete as you drive the vehicle. • If you do not allow the engine to relearn its idle, the idle quality of your vehicle may be adversely affected until the idle is eventually relearned. • If the battery has been
disconnected or a new battery has been installed, the clock and
180
preset radio stations must be reset once the battery is reconnected. • Always dispose of used automotive batteries in a responsible manner. Follow your community’s standards for disposal. Call your local recycling center to find out more about recycling automotive batteries.
CHANGING THE AIR FILTER 1. Loosen the clamp that secures the air cleaner in place. 2. Separate the two halves of the air cleaner. 3. Remove the air filter element from the open end of the engine air cleaner and replace it with a new element. Be careful not to crimp the filter edges between halves. This could cause filter damage if not properly seated. 4. Replace the two halves of the air cleaner and secure the clamp. For information on replacement air filter elements, refer to the Capacities and specifications chapter.
REPLACING THE WIPER BLADES If the windshield wiper blades do not work properly after cleaning, replacement of the blade element may be necessary. To replace the windshield wiper blades:
Maintenance and care
f12_changing_air_filter
f12_changing_wiper_blades
181
f12_maint_tires
com_about_tire_grades.01
Maintenance and care
1. Pull the arm away from the windshield and lock it into the service position. 2. Turn the blade at an angle from the wiper arm. Depress lock tab and push wiper mounting arm away from wiper blade assembly. 3. Attach new wiper blade by pulling wiper mounting arm down on wiper blade until lock tab is engaged.
TIRES
Information about tire quality grades New vehicles are fitted with tires that have their Tire Quality Grade (described below) molded into the tire’s sidewall. These Tire Quality Grades are determined by standards that the United States Department of Transportation has set. Tire Quality Grades apply to new pneumatic tires for use on passenger cars. They do not apply to deep tread, winter-type snow tires, space-saver or temporary use spare tires, tires with nominal rim diameters of 10 to 12 inches or limited production tires as defined in Title 49 Code of Federal Regulations Part 575.104(c)(2). U.S. Department of Transportation-Tire quality grades: The U.S. Department of Transportation requires Ford to give you the following information
182
about tire grades exactly as the government has written it. Treadwear The treadwear grade is a comparative rating based on the wear rate of the tire when tested under controlled conditions on a specified government test course. For example, a tire grade 150
would wear one and one-half (1
1/2) times as well on the government course as a tire grade 100. The relative performance of tires depends upon the actual conditions of their use, however, and may depart significantly from the norm due to variations in driving habits, service practices, and differences in road characteristics and climate. TractionABC The traction grades, from highest to lowest are A, B, and C, and they represent the tire’s ability to stop on wet pavement as measured under test surfaces of asphalt and concrete. A tire marked C may have poor traction performance. Warning: The traction grade assigned to this tire is based on braking (straightahead) traction tests and does not include cornering (turning) traction. TemperatureABC The temperature grades are A (the highest), B, and C, representing the tire’s resistance to the generation of heat and its ability to dissipate heat when tested underMaintenance and care
com_treadwear.01
com_traction_abc.01
com_temperature_abc.01
183
Maintenance and care
controlled conditions on a specified indoor laboratory test wheel. Sustained high temperature can cause the material of the tire to degenerate and reduce tire life, and excessive temperature can lead to sudden tire failure. The grade C corresponds to a level of performance which all passenger car tires must meet under the Federal Motor Vehicle Safety Standard No. 109. Grades B and A represent higher levels of performance on the laboratory test wheel than the minimum required by law.
The temperature grade for this tire is established for a
tire that is properly inflated and not overloaded. Excessive speed, underinflation, or excessive loading, either separately or in combination, can cause heat buildup and possible tire failure.
Servicing the tires Checkingthetirepressure Check the tire pressure at least once a month or after rotating tires and inflate tires as necessary. Tire pressure is most accurate when tires are cold (after vehicle has been parked for at least one
184
f12_servicing_tires
Maintenance and care
hour or driven less than 5 km [3
miles]).The cold pressure amount is listed on the Safety Compliance Certification Label located on the inside driver door latch pillar.
Improperly inflated tires can affect vehicle handling
and can fail suddenly, possibly resulting in loss of vehicle control.
Rotating the tires Rotate your tires at regular intervals to ensure even wear. Refer to the following diagrams for rotation cycles. Rotation intervals are listed in the “Service Guide.” Your wheels and tires are match-mounted for improved ride. Before you begin a tire repair, mark the wheel and tire to ensure
f12_rotating_tires
185
f12_replacing_tires
Maintenance and care
proper alignment when remounting. • Four-tire rotation
• Five-tire rotation
Replacing the tires Replace the tires when the wear band is visible through the tire treads.
186
When replacing full size tires, never mix radial, bias-belted, or bias-type tires. Use only the tire sizes that are listed on the tire pressure decal. Make sure that all tires are the same size, speed rating, and load-carrying capacity. Use only the tire combinations recommended on the decal. If you do not follow these precautions, your vehicle may not drive properly and safely.
Make sure that all replacement tires are of
the same size, type, load-carrying capacity and tread design (e.g., “All Terrain”, etc.), as originally offered by Ford.
Do not replace your tires with “high performance“
tires or larger size tires.
Failure to follow these precautions may adversely affect the handling of the vehicle and make it easier to lose control and roll over.
Identifying tire types Refer to the Safety Compliance Certification Label to determine the specific size tire and wheel Ford Motor Company recommends for use on this vehicle.
Maintenance and care
f12_iden_tire_types
f12_snow_tires
187
Maintenance and care
Snow tires and chains
Snow tires must be the same size and grade as the tires you currently have on your vehicle.
tires (of all sizes) only.
The tires on your vehicle have all weather treads to provide traction in rain and snow. However, in some climates, you may need to use snow tires and chains. Follow these guidelines when using snow tires and chains. • Use only SAE Class “S” chains. • Install chains securely, verifying that the chains do not touch any wiring, brake lines or fuel lines. • 4x2: Install tire chains on rear • 4x4: Install tire chains on rear tires (of all sizes), and on front tires of size P235/70R16 only. • Drive cautiously. If you hear the chains rub or bang against your vehicle, stop and retighten the chains. If this does not work, remove the chains to prevent damage to your vehicle. • If possible, avoid fully loading • Remove the tire chains when they are no longer needed. Do not use tire chains on dry roads. • The suspension insulation and bumpers will help prevent vehicle damage. Do not remove
your vehicle.
188
Maintenance and care
f12_fuel_info
com_important_precautions.06
these components from your vehicle when using snow tires and chains.
FUEL
Important safety precautions
Do not overfill the fuel tank. The pressure in an
overfilled tank may cause leakage and lead to fuel spray and fire.
If you do not use the proper fuel cap, the
pressure in the fuel tank can damage the fuel system or cause it to work improperly in a collision.
The fuel system may be under pressure. If the fuel
cap is venting vapor or if you hear a hissing sound, wait until it stops before completely removing the cap.
Automotive fuels can cause serious injury or
death if misused or mishandled.
189
Maintenance and care
Observe the following guidelines when handling automotive fuel: • Extinguish all smoking materials
and any open flames before fueling your vehicle. • Always turn off the vehicle • Automotive fuels can be harmful
before fueling.
or fatal if swallowed. If fuel is swallowed, call a physician immediately, even if no symptoms are immediately apparent. The toxic affects of fuel may not be visible for hours. • Fuels can also be harmful if absorbed through the skin. If fuel is splashed on the skin, promptly remove contaminated clothing and wash skin thoroughly with soap and water.
• If fuel is splashed in the eyes, remove contact lenses, flush with water for 15 minutes and seek medical attention. • Be particularly careful if you are
taking “Antabuse” or other forms of disulfiram for the treatment of alcoholism. Breathing gasoline vapors or skin contact could cause an adverse reaction. Consult a physician immediately. Choosingtherightfuel Use only UNLEADED FUEL. The use of leaded fuel is prohibited by law and could damage your
190
com_choosing_fuel.01
vehicle. The damage may not be covered by your warranty. Your vehicle was not designed to use fuel containing manganese-based additives such as MMT. Additionally, vehicles certified to California emission standards (indicated on the underhood Vehicle Emissions Control Information label) are designed to operate on California reformulated gasolines. If California reformulated gasoline is not available when you refuel, your vehicle can be operated on non-California fuels. However, even though your engine will perform adequately on other gasolines, the performance of the emission control devices and systems may be adversely affected. Repair of damage caused by using a fuel that your vehicle was not designed for may not be covered by your warranty. Octanerecommendations Your vehicle is designed to use regular gasoline with an (R+M)/2
octane rating of 87. We do not recommend gasolines labeled as “regular” in high altitude areas that are sold with octane ratings of 86
or even less.Do not be concerned if your vehicle sometimes knocks lightly. However, if it knocks heavily under most driving conditions on the recommended octane fuel, see
Maintenance and care
com_octane_recommendations.01
87
191
Maintenance and care
your dealer or a qualified service technician to prevent any engine damage. Fuelquality If you are experiencing starting, rough idle or hesitation problems try a different brand of fuel. If the condition persists, see your dealer or a qualified service technician. The American Automobile Manufacturers Association (AAMA) issued a gasoline specification to provide information on high quality fuels that optimize the performance of your vehicle. We recommend the use of gasolines that meet the AAMA specification if they are available. It should not be necessary to add any aftermarket products to your fuel tank if you continue to use a high-quality fuel. Cleanerair Ford approves the use of gasolines to improve air quality, including reformulated gasolines, that contain oxygenates such as a maximum of 10% ethanol or 15% MTBE. There should be no more than 5% methanol with cosolvents and additives to protect the fuel system. Calculatingfueleconomy To accurately calculate your vehicle’s fuel economy: 1. Fill the tank completely and record the initial odometer reading.
192
com_fuel_quality.01
f12_cleaner_air
f12_calculating_economy
Maintenance and care
2. Each time you fill the tank, record the amount of fuel added (in liters or gallons). 3. After at least three to five fuel tank fill-ups, fill the fuel tank and record the current mileage reading. 4. Use one of the following equations to calculate fuel economy. Liters used x 100 4 Total kilometers traveled = km/liter. Total miles traveled 4 Total gallons used = mpg. 5. Keep a record for at least one month. This will provide an accurate estimate of the vehicle’s fuel economy.
f12_wysk_emission_control
193
Maintenance and care
WHAT YOU SHOULD KNOW ABOUT THE EMISSION CONTROL SYSTEM Your vehicle is equipped with a catalytic convertor which enables your vehicle to comply with applicable exhaust emission requirements. For more information on your vehicle’s emission control system, see the Vehicle Emission Control Information decal located on the left side of the engine compartment.
Follow these guidelines to ensure proper emission system operation: • Use only unleaded fuel. • Avoid running out of fuel. • Do not turn off the ignition • Have regular maintenance checks performed according to the intervals in the “Service Guide.”
while the vehicle is in motion.
When servicing your vehicle, never use a metal exhaust collector. A metal collector may melt or deform plastic parts.
194
Maintenance and care
Do not park, idle, or drive your vehicle in dry grass or other dry ground cover. The emission system heats up the engine compartment and exhaust system, which can start a fire.
If you smell exhaust fumes inside your vehicle, have your dealer inspect your vehicle immediately. Do not drive if you smell exhaust fumes.
On vehicles without original equipment floor
covering or insulation, do not let passengers ride in your truck in a manner that allows contact between skin and the metal floor.
If you notice one or more of the following, the emissions system may not be working properly. Have your vehicle serviced as soon as possible. • Fluid leaks • The
or CHECK
ENGINE lights
illuminate in the instrument cluster and remain lit
• Strange odors • Engine runs more than five
seconds after shut-off or engine misfires, surges, stalls or backfires
• Loss of oil pressure.
f12_important_emissions_info
195