- 2008 Ford F 250 Owners Manuals
- Ford F 250 Owners Manuals
- 2012 Ford F 250 Owners Manuals
- Ford F 250 Owners Manuals
- 2000 Ford F 250 Owners Manuals
- Ford F 250 Owners Manuals
- 2001 Ford F 250 Owners Manuals
- Ford F 250 Owners Manuals
- 2006 Ford F 250 Owners Manuals
- Ford F 250 Owners Manuals
- 2015 Ford F 250 Owners Manuals
- Ford F 250 Owners Manuals
- 2010 Ford F 250 Owners Manuals
- Ford F 250 Owners Manuals
- 2004 Ford F 250 Owners Manuals
- Ford F 250 Owners Manuals
- 1999 Ford F 250 Owners Manuals
- Ford F 250 Owners Manuals
- 2007 Ford F 250 Owners Manuals
- Ford F 250 Owners Manuals
- 2009 Ford F 250 Owners Manuals
- Ford F 250 Owners Manuals
- 2013 Ford F 250 Owners Manuals
- Ford F 250 Owners Manuals
- 2016 Ford F 250 Owners Manuals
- Ford F 250 Owners Manuals
- 1998 Ford F 250 Owners Manuals
- Ford F 250 Owners Manuals
- 2005 Ford F 250 Owners Manuals
- Ford F 250 Owners Manuals
- 2011 Ford F 250 Owners Manuals
- Ford F 250 Owners Manuals
- 2014 Ford F 250 Owners Manuals
- Ford F 250 Owners Manuals
- 2002 Ford F 250 Owners Manuals
- Ford F 250 Owners Manuals
- 2003 Ford F 250 Owners Manuals
- Ford F 250 Owners Manuals
- 1996 Ford F 250 Owners Manuals
- Ford F 250 Owners Manuals
- Download PDF Manual
-
transmission will downshift to the appropriate gear: third, second or first gear. Shift strategy (4R100 automatic transmission) To account for customer driving habits and conditions, your 4R100
automatic transmission electronically controls the shift quality by using an adaptive learning strategy. The adaptive learning strategy is maintained by power from the battery. When the battery is disconnected or a new battery is installed, the transmission must relearn its adaptive strategy. Optimal shifting will resume within a few hundred kilometers (miles) of operation. If the shift quality does not improve within a few hundred kilometers (miles) of operation, or if the downshifts and other throttle conditions do not function normally, see your dealer or a qualified service technician as soon as possible.MANUAL TRANSMISSION OPERATION (IF EQUIPPED)
Using the clutch Vehicles equipped with a manual transmission have a starter interlock that prevents cranking the engine unless the clutch pedal is fully depressed.
139
Driving
When starting a vehicle with a manual transmission, you must: 1. Make sure the parking brake is fully set. 2. Depress the clutch pedal fully. 3. Put the gearshift lever in N (Neutral).
3 D
4 R
3 D
2 4
4. Turn the ignition to position 5
(START) to start the engine, let the engine idle for a few seconds. 5. Depress the brake pedal. 6. Release the parking brake. 7. Move the gearshift lever to the desired gear. 8. Release the brake pedal. 9. Slowly release the clutch pedal while slowly pressing down on the accelerator pedal.• Do not drive with your foot resting on the clutch pedal and do not use
the clutch to hold your vehicle at a standstill while waiting on a hill. These actions will greatly reduce clutch life.
140
Driving
Recommended shift speeds Downshift according to the following charts for your specific engine/drivetrain combination:
Maximum downshift speeds1
5-speed transmission
Shift from:
Transfer case position (if equipped)2
D (Overdrive) - 4
4 - 3
3 - 2
2 - 12H or 4H
72 km/h (45 mph) 56 km/h (35 mph) 32 km/h (20 mph) 8 km/h (5 mph)
4L
35 km/h (22 mph) 23 km/h (14 mph) 13 km/h (8 mph) 0 km/h (0 mph)
1 Use 2H or 4H for 4WD equipped vehicles. 2 Downshift at lower speeds when driving on slippery surfaces.
Maximum downshift speeds1
6-speed transmission
Shift from:
Transfer case position (if equipped)2
D (Overdrive) - 4
4 - 3
3 - 2
2 - 1
1 - LO2H or 4H
72 km/h (45 mph) 56 km/h (35 mph) 32 km/h (20 mph) 8 km/h (5 mph)
4L
26 km/h (16 mph) 19 km/h (12 mph) 13 km/h (8 mph) 3 km/h (2 mph)
Only shift to LO when at a stop.
1 Use 2H or 4H for 4WD equipped vehicles. 2 Downshift at lower speeds when driving on slippery surfaces.
141
Driving
Parking your vehicle 1. Disengage the clutch, apply brake and shift into N (Neutral).
3 D
4 R
3 D
2 4
2. Set parking brake. 3. Shift into 1 (First).
4. Turn the ignition key to position 3 (OFF).
142
Do not park your vehicle in Neutral, it may move unexpectedly and injure someone. Use 1 (First) gear and set the parking brake
fully.
Driving
Reverse Make sure that your vehicle is at a complete stop before you shift into R (Reverse). Failure to do so may damage the transmission. Put the gearshift lever in N (Neutral) and wait at least three seconds before shifting into R (Reverse). With the 5–speed transmission you can shift into R (Reverse) only by moving the gearshift lever from left of 3 (Third) and 4 (Fourth) gears before you shift into R (Reverse). This is a special lockout feature that protects you from accidentally shifting into R (Reverse) when you downshift from D (Overdrive).
4 R
With the 6–speed transmission you can shift into R (Reverse) by moving the gearshift to the extreme left from N (Neutral).
R 1
42
143
Driving
2.
Removing key from ignition • Turn the ignition key to position • Push the release lever forward and rotate the key towards you and remove.
POWER TAKE OFF (PTO) CAPABILITY (IF EQUIPPED) Some vehicles equipped with an automatic transmission and the 6.8L or 7.3L engine are also equipped with Power Take Off (PTO) capability. These vehicles have a special transmission case, internal components and calibration for PTO usage. The PTO can be used during mobile and stationary continuous/intermittent applications. PTO operation is disabled while the vehicle is in Overdrive (the TCIL will not be illuminated), in N (Neutral), during engine cranking. Transmission upshift and downshift schedules will be reduced by about 15% and will have a firmer shift feel during PTO mobile applications. The PTO cannot be disabled while the transmission is in Manual 3
(Overdrive position with Overdrive canceled), Manual 2, Manual 1. Refer to the Body Builder’s Layout Book for recommended electrical installation.144
Driving
FOUR-WHEEL DRIVE (4WD) OPERATION (IF EQUIPPED)
For important information regarding safe operation of this type of vehicle, see Preparing to drive your vehicle in this chapter.
When four–wheel drive (4WD) is engaged, power is supplied to all four wheels through a transfer case. 4WD power can be selected when additional driving power is desired. If equipped with the Electronic Shift 4WD System, and the instrument panel control is moved to 4WD Low while the vehicle is moving, the system will not engage and no damage will occur to the 4WD system. Before 4WD Low can be engaged, the vehicle must be brought to a complete stop with the brake pedal depressed and the transmission placed in neutral (or the clutch pedal depressed on manual transmissions). 4WD operation is not recommended on dry pavement. Doing so could result in difficult disengagement of the transfer case, increased tire wear and decreased fuel economy.
Electronic shift on the fly (ESOF) 4x4 system (if equipped) The 4WD system: • provides 4x4 High engagement and disengagement while the vehicle is • is operated by a rotary control located on the instrument panel that • uses hub locks that can be engaged and disengaged automatically by
allows you select 2WD, 4x4 High or 4x4 Low operation.
moving.
using a rotary control located on the instrument panel.
145
Driving • automatic hub locks can be
manually overridden by rotating the hub lock control from AUTO to LOCK. Automatic operation of the hub locks is recommended. • For proper operation, make sure that the arrow and the indicator dot on the hub are aligned.
Manual 4x4 system (if equipped) The 4WD system is engaged or disengaged by rotating the control for both front wheel hub locks from the FREE or LOCK position, then manually engaging or disengaging the transfer case with the floor-mounted shifter. • For proper operation, make sure that the arrow and the indicator dot on the hub are aligned.
4WD system indicator lights The 4WD system indicator lights illuminate only under the following conditions. If these lights illuminate when driving in 2WD, contact your Ford dealer as soon as possible. • 4x4-momentarily illuminates after the engine is started. Illuminates when 4H (4x4 High) or 4L (4x4
Low) is engaged.4x4
146
Driving
• LOW RANGE–momentarily illuminates when the ignition is turned to the ON position. Illuminates when 4L (4x4 Low) is engaged.
Using a manual 4WD system (if equipped) 2H (2WD High) – Power to rear axle only. 4H (4WD High) – Power to front and rear axles. N (Neutral) – No power to either axle. 4L (4WD Low)– Power to front and rear axles at reduced speed. Shifting from 2H (2WD high) to 4H (4WD high) Engage the locking hubs by rotating the hub lock control from FREE to LOCK, then move the transfer case lever from 2H (2WD High) to 4H (4WD High). • For proper operation, make sure that the arrow and the indicator dot on the hub are aligned.
Do not shift into 4H (4WD High) with the rear wheels slipping.
2H 4H
4L
147
Driving
Shifting from 4H (4WD high) to 2H (2WD high) Move the transfer case lever to 2H (2WD High) at a stop or any forward speed up to 88 km/h (55
mph). With the vehicle at complete stop, disengage the locking hubs (optional) by rotating the hub lock control from LOCK to FREE. • For proper operation, make sure that the arrow and the2H 4H
4L
indicator dot on the hub are aligned.
Shifting from 4H (4WD high) to 4L (4WD low) 1. Bring the vehicle to a complete stop. 2. Depress the brake. 3. Place the gearshift lever in N (Neutral) (automatic transmission) or depress the clutch (manual transmission). 4. Move the transfer case shift lever through N (Neutral) directly to 4L (4WD Low) and hold the shift lever in 4L (4WD Low) until the transfer case has fully engaged (up to 15
seconds). 5. If the transfer case does not engage into 4L (4WD Low), repeat steps 1 through 4. Shifting from 4L (4WD low) to 4H (4WD high) or 2H (2WD high) 1. Bring the vehicle to a complete stop. 2. Depress the brake. 3. Place the gearshift lever in N (Neutral) (automatic transmission) or depress the clutch (manual transmission).2H 4H
4L
148
Driving
2H 4H
4. Move the transfer case shift lever through N (Neutral) directly to 4H (4WD High) or 2H (2WD high) and hold the shift lever in position until the transfer case has fully engaged (up to 15 seconds). 5. If the transfer case does not engage, repeat steps 1 through 4. Using the N (Neutral) position The transfer case neutral position overrides the transmission and puts the vehicle in neutral regardless of transmission gearshift lever position. The vehicle can move forward or backwards. This position should only be used when towing the vehicle.
4L
2H 4H
4L
Do not leave the vehicle unattended with the transfer case in the N (Neutral) position. Always set the parking brake fully and turn
off the ignition when leaving the vehicle.
Using the electronic shift 4WD system (if equipped) Positions of the electronic shift system To prevent damage, the electronic shift 4WD system is designed to allow up to 45 seconds before the shift command is performed. In the event that conflicting shift commands are selected, allow up to 45 seconds for the shift command to be performed prior to reporting any shift concerns to your dealer. 2WD (2WD High) – Power to rear axle only. 4x4 HIGH (4WD High) – Power delivered to front and rear axles for increased traction. 4x4 LOW (4WD Low) – Power to front and rear axles at low speeds.
149
Driving
Shifting from 2WD (2WD high) to 4x4 HIGH (4WD high) Rotate the 4WD control to the 4x4
HIGH position at speeds up to 88
km/h (55 mph). • To prevent damage, the4X4
HIGH2WD
4X4
LOWelectronic shift 4WD system is designed to engage 4x4 HIGH (4WD high) when the vehicle is moving. If the 4x4 indicator light does not illuminate when shifting a vehicle that is stationary, start the vehicle moving. Once the vehicle is moving, 4x4 HIGH (4WD high) will engage and the 4x4 indicator will illuminate.
Do not shift into 4x4 HIGH with the rear wheels slipping. Shifting from 4x4 HIGH (4WD high) to 2WD (2WD high) Rotate the 4WD control to 2WD at any forward speed. Disengagement of the transfer case and front hubs may be delayed due to torque bind which is caused by driving on dry hard surfaces or performing tight turns while using the 4WD system.
4X4
HIGH4X4
LOW2WD
• You do not need to operate the vehicle in R (Reverse) to disengage
your front hubs.
Shifting from 4x4 HIGH (4WD high) to 4x4 LOW (4WD low) 1. Bring the vehicle to a complete stop. 2. Depress the brake. 3. Place the gearshift in N (Neutral) (automatic transmission) or depress the clutch (manual transmission).
150
Driving
2WD
4X4
LOW4X4
HIGH4. Move the 4WD control to the 4x4
LOW position. 5. Hold the shift command until the LOW RANGE indicator light illuminates. 6. If the LOW RANGE indicator light does not illuminate after 15
seconds, start the vehicle moving, then repeat steps 1 through 5
before reporting any shift concerns to your dealer. Shifting from 4x4 LOW (4WD low) to 4x4 HIGH (4WD high) or 2WD (2WD high) 1. Bring the vehicle to a complete stop. 2. Depress the brake. 3. Place the gearshift in N (Neutral) (automatic transmission) or depress the clutch (manual transmission). 4. Move the 4WD control to the 4x4
HIGH (4WD high) or 2WD (2WD high) position. 5. Hold the shift command until the LOW RANGE indicator light shuts off. 6. If the LOW RANGE indicator light does not shut off after 15 seconds, start the vehicle moving, then repeat steps 1 through 5 before reporting any shift concerns to your dealer.4X4
HIGH4X4
LOW2WD
Driving off-road with 4WD Your vehicle is specially equipped for driving on sand, snow, mud and rough terrain and has operating characteristics that are somewhat different from conventional vehicles, both on and off the road. Maintain steering wheel control at all times, especially in rough terrain. Since sudden changes in terrain can result in abrupt steering wheel motion, make sure you grip the steering wheel from the outside. Do not grip the spokes.
151
Driving
Drive cautiously to avoid vehicle damage from concealed objects such as rocks and stumps. You should either know the terrain or examine maps of the area before driving. Map out your route before driving in the area. For more information on driving off-road, read the “Four Wheeling” supplement in your owner’s portfolio. If your vehicle gets stuck If the vehicle is stuck it may be rocked out by shifting from forward and reverse gears, stopping between shifts, in a steady pattern. Press lightly on the accelerator in each gear. Do not rock the vehicle if the engine is not at normal operating temperature or damage to the transmission may occur. Do not rock the vehicle for more than a few minutes or damage to the transmission and tires may occur or the engine may overheat.
Do not spin the wheels at over 56 km/h (35 mph). The tires may fail and injure a passenger or bystander.
Sand When driving over sand, try to keep all four wheels on the most solid area of the trail. Do not reduce the tire pressures but shift to a lower gear and drive steadily through the terrain. Apply the accelerator slowly and avoid spinning the wheels. Mud and water If you must drive through high water, drive slowly. Traction or brake capability may be limited. When driving through water, determine the depth; avoid water higher than the bottom of the hubs (if possible) and proceed slowly. If the ignition system gets wet, the vehicle may stall. Once through water, always try the brakes. Wet brakes do not stop the vehicle as effectively as dry brakes. Drying can be improved by moving your vehicle slowly while applying light pressure on the brake pedal. After driving through mud, clean off residue stuck to rotating driveshafts and tires. Excess mud stuck on tires and rotating driveshafts causes an imbalance that could damage drive components.
152
Driving
If the transmission, transfer case or front axle are submerged in water, their fluids should be checked and changed, if necessary. Water intrusion into the transmission may damage the transmission. If the front or rear axle is submerged in water, the axle lubricant should be replaced. Driving on hilly or sloping terrain When driving on a hill, avoid driving crosswise or turning on steep slopes. You could lose traction and slip sideways. Drive straight up, straight down or avoid the hill completely. Know the conditions on the other side of a hill before driving over the crest. When climbing a steep hill, start in a lower gear rather than downshifting to a lower gear from a higher gear once the ascent has started. This reduces strain on the engine and the possibility of stalling. When descending a steep hill, avoid sudden braking. Shift to a lower gear when added engine braking is desired. When speed control is on and you are driving uphill, your vehicle speed may drop considerably, especially if you are carrying a heavy load. If vehicle speed drops more than 16 km/h (10 mph), the speed control will cancel automatically. Resume speed with accelerator pedal. If speed control cancels after climbing the hill, reset speed by pressing and holding the SET ACCEL button (to resume speeds over 50 km/h [30 mph]). Automatic transmissions may shift frequently while driving up steep grades. Eliminate frequent shifting by shifting out of a lower gear. Driving on snow and ice A 4WD vehicle has advantages over 2WD vehicles in snow and ice but can skid like any other vehicle. Avoid sudden applications of power and quick changes of direction on snow and ice. Apply the accelerator slowly and steadily when starting from a full stop. If your vehicle is equipped with a Rear Anti-lock Brake System (RABS), you should be careful when braking. Front brake lock-up, on any surface, causes loss of steering control.
(Overdrive) into
153
Driving
If your vehicle is equipped with a Four Wheel Anti-lock Brake System (ABS), apply the brakes as you normally would. In order to allow the ABS to operate properly, keep steady pressure on the brake pedal. When driving on snow or ice with either braking system, allow more stopping distance and drive slower than usual. Consider using one of the lower gears.
VEHICLE LOADING Before loading a vehicle, familiarize yourself with the following terms: • Base Curb Weight: Weight of the vehicle including any standard equipment, fluids, lubricants, etc. It does not include occupants or aftermarket equipment. • Payload: Combined maximum allowable weight of cargo, occupants and optional equipment. The payload equals the gross vehicle weight rating minus base curb weight.
weight. The GVW is not a limit or a specification.
• GVW (Gross Vehicle Weight): Base curb weight plus payload • GVWR (Gross Vehicle Weight Rating): Maximum permissable total weight of the base vehicle, occupants, optional equipment and cargo. The GVWR is specific to each vehicle and is listed on the Safety Certification Label on the driver’s door pillar.
• GAWR (Gross Axle Weight Rating): Carrying capacity for each axle
system. The GAWR is specific to each vehicle and is listed on the Safety Certification Label on the driver’s door pillar. • GCW (Gross Combined Weight): The combined weight of the towing vehicle (including occupants and cargo) and the loaded trailer. • GCWR (Gross Combined Weight Rating): Maximum permissable combined weight of towing vehicle (including occupants and cargo) and the loaded trailer • Maximum Trailer Weight Rating: Maximum weight of a trailer the
vehicle is permitted to tow. The maximum trailer weight rating is determined by subtracting the vehicle curb weight for each engine/transmission combination, any required option weight for trailer towing and the weight of the driver from the GCWR for the towing vehicle.
154
Driving • Maximum Trailer Weight: Maximum weight of a trailer the loaded
vehicle (including occupants and cargo) is permitted to tow. It is determined by subtracting the weight of the loaded trailer towing vehicle from the GCWR for the towing vehicle.
• Trailer Weight Range: Specified weight range that the trailer must fall within that ranges from zero to the maximum trailer weight rating.
Remember to figure in the tongue load of your loaded trailer when figuring the total weight.
Do not exceed the GVWR or the GAWR specified on the certification label.
Do not use replacement tires with lower load carrying capacities than the originals because they may lower the vehicle’s GVWR and GAWR limitations. Replacement tires with a higher limit than the originals do not increase the GVWR and GAWR limitations. The Safety Certification Label, found on the driver’s door pillar, lists several important vehicle weight rating limitations. Before adding any additional equipment, refer to these limitations. If you are adding weight to the front of your vehicle, (potentially including weight added to the cab), the weight added should not exceed the front axle reserve capacity (FARC). Additional frontal weight may be added to the front axle reserve capacity provided you limit your payload in other ways (i.e. restrict the number of occupants or amount of cargo carried). Always ensure that the weight of occupants, cargo and equipment being carried is within the weight limitations that have been established for your vehicle including both gross vehicle weight and front and rear gross axle weight rating limits. Under no circumstance should these limitations be exceeded. Exceeding any vehicle weight rating limitation could result in serious damage to the vehicle and/or personal injury.
Special loading instructions for owners of pickup trucks and utility-type vehicles
For important information regarding safe operation of this type of vehicle, see the Preparing to drive your vehicle section
inthe Driving chapter of this owner guide.
155
Driving
Loaded vehicles, with a higher center of gravity, may handle differently than unloaded vehicles. Extra precautions, such as
slower speeds and increased stopping distance, should be taken when driving a heavily loaded vehicle.
Your vehicle has the capability to haul more cargo and people than most passenger cars. Depending upon the type and placement of the load, hauling cargo and people may raise the center of gravity of the vehicle.
Calculating the load your vehicle can carry/tow 1. Use the appropriate maximum gross combined weight rating (GCWR) chart to find the maximum GCWR for your type engine and rear axle ratio. 2. Weigh your vehicle as you customarily operate the vehicle without cargo. To obtain correct weights, try taking your vehicle to a shipping company or an inspection station for trucks. 3. Subtract your loaded vehicle weight from the maximum GCWR on the following charts. This is the maximum trailer weight your vehicle can tow and must fall below the maximum shown under maximum trailer weight on the chart.
DRIVING THROUGH WATER Do not drive quickly through standing water, especially if the depth is unknown. Traction or brake capability may be limited and if the ignition system gets wet, your engine may stall. Water may also enter your engine’s air intake and severely damage your engine. If driving through deep or standing water is unavoidable, proceed very slowly. Never drive through water that is higher than the bottom of the hubs (for trucks) or the bottom of the wheel rims (for cars). Once through the water, always try the brakes. Wet brakes do not stop the vehicle as effectively as dry brakes. Drying can be improved by moving your vehicle slowly while applying light pressure on the brake pedal. Driving through deep water where the transmission vent tube is submerged may allow water into the transmission and cause internal transmission damage.
156
Driving
TRAILER TOWING Your vehicle may tow a Conventional/Class IV trailer or fifth wheel trailer provided the maximum trailer weight is less than or equal to the maximum trailer weight listed for your engine and rear axle ratio on the following charts. 2nd unit bodies are not included in maximum trailer weight ratings. Weight of additional “body” must be subtracted from the maximum trailer weight.
Your vehicle’s load capacity is designated by weight, not by volume, so you cannot necessarily use all available space when loading a vehicle. Towing a trailer places an additional load on your vehicle’s engine, transmission, axle, brakes, tires and suspension. Inspect these components carefully prior to and after any towing operation.
Do not exceed the GVWR or the GAWR specified on the certification label.
Towing trailers beyond the maximum recommended gross trailer weight could result in engine damage, transmission/axle damage,
structural damage, loss of control, and personal injury.
F-250 w/manual transmission
Engine
Rear axle ratio 3.73
4.10
3.73
4.30Maximum GCWR - kg (lbs.) 6 124 (13 500) 6 804 (15 000) 7 484 (16 500) 8 165 (18 000)
Maximum trailer weight - kg (lbs.)1
4 536 (10 000) 4 536 (10 000) 4 536 (10 000) 4 536 (10 000)5.4L 5.4L 6.8L 6.8L 1Conventional/Class IV trailer hitch only. Fifth wheel trailer maximum weights can be calculated by subtracting GVW from GCWR.
157
Driving
F-250 w/automatic transmission
Engine
Rear axle
Maximum
GCWR - kg (lbs.)
Maximum trailer weight - kg (lbs.)1
ratio 3.73
4.10
3.73
4.30ratio 3.73
4.10
3.73
4.10
4.30ratio 3.73
4.10
3.73
4.305.4L 5.4L 6.8L 6.8L
4 536 (10 000) 4 536 (10 000) 4 536 (10 000) 4 536 (10 000) 1Conventional/Class IV trailer hitch only. Fifth wheel trailer maximum weights can be calculated by subtracting GVW from GCWR.
6 124 (13 500) 6 804 (15 000) 7 711 (17 000) 8 165 (18 000)
F-350 w/manual transmission
Engine
Rear axle
Maximum
GCWR - kg (lbs.)
Maximum trailer weight - kg (lbs.)1
5.4L 5.4L 6.8L 6.8L 6.8L
4 536 (10 000) 4 536 (10 000) 4 536 (10 000) 4 536 (10 000) 4 536 (10 000) 1Conventional/Class IV trailer hitch only. Fifth wheel trailer maximum weights can be calculated by subtracting GVW from GCWR.
6 124 (13 500) 6 804 (15 000) 7 484 (16 500) 8 392 (18 500) 9 072 (20 000)
F-350 w/automatic transmission
Engine
Rear axle
Maximum
GCWR - kg (lbs.)
Maximum trailer weight - kg (lbs.)1
5.4L 5.4L 6.8L 6.8L
4 536 (10 000) 4 536 (10 000) 4 536 (10 000) 4 536 (10 000) 1Conventional/Class IV trailer hitch only. Fifth wheel trailer maximum weights can be calculated by subtracting GVW from GCWR.
6 124 (13 500) 6 804 (15 000) 7 711 (17 000) 9 072 (20 000)
158
F-450 with manual transmission
Driving
Engine
Rear axle
Maximum
GCWR - kg (lbs.)
Maximum trailer weight - kg (lbs.)1
6.8L 6.8L
4 536 (10 000) 4 536 (10 000) 1Conventional/Class IV trailer hitch only. Fifth wheel trailer maximum weights can be calculated by subtracting GVW from GCWR.
9 979 (22 000) 9 979 (22 000)
ratio 4.88
5.38F-450 w/automatic transmission
Engine
Rear axle
Maximum
GCWR - kg (lbs.)
Maximum trailer weight - kg (lbs.)1
6.8L 6.8L
4 536 (10 000) 4 536 (10 000) 1Conventional/Class IV trailer hitch only. Fifth wheel trailer maximum weights can be calculated by subtracting GVW from GCWR.
10 886 (24 000) 11 794 (26 000)
ratio 4.88
5.38Engine
Rear axle
F-550
Maximumratio
GCWR - kg (lbs.)
Maximum trailer
weight - kg
(lbs.)1
4.88
5.386.8L 6.8L
10 886 (24 000) 11 794 (26 000)
4 536 (10 000) 4 536 (10 000) 1Conventional/Class IV trailer hitch only. Fifth wheel trailer maximum weights can be calculated by subtracting GVW from GCWR. Towing a Class IV trailer (extra heavy duty) 2 268–4 536 kg (5 001–10 000 lbs.) trailer weight requires a weight-distributing or fifth-wheel hitch. Trailers over 4 536 kg (10 000 lbs.) require a fifth-wheel hitch.
Preparing to tow Use the proper equipment for towing a trailer, and make sure it is properly attached to your vehicle. See your dealer or a reliable trailer dealer if you require assistance.
159
Driving
Hitches Do not use hitches that clamp onto the vehicle’s bumper or attach to the axle. You must distribute the load in your trailer so that 10%–15% of the total weight of the trailer is on the tongue.
Load equalizing hitch When hooking up a trailer using a load equalizing hitch, always use the following procedure: 1. Park the unloaded vehicle on a level surface. With the ignition on and all doors closed, allow the vehicle to stand for several minutes so that it can level. 2. Measure the height of a reference point on the front and rear bumpers at the center of the vehicle. 3. Attach the trailer to the vehicle and adjust the hitch equalizers so that the front bumper height is within 0–13 mm (0.5 in) of the reference point. After proper adjustment, the rear bumper should be no higher than in Step 2.
Adjusting an equalizing hitch so the rear bumper of the vehicle is higher than it was unloaded will defeat the function of the
load equalizing hitch and may cause unpredictable handling.
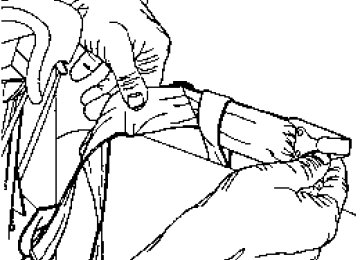
Safety chains Always connect the trailer’s safety chains to the frame or hook retainers of the vehicle hitch. To connect the trailer’s safety chains, cross the chains under the trailer tongue and allow slack for turning corners. If you use a rental trailer, follow the instructions that the rental agency gives to you. Do not attach safety chains to the bumper.
Trailer brakes Electric brakes and manual, automatic or surge-type trailer brakes are safe if installed properly and adjusted to the manufacturer’s specifications. The trailer brakes must meet local and Federal regulations.
160
Driving
Do not connect a trailer’s hydraulic brake system directly to your vehicle’s brake system. Your vehicle may not have enough
braking power and your chances of having a collision greatly increase.
The braking system of the tow vehicle is rated for operation at the GVWR not GCWR.
Trailer lamps Trailer lamps are required on most towed vehicles. Make sure your trailer lamps conform to local and Federal regulations. See your dealer or trailer rental agency for proper instructions and equipment for hooking up trailer lamps.
Using a step bumper (if equipped) The rear bumper is equipped with an integral hitch and only requires a ball with a 25.4 mm (one inch) shank diameter. The bumper has a 2 270 kg (5 000 lb.) trailer weight and 227 kg (500 lb.) tongue weight capacity. If it is necessary to relocate the trailer hitch ball position, a frame-mounted trailer hitch must be installed.
shut off automatically when you are towing on long, steep grades.
Driving while you tow When towing a trailer: • Ensure that you turn off your speed control. The speed control may • Consult your local motor vehicle speed regulations for towing a trailer. • Use a lower gear when towing up or down steep hills. This will eliminate excessive downshifting and upshifting for optimum fuel economy and transmission cooling. • Anticipate stops and brake gradually. Exceeding the GCWR rating may cause internal transmission damage and void your warranty coverage. Servicing after towing If you tow a trailer for long distances, your vehicle will require more frequent service intervals. Refer to your scheduled maintenance guide for more information.
161
Driving
loaded trailer weight.
Trailer towing tips • Practice turning, stopping and backing up before starting on a trip to get the feel of the vehicle trailer combination. When turning, make wider turns so the trailer wheels will clear curbs and other obstacles.
• Allow more distance for stopping with a trailer attached. • The trailer tongue weight should be no more than 10–15% of the • After you have traveled 80 km (50 miles), thoroughly check your • When stopped in traffic for long periods of time in hot weather, place the gearshift in P (Park) (automatic transmissions) or N (Neutral) (manual transmissions). This aids engine cooling and air conditioner efficiency. • Vehicles with trailers should not be parked on a grade. If you must
hitch, electrical connections and trailer wheel lug nuts.
park on a grade, place wheel chocks under the trailer’s wheels.
Launching or retrieving a boat When backing down a ramp during boat launching or retrieval, • Do not allow the static water level to rise above the bottom edge of • Do not allow waves to break higher than 15 cm (6 inches) above the • Disconnect the trailer tow electrical connector to prevent blown fuses
bottom edge of the rear bumper.
the rear bumper and
caused by water entering into your trailer’s electrical wiring. Exceeding these limits may allow water to enter critical vehicle components, adversely affecting driveability, emissions and reliability. Replace front and rear axle lubricants any time the axles have been submerged in water. Axle lubricant quantities are not to be checked unless a leak is suspected.
All Rear Wheel Drive (RWD) vehicles This applies to all cars and 4x2 trucks/sport utilities with rear wheel drive capability. An example of recreational towing is towing your vehicle behind a motorhome. The following recreational towing guidelines are designed to ensure that your transmission is not damaged.
162
Driving
• Place the transmission in N (Neutral). • Maximum speed is 56 km/h (35 mph). • Maximum distance is 80 km (50 miles). If a distance of 80 km (50 miles) or a speed of 56 km/h (35 mph) must be exceeded, you must disconnect the driveshaft. Ford recommends the driveshaft be removed/installed only by a qualified technician. See your local dealer for driveshaft removal/installation. Improper removal/installation of the driveshaft can cause transmission fluid loss, damage to the driveshaft and internal transmission components. RWD vehicles with 4x4 electronic shift transfer case or All Wheel Drive (AWD) vehicles with automatic transmissions Regarding recreational towing or having your vehicle towed, 4x4 vehicles with electronic shift on the fly and AWD vehicles cannot be towed with any wheels on the ground (with the exception of moving it as a disabled vehicle off the road out of traffic).
SNOWPLOWING For low speed snow removal, Ford offers a Snowplow Package as an option. If you do not have this equipment, do not use your vehicle as a snowplow or powertrain and suspension system damage may occur. Do not install a snowplow and plow with your vehicle until it has been driven at least 800 km (500 miles).
Installing the snowplow
Removing the blocker beam without installing snowplow attachment hardware may affect air bag deployment in a crash. Do not operate the truck unless either the blocker beam or snowplow attachment hardware is installed on the vehicle.
Read the following instructions before installing a snowplow: • Front GAWR must not exceed 63% of the GVW. Add ballast weight to the back of the vehicle, if necessary. Refer to the Safety Compliance Certification Label to find Front GAWR.
163
Driving • The Front Axle Accessory Reserve Capacity and the Total Accessory Reserve Capacity listed on the bottom right of the Safety Compliance Certification Label will determine whether or not the addition of a snowplow will overload your vehicle.
• The weight of the snowplow and supporting components distributed to the front axle must not exceed the front accessory reserve capacity. • The total weight of the snowplow and aftermarket equipment must • The weight of the installed snowplow and aftermarket equipment must
not exceed the Total Accessory Reserve Capacity.
not load the vehicle beyond the GAWR (front/rear) and GVWR listed on the Safety Compliance Certification Label. • The total weight of the snowplow and aftermarket equipment must be
considered part of the payload and must not exceed the Gross Combined Weight Rating (GCWR) for towing.
• Federal and most local regulations require additional exterior lamps for snowplow-equipped vehicles. Consult your dealer for additional information. • After installing a snowplow to the vehicle, ensure the vehicle’s front toe alignment and front ride height are within specification (reset if required). These specifications are located in the vehicle’s Workshop Manual. Adherence to the toe, tire pressures and ride height specification is important for proper tire wear, ride, handling and headlight aim. Also, maintain the engine oil and transmission fluid change intervals following the severe duty schedule.
Do not exceed the GVWR or the GAWR specified on the certification label.
Removing snowplow Read the following instructions before removing a snowplow: • After removing a snowplow from the vehicle, ensure the vehicle’s front toe alignment and front ride height are within specification (reset if required). These specifications are located in the vehicle’s Workshop Manual. Adherence to the toe and ride height specification is important for proper tire wear, ride, handling and headlight aim.
164
Driving
Snowplowing with your air bag equipped vehicle Your vehicle is equipped with driver and passenger air bag Supplemental Restraint System (SRS). The SRS is designed to activate when the vehicle sustains sufficient longitudinal deceleration.
Careless or high speed driving while plowing snow which results in sufficient vehicle decelerations can deploy the air bag. Such driving also increases the risk of accidents.
All occupants of the vehicle, including the driver, should always properly wear their safety belts, even when an air bag SRS is
provided.
Never remove or defeat the “tripping mechanisms” designed into the snow removal equipment by its manufacturer. Doing so may cause damage to the vehicle and the snow removal equipment as well as possible air bag deployment.
Additional equipment such as snowplow equipment may effect the performance of the air bag sensors increasing the risk of
injury. Please refer to the Body Builders Layout Book for instructions about the appropriate installation of additional equipment.
Do not attempt to service, repair, or modify the Air Bag Supplemental Restraint System or its fuses. See your Ford or
Lincoln Mercury dealer.
165
Driving
Engine temperature while plowing When driving with a plow, your engine may run at a higher temperature than normal because the attached snowplow blade will restrict airflow to the radiator.
If you are driving more than 24 km (15 miles) at temperatures above freezing, angle the plow blade either full left or full right to provide maximum airflow to the radiator. If you are driving less than 24 km (15 miles) at speeds up to 64 km/h (40 mph) in cold weather, you will not need to worry about blade position to provide maximum airflow. 4WD operation while plowing • Shift transfer case to 4x4 LOW (4WD Low) when plowing in small • Shift transfer case to 4x4 HIGH (4WD High) when plowing larger
areas at speeds below 8 km/h (5 mph).
areas or light snow at higher speeds. Do not exceed 24 km/h (15 mph).
• Do not shift the transmission from a forward gear to R (Reverse) until • If the vehicle is stuck, shift the transmission in a steady motion
the engine is at idle and the wheels are stopped.
between forward and reverse gears. Do not rock the vehicle for more than a few minutes. The transmission and tires may be damaged or the engine can overheat.
It is the owner’s responsibility to avoid engine overheating which can cause damage.
Do not spin the wheels at over 35 mph (55 km/h). The tires may fail and injure a passenger or bystander.
166
Roadside emergencies
GETTING ROADSIDE ASSISTANCE To fully assist you should you have a vehicle concern, Ford offers a complimentary roadside assistance program. This program is separate from the New Vehicle Limited Warranty. The service is available: • 24–hours, seven days a week • for the Basic warranty period (Canada) or New Vehicle Limited
Warranty period (U.S.) of three years or 60 000 km (36 000 miles), whichever comes first on Ford and Mercury vehicles, and four years or 80 000 km (50 000 miles) on Lincoln vehicles
Roadside assistance will cover: • changing a flat tire • jump-starts • lock-out assistance • fuel delivery • towing of your disabled vehicle up to 56.3 kms (35 miles) from the point of pickup (this can include to the nearest Ford dealership, or your selling dealer if within the specified distance.) One tow per disablement. Even non-warranty related tows, like accidents or getting stuck in the mud or snow, are covered (some exclusions apply, such as impound towing or repossession).
Using roadside assistance Complete the roadside assistance identification card and place it in your wallet for quick reference. In the United States, this card is found in the Owner Guide portfolio in the glove compartment in Ford vehicles and is mailed to you if you own a Mercury or Lincoln. In Canada, the card is found in the Roadside Assistance book in the glove compartment. To receive roadside assistance in the United States for Ford or Mercury vehicles, call 1–800–241–3673 or if you own a Lincoln vehicle, call 1–800–521–4140. In Canada call 1–800–665–2006. Should you need to arrange roadside assistance for yourself, Ford will reimburse a reasonable amount. To obtain information about reimbursement, call 1–800–241–3673 in the United States for Ford or Mercury vehicles; or if you own a Lincoln vehicle, call 1–800–521–4140. Call 1–800–665–2006 in Canada.
167
Roadside emergencies
Roadside coverage beyond basic warranty In the United States, you may purchase additional roadside assistance coverage beyond this period through the Ford Auto Club by contacting your Ford or Lincoln Mercury dealer. Similarly in Canada, for uninterrupted Roadside Assistance coverage, you may purchase extended coverage prior to your Basic Warranty’s Roadside Assistance expiring. For more information and enrollment, contact 1–877–294–2582 or visit our website at www.ford.ca.
HAZARD FLASHER Use only in an emergency to warn traffic of vehicle breakdown, approaching danger, etc. The hazard flashers can be operated when the ignition is off. • The hazard lights control is
located on top of the steering column.
• Depress hazard lights control to
activate all hazard flashers simultaneously.
• Depress control again to turn the
flashers off.
RESETTING THE FUEL PUMP SHUT-OFF SWITCH FUEL RESET The fuel pump shut-off switch is a device intended to stop the electric fuel pump when your vehicle has been involved in a substantial jolt. After a collision, if the engine cranks but does not start, the fuel pump shut-off switch may have been activated.
168
Roadside emergencies
The fuel pump shut-off switch is located in the passenger’s foot well, by the kick panel.
Use the following procedure to reset the fuel pump shut-off switch. 1. Turn the ignition to the OFF position. 2. Check the fuel system for leaks. 3. If no fuel leak is apparent, reset the fuel pump shut-off switch by pushing in on the reset button. 4. Turn the ignition to the ON position. Pause for a few seconds and return the key to the OFF position. 5. Make a further check for leaks in the fuel system.
169
Roadside emergencies
FUSES AND RELAYS
Fuses If electrical components in the vehicle are not working, a fuse may have blown. Blown fuses are identified by a broken wire within the fuse. Check the appropriate fuses before replacing any electrical components. NOTE: Always replace a fuse with one that has the specified amperage rating. Using a fuse with a higher amperage rating can cause severe wire damage and could start a fire. Standard fuse amperage rating and color
15
COLOR
Mini fuses
Grey Violet Pink Tan
Brown
Red Blue Yellow Natural Green
— — — — —
Standard
fuses
Grey Violet Pink Tan
Brown
Red Blue Yellow Natural Green
— — — — —
Maxi fuses
— — — — — — —
Yellow
—
Green Orange
Red Blue Tan
Natural
Cartridge
maxi fuses
— — — — — — — Blue — Pink Green Red — — —
Fuse link cartridge
— — — — — — — Blue — Pink Green Red Yellow Brown Black
Fuse rating
2A 3A 4A 5A 7.5A 10A 15A 20A 25A 30A 40A 50A 60A 70A 80A
170
Roadside emergencies
Passenger compartment fuse panel The fuse panel is located below and to the left of the steering wheel by the brake pedal. Remove the panel cover to access the fuses. To remove the fuse panel cover, turn the panel fasteners counterclockwise.
To remove a fuse use the fuse puller tool provided on the fuse panel cover.
171
Roadside emergencies
The fuses are coded as follows.
Fuse/Relay Location
Fuse Amp
Passenger Compartment Fuse Panel
Rating
Description
20A — 20A 10A
— — 5A 5A — 15A
Turn/Hazard Lamps Not Used Cigar Lighter, Data Link Connector Glove Box Lamp, Map Lamps, Power Mirrors, Underhood Lamp Not Used Not Used Power Window/Lock Switch Illumination Radio, Headlamp Switch Illumination Not Used Dual Fuel Tanks
10
172
Fuse/Relay Location
11
12
1314
15
16
17
18
1920
21
2223
2425
Roadside emergencies
Fuse Amp
Passenger Compartment Fuse Panel
Rating
30A
15A 20A
10A
5A
15A — 5A 10A
15A — 10A
10A 10A
—
Description
Wiper Motor, Wiper Run/Park Relay Coil, Wiper Hi/LO Relay Coil, Washer Pump Relay Coil Horn Stop Lamps, Center High-mount Stop Lamp, Trailer Tow Stop Lamp, Speed Control Dome Lamp, Cargo Lamp, Courtesy Lamps, Running Board Lamps Stop Lamp Switch (Logic): Generic Electronic Module (GEM), Powertrain Control Module (PCM), Four Wheel Anti-lock Brake System (4WABS) Module, Brake Shift Interlock, Cluster and PCM Keep Alive Memory Instrument Cluster, Hi-beam Headlamps Not Used Audio Auxiliary Powertrain Control Module (APCM) (Diesel only), Instrument Cluster, GEM Module, Overdrive Cancel Switch, Idle Validation Switch (Diesel only), Overhead Console, Diesel PCM via Clutch Starter Motor Relay Coil, Clutch Switch Not Used Passenger Air Bag Activation/Deactivation Switch, Blower Motor Relay Coil Air Bag Module A/C Clutch, Blend Door Actuator, Trailer Tow Battery Charge Relay Coil, Four Wheel Anti-Lock Brake System (4WABS), Turn Signal Not Used
173
Roadside emergencies
Fuse/Relay Location
26
2728
29
30
31
Relay 1
Relay 2
Relay 3
Relay 4
Relay 5Fuse Amp
Passenger Compartment Fuse Panel
Rating
— 10A
15A
5A
30A
5A — — — — —
Description
Not Used Ignition Run Power Feed (Customer Access) Brake Shift Interlock, DRL Relay Coil, Speed Control Module, Backup Lamps, Trailer Tow Backup Lamp Relay Coil, Electronic Shift On The Fly Hub Lock Solenoid, Vacuum Pump Motor Instrument Cluster (Charge and Airbag Warning Lamps) PCM Relay Coil, Ignition Coil (Gasoline only), Fuel Heater (Diesel only), Wastegate Solenoid (Diesel only), Injector Driver Module Relay Coil (Diesel only) Fog Lamp Switch Interior Lamp Relay Not Used Horn Power Window One Touch Down Relay Accessory Delay Relay
174
Roadside emergencies
Power distribution box The power distribution box, trailer tow and electronic shift on the fly relay blocks are located in the engine compartment near the brake master cylinder.
The power distribution box contains high-current fuses that protect your vehicle’s main electrical systems from overloads.
Always disconnect the battery before servicing high current fuses.
Always replace the cover to the Power Distribution Box before reconnecting the battery or refilling fluid reservoirs.
If the battery has been disconnected and reconnected, refer to the Battery section of the Maintenance and care chapter.
175
Roadside emergencies
The high-current fuses and relays are coded as follows. Fuse/Relay Location
Fuse Amp
Power Distribution Box Description
Rating 7.5A * 10A* 7.5A* 20A*
20A*
(Gasoline only)
5A*
(Diesel only)
10A*
Trailer Tow Left Stop/Turn Lamp Washer Pump Trailer Tow Right Stop/Turn Lamp Trailer Tow Backup Lamps, Trailer Tow Park Lamps Gasoline only-PCM, Fuel Pump Relay Coil, Mass Air Flow Sensor, Fuel Injectors Diesel only-Dual Alternator ⬙A⬙ Field
Gasoline only-A/C (CASS) Diesel only-Single or Dual Alternator ⬙A⬙ Field, Regulator
176
Roadside emergencies
Fuse Amp
Power Distribution Box Description
Rating 20A*
(Gasoline only)
5A*
(Diesel only)
15A*
10A* 20A* 10A* 15A*
30A** 60A** 30A** 30A** 30A**
30A** 20A** 50A** 50A** 50A** 40A** 30A**
Gasoline only-Vapor Management Valve, HEGO Sensors, Intake Manifold Communication Control, EVR Solenoid, PCM, Canister Vent Solenoid Diesel only-Dual Alternator ⬙A⬙ Field Trailer Tow Electronic Brake Illumination, Park Lamps, Trailer Tow Park Lamp Relay Coil Left Headlamp (Low Beam) Power Point Right Headlamp (Low Beam) Daytime Running Lamps (DRL) Resistor, Fog Lamps Multi-function Switch, Headlamps Anti-Lock Brake System Heated Seats Trailer Tow Battery Charge Electronic Shift On The Fly Relay, Transfer Case Shift Motor Power Seat, Adjustable Pedals Fuel Pump Motor, PCM Ignition Switch (B4 & B5) Ignition Switch (B1 & B3) Junction Box Battery Feed Blower Motor PCM Power
(Gasoline only)
20A**
(Diesel only)
30A***
Power Windows
Fuse/Relay Location
10
11
1213
14
15
16
1718
19
20
21
22
23
2425
177
Roadside emergencies
Fuse/Relay Location
26
27
28
29
30
31
3233
34
35
36
37
38
39
40
41Fuse Amp
Power Distribution Box Description
Rating 20A**
- (Gasoline
only)
30A**
(Diesel only)
30A** 20A**
-- -- --
-- -- -- -- -- -- -- -- —
If equipped with Remote Keyless Entry-Driver Door Unlock Relay Coil, All Door Unlock Relay Coil, All Door Lock Relay Coil, Park Lamp Flash Relay, If not equipped with Remote Keyless Entry-Power Door Lock Motors Gasoline only-Not Used Diesel only-Injector Driver Module
Trailer Tow Electronic Brake Controller Radio PCM Power Relay Blower Motor Relay A/C CASS (Gasoline only), Injector Driver Module Power Relay (Diesel only) Washer Pump Relay Windshield Wiper Park/Run Relay Windshield Wiper HI/LO Relay A/C Clutch Diode PCM Diode Trailer Tow Backup Lamp Relay Trailer Tow Battery Charge Relay Electronic Shift On The Fly Relay #1
Electronic Shift On The Fly Relay #2* Mini Fuses ** Maxi Fuses ***Circuit Breaker
178
Roadside emergencies
CHANGING THE TIRES If you get a flat tire while driving, do not apply the brake heavily. Instead, gradually decrease your speed. Hold the steering wheel firmly and slowly move to a safe place on the side of the road.
Spare tire information Your vehicle may be equipped with a spare tire that can be used as either a spare or a regular tire. The spare tire is not equipped with wheel trim. The wheel trim from the original wheel/tire may be used on the spare. If your vehicle is equipped with 4WD, a spare tire of a different size than the road tires should not be used. Such a tire could result in damage to driveline components and make the vehicle difficult to control. Location of the spare tire and tools The spare tire and tools for your vehicle are stowed in the following locations:
Tool
Spare tire
(pick-up trucks only)
Jack
Jack handle and lug
wrench
Key, spare tire lock
(if equipped)
Location
Under the vehicle, just forward of the rear bumper Regular cab, crew cab and SuperCab without rear bench seat: Fastened to floor pan behind rearmost seat on passenger side SuperCab with rear bench seat: Under rear bench on passenger side On top of the radiator support at the front of the engine compartment In the glove box
Removing the spare tire (with spare tire carrier only) 1. The following tools are required to remove the spare tire: • one handle extension and one typical extension. To assemble, align button with hole and slide parts together. To disconnect, depress button and pull apart.
179
Roadside emergencies • one wheel nut wrench. Slide over
square end of jack handle.
2. If equipped, unlock and remove the spare tire lock from the rear bumper drive tube using the the spare tire lock key and the jack handle. 3. Insert the hooked end of the jack handle into the rear bumper drive tube. The handle will stop moving and you will feel forward resistance to turning when properly engaged. 4. Turn the handle counterclockwise and lower the spare until you can slide the tire rearward and the cable is slack. 5. Remove the retainer through the center of the wheel.
180
Roadside emergencies
Stowing the spare tire 1. Lay the tire on the ground with the valve stem facing up. 2. Slide the wheel under the vehicle and install the retainer through the wheel center. 3. Turn the jack handle clockwise until the tire is raised to its original position underneath the vehicle. The effort to turn the jack handle increases significantly and the spare tire carrier ratchets when the tire is raised to the stowed position. The spare tire carrier has a built-in ratchet feature that will not allow you to overtighten. 4. Check that the tire lies flat to the frame assembly. Push against the tire to make sure it is tightly seated under the vehicle. Loosen or retighten if necessary. 5. If removed, install the spare tire lock into the bumper drive tube with the spare tire lock key and jack handle.
Tire change procedure 1. Park on a level surface, activate hazard flashers and set the parking brake. • Automatic transmission: Place gearshift lever in P (Park). • Manual transmission: Place gearshift lever in R (Reverse). • Electronic Shift On the Fly four wheel drive: Place transfer case in 2WD, 4x4 HIGH or 4x4 LOW. • Manual shift transfer case four wheel drive: Place transfer case in 2H, 4H or 4L.
181
Roadside emergencies
To prevent the vehicle from moving when you change a tire, be sure the parking brake is set, then block (in both directions) the wheel that is diagonally opposite (other side and end of the vehicle) to the tire being changed.
2. Turn engine OFF and block the diagonally opposite wheel (block not provided). 3. Remove the jack, jack handle, lug wrench and spare tire from the stowage locations. 4. Use the tip of the lug wrench to remove any wheel trim. 5. Loosen each wheel lug nut one-half turn counterclockwise but do not remove them until the wheel is raised off the ground.
When one of the rear wheels is off the ground, the transmission alone will not prevent the vehicle from moving or slipping off the