- 2010 Toyota Yaris Sedan Owners Manuals
- Toyota Yaris Sedan Owners Manuals
- 2008 Toyota Yaris Sedan Owners Manuals
- Toyota Yaris Sedan Owners Manuals
- 2011 Toyota Yaris Sedan Owners Manuals
- Toyota Yaris Sedan Owners Manuals
- 2009 Toyota Yaris Sedan Owners Manuals
- Toyota Yaris Sedan Owners Manuals
- 2012 Toyota Yaris Sedan Owners Manuals
- Toyota Yaris Sedan Owners Manuals
- Download PDF Manual
-
tion. To free it, turn the key while turning the steering wheel slightly in either direc- tion.
■If the engine does not start (vehicles with engine immobilizer system) The engine immobilizer system may not have been deactivated. (→P. 64)
■Key reminder function
A buzzer sounds if the driver’s door is opened, while the engine switch is in the ACC or LOCK position to remind you to remove the key.
CAUTION
■When starting the engine
Always start the engine while sitting in the driver’s seat. Do not depress the accelerator while starting the engine under any circumstances. Doing so may cause an accident resulting in death or serious injury.
■Caution while driving
Do not turn the engine switch to the LOCK position. If in an emergency, you must turn the engine off while the vehicle is moving, turn the engine switch only to the ACC position.
116
2
2-1. Driving procedures
NOTICE
■To prevent battery discharge
Do not leave the engine switch in the ACC or ON position for long periods if the engine is not running. ■When starting the engine
●Do not crank for more than 30 seconds at a time. This may overheat the
starter and wiring systems. ●Do not race a cold engine. ●If the engine becomes difficult to start or stalls frequently, have the engine
checked immediately.
117
2-1. Driving procedures Automatic transmission∗
Select a shift position appropriate for the driving conditions. ■ Shifting the shift lever
While the engine switch is on, depress the brake pedal and
move the shift lever.
118
∗: If equipped
2
2-1. Driving procedures
■ Shift position uses
Shift position
Function
Parking the vehicle or starting the engine
Reversing Neutral
Normal driving*
Position for engine braking
Position for more powerful engine braking
Position for maximum engine braking
*: Shifting to the D position allows the system to select a gear suitable for the driving conditions. Setting the shift lever to the D position is recommended for normal driving.
■Downshifting restrictions
The shift lever cannot be downshifted if the following speeds are exceeded. mph (km/h)
Downshifting
3→2
2→L
Tire size 175/65R14
185/60R15
175/65R14
185/60R15Maximum speed
53 (86) 54 (88) 26 (43) 27 (44)
■When driving with the cruise control system (if equipped)
The engine brake will not operate when downshifting from D to 3. (→P. 142)
■If the shift lever cannot be shifted from P (→P. 347) ■Driving on a downhill
On declines, there may be case where the vehicle shifts down automatically to obtain engine braking. As a result of the downshifting, the engine speed may increase.
119
2-1. Driving procedures Manual transmission∗
■ Shifting the shift lever
Fully depress the clutch pedal before operating the shift lever, and then release it slowly.
■Maximum allowable speeds
Observe the following maximum allowable speeds in each gear when maxi- mum acceleration is necessary.
mph (km/h)
Shift position
Maximum speed
31 (51) 59 (95) 86 (139)
120
∗: If equipped
2
2-1. Driving procedures Turn signal lever
Left turn Right turn Move and hold the lever partway to signal a lane change. The left hand signal will flash until you release the lever. Move and hold the lever partway to signal a lane change. The right hand signal will flash until you release the lever.
■Turn signals can be operated when
The engine switch is in the ON position.
■If the indicators flash faster than usual
Check that a light bulb in the front or rear turn signal lights has not burned out.
121
2-1. Driving procedures Parking brake
■ Set the parking brake
except Canada
Canada
Fully set the parking brake while depressing the brake pedal.
At this time, the indicator will come on.
■ Release the parking brake
Slightly raise the lever Press the button Lower it completely
122
2-1. Driving procedures
■Parking brake engaged warning buzzer
The buzzer sounds to indicate that parking brake is still engaged (with the vehicle having reached a speed of 3 mph [5 km/h]).
■Usage in winter time
See “Winter driving tips” for parking brake usage in winter time. (→P. 155)
NOTICE
■Before driving
Fully release the parking brake. Driving the vehicle with the parking brake set will lead to brake components overheating, which may affect braking performance and increase brake wear.
123
2-1. Driving procedures Horn
To sound the horn, press on or close to the
mark.
■After adjusting the steering wheel
Make sure that the steering wheel is securely locked. The horn may not sound if the steering wheel is not securely locked. (→P. 52)
124
2-2. Instrument cluster Gauges and meters
Vehicles with Optitron type meters
The following gauges, meters and displays illuminate when the engine switch is in the ON position.
Tachometer Displays the engine speed in revolutions per minute. Speedometer Displays the vehicle speed. Fuel gauge Displays the quantity of fuel remaining in the tank. Clock Indicates the time.
125
2-2. Instrument cluster
Odometer/trip meter Odometer: Displays the total distance the vehicle has been driven. Trip meter: Displays the distance the vehicle has been driven since the meter was last reset. Trip meters A and B can be used to record and display differ- ent distances independently. ODO/TRIP button Switches between odometer and trip meter displays. Pushing and hold- ing the button will reset the trip meter when the trip meter is being dis- played. CLOCK button Adjusts the time. (→P. 231)
126
Vehicles without Optitron type meters
2-2. Instrument cluster
Tachometer Displays the engine speed in revolutions per minute. Speedometer Displays the vehicle speed. Fuel gauge Displays the quantity of fuel remaining in the tank. Clock Indicates the time.
127
2-2. Instrument cluster
Odometer/trip meter Odometer: Displays the total distance the vehicle has been driven. Trip meter: Displays the distance the vehicle has been driven since the meter was last reset. Trip meters A and B can be used to record and display differ- ent distances independently. ODO/TRIP button Switches between odometer and trip meter displays. Pushing and hold- ing the button will reset the trip meter when the trip meter is being dis- played. CLOCK button Adjusts the time. (→P. 231)
Odometer and trip meter display button
Pressing this button switches between odometer and trip meter dis- plays.
Odometer Trip meter A* Trip meter B* *:Pushing and holding the button will reset the trip meter.
128
2-2. Instrument cluster
Instrument panel light control
The brightness of the instrument panel lights can be adjusted.
Brighter Darker With the dial turned fully up, the intensity of the instrument panel lights will not be reduced even when the tail lights/headlights are turned on.
NOTICE
■To prevent damage to the engine and its components
●Do not let the indicator needle of the tachometer enter the red zone, which
indicates the maximum engine speed.
●The engine may be overheating if the high engine coolant temperature warning light comes on. In this case, immediately stop the vehicle in a safe place, and check the engine after it has cooled completely. (→P. 353)
129
2-2. Instrument cluster Indicators and warning lights
The indicator and warning lights on the instrument cluster and cen- ter panel inform the driver of the status of the vehicle’s various sys- tems.
Instrument cluster (vehicles with Optitron type meters)
Instrument cluster (vehicles without Optitron type meters)
130
Center panel
2-2. Instrument cluster
131
2-2. Instrument cluster
■ Indicators
The indicators inform the driver of the operating state of the vehicle’s various systems.
(if equipped)
(if equipped) *1,2
Cruise control indicator (→P. 142)
Cruise control set indi- cator (→P. 142)
Slip indicator (→P. 146)
*1 VSC OFF indicator
(→P. 147)
*1 TRAC OFF indicator
(→P. 147)
AIR BAG ON indicator (→P. 84)
AIR BAG OFF indicator (→P. 84)
Turn signal indicator (→P. 121)
Headlight high beam indicator (→P. 135)
Headlight indicator (→P. 134)
Tail light indicator (→P. 134)
Front fog light indicator (→P. 137)
(Automatic transmis- sion vehicles) Shift position and shift range indicators (→P. 118)
Low engine coolant temperature indicator Indicates the engine coolant temperature is cool.
(except Canada)
(Canada)
(if equipped)
132
2-2. Instrument cluster
■ Warning lights
Warning lights inform the driver of malfunctions in any of the vehicle’s systems. (→P. 323)
*1
*1
*1
*1
*1
*1
(except Canada) *1
(Canada)
*1
*1
(Canada)
(except Canada)
(Canada)
(except Canada) *1
(if equipped) *4
*1,3
*1
*1
(except Canada)
*1
(except Canada)
(if equipped)
*1: These lights turn on when the engine switch is turned to the ON position to indicate that a system check is being performed. They will turn off after the engine is started, or after a few seconds. There may be a malfunction in a system if a light does not come on, or if the lights do not turn off. Have the vehicle inspected by your Toyota dealer.
*2: The indicator flashes to indicate that the system is operating. *3: The indicator comes on to indicate a malfunction. *4: The indicator flashes to indicate a malfunction.
CAUTION
■If a safety system warning light does not come on
Should a safety system light such as ABS and the SRS airbag warning light not come on when you start the engine, this could mean that these systems are not available to help protect you in an accident, which could result in death or serious injury. Have the vehicle inspected by your Toyota dealer immediately if this occurs.
133
2-3. Operating the lights and wipers Headlight switch
The headlights can be operated manually. Turning the end of the lever turns on the lights as follows:
Type A
running
OFF Vehicles with daytime running light system: The daytime lights turn on. The side marker, parking, tail, license plate, daytime run- ning (if equipped) and instrument panel lights turn on. The headlights and all lights listed above (except daytime run- ning lights) turn on.
except Canada
Canada
134
2
2-3. Operating the lights and wipers
running
OFF Vehicles with daytime running light system: The daytime lights turn on. The side marker, parking, tail, license plate, daytime run- ning (if equipped) and instrument panel lights turn on. The headlights and all lights listed above (except daytime run- ning lights) turn on.
Type B
except Canada
Canada
Turning on the high beam headlights
With the headlights on, push the lever forward to turn on the high beams. Pull the lever back to the center position to turn the high beams off. Pull the lever toward you to turn on the high beams. Release the lever to turn them off. You can flash the high beams with the headlights on or off.
135
2-3. Operating the lights and wipers
■Daytime running light system (if equipped)
●To make your vehicle more visible to other drivers, the headlights turn on automatically (at a reduced intensity) whenever the engine is started and the parking brake is released. Daytime running lights are not designed for use at night.
●Compared to turning on the headlights, the daytime running light system offers greater durability and consumes less electricity, so it can help improve fuel economy. ■Light reminder buzzer
A buzzer sounds when the key is removed and the driver’s door is opened while the lights are turned on.
NOTICE
■To prevent battery discharge
Do not leave the lights on longer than necessary when the engine is not run- ning.
136
2-3. Operating the lights and wipers Fog light switch∗
The fog lights improve visibility in difficult driving conditions, such as in rain or fog. They can be turned on only when the headlights are on low beam.
Type A
OFF Front fog lights ON
∗: If equipped 137
2-3. Operating the lights and wipers
Type B
OFF Front fog lights ON
138
2
2-3. Operating the lights and wipers Windshield wipers and washer
Type A
Intermittent wind- shield wiper opera- tion Low speed wind- shield wiper opera- tion High speed wind- shield wiper opera- tion Temporary operation
Washer/wiper dual opera- tion Wipers will automatically oper- ate a couple of times after the washer squirts.
139
2-3. Operating the lights and wipers
Type B
Intermittent wind- shield wiper opera- tion Low speed wind- shield wiper opera- tion High speed wind- shield wiper opera- tion Temporary operation
Washer/wiper dual opera- tion Wipers will automatically oper- ate a couple of times after the washer squirts.
■The windshield wiper and washer can be operated when
The engine switch must be in the ON position.
■If no windshield washer fluid sprays
Check that the washer nozzles are not blocked and if there is washer fluid in the windshield washer fluid reservoir.
140
2-3. Operating the lights and wipers
NOTICE
■When the windshield is dry
Do not use the wipers, as they may damage the windshield.
■When there is no washer fluid spray from the nozzle
Damage to the washer fluid pump may be caused if the lever is pulled toward you and held continually. ■When a nozzle becomes block
Do not try to clear it with a pin or other object. The nozzle will be damaged.
141
2-4. Using other driving systems Cruise control∗
Use cruise control to maintain a set speed without using the acceler- ator.
Cruise control indicator Cruise control set indicator Cruise control switch
■ Setting the vehicle speed
Press the ON-OFF button to activate the cruise control.
indicator will
Cruise control come on. Press the button again deactivate the cruise control.
to
Accelerate or decelerate the vehicle to the desired speed, and push the lever down to set the speed.
“SET” indicator will come on. The vehicle speed at the moment the lever is released becomes the set speed.
142
∗: If equipped
2
2-4. Using other driving systems
■ Adjusting the set speed
To change the set speed, operate the lever until the desired set speed is obtained.
Increases the speed Decreases the speed Fine adjustment: Momentarily move the lever in the desired direction. Large adjustment: Hold lever in the desired direction.
the
The set speed will be increased or decreased as follows: Fine adjustment: By approximately 1 mph (1.6 km/h) each time the lever is operated. Large adjustment: The set speed can be increased or decreased con- tinually until the lever is released.
■ Canceling and resuming the constant speed control
Pulling the lever toward you cancels the constant speed control. The speed setting is also can- celed when the brakes are applied or the clutch pedal (manual transmission only) is depressed. Pushing resumes speed control. Resuming is available when the vehicle speed is more than approximately 25 mph (40
km/h).lever up constant
the the
143
2-4. Using other driving systems
■Cruise control can be set when
●The shift lever is in D or range 3. (vehicles with an automatic transmis-
sion)
●Vehicle speed is above approximately 25 mph (40 km/h).
■Accelerating
The vehicle can be accelerated normally. After acceleration, the set speed resumes.
■Automatic cruise control cancelation
Cruise control will stop maintaining the vehicle speed in any of the following situations. ●Actual vehicle speed falls more than approximately 10 mph (16 km/h)
below the preset vehicle speed. At this time, the memorized set speed is not retained.
●Actual vehicle speed is below approximately 25 mph (40 km/h). ●VSC is activated.
■If the cruise control indicator flashes
Press the ON-OFF button once to deactivate the system, and then press the button again to reactivate the system. If the cruise control speed cannot be set or if the cruise control cancels immediately after being activated, there may be a malfunction in the cruise control system. Have the vehicle inspected by your Toyota dealer.
144
2
2-4. Using other driving systems
CAUTION
■To avoid operating the cruise control by mistake
Switch the cruise control off using the ON-OFF button when not in use.
■Situations unsuitable for cruise control
Do not use cruise control in any of the following situations. Doing so may result in loss of control and could cause an accident resulting in death or serious injury. ●In heavy traffic ●On roads with sharp bends ●On winding roads ●On slippery roads, such as those covered with rain, ice or snow ●On steep hills
Vehicle speed may exceed the set speed when driving down a steep hill.
●When your vehicle is towing a trailer or during emergency towing
145
2-4. Using other driving systems Driving assist systems
To help enhance driving safety and performance, the following sys- tems operate automatically in response to various driving situations. Be aware, however, that these systems are supplementary and should not be relied upon too heavily when operating the vehicle. ■ ABS (Anti-lock Brake System)
Helps to prevent wheel lock when the brakes are applied suddenly, or if the brakes are applied while driving on a slippery road surface.
■ Brake Assist
Generates an increased level of braking force after the brake pedal is depressed, when the system detects a panic stop situation.
■ VSC (Vehicle Stability Control)
Helps the driver to control skidding when swerving suddenly or turning on slippery road surfaces.
■ TRAC (Traction Control)
Helps to maintains drive power and prevents the front wheels from spinning when starting the vehicle or accelerating on slippery roads.
■ EPS (Electric Power Steering)
Employs an electric motor to reduce the amount of effort needed to turn the steering wheel.
When the VSC/TRAC systems are operating
Slip indicator flashes to indicate that VSC/TRAC systems are operating.
A buzzer (intermittent) sounds to indicate that VSC is operating.
146
2-4. Using other driving systems
Disabling TRAC/VSC systems
If the vehicle gets stuck in fresh snow or mud, TRAC/VSC may reduce power from the engine to the wheels. You may need to turn the system off to enable you to rock the vehicle in order to free it. ■ Turning off the TRAC system only
To turn the TRAC system off, quickly press and release the button.
The TRAC OFF indicator will come on. Push the button again to turn the system back on.
147
2-4. Using other driving systems
■ Turning off both TRAC and VSC systems
To turn the TRAC and VSC sys- tems off, press and hold the but- ton for more than 3 seconds while the vehicle is stopped.
The TRAC OFF indicator light and VSC OFF indicator light will come on.
■ When the TRAC OFF indicator light comes on even if the but-
ton has not been pressed TRAC system cannot be operated. Contact your Toyota dealer.
■Sounds and vibrations caused by the ABS, TRAC, VSC and brake
assist systems ●A sound may be heard from the engine compartment when the engine is started or just after the vehicle begins to move. This sound does not indi- cate that a malfunction has occurred in any of these systems
●Any of the following conditions may occur when the above systems are
operating. None of these indicates that a malfunction has occurred. • Vibrations may be felt through the vehicle body and steering. • A motor sound may be heard after the vehicle comes to a stop. • The brake pedal may pulsate slightly after the ABS is activated. • The brake pedal may move down slightly after the ABS is activated.
148
2-4. Using other driving systems
■Reactivation of the TRAC/VSC systems after turning off the engine
Turning the engine switch OFF after turning off the TRAC and VSC systems will automatically reactivate them.
■Reactivation of the TRAC system linked to vehicle speed
When only the TRAC system is turned off, the TRAC system will turn on when vehicle speed increases. However, when both TRAC and VSC sys- tems are turned off, the systems will not turn on even when vehicle speed increases.
■EPS operation sound
When the steering wheel is operated, a motor sound (whirring sound) may be heard. This does not indicate a malfunction.
■Reduced effectiveness of the EPS system
The effectiveness of the EPS system is reduced to prevent the system from overheating when there is frequent steering input over an extended period of time. The steering wheel may feel heavy as a result. Should this occur, refrain from excessive steering input or stop the vehicle and turn the engine off. The EPS system should return to normal within 10 minutes.
CAUTION
■The ABS does not operate effectively when
●Tires with inadequate gripping ability are used (such as excessively worn
tires on a snow covered road).
●The vehicle hydroplanes while driving at high speed on the wet or slick
roads.
149
2-4. Using other driving systems
CAUTION
■Stopping distance when the ABS is operating will exceed that of nor-
mal conditions The ABS is not designed to shorten the vehicle’s stopping distance. Always maintain a safe distance from the vehicle in front of you in the following situ- ations. ●When driving on dirt, gravel or snow-covered roads ●When driving with tire chains ●When driving over bumps in the road ●When driving over roads with potholes or uneven roads
■When VSC system is activated
The slip indicator flashes and a warning buzzer sounds. Always drive care- fully. Reckless driving may cause an accident. Exercise particular care when the indicator flashes and a buzzer sounds.
■TRAC system may not operate effectively when
Directional control and power may not be achievable while driving on slip- pery road surfaces, even if TRAC is operating. Do not drive the vehicle in conditions where stability and power may be lost.
■Replacing tires
Make sure that all tires are of the specified size, brand, tread pattern and total load capacity. In addition, make sure that the tires are inflated to the recommended tire inflation pressure level. The ABS, VSC and TRAC systems will not function correctly if different tires are installed on the vehicle. Contact your Toyota dealer for further information when replacing tires or wheels.
■Handling of tires and suspension
Using tires with any kind of problem or modifying the suspension will affect the driving assist systems, and may cause the system to malfunction.
150
2-5. Driving information Cargo and luggage
Take notice of the following information about storage precau- tions, cargo capacity and load. ● Stow cargo and luggage in the trunk whenever possible. ● Be sure all items are secured in place. ● Be careful to keep the vehicle level. Placing the weight as far for-
ward as possible helps maintain vehicle balance.
● For better fuel economy, do not carry unnecessary weight.
Capacity and distribution
Cargo capacity depends on the total weight of the occupants. (Cargo capacity) = (Total load capacity) − (Total weight of occupants) Steps for Determining Correct Load Limit— (1)Locate the statement “The combined weight of occupants and cargo should never exceed XXX kg or XXX lbs.” on your vehicle’s placard.
(2)Determine the combined weight of the driver and passengers that
will be riding in your vehicle.
(3)Subtract the combined weight of the driver and passengers from
XXX kg or XXX lbs.
(4)The resulting figure equals the available amount of cargo and lug-
gage load capacity. For example, if the “XXX” amount equals 1400 lbs. and there will be five 150 lb passengers in your vehicle, the amount of available cargo and luggage load capacity is 650 lbs. (1400 − 750 (5 × 150) = 650 lbs.)
(5)Determine the combined weight of luggage and cargo being loaded on the vehicle. That weight may not safely exceed the available cargo and luggage load capacity calculated in Step 4.
151
2-5. Driving information
(6)If your vehicle will be towing a trailer, load from your trailer will be transferred to your vehicle. Consult this manual to determine how this reduces the available cargo and luggage load capacity of your vehicle. Except Canada: Toyota does not recommend towing a trailer with your vehicle. Your vehicle is not designed for trailer towing.
Example on your vehicle
Cargo capacity Total load capacity
When 2 people with the combined weight of 366 lb. (166 kg) are riding in your vehicle, which has a total load capacity of 845 lb. (383
kg), the available amount of cargo and luggage load capacity will be as follows: 845 lb. − 366 lb. = 479 lb. (383 kg − 166 kg = 217 kg)In this condition, if 3 more passengers with the combined weight of 388 lb. (176 kg) get on, the available cargo and luggage load will be reduced as follows:
479 lb. − 388 lb. = 91 lb. (217 kg − 176 kg = 41 kg) As shown in the above example, if the number of occupants increases, the cargo and luggage load will be reduced by an amount that equals the increased weight due to the additional occupants. In other words, if an increase in the number of occupants causes an excess of the total load capacity (combined weight of occupants plus cargo and luggage load), you must reduce the cargo and luggage on your vehicle.
152
2
2-5. Driving information
CAUTION
■Things that must not be carried in the trunk
The following things may cause a fire if loaded in the trunk. ●Receptacles containing gasoline ●Aerosol cans
■Storage precautions
Observe the following precautions. Failing to do so may result in death or serious injury. ●Do not place cargo or luggage in or on the following locations as the item may get under the clutch, brake or accelerator pedal and prevent the pedals from being depressed properly, block the driver’s vision, or hit the driver or passengers, causing an accident. • Driver’s feet • Front passenger or rear seats (when stacking items) • Package tray • Instrument panel • Dashboard • Auxiliary box or tray that has no lid
●Secure all items in the occupant compartment, as they may shift and injure someone during emergency braking, sudden swerving or an accident.
●Never allow anyone to ride in the enlarged trunk. It is not designed for passengers. They should ride in their seats with their seat belts prop- erly fastened. Otherwise, they are much more likely to suffer death or serious bodily injury, in the event of sudden braking, sudden swerving or an accident.
■Capacity and distribution
●Do not exceed the maximum axle weight rating or the total vehicle
weight rating.
●Even if the total load of occupant’s weight and the cargo load is less than the total load capacity, do not apply the load unevenly. Improper loading may cause deterioration of steering or braking control which may cause death or serious injury.
153
2-5. Driving information Vehicle load limits
Vehicle load limits include total load capacity, seating capacity, TWR (Trailer Weight Rating) and cargo capacity. ■ Total load capacity: 845 lb. (383 kg)
Total load capacity means the combined weight of occupants, cargo and luggage.
■ Seating capacity: 5 occupants (Front 2, Rear 3)
Seating capacity means the maximum number of occupants whose estimated average weight is 150 lb. (68 kg) per person. Even if the number of occupants are within the seating capacity, do not exceed the total load capacity.
■ TWR (Trailer Weight Rating) (Canada): 700 lb. (318 kg)
TWR (Trailer Weight Rating) means the maximum gross trailer weight (trailer weight plus its cargo weight) that your vehicle is able to tow.
■ TWR (Trailer Weight Rating) (except Canada):
Toyota does not recommend towing a trailer with your vehicle.
■ Cargo capacity
Cargo capacity may increase or decrease depending on the weight and the number of occupants.
■Total load capacity and seating capacity
These details are also described on the tire and loading information label. (→P. 276)
CAUTION
■Overloading the vehicle
Do not overload the vehicle. It may not only cause damage to the tires, but also degrade steering and braking ability, resulting in an accident.
154
2
2-5. Driving information Winter driving tips
Carry out the necessary preparations and inspections before driving the vehicle in winter. Always drive the vehicle in a manner appropri- ate to the prevailing weather conditions. ■ Pre-winter preparations
● Use fluids that are appropriate to the prevailing outside tem-
peratures. • Engine oil • Engine coolant • Washer fluid
● Have a service technician inspect the level and specific grav-
ity of battery electrolyte.
● Have the vehicle fitted with four snow tires or purchase a set
of tire chains for the front tires. Ensure that all tires are the same size and brand, and that chains match the size of the tires. ■ Before driving the vehicle
Perform the following according to the driving conditions. ● Do not try to forcibly open a window, scrape an outside rear view mirror surface or move a wiper or outside rear view mir- ror that is frozen. Pour warm water over the frozen area to melt the ice. Wipe away the water immediately to prevent it from freezing.
● To ensure proper operation of the climate control system fan, remove any snow that has accumulated on the air inlet vents in front of the windshield.
● Remove any ice that has accumulated on the vehicle chassis. ● Periodically check for and remove any excess ice or snow that may have accumulated in the wheel well or on the brakes.
155
2-5. Driving information
■ When driving the vehicle
Accelerate the vehicle slowly and drive at a reduced speed suit- able to road conditions.
■ When parking the vehicle
Park the vehicle and move the shift lever to P (automatic trans- mission) or to 1 or R (manual transmission) without setting the parking brake. The parking brake may freeze up, preventing it from being released. If necessary, block the wheels to prevent inadvertent sliding or creeping.
Regulations on the use of snow chains
● Regulations regarding the use of tire chains vary according to loca- tion and type of road. Always check local regulations before install- ing chains.
● Use SAE Class “S” type radial tire chains, with the exception of
radial cable chains or V-bar type chains. • • Refer to the explanation that comes with the tire chains for
Install the chains on the front tires.
installation instructions.
● Retighten the chains after driving 1/4 - 1/2 mile (0.5 - 1.0 km).
156
2-5. Driving information
■Snow chain installation
Observe the following precautions when installing and removing chains. ●Install and remove tire chains in a safe location. ●Install tire chains on the front tires only. Do not install tire chains on the
rear tires.
●Install the tire chains on front tires as tightly as possible. ●Install tire chains following the instructions provided in the accompanying
instructions.
●If wheel ornaments are used, they will be scratched by the chain band,
so remove the ornaments before putting on the chains. (→P. 337)
CAUTION
■Driving with snow tires
Observe the following precautions to reduce the risk of accidents. Failing to do so may result in a loss of vehicle control and cause death or serious injury. ●Use tires of the size specified for your vehicle. ●Maintain the recommended level of air pressure. ●Do not drive in excess of 75 mph (120 km/h) regardless of the type of
snow tires being used.
●Snow tires should be installed on all wheels.
■Driving with snow chains
Observe the following precautions to reduce the risk of accidents. Failing to do so may result in the vehicle being unable to be driven safely, and may cause death or serious injury. ●Do not drive in excess of the speed limit specified for the tire chains being
used or 30 mph (50 km/h), whichever is lower.
●Avoid driving on bumpy road surfaces or over potholes. ●Avoid sudden turns and braking. ●Slow down sufficiently before entering a curve to ensure that vehicle con-
trol is maintained.
157
2-5. Driving information
NOTICE
■Repairing or replacing snow tires (vehicles with a tire pressure warn-
ing system) Request repairs of and obtain replacement snow tires from Toyota dealers or legitimate tire retailers. This is because the removal and attachment of snow tires affects the opera- tion of the tire pressure warning valves and transmitters.
■Fitting tire chains (vehicles with a tire pressure warning system)
The tire pressure warning valves and transmitters may not function correctly when tire chains are fitted.
158
2-5. Driving information Trailer towing (except Canada)
Toyota does not recommend towing a trailer with your vehicle. Toy- ota also does not recommend the installation of a tow hitch or the use of a tow hitch carrier for a wheelchair, scooter, bicycle, etc. Your Toyota is not designed for trailer towing or for the use of tow hitch mounted carriers.
159
2-5. Driving information Trailer towing (Canada)
Your vehicle is designed primarily as a passenger-and-load-carrying vehicle. Towing a trailer can have an adverse impact on handling, performance, braking, durability, and fuel consumption. For your safety and the safety of others, you must not overload your vehicle or trailer. You must also ensure that you are using appropriate tow- ing equipment, that the towing equipment has been installed cor- rectly and used properly, and that you employ the requisite driving habits. Vehicle-trailer stability and braking performance are affected by trailer stability, brake performance and setting, trailer brakes, the hitch and hitch systems (if equipped). To tow a trailer safely, use extreme care and drive the vehicle in accordance with your trailer’s characteristics and operating condi- tions. Toyota warranties do not apply to damage or malfunction caused by towing a trailer for commercial purposes. Contact your Toyota dealer for further information about additional requirements such as towing kits, etc.
160
2
2-5. Driving information
Towing related terms
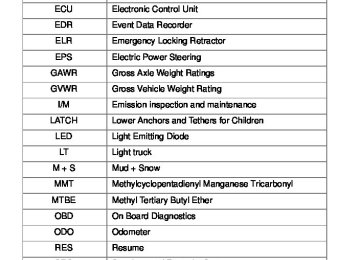
■ GCWR (Gross Combination Weight Rating)
The maximum allowable gross combination weight. The gross combination weight is the sum of the total vehicle weight (including the occupants, cargo and any optional equipment installed on the vehicle) and the weight of the trailer being towed (including the cargo in the trailer).
■ GVWR (Gross Vehicle Weight Rating)
The maximum allowable gross vehicle weight. The gross vehicle weight is the total weight of the vehicle. When towing a trailer, it is the sum of the vehicle weight (including the occupants, cargo and any optional equipment installed on the vehicle) and the tongue weight.
161
2-5. Driving information
■ GAWR (Gross Axle Weight Rating)
Front GAWR
Rear GAWR
The maximum allowable gross axle weight. The gross axle weight is the load placed on each axle (front and rear).
■ TWR (Trailer Weight Rating)
(With brakes)
The maximum allowable gross trailer weight. The gross trailer weight is the sum of the trailer weight and the weight of the cargo in the trailer. TWR is calculated assuming base vehicle with one driver, one front passenger, towing package (if available), hitch and hitch sys- tems (if required).
Additional optional equipment, passengers and cargo in the vehi- cle will reduce the trailer weight rating so as not to exceed GCWR, GVWR and GAWR.
162
2-5. Driving information
■ Unbraked TWR (Unbraked Trailer Weight Rating) (Without brakes)
The trailer weight rating for tow- ing a trailer without a trailer ser- vice brake system.
■ Tongue Weight
The load placed on the trailer hitch ball. (→P. 165)
163
2-5. Driving information
Weight limits
● The gross trailer weight must never exceed 700 lb. (318 kg).
● The gross vehicle weight must never exceed the GVWR indi- cated on the Certification Label.
● The gross axle weight on each axle must never exceed the GAWR indicated on the Certi- fication Label.
● If the gross trailer weight is over the unbraked TWR, trailer service
brakes are required.
TWR and Unbraked TWR
Confirm that the gross trailer weight, gross combination weight, gross vehicle weight, gross axle weight and tongue weight are all within the limits. ■ TWR and unbraked TWR
700 lb. (318 kg)
164
2
2-5. Driving information
Trailer Tongue Weight
● A recommended tongue weight varies in accordance with the types
of trailers or towing as described below.
● To ensure the recommended values shown below, the trailer must
be loaded by referring to the following instructions. • Tongue Weight
The gross trailer weight should be distributed so that the tongue weight is 9% to 11%. (Tongue weight /Gross trailer weight x 100
= 9% to 11%)Gross trailer weight Tongue weight
If using a weight distributing hitch when towing, return the front axle to the same weight as before the trailer connection. If front axle weight cannot be measured directly, measure the front fender height above the front axle before connection. Adjust weight distributing hitch torque until front fender is returned to the same height as before connection. The gross trailer weight, gross axle weight and tongue weight can be measured with platform scales found at a highway weighing station, building supply company, trucking company, junk yard, etc.
165
2-5. Driving information
Hitch
Trailer hitch assemblies have different weight capacities. Toyota rec- ommends the use of Toyota hitch/bracket for your vehicle. For details, contact your Toyota dealer. ● If you wish to install a trailer hitch, contact your Toyota dealer. ● Use only a hitch that conforms to the gross trailer weight require-
ment of your vehicle.
● Follow the directions supplied by the hitch manufacturer. ● Lubricate the hitch ball with a light coating of grease. ● Remove the trailer hitch whenever you are not towing a trailer. After removing the hitch, seal any mounting hole in the vehicle body to prevent entry of any substances into the vehicle.
Positions for hitch ball
Weight carrying ball position: 40.2 in. (1021 mm)
166
2
2-5. Driving information
Connecting trailer lights
Please consult your dealer when installing trailer lights, as incorrect installation may cause damage to the vehicle’s lights. Please take care to comply with your state’s laws when installing trailer lights.
Trailer towing tips
Your vehicle will handle differently when towing a trailer. Help to avoid an accident, death or serious injury, keep the following in mind when towing: ● Speed limits for towing a trailer vary by state or province. Do not
exceed the posted towing speed limit.
● Toyota recommends that the vehicle-trailer speed limit is 65 mph (104 km/h) on a flat, straight, dry road. Do not exceed this limit, the posted towing speed limit or the speed limit for your trailer as set forth in your trailer owner’s manual, whichever is lowest. Instability of the towing vehicle-trailer combination (trailer sway) increases as speed increases. Exceeding speed limits may cause loss of con- trol.
● Before starting out, check the trailer lights, tires and the vehicle-
trailer connections. Recheck after driving a short distance.
● Practice turning, stopping and reversing with the trailer attached in an area away from traffic until you become accustomed to the feel of the vehicle-trailer combination.
● Reversing with a trailer attached is difficult and requires practice. Grip the bottom of the steering wheel and move your hand to the left to move the trailer to the left. Move your hand to the right to move the trailer to the right. (This is generally opposite to reversing without a trailer attached.) Avoid sharp or prolonged turning. Have someone guide you when reversing to reduce the risk of an acci- dent.
167
2-5. Driving information
● As stopping distance is increased when towing a trailer, vehicle-to- vehicle distance should be increased. For each 10 mph (16 km/h) of speed, allow at least one vehicle and trailer length.
● Avoid sudden braking as you may skid, resulting in the trailer jack- knifing and a loss of vehicle control. This is especially true on wet or slippery surfaces.
● Avoid jerky starts or sudden acceleration. ● Avoid jerky steering and sharp turns, and slow down before mak-
ing a turn.
● Note that when making a turn, the trailer wheels will be closer than the vehicle wheels to the inside of the turn. Compensate by making a wider than normal turning radius.
● Slow down before making a turn, in cross winds, on wet or slippery
surfaces, etc. Increasing vehicle speed can destabilize the trailer.
● Take care when passing other vehicles. Passing requires consider- able distance. After passing a vehicle, do not forget the length of your trailer, and be sure you have plenty of room before changing lanes.
● To maintain engine braking efficiency and charging system perfor- mance when using engine braking, do not use fifth gear (manual transmission) or do not put the transmission in D (automatic trans- mission).
● Instability happens more frequently when descending steep or long downhill grades. Before descending, slow down and downshift. Do not make sudden downshifts while descending steep or long down- hill grades.
● Avoid holding the brake pedal down too long or applying the brakes too frequently. This could cause the brakes to overheat and result in reduced braking efficiency.
168
2
2-5. Driving information
● Due to the added load of the trailer, your vehicle’s engine may overheat on hot days (at temperatures over 85°F [30°C]) when driving up a long or steep grade. If the high engine coolant temper- ature warning light indicates overheating, immediately turn off the air conditioning (if in use), pull your vehicle off the road and stop in a safe spot. (→P. 353)
● Always place wheel blocks under both the vehicle’s and the trailer’s wheels when parking. Apply the parking brake firmly, and put the transmission in 1 or R (manual transmission) or in P (auto- matic transmission). Avoid parking on a slope, but if unavoidable, do so only after performing the following:
Apply the brakes and keep them applied. Have someone place wheel blocks under both the vehicle’s and trailer’s wheels. When the wheel blocks are in place, release the brakes slowly until the blocks absorb the load. Apply the parking brake firmly. Shift into 1 or R (manual transmission) or P (automatic trans- mission) and turn off the engine.
● When restarting after parking on a slope:
With the clutch pedal depressed (manual transmission) or the transmission in P (automatic transmission), start the engine. On vehicles with an automatic transmission, be sure to keep the brake pedal depressed. Shift into a forward gear. If reversing, shift into R. Release the parking brake (and also the brake pedal on vehi- cles with an automatic transmission), and slowly pull or back away from the wheel blocks. Stop and apply the brakes. Have someone retrieve the blocks.
169
2-5. Driving information
■Matching trailer ball height to trailer coupler height
No matter which class of tow hitch applies, for a more safe trailer hookup, the trailer ball setup must be the proper height for the coupler on the trailer.
Coupler Trailer ball
■Before towing
Check that the following conditions are met: ●Ensure that your vehicle’s tires are properly inflated. (→P. 371) ●Trailer tires are inflated according to the trailer manufacturer’s recom-
mendation.
●All trailer lights work as required by law. ●All lights work each time you connect them. ●The trailer ball is set at the proper height for the coupler on the trailer. ●The vehicle remains level when a loaded or unloaded trailer is hitched. Do not drive if the vehicle is not level, and check for improper tongue weight, overloading, worn suspension, or other possible causes.
●The trailer cargo is securely loaded. ●The rear view mirrors conform to all applicable federal, state/provincial or local regulations. If they do not, install rear view mirrors appropriate for towing purposes.
170
2-5. Driving information
■Break-in schedule
If your vehicle is new or equipped with any new power train components (such as an engine, transmission, differential or wheel bearing), Toyota rec- ommends that you do not tow a trailer until the vehicle has been driven for over 500 miles (800 km). After the vehicle has been driven for over 500 miles (800 km), you can start towing. However, for the next 500 miles (800 km), drive the vehicle at a speed of less than 50 mph (80 km/h) when towing a trailer, and avoid full throttle acceleration.
■Maintenance
●If you tow a trailer, your vehicle will require more frequent maintenance due to the additional load. (See “Scheduled Maintenance Guide” or “Owner’s Manual Supplement”.)
●Retighten the fixing bolts of the towing ball and bracket after approxi-
mately 600 miles (1000 km) of trailer towing.
■If trailer sway occurs
One or more factors (crosswinds, passing vehicles, rough roads, etc.) can adversely affect handling of your vehicle and trailer, causing instability. ●If trailer swaying occurs:
• Firmly grip the steering wheel. Steer straight ahead.
Do not try to control trailer swaying by turning the steering wheel.
• Begin releasing the accelerator pedal immediately but very gradually to
reduce speed. Do not increase speed. Do not apply vehicle brakes.
If you make no extreme correction with the steering or brakes, your vehicle and trailer should stabilize. ●After the trailer swaying has stopped:
• Stop in a safe place. Get all occupants out of the vehicle. • Check the tires of the vehicle and the trailer. • Check the load in the trailer.
Make sure the load has not shifted. Make sure the tongue weight is appropriate, if possible.
• Check the load in the vehicle.
Make sure the vehicle is not overloaded after occupants get in.
171
2-5. Driving information
If you cannot find any problems, the speed at which trailer swaying occurred is beyond the limit of your particular vehicle-trailer combination. Drive at a lower speed to prevent instability. Remember that swaying of the towing vehicle-trailer increases as speed increases.
CAUTION
■Trailer towing precautions
To tow a trailer safely, use extreme care and drive the vehicle in accordance with the trailer’s characteristics and operating conditions. Failure to do so could cause an accident resulting in death or serious injury. Vehicle stability and braking performance are affected by trailer stability, brake setting and performance, and the hitch. Your vehicle will handle differently when towing a trailer.
■To avoid accident or injury
●Do not exceed the TWR, unbraked TWR, GCWR, GVWR or GAWR. ●Adjust the tongue weight within the appropriate range. Place heavier loads
as close to the trailer axle as possible.
●Do not exceed 65 mph (104 km/h), the posted towing speed limit or the speed limit for your trailer as set forth in your trailer owner’s manual, whichever is lowest. Slow down sufficiently before making a turn, in cross winds, on wet or slippery surface, etc. to help avoid an accident. If you experience a vehicle-trailer instability from reducing a certain speed, slow down and make sure you keep your vehicle speed under the speed of which you experience the instability.
●Do not make jerky, abrupt or sharp turns. ●Do not apply the brakes suddenly as you may skid, resulting in jackknifing and loss of vehicle control. This is especially true on wet or slippery sur- faces.
●Do not exceed the trailer hitch assembly weight, gross vehicle weight,
gross axle weight and trailer tongue weight capacities.
●Do not use cruise control when towing. ●Slow down and downshift before descending steep or long downhill grades. Do not make sudden downshifts while descending steep or long downhill grades.
172
2
2-5. Driving information
CAUTION
■To avoid accident or injury
●Vehicle-trailer instability is more likely on steep long downhills. Before descending steep or long downhill grades, slow down and downshift. Do not make sudden downshifts when descending steep or long downhill grades. Avoid holding the brake pedal down too long or applying the brakes too frequently. This could cause the brakes to overheat and result in reduced braking efficiency.
●Do not tow a trailer when the compact spare tire is installed on your vehi-
cle. ■Hitch
Trailer hitch assemblies have different weight capacities established by the hitch manufacturer. Even though the vehicle may be physically capable of towing a higher weight, the operator must determine the maximum weight rating of the particular hitch assembly and never exceed the maximum weight rating specified for the trailer-hitch. Exceeding the maximum weight rating set by the trailer-hitch manufacturer can cause an accident resulting in death or serious personal injuries.
■When towing a trailer
Toyota recommends trailers with brakes that conform to any applicable fed- eral and state/provincial regulations. ●If the gross trailer weight exceeds unbraked TWR, trailer brakes are required. Toyota recommends trailers with brakes that conform to all appli- cable federal and state/provincial regulations.
●Never tap into your vehicle’s hydraulic system, as this will lower the vehi-
cle’s braking effectiveness.
●Never tow a trailer without using a safety chain securely attached to both the trailer and the vehicle. If damage occurs to the coupling unit or hitch ball, there is danger of the trailer wandering into another lane.
173
2-5. Driving information
NOTICE
■When installing a trailer hitch
Use only the position recommended by your Toyota dealer. Do not install the trailer hitch on the bumper; this may cause body damage.
■Do not directly splice trailer lights
Do not directly splice trailer lights. Directly splicing trailer lights may damage your vehicle’s electrical system and cause a malfunction.
174
2-5. Driving information Dinghy towing (vehicles with an automatic transmission)
Your vehicle is not designed to be dinghy towed (with 4 wheels on the ground) behind a motor home.
NOTICE
■To avoid serious damage to your vehicle
Do not tow your vehicle with four wheels on the ground.
175
2-5. Driving information Dinghy towing (vehicles with a manual transmission)
Your vehicle can be dinghy towed in a forward direction (with 4
wheels on the ground) behind a motor home.Dinghy towing does not elimi- nate the possibility of damage to your vehicle.
Towing your vehicle with 4 wheels on the ground
To prevent damage to your vehicle, perform the following procedures before towing.
Shift the shift lever to N. Turn the engine switch to the ACC position. Ensure that the audio system and other powered devices have been turned off. Release the parking brake. After towing, leave the engine in idle for at least 3 minutes before driving the vehicle.
■Necessary equipment and accessories
Specialized equipment and accessories are required for dinghy towing. Con- tact the service branch of the motor home manufacturer regarding recom- mended equipment.
176
NOTICE
■Dinghy towing direction
2-5. Driving information