- Download PDF Manual
-
To use the belt, sit erect and fully back in the seat before taking the buckle tongue in the outer hand, and drawing the belt through the top slide, pass the belt across the body and push the tongue into the buckle lock at the inboard side of the seat, until a positive ‘click’ is heard. Pull on the belt to check for correct latching and ensure that the belt fits snugly against the body with all the slack taken up by the reel. The belt should be worn low across the front of the pelvis, and across the chest and shoulder.
The belts are released by pressing the red button on the buckle lock, and will retract automatically for tidy storage and to permit easy access to the passenger compartment.
Seat Belt Precautions
WARNING:
• Be sure you and your passenger always wear seat belts and wear them properly. Not wearing a seat belt correctly, increases the chance of serious injury or death in a crash, even with airbags.
• On fastening the seat belt, ensure that no part of the belt is twisted, or is entangled in the door or seat mechanism.
• Seat belts are designed to bear upon the bone structure of the body and should be worn low across the front of the pelvis, and across the chest and shoulder. Wearing the lap section of the belt across the abdominal area must be avoided. Improperly positioning the seat belts can cause serious injury or death in a crash. Ensure the seat belts are correctly positioned before driving.
• Pregnant women should always wear seat belts to protect both themselves and the unborn child. The lap belt por- tion of the belt should be kept as low as possible across the hips. Consult your doctor regularly to check if you should drive.
• The shoulder portion of the belt must never be worn
•
beneath the arm, or behind the back.
• Each seat belt assembly is designed for use by one occupant of adult build, and should not be used by children unable to meet the requirements set forth herein.
oh_croft_InD.indd 19
20/05/2004 07:58:43
19
WARNING:
• Lotus strongly recommends that you do not carry children
as passengers in your Elise.
• Because the Elise is fitted with a non-switchable pas- senger airbag, a rear facing child seat must never be used.
• Never use one belt around two people, or allow a child
to be carried on a driver’s or passenger’s lap. • Refer to Child Restraints section of handbook.
WARNING:
•
• No modifications or additions should be made to the inertia reel assemblies or seat belts. Do not attempt to adjust the seat belt tension by altering the mechanism. • The seat belt should be replaced if webbing becomes
frayed, contaminated, or damaged. Inspect regularly. It is essential to replace the entire seat belt assembly if it has been used in a severe impact, even if damage to the assembly is not obvious. In situations where the airbags have been deployed, the belt tensioner systems must also be replaced. Seat belt anchorage points must also be rigorously checked.
• Not checking or maintaining seat belts can result in serious injury or death if the seat belts do not work properly when needed. Check the belts regularly and have any problem corrected immediately.
• No one should sit in a seat with an in-operative seat belt.
Care should be taken to avoid contamination of the webbing with polishes, oils or chemicals and particularly battery acid. Use only a mild detergent to clean the webbing, never use bleach or dye, and allow the belt to dry fully before using the car. Ensure that the buckle mechanism is kept free of dirt contamination as disassembly for cleaning is not possible.
20
oh_croft_InD.indd 20
20/05/2004 07:58:44
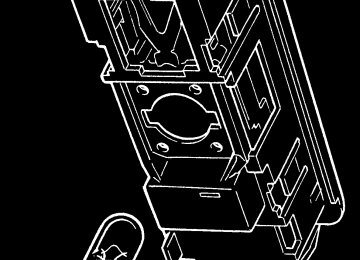
AIRBAG INFLATED ON IMPACT
w53b
Airbag Safety System
Your car has airbags. One airbag for the driver, and
another for the passenger.
The car is also equipped with shoulder and lap belts. Airbags
are supplementary restraints to the seat belts.
In the event of a moderate to severe frontal collision, airbags provide occupant protection additional to that provided by the lap and diagonal seat belts. Both driver and passenger must wear the seat belts at all times, whether or not an air bag is provided, in order to minimise the risk of severe injury or death, no matter how short the journey. An occupant who is properly restrained by a seat belt, will be in the best position for full effectiveness of the airbag in the event of airbag deployment.
The airbag system is designed to inflate when the car is involved in a frontal, or near frontal collision, and the force of impact is sufficient to warrant additional occupant protection. The driver's airbag is housed in the centre of the steering wheel, and that for the passenger in the dashboard. When triggered by an electronic crash sensor, each air bag inflates in a fraction of a second to provide protection for the occupant’s upper body, and then deflates very rapidly to minimise any obstruction to the driver.
Some parts of the system are designed to operate only once, and need replacing after air bag inflation with new components, before being ready for another deployment.
Remember that the seat belts, when correctly worn, provide
oh_croft_InD.indd 21
20/05/2004 07:58:44
21
AIRBAG DEFLATED AFTER DEPLOYMENT
w53b
the primary crash protection to the occupants, especially in collisions below the actuation threshold of the airbag system, and during types of accident which do not cause airbag deploy- ment. Therefore, both driver and passenger must always wear seat belts (in most states, and all Canadian provinces, the law requires the use of seat belts). See the earlier pages on ‘Seat Belts’.
WARNING:
• You can be killed or seriously injured in a crash if you aren’t wearing your seat belt - even with airbags. Wearing your seat belt during a crash helps reduce your chance of hitting things inside the car or being ejected from it. Airbags are designed to work with seat belts, but don’t replace them. Airbags are designed to deploy only in moderate to severe frontal and near frontal crashes. They aren’t designed to inflate at all in rollover, rear or low-speed frontal crashes, or in many types of side im- pacts. Both driver and passenger should wear a seat belt properly to minimise the risk of severe injury or death in the event of a crash.
• Airbags inflate with great force, in a fraction of a second. If you’re too close to an inflating airbag, as you would be if you were leaning forward, you could be killed or seriously injured. Seat belts help keep you in the correct position before and during a crash. Always wear your seat
22
oh_croft_InD.indd 22
20/05/2004 07:58:44
belt, even with airbags. Sit as far back from the steering wheel as is comfortable, whilst ensuring that full control can be maintained.
•
• Airbags plus lap-shoulder seat belts offer the best protection for adults, but not for young children and infants. Neither the car’s seat belt system nor its airbag system is designed for them. Young children and infants need the protection that a child restraint system can provide. See later section on ‘Child Restraints’. If an object is between a person and an airbag, the bag might not inflate properly or it might force the object into that person causing death or serious injury. The path of an inflating airbag must be kept clear. Don’t put anything between an occupant and an airbag, and don’t attach or put anything on the steering wheel hub or on or near any passenger dashboard air bag covering.
• Do not lean against the inside of the doors; always hold the steering wheel by the outer rim; never rest your hands on the airbag panel.
• Never transport heavy objects on or in front of the pas-
• Give your passenger all of the information in this sec-
senger seat.
tion.
• Do not attempt to de-activate the airbags, or make any other changes to the wiring or components of the airbag system. Do not undertake any wiring for electrical ac- cessory equipment in the vicinity of the airbag wiring harnesses. Doing so may disable the airbag system, or cause its unintended deployment.
• Adjust the driver’s seat to ensure that your chest is at
least 10 inches (250mm) from the steering wheel. If the airbag trim cover on the passenger side of the dash- board is accidently knocked off, the passenger airbag will not operate correctly. Improper protection could result in death or serious injury to a passenger in a crash. Do not attempt to refit or repair the trim cover, but have the fault rectified immediately by your dealer.
•
Airbag Tell Tale
There is an airbag warning light (‘tell tale’) on the instrument panel which shows the airbag symbol. The system checks the following airbag electrical circuits for malfunction:
23
oh_croft_InD.indd 23
20/05/2004 07:58:45
• Drivers airbag circuit; • Passenger airbag circuit; • Seatbelts pre-tensioner circuit; •
Internal componentry of the sensor and diagnostic module.
As a bulb and circuit check, the tell tale will light briefly when the ignition is switched on, and then go out. If the lamp lights at any other time, a fault in the airbag system is indicated, which should be rectified without delay by your Lotus dealer.
WARNING: If the airbag tell tale does not light up as the ignition is turned on, or remains lit for more than a few seconds, have the fault rectified immediately by your dealer. Ignoring the tell tale can result in serious injury or death if the airbags do not inflate when needed.
Airbag Deployment
If a crash or collision causes the airbags to inflate, you may see what looks like smoke, but is actually powder from the airbag surface used to aid smooth deployment. Although the powder is not harmful, people with respiratory problems may experience some temporary discomfort. If this occurs, get out of the car if possible as soon as it is safe to do so.
After airbag deployment, the airbags, seat belt tensioners and electronic control unit must be replaced by a Lotus dealer or other suitably qualified organisation.
Component parts of the airbag system are located in various sites around the car. Any technician working on the car should be advised that the car is fitted with airbags to allow suitable precautions to be taken.
WARNING:
• For up to 20 seconds after the ignition has been turned off and the battery disconnected, an airbag can still inflate if improper servicing occurs. You can be injured if you are close to an airbag when it inflates.
• Airbag system components should be serviced only by an authorised Lotus dealer. Do not work on the airbag system yourself.
• The disposal of used airbag units is subject to stringent
24
oh_croft_InD.indd 24
20/05/2004 07:58:45
•
regulations, and should be handled only by your dealer. If you sell your Lotus, notify the purchaser that the car is equipped with airbags, and refer them to ‘Airbag Safety System’ in this handbook (safety and disposal rules).
• Further information on the airbag system can be found
on stickers on the sun visors.
• For important recommendations on the use of child restraints, please refer to ‘Child Restraints’ in this hand- book. Never use a rear facing child seat in your Elise.
• A crash can damage the restraint systems in your car. A damaged restraint system may not properly protect the person using it, resulting in serious injury or even death in a crash. To help make sure your restraint systems are working properly after a crash, have them inspected and any necessary replacements made as soon as possible.
oh_croft_InD.indd 25
20/05/2004 07:58:45
25
Child Restraints
WARNING: Lotus strongly recommends that children are not car- ried in the Elise due to the risk of death or serious injury if the child is too close to the dashboard when the airbag inflates.
Accident statistics show that children are safer when properly restrained in the back seats of cars, an option unavailable on this model. In addition, your car is equipped with a passenger’s airbag which poses serious risks to children - particularly infants and small children. If, nevertheless, a child is to be carried in the car, the following notes are provided for guidance:
When a child is of a physical size whereby the standard fitment lap and diagonal seat belt will fit satisfactorily, with the belt positioned over the collar bone and against the centre of the chest, the standard seat and seat belt should be used. If the belt touches or crosses the child’s neck, the child should NOT be carried in the Elise.
WARNING:
• Children should not be carried in the Elise unless they are large enough to be able properly to use the standard seat belt without any child seat or booster seat.
• Child restraint systems (other than belt positioning booster seats) are designed to be secured in the car seat by the lap belt portion of the lap/shoulder belt. READ ALL INSTRUCTIONS THAT ACCOMPANY THE CHILD RESTRAINT OR BOOSTER SEAT. Infants who are unable to sit up by themselves, unsupported, should NOT be carried in the Elise.
• Never put a rear-facing child seat in the passenger seat of the Elise. If the airbag inflates, it can hit the child or the back of the child seat with enough force to kill or very seriously injure an infant.
• There is no provision on the Elise to switch off or disable
•
the passenger airbag.
WARNING: Children who are not properly restrained can be killed
or seriously injured in an accident.
26
oh_croft_InD.indd 26
20/05/2004 07:58:45
Behaviour: It is essential that the behaviour of any child trav- elling in the car is such that they remain correctly seated and belted, and it is the responsibility of the driver to ensure that this occurs.
The following wording has been included to comply with National Highway Traffic Safety Authority requirements, however;
WARNING: Lotus strongly recommends that you do not fit any type of child seat into the Elise due to the risk of death or seri- ous injury if the child is too close to the dashboard when the airbag inflates.
Procedure for Proper Fitment of Forward-Facing Child Seat Automatic Locking Retractor: The safety belt for the passen- ger’s seat is equipped with an automatic locking retractor that must be used for securing a forward-facing child restraint sys- tem. When activated, this retractor allows you to securely fas- ten the child restraint system.
Activating the Automatic Retractor: 1. Pull the passenger seat safety belt completely out. At this point, the locking mechanism is activated. 2. Place the forward-facing child seat in the passenger seat, using the safety belt to secure the child seat, following the instructions that come with the child seat. 3. Insert the safety tongue into the buckle and make sure that it is properly latched. 4. Allow the safety belt to retract until it is tight on the child seat. You may further tighten the belt by pulling on it to allow more of it to retract. Check to make sure the child seat is secured, and that the belt is snug and will not pull out.
Releasing the safety belt and child seat: 1. Unbuckle the safety belt. 2. Remove the child seat. 3. Make sure that the belt has fully retracted. At this point the automatic locking feature is disengaged.
oh_croft_InD.indd 27
20/05/2004 07:58:46
27
28
oh_croft_InD.indd 28
20/05/2004 07:58:46
MECHANICAL KEY
Push button
Keyhole light
ohs149
KEYS & CAR SECURITY ALARM
Keys
A single mechanical key operates the manual door locks (see also ‘Doors’ and ‘Central Door Locking’), combined igni- tion switch/steering lock, and engine cover. The head of the key incorporates a push button activated key hole light to facilitate operation in the dark.
A duplicate key is supplied with the new car and, on receipt, should be separated and kept in a safe place for use in an emergency. The mechanical key code is printed on a plastic tab which should be removed from the key ring and the number recorded safely with the car documents. This number will be required when ordering a replacement, or any additional keys from your dealer. Ensure that a spare key is available at all times to guard against becoming stranded.
WARNING: Never leave the car unattended with the key in the igni- tion switch, especially if unsupervised children and/or animals are in the car. Dangers can arise from window operation and other electric controls. If the engine is running, operation of the car’s controls could cause an accident and result in death or serious injury.
oh_croft_InD.indd 29
20/05/2004 07:58:46
29
COBRA TRANSMITTER FOB & CODE NUMBERS
Push button
Fob tell tale
Small button
oh102
S/N 99999999
PIN CODE =9999
Car Security Alarm
The Lotus Elise is fitted with a Cobra 8186 immobiliser/alarm
which includes the following features: •
‘Dynamic coding’ of the transmitter fobs; Each time the trans- mitters are used, the operating frequency is random changed to guard against unauthorised code copying.
• Automatic (passive) engine immobilisation to prevent the
engine from being started without the transmitter fob.
• Sensing switches on doors, front body access panels and the engine cover, meaning the alarm sounds if someone tries to force entry.
• Personal protection by ‘on demand’ activation of the siren. • Selectable cockpit intrusion sensing using a microwave
• Self powered siren to maintain protection if the car battery is
sensor.
disconnected.
Transmitter Fobs
Two transmitter fobs are provided with the car to operate the immobiliser/alarm system. The two transmitters should be kept separate, and a replacement obtained immediately after any loss to ensure that a spare is always available.
Each individual alarm system has a unique serial number and an owner’s Personal Identification Number (PIN), both of which are printed on a code card supplied with the car. In order to allow replacement transmitters to be ordered, it is essential that these numbers are recorded and kept safely with the car documents. If the code card is not available on receipt of the
30
oh_croft_InD.indd 30
20/05/2004 07:58:46
Tachometer
Security/RPM tell tale
car, enquire with the dealer immediately.
ohs127a
Engine Immobiliser
In order to provide a measure of car security, independent of any driver action, the system will ‘passively’ immobilise the engine’s cranking and running circuits after the first occurring of the following: i) Four minutes after switching off the ignition; ii) Two minutes after a mobilising command (see below); or iii) One minute after switching off the ignition and opening the
driver’s door. The immobilised state is indicated by the security tell tale in
the tachometer upper face flashing continuously.
To mobilise the engine, press once, and for a full second, the larger of the two buttons on the transmitter fob. The security tell tale will be extinguished.
Valet Mode
If leaving the car for servicing or parking, the passive immobil- isation feature may be switched off by switching on the ignition and pressing the transmitter small button. Two beeps will confirm ‘valet’ activation, repeated as a reminder when the ignition is switched off. The security tell tale will remain off.
At the next arming command, the valet mode will be switched
off, and normal immobilisation resume.
oh_croft_InD.indd 31
20/05/2004 07:58:47
31
Arming the Alarm
Remove the ignition key, close (and lock) both doors, and check that the engine cover and front body access panels are secure. The roof may be either closed or open. Press once, and for a full second, the larger of the two buttons on the trans- mitter fob (on cars with central door locking, this action will automatically lock both doors - see later). This command will be acknowledged by: - 2 flashes of the hazard warning lamps; - Continuous flashing of the security tell tale.
Check that these indications occur. If not, press the button a second time, as the first press may have only switched off the passive immobilisation (see above).
Note that if the system is armed when a door or engine cover/ front access panel is not fully closed or if the interior lamp is in the ‘off’ position, a continuous buzz will be heard as warning.
If still open after expiry of the arming period, (see below) the alarm will be armed with that switch group (both doors, or front/rear access lids) excluded from the circuit.
After arming the system, the engine is immediately immo- bilised, but a period of approximately 45 seconds must elapse before all functions and sensors become fully active. After this time, the alarm will be triggered by any of the following actions: Interruption of the car battery power supply. - Energising the ignition circuit (‘hot wiring’). - Opening a door; - Opening the engine cover or a front access panel. - Movement detected within the cabin.
When the alarm is triggered, the hazard warning lamps will flash and the electronic wailing siren will sound for a period of approximately 30 seconds before closing down and resetting, ready for any further triggering input. If a trigger is continuously present, the alarm will repeat after a short delay, and continue in this sequence for about 10 cycles.
To silence the siren when triggered, press once, and for a full second, the larger button on the transmitter fob. This will not affect the status of the alarm which will remain armed.
32
oh_croft_InD.indd 32
20/05/2004 07:58:47
Disarming the Alarm
To disarm the alarm, press once, and for a full second, the larger button on the transmitter fob. This command will be acknowledged by: - 1 flash of the hazard warning lamps; - Extinguishing of the security tell tale.
If the alarm had been triggered during the last armed period, the disarm command will be acknowledged by the hazard lamps flashing 4 times, and the buzzer sounding 4 times. The security tell tale will then flash a code to indicate the triggering source: - 1 pulse flashing: door, engine cover/boot lid or body front
- 2 pulse flashing: movement detected in cabin by microwave
- 4 pulse flashing: tampering with ignition circuit. - 6 pulse flashing: interruption of battery supply. The coding will be deleted when the ignition is next turned
access panel.
sensor.
on.
Emergency disarming/mobilising
If the transmitter fobs are lost or damaged, the alarm system owner’s unique PIN may be used to disarm the alarm and/or mobilise the engine provided that access is available to the cabin. Follow the transmitter fob programming instructions (see page 18) from step 3.
oh_croft_InD.indd 33
20/05/2004 07:58:47
33
Microwave sensor
ohs120
Intrusion Sensing
A microwave sensor is mounted behind the cabin rear bulkhead trim panel, and is able to detect substantial physical movement within the cockpit, and trigger the alarm. Microwave transmissions are blocked by metal objects, so it is important not to shield the signal by placing such items on the bulkhead ledge.
If desired, the alarm may be armed without the intrusion sensor or battery interruption circuits being active by arming the system in the usual way with the transmitter larger button, and within 20 seconds, pressing the smaller button twice.
Manual Activation of Siren
To enhance personal security, with the system in a fully armed state (after 45 second arming period), the siren may be manually triggered by pressing the transmitter smaller button. The siren will sound and the turn lamps flash for 15 seconds. To stop the siren, press either of the two transmitter buttons.
34
oh_croft_InD.indd 34
20/05/2004 07:58:47
Transmitter casing
Transmitter body
Battery
ohs102
Transmitter Fob Battery Replacement
The transmitter fobs will normally operate within a range of 5 metres from the car, but this may be reduced by the presence of other radio signals in the vicinity. A small LED tell tale on the transmitter fob will flash whilst the button is held down to indicate correct operation, but if the lamp flashes irregularly or only once, transmitter battery replacement is required.
The transmitters are powered by a long life 3V Lithium battery, type CR2032, which with normal use should last for 3 years. To ensure continuity of operation, it is recommended to renew the batteries every 12 months: - Using a small screwdriver, prise open the case in the areas
marked ‘open’.
- Remove the old battery and wait for 10 seconds before insert- ing the new battery with +ve sign uppermost, and holding the battery only by the periphery.
- Align the locating studs, and firmly press the case together. - The transmitter should now operate normally, but may require
re-synchronisation with the control unit.
Transmitter Re-synchronisation
If at any time the transmitter does not function, and the battery is known to be good, carry out the following re-synchronisation procedure: - Stand close to the car and hold down both buttons on the transmitter until the LED on the fob is extinguished (approx. 10 seconds).
35
oh_croft_InD.indd 35
20/05/2004 07:58:48
- Release both buttons; the fob tell tale should come on con-
stantly.
- Press the larger button for one second (the fob tell tale will
flash). Synchronisation is complete.
Programming Additional Transmitter Fobs
Two transmitter fobs are provided with the new car. If one transmitter is lost or damaged, a replacement should be ob- tained immediately from your dealer, and programmed to the car alarm controller using a functioning transmitter fob and the system owner’s unique Personal Identification Number (PIN). Up to 4 transmitter fobs can be matched with the alarm system, but all fobs must collectively undergo the single programming operation: 1. Press, simultaneously, both buttons on a transmitter fob until the fob tell tale stops flashing (approx. 10 seconds). On release of the buttons, the fob tell tale will light.
2. Repeat operation (1) for ALL the transmitter fobs required to
operate the system.
3. Turn the ignition on and off 3 times within 7 seconds; the
security tell tale in the tachometer will light for 3 seconds.
4. Enter the PIN: Immediately the tell tale goes out, switch ON the ignition and count the number of security tell tale flashes until equal to the first number of the PIN, then turn the ignition OFF, then back ON again.
5. Repeat operation (4) for the remaining 3 digits of the PIN, remembering to turn the ignition OFF and back ON after each code number.
Note: If at any time a mistake is made when entering the PIN, turn the ignition OFF for 10 seconds and re-commence entering the PIN.
6. If the PIN is correct, the security tell tale will be lit. Test op-
eration of each transmitter fob.
Disconnecting the Car Battery
If the battery is to be disconnected, refer to the ‘Battery’ section later in this handbook which includes the following precaution: - Before disconnecting the battery, ensure that the alarm system
is disarmed and mobilised.
36
oh_croft_InD.indd 36
20/05/2004 07:58:48
ENTRY & COMFORT
•
WARNING: In very hot/cold territories, or under conditions of extreme solar heating, be aware of exposed metal surfaces in the cabin. Take suitable precautions to guard against burn injuries from hot or cold metal.
• Unlocked doors can be dangerous. Young children who get into unlocked cars may be unable to get out. Always lock your car whenever you leave it.
Central Door Locking (CDL)
The central door locking (CDL) operates on the driver’s and passenger’s doors in conjunction with the security alarm system. For full details of the alarm system, see page 30.
To unlock from outside:
To unlock the doors from outside, press once, for a full second, the larger button on the transmitter fob. The alarm will be dis- armed and both doors unlocked. Press the exterior lock button and pull open the door using the fingergrip below the button. If the door is swung fully open, a spring detent mechanism on the hinge will aid restraint of the door for convenience whilst entering or exiting the car, but the door should be manually held in windy conditions, or if the car is parked on a slope.
From inside the car, pull the door firmly shut using the recess
provided at the top of the door trim panel.
WARNING: Before closing a door take care to ensure that no persons
or objects will be trapped to avoid injury or damage.
To lock from inside:
If it is desired to lock the doors from inside the car, for example to deter highjack attempts, press the right hand side of the CDL rocker switch on the front of the gear lever shroud to lock both doors with or without the ignition switched on. Alternatively, the doors can be locked individually by depressing the button at the rear end of each door sill.
WARNING: Whether locked using the rocker switch or sill buttons,
oh_croft_InD.indd 37
20/05/2004 07:58:48
37
t
Interior CDL switch
Door sill button
ohs140
ohs122
the doors will be ‘deadlocked’ meaning that the interior door release handles will not open the doors. In order to get out of the car in an emergency when the doors are locked see the section below ‘to unlock from inside’.
To unlock from inside:
To unlock both doors from inside, press the left hand side of the rocker switch on the front of the gear lever shroud, or raise the sill button on each door. Note that in the event of a car col- lision which causes the safety inertia switch to be tripped, the doors will automatically be unlocked.
Pull the release handle at the front of the door and push open. Shut the door from outside by using firm hand pressure towards the rear of the door.
WARNING: Before closing a door take care to ensure that no persons
or objects will be trapped to avoid injury or damage.
To lock from outside:
To lock the car from outside, remove the ignition key, close both doors and check that the engine cover and front body ac- cess panels are secure. Arm the security alarm by pressing once, for a full second, the larger of the two buttons on the transmitter fob. This action will both arm the alarm and electrically lock the driver’s and passenger’s doors.
38
oh_croft_InD.indd 38
20/05/2004 07:58:49
ohs97b
Lock
Unlock
Mechanical locking
Interior release handle
ohs103
Notes: •
In the event of a flat car battery, the CDL will not operate. The doors can be unlocked from outside only after opening the engine cover and restoring power to the battery by substitution, re-charging or ‘jumping’ to a second battery. The doors cannot be unlocked using the mechanical key if the CDL was used to lock the car.
• To lock the car with a flat or disconnected car battery, or if the transmitter fob is disabled, use the mechanical key in each exterior door lock button and turn anticlockwise to the vertical position to disconnect each release button from the latch. This technique does not ‘deadlock‘ the interior release handles, but does allow continued key access to the car until restoration of battery power.
Note that a door locked with the mechanical key cannot be
unlocked using only the transmitter fob.
• To deadlock the car i.e. disable interior release handles, with a flat car battery, or without the use of the transmitter fob or mechanical key, close and lock one door using the sill but- ton, and for the second door, hold the exterior release button pressed in and depress the sill button before closing the door. Access is now available only by using the transmitter fob after restoration of car electrical power.
oh_croft_InD.indd 39
20/05/2004 07:58:49
39
t
MIRROR DIMMER
Night
Day
ohs149
‘Lights On’ Buzzer
A ‘lights on’ reminder buzzer will sound if the lights are on, the
ignition is switched off, and the driver’s door is then opened.
Interior Rear View Mirror
The mirror can be dimmed to reduce headlamp glare from following cars by turning the lever on the underside of the mirror towards the left. Turn towards the right for daytime use.
Door Mirrors
Rear view mirrors are fitted on both driver’s and passenger’s doors, and may be adjusted manually by direct manipulation of the mirror housing. Note that the passenger side mirror glass is convex to provide a wider field of vision.
A spring detent mechanism allows the complete mirror to swing forwards or backwards on accidental contact to reduce possible damage.
WARNING: The passenger side convex mirror makes objects seem smaller and farther away than when viewed through a flat mirror. Take care to judge distances and speeds correctly. If you move into a lane on your right when the car behind is too close, you could cause a collision and a crash. Check your interior mirror or glance over your shoulder before changing lanes.
40
oh_croft_InD.indd 40
20/05/2004 07:58:49
INTERIOR LAMP SWITCHING
ohs99
Interior Lamp
The interior lamp is located centrally in the rear bulkhead trim
panel, and incorporates a three position rocking lens:
• Lens rocked upwards; lamp is switched off. NOTICE: Use this position only temporarily as required. Arm- ing the security alarm system with the lamp switched off may exclude the doors from activating the alarm.
• Lens central; lamp is switched on with or without ignition. NOTICE: To guard against flattening the battery, take care not to leave the lamp on when parking the car, or to switch it on accidentally when using the storage space behind the seats.
• Lens rocked downwards; a courtesy mode applies, where the lamp is switched on whenever a door is opened, and goes out when both doors are closed. This is the normal position and should be used whenever leaving the car.
Sun Visors
To help reduce sun glare, pivoted visors are provided for both driver and passenger. Swing down the visor from the windscreen header rail as required.
oh_croft_InD.indd 41
20/05/2004 07:58:50
41
t
Illuminated dot
Window up
Window down
ohs124
Door Windows
In frosty or icy weather conditions, the windows may become frozen to the weatherstrip seals. Use a windscreen de-icer spray to free the glass before operating the windows.
WARNING:
• Before closing a window, always check that no persons or objects will be trapped; incautious window operation could be dangerous, especially to children. Ensure that any passenger is also made aware of this danger.
• To guard against incautious electric window operation, do not leave small children unattended in the car with the ignition key in position.
• Do not leave children or animals in a parked car with the roof and windows closed, in hot weather conditions as they may suffocate and/or experience heat exhaustion.
Manual Winders:
Each door window may be raised or lowered by the winder
handle near the front of the door.
Electric Windows:
On cars so equipped, switches for the electric window op- eration are mounted in the front of the door trim panels, and are operative only with the ignition switched on. To help locate the switches in the dark, an illuminated dot is provided in the ‘up’
42
oh_croft_InD.indd 42
20/05/2004 07:58:50
button which glows amber when the lights are switched on.
To lower a window, switch on the ignition and press the lower, domed end of the switch in the relevant door. Release the switch to stop window movement. To raise a window, press the upper, dished end of the switch.
oh_croft_InD.indd 43
20/05/2004 07:58:50
43
Key insert/remove
Column unlocked
Ignition auxilliaries
Position not used
INSTRUMENTS & SWITCHES
oh33e
Ignition Switch/Steering Lock
The switch/lock is located on the right hand side of the steer-
ing column.
Insert the key into the slot, and turn clockwise to position ‘I’ to unlock the steering column. If the key is reluctant to turn, wiggle the steering wheel to ease the load on the steering lock.
II Turn to position ‘II’ to switch on the ignition and operate aux-
iliary equipment.
III This spring loaded position is not used on the Elise. The engine start function is controlled by a ‘Start’ button at the left hand end of the dashboard (see below).
B To remove the key, turn fully counterclockwise to ‘B’ and withdraw. The steering column lock will be activated when the key is withdrawn but may not engage until the steering is turned and the mechanism is aligned.
NOTICE: DO NOT leave the ignition switched on for long periods without the engine running. Although the engine ignition system itself draws no current when the engine is stopped, a battery drain will occur through other circuits even when auxiliary equip- ment is not being used.
For security reasons, and to guard against battery drain,
always remove the key when leaving the car.
44
oh_croft_InD.indd 44
20/05/2004 07:58:50
Engine start button
ohs147
WARNING:
• Do not push or tow the car unless the key is first used to unlock the column and is then left in the lock. With- drawing the key will cause the steering to lock. • Never remove the key from the ignition switch or turn off the ignition while the car is moving. Withdrawing the key will cause the steering to lock and may cause an accident resulting in serious injury or death. • To reduce the risk of theft, or danger to a child remaining in the car, always remove the key when leaving a parked car.
Engine Start Button
An engine start button is located at the left hand end of the dashboard, alongside the lighting switches, and is backlit when the ignition is turned on.
The button is operative only with the ignition on, and engages the engine starter motor for as long as the button is pressed. Release the button to stop engine cranking.
For the correct engine starting procedure, refer to later sec-
tion ‘Starting Procedure’.
NOTICE: Pressing the start button when the engine is running may damage the starter mecha
oh_croft_InD.indd 45
20/05/2004 07:58:51
45
TELL TALE LAMPS
m252a
Passive Ilisation: The start button will operate only when the security tell tale in the tachometer face is out. If the tell tale is flashing, the engine is immobilised; Press once, and for a full second, the larger of the two buttons on the trans- mitter fob. The security tell tale will be extinguished. For further information see ‘Car Security Alarm’.
WARNING ‘TELL TALE’ LAMPS
A block of tell tale lamps is incorporated into the instrument cluster to provide you with important information concerning the operation of your Elise.
Bulb Check
In order to check that the warning systems are operative, all the tell tale lamps (except the ‘security’ tell tale; see Car Se- curity Alarm section) should light for about 6 seconds following ignition switch on. If any lamp should fail to light, it is possible that the bulb or warning circuit may be faulty; see your dealer without delay.
Turn Tell Tale
When the left hand or right hand turn indicators are operating, this green tell tale flashes in unison. A clicking sound may also be heard. If the tell tale fails to light, or flashes at an unusual or irregular rate, check the operation of the turn indicator lamps immediately.
46
oh_croft_InD.indd 46
20/05/2004 07:58:51
Seat Belt Tell Tale
The red seat belt tell tale is provided as a reminder that both driver and passenger should always wear the seat belts, no matter how short the journey. The lamp will flash until the driv- er’s seat belt is fastened, accompanied for the first 8 seconds by a buzzer.
Brake Tell Tale
This tell tale will glow red with the ignition switched on whenever the parking brake is applied. Driving the car with the brake not fully released will cause overheat damage to the rear brakes. Each time the parking brake is released, check that the tell tale is extinguished.
With the parking brake released, if the tell tale should light at any time after the six second check period, stop the car im- mediately, as the circuit has detected a dangerously low level of brake fluid in the master cylinder reservoir, possibly caused by a hydraulic leak in one of the separate front or rear brake circuits. In the event of a leak there is a danger that air may enter the hydraulic system and cause spongy operation and extended pedal travel. The divided brake circuit should ensure that emergency braking remains, but the car should not be driven until the fault has been identified and rectified.
WARNING: If the tell tale remains lit when the parking brake has been released, the footbrake may not be working properly. Stop the car immediately it is safe to do so, and do not continue until the fault has been rectified. Continuing to drive could cause a crash and result in death or serious injury.
Oil Pressure Tell Tale
This red tell tale warns of low engine oil pressure. The lamp will be lit whenever the ignition is on and the engine is stopped, but should go out as soon as the engine is started. If the lamp fails to go out after engine start up, or comes on when the engine is running, stop the engine immediately and do not restart until the cause has been investigated and rectified.
oh_croft_InD.indd 47
20/05/2004 07:58:52
47
WARNING: Continuing to run the engine with the oil tell tale lit could cause major engine damage or seizure, resulting in loss of car control and a crash. You or others could be killed or seriously injured.
Low Fuel Level Tell Tale
When only a single segment of the fuel gauge bar graph remains, representing approximately 1.3 U.S. gall. (5 litres), this amber tell tale will flash. Refuel at the next opportunity.
ABS Tell Tale
This amber tell tale should light for about four seconds follow- ing ignition switch on, and then go out. If the lamp remains lit, or comes on whilst driving, a fault in the anti-lock brake system is indicated. The base brake system will continue to operate nor- mally, but without the anti-lock feature. The car can be driven but should be checked and repaired at the earliest opportunity.
High Beam Tell Tale
are operating.
This lamp glows blue whenever the headlamp high beams
Airbag Tell Tale
The airbag safety system has a self-diagnostic feature which lights the red tell tale if a fault is detected. As a bulb and circuit check, the tell tale will light for about six seconds following ig- nition switch on, and then go out. If the lamp remains lit, or comes on at any other time, a fault in the airbag system is indicated, which should be rectified without delay.
WARNING: If the airbag tell tale is lit, the airbags may not inflate correctly in a crash, or may inflate without warning. To help avoid injury to you or others, have the airbag system repaired as soon as possible.
Battery Charging Tell Tale
This red tell tale will light whenever the ignition is on and the engine is stopped. If it lights any time that the engine is running, the battery is not being charged, which may be due to a broken auxiliary drive belt, or an electrical fault. A broken drive belt
48
oh_croft_InD.indd 48
20/05/2004 07:58:52
will also disable the engine coolant pump and result in rapid overheating; stop the engine as soon as it is safe to do so, and summon assistance. If the drive belt is intact and the cooling system unaffected, it may be possible in favourable daylight conditions, to drive a short distance to a repair facility, but do not, under any circumstances, allow the battery to become completely discharged by continuing to drive.
Engine Malfunction Indicator Lamp
The engine Malfunction Indicator Lamp (MIL) is provided to warn the driver that the engine management system has de- tected a fault which may result in increased noxious emissions from the exhaust. In order to minimise emissions and potential engine damage, various operational limitations may automati- cally be applied. i) If the MIL lights continuously whilst driving, immediately reduce speed and adopt a moderate driving style. Seek dealer advice without delay and avoid all unnecessary journeys.
ii) If the MIL flashes, an engine misfire has been detected which is likely to cause overheat damage to the catalytic converter. Slow down immediately and be prepared to stop. - If the MIL then stops flashing, and is lit continuously, proceed with caution and seek dealer advice. - If the MIL continues to flash, stop the car as soon as it is safe to do so, and switch off the engine. Seek dealer advice.
NOTICE: Continuing to drive the car with a flashing MIL may cause overheat damage to the catalytic converter, possible en- gine damage, increased emissions, and impaired fuel economy and driveability.
In order to comply with emissions regulations, data regarding activation of the MIL is recorded in the engine electronic control- ler, and may be downloaded by Lotus dealers.
Security/RPM Tell Tale
The security tell tale is located at the top of the tachometer display, and indicates the status of the immobiliser and alarm. • Tell tale out; engine is mobilised, and the alarm is off. • Tell tale flashing; engine is immobilised, or alarm is armed
and engine immobilised.
For full details of the car security system, refer to the earlier
section ‘Car Security’.
49
oh_croft_InD.indd 49
20/05/2004 07:58:52
Note that the tell tale also functions as a high engine speed
(rpm) warning - see ‘Tachometer’.
NOTICE: The car is not fitted with a low pressure tell tale. You should check the tire condition and pressure regularly. See section in the handbook on tires which specifies tire care and pressures.
50
oh_croft_InD.indd 50
20/05/2004 07:58:53
Tachometer
Security/RPM tell tale
Speedometer
INSTRUMENTS
ohs127a
Speedometer
ary scale in km/h.
This instrument displays road speed in MPH, with a second-
Tachometer
The tachometer indicates engine speed in revolutions per minute. The engine management system limits the maximum continuous engine speed to 8000 rpm once normal running temperature has been reached. Very short bursts up to 8500 rpm are allowed during maximum acceleration through the lower gears.
A 6000 rpm limit is imposed on a cold engine in order to
reduce possible damage from a harsh driving style.
NOTICE: • The use of wide throttle openings and/or high rpm before normal running temperature has been reached will result in premature wear and should be avoided.
• Do not run the engine continuously at its maximum speed, or allow overspeeding to occur on the overrun by downshift- ing prematurely, as the high engine loads imposed could result in catastrophic failure.
A red tell tale lamp in the top of the tachometer face lights at high rpm (dependent on gear engaged) to warn that maximum
51
oh_croft_InD.indd 51
20/05/2004 07:58:53
Trip distance
Proportion of fuel remaining
Odometer
Coolant temperaure
m253
engine speed is being approached. When exploiting full accel- eration, gearchange upshifts should be made immediately the tell tale comes on.
Note that this lamp also functions as a security system tell
tale (see ‘Car Security’).
Recalibration of the speedo and tacho needle zero positions will occur during a 3 second period following ignition switch on, but if a needle becomes ‘stranded‘ outside of the re-calibration range, the following procedure should be followed: With the car stationary; • Open driver‘s door; • Press and hold trip reset button on steering column shroud; • Turn on ignition.
LCD DISPLAY PANEL
A liquid crystal display (LCD) panel is provided below the instruments in order to display fuel level, coolant temperature, total mileage and trip functions. The panel is blank until the ignition is switched on.
Fuel Level Display
An indication of the level of fuel in the tank is displayed in the form of a bar graph at the right hand top of the LCD panel in the instrument cluster. When completely full (approximately 10.6 U.S. gall. {40 litres}), the display will show 6 black segments. As the fuel level falls, a white band will extend from the right to represent the empty proportion.
52
oh_croft_InD.indd 52
20/05/2004 07:58:53
When only a single segment remains, representing approxi- mately 1.3 U.S. gall. (5 litres), the amber low fuel tell tale will flash. Refuel at the next opportunity.
NOTICE: Do not allow the tank to run completely dry, as this may damage the catalytic converter and fuel pump. This may affect the terms of your warranty.
Coolant Temperature Display
The engine coolant temperature will be displayed at the bot- tom right hand corner of the panel as soon as the temperature reaches 162°F. The running temperature will fluctuate a cer- tain amount as the operating conditions change, and during periods of idling or in heavy traffic, the temperature may rise to over 212°F, with the cooling fans switching on at half speed at approximately 208°F and at full speed at approximately 217°F. The temperature display will flash at temperatures over 226°F to prompt closer monitoring by the driver of high temperatures. The pressurised cooling system has a boiling point of over 248°F. If the temperature approaches this level then the driver should be concerned. If this should occur, allow the engine to idle for a few minutes whilst monitoring the temperature, and if it continues to rise, switch off and seek qualified assistance.
NOTICE: After a heavy snowfall, ensure that the radiator cooling outlet grilles in the front body are cleared of snow before driving the car, or overheating may occur.
Odometer