- 2010 Mercedes-Benz R Class Owners Manuals
- Mercedes-Benz R Class Owners Manuals
- 2006 Mercedes-Benz R Class Owners Manuals
- Mercedes-Benz R Class Owners Manuals
- 2008 Mercedes-Benz R Class Owners Manuals
- Mercedes-Benz R Class Owners Manuals
- 2009 Mercedes-Benz R Class Owners Manuals
- Mercedes-Benz R Class Owners Manuals
- 2007 Mercedes-Benz R Class Owners Manuals
- Mercedes-Benz R Class Owners Manuals
- 2011 Mercedes-Benz R Class Owners Manuals
- Mercedes-Benz R Class Owners Manuals
- Download PDF Manual
-
Make sure that you do not operate the ADS switch or the vehicle level control system when coupling/decoupling the trailer.
Observe the maximum permissible trailer dimensions (width and length). Most federal states and all Canadian provinces require by law: Rsafety chains between the towing vehicle and the trailer. The chains should be cross- wound under the trailer drawbar. They must be fastened to the vehicle's trailer coupling, not to the bumper or the axle. Allow for enough play in the chains to facilitate turning tight corners.
Ra separate brake system for certain types
of trailer.
Ra safety switch for braked trailers. Check the specific legal requirements applicable to your federal state. If the trailer detaches from the towing vehicle, the safety switch applies the trailer's brakes.
! Do not connect the trailer's brake system (if featured) to the hydraulic brake system of the towing vehicle, as the latter is equipped with an anti-lock brake system. Doing so will result in a loss of function of the brake systems of both the vehicle and the trailer.
i The vehicle's wiring harness features a
line to the brake indicator lamp.
X Make sure that the automatic transmission
is set to position P.
X Apply the vehicle's parking brake. X Start the engine. X Vehicles with the AIRMATIC package:
select highway level and set ADS to AUTO or COMF.
X Switch off the engine. X Close all doors and the tailgate. X Couple up the trailer. X Establish all electrical connections.
i Vehicles with the AIRMATIC package: with a trailer attached, the vehicle will always remain at highway level. When coupling up a trailer, please observe the following: Rif highway level has not been set
manually, the vehicle will automatically sink to highway level as soon as it reaches a speed of 5 mph (8 km/h).
Rhigh-speed level is not available. These restrictions apply to all accessories powered through a connection to the trailer power socket of your vehicle, e.g. a bicycle carrier.
Towing a trailer There are numerous legal requirements concerning the towing of a trailer, e.g. speed restrictions. Make sure that your vehicle/ trailer combination complies with the local requirements not only in your area of residence but also at any location to which you are traveling. The police and local authorities can provide reliable information. Please observe the following when towing a trailer: RTo acquaint yourself with driving with a trailer and with the resulting changes to handling, you should practice cornering, stopping and reversing in a traffic-free location.
RBefore driving, check: the trailer coupling the safety switch for braked trailers the safety chains the electrical connections the lights the wheels
RAdjust the exterior mirrors to provide an
unobstructed view of the rear section of the trailer.
RIf the trailer features electronically
controlled brakes, pull away the vehicle/
BA 251 USA, CA Edition A 2011; 1; 3, en-US d2sboike
2010-04-16T14:31:55+02:00 - Seite 195
Version: 3.0.3.5Towing a trailer
195
trailer combination carefully, manually brake using the brake controller, and check the brakes for correct function.
RSecure any objects on the trailer to prevent the cargo from slipping when the vehicle is in motion.
RIf you couple up a trailer, regularly check the cargo for secure fastening and make sure that the trailer lamps and (if applicable) the trailer brakes are functioning correctly.
RBear in mind that the handling will be less
stable when towing a trailer than when driving without one. Avoid sudden steering movements.
RThe vehicle/trailer combination is heavier, accelerates more slowly, has a decreased gradient climbing capability and a longer braking distance. It is more susceptible to side winds and requires more careful steering.
RIf possible, avoid abrupt braking. Depress the brake pedal moderately at first, so that the trailer can activate its own brakes. Then increase the pressure on the brake pedal. RIf the automatic transmission continues to
shift back and forth between two gears when driving up or downhill, restrict the shift range. Select shift range 4, 3, 2, or 1. A lower gear and lower speed reduce the risk of engine failure.
RWhen driving downhill, shift to a lower gear
to utilize the engine's braking effect. Avoid continuous brake application as this may overheat the vehicle brakes and, if installed, the trailer brakes.
RIf the coolant temperature increases
dramatically while the air-conditioning system is switched on, switch off the air- conditioning system. Coolant heat can additionally be dissipated by opening the windows and by setting the
blower fan and the interior temperature to maximum.
RWhen overtaking, pay particular attention
to the extended length of your vehicle/ trailer combination. Due to the length of your vehicle/trailer combination, you will have to travel an additional distance beyond the vehicle you are overtaking before returning to the previous lane.
Decoupling a trailer G Warning! Vehicles with AIRMATIC: While you are coupling or decoupling a trailer, make sure nobody locks or unlocks the vehicle and/or opens or closes doors or the tailgate. The vehicle’s level could change and you could endanger yourself and/or others as a result. Make sure that you do not operate the ADS switch or the vehicle level control system when coupling/decoupling the trailer.
X Make sure that the automatic transmission
is set to position P.
X Apply the vehicle's parking brake. X Start the engine. X Close all doors and the tailgate. X Apply the trailer's parking brake. G Warning! Vehicles with AIRMATIC: As soon as you disconnect the electrical connection between the trailer and the vehicle, the vehicle will lower. To help avoid personal injury, make sure no one is near the wheel housing or underneath the vehicle before the electrical connection is disconnected. When you decouple the trailer, the vehicle is temporarily raised because the springs are relieved of load. Be especially careful during this process, as you could otherwise injure yourself and/or others. Make sure that any
BA 251 USA, CA Edition A 2011; 1; 3, en-US d2sboike
2010-04-16T14:31:55+02:00 - Seite 196
Version: 3.0.3.5196 Towing a trailer
Vehicle Weight Rating (GVWR) is specified on the type plate located on the B-pillar on the driver's side of your vehicle.
i Mercedes-Benz recommends loading the
trailer so that the drawbar noseweight remains between 8% and 10% of the permissible gross trailer weight.
i The weight of additional accessories,
passengers, and cargo reduces the permissible trailer load and drawbar noseweight for your vehicle.
Checking the vehicle and trailer weight RTo check that the weights of the towing vehicle and the trailer comply with the maximum permissible values, have the vehicle/trailer combination (including the driver, passengers, and cargo with a fully laden trailer) weighed on a calibrated weighbridge.
RCheck the permissible axle weight of the
front and rear axle, the Gross Trailer Weight (GTW), and the drawbar noseweight. Check the permissible axle weight of the front and rear axle, the Gross Trailer Weight (GTW), and the drawbar noseweight.
Trailer power supply The trailer power socket of your vehicle is designed for connecting the 7-pin connector supplied as part of the Mercedes-Benz- approved trailer coupling. i Depending on your trailer, you may need
an adapter to connect your trailer to the vehicle.
Further information is available from any authorized Mercedes-Benz Center.
persons remaining in the vehicle do not press the switches for vehicle level control or the ADS.
X Detach the trailer cable and decouple the
trailer.
X Detach the trailer cable and decouple the
trailer.
X Switch off the engine.
Permissible trailer load and drawbar noseweight Weight specifications The Gross Trailer Weight (GTW) is the combined weight of the trailer together with the cargo and equipment loaded on the trailer. Permissible gross weight: 3500 lb (1588 kg). The permissible Trailer drawbar Weight Rating (TWR) is the maximum weight permitted on the trailer drawbar: 350 lb (158 kg) limit for Mercedes-Benz-approved trailer couplings.
Loading a trailer RWhen loading a trailer, please note that
neither the permissible gross trailer weight nor the permissible Gross Vehicle Weight Rating (GVWR) may be exceeded. The permissible Gross Vehicle Weight Rating (GVWR) is specified on the type plate located on the B-pillar on the driver's side of your vehicle. You can find the maximum permissible values on the type plates of your vehicle and the trailer. Always observe the lowest respective value when determining the maximum weight with which you can load the vehicle and the trailer.
RThe drawbar noseweight acting on the ball coupling has to be added to the rear axle weight in order to prevent the permissible Gross Axle Weight Rating (GAWR) from being exceeded. The permissible Gross
BA 251 USA, CA Edition A 2011; 1; 3, en-US d2sboike
2010-04-16T14:31:55+02:00 - Seite 197
Version: 3.0.3.5197
Vehicle equipment ............................ 198
Important safety guidelines ............ 198
Displays and operation .................... 198
Menus and submenus ...................... 201
Display messages ............................. 213
Warning and indicator lamps in the instrument cluster ............................ 236BA 251 USA, CA Edition A 2011; 1; 3, en-US d2sboike
2010-04-16T14:31:55+02:00 - Seite 198
Version: 3.0.3.5198 Displays and operation
Vehicle equipment
i This manual describes all the standard and optional equipment of your vehicle which was available at the time of purchase. Country-specific differences are possible. Bear in mind that your vehicle may not feature all functions described here. This also refers to safety-related systems and functions.
Important safety guidelines
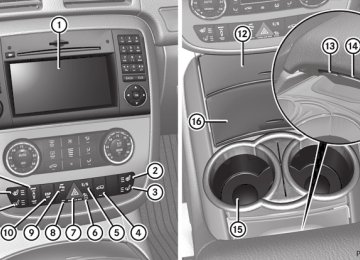
You will find an illustration of the instrument cluster in the "At a glance" section (Y page 28). G Warning A driver's attention to the road and traffic conditions must always be his/her primary focus when driving. For your safety and the safety of others, selecting features through the multifunction steering wheel should only be done by the driver when traffic and road conditions permit it to be done safely. Bear in mind that at a speed of just 30 mph (approximately 50 km/h ), your vehicle is covering a distance of 44 feet (approximately 14 m) every second. G Warning! No messages will be displayed if either the instrument cluster or the multifunction display is inoperative. As a result, you will not be able to see information about your driving conditions, such as Rspeed Routside temperature Rwarning/indicator lamps Rmalfunction/warning messages Rfailure of any systems Driving characteristics may be impaired.
If you must continue to drive, do so with added caution. Contact an authorized Mercedes- Benz Center as soon as possible. G Warning Malfunction and warning messages are only indicated for certain systems and are intentionally not very detailed. The malfunction and warning messages are simply a reminder with respect to the operation of certain systems. They do not replace the owner's and/or driver's responsibility to maintain the vehicle's operating safety. Have all required maintenance and safety checks performed on the vehicle. Bring the vehicle to an authorized Mercedes-Benz Center to address the malfunction and warning messages.
Displays and operation Tachometer The red band in the tachometer indicates the engine's overrevving range. ! Do not drive in the overrevving range, as
this could damage the engine.
The fuel supply is interrupted to protect the engine when the red band is reached.
Outside temperature display The outside temperature display is in the multifunction display. G Warning! The outside temperature indicator is not designed to serve as an ice-warning device and is therefore unsuitable for that purpose. Indicated temperatures just above the freezing point do not guarantee that the road surface is free of ice. The road may still be icy, especially in wooded areas or on bridges.
Changes in the outside temperature are displayed after a short delay.
BA 251 USA, CA Edition A 2011; 1; 3, en-US d2sboike
2010-04-16T14:31:55+02:00 - Seite 199
Version: 3.0.3.5Displays and operation 199
Speedometer with segments The segments in the speedometer indicate which speed range is available. DISTRONIC mode: One or two segments around the stored speed light up.
Operating the on-board computer The on-board computer is activated as soon as you turn the SmartKey to position 1 in the ignition lock. You can control the multifunction display and the settings in the on-board computer using the buttons on the multifunction steering wheel.
: Multifunction display
; ~
Makes/accepts or rejects/ ends a call Selects submenus in the Settings menu Changes values Adjusts the volume
? Switches on the Voice Control
System; see the separate operating instructions
Selects a menu: scrolls back and forth
= V A Switches off the Voice Control
System; see the separate operating instructions Press briefly: Scrolls back and forth within a menu In the Audio menu: selects a stored station, an audio track or a video scene In the Telephone menu: switches to the phone book and selects a name or a telephone number Press and hold: In the Audio menu: selects the previous/next station or selects an audio track using rapid scrolling In the Telephone menu: starts rapid scrolling through the phone book
Multifunction display To activate the multifunction display: Rswitch on the ignition. Rswitch on the lights.
BA 251 USA, CA Edition A 2011; 1; 3, en-US d2sboike
2010-04-16T14:31:55+02:00 - Seite 200
Version: 3.0.3.5200 Displays and operation
Ropen the driver's door. Rpress the . reset button in the instrument
cluster.
Values and settings as well as display messages are shown in the multifunction display.
: Display area for menus or submenus ; Gear indicator = Transmission mode display ? Status bar with outside temperature or
speed (Y page 206)
Further information on the gear indicator (Y page 156).
BA 251 USA, CA Edition A 2011; 1; 3, en-US d2sboike
2010-04-16T14:31:55+02:00 - Seite 201
Version: 3.0.3.5Menus and submenus
201
Menus and submenus Menu overview The number of menus shown depends on the optional equipment in the vehicle.
Function
: Standard display menu (Y page 202)
Rtire pressure loss warning system (Canada only) (Y page 325) Rtire pressure monitor (USA only) (Y page 327) RASSYST PLUS service interval display (Y page 283)
; Audio menu (Y page 203) = Navigation menu (Y page 204) ? AIRMATIC/compass menu (Y page 204)
Rlevel control (Y page 183) Rcompass display (Y page 276) A DISTRONIC menu (Y page 175) B Message memory26 menu (Y page 213) C Settings menu (Y page 205) D Additional functions menu (Y page 210)
26 The menu is only visible when there is a display message.
BA 251 USA, CA Edition A 2011; 1; 3, en-US d2sboike
2010-04-16T14:31:55+02:00 - Seite 202
Version: 3.0.3.5202 Menus and submenus
Function
E Trip computer menu (Y page 210) F Telephone menu (Y page 211)
Standard display menu Standard display X Press V or U on the steering wheel
to select the standard display.
Standard display : Trip odometer ; Odometer You can select the following functions in the Standard display menu by pressing & or *: Rtire pressure loss warning system
(Y page 325) (Canada only)
Rtire pressure monitor (Y page 327) (USA
only)
Rcoolant temperature (Y page 202) Rdigital speedometer or outside
temperature (Y page 202)
RASSYST PLUS service interval display
(Y page 283)
X To reset the trip odometer: press and
hold the . reset button in the instrument cluster until the trip odometer is reset.
Displaying the coolant temperature G Warning Driving when your engine is overheated can cause some fluids which may have leaked into
the engine compartment to catch fire. You could be seriously burned. Steam from an overheated engine can cause serious burns which can occur just by opening the engine hood. Stay away from the engine if you see or hear steam coming from it. Stop the vehicle in a safe location away from other traffic. Turn off the engine, get out of the vehicle and do not stand near the vehicle until the engine has cooled down.
X Press V or U on the steering wheel
to select the standard display.
X Press the & or * button to select the
coolant temperature.
Under normal driving conditions, with the correct anti-corrosion and antifreeze additive concentration, the reading may rise to 248 ‡(120 †). ! If the coolant temperature exceeds
248 ‡(120 †) do not continue driving. The engine will otherwise be damaged.
Displaying the digital speedometer or outside temperature If you have selected the digital speedometer for the status line (Y page 206), the outside temperature will be displayed here.
BA 251 USA, CA Edition A 2011; 1; 3, en-US d2sboike
2010-04-16T14:31:55+02:00 - Seite 203
Version: 3.0.3.5Menus and submenus
203
X Press V or U on the steering wheel
to select the standard display.
X Press the & or * button to select
digital speedometer or the outside temperature.
Digital speedometer
Outside temperature
Audio menu Selecting a radio station i SIRIUS XM satellite radio acts like a
normal radio. For more information on satellite radio operation, see the separate operating instructions.
You can only change the waveband and store new stations using COMAND APS. X Switch on COMAND APS and select Radio (see the separate operating instructions). X Press V or U on the steering wheel
to select the Audio menu.
: Waveband27
; Current channel X To select a stored channel: briefly pressthe & or * button.
X To select a channel from the channel
list: press and briefly hold the & or * button.
X To select a station using the station
search28: press and briefly hold the & or * button.
Audio player or audio media operation Audio data from various audio devices or media can be played, depending on the equipment installed in the vehicle. X Switch on COMAND APS and select the
audio device or medium; see the separate operating instructions.
X Press V or U on the steering wheel
to select the Audio menu.
CD changer display (example) : Current CD ; Current track
27 When current channel ; has been stored, the memory position will also be displayed. 28 Only if no station list is received.
BA 251 USA, CA Edition A 2011; 1; 3, en-US d2sboike
2010-04-16T14:31:55+02:00 - Seite 204
Version: 3.0.3.5204 Menus and submenus
X To select the next/previous track: briefly press the & or * button. X To select a track from the track list
(rapid scrolling): press and briefly hold the & or * button.
The current track will not be displayed in audio AUX mode (Auxiliary audio mode: external audio source connected).
Video DVD operation X Switch on COMAND APS and select video
DVD (see the separate operating instructions).
X Press V or U on the steering wheel
to select the Audio menu.
DVD changer display (example) : Current DVD (for DVD changer) ; Current scene X Press the & or * button to select a
scene.
Navigation menu Displaying navigation instructions In the Navigation menu, the instructions from the navigation system appear in the multifunction display. For more information, see the separate operating instructions. X Switch on COMAND APS (see the separate
operating instructions).
X Press V or U on the steering wheel
to select the Navigation menu.
Route guidance inactive The direction of travel appears in the multifunction display. If the name of the street is part of the navigation system data, this will also be displayed.
Route guidance active The multifunction display shows navigation instructions, for example:
AIRMATIC/compass menu In the AIRMATIC/compass menu you can view the messages for level control (Y page 183) and see the compass display (Y page 276). The display in the AIRMATIC/ compass menu depends on the optional equipment in your vehicle. X Press V or U on the steering wheel to select the AIRMATIC/compass menu.
Example display for vehicles with AIRMATIC package and compass
BA 251 USA, CA Edition A 2011; 1; 3, en-US d2sboike
2010-04-16T14:31:55+02:00 - Seite 205
Version: 3.0.3.5Menus and submenus
205
Settings menu Introduction
The Settings menu allows you to: RRestoring the factory settings RChanging the instrument cluster settings RChanging the time/date settings29
RChanging the lighting settings RChanging the vehicle settings RChanging the convenience settingsResetting to factory settings For safety reasons, the Daytime Running Lamps function in the Lighting submenu is only reset if the engine is switched off. X Press V or U on the steering wheel to select the Settings menu. X Press and hold the . reset button on the instrument cluster for approximately three seconds. A prompt appears in the multifunction display asking you to confirm by pressing reset button . again.
X Press the . reset button again.
The settings of most functions are restored to the factory settings.
or X If you want to retain the settings, do not press the . reset button a second time. After approximately five seconds, the Settings menu reappears. X Press V or U to select a different
menu.
Instrument cluster Selecting the unit of measurement for distance This function is only available in Canada. The Display Unit Speedometer/ Odometer function allows you to choose whether certain displays appear in km/h or mph. The selected unit of measurement for distance applies to: Rthe analog speedometer Rthe odometer and the trip odometer Rthe trip computer Rthe navigation instruction in the
Navigation menu
RDISTRONIC X Press V or U on the steering wheel to select the Settings menu. X Press & to call up the selection of
submenus. X Press W or X to select the Instrument Cluster submenu. X Press & to select Display Unit Speedometer/Odometer. X Press the W or X button to select Km or Miles as the unit of measurement for distance.
X Press the &, V or U button to
select a different display.
Selecting the unit of distance for the digital speedometer X Press V or U on the steering wheel to select the Settings menu. X Press & to call up the selection of
submenus. X Press the W or X button to select the Instrument Cluster submenu. X Press the & button to display Display Unit Digital speedometer.
29 This function is not available in vehicles with the navigation module.
BA 251 USA, CA Edition A 2011; 1; 3, en-US d2sboike
2010-04-16T14:31:55+02:00 - Seite 206
Version: 3.0.3.5206 Menus and submenus
X Press the W or X button to select Km or Miles as the unit of measurement for distance.
X Press the &, V or U button to
select a different display.
Selecting the language The Language function allows you to select the language for the instrument cluster. X Press V or U on the steering wheel to select the Settings menu. X Press & to call up the selection of
submenus. X Press W or X to select the Instrument Cluster submenu. X Press the & button to select Language. X Press the W or X button to select the
desired language.
X Press the &, V or U button to
select a different display.
Selecting the status line display X Press V or U on the steering wheel to select the Settings menu. X Press & to call up the selection of
submenus. X Press W or X to select the Instrument Cluster submenu. X Press & to select Status Line Display. X Press W or X to select the display in the status line: speed (Speed) or outside temperature (Outside Temperature). The selected display now appears constantly in the lower multifunction display. When you scroll through the Standard display menu (Y page 202), you will see the display you have not selected.
X Press the &, V or U button to
select a different display.
Time/date Only vehicles without the navigation module have this submenu. To set the time and date on vehicles without the navigation module, see the separate operating instructions. In the Time / Date submenu, you can set the time and date. X Press V or U on the steering wheel to select the Settings menu. X Press & to call up the selection of
submenus. X Press the W or X button to select the Time / Date submenu. X To set the clock: press & on the steering wheel to select Clock Set hour or Clock Set Minute(s).
or X To set the date: press & to select Date Set day, Date Set Month or Date Set Year. X Press W or X to set a value. X Press the &, V or U button to
select a different display.
Lighting Switching the daytime running lamps on/ off This function is not available in Canada. If you have activated the daytime running lamps function and the light switch is in the $ or à position, the daytime running lamps are switched on automatically when the engine is running. In the dark, the following also light up: Rthe low-beam headlamps Rthe side lamps Rthe tail lamps Rthe license plate lamp Rthe side marker lamp On vehicles with daytime running lamps, the factory setting is On.
BA 251 USA, CA Edition A 2011; 1; 3, en-US d2sboike
2010-04-16T14:31:55+02:00 - Seite 207
Version: 3.0.3.5Menus and submenus
207
X Switch off the engine. X Press V or U on the steering wheel to select the Settings menu. X Press & to call up the selection of
submenus. X Press the W or X button to select the Lighting submenu. X Press & to select Daytime Running Lamps. X Press W or X to set daytime running lamps to On or Off. X Press the &, V or U button to
select a different display.
Switching the surround lighting on/off If you activate the surround lighting function and the light switch is set to Ã, the following will light up if it is dark and you unlock the vehicle using the key: Rthe side lamps Rthe license plate lamp Rthe tail lamps Rthe fog lamps30
Rthe low-beam headlamps31
Rthe side marker lamp Rthe surround lighting in the exterior mirrors The surround lighting switches off automatically after 40 seconds or when the driver's door is opened. X Press V or U on the steering wheel to select the Settings menu. X Press & to call up the selection ofsubmenus. X Press the W or X button to select the Lighting submenu. X Press & to select Surround Lighting Function.
30 Only for vehicles with front fog lamps. 31 Only for vehicles without front fog lamps. 32 Only for vehicles with front fog lamps. 33 Only for vehicles without front fog lamps.
X Press the W or X button to activate or deactivate the Surround Lighting Function function. X When leaving the vehicle, turn the light
switch to position Ã. The surround lighting is activated.
X Press the &, V or U button to
select a different display.
Activating/deactivating the exterior lighting delayed switch-off When you activate the Headlamp Delayed Shut-off function and the light switch is set to Ã, the exterior lighting remains on for another 15 seconds after closing the doors when it is dark. If the engine is switched off and then none of the doors are opened, or if an open door is not closed, the exterior lighting goes out after 60 seconds. If you have activated the delayed switch-off function, the light switch is set to à and you switch off the engine, the following remain lit: Rthe parking lamps Rthe license plate lamp Rthe tail lamps Rthe fog lamps32
Rthe low-beam headlamps33
Rthe side marker lamps X Press V or U on the steering wheel to select the Settings menu. X Press & to call up the selection ofsubmenus. X Press the W or X button to select the Lighting submenu. X Press the & button to select Headlamp Delayed Shut-off.
BA 251 USA, CA Edition A 2011; 1; 3, en-US d2sboike
2010-04-16T14:31:55+02:00 - Seite 208
Version: 3.0.3.5208 Menus and submenus
X Press the W or X button to activate or deactivate the Headlamp Delayed Shut-off function. X Before switching off the engine, turn the
light switch to position Ã. The exterior lighting delayed shut-off is activated.
X Press the &, V or U button to
select a different display.
To deactivate the delayed shut-off temporarily: X Before leaving the vehicle, turn the
SmartKey to position 0 in the ignition lock.
X Turn the SmartKey to position 2 in the
ignition lock and back to position 0. The delayed shut-off is deactivated.
The delayed shut-off is reactivated the next time you start the engine. Activating/deactivating the interior lighting delayed switch-off When you activate the Interior Lighting Delayed Shut-off function and remove the SmartKey from the ignition lock, the interior lighting remains on for 10 seconds. X Press V or U on the steering wheel to select the Settings menu. X Press & to call up the selection of
submenus. X Press the W or X button to select the Lighting submenu. X Press the & button to select Interior Lighting Delayed Shut-off. X Press the W or X button to activate or deactivate the Interior Lighting Delayed Shut-off function. X Press the &, V or U button to
select a different display.
Vehicle Activating/deactivating the automatic locking feature When you activate the Automatic Door Locking function, your vehicle will be centrally locked above a speed of approximately 9 mph (15 km/h). i Further information on the automatic
locking feature (Y page 81). X Press V or U on the steering wheel to select the Settings menu. X Press & to call up the selection of
submenus. X Press the W or X button to select the Vehicle submenu. X Press & to select Automatic Door Locking. X Press W or X to switch Automatic Door Locking on or off. X Press the &, V or U button to
select a different display.
Activating/deactivating the radar sensor system If the radar sensor system is switched off, Blind Spot Assist (Y page 191) is deactivated. i USA only: This device has been approved by the FCC as a “Vehicular Radar System”. The radar sensor is intended for use in an automotive radar system only. Removal, tampering, or altering of the device will void any warranties, and is not permitted by the FCC. Do not tamper with, alter, or use in any non-approved way. Any unauthorized modification to this device could void the user’s authority to operate the equipment.
i Canada only:
This device complies with RSS-210 of Industry Canada. Operation is subject to the following two conditions: 1. This device may not cause interference, and
BA 251 USA, CA Edition A 2011; 1; 3, en-US d2sboike
2010-04-16T14:31:55+02:00 - Seite 209
Version: 3.0.3.5Menus and submenus
209
2. This device must accept any interference received, including interference that may cause undesired operation of the device. Any unauthorized modification to this device could void the user’s authority to operate the equipment. X Press V or U on the steering wheel to select the Settings menu. X Press & to call up the selection of
submenus. X Press the W or X button to select the Vehicle submenu. X Press the & button to select Radar Sensor (See Operator's Manual). X Press the W or X button to activate or deactivate the Radar Sensor (See Operator's Manual). X Press the &, V or U button to
select a different display.
Convenience Activating/deactivating the EASY- ENTRY/EXIT feature You can use the Easy-entry Function to activate or deactivate the easy-entry/exit feature (Y page 110). G Warning You must make sure no one can become trapped or injured by the moving steering wheel when the easy-entry/exit feature is activated. To stop steering wheel movement do one of the following: RMove steering wheel adjustment stalk. RPress one of the memory position buttons. RPress memory button M. Do not leave children unattended in the vehicle, or with access to an unlocked vehicle. Children could open the driver's door and unintentionally activate the easy-entry/exit feature, which could result in an accident and/or serious personal injury.
X Press V or U on the steering wheel to select the Settings menu. X Press & to call up the selection of
submenus. X Press the W or X button to select the Comfort submenu. X Press & to select the Easy-entry Function function. X Press the W or X to activate or deactivate the Easy-entry Function function.
X Press the &, V or U button to
select a different display.
Switching the belt adjustment on/off Further information on belt adjustment (Y page 56). X Press V or U on the steering wheel to select the Settings menu. X Press & to call up the selection of
submenus. X Press the W or X button to select the Comfort submenu. X Press the & button to select Belt Adjustment. X Press the W or X button to activate or deactivate Belt Adjustment. X Press the &, V or U button to
select a different display.
Switching the fold in mirrors when locking function on/off When you activate the Fold In Mirrors When Locking function, the exterior mirrors are folded in when the vehicle is locked. When you switch on the ignition, the exterior mirrors fold out again. If you have switched the function on and you fold the exterior mirrors in using the button on the door (Y page 112), they will not fold out automatically. The exterior mirrors can then only be folded out using the button on the door.
BA 251 USA, CA Edition A 2011; 1; 3, en-US d2sboike
2010-04-16T14:31:55+02:00 - Seite 210
Version: 3.0.3.5210 Menus and submenus
X Press V or U on the steering wheel to select the Settings menu. X Press & to call up the selection of
submenus. X Press the W or X button to select the Comfort submenu. X Press & to select Fold In Mirrors When Locking. X Press W or X to activate/deactivate the Fold In Mirrors When Locking function.
X Press the &, V or U button to
select a different display.
Additional functions menu Switching the distance warning function on/off This function is only available with DISTRONIC. X Press V or U on the steering wheel to select the Additional functions menu. X Press the & or * button to select the Distance Warning function. X Press the W or X button to activate or deactivate the Distance Warning system. When the distance warning function (Y page 70) is activated, the Ä symbol is shown in the lower multifunction display.
X Press the &, V or U button to
select a different display.
Switching Blind Spot Assist on/off Further information about Blind Spot Assist (Y page 191). X Press V or U on the steering wheel to select the Additional functions menu. X Press the & or * button to select the Blind Spot Assist function.
X Press the W or X button to switch Blind Spot Assist on or off. X Press the &, V or U button to
select a different display.
Trip computer menu Trip computer "From start" or "From reset" The values in the From Start submenu refer to the start of your journey, while those in the From Reset submenu refer to the last time you reset this submenu. X Press V or U on the steering wheel to select the trip computer menu. X Press & or * to select From Start or From Reset.
Trip computer "After start" (example) : Distance ; Time = Average speed ? Average fuel consumption The From Start trip computer is reset automatically when Rthe ignition has been switched off for more
than 4 hours.
R999 hours have been exceeded. R9999 miles have been exceeded. The From Reset trip computer is automatically reset if the trip exceeds 9999 hours or 99,999 miles. You can select Km or Miles as the unit of measurement for distance (Y page 205).
BA 251 USA, CA Edition A 2011; 1; 3, en-US d2sboike
2010-04-16T14:31:55+02:00 - Seite 211
Version: 3.0.3.5Menus and submenus
211
Resetting values X Press V or U on the steering wheel
to select the trip computer menu.
X Press & or * to select the function
that you wish to reset.
X Press and hold the . reset button on the
instrument cluster until the values have reverted to "0".
Calling up the range X Press V or U on the steering wheel to select the trip computer menu. X Press & or * to select Range:. The multifunction display shows the estimated range of the vehicle, based on the current driving style and the fuel level. If there is only a small amount of fuel remaining in the fuel tank, a vehicle refueling C appears instead of the range.
Displaying the current fuel consumption X Press V or U on the steering wheel
to select the trip computer menu. X Press & or * to select Consumption. The current fuel consumption is displayed.
G Warning A driver's attention to the road must always be his/her primary focus when driving. For your safety and the safety of others, we recommend that you pull over to a safe location and stop before placing or taking a telephone call. If you choose to use the telephone while driving, please use the hands- free device and only use the telephone when weather, road and traffic conditions permit. Some jurisdictions prohibit the driver from using a mobile phone while driving a vehicle. Bear in mind that at a speed of just 30 mph (approximately 50 km/h ), your vehicle is covering a distance of 44 feet (approximately 14 m) every second.
X Switch on the mobile phone and COMAND
APS (see the separate operating instructions).
X Press V or U on the steering wheel
to select the Telephone menu.
You will see one of the following display messages in the multifunction display: RReady or the name of the network provider: the mobile phone has found a network and is ready to receive. RNo Service: No network is available. Accepting a call If someone calls you when you are in the Telephone menu, a display message appears in the multifunction display, for example:
Telephone menu Introduction You can establish a Bluetooth® wireless connection to COMAND APS (see the separate operating instructions).
X Press 6 on the steering wheel to accept
an incoming call.
If you are not in the Telephone menu, you can still accept a call.
BA 251 USA, CA Edition A 2011; 1; 3, en-US d2sboike
2010-04-16T14:31:55+02:00 - Seite 212
Version: 3.0.3.5212 Menus and submenus
Rejecting or ending a call X Press the ~ button on the steering
wheel.
If you are not in the Telephone menu, you can still accept a call.
Dialing a number from the phone book You can enter new telephone numbers into the phone book via the mobile phone (see the separate operating instructions). If your mobile phone is operational, you can select and dial a number from the phone book at any time. X Press V or U on the steering wheel
to select the Telephone menu.
X Press the & or * button to select the
desired name. To start scrolling rapidly, press and hold the & or * button for longer than one second.
X Press 6 to start dialing. or X If you do not want to make a call, press the
~ button.
Redialing The on-board computer saves the last names or numbers dialed in the redial memory. X Press V or U on the steering wheel
to select the Telephone menu.
X Press the 6 button to switch to the
redial memory.
X Press the & or * button to select the
desired name or number.
X Press 6 to start dialing.
BA 251 USA, CA Edition A 2011; 1; 3, en-US d2sboike
2010-04-16T14:31:55+02:00 - Seite 213
Version: 3.0.3.5Display messages
213
Display messages Hiding display messages G Warning All categories of messages contain important information which should be taken note of and, where a malfunction is indicated, addressed as soon as possible at an authorized Mercedes-Benz Center. Failure to repair the condition noted may cause damage not covered by the Mercedes-Benz Limited Warranty, or result in property damage or personal injury.
Display messages appear in the multifunction display. X Press the V, U, & or * button on the steering wheel to select another display. or X Press reset button . on the instrument cluster (Y page 28).
The display message is cleared.
The multifunction display shows high-priority display messages in red. You cannot hide display messages of the highest priority. The multifunction display shows these messages continuously until the causes for the messages have been remedied. Certain display messages are accompanied by an audible warning tone or a continuous tone. Please respond in accordance with the display messages and follow the additional notes in this Operator's Manual.
Message memory menu The on-board computer saves certain display messages. You can call up the display messages in the message memory menu. The message memory menu is only shown if any display messages have been stored. X Press the V or U button repeatedly, until either the original menu or the message memory menu is shown. If there are display messages, the multifunction display shows, for example, 2 messages. X Using & or * scroll through the display messages. When the ignition is switched off, all display messages are deleted apart from some high- priority display messages. Once the causes of the high-priority display messages have been rectified, the corresponding display messages are also deleted.
BA 251 USA, CA Edition A 2011; 1; 3, en-US d2sboike
2010-04-16T14:31:55+02:00 - Seite 214
Version: 3.0.3.5214 Display messages
Safety systems Display messages ESP Unavailable See Operator's Manual
ESP Inoperative See Operator's Manual
Possible causes/consequences and M Solutions G Risk of accident ESP® (Electronic Stability Program) and therefore also PRE- SAFE® are temporarily unavailable. The self-diagnosis function might not be complete, for example. BAS (Brake Assist System) has also been deactivated. The brake system continues to function normally, but without the functions listed above. X Carefully drive a short distance making slight steering
movements at a speed above 12 mph (20 km/h) If the display message disappears, the functions mentioned above are available again.
If the display message continues to be displayed: X Drive on carefully. X Visit a qualified specialist workshop.
ESP® and therefore also BAS and PRE-SAFE® are not available due to undervoltage. The brake system continues to function normally, but without the functions listed above. X Drive on carefully. X Visit a qualified specialist workshop immediately. If the display message is shown during the journey and the ä warning lamp is flashing, then 4ETS (Electronic Traction System) is deactivated. The brakes on the drive wheels could otherwise overheat. X Let the brakes cool down until the display message disappears
and the ä warning lamp goes out. 4ETS is activated again. G Risk of accident ESP® and therefore also Brake Assist and PRE-SAFE® are not available due to a malfunction. The d warning lamp also lights up in the instrument cluster. The brake system continues to function normally, but without the functions listed above. X Drive on carefully. X Visit a qualified specialist workshop immediately.
BA 251 USA, CA Edition A 2011; 1; 3, en-US d2sboike
2010-04-16T14:31:55+02:00 - Seite 215
Version: 3.0.3.5Display messages
215
Display messages Tele Aid Inoperative
PRE-SAFE Inoperative See Operator's Manual
Restraint Sys. Malfunction Service Required
Possible causes/consequences and M Solutions USA only: one or more main functions in the mbrace system are malfunctioning. Canada only: one or more main functions in the Tele Aid system are malfunctioning. X USA only: have the mbrace system checked at a qualified
specialist workshop.
X Canada only: have the Tele Aid system checked at a qualified
specialist workshop. G Risk of injury Important functions of PRE-SAFE® have failed. All other occupant safety systems, e.g. air bags, remain available. X Visit a qualified specialist workshop immediately. G Risk of injury The restraint systems are malfunctioning. X Visit a qualified specialist workshop immediately.
G Warning In the event a malfunction of the SRS is indicated as outlined above, the SRS may not be operational. For your safety, we strongly recommend that you contact an authorized Mercedes-Benz Center immediately to have the system checked. Otherwise the SRS may not be activated when needed in an accident, which could result in serious or fatal injury, or it might deploy unexpectedly and unnecessarily which could also result in injury.
BA 251 USA, CA Edition A 2011; 1; 3, en-US d2sboike
2010-04-16T14:31:55+02:00 - Seite 216
Version: 3.0.3.5216 Display messages
Display messages Front Passenger Airbag Enabled See Operator's Manual
Possible causes/consequences and M Solutions The front-passenger air bag is enabled during the journey, although: Rthere is a child, a small adult or an object weighing less than the
system's weight threshold is on the front-passenger seat.
Rthe front-passenger seat is unoccupied The system may detect the additional weight of objects on the seat or forces acting on the seat. X Pull over and stop the vehicle safely as soon as possible, paying
attention to road and traffic conditions.
X Engage the parking brake. X Switch off the ignition. X Open the front-passenger door. X Remove the child and the child restraint system from the front-
passenger seat.
X If necessary, secure the child in a child restraint system on a