- 2016 GMC Acadia Owners Manuals
- GMC Acadia Owners Manuals
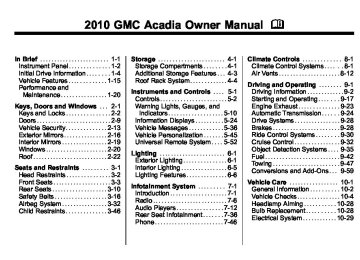
- 2010 GMC Acadia Owners Manuals
- GMC Acadia Owners Manuals
- 2007 GMC Acadia Owners Manuals
- GMC Acadia Owners Manuals
- 2013 GMC Acadia Owners Manuals
- GMC Acadia Owners Manuals
- 2012 GMC Acadia Owners Manuals
- GMC Acadia Owners Manuals
- 2014 GMC Acadia Owners Manuals
- GMC Acadia Owners Manuals
- 2009 GMC Acadia Owners Manuals
- GMC Acadia Owners Manuals
- 2008 GMC Acadia Owners Manuals
- GMC Acadia Owners Manuals
- 2011 GMC Acadia Owners Manuals
- GMC Acadia Owners Manuals
- 2015 GMC Acadia Owners Manuals
- GMC Acadia Owners Manuals
- Download PDF Manual
-
and released, the station that was set, returns.
4. Repeat the steps for each radio
station to be stored as a favorite.
To setup the number of favorites pages: 1. Press MENU to display the radio
setup menu.
2. Press the softkey below the
FAV 1-6 tab.
7-10
Infotainment System
3. Select the desired number of
favorites pages by pressing the softkey below the displayed page numbers.
4. Press FAV, or let the menu time
out, to return to the original main radio screen showing the radio station frequency tabs and to begin the process of programming favorites for the chosen amount of numbered pages.
XM™ Radio Messages XL (Explicit Language Channels): These channels, or any others, can be blocked at a customer's request, by calling 1-800-852-XMXM (9696). XM Updating: The encryption code in the receiver is being updated, and no action is required. This process should take no longer than 30 seconds.
No XM Signal: The system is functioning correctly, but the vehicle is in a location that is blocking the XM™ signal. When the vehicle is moved into an open area, the signal should return. Loading XM: The audio system is acquiring and processing audio and text data. No action is needed. This message should disappear shortly. Channel Off Air: This channel is not currently in service. Tune in to another channel. Channel Unauth : This channel is blocked or cannot be received with your XM Subscription package. Channel Unavail: This previously assigned channel is no longer assigned. Tune to another station. If this station was one of the presets, choose another station for that preset button. No Artist Info: No artist information is available at this time on this channel. The system is working properly.
No Title Info: No song title information is available at this time on this channel. The system is working properly. No CAT Info: No category information is available at this time on this channel. The system is working properly. No Information: No text or informational messages are available at this time on this channel. The system is working properly. CAT Not Found: There are no channels available for the selected category. The system is working properly. XM Theftlocked: The XM receiver in the vehicle could have previously been in another vehicle. For security purposes, XM receivers cannot be swapped between vehicles. If this message is received after having the vehicle serviced, check with your dealer/retailer.
If this message is
If tuned to channel 0,
XM Radio ID: this message alternates with the XM™ Radio 8 digit radio ID label. This label is needed to activate the service. Unknown: received when tuned to channel 0, there could be a receiver fault. Consult with your dealer/retailer. Check XM Receivr: message does not clear within a short period of time, the receiver could have a fault. Consult with your dealer/retailer. XM Not Available: If this message does not clear within a short period of time, the receiver could have a fault. Consult with your dealer/ retailer.
If this
Radio Reception Frequency interference and static can occur during normal radio reception if items such as cell phone chargers, vehicle convenience
accessories, and external electronic devices are plugged into the accessory power outlet. If there is interference or static, unplug the item from the accessory power outlet. FM FM signals only reach about 16 to 65 km (10 to 40 miles). Although the radio has a built-in electronic circuit that automatically works to reduce interference, some static can occur, especially around tall buildings or hills, causing the sound to fade in and out. AM The range for most AM stations is greater than for FM, especially at night. The longer range can cause station frequencies to interfere with each other. For better radio reception, most AM radio stations boost the power levels during the day, and then reduce these levels during the night. Static can also
Infotainment System 7-11
occur when things like storms and power lines interfere with radio reception. When this happens, try reducing the treble on the radio. XM™ Satellite Radio Service XM Satellite Radio Service gives digital radio reception from coast-to-coast in the 48 contiguous United States, and in Canada. Just as with FM, tall buildings or hills can interfere with satellite radio signals, causing the sound to fade in and out. In addition, traveling or standing under heavy foliage, bridges, garages, or tunnels may cause loss of the XM signal for a period of time. Cellular Phone Usage Cellular phone usage may cause interference with the vehicle's radio. This interference may occur when making or receiving phone calls, charging the phone's battery, or simply having the phone on.
7-12
Infotainment System
This interference can cause an increased level of static while listening to the radio. If static is received while listening to the radio, unplug the cellular phone and turn it off.
Multi-Band Antenna The multi-band antenna is located on the roof of the vehicle. This type of antenna is used with the AM/FM radio, as well as OnStar® and the XM™ Satellite Radio Service System, if the vehicle has these features. Keep this antenna clear of snow and ice build up for clear radio reception. If the vehicle has a sunroof, the performance of the radio system may be affected if the sunroof is open. Loading items onto the roof of the vehicle can interfere with the performance of the radio system and, if the vehicle has this feature, OnStar®. Make sure the multi-band antenna is not obstructed.
Audio Players
CD Player
Playing a CD Insert a CD partway into the slot, label side up. The player pulls it in and the CD should begin playing. Z EJECT : Press and release to eject the disc that is currently playing. A beep sounds and Ejecting Disc displays. Once the disc is ejected, Remove Disc displays. The disc can be removed. If the disc is not removed, after several seconds, the disc automatically pulls back into the player. f (Tune): Turn to select tracks on the CD that is currently playing. © SEEK ¨ : Press © to go to the start of the current track, if more than ten seconds on the CD have played. Press ¨ to go to the next track.
If either arrow is held, or pressed multiple times, the player continues moving backward or forward through the tracks on the CD. s REV (Fast Reverse): Press and hold to reverse playback quickly within a track. Sound will be heard at a reduced volume. Release to resume playing the track. The elapsed time of the track displays. \ FWD (Fast Forward): Press and hold to advance playback quickly within a track. Sound will be heard at a reduced volume. Release to resume playing the track. The elapsed time of the track displays. RDM (Random): CD tracks can be listened to in random, rather than sequential order with the random setting. To use random, press the softkey under the RDM label until Random Current Disc displays. Press the softkey again to turn off random play.
Infotainment System 7-13
BAND: Press to listen to the radio when a CD is playing. The CD remains inside the radio for future listening. CD/AUX (CD/Auxiliary): Press to select between CD, or Auxiliary. . When a CD is in the player the CD icon and a message showing the disc and/or track number displays. If an auxiliary input device is not connected, “No Input Device Found” displays.
Care of CDs If playing a CD-R, the sound quality can be reduced due to CD-R or CD-RW quality, the method of recording, the quality of the music that has been recorded, and the way the CD-R or CD-RW has been handled. Handle them carefully. Store CD-R(s) or CD-RW(s) in their original cases or other protective cases and away from direct sunlight and dust. The CD player scans the
bottom surface of the disc. If the surface of a CD is damaged, such as cracked, broken, or scratched, the CD does not play properly or not at all. Do not touch the bottom side of a CD while handling it; this could damage the surface. Pick up CDs by grasping the outer edges or the edge of the hole and the outer edge. If the surface of a CD is soiled, take a soft, lint free cloth or dampen a clean, soft cloth in a mild, neutral detergent solution mixed with water, and clean it. Make sure the wiping process starts from the center to the edge.
Care of the CD Player Do not add any label to a CD, it could get caught in the CD player. If a CD is recorded on a personal computer and a description label is needed, try labeling the top of the recorded CD with a marking pen. The use of CD lens cleaners for CDs is not advised.
Notice: If a label is added to a CD, or more than one CD is inserted into the slot at a time, or an attempt is made to play scratched or damaged CDs, the CD player could be damaged. While using the CD player, use only CDs in good condition without any label, load one CD at a time, and keep the CD player and the loading slot free of foreign materials, liquids, and debris. If an error displays, see “CD Messages” later in this section. Playing an MP3/WMA CD-R or CD-RW Disc The radio has the capability of playing an MP3/WMA CD-R or CD-RW disc. For more information on how to play an MP3/WMA CD-R or CD-RW disc, see MP3 (Radio with CD and Radio with CD/USB) on page 7‑22 or MP3 (Radio with CD/DVD) on page 7‑28.
7-14
Infotainment System
CD Messages CHECK DISC: Radios with a Single CD player display CHECK DISC and/or ejects the CD if an error occurs. Optical Error: The disc was inserted upside down. Disk Read Error: A disc was inserted with an invalid or unknown format. Player Error: There are disc LOAD or disc EJECT problems.
It is very hot. When the temperature returns to normal, the CD should play. The road is very rough. When the road becomes smoother, the CD should play. The CD is dirty, scratched, wet, or upside down. The air is very humid. If so, wait about an hour and try again.
There could have been a problem while burning the CD. The label could be caught in the CD player.
If the CD is not playing correctly for any other reason, try a known good CD. If any error occurs repeatedly or if an error cannot be corrected, contact your dealer/retailer. If the radio displays an error message, write it down and provide it to your dealer/retailer when reporting the problem.
CD/DVD Player
Playing a CD (In Either the DVD or CD Slot) Insert a CD partway into the slot, label side up. The player pulls it in and the CD should begin playing (loading a disc into the system, depending on media type and format ranges from 5 to 20 seconds for a CD, and up to 30 seconds for a DVD to begin playing).
If the ignition or radio is turned off, while a CD is in the player, it stays in the player. When the ignition or radio is turned on, the CD starts playing where it stopped, if it was the last selected audio source. The CD is controlled by the buttons on the radio faceplate or by the RSA unit. See Rear Seat Audio (RSA) System on page 7‑44 for more information. The DVD/CD decks, (upper slot is the DVD deck and the lower slot is the CD deck) of the radio are compatible with most audio CDs, CD-R, CD-RW, and MP3/WMAs. When a CD is inserted, the text label DVD or CD symbol displays on the left side of the radio display. As each new track starts to play, the track number displays. Z CD (Eject): Press and release to eject the disc that is currently playing. The disc ejects from the bottom slot. A beep sounds and Ejecting Disc displays. Once the disc is ejected, Remove Disc displays. The disc can be removed.
If the disc is not removed, after several seconds, the disc automatically pulls back into the player. Z DVD (Eject): Press and release to eject the disc that is currently playing in the top slot. A beep sounds and Ejecting Disc displays. If loading and reading of a disc cannot be completed, and the disc fails to eject, press and hold Z DVD for more than five seconds to force the disc to eject. f (Tune): Turn to select tracks on the CD that is currently playing. © SEEK ¨ : Press © to go to the start of the current track if the track has played more than five seconds. If the track has played less than five seconds the previous track will play. Press ¨ to go to the next track.
If either arrow is held, or pressed multiple times, the player continues moving backward or forward through the tracks on the CD. s REV (Fast Reverse): Press and hold to reverse playback quickly within a track. Sound will be heard at a reduced volume. Release to resume playing the track. The elapsed time of the track displays. \ FWD (Fast Forward): Press and hold to advance playback quickly within a track. Sound will be heard at a reduced volume. Release to resume playing the track. The elapsed time of the track displays. RDM (Random): CD tracks can be listened to in random, rather than sequential order with the random setting. To use random, press the softkey under the RDM tab until Random Current Disc displays. Press the softkey again to turn off random play.
Infotainment System 7-15
BAND: Press to listen to the radio when a CD or DVD is playing. The CD or DVD remains inside the radio for future listening or for viewing entertainment. DVD/CD AUX (Auxiliary): Press to select between DVD, CD, or Auxiliary.
If an auxiliary input device is not connected, “No Aux Input Device” displays.
. When a disc is in either slot, the DVD/CD text tab and a message showing the track or chapter number displays. If an auxiliary input device is not connected, and a disc is in both the DVD slot and the CD slot the DVD/CD AUX button only cycles between the two sources and does not indicate “No Aux Input Device”. If a front auxiliary input device is connected, the DVD/CD AUX button cycles through all available options.
7-16
Infotainment System
If a disc is inserted into the top DVD slot, the rear seat operator can turn on the video screen and use the remote control to only navigate the CD tracks through the remote control. See “Using the Auxiliary Input Jack(s)” later in this section, or “Audio/Video (A/V) Jacks” under, Rear Seat Entertainment (RSE) System on page 7‑36 for more information.
Care of CDs and DVDs If playing a CD-R, the sound quality can be reduced due to CD-R or CD-RW quality, the method of recording, the quality of the music that has been recorded, and the way the CD-R or CD-RW has been handled. Handle them carefully. Store CD-R(s) or CD-RW(s) in their original cases or other protective cases and away from direct sunlight and dust. The CD or DVD player scans the bottom surface of the disc. If the surface of a CD is
damaged, such as cracked, broken, or scratched, the CD does not play properly or not at all. Do not touch the bottom side of a CD while handling it; this could damage the surface. Pick up CDs by grasping the outer edges or the edge of the hole and the outer edge. If the surface of a CD is soiled, take a soft, lint free cloth or dampen a clean, soft cloth in a mild, neutral detergent solution mixed with water, and clean it. Make sure the wiping process starts from the center to the edge.
Care of the CD and DVD Player Do not add any label to a CD, it could get caught in the CD or DVD player. If a CD is recorded on a personal computer and a description label is needed, try labeling the top of the recorded CD with a marking pen. The use of CD lens cleaners for CDs is not advised.
Notice: If a label is added to a CD, or more than one CD is inserted into the slot at a time, or an attempt is made to play scratched or damaged CDs, the CD player could be damaged. While using the CD player, use only CDs in good condition without any label, load one CD at a time, and keep the CD player and the loading slot free of foreign materials, liquids, and debris. If an error displays, see “CD Messages” later in this section. Radios with CD and DVD Audio Output Only one audio source can be heard through the speakers at one time. An audio source is defined as DVD slot, CD slot, XM, FM/AM, Front Auxiliary Jack, or Rear Auxiliary Jack.
Press O to turn the radio on. The radio can be heard through all of the vehicle speakers. Front seat passengers can listen to the radio (AM, FM, or XM) by pressing BAND or DVD/CD AUX to select the CD slot, DVD slot, front or rear auxiliary input (if available). If a playback device is plugged into the radio’s front auxiliary input jack or the rear auxiliary jack, the front seat passengers are able to listen to playback from this source through the vehicle speakers. See “Using the Auxiliary Input Jack(s)” later in this section, or “Audio/Video (A/V) Jacks” under, Rear Seat Entertainment (RSE) System on page 7‑36 for more information. In some vehicles, depending on audio options, the rear speakers can be muted when the RSA power is turned on. See Rear Seat Audio (RSA) System on page 7‑44 for more information.
Playing an MP3/WMA CD-R or CD-RW Disc The radio has the capability of playing an MP3/WMA CD-R or CD-RW disc. For more information on how to play an MP3/WMA CD-R or CD-RW disc, see MP3 (Radio with CD and Radio with CD/USB) on page 7‑22 or MP3 (Radio with CD/DVD) on page 7‑28. CD Messages Optical Error: The disc was inserted upside down. Disk Read Error: A disc was inserted with an invalid or unknown format. Player Error: There are disc LOAD or disc EJECT problems.
It is very hot. When the temperature returns to normal, the CD should play. The road is very rough. When the road becomes smoother, the CD should play.
Infotainment System 7-17
The CD is dirty, scratched, wet, or upside down. The air is very humid. If so, wait about an hour and try again. There could have been a problem while burning the CD. The label could be caught in the CD player.
If the CD is not playing correctly for any other reason, try a known good CD. If any error occurs repeatedly or if an error cannot be corrected, contact your dealer/retailer. If the radio displays an error message, write it down and provide it to your dealer/retailer when reporting the problem.
7-18
Infotainment System
Using the DVD Player The DVD player can be controlled by the buttons on the remote control, the RSA system, or by the buttons on the radio faceplate. See “Remote Control”, under Rear Seat Entertainment (RSE) System on page 7‑36 and Rear Seat Audio (RSA) System on page 7‑44 for more information. The DVD player is only compatible with DVDs of the appropriate region code that is printed on the jacket of most DVDs. The DVD slot of the radio is compatible with most audio CDs, CD-R, CD-RW, DVD-Video, DVD-Audio, DVD-R/RW, DVD+R/RW media along with MP3 and WMA formats. If an error message displays on the video screen or the radio, see “DVD Display Error Messages” under, Rear Seat Entertainment (RSE) System on page 7‑36 and “DVD Radio Error Messages” in this section for more information.
Playing a DVD f (Tune): Turn to change tracks on a CD or DVD, to manually tune a radio station, or to change clock or date settings, while in the clock or date setting mode. See the information given earlier in this section specific to the radio, CD, and the DVD. Also, see “Setting the Clock” in the index, for setting the clock and date. © SEEK (Previous Track/ Chapter): Press to return to the start of the current track or chapter. Press © again to go to the previous track or chapter. This button may not work when the DVD is playing the copyright information or the previews. SEEK ¨ (Next Track/Chapter): Press to go to the next track or chapter. This button may not work when the DVD is playing the copyright information or the previews.
s REV (Fast Reverse): Press to quickly reverse the DVD at five times the normal speed. The radio displays the elapsed time while in fast reverse. To stop fast reversing, press again. This button may not work when the DVD is playing the copyright information or the previews. \ FWD (Fast Forward): Press to fast forward the DVD. The radio displays the elapsed time and fast forwards five times the normal speed. To stop fast forwarding, press again. This button may not work when the DVD is playing the copyright information or the previews.
Z (Eject): Press to eject a DVD. If the DVD is ejected, but not removed, the player automatically pulls it back in after 15 seconds. If loading and reading of a DVD cannot be completed, because of an unknown format, etc., and the disc fails to eject, press and hold for more than five seconds to force the disc to eject.
DVD-V (Video) Display Buttons Once a DVD-V is inserted, the radio display menu shows several icons. Press the softkeys under any icon during DVD playback. See the icon list below for more information. The rear seat passenger can navigate the DVD-V menus and controls through the remote control. See “Remote Control”, under Rear Seat Entertainment (RSE) System on page 7‑36 for more information. The Video Screen automatically turns on when the DVD-V is inserted into the DVD slot.
r / j (Play/Pause): Press either the play or pause icon displayed on the radio system, to toggle between pausing or restarting playback of a DVD.
If the forward arrow is showing on display, the system is in pause mode. If the pause icon is showing on display, the system is in playback mode. If the DVD screen is off, press the play button to turn the screen on.
Some DVDs begin playing after the previews have finished, although there could be a delay of up to 30 seconds. If the DVD does not begin playing the movie automatically, press the softkey under the play/pause icon displayed on the radio. If the DVD still does not play, refer to the on-screen instructions, if available.
Infotainment System 7-19
c (Stop): Press to stop playing, rewinding, or fast forwarding a DVD. r (Enter): Press to select the choices that are highlighted in any menu. y (Menu): Press to access the DVD menu. The DVD menu is different on every DVD. Use the softkeys under the navigation arrows to navigate the cursor through the DVD menu. After making a selection press this button. This button only operates when using a DVD. Nav (Navigate): Press to display directional arrows for navigating through the menus. q (Return): Press to exit the current active menu and return to the previous menu. This button operates only when a DVD is playing and a menu is active.
7-20
Infotainment System
DVD-A (Audio) Display Buttons Once a DVD-A is inserted, the radio display menu shows several icons. Press the softkeys under any icon during DVD playback. See the icon list below for more information. The rear seat operator can navigate the DVD-A menus and controls through the remote control. See “Remote Control”, under Rear Seat Entertainment (RSE) System on page 7‑36 for more information. The Video Screen does not automatically power on when the DVD-A is inserted into the DVD slot. It must be manually turned on by the rear seat occupant through the remote control power button.
r / j (Play/Pause): Press either the play or pause icon displayed on the radio system, to toggle between pausing or restarting playback of a DVD.
If the forward arrow is showing on display, the system is in pause mode. If the pause icon is showing on display, the system is in playback mode.
q Group r : Press to cycle through musical groupings on the DVD-A disc. Nav (Navigate): Press to display directional arrows for navigating through the menus. e (Audio Stream): Press to cycle through audio stream formats located on the DVD-A disc. The video screen shows the audio stream changing.
Inserting a Disc To play a disc, gently insert the disc, with the label side up, into the loading slot. The DVD player might not accept some paper labeled media. The player starts loading the disc into the system and shows “Loading Disc” on the radio display. At the same time, the radio displays a softkey menu of option(s). Some discs automatically play the movie while others default to the softkey menu display, which requires the Play, Enter, or Navigation softkeys to be pressed; either by the softkey on the radio or by the rear seat passenger using the remote control. It may take up to 30 seconds for a DVD to begin playing.
Infotainment System 7-21
DVD Error Messages Player Error: This message displays when there are disc load or eject problems. Disc Format Error: This message displays, if the disc is inserted with the disc label wrong side up, or if the disc is damaged. Disc Region Error: This message displays, if the disc is not from a correct region. No Disc Inserted: This message displays, if no disc is present when Z DVD or DVD/CD AUX is pressed on the radio.
Stopping and Resuming Playback To stop playing a DVD without turning off the system, do one of the following: . Press c on the remote control. . Press the softkey under the stop or the play/pause icons displayed on the radio. If the radio head is sourced to something other than DVD-V, press the DVD/CD AUX button to make DVD-V the active source.
To resume DVD playback, do one of the following: . Press r / j on the remote
control.
. Press the softkey under the
play/pause icon displayed on the radio.
The DVD should resume play from where it last stopped if the disc has not been ejected and the stop button has not been pressed twice on the remote control. If the disc has been ejected or the stop button has been pressed twice on the remote control, the disc resumes playing at the beginning of the disc.
Ejecting a Disc Press Z DVD on the radio to eject the disc. If a disc is ejected from the radio, but not removed, the radio reloads the disc after a short period of time. The disc is stored in the radio. The radio does not resume play of the disc automatically. If the movie is reloaded and the RSA system is sourced to the DVD, the player begins to play again. If loading and reading a DVD or CD cannot be completed, and the disc fails to eject, press and hold Z DVD for more than five seconds to force the disc to eject.
7-22
Infotainment System
MP3 (Radio with CD and Radio with CD/USB)
Format Radios that have the capability of playing MP3s can play .mp3 or .wma files that were recorded onto a CD-R or CD-RW disc. The files can be recorded with the following fixed bit rates: 32 kbps, 40 kbps, 56 kbps, 64 kbps, 80 kbps, 96 kbps, 112 kbps, 128 kbps, 160 kbps, 192 kbps, 224 kbps, 256 kbps, and 320 kbps or a variable bit rate. Radios that have a USB port can play .mp3 and .wma files that are stored on a USB storage device as well as AAC files that are stored on an iPod®.
Compressed Audio or Mixed Mode Discs The radio can play discs that contain both uncompressed CD audio and MP3/WMA files. If both formats are on the disc, the radio plays both file formats in the order in which they were recorded to the disc.
CD‐R or CD‐RW Supported File and Folder Structure The radio supports: . Up to 50 folders. . Up to 8 folders in depth. . Up to 15 playlists. . Up to 512 files and folders. . Playlists with an .m3u or .wpl
extension. Files with an .mp3, .wma, or .cda file extension.
USB Supported File and Folder Structure The radio supports: . Up to 700 folders. . Up to 8 folders in depth. . Up to 65,535 files.
Folder and file names up to 64 bytes. Files with an .mp3 or .wma file extension.
. AAC files stored on an iPod.
FAT16
FAT32Root Directory The root directory of the disc is treated as a folder. If the root directory has compressed audio files, the directory displays on the radio as the CD label. If a disc contains both uncompressed CD audio and MP3/WMA files, a folder under the root directory called CD accesses all of the CD audio tracks on the disc.
Empty Folder Folders that do not contain files are skipped, and the player advances to the next folder that contains files.
Order of Play Compressed audio files are accessed in the following order: . Playlists (Px).
Files stored in the root directory. Files stored in folders in the root directory.
Tracks are played in the following order: . Play begins from the first track in
the first playlist and continues sequentially through all tracks in each playlist. When the last track of the last playlist has played, play continues from the first track of the first playlist.
. Play begins from the first track in the first folder and continues sequentially through all tracks in each folder. When the last track of the last folder has played, play continues from the first track of the first folder.
When play enters a new folder, the display does not automatically show the new folder name unless the folder mode has been chosen as the default display. The new track name displays.
Infotainment System 7-23
File System and Naming The song name that displays is the song name that is contained in the ID3 tag. If the song name is not present in the ID3 tag, then the radio displays the file name without the extension (such as .mp3) as the track name. Track names longer than 32 characters or four pages are shortened. Parts of words on the last page of text and the extension of the filename does not display.
Preprogrammed Playlists Preprogrammed playlists that were created using WinAmp™, MusicMatch™, or Real Jukebox™ software can be accessed, however, they cannot be edited using the radio. These playlists are treated as special folders containing compressed audio song files. Playlists that have an .m3u or .pls file extension and are stored on a USB device may be supported by the radio with a USB port.
7-24
Infotainment System
Playing a CD-R or CD-RW MP3
f (Tune): Turn to select MP3/WMA files. © SEEK: Press to go to the start of the track, if more than ten seconds have played. Press and hold or press multiple times to continue moving backward through tracks. ¨ SEEK: Press to go to the next track. Press and hold or press multiple times to continue moving forward through tracks. s REV (Reverse): Press and hold to reverse playback quickly. Sound is heard at a reduced volume and the elapsed time of the file displays. Release s REV to resume playing. \ FWD (Fast Forward): Press and hold to advance playback quickly. Sound is heard at a reduced volume and the elapsed time of the file displays. Release \ FWD to resume playing. The elapsed time of the file displays.S c (Previous Folder): Press the softkey below S c to go to the first track in the previous folder. c T (Next Folder): Press the softkey below c T to go to the first track in the next folder. RDM (Random): Files on the disc can be listened to in random, rather than sequential order. To use random, press the softkey under the RDM tab until Random Current Disc displays to play songs in random order. Press the same softkey again to turn off random play. h (Music Navigator): Press the softkey below h to play files in order by artist or album. The player scans the disc to sort the files by artist and album ID3 tag information. It can take several minutes to scan the disc depending on the number of files on the disc. The radio may begin playing while it is scanning in the background.
When the scan is finished, the disc begins playing files in order by artist. The current artist playing is shown on the second line of the display. Once all songs by that artist are played, the player moves to the next artist in alphabetical order and begins playing files by that artist. To listen to files by another artist, press the softkey located below either arrow tab. The disc goes to the next or previous artist in alphabetical order. Continue pressing either softkey below the arrow tab until the artist displays. To change from playback by artist to playback by album: 1. Press the softkey located below
the Sort By tab.
2. Press one of the softkeys below
the album tab from the sort screen.
3. Press the softkey below the
back tab to return to the main music navigator screen.
The album name displays on the second line between the arrows and songs from the current album begins to play. Once all songs from that album have played, the player moves to the next album in alphabetical order on the CD and begins playing MP3 files from that album. To exit music navigator mode, press the softkey below the Back tab to return to normal MP3 playback. Connecting a USB Storage Device or iPod® The USB Port can be used to control an iPod or a USB storage device. To connect a USB storage device, connect the device to the USB port located in the center console. To connect an iPod, connect one end of the USB cable that came with the iPod to the iPod’s dock connector and connect the other
end to the USB port located in the center console. If the vehicle is on and the USB connection works, “OK to disconnect” and a GM logo may appear on the iPod and iPod appears on the radio's display. The iPod music appears on the radio’s display and begins playing. The iPod charges while it is connected to the vehicle if the vehicle is in the ACC/ACCESSORY or ON/RUN position. When the vehicle is turned off, the iPod automatically powers off and will not charge or draw power from the vehicle's battery. If you have an older iPod model that is not supported, it can still be used by connecting it to the Auxiliary Input Jack using a standard 3.5 mm (1/8 in) stereo cable. See “Using the Auxiliary Input Jack” earlier for more information.
Infotainment System 7-25
Using the Radio to Control a USB Storage Device or iPod The radio can control a USB storage device or an iPod using the radio buttons and knobs and display song information on the radio’s display. f (Tune): Turn to select files. © SEEK: Press to go to the start of the track, if more than ten seconds have played. Press and hold or press multiple times to continue moving backward through tracks. ¨ SEEK: Press to go to the next track. Press and hold or press multiple times to continue moving forward through tracks. s REV (Reverse): Press and hold to reverse playback quickly. Sound is heard at a reduced volume. Release s REV to resume playing. The elapsed time of the file displays.
7-26
Infotainment System
\ FWD (Fast Forward): Press and hold to advance playback quickly. Sound is heard at a reduced volume. Release \ FWD to resume playing. The elapsed time of the file displays. 4 (Information): Press to display additional information about the selected track. Using Softkeys to Control a USB Storage Device or iPod The five softkeys below the radio display are used to control the functions listed below. To use the softkeys: 1. Press the first or fifth softkey
below the radio display to display the functions listed below, or press the softkey below the function if it is currently displayed.
2. Press the softkey below the tab with the function on it to use that function.
j (Pause): Press the softkey below j to pause the track. The tab appears raised when pause is being used. Press the softkey below j again to resume playback. Back: Press the softkey below the back tab to go back to the main display screen on an iPod, or the root directory on a USB storage device. c (Folder View): Press the softkey below c to view the contents of the current folder on the USB drive. To browse and select files:
1. Press the softkey below c . 2. Turn f to scroll through the list
of folders.
3. Press f to select the folder.
If there is more than one folder, repeat Steps 1 and 2 until the folder is reached.
4. Turn f to scroll through the files
in the selected folder.
5. Press f to select the file to be
played.
To skip through large lists, the five softkeys can be used to navigate in the following order:
First softkey, first item in the list. . Second softkey, 1% through the
list each time the softkey is pressed. Third softkey, 5% through the list each time the softkey is pressed. Fourth softkey, 10% through the list each time the softkey is pressed. Fifth softkey, end of the list.
h (Music Navigator): Press the softkey below h to view and select a file on an iPod, using the iPod's menu system. Files are sorted by: . Playlists . Artists . Albums . Genres . Songs . Composers To select files:
1. Press the softkey below h . 2. Turn f to scroll through the list
of menus.
3. Press f to select the menu. 4. Turn f to scroll through the folders or files in the selected menu.
5. Press f to select the file to be
played.
To skip through large lists, the five softkeys can be used to navigate in the following order:
First softkey, first item in the list. . Second softkey, 1% through the
list each time the softkey is pressed. Third softkey, 5% through the list each time the softkey is pressed. Fourth softkey, 10% through the list each time the softkey is pressed. Fifth softkey, end of the list.
Repeat Functionality To use Repeat: Press the softkey below " or ' to select between Repeat All and Repeat Track. " (Repeat All): Press the softkey below " to repeat all tracks. The tab appears lowered when Repeat All is being used. This is the default mode when a USB storage device or iPod is first connected.
Infotainment System 7-27
' (Repeat Track): Press the softkey below ' to repeat one track. The tab appears raised when Repeat Track is being used.
Shuffle Functionality To use Shuffle: Press the softkey below > , 2 , < or = to select between Shuffle Off, Shuffle All Songs/Shuffle Songs, Shuffle Album, or Shuffle Folder. > (Shuffle Off): This is the default mode when a USB storage device or iPod is first connected. 2 (Shuffle All Songs / Shuffle Songs): Shuffles all songs on the USB storage device or iPod. < (Shuffle Album): Shuffles all songs in the current album on an iPod. = (Shuffle Folder): Shuffles all songs in the current folder on a USB storage device.
7-28
Infotainment System
MP3 (Radio with CD/DVD)
Format The radio can play .mp3 or .wma files that were recorded onto a CD-R or CD-RW disc. The USB port can play .mp3 and .wma files that are stored on a USB storage device as well as AAC files that are stored on an iPod®.
Compressed Audio or Mixed Mode Discs The radio plays discs that contain both uncompressed CD audio and MP3/WMA files depending on which slot the disc is loaded into. The DVD Player only reads uncompressed audio and ignores MP3/WMA files on a mixed mode disc.
The CD Player reads both uncompressed audio and MP3/ WMA files on a mixed mode disc. Uncompressd audio is played before MP3/WMA files. Press the CAT (category) button to toggle between uncompressed audio and MP3/WMA files.
CD‐R or CD‐RW Supported File and Folder Structure The DVD Player supports: . Up to 255 folders. . Up to 8 folders in depth. . Up to 15 playlists. . Up to 40 sessions. . Playlists with an .m3u or .wpl
extension. Files with an .mp3, .wma, or .cda file extension.
The CD Player supports: . Up to 512 files and folders. . Up to 8 folders in depth. . Playlists with an .m3u or .wpl
extension. Files with an .mp3, .wma, or .cda file extension.
USB Supported File and Folder Structure The radio supports: . Up to 700 folders. . Up to 8 folders in depth. . Up to 65,535 files.
Folder and file names up to 64 bytes. Files with an .mp3 or .wma file extension.
. AAC files stored on an iPod.
FAT16
FAT32Root Directory The root directory of the disc is treated as a folder. If the root directory has compressed audio files, the directory displays as F1 ROOT on the radio. If a disc contains both uncompressed CD audio and MP3/ WMA files, a folder under the root directory called CD accesses all of the CD audio tracks on the disc.
Empty Folder Folders that do not contain files are skipped, and the player advances to the next folder that contains files.
No Folder When the disc contains only compressed files, the files are located under the root folder. The next and previous folder function does not function on a disc that was recorded without folders or playlists. When displaying the name of the folder the radio displays ROOT.
When the disc contains only playlists and compressed audio files, but no folders, all files are located under the root folder. The folder down and the folder up buttons search playlists first and then goes to the root folder. When the radio displays the name of the folder the radio displays ROOT.
Order of Play Compressed audio files are accessed in the following order: . Playlists.
Files stored in the root directory. Files stored in folders in the root directory.
Tracks are played in the following order: . Play begins from the first track in
the first playlist and continues sequentially through all tracks in each playlist. When the last track of the last playlist has played, play continues from the first track of the first playlist.
Infotainment System 7-29
. Play begins from the first track in
the first folder and continues sequentially through all tracks in each folder. When the last track of the last folder has played, play continues from the first track of the first folder.
When play enters a new folder, the display does not automatically show the new folder name unless the folder mode has been chosen as the default display. The new track name displays.
File System and Naming The song name that displays is the song name that is contained in the ID3 tag. If the song name is not present in the ID3 tag, then the radio displays the file name without the extension (such as .mp3) as the track name. Track names longer than 32 characters or four pages are shortened. Parts of words on the last page of text and the extension of the filename does not display.
7-30
Infotainment System
Preprogrammed Playlists Preprogrammed playlists that were created using WinAmp™, MusicMatch™, or Real Jukebox™ software can be accessed, however, they cannot be edited using the radio. These playlists are treated as special folders containing compressed audio song files. Playlists that have an .m3u or .pls file extension and are stored on a USB device may be supported by the radio with a USB port. Playing an MP3/WMA File From a Disc (In Either the DVD or CD Slot) If a disc is inserted into the top DVD slot, the rear seat operator can turn on the video screen and use the remote control to navigate the CD (tracks only). f (Tune): Turn to select MP3/WMA files.
© SEEK: Press to go to the start of the track, if more than five seconds have played. Press to go to the previous track if more then five seconds have played. Press and hold or press multiple times to continue moving backward through tracks. ¨ SEEK: Press to go to the next track. Press and hold or press multiple times to continue moving forward through tracks. s REV (Reverse): Press and hold to reverse playback quickly. Sound is heard at a reduced volume and the elapsed time of the file displays. Release s REV to resume playing. \ FWD (Fast Forward): Press and hold to advance playback quickly. Sound is heard at a reduced volume and the elapsed time of the file displays. Release \ FWD to resume playing. The elapsed time of the file displays.
S c (Previous Folder): Press the softkey below S c to go to the first track in the previous folder. c T (Next Folder): Press the softkey below c T to go to the first track in the next folder. RDM (Random): Files on the disc can be listened to in random, rather than sequential order. To use random, press the softkey under the RDM tab until Random Current Disc displays to play songs in random order. Press the same softkey again to turn off random play. h (Music Navigator): Press the softkey below h to play files in order by artist or album. The player scans the disc to sort the files by artist and album ID3 tag information. It can take several minutes to scan the disc depending on the number of files on the disc. The radio may begin playing while it is scanning in the background.
When the scan is finished, the disc begins playing files in order by artist. The current artist playing is shown on the second line of the display. Once all songs by that artist are played, the player moves to the next artist in alphabetical order and begins playing files by that artist. To listen to files by another artist, press the softkey located below either arrow tab. The disc goes to the next or previous artist in alphabetical order. Continue pressing either softkey below the arrow tab until the artist displays. To change from playback by artist to playback by album: 1. Press the softkey located below
the Sort By tab.
2. Press one of the softkeys below
the album tab from the sort screen.
3. Press the softkey below the
back tab to return to the main music navigator screen.
The album name displays on the second line between the arrows and songs from the current album begins to play. Once all songs from that album have played, the player moves to the next album in alphabetical order on the CD and begins playing MP3 files from that album. To exit music navigator mode, press the softkey below the Back tab to return to normal MP3 playback. Connecting a USB Storage Device or iPod® The USB Port can be used to control an iPod or a USB storage device. To connect a USB storage device, connect the device to the USB port located in the center console. To connect an iPod, connect one end of the USB cable that came with the iPod to the iPod’s dock connector and connect the other
Infotainment System 7-31
end to the USB port located in the center console. If the vehicle is on and the USB connection works, “OK to disconnect” and a GM logo may appear on the iPod and iPod appears on the radio's display. The iPod music appears on the radio’s display and begins playing. The iPod charges while it is connected to the vehicle if the vehicle is in the ACC/ACCESSORY or ON/RUN position. When the vehicle is turned off, the iPod automatically powers off and will not charge or draw power from the vehicle's battery. If you have an older iPod model that is not supported, it can still be used by connecting it to the Auxiliary Input Jack using a standard 3.5 mm (1/8 in) stereo cable. See “Using the Auxiliary Input Jack” earlier for more information.
7-32
Infotainment System
Using the Radio to Control a USB Storage Device or iPod The radio can control a USB storage device or an iPod using the radio buttons and knobs and display song information on the radio’s display. f (Tune): Turn to select files. © SEEK: Press to go to the start of the track, if more than ten seconds have played. Press and hold or press multiple times to continue moving backward through tracks. ¨ SEEK: Press to go to the next track. Press and hold or press multiple times to continue moving forward through tracks. s REV (Reverse): Press and hold to reverse playback quickly. Sound is heard at a reduced volume. Release s REV to resume playing. The elapsed time of the file displays.
\ FWD (Fast Forward): Press and hold to advance playback quickly. Sound is heard at a reduced volume. Release \ FWD to resume playing. The elapsed time of the file displays. 4 (Information): Press to display additional information about the selected track. Using Softkeys to Control a USB Storage Device or iPod The five softkeys below the radio display are used to control the functions listed below. To use the softkeys: 1. Press the first or fifth softkey
below the radio display to display the functions listed below, or press the softkey below the function if it is currently displayed.
2. Press the softkey below the tab with the function on it to use that function.
j (Pause): Press the softkey below j to pause the track. The tab appears raised when pause is being used. Press the softkey below j again to resume playback. Back: Press the softkey below the back tab to go back to the main display screen on an iPod, or the root directory on a USB storage device. c (Folder View): Press the softkey below c to view the contents of the current folder on the USB drive. To browse and select files:
1. Press the softkey below c . 2. Turn f to scroll through the list
of folders.
3. Press f to select the folder.
If there is more than one folder, repeat Steps 1 and 2 until the folder is reached.
4. Turn f to scroll through the files
in the selected folder.
5. Press f to select the file to be
played.
To skip through large lists, the five softkeys can be used to navigate in the following order:
First softkey, first item in the list. . Second softkey, 1% through the
list each time the softkey is pressed. Third softkey, 5% through the list each time the softkey is pressed. Fourth softkey, 10% through the list each time the softkey is pressed. Fifth softkey, end of the list.
h (Music Navigator): Press the softkey below h to view and select a file on an iPod, using the iPod's menu system. Files are sorted by: . Playlists . Artists . Albums . Genres . Songs . Composers To select files:
1. Press the softkey below h . 2. Turn f to scroll through the list
of menus.
3. Press f to select the menu. 4. Turn f to scroll through the folders or files in the selected menu.
5. Press f to select the file to be
played.
Infotainment System 7-33
To skip through large lists, the five softkeys can be used to navigate in the following order:
First softkey, first item in the list.
. Second softkey, 1% through
the list each time the softkey is pressed. Third softkey, 5% through the list each time the softkey is pressed. Fourth softkey, 10% through the list each time the softkey is pressed. Fifth softkey, end of the list.
Repeat Functionality To use Repeat: Press the softkey below " or ' to select between Repeat All and Repeat Track. " (Repeat All): Press the softkey below " to repeat all tracks. The tab appears lowered when Repeat All is being used. This is the default mode when a USB storage device or iPod is first connected.
7-34
Infotainment System
' (Repeat Track): Press the softkey below ' to repeat one track. The tab appears raised when Repeat Track is being used.
Shuffle Functionality To use Shuffle: Press the softkey below > , 2, < or = to select between Shuffle Off, Shuffle All Songs/ Shuffle Songs, Shuffle Album, or Shuffle Folder. > (Shuffle Off): This is the default mode when a USB storage device or iPod is first connected. 2 (Shuffle All Songs / Shuffle Songs): Shuffles all songs on the USB storage device or iPod. < (Shuffle Album): Shuffles all songs in the current album on an iPod. = (Shuffle Folder): Shuffles all songs in the current folder on a USB storage device.
Auxiliary Devices The vehicle may have a 3.5 mm (1/8 in) auxiliary input jack located on the lower right side of the faceplate and for vehicles with a USB port, it is located in the center console. Using the 3.5 mm (1/8 in) Auxiliary Input Jack The auxiliary input jack is located on the lower right side of the faceplate. This is not an audio output; do not plug a headphone set into the front auxiliary input jack. Connect an auxiliary input device such as an iPod®, laptop computer, MP3 player, CD player, or cassette tape player, etc. to the auxiliary input jack for use as another source for audio listening. Drivers are encouraged to set up any auxiliary device while the vehicle is in P (Park). See Defensive Driving on page 9‑2
for more information on driver distraction.To use an auxiliary input device, connect a 3.5 mm (1/8 in) cable to the radio's front auxiliary input jack. O (Power/Volume): Turn clockwise or counterclockwise to increase or decrease the volume of the portable player. Additional volume adjustments might have to be made from the portable device if the volume is not loud or soft enough. BAND: Press to listen to the radio when a portable audio device is playing. The portable audio device continues playing, so you might want to stop it or turn it off. CD/AUX (CD/Auxiliary): Press to select between CD, or Auxiliary. . When a CD is in the player the CD icon and a message showing the disc and/or track number displays. If an auxiliary input device is not connected, “No Input Device Found” displays.
DVD/CD AUX (Auxiliary): Press to select between DVD, CD, or Auxiliary.
If an auxiliary input device is not connected, “No Aux Input Device” displays.
. When a disc is in either slot, the DVD/CD text tab and a message showing the track or chapter number displays. If an auxiliary input device is not connected, and a disc is in both the DVD slot and the CD slot the DVD/CD AUX button only cycles between the two sources and does not indicate “No Aux Input Device”. If a front auxiliary input device is connected, the DVD/CD AUX button cycles through all available options.
If a disc is inserted into top DVD slot, the rear seat operator can turn on the video screen and use the
Infotainment System 7-35
USB Supported Devices . USB Flash Drives . Portable USB Hard Drives
Fifth generation or later iPod iPod nanos iPod touch iPod classic
Not all iPods and USB Drives are compatible with the USB port. Make sure the iPod has the latest firmware from Apple® for proper operation. iPod firmware can be updated using the latest iTunes® application. See www.apple.com/ itunes. For help with identifying your iPod, go to www.apple.com/support.
remote control to only navigate the CD tracks through the remote control. See “Using the Auxiliary Input Jack(s)” later in this section, or “Audio/Video (A/V) Jacks” under, Rear Seat Entertainment (RSE) System on page 7‑36 for more information. Using the USB Port For vehicles with a USB port, the connector is located in the center console. Radios with a USB port can control a USB storage device or an iPod® using the radio buttons and knobs. See MP3 (Radio with CD and Radio with CD/USB) on page 7‑22 or MP3 (Radio with CD/DVD) on page 7‑28 for information about how to connect and control a USB storage device or an iPod.
7-36
Infotainment System
Rear Seat Infotainment
Rear Seat Entertainment (RSE) System The vehicle may have a DVD Rear Seat Entertainment (RSE) system. The RSE system works with the vehicle's audio system. The DVD player is part of the front radio. The RSE system includes a radio with a DVD player, a video display screen, audio/video jacks, two wireless headphones, and a remote control. See Operation on page 7‑2 for more information on the vehicle's audio/DVD system. Before Driving The RSE is designed for rear seat passengers only. The driver cannot safely view the video screen while driving and should not try to do so.
In severe or extreme weather conditions the RSE system might or might not work until the temperature is within the operating range. The operating range for the RSE system is above −4°F (−20°C) or below 140°F (60°C). If the temperature of the vehicle is outside of this range, heat or cool the vehicle until the temperature is within the operating range of the RSE system. Parental Control The RSE system may have a Parental Control feature, depending on the radio. To enable Parental Control, press and hold the radio power button for more than two seconds to stop all system features such as: radio, video screen, RSA, DVD and/or CD. While Parental Control is on, Q displays. When the radio is turned back on, Parental Control is unlocked.
Headphones The RSE includes two 2-channel wireless headphones that are dedicated to this system. Channel 1
is dedicated to the video screen, while Channel 2 is dedicated to RSA selections. These headphones are used to listen to media such as CDs, DVDs, MP3/WMAs, DVD-As, radio, any auxiliary source connected to A/V jacks, or the auxiliary input jack, if the vehicle has this feature. The wireless headphones have an On/Off button, channel 1/2 switch, and a volume control. Switch the headphones to Off when not in use. Push the power button to turn on the headphones. An indicator light located on the headphones comes on. If the light does not come on, the batteries might need to be replaced. Intermittent sound or static on the headphones can also be an indication of weak batteries. See “Battery Replacement” later in this section for more information.The headphones may automatically turn off after four hours of continuous use. To adjust the volume on the headphones, use the volume control located on the right side. Infrared transmitters are located at the rear of the RSE overhead console. The headphones shut off automatically to save the battery power if the RSE system and RSA are shut off or if the headphones are out of range of the transmitters for more than three minutes. Moving too far forward or stepping out of the vehicle, can cause the headphones to lose the audio signal. For optimal audio performance, the headphones must be worn correctly. Headphones should be worn with the headband over the top of the head for best audio reception. The symbol L (Left) appears on the upper left side, above the ear pad and should be positioned on the left
ear. The symbol R (Right) appears on the upper right side, above the ear pad and should be positioned on the right ear. Notice: Do not store the headphones in heat or direct sunlight. This could damage the headphones and repairs will not be covered by the warranty. Storage in extreme cold can weaken the batteries. Keep the headphones stored in a cool, dry place. If the foam ear pads attached to the headphones become worn or damaged, the pads can be replaced separately from the headphone set. See your dealer/retailer for more information. Headphones should be stored in the front floor console and not in the front seat back pocket. Headphone damage can occur when the second row seats are folded forward.
Infotainment System 7-37
Battery Replacement To change the batteries on the headphones: 1. Turn the screw to loosen the
battery door located on the left side of the headphones. Slide the battery door open.
2. Replace the two batteries in the
compartment. Make sure that they are installed correctly, using the diagram on the inside of the battery compartment.
3. Replace the battery door and
tighten the door screw.
If the headphones are to be stored for a long period of time, remove the batteries and keep them in a cool, dry place.
7-38
Infotainment System
Audio/Video (A/V) Jacks
The A/V jacks, located on the rear of the floor console, allow audio or video signals to be connected from an auxiliary device such as a camcorder or a video game unit to the RSE system. Adapter connectors or cables (not supplied) might be required to connect the auxiliary device to the A/V jacks. Refer to the manufacturer’s instructions for proper usage.
The A/V jacks are color coded to match typical home entertainment system equipment. The yellow jack (A) is for the video input. The white jack (B) is for the left audio input. The red jack (C) is for the right audio input. Power for auxiliary devices is not supplied by the radio system. To use the auxiliary inputs of the RSE system, connect an external auxiliary device to the color-coded A/V jacks and turn both the auxiliary device and the video screen power on. If the video screen is in the DVD player mode, pressing the AUX (auxiliary) button on the remote control, switches the video screen from the DVD player mode to the auxiliary device. The radio can listen to the audio of the connected auxiliary device by sourcing to auxiliary. See Auxiliary Devices on page 7‑34 for more information.
How to Change the RSE Video Screen Settings The screen display mode (normal, full, and zoom), screen brightness, and setup menu language can be changed from the on screen setup menu by using the remote control. To change a setting: 1. Press z . 2. Use n , q , p , o and r to
navigate and use the setup menu.
3. Press z again to remove the setup menu from the screen.
Audio Output Audio from the DVD player or auxiliary inputs can be heard through the following sources: . Wireless Headphones . Vehicle Speakers . Vehicle wired headphone jacks on the rear seat audio system, if the vehicle has this feature.
The RSE system always transmits the audio signal to the wireless headphones, if there is audio available. See “Headphones” earlier in this section for more information. The DVD player is capable of outputting audio to the wired headphone jacks on the RSA system, if the vehicle has this feature. The DVD player can be selected as an audio source on the RSA system. See Rear Seat Audio (RSA) System on page 7‑44 for more information. When a device is connected to the A/V jacks, or the radio's auxiliary input jack, if the vehicle has this feature, the rear seat passengers are able to hear audio from the auxiliary device through the wireless or wired headphones. The front seat passengers are able to listen to playback from this device through the vehicle speakers by selecting AUX as the source on the radio.
Video Screen The video screen is located in the overhead console. When the video screen is not in use, push it up into its locked position. To use the video screen: 1. Push the release button located
on the overhead console.
2. Move the screen to the desired
position.
If a DVD is playing and the screen is raised to its locked position, the screen remains on; this is normal, and the DVD continues to play through the previous audio source. Press P on the remote control or eject the disc to turn off the screen. The infrared receivers for the wireless headphones and the remote control are located at the rear of the overhead console.
Infotainment System 7-39
Notice: Avoid directly touching the video screen, as damage may occur. See “Cleaning the Video Screen” later in this section for more information. Remote Control To use the remote control, aim it at the transmitter window at the rear of the overhead console and press the