- 2002 Subaru Forester Owners Manuals
- Subaru Forester Owners Manuals
- 2000 Subaru Forester Owners Manuals
- Subaru Forester Owners Manuals
- 2011 Subaru Forester Owners Manuals
- Subaru Forester Owners Manuals
- 2009 Subaru Forester Owners Manuals
- Subaru Forester Owners Manuals
- 2012 Subaru Forester Owners Manuals
- Subaru Forester Owners Manuals
- 2001 Subaru Forester Owners Manuals
- Subaru Forester Owners Manuals
- 2010 Subaru Forester Owners Manuals
- Subaru Forester Owners Manuals
- Download PDF Manual
-
– CONTINUED –
2-31
FORESTER U.S.A. (E)
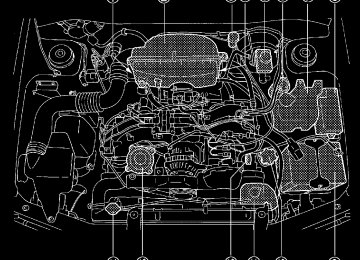
B Components
HS2000BB
J SRS airbag operation
CAUTION
Do not touch the SRS airbag system components around the steering wheel and dashboard with bare hands right after deploy- ment. Doing so can cause burns because the components can be very hot as a result of deployment.
2-32
FORESTER U.S.A. (E)
Seat, seat belt and SRS airbag
HS2001BB
The SRS airbag can function only when the ignition switch is in the “ON” position.
If the front sub sensors inside the both front fenders and the impact sensors in the airbag control module detect a certain predetermined amount of force during a frontal collision, the control module sends signals to the airbag modules instructing them to inflate the SRS air- bags. Then both airbag modules produce gas, which instantly inflates driver’s and passenger’s SRS airbags. After the deployment, the SRS airbags immediately start to deflate so that the driver’s vision is not obstructed. The time required from detecting impact to the deflating SRS airbag after deployment is shorter than the blink of eye.
The front passenger’s SRS airbag deploys together with driver’s SRS airbag even when no one occupies the front passenger’s seat.
Although it is highly unlikely that the SRS airbag would activate in a non-accident situation, should it occur, the SRS airbag will deflate quickly, not obscuring vision and will not interfere with the driver’s ability to maintain control of the vehicle.
When the SRS airbag deploys, a sudden, fairly loud inflation noise will be heard and some smoke will be released. These occurrences are
– CONTINUED –
2-33
FORESTER U.S.A. (E)
normal result of the deployment. This smoke does not indicate a fire in the vehicle.
The SRS airbag is designed to deploy in the event of an accident in- volving a moderate to severe frontal collision. It is basically not de- signed to deploy in lesser frontal impacts because the necessary protection can be achieved by the seatbelt alone. Also, it is basically not designed to deploy in side or rear impacts or in roll-over acci- dents because deployment of the SRS airbag would not help the oc- cupant in those situations. The SRS airbag is designed to function on a one-time-only basis.
SRS airbag deployment depends on the level of force experienced in the passenger compartment during a collision. That level differs from one type of collision to another, and it may have no bearing on the visible damage done to the vehicle itself.
n Examples of accident in which the SRS airbag will most likely
deploy.
A head-on collision against a thick concrete wall at a vehicle speed of 12 to 19 mph (20 to 30 km/h) activates the SRS airbag. The SRS air- bag will also be activated when the vehicle is exposed to a frontal im- pact similar in fashion and magnitude to the above-mentioned colli- sion.
HS2003BA
2-34
FORESTER U.S.A. (E)
Seat, seat belt and SRS airbag
n Examples of the types of accidents in which it is possible that
the SRS airbag will deploy.
The SRS airbag may be activated when the vehicle sustains a hard impact in the undercarriage area from the road surface (such as when the vehicle plunges into a deep ditch, is severely bumped or knocked hard against an obstacle on the road such as a curb).
HS2004BA
HS2005BA
n Examples of the types of accidents in which the SRS airbag is
unlikely to deploy.
There are many types of collisions which might not necessarily require SRS airbag deployment. If the vehicle strikes an object, such as a telephone pole or sign pole, or if it slides under a truck’s load bed, or if it sustains an oblique offset frontal impact, the SRS airbag may not deploy depending on the level of accident forces involved.
The vehicle strikes a tele- phone pole or similar ob- ject.
The vehicle slides under a truck’s load bed.
The vehicle sustains an oblique offset frontal im- pact.
HS0238
HS0239
HS0240
– CONTINUED –
2-35
FORESTER U.S.A. (E)
n Examples of the types of accidents in which the SRS airbag
will basically not deploy.
The SRS airbag is basically not designed to deploy if the vehicle is struck from side or from behind, or if it rolls onto its side or roof, or if it is involved in a low-speed frontal collision.
The vehicle is struck from behind.
The vehicle is struck from the side.
The vehicle rolls onto its side or roof.
HS0241
HS0242
HS0243
In an accident where the vehicle is impacted more than once, the SRS airbag deploys only once on the first impact. Example: In the case of a double collision, first with another vehicle, then against a concrete wall in immediate succession, the SRS airbag is activated on the first impact but not on the second.
HB1070BB
2-36
FORESTER U.S.A. (E)
J SRS airbag system monitors
SRS airbag system warning light
Seat, seat belt and SRS airbag
HS0154
A diagnostic system continually monitors the readiness of the SRS air- bag system while the vehicle is being driven. The SRS airbag system warning light “AIRBAG” will show normal system operation by lighting for about 6 seconds when the ignition key is turned to the “ON” position.
The following components are monitored by the indicator:
D Front sub sensor (Right hand side) D Front sub sensor (Left hand side) D Airbag control module (including impact sensors) D Airbag module (Driver’s side) D Airbag module (Passenger’s side) D All related wiring
In the event of a malfunction indicated by any of following, the vehicle should be taken promptly to your nearest SUBARU dealer to have the system checked. Unless checked and repaired, the SRS airbags will not function reliably: D Flashing or flickering of the indicator light. D No illumination of the warning light when the ignition switch is first turned to the “ON” position. D Continuous illumination of the warning light. D Illumination of the warning light while driving.
– CONTINUED –
2-37
FORESTER U.S.A. (E)
J SRS airbag system servicing
WARNING
D When discarding an airbag module or scrapping the entire car damaged by a collision, consult your SUBARU dealer. D The SRS airbag has no user-serviceable parts. Do not use electrical test equipment on any circuit related to the SRS airbag system. For required servicing of the SRS airbag, see your near- est SUBARU dealer. Tampering with or disconnecting the sys- tem’s wiring could result in accidental inflation of the SRS airbag or could make the system inoperative, which may result in seri- ous injury. The wiring harnesses of the SRS airbag system are covered with yellow insulation and the system connectors are yellow for easy identification.
CAUTION
If you need service or repair in areas listed below, we recommend that you have an authorized SUBARU dealer perform the work. The SRS airbag control module, impact sensors and airbag modules are stored in these areas.
D Under the center console D Inside each front fender D Steering wheel and column and nearby areas D Instrument panel and nearby areas
In the event that the SRS airbag is deployed, replacement of the sys- tem should be performed only by an authorized SUBARU dealer. When the components of the SRS airbag system are replaced, use only genuine SUBARU parts.
To ensure their long-term reliability, the SRS airbags must be inspected by a SUBARU dealer ten years after the date of manufacture, which is shown on the certification label attached to the driver’s door.
2-38
2
FORESTER U.S.A. (E)
Seat, seat belt and SRS airbag
NOTE In the following cases, contact your SUBARU dealer as soon as pos- sible.
D The front part of the vehicle was involved in an accident in which the SRS airbags did not deploy. D The pad section of the steering wheel or front passenger’s air- bag cover is scratched, cracked, or otherwise damaged.
J Precautions against vehicle modification
WARNING
D To avoid accidental activation of the system or rendering the system inoperative, which may result in serious injury, no modifi- cations should be made to any components or wiring of the SRS airbag system. This includes following modifications:
D Installation of custom steering wheel D Attachment of additional trim materials to the dashboard
D Installation of additional electrical/electronic equipment such as a mobile two-way radio on or near the SRS airbag system components and/or wiring is not advisable. This could interfere with proper operation of the SRS airbag system.
CAUTION
Do not perform any of the following modifications. Such modifi- cations can interfere with proper operation of the SRS airbag sys- tem.
D Attachment of any equipment (brush bar, winches, snow plow, skid plate, etc.) other than SUBARU genuine accessory parts to the front end D Modification of the suspension system or front end structure D Installation of a tire of different size and construction from the original tires listed on the tire placard attached to the door jamb
– CONTINUED –
2-39
FORESTER U.S.A. (E)
Always consult your SUBARU dealer if you want to install any accessory parts to your vehicle.
2-40
FORESTER U.S.A. (E)
Instruments and controls
Gauges
Speedometer Odometer/Trip meter Tachometer Fuel gauge Temperature gauge
. . . . . . . . . . . . . . . . . . . . . . . . . . . . . . . . . . . . . . . . . . . . . . . . . . . . . . . . . . . . . . . . . . . . . . . . . . . . . . . . . . . . . . . . . . . . . . . . . . . . . . . . . . . . . . . . . . . . . . . . . . . . . . . . . . . . . . . . . . . . . . . . . . . . . . . . . . . . . . . . . . . . . . . . . . . . . . . . . . . . . . . . . . . . . . . . . . . . . . . . . . . . . . . . . . . . . . . . . . . . . . . . . . . . . . . . . . . . . . . . . . . . . . . . . . . . . . . . . . . . . . . . . . . . . . . . . . . . . . . . . . . . . . . . . . . . . . . . . . . . . . . . . . . . . . . . . . . . . . . . . . . . . . . . . . . . . . . . . . . . . . . . . . . . . . . . . . . . . . . . . . .
Warning and indicator lights
Seat belt warning light and chime SRS airbag system warning light Charge warning light Oil pressure warning light Brake system warning light CHECK ENGINE warning light/Malfunction indicator lamp ABS warning light (for vehicles with ABS) AT OIL TEMPerature warning light (for AT vehicles) Door open warning lights Front-wheel drive warning light (for AT vehicles) Turn signal indicator lights High beam indicator
. . . . . . . . . . . . . . . . . . . . . . . . . . . . . . . . . . . . . . . . . . . . . . . . . . . . . . . . . . . . . . . . . . . . . . . . . . . . . . . . . . . . . . . . . . . . . . . . . . . . . . . . . . . . . . . . . . . . . . . . . . . . . . . . . . . . . . . . . . . . . . . . . . . . . . . . . . . . . . . . . . . . . . . . . . . . . . . . . . . . . . . . . . . . . . . . . . . . . . . . . . . . . . . . . . . . . . . . . . . . . . . . . . . . . . . . . . . . . . . . . . . . . . . . . . . . . . . . . . . . . . . . . . . . . . . . . . . . . . . . . . . . . . . . . . . . . . . . . . . . . . . . . . . . . . . . . . . . . . . . . . . . . . . . . . . . . . . . . . . . . . . . . . . . . . . . . . . . . . . . . . . . . . . . . . . . . . . . . . . . . . . . . . . . . . . . . . . . . . . . . . . . . . . . . . . . . . . . . . . . . . . . . . . . . . . . . . . . . . . . . . . . . . . . . . . . . . . . . . . . .
Hazard warning flasher Light control switch Turn signals lever Illumination brightness control Parking light switch Fog light switch (if equipped) Wiper and washer
. . . . . . . . . . . . . . . . . . . . . . . . . . . . . . . . . . . . . . . . . . . . . . . . .
. . . . . . . . . . . . . . . . . . . . . . . . . . . . . . . . . . . . . . . . . . . . . . . . . . . . . .
. . . . . . . . . . . . . . . . . . . . . . . . . . . . . . . . . . . . . . . . . . . . . . . . . . . . . . . .
. . . . . . . . . . . . . . . . . . . . . . . . . . . . . . . . . . . . . .
. . . . . . . . . . . . . . . . . . . . . . . . . . . . . . . . . . . . . . . . . . . . . . . . . . . . . .
. . . . . . . . . . . . . . . . . . . . . . . . . . . . . . . . . . . . . . . .
Windshield wiper and washer switches Rear window wiper and washer switch (if equipped)
. . . . . . . . . . . . . . . . . . . . . . . . . . . . . . . . . . . . . . . . . . . . . . . . . . . . . . . . . . . . . . . . . . . . . . . . . . . . . . . . . . . . . . . . . . . . . . . . . .
Windshield wiper deicer (if equipped) Rear window defogger switch Horn Mirrors
. . . . . . . . . . . . . . . . . . . . . . . . . . . . . . . . . . . . . . . . . . . . . . . . . . . . . . . . . . . . . . . . . . . . . . . . . . .
. . . . . . . . . . . . . . . . . . . . . . . . . . . . . . . . . . . . . . . . . . . . . . . . . . . . . . . . . . . . . . . . . . . . . . . . . . . . . . . . . . . . . . . . . . . . . . . . . . . . . . . . . . . . . . . . . . . . . . . . . . . . . . . . . . . . . . . . . . . . . . . . . . . . . . . . . . . . . . . . . . . . . . . . . . . . . . . . . . . . . . . . . . . . . . . .
Inside mirror Outside mirrors
. . . . . . . . . . . . . . . . . . . . . . . . . . . . .
. . . . . . . . . . . . . . . . . . . . . . . . . . . . . . . . . . . . . . . .
3-2
3-2
3-2
3-3
3-3
3-4
3-5
3-5
3-5
3-6
3-6
3-6
3-7
3-8
3-9
3-10
3-10
3-10
3-10
3-11
3-11
3-14
3-14
3-15
3-16
3-16
3-18
3-19
3-20
3-21
3-22
3-23
3-23
3-23FORESTER U.S.A. (E)
Gauges
HS0050
J Speedometer The speedometer shows the vehicle speed.
J Odometer/Trip meter
Tripmeter
Odometer
HS0051
This meter displays the odometer and trip meter when the ignition switch is in the “ON” position. To change the mode indication, briefly push the knob. The odometer shows the total distance that the vehicle has been driven. The trip meter shows the distance that the vehicle has been driven since you last set it to zero. To set the trip meter to zero, select the indication of the trip meter by
3-2
FORESTER U.S.A. (E)
Instruments and controls
pushing the knob and keep the knob pushed for more than 2 seconds.
NOTE If the connection between the combination meter and battery is bro- ken for any reason such as vehicle maintenance or fuse replace- ment, the data recorded on the trip meter will be lost.
J Tachometer
CAUTION
Do not operate the engine with the pointer of the tachometer in the red zone. In this range, fuel injection will be cut by the engine control module to protect the engine from overrevving. The en- gine will resume running normally after the engine speed is re- duced below the red zone.
The tachometer shows the engine speed in thousands of revolutions per minute.
J Fuel gauge
Low fuel warning light
HS0155
The fuel gauge shows the approximate amount of fuel remaining in the tank. The gauge does not return to “E” even though the ignition switch is in the “ACC” or “LOCK” position.
– CONTINUED –
3-3
FORESTER U.S.A. (E)
The gauge may move slightly during braking, turning or acceleration due to fuel movement in the tank.
B Low fuel warning light The low fuel warning light comes on when the tank is nearly empty (about 2.3 U.S. gal., 9.0 liters, 1.9 Imp. gal.). It only operates when the ignition switch is in the “ON” position.
J Temperature gauge
CAUTION
If the pointer exceeds the normal operating range, safely stop the vehicle as soon as possible. See “In case of emergency” in this manual.
Normal operating range
HS0052
The temperature gauge shows engine coolant temperature when the ignition switch is in the “ON” position.
The coolant temperature will vary in accordance with the outside temper- ature and driving conditions.
We recommend that you drive moderately until the pointer of the tempera- ture gauge reaches near the middle of the range. Engine operation is opti- mum with the engine coolant at this temperature range and high revving operation when the engine is not warmed up enough should be avoided.
3-4
3
FORESTER U.S.A. (E)
Instruments and controls
Warning and indicator lights
Several of the warning and indicator lights come on momentarily and then go out when the ignition switch is initially turned to the “ON” posi- tion. This permits checking the operation of the bulbs. Apply the parking brake and turn the ignition switch to the “ON” position. The following lights come on:
Seat belt warning light SRS airbag system warning light Charge warning light Oil pressure warning light Brake system warning light CHECK ENGINE warning light/Malfunction indicator lamp ABS warning light (if equipped) AT OIL TEMP warning light (automatic transmission vehicles)
If any lights fail to come on, it indicates a burned-out bulb or a malfunc- tion of the corresponding system. Consult your authorized SUBARU dealer for repair.
J Seat belt warning light and chime When the ignition switch is turned to the “ON” position, the seat belt warning light will come on and the reminder chime will sound to remind driver to fasten the seat belt. The seat belt warning light remains on for about six seconds and turns off automatically after six seconds. The seat belt reminder chime will turn off when the driver’s side seat belt is buckled or it will turn off automatically after about six seconds.
J SRS airbag system warning light AIRBAG When the ignition switch is turned to the “ON” position, the SRS airbag system warning light will come on for about six seconds and go out. This shows the SRS airbag system is in normal operation. If this light comes on while driving or does not go out after the engine starts, it may indicate that the SRS airbag system is not working properly. Contact your nearest SUBARU dealer immediately.
– CONTINUED –
3-5
FORESTER U.S.A. (E)
J Charge warning light If this light comes on when the engine is running, it may indicate that the charging system is not working properly. If the light comes on while driving or does not go out after the engine starts, stop the engine at the first safe opportunity and check the alterna- tor belt. If the belt is loose, broken or if the belt is in good condition but the light remains on, contact your nearest SUBARU dealer immediately.
J Oil pressure warning light
CAUTION
Do not operate the engine with the oil pressure warning light on. This may cause serious engine damage.
If this light comes on when the engine is running, it may indicate that the engine oil pressure is low and the lubricating system is not working prop- erly. If the light comes on while driving or does not go out after the engine starts, stop the engine at the first safe opportunity and check the engine oil level. If the oil level is low, add oil immediately. If the engine oil is at the proper level but the light remains on, contact your nearest SUBARU dealer immediately.
J Brake system warning light
BRAKE (U.S.) (Canada)
WARNING
D Driving with the brake system warning light on is dangerous. This indicates your brake system may not be working properly. If the light remains on, have the brakes inspected by a SUBARU dealer immediately. D If at all in doubt about whether the brakes are operating prop- erly, do not drive the vehicle. Have your vehicle towed to the nearest SUBARU dealer for repair.
This light has the following two functions:
3-6
3
FORESTER U.S.A. (E)
Instruments and controls
B Parking brake warning The light comes on with the parking brake applied while the ignition switch is in the “ON” position. It goes out when the parking brake is fully released.
B Brake fluid level warning This light comes on when the brake fluid level has dropped to near the “MIN” level of the brake fluid reservoir with the ignition switch in the “ON” position and with the parking brake fully released.
If the brake system warning light should come on while driving (with the parking brake fully released and with the ignition switch posi- tioned in “ON”), it could be an indication of leaking of brake fluid or worn brake pads. Have your vehicle checked by a SUBARU dealer immediately.
J CHECK ENGINE warning light/
Malfunction indicator lamp
CAUTION
If the CHECK ENGINE light comes on while you are driving, have your vehicle checked/repaired by your SUBARU dealer as soon as possible. Continued vehicle operation without having the emission control system checked and repaired as necessary could cause serious damage, which may not be covered by your vehicle’s warranty.
If this light comes on steadily or blinks while the engine is running, it may indicate that there is a problem or potential problem somewhere in the emission control system.
B If the light comes on steadily: If the light comes on steadily while driving or does not go out after the engine starts, an emission control system malfunction has been de- tected. You should have your vehicle checked by an authorized SUBARU dealer immediately.
– CONTINUED –
3-7
FORESTER U.S.A. (E)
NOTE This light also comes on when the fuel filler cap is not tightened until it clicks.
If you have recently refueled your vehicle, the cause of the CHECK ENGINE warning light/malfunction indicator lamp coming on could be a loose or missing fuel filler cap. Remove the cap and retighten it until it clicks. Make sure nothing is interfering with the sealing of the cap. Tightening the cap will not make the CHECK ENGINE warning light turn off immediately. It may take several driving trips. If the light does not go out, take your vehicle to your authorized SUBARU dealer immediately.
B If the light is blinking: If the light is blinking while driving, an engine misfire condition has been detected which may damage the emission control system. To prevent serious damage to the emission control system, you should do the following: D Reduce vehicle speed. D Avoid hard acceleration. D Avoid steep uphill grades. D Reduce the amount of cargo, if possible. D Stop towing a trailer as soon as possible.
The CHECK ENGINE warning light may stop blinking and come on steadily after several driving trips. You should have your vehicle checked by an authorized SUBARU dealer immediately.
J ABS warning light
(for vehicles with ABS)
(U.S.) (Canada) The ABS warning light comes on when the ignition switch is turned to the “ON” position and goes out after about two seconds. This is an indication that the ABS system is working properly. If the warning light behaves as follows, the ABS system may not work properly. D The warning light does not come on when the ignition switch is turned to the “ON” position.
ABS
3-8
3
FORESTER U.S.A. (E)
Instruments and controls
D The warning light comes on when the ignition switch is turned to the “ON” position, but it does not go out even when the vehicle speed exceeds approximately 8 mph (12 km/h). D The warning light comes on during driving.
When the warning light is on, the ABS function shuts down; however, the conventional brake system continues to operate normally. If this occurs, have the ABS system repaired at the first available opportunity by your SUBARU dealer.
NOTE If the warning light behavior is as shown below, the ABS system may be considered normal. D The warning light comes on right after the engine is started but goes out immediately, remaining off. D The warning light remains on after the engine has been started, but it goes out when the vehicle speed reaches about 8 mph (12
km/h). D The warning light comes on during driving, but it goes out immediately and remains off. When driving with an insufficient battery voltage such as when the engine is jump started, the ABS warning light may come on. This is due to the low battery voltage and does not indicate a malfunction. When the battery becomes fully charged, the light will go out.J AT OIL TEMPerature warning light
(for AT vehicles)
If this light comes on when the engine is running, it may indicate that the automatic transmission fluid temperature is too hot.
If the light comes on while driving, it is unnecessary to stop the vehicle, but avoid driving up steep grades or in stop and go traffic.
B Automatic transmission control system warning If the light flashes after the engine starts, it may indicate that the auto- matic transmission control system is not working properly. Contact your nearest SUBARU dealer for service immediately.
– CONTINUED –
3-9
FORESTER U.S.A. (E)
J Door open warning lights The door open warning light comes on if any door or the rear gate is not fully closed.
Always make sure this light is out before you start to drive.
J Front-wheel drive warning light (for AT vehicles) This light comes on when All Wheel Drive is disengaged and the drive mechanism is switched to Front Wheel Drive for maintenance or similar purposes.
J Turn signal indicator lights These lights show the operation of the turn signal or lane change signal. If the indicator lights do not blink or blink rapidly, the turn signal bulb may be burned out. Replace the bulb as soon as possible. Refer to “Re- placing bulbs” section in Chapter 10.
J High beam indicator This light shows that the headlights are in the high beam mode. This indicator light also comes on when operating headlight flasher.
3-10
FORESTER U.S.A. (E)
Hazard warning flasher
Instruments and controls
HS0053
The hazard warning flasher is used to warn other drivers when you have to park your vehicle under emergency conditions. The hazard warning flasher works with the ignition switch in any position.
When you have to park your vehicle under emergency conditions, pull off the roads safely and park away from the traffic if it is possible.
To turn on the hazard warning flasher, push the hazard warning button on the instrument panel. To turn off the flasher, push the button again.
NOTE When the hazard warning flasher is on, the turn signals do not work.
Light control switch
WARNING
To prevent battery discharge resulting from accidentally leaving your lights on when your vehicle is parked, the light switch oper- ates only when the ignition switch is in the “ON” position. In any other position, the vehicle’s lights will be out. If you park your ve- hicle on a roadside at night, use the hazard warning flasher to alert the other drivers.
– CONTINUED –
3-11
FORESTER U.S.A. (E)
Dimmer
Headlight flasher
HS0054
HS0055
The light switch operates only when the ignition switch is in the “ON” position.
B Headlights To turn on the headlights, turn the knob on the end of the turn signal lever.
first position
Parking lights, instrument panel illumination, tail lights and license plate light are on.
second position
Headlights, parking lights, instrument panel illumination, tail lights, and license plate light are on.
B High/low beam change (dimmer) To change from low beam to high beam, push the turn signal lever forward. When the headlights are on high beam, the high beam indi- cator light “a” on the instrument panel is also on. To switch back to low beam, pull the lever back to the detent position.
B Headlight flasher
CAUTION
Do not hold the lever in the flashing position for more than just a few seconds.
3-12
FORESTER U.S.A. (E)
Instruments and controls
To flash the headlights, pull the lever toward you and then release it. The high beam will stay on for as long as you hold the lever. The headlight flasher works even though the lighting switch is in the “OFF” position.
When the headlights are on high beam, the high beam indicator light “a” on the instrment panel also comes on.
B Daytime running light system (for CANADA models)
WARNING
The tail lights, parking lights, and side marker lights are not turned on by the daytime running light system. The light switch must always be turned to the “a” position when it is dark out- side.
The low beam headlights will automatically come on at reduced brightness when the engine has started, under the following condi- tions:
D The parking brake is fully released. D The automatic transmission selector lever is set at other than the “P” position. D The light switch is in the “OFF” position.
– CONTINUED –
3-13
FORESTER U.S.A. (E)
Turn signals lever
Right turn
Left turn
HS0056
To activate the right turn signal, push the turn signal lever up. To activate the left turn signal, push the turn signal lever down. When the turn is fin- ished, the lever will return automatically. If the lever does not return after cornering, return the lever to the neutral position by hand.
To signal a lane change, push the turn signal lever up or down slightly and hold it during the lane change. The turn signal indicator lights will flash in the direction of the turn or lane change. The lever will return auto- matically to the neutral position when you release it.
Illumination brightness control
Brighten
Darken
HS0057
3-14
FORESTER U.S.A. (E)
Instruments and controls
When the lighting switch is in the “p” or “a” position, you can adjust brightness of the instrument panel illumination for better visibility. To brighten, turn the control dial counterclockwise. To darken, turn the control dial clockwise.
Parking light switch
HS0058
The parking light switch operates regardless of the ignition switch posi- tion.
By pushing the front end of this switch, following lights will come on.
– Parking lights – Front side marker lights – Tail lights – License plate lights
To turn off, push the rear end of the parking light switch. Avoid leaving these lights on for a long time because that will run down the battery.
– CONTINUED –
3-15
FORESTER U.S.A. (E)
Fog light switch (if equipped)
The fog lights operate only when the headlights are on low beam. Push the fog light switch to turn the fog lights on. Press the switch again to turn them off.
HB2025BB
The indicator light located on the switch will illuminate when the fog lights are on.
Wiper and washer
WARNING
In freezing weather, do not use the windshield washer until the windshield is sufficiently warmed by the defroster. Otherwise the washer fluid can freeze on the windshield, blocking your view.
CAUTION
D Do not operate the washer continuously for more than ten se- conds, or when the washer fluid tank is empty. This may cause overheating of the washer motor. Check the washer fluid level fre- quently, such as at fuel stops.
3-16
3
FORESTER U.S.A. (E)
Instruments and controls
D Do not operate the wipers when the windshield or rear window is dry. This may scratch the glass, damage the wiper blades and cause the wiper motor to burn out. Before operating the wiper on a dry windshield or rear window, always use the windshield washer. D In freezing weather, be sure that the wiper blades are not fro- zen to the windshield or rear window before switching on the wipers. Attempting to operate the wiper with the blades frozen to the window glass could cause not only the wiper blades to be damaged but also the wiper motor to burn out. If the wiper blade is frozen to the window glass, be sure to operate the defroster, wiper deicer (if equipped) or rear window defogger before turning on the wiper. D If the wipers stop during operation because of ice or some oth- er obstruction on the window, the wiper motor could burn out even if the wiper switch is turned off. If this occurs, promptly stop the vehicle in a safe place, turn the ignition switch to the “LOCK” position and clean the window glass to allow proper wiper opera- tion. D Use clean water if windshield washer fluid is unavailable. In areas where water freezes in winter, use SUBARU Windshield Washer Fluid or the equivalent. (See “Windshield washer fluid” section in chapter 10.) Also, when driving the vehicle when there are freezing tempera- tures, use non-freezing type wiper blades. D Do not clean the wiper blades with gasoline or a solvent, such as paint thinner or benzene. This will cause deterioration of the wiper blades.
NOTE D The wiper operates only when the ignition switch is in the “ON” or “ACC” position. D Clean your wiper blades and window glass periodically with a washer solution to prevent streaking, and to remove accumulations of road salt or road film. Keep the washer button depressed at least for 1 second so that washer solution will be sprinkled all over the
– CONTINUED –
3-17
FORESTER U.S.A. (E)
windshield or rear window. D Grease, wax, insects or other material on the windshield or the wiper blades results in jerky wiper operation and streaking on the glass. If you cannot remove those streaks after operating the washer or if the wiper operation is jerky, clean the outer surface of the windshield or rear window and the wiper blades using a sponge or soft cloth with a neutral detergent or mild-abrasive cleaner. After cleaning, rinse the window glass and wiper blades with clean water. The glass is clean if no beads form on the glass when you rinse with water. D If you cannot eliminate the streaking even after following this pro- cedure, replace the wiper blades with new ones. Refer to the “Wiper blade replacement” section (chapter 10) for replacement instruc- tions.
J Windshield wiper and washer switches
B Windshield wipers
To turn the wipers on, push the wiper control lever down.
HB2019BB
: Intermittent LO : Low speed HI : High speed
To turn the wipers off, return the lever to the “OFF” position.
3-18
FORESTER U.S.A. (E)
Instruments and controls
B Mist (for a single wipe) For a single wipe of the wipers, pull the lever toward you. The wipers operate until you release the lever.
B Washer
HB2020BA
To wash the windshield, push the washer button at the end of the wip- er control lever. The washer fluid sprays until you release the washer button. The wipers operate while you push the button.
J Rear window wiper and washer switch
(if equipped)
HB2021BA
– CONTINUED –
3-19
FORESTER U.S.A. (E)
B Rear wiper To turn the rear wiper on, turn the knob on the end of the wiper control lever to the “ON” position. To turn the wiper off, return the knob on the end of the lever to the “OFF” position.
” position. The washer fluid sprays until you release the knob.
B Washer To wash the rear window while the rear wiper is operating, turn the knob on the end of the wiper control lever counterclockwise to the “ To wash the rear window when the rear wiper is not in use, turn the knob on the end of the wiper control lever clockwise to the “ ” position. The washer fluid sprays and the wiper operates until you re- lease the knob.
Windshield wiper deicer (if equipped)
CAUTION
To prevent the battery from being discharged, do not operate the windshield wiper deicer continuously for any longer than neces- sary.
The windshield wiper deicer operates only when the ignition switch is in the “ON” position.
HB2027BB
3-20
FORESTER U.S.A. (E)
Instruments and controls
Before turning on the windshield wiper deicer, remove any snow from the windshield. To turn on the windshield wiper deicer, push the switch. The indicator light located on the switch lights up while the windshield wiper deicer is operating. The windshield wiper deicer will automatically shut off after about 15 min- utes. If the wiper blades have been deiced completely before that time, push the switch to turn it off. It also turns off when the ignition switch is turned to the “ACC” or “LOCK” position. If deicing is not complete when you restart your vehicle, you have to push the switch to turn the deicer on again.
Rear window defogger switch
CAUTION
D Do not use sharp instruments or window cleaner containing abrasives to clean the inner surface of the rear window. They may damage the conductors printed on the window. D To prevent the battery from being discharged, do not operate the defogger continuously for any longer than necessary.
The rear window defogger operates only when the ignition switch is in the “ON” position.
Indicator light
HS0063
To turn on the defogger, push the switch. To turn it off, push the switch
– CONTINUED –
3-21
FORESTER U.S.A. (E)
again. The indicator light located on the switch lights up while the rear window defogger is operating. The defogger will automatically shut off after about 15 minutes. If the win- dow clears before that time, push the switch to turn it off. It also turns off when the ignition switch is turned to the “ACC” or “LOCK” position. If defrosting or defogging is desired when you restart your vehicle, you have to push the switch to turn it on again.
NOTE If your vehicle is equipped with the outside mirror defogger, the out- side mirror defogger operates while the rear window defogger is operating.
Horn
To sound the horn, push the horn pad.
OM-H2736
3-22
FORESTER U.S.A. (E)
Instruments and controls
Mirrors
Always check that the inside and outside mirrors are properly adjusted before you start driving.
J Inside mirror
HB4003BB
The inside mirror has a day and night position. Pull the tab at the bottom of the mirror toward you for the night position. Push it away for the day position. The night position reduces glare from headlights.
J Outside mirrors
WARNING
Objects look smaller in a convex mirror (passenger side) and far- ther away than when viewed in a flat mirror. Do not use the con- vex mirror to judge the distances of vehicles behind you when changing lanes. Use the inside mirror (or glance backwards) to determine the actual size and distance of objects that you view in the convex mirror.
– CONTINUED –
3-23
FORESTER U.S.A. (E)
HS0065
B Adjusting mirrors To adjust the mirrors by hand, push where indicated by the arrows.
HS0066
3-24
FORESTER U.S.A. (E)
Instruments and controls
B Remote control mirror switch (if equipped) The remote control mirrors operate only when the ignition switch is in the “ON” or “ACC” position.
Selection switch
Direction control switch
HS0067
1. Press either end of the selection switch, “L” for the left and “R” for the right. 2. Move the direction control switch in the direction you want to move the mirror. 3. Return the selection switch to the neutral position to prevent unintentional operation.
The mirrors can also be adjusted manually.
B Outside mirror defogger (if equipped)
CAUTION
To prevent the battery from being discharged, do not operate the defogger continuously for any longer than necessary.
The outside mirror defogger shares the switch with rear window defogger.
The outside mirror defogger operates only when the ignition switch is in the “ON” position.
– CONTINUED –
3-25
FORESTER U.S.A. (E)
Indicator light
HS0063
To turn on the outside mirror defogger, push the switch. To turn it off, push the switch again. The indicator light located on the switch is on while the outside mirror defogger is operation. The defogger will automatically shut off after about 15 minutes. If the mirror clears before that time, push the switch to turn it off. It also turns off when the ignition switch is turned to the “ACC” or “LOCK” position. If defrosting or defogging is desired when you restart your vehicle, you have to push the switch to turn it on again.
NOTE While the outside mirror defogger is operating, the rear window defogger also operates
3-26