- 2004 Hyundai Tiburon Owners Manuals
- Hyundai Tiburon Owners Manuals
- 2005 Hyundai Tiburon Owners Manuals
- Hyundai Tiburon Owners Manuals
- 2003 Hyundai Tiburon Owners Manuals
- Hyundai Tiburon Owners Manuals
- 2008 Hyundai Tiburon Owners Manuals
- Hyundai Tiburon Owners Manuals
- 2006 Hyundai Tiburon Owners Manuals
- Hyundai Tiburon Owners Manuals
- Download PDF Manual
-
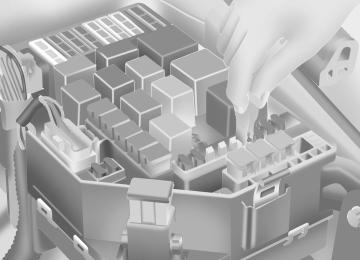
o Replace the filter every 12,000 miles (20,000 km) or once a year. If the car is being driven in severe conditions such as dusty, rough roads, more frequent air conditioner filter inspections and changes are required.
o When the air flow rate is decreased, it must be checked at an authorized dealer. o If your vehicle is not equipped with this filter, it can be installed by your dealer. Check with your dealer for details.
STEREO SOUND SYSTEM
B750A02A-AAT How Car Audio Works FM reception
Ionosphere
AM reception
Ionosphere
FM radio station
Mountains
FEATURES OF YOUR HYUNDAI
79
Unobstructed
area
B750A02L AM broadcasts can be received at greater distances than FM broadcasts. This is because AM radio waves are transmitted at low frequen- cies. These long, low frequency radio waves can follow the curvature of the earth rather than travelling straight out into the atmosphere. In addition, they curve around obstructions so that they can provide better signal coverage.
Buildings
Obstructed area
Iron bridges
B750A03L
FM broadcasts are transmitted at high frequen- cies and do not bend to follow the earth's surface. Because of this, FM broadcasts gen- erally begin to fade at short distances from the station. Also, FM signals are easily affected by buildings, mountains, or other obstructions. These can result in certain listening conditions which might lead you to believe a problem exists with your radio. The following conditions are normal and do not indicate radio trouble:
B750A01L AM and FM radio signals are broadcast from transmitter towers located around your city. They are intercepted by the radio antenna on your car. This signal is then received by the radio and sent to your car speakers. When a strong radio signal has reached your vehicle, the precise engineering of your audio system ensures the best possible quality repro- duction. However, in some cases the signal coming to your vehicle may not be strong and clear. This can be due to factors such as the distance from the radio station, closeness of other strong radio stations or the presence of buildings, bridges or other large obstructions in the area.
1FEATURES OF YOUR HYUNDAI 80
B750B02Y-AAT Using a cellular phone or a two-way radio
When a cellular phone is used inside the vehicle, noise may be produced from the audio equip- ment. This does not mean that something is wrong with the audio equipment. In such a case, use the cellular phone at a place as far as possible from the audio equipment.
B750A04L
B750A05L
o Fading - As your car moves away from the radio station, the signal will weaken and sound will begin to fade. When this occurs, we suggest that you select another stronger station.
o Flutter/Static - Weak FM signals or large obstructions between the transmitter and your radio can disturb the signal causing static or fluttering noises to occur. Reducing the treble level may lessen this effect until the disturbance clears.
o Station Swapping - As an FM signal weak- ens, another more powerful signal near the same frequency may begin to play. This is because your radio is designed to lock onto the clearest signal. If this occurs, select another station with a stronger signal.
o Multi-Path Cancellation - Radio signals being received from several directions can cause distortion or fluttering. This can be caused by a direct and reflected signal from the same station, or by signals from two stations with close frequencies. If this occurs, select another station until the condition has passed.
CAUTION:
When using a communication system such a cellular phone or a radio set inside the vehicle, a separate external antenna must be fitted. When a cellular phone or a radio set is used with an internal antenna alone, it may interfere with the vehicle's electrical system and adversely affect safe operation of the vehicle.
WARNING:
Don't use a cellular phone when you are driving. Stop at a safe place to use a cellular phone.
FEATURES OF YOUR HYUNDAI
81
AUDIO SYSTEM
H260A01O-AAT STEREO RADIO OPERATION (H260) (If installed)
3. BASS/TREBLE Control Knob
4. SCAN Button
6. BAND Selector
2. FADER Control Knob
5. TUNE/SEEK Select Button
7. PRESET Buttons
1. POWER ON-OFF/VOLUME/BALANCE Control Knob
H260A01O
1FEATURES OF YOUR HYUNDAI 82
H260B03E-AAT 1. POWER ON-OFF Control Knob
The radio unit may be operated when the ignition key is in the "ACC" or "ON" position. Press the knob to switch the power on. The LCD shows the radio frequency in the radio mode or the CD track indicator in either the CD mode or CD AUTO CHANGER mode. To switch the power off, press the knob again.
VOLUME Control
Rotate the knob clockwise to increase the volume and turn the knob counterclockwise to reduce the volume.
BALANCE Control
Pull and turn the control knob clockwise to emphasize right speaker sound (left speaker sound will be attenuated). When the control knob is turned counterclockwise, left speaker sound will be emphasized (right speaker sound will be attenuated).
2. FAD (Fader Control) Knob
5. TUNE (Manual) Select Button
Press the ( ) side or ( ) side to increase or to decrease the frequency. Press either button and hold down to continuously scroll. Release button once the desired station is reached.
SEEK Operation (Automatic Channel Selection)
Press the TUNE select button for 1 sec or more. Releasing it will automatically tune to the next available station with a beep sound. When the ( ) side is pressed longer than 1
second, releasing will automatically tune to the next higher frequency and when the ( ) side is pressed longer than 1 second, releasing will automatically tune to the next lower frequency.Turn the control knob counterclockwise to emphasize front speaker sound (rear speaker sound will be attenuated). When the control knob is turned clockwise, rear speaker sound will be emphasized (front speaker sound will be attenuated).
3. BASS Control Knob
Press to pop the knob out and turn to the left or right for the desired bass tone.
TREB (Treble Control) Knob
Pull the bass control knob further out. Turn to the left or right for the desired treble tone.
4. SCAN Button
When the scan button is pressed, the frequency will increase and the receivable stations will be tuned in one after another, receiving each sta- tion for 5 seconds. To stop scanning, press the scan button again.
FEATURES OF YOUR HYUNDAI
83
CAUTION:
o Do not place beverages close to the audio system. The audio system mecha- nism may be damaged if you spill them. o Do not impact on the audio system, or the audio system mechanism could be damaged.
6. BAND Selector
Pressing the button changes the AM, FM1 and FM2 bands. The mode selected is displayed on LCD.
FM/AM
7. PRESET STATION SELECT Button
Six (6) stations for AM, FM or FM2 respectively can be preset in the electronic memory circuit on this unit.
HOW TO PRESET STATIONS
Six AM and twelve FM stations may be pro- grammed into the memory of the radio. Then, by simply pressing the band select button and/or one of the six station select buttons, you may recall any of these stations instantly. To pro- gram the stations, follow these steps:
o Press band selector to set the band for AM,
FM or FM2.
o Select the desired station to be stored by
seek, scan or manual tuning.
o Determine the preset station select button
you wish to use to access that station.
o Press the station select button for more than two seconds. A select button indicator will show in the display indicating which select button you have depressed. The frequency display will flash after it has been stored into the memory. You should then release the button, and proceed to program the next desired station. A total of 18 stations can be programmed by selecting one AM and two FM stations per button.
o When completed, any preset station may be recalled by selecting AM, FM or FM2 band and the appropriate station button.
1FEATURES OF YOUR HYUNDAI 84
H260B01O-AAT COMPACT DISC PLAYER OPERATION (H260) (If installed)
4. SCAN Button
1. Playing CD
6. EJECT Button
3. TRACK UP/DOWN
2. FF/REW Button
5. REPEAT Button
H260A01O
B260D03O-AAT 1. Playing CD
o Insert the CD with the label facing upward. o Insert the CD to start CD playback, during
radio operation.
o When a disc is in the CD deck, if you press the CD button, the CD player will begin playing even if the radio is being used.
o The CD player can be used when the ignition switch is in either the "ON" or "ACC" position.
2. FF/REW ( / )
If you want to fast forward or reverse through the compact disc track, push and hold the FF ( ) or REW ( ) button. When you release the button, the compact disc player will resume playing.
3. TRACK UP/DOWN
o The desired track on the disc currently being played can be selected using the track number.
o Press once to skip forward to the beginn- ing of the next track. Press once to skip back to the beginning of the track.
4. SCAN Button
o Press the SCAN button to playback the first
10 seconds of each track.
o Press the SCAN button again within 10 sec. When you have reached the desired track.
5. REPEAT Button
o To repeat the track you are currently listen- ing to, press the RPT button. To cancel , press again.
o If you do not release RPT operation when the track ends, it will automatically be replayed. This process will be continued until you push the button again.
6. EJECT Button
When the EJECT button is pressed with a CD loaded, the CD will eject.
FEATURES OF YOUR HYUNDAI
85
NOTE: o If the CD does not operate properly or if the ER2 fault code is displayed, use one of two methods to reset the CD deck function. - Remove the audio fuse for 5 minutes.
Then, reinstall the audio fuse.
- Disconnect the negative terminal of the battery and wait 5 minutes. Then reconnect the negative battery termi- nal.
o To assure proper operation of the unit, keep the vehicle interior temperature within a normal range by using the vehicle’s air conditioning or heating system.
o When replacing the fuse, replace it with
a fuse having the correct capacity.
o The preset station frequencies are all erased when the car battery is discon- nected. Therefore, all data will have to be set again if this should occur.
o Do not add any oil to the rotating parts. Keep magnets, screwdrivers and other metallic objects away from the tape mechanism and head.
o This equipment is designed to be used only in a 12 volt DC battery system with negative ground.
o Do not grip or pull out the disc with your hand while the disc is being pulled into the unit by the self loading mechanism. These can cause poor disc scratching to occur or trouble in the compact disc player.
o Avoid using CD-Recordable or CD- Rewritable as the player could not be operated in recording way of the CD maker. When using the compact disc player, genuine CDs are recommended.
1FEATURES OF YOUR HYUNDAI 86
o This unit is made of precision parts. Do not attempt to disassemble or adjust any parts.
o When driving your vehicle, be sure to keep the volume of the unit set low enough to allow you to hear sounds coming from the outside.
o Do not expose this equipment (includ- ing the speakers) to water or excessive moisture.
CAUTION:
o Do not insert warped or poor quality discs into the CD player as damage to the unit may occur.
o Do not insert anything like coins into the player slot as damage to the unit may occur.
o Do not place beverages close to the audio system. The playback mechanism may be damaged if you spill them.
o Do not impact on the audio system, or the playback mechanism could be dam- aged.
o Driving on the off-roads or other vibra-
tions may skip your compact disc. Do not use the audio system on off- roads as the discs could be scratched and damaged.
B260E01E-AAT CD AUTO CHANGER (H260) (If installed)
6. SCAN Button
1. CD Select Button
3. TRACK UP/DOWN
FEATURES OF YOUR HYUNDAI
87
4. FF/REW Button
5. REPEAT Button
2. DISC Select Button
H260A01O
1FEATURES OF YOUR HYUNDAI 88
B260F01GK-AAT The CD auto changer is located in the right side of the quater trim.
o To use the CD auto changer.
1. Open the sliding lid of the CD auto changer. 2. To eject the compact disc magazine, press the EJECT button located inside the CD auto changer. Insert the discs into the magazine.
3. 4. Push the magazine into the CD auto changer
and close the sliding lid.
o The CD auto changer can be used when the ignition switch is in either the "ON" or "ACC" position.
1. CD Select Button
When the CD changer magazine contains discs, press the "CD" button and the CD changer can be used even if the radio is being used. The Hyundai CD changer can hold up to eight discs. The disc number will be lit, and the track number, and elapsed time will be displayed.
2. DISC Select Button
5. REPEAT
To select the CD you want, push " " to change the disc number.
TUNE DISC
3. TRACK UP/DOWN
o The desired track on the disc currently being played can be selected using the track number.
o Press once to skip forward to the begin- ning of the next track. Press once to skip back to the beginning of the track.
4. FF/REW ( / )
If you want to fast forward or reverse through the compact disc track, push and hold in the FF ( ) or REW ( ) button. When you release the button, the compact disc player will resume playing.
o To repeat the music you are listening to, press the RPT button. To cancel, press again.
o If you do not release RPT operation when the track ends, it will automatically be replayed. This process will be continued until you push the button again.
6. SCAN Button
o Press the SCAN button to playback the first
10 seconds of each track.
o Press the SCAN button again within 10 sec.
for the desired track.
NOTE: o When replacing the fuse, replace it with
a fuse having the correct capacity.
o This equipment is designed to be used only in a 12 volt DC battery system with negative ground.
o This unit is made of precision parts. Do not attempt to disassemble or adjust any parts.
o When driving your vehicle, be sure to keep the volume of the unit set low enough to allow you to hear sounds coming from the outside.
FEATURES OF YOUR HYUNDAI
89
CAUTION:
o Do not insert warped or poor quality discs into the CD changer as damage to the unit may occur.
o Do not insert anything like coins into the changer slot as damage to the unit may occur.
o Do not place beverages close to the audio system. The playback mechanism may be damaged if you spill them.
o Do not impact on the audio system, or the playback mechanism could be dam- aged.
o Driving on the off-roads or other vibra-
tions may skip your compact disc. Do not use the audio system on off- roads as the discs could be scratched and damaged.
o Do not grip or pull out the disc with your hand while the disc is being pulled into the unit by the self loading mechanism. These can cause poor disc scratching to occur or trouble in the compact disc changer.
o Avoid using CD-Recordable or CD- Rewritable as the changer could not be operated in recording way of the CD maker. When using the compact disc changer, genuine CDs are recommended.
1FEATURES OF YOUR HYUNDAI 90
H290A01FC-GAT STEREO RADIO OPERATION (H280) (If installed)
1. POWER ON/OFF VOLUME Control Knob
8. SCAN Button (If installed)
7. EQUALIZER Button
6. BAND Select Button
4. TUNE/SEEK Select Button
H290A01OA
5. PRESET Buttons
2. BASS/BALANCE Control Knob
3. TREBLE/FAD Konb
H290B03E-GAT 1. POWER ON-OFF Control Knob
The radio unit may be operated when the ignition key is in the "ACC" or "ON" position. Press the button to switch the power on. The display shows the radio frequency in the radio mode, the tape direction indicator in the tape mode or CD track in either the CD mode or CD AUTO CHANGER mode. To switch the power off, press the button again.
VOLUME Control
Rotate the knob clockwise to increase the volume and turn the knob counterclockwise to reduce the volume.
2. BASS/BALANCE Control Knob BASS Control Knob
Press to pop the knob out. To increase the bass, rotate the knob clockwise, while to decrease the bass, rotate the knob counterclockwise.
BALANCE Control knob
Pull the Bass control knob out further. Rotate the knob clockwise to emphasize right speaker sound (left speaker sound will be attenuated). When the control knob is turned counterclock- wise, left speaker sound will be emphasized (right speaker sound will be attenuated).
3. TREBLE/FAD Knob TREBLE Control Knob
Press to pop the knob out and turn to the left or right for the desired treble tone.
FAD (Fader Control) Knob
Pull the Treble control knob out further. Turn the control knob counterclockwise to emphasize front speaker sound (rear speaker sound will be attenuated). When the control knob is turned clockwise, rear speaker sound will be empha- sized (front speaker sound will be attenuated).
4. TUNE (Manual) Select Button
Press the ( ) side or ( ) side to increase or to decrease the frequency. Press either button and hold down to continuously scroll. Release button once the desired station is reached.
FEATURES OF YOUR HYUNDAI
91
SEEK Operation (Automatic Channel Selection)
Press the TUNE select button for 0.5 sec or more. Releasing it will automatically tune to the next available station with a beep sound. When the ( ) side is pressed longer than 0.5
second, releasing will automatically tune to the next higher frequency and when the ( ) side is pressed longer than 0.5 second, releasing will automatically tune to the next lower frequency.5. PRESET STATION Select Buttons
Six (6) stations for AM, FM and FM2 respec- tively can be preset in the electronic memory circuit.
HOW TO PRESET STATIONS
Six AM and twelve FM stations may be pro- grammed into the memory of the radio. Then, by simply pressing the band select button and/or one of the six station select buttons, you may recall any of these stations instantly. To pro- gram the stations, follow these steps:
1FEATURES OF YOUR HYUNDAI 92
o Press band selector to set the band for AM,
FM or FM2.
o Select the desired station to be stored by
seek or manual tuning.
o Determine the preset station select button
you wish to use to access that station.
o Press the station select button for more than two seconds. A select button indicator will show in the display indicating which select button you have depressed. The frequency display will flash after it has been stored into the memory with beep sound. You should then release the button, and proceed to program the next desired station. A total of 18 stations can be programmed by selecting one AM and two FM station per button.
o When completed, any preset station may be recalled by selecting AM, FM or FM2 band and the appropriate station button.
6. BAND Selector
FM/AM
Pressing the button changes the AM, FM1 and FM2 bands. The mode selected is shown on the display.
7. EQUALIZER Button
Press the EQ button to select the CLASSIC, JAZZ, ROCK and DEFEAT MODE for the desired tone quality. Each press of the button changes the display as follows;
CLASSIC → JAZZ → ROCK → DEFEAT
8. SCAN Button (If installed)
When the scan button is pressed, the frequency will increase and the receivable stations will be tuned in one after another, receiving each sta- tion for 5 seconds. To stop scanning, press the scan button again.
CAUTION:
o Do not place beverages close to the audio system. The audio system mecha- nism may be damaged if you spill them. o Do not impact on the audio system, or the audio system mechanism could be damaged.
H290C01FC-GAT CASSETTE TAPE PLAYER OPERATION (H280) (If installed)
FEATURES OF YOUR HYUNDAI
93
5. EQUALIZER Button
4. TAPE EJECT Button
2. AUTO MUSIC Select Button
6. DOLBY Button
1. FF/REW Button
3. TAPE PROGRAM Button
H290A01OA
1FEATURES OF YOUR HYUNDAI 94
H290D02O-GAT 1. FF/REW Button
o Fast forward tape winding starts when the FF ( ) button is pressed during the PLAY or REW mode.
o Tape play starts when the FF ( ) button
is pressed again during the FF mode. o Tape rewinding starts when the REW
( ) button is pressed during the PLAY or FF mode.
o Tape play starts when the REW ( ) button
pressed again during the REW mode.
3. TAPE PROGRAM Button
This allows you to play the reverse side of the tape by merely depressing the program button. An arrow will appear in the display to show tape direction.
4. TAPE EJECT button
o When the button is pressed with the
cassette loaded, the cassette is ejected.
o When the button is pressed during the
FF/REW mode, the cassette is ejected.
2. AUTO MUSIC Select Button
5. EQ Button
Press the button to find the starting point of each song in a prerecorded music tape. The quiet space between songs (must have at least a 4
sec. gap) can be identified by the AUTO MUSIC Select button.o Pressing the button will play the beginn-
ing of the next music segment.
o Pressing the button will start replay at the beginning of the music just listened to.
Press the EQ button to select the CLASSIC, JAZZ, ROCK and DEFEAT MODE for the desired tone quality. Each press of the button changes the display as follows;
CLASSIC → JAZZ → ROCK → DEFEAT
6. DOLBY Button
If you get background noise during tape PLAY, you can reduce this considerably by merely pressing the DOLBY button. If you want to cancel the DOLBY feature, press the button again.
CAUTION:
o Do not insert anything like coins into the player slot as damage to the unit may occur.
o Do not place beverages close to the audio system. The playback mechanism may be damaged if you spill them.
o Do not impact on the audio system, or the playback mechanism could be dam- aged.
H290E01FC-GAT COMPACT DISC PLAYER OPERATION (H280) (If installed)
6. CD EJECT Button
FEATURES OF YOUR HYUNDAI
95
7. SCAN Button (If installed)
5. EQUALIZER Button
3. TRACK UP/DOWN
1. CD Select Button
4. REPEAT
2. FF/REW Button
H290A01OA
1FEATURES OF YOUR HYUNDAI 96
H290F01O-GAT 1. CD Select Button
o Insert the CD with the label facing upward. o Insert the CD to start CD playback, during
radio operation or cassette tape playing.
o When a disc is in the CD deck, if you press the CD button the CD player will begin playing even if the radio or cassette player is being used.
o The CD player can be used when the ignition switch is in either the "ON" or "ACC" position.
2. FF/REW ( / )
If you want to fast forward or reverse through the compact disc track, push and hold the FF ( ) or REW ( ) button. When you release the button, the compact disc player will resume playing.
3. TRACK UP/DOWN
o The desired track on the disc currently being played can be selected using the track number.
o Press button once to skip forward to the beginning of the next track. Press button once to skip back to the beginning of the track.
4. REPEAT
7. SCAN Button (If installed)
o To repeat the track you are listening to, press the RPT button. To cancel, press again.
o If you do not release RPT operation when the track ends, it will automatically be replayed. This process will be continued until you push the button again.
5. EQUALIZER Button
Press the EQ button to select the CLASSIC, JAZZ, ROCK and DEFEAT MODE for the desired tone quality. Each press of the button changes the display as follows;
CLASSIC → JAZZ → ROCK → DEFEAT
6. CD EJECT Button
When the button is pressed with a CD loaded, the CD will eject.
o Press the SCAN button to playback the first
10 seconds of each track.
o Press the SCAN button again within 10 sec. When you have reached the desired track.
NOTE: o To assure proper operation of the unit, keep the vehicle interior temperature within a normal range by using the vehicle’s air conditioning or heating system.
o When replacing the fuse, replace it with
a fuse having the correct capacity.
o The preset station frequencies are all erased when the car battery is discon- nected. Therefore, all data will have to be set again if this should occur.
o Do not add any oil to the rotating parts. Keep magnets, screwdrivers and other metallic objects away from the tape mechanism and head.
o This equipment is designed to be used only in a 12 volt DC battery system with negative ground.
o This unit is made of precision parts. Do not attempt to disassemble or adjust any parts.
FEATURES OF YOUR HYUNDAI
97
o Do not grip or pull out the disc with your hand while the disc is being pulled into the unit by the self loading mechanism. These can cause poor disc scratching to occur or trouble in the compact disc player.
o Avoid using CD-Recordable or CD- Rewritable as the player could not be operated in recording way of the CD maker. When using the compact disc player, genuine CDs are recommended.
o When driving your vehicle, be sure to keep the volume of the unit set low enough to allow you to hear sounds coming from the outside.
o Do not expose this equipment (includ- ing the speakers and tape) to water or excessive moisture.
CAUTION:
o Do not insert warped or poor quality discs into the CD player as damage to the unit may occur.
o Do not insert anything like coins into the player slot as damage to the unit may occur.
o Do not place beverages close to the audio system. The playback mechanism may be damaged if you spill them.
o Do not impact on the audio system, or the playback mechanism could be dam- aged.
o Driving on the off-roads or other vibra-
tions may skip your compact disc. Do not use the audio system on off- roads as the discs could be scratched and damaged.
1FEATURES OF YOUR HYUNDAI 98
H290G01FC-GAT CD AUTO CHANGER (H280) (If Installed)
6. SCAN Button (If installed)
7. EQ Button
3. TRACK UP/DOWN
5. REPEAT
4. FF/REW Button
2. DISC Select Button
1. CD CHANGER Select Button
H290A01OA
3. TRACK UP/DOWN
6. SCAN Button (If installed)
FEATURES OF YOUR HYUNDAI
99
o The desired track on the disc currently being played can be selected using the track number.
o Press once to skip forward to the beginn- ing of the next track. Press once to skip back to the beginning of the track.
4. FF/REW ( / )
If you want to fast forward or reverse through the compact disc track, push and hold in the FF ( ) or REW ( ) button. When you release the button, the compact disc player will resume playing.
5. REPEAT
o To repeat the music you are listening to, press the RPT button. To cancel, press again.
o If you do not release RPT operation when the track ends, it will automatically be replayed. This process will be continued until you push the button again.
o Press the SCAN button to playback the first
10 seconds of each track.
o Press the SCAN button again within 10 sec.
for the desired track.
7. EQ Button
Press the EQ button to select the CLASSIC, JAZZ, ROCK and DEFEAT MODE for the desired tone quality. Each press of the button changes the display as follows;
CLASSIC → JAZZ → ROCK → DEFEAT
NOTE: o When replacing the fuse, replace it with
a fuse having the correct capacity.
o This equipment is designed to be used only in a 12 volt DC battery system with negative ground.
o This unit is made of precision parts. Do not attempt to disassemble or adjust any parts.
o When driving your vehicle, be sure to keep the volume of the unit set low enough to allow you to hear sounds coming from the outside.
B290H01GK-GAT The CD auto changer is located in the right side of the quater trim.
o To use the CD auto changer.
1. Open the sliding lid of the CD auto changer. 2. To eject the compact disc magazine, press the EJECT button located inside the CD auto changer. Insert the discs into the magazine.
3. 4. Push the magazine into the CD auto changer
and close the sliding lid.
o The CD auto changer can be used when the ignition switch is in either "ON" or "ACC" position.
1. CD CHANGER Select Button
When the CD changer magazine contains discs, press the "CD/CDC" button and the CD changer can be used even if the radio or cassette player is being used. The Hyundai CD changer can hold up to eight discs. The disc number will be lit, and the track number, and elapsed time will be displayed.
2. DISC Select Button
To select the CD you want, push " " to change the disc number.
TUNE DISC
1FEATURES OF YOUR HYUNDAI 100
CAUTION:
o Do not insert warped or poor quality discs into the changer as damage to the unit may occur.
o Do not insert anything like coins into the changer slot as damage to the unit may occur.
o Do not place beverages close to the audio system. The playback mechanism may be damaged if you spill them.
o Do not impact on the audio system, or the playback mechanism could be dam- aged.
o Driving on the off-roads or other vibra-
tions may skip your compact disc. Do not use the audio system on off- roads as the discs could be scratched and damaged.
o Do not grip or pull out the disc with your hand while the disc is being pulled into the unit by the self loading mechanism. These can cause poor disc scratching to occur or trouble in the compact disc changer.
o Avoid using CD-Recordable or CD- Rewritable as the changer could not be operated in recording way of the CD maker. When using the compact disc changer, genuine CDs are recommended.
AUDIO FAULT CODE
FEATURES OF YOUR HYUNDAI
101
B890A01Y-AAT If you see any error indication in the display while using the system in the CD or Tape mode, find the cause in the chart below. If you cannot clear the error indication, take the car to your Hyundai dealer.
INDICATION
CAUSE
SOLUTION
Er2
Er3
Er6
Er8
CD DECK MECHANICAL ERROR
After resetting the audio system, push the eject button.
(EJECT ERROR, LOADING ERROR)
If disc is not ejected, consult your Hyundai dealer.
FOCUS ERROR
DATA READ ERROR
DISC ERROR
TAPE DECK ERROR
TAPE EJECT ERROR
Make sure the disc is not scratched or damaged.
Press the eject button and pull out the disc.
Then insert a normal CD disc.
Check if the disc is inserted correctly in the CD player.
Make sure the disc is not scratched or damaged.
After resetting the audio system, push the eject button.
If tape does not eject, consult your Hyundai dealer.
HHH
TEMPERATURE IS TOO HIGH
Fault code will reset automatically when the temperature returns to normal.
no CD
NO DISC IN MAGAZINE
NO CD MAGAZINE IN THE AUTO CHANGER
Insert disc in magazine or insert CD magazine in the auto changer.
1FEATURES OF YOUR HYUNDAI 102
CARE OF DISC
B850A02F-AAT Proper Handling
CARE OF CASSETTE TAPES
Storage
B860A01A-AAT
When not in use, place your discs in their individual case and store them in a cool place away from the sun, heat, and dust. Do not grip or pull out the disc with your hand while the disc is being pulled into the unit by the self loading mechanism.
Keep Your Discs Clean
B850A01L Handle your disc as shown. Do not drop the disc. Hold the disc so you will not leave finger- prints on the surface. If the surface is scratched, it may cause the pickup to skip signal tracks. Do not affix tape, paper, or gummed labels on the disc. Do not write on the disc.
Damaged Disc
Do not attempt to play damaged, warped or cracked discs. These could severely damage the playback mechanism.
B850A02L Fingerprints, dust, or soil on the surface of a disc could cause the pickup to skip signal tracks. Wipe the surface clean with a clean soft cloth. If the surface is heavily soiled, dampen a clean soft cloth in a solution of mild neutral detergent to wipe it clean.
B860A01L Proper care of your cassette tapes will extend the tape life and increase your listening enjoy- ment. Always protect your tapes and cassette cases from direct sunlight, severely cold and dusty conditions. When not in use, cassettes should always be stored in the original protec- tive cassette case. When the vehicle is very hot or cold, allow the interior temperature to become more comfortable before listening to your cas- settes.
FEATURES OF YOUR HYUNDAI
103
o Never leave a cassette inserted in the player when not being played. This could damage the tape player unit and the cassette tape. o We strongly recommend against the use of tapes longer than C-60 (60 minutes total). Tapes such as C-120 or C-180 are very thin and do not perform as well in the automotive environment.
o Store cassettes in a cool, dry place with the open side facing down to prevent dust from setting in the cassette body.
o Avoid repeated fast reverse usage to replay one given tune or tape section. This can cause poor tape winding to occur, and even- tually cause excessive internal drag and poor audio quality in the cassette. If this occurs, it can sometimes be corrected by fast winding the tape from end to end several times. If this does not correct the problem, do not continue to use the tape in your vehicle.
o The playback head, capstan and pinch roll- ers will develop a coating of tape residue that can result in deterioration of sound quality, such as a wavering sound. They should be cleaned monthly using a commercially avail- able head cleaning tape or special solution available from audio specialty shops. Follow the supplier's directions carefully and never oil any part of the tape player unit.
o Always be sure that the tape is tightly wound on its reel before inserting in the player. Rotate a pencil in the drive sprockets to wind up any slack.
Head
HGK062
o Be sure that the cassette label is not loose or peeling off or tape ejection may be difficult. o Never touch or soil the actual audio tape
surfaces.
o Keep all magnetized objects, such as elec- tric motors, speakers or transformers away from your cassette tapes and tape player unit.
Cotton applicator
B860A02L
1FEATURES OF YOUR HYUNDAI 104
ANTENNA
B870A01A-AAT Fixed Rod Antenna
CAUTION:
o Be sure to remove the antenna before washing the car in an automatic car wash or it may be damaged.
o When reinstalling your antenna, it is important that it is fully tightened to ensure proper reception.
B860A03L
NOTE: Look at a tape before you insert it. If the tape is loose, tighten it by turning one of the hubs with a pencil or your finger. If the label is peeling off, do not put it in the drive mechanism. Do not leave tapes sitting where they are exposed to hot, warm, or high humidity, such as on top of the dashboard or in the player. If a tape is exposed to excessively hot or cold, let it reach a moderate temperature before putting it in the player.
B870A01A
Your car uses a fixed rod antenna to receive both AM and FM broadcast signals. This antenna is a removable type. To remove the antenna, turn it counterclockwise. To install the antenna, turn it clockwise.
DRIVING YOUR HYUNDAI
Before Starting the Engine ............................................ 2-3
Key Positions ................................................................ 2-3
Starting .......................................................................... 2-4
Manual Transaxle ......................................................... 2-5
Automatic Transaxle ..................................................... 2-8
Good Braking Practices .............................................. 2-11
Anti-Lock Brake System (ABS) .................................. 2-12
Traction Control System (TCS) .................................. 2-13
Driving for Economy ................................................... 2-14
Winter Driving ............................................................. 2-16
Trailer or Vehicle Towing ............................................ 2-182 DRIVING YOUR HYUNDAI
WARNING: ENGINE EXHAUST CAN BE DANGEROUS!
C010A01GK-AAT Engine exhaust fumes can be extremely dangerous. If, at any time, you smell exhaust fumes inside the vehicle, open the windows immediately. o Do not inhale exhaust fumes. Exhaust fumes contain carbon monoxide, a colorless, odorless gas that can cause unconsciousness and death by asphyxiation. o Be sure the exhaust system does not leak. The exhaust system should be checked whenever the vehicle is raised to change the oil or for any other purpose. If you hear a change in the sound of the exhaust or if you drive over something that strikes the underneath side of the car, have the exhaust system checked as soon as possible by your Hyundai dealer. o Do not run the engine in an enclosed area. Letting the engine idle in your garage, even with the garage door open, is a hazardous practice. Never run the engine in your garage any longer than it takes to start the engine and back the car out. o Avoid idling the engine for prolonged periods with people inside the car. If it is necessary to idle the engine for a prolonged period with people inside the car, be sure to do so only in an open area with the air intake set at "Fresh" and fan operating at one of the higher speeds so fresh air is drawn into the interior. If you must drive with the tail gate open because you are carrying objects that make this necessary: 1. Close all windows. 2. Open side vents. 3. Set the air intake control at "Fresh", the air flow control at "Floor" or "Face" and the fan at one of the higher speeds. To assure proper operation of the ventilation system, be sure the ventilation air intakes located just in front of the windshield are kept clear of snow, ice, leaves or other obstructions.
PROPOSITION 65 WARNING:
Engine exhaust and a wide variety of automobile components and parts, including components found in the interior furnishings in a vehicle, contain or emit chemicals known to the State of California to cause cancer and birth defects and reproductive harm. In addition, certain fluids contained in vehicles and certain products of component wear contain or emit chemicals known to the State of California to cause cancer and birth defects or other reproductive harm.
DRIVING YOUR HYUNDAI
ACC
BEFORE STARTING THE ENGINE
TO START THE ENGINE
KEY POSITIONS
C020A01A-AAT Before you start the engine, you should always:
C030A01A-AAT COMBINATION IGNITION SWITCH
C040A01A-AAT
1. Look around the vehicle to be sure there are no flat tires, puddles of oil, water or other indications of possible trouble.
2. After entering the car, check to be sure the
parking brake is engaged.
3. Check that all windows, and lights are clean. 4. Check that the interior and exterior mirrors
are clean and in position.
5. Check your seat, seatback and headrest to be sure they are in their proper positions.
6. Close all the doors. 7. Fasten your seat belt and be sure that all
other occupants have fastened theirs.
8. Turn off all lights and accessories that are
not needed.
9. When you turn the ignition switch to "ON", check that all appropriate warning lights are operating and that you have sufficient fuel. 10.Check the operation of warning lights and all
bulbs when key is in the "ON" position.
o If your Hyundai is equipped with a manual transaxle, place the shift lever in neutral and depress the clutch pedal fully.
o If your Hyundai has an automatic transaxle,
place the shift lever in "P" (park).
o To start the engine, insert the ignition key and turn it to the "START" position. Release it as soon as the engine starts. Do not hold the key in the "START" position for more than 15
seconds.NOTE: o For safety, the engine will not start if the clutch pedal is not depressed fully (Manual transaxle) or the shift lever is not in "P" or "N" Position (Automatic transaxle).
o The ignition key cannot be turned from "ACC" position to "LOCK" position un- less the shift lever is in the "P" (Park) position or the negative battery terminal is disconnected from the battery. To remove the key, always confirm that the shift lever is securely positioned in "P" (Park) (For Automatic transaxle)
o For additional information about start-
ing, see page 2-5.
LOCK
ON
START
C040A01E-1
WARNING:
The engine should not be turned off or the key removed from the ignition key cylinder while the vehicle is in motion. The steering wheel is locked by removing the key.
o "START"
The engine is started in this position. It will crank until you release the key.
2 DRIVING YOUR HYUNDAI
NOTE: Do not hold the key in the "START" position
for more than 15 seconds.
o "ON"
When the key is in the "ON" position, the ignition is on and all accessories may be turned on. If the engine is not running, the key should not be left in the "ON" position. This will discharge the battery and may also damage the ignition sys- tem.
o "ACC"
With the key in the "ACC" position, some elec- trical accessories (radio, etc.) may be oper- ated.
o "LOCK"
The key can be removed or inserted in this position. To protect against theft, the steering wheel locks by removing the key.
NOTE: To unlock the steering wheel, insert the key, and then turn the steering wheel and key simultaneously.
C070C02A-AAT To Remove the Ignition Key
ACC
LOCK
ON
STARTING
C050A01A-AAT
LOCK
START
ON
START
C050A01E-1
C070C01E-1
(If your vehicle is equipped with an automatic transaxle) 1. Turn the ignition key counterclockwise from the "ACC" position to the "LOCK" position. 2. The key can be removed in the "LOCK"position.
(If your vehicle is equipped with a manual transaxle) 1. Turn the ignition key to the "ACC" position. 2. Simultaneously push and turn the ignition counterclockwise from the "ACC"
key position to the "LOCK" position.
3. The key can be removed in the "LOCK"
position.
WARNING:
Never run the engine in a closed or poorly ventilated area any longer than is needed to move your car in or out of the area. The carbon monoxide gas emitted is odorless and can cause serious injury or death.
2
DRIVING YOUR HYUNDAI
MANUAL TRANSAXLE
C070A01GK-AAT OPERATING THE MANUAL TRANSAXLE
A Type
B Type
4. Turn the ignition key to the "Start" position
and release it when the engine starts. After the engine has started, allow the engine to run for 10 to 20 seconds prior to placing the vehicle in gear. The starter should not be operated for more than 15 seconds at a time. Wait 15-30 sec- onds between starting attempts to protect the starter from overheating.
HGK181
Your Hyundai's manual transaxle has a con- ventional shift pattern. This shift pattern is im- printed on the shift knob. The transaxle is fully synchronized in all forward gears so shifting to either a higher or a lower gear is easily accom- plished.C050B01A-AAT NORMAL CONDITIONS: The Starting Procedure:
Insert key, and fasten the seat belt.
1. 2. Depress the clutch pedal fully and place the gearshift lever (manual transaxle) in neutral or the selector lever (automatic transaxle) in "P" (park) position.
3. After turning the ignition key to the "ON" position, make certain all warning lights and gauges are functioning properly before start- ing the engine.
WARNING:
Be sure that the clutch is fully depressed when starting a manual transaxle vehicle. Your manual transaxle equipped vehicle will not start unless the clutch pedal is fully depressed. On a manual transaxle equipped vehicle that can be started without de- pressing the clutch, there is the potential to cause damage to the vehicle or injury to someone inside or outside the vehicle as a result of the forward or backward move- ment of the vehicle that will occur if the clutch is not depressed when the vehicle is started.
2 DRIVING YOUR HYUNDAI
B Type
Mis shift prevention tab
HGK242
When shifting into reverse gear, pull the mis- shift prevention tab and shift into reverse gear position. (B Type: 6 speed type)NOTE: o To shift into reverse, rest the lever in neutral for at least 3 seconds after your car is completely stopped. Then move the lever into the reverse position.
o During cold weather, shifting may be difficult until the transaxle lubricant has warmed up. This is normal and not harm- ful to the transaxle.
C070B01A-AAT Using the Clutch
The clutch should be pressed all the way to the floor before shifting, then released slowly. The clutch pedal should always be used after fully returning to the original position. Do not rest your foot on the clutch pedal while driving. This can cause unnecessary wear. Do not partially engage the clutch to hold the car on an incline. This causes unnecessary wear. Use the parking brake to hold the car on an incline. Do not operate the clutch pedal rapidly and repeatedly.
o If you 've come to a complete stop and it's hard to shift into 1st or R(Reverse), put the shift lever in N(Neutral) position and release the clutch. Press the clutch pedal back down, and then shift into 1st or R(Reverse) gear position.
o Do not use the shift lever as a handrest during driving, as this can result in pre- mature wear of the transaxle shift forks.
CAUTION:
When downshifting from fifth gear to fourth gear, caution should be taken not to inad- vertently press the gear shift lever sideways in such a manner that second gear is en- gaged. Such a drastic downshift may cause the engine speed to increase to the point that the tachometer will enter the red zone. Such over-revving of the engine may pos- sibly cause engine damage.
C070D03A-AAT Good Driving Practices
o Never take the car out of gear and coast down a hill. This is extremely hazardous. Always leave the car in gear.
o Don't "ride" the brakes. This can cause them to overheat and malfunction. Instead, when you are driving down a long hill, slow down and shift to a lower gear. When you do this, engine braking will help slow the car.
o Slow down before shifting to a lower gear. This will help avoid over-revving the engine, which can cause damage.
o Slow down when you encounter cross winds. This gives you much better control of your car.
o Be sure the car is completely stopped before you attempt to shift into reverse. The transaxle can be damaged if you do not. To shift into reverse, depress the clutch, move the shift lever to neutral, wait three seconds, then shift to the reverse position.
o Exercise extreme caution when driving on a slippery surface. Be especially careful when braking, accelerating or shifting gears. On a slippery surface, an abrupt change in ve- hicle speed can cause the drive wheels to lose traction and the vehicle to go out of control.
WARNING:
o Avoid high cornering speeds. o Do not make quick steering wheel move- ments, such as sharp lane changes or fast, sharp turns.
o Always wear your seat belts.
In a collision crash, un unbelted person is significantly more likely to die than a person wearing a seatbelt.
o The risk of rollover is greatly increased if you lose control of your vehicle at high- way speeds.
o Loss of control often occurs if two or more wheels drop off the roadway and the driver oversteers to reenter the road- way.
o In the event your vehicle leaves the road- way, do not steer sharply. Instead, slow down before pulling back into the travel lanes.
o Never exceed posted speed limits.
DRIVING YOUR HYUNDAI
C070E02GK-AAT RECOMMENDED SHIFT POINTS
The shift points as shown below are recom- mended for optimum fuel economy and perfor- mance.
A Type (5 speed)
Shift
from-to
1-2
2-3
3-4
4-5
B Type (6 speed)
Shift
from-to
1-2
2-3
3-4
4-5
5-6
Recommended
15 mph (20 km/h)
25 mph (40 km/h)
35 mph (55 km/h)
45 mph (75 km/h)
Recommended
10 mph (15 km/h)
20 mph (35 km/h)
30 mph (50 km/h)
45 mph (70 km/h)
60 mph (95 km/h)
2 DRIVING YOUR HYUNDAI
AUTOMATIC TRANSAXLE
C090A03Y-AAT
HGK174
The highly efficient Hyundai automatic transaxle has four forward speeds and one reverse speed. The individual speeds are selected au- tomatically, depending on the position of the speed selector lever. The selector lever has 2
gates; the main gate and the manual gate.NOTE: For information on manual gate operation, refer to "Sports Mode".
In the main gate, the selector lever has 4
positions, and is equipped with a button to avoid inadvertent wrong selection.NOTE:
Depress the brake pedal and push the button when shifting. Push the button when shifting. The selector lever can be shifted freely.
The first few shifts on a new vehicle, or if the battery has been disconnected, may be somewhat abrupt. This is a normal condi- tion, and the shifting sequence will adjust after shifts are cycled a few times by the T.C.M (Transaxle Control Module).
C090A02L
CAUTION:
Never shift into "R" or "P" position while the vehicle is moving.
The indicator lights in the instrument cluster indicate the selector lever position when the ignition is switched "ON". During the sports mode operation, the gear currently in use dis- plays in the numeral indicator.
C090B01A-AAT The function of each position is as fol- lows:
o P (Park):
C090C01A-AAT o R(Reverse):
C090F01GK-GAT Sports Mode
Use for backing up the vehicle. Bring the car to a complete stop before shifting the selector lever to "R" position.
Use to hold the vehicle in place when parked or while starting the engine. Whenever parking the car, apply the parking brake and shift the selec- tor lever to the "P" (Park) position.
C090D02O-AAT o N (Neutral):
DRIVING YOUR HYUNDAI
CAUTION:
Never place the selector lever in the "P" (Park) position unless the vehicle is fully stopped. Failure to observe this caution will cause severe damage to the transaxle.
In the "N" position, the transaxle is in neutral, which means that no gears are engaged. The engine can be started with the shift lever in "N" position, although this is not recommended except if the engine stalls while the car is moving.
C090E01O-AAT o D(Drive):
Use for normal driving. The transaxle will auto- matically shift through a four gear sequence.
HGK175
Whether the vehicle is stationary or in motion, sports mode is selected by pushing the selector lever from the "D" position into the manual gate. To return to "D" range operation, push the selector lever back into the main gate. In sports mode, moving the selector lever back- wards and forwards can make rapid gearshifts simple. In contrast to a manual transaxle, the sports mode allows gearshifts with the accel- erator pedal depressed. UP (+) : Push the lever forward once to shift up one gear. DOWN (-) : Pull the lever backwards once to shift down one gear. SKIP : By rapidly moving the selector forward or backward twice, it is possible to skip one gear, i.e. 1st to 3rd or 3rd to 1st .2 DRIVING YOUR HYUNDAI 10
CAUTION:
o In sports mode, the driver must execute shifts in accordance with prevailing road conditions, taking care to keep the en- gine speed below the red zone.
o For engine protection, upward shifts are made automatically when the engine rpm reaches the red zone.
o By rapidly moving the selector lever backwards (-) twice it is possible to skip one gear by using the sports mode. Since sudden engine braking and/or rapid acceleration can cause a loss of traction, however, downshifts must be made carefully in accordance with the vehicle's speed.
NOTE: o In sports mode, only the four forward gears can be selected. To reverse or park the vehicle, move the selector lever to the "R" or "P" position as required.
o In sports mode, downward shifts are made automatically when the vehicle slows down. When the vehicle stops, 1st gear is automatically selected.
o To maintain the required levels of ve- hicle performance and safety, the sys- tem may not execute certain gearshifts when the selector lever is operated.
o Before driving away from a stop on a slippery road, push the selector lever forward into the +(UP) position. This causes the transaxle to shift into 2nd gear which is better for smooth driving away on a slippery road. Push the selec- tor lever to the -(DOWN) side to shift back to 1st gear.
C090H01L-GAT NOTE: o For smooth and safe operation, depress the brake pedal when shifting from "Neu- tral" position or "Park" position to a forward or reverse gear.
o The ignition key must be in the "ON" position and the brake pedal fully de- pressed in order to move the shift lever from the "P" (Park) position to any of the other positions.
o It is always possible to shift from "R", "N", "D" position to "P" position. The vehicle must be fully stopped to avoid transaxle damage.
C090I02L-GAT
CAUTION:
o Shift into "R" and "P" position only when
the vehicle has completely stopped.
o Do not accelerate the engine in reverse or any of the forward positions with the brakes applied.
o Always apply the footbrake when shift- ing from "P" or "N", to "R", "D"position. o Do not use the "P" (Park) position in place of the parking brake. Always set the parking brake, shift the transaxle into "P" (Park) position and turn off the ignition when you leave the vehicle, even momentarily. Never leave the vehicle unattended while the engine is running. o Check the automatic transaxle fluid level
regularly, and add fluid as necessary.
o See the maintenance schedule for the
proper fluid recommendation.
!
WARNING:
o Avoid high cornering speeds. o Do not make quick steering wheel move- ments, such as sharp lane changes or fast, sharp turns.
o Always wear your seat belts.
In a collision crash, un unbelted person is significantly more likely to die than a person wearing a seatbelt.
o The risk of rollover is greatly increased if you lose control of your vehicle at high- way speeds.
o Loss of control often occurs if two or more wheels drop off the roadway and the driver oversteers to reenter the road- way.
o In the event your vehicle leaves the road- way, do not steer sharply. Instead, slow down before pulling back into the travel lanes.
o Never exceed posted speed limits.
C090N02O-AAT Good Driving Practices
o Never move the gear selector lever from "P" or "N" to any other position with the accelera- tor pedal depressed.
o Never move the gear selector lever into "P"
when the vehicle is in motion.
o Be sure the car is completely stopped before
you attempt to shift into "R".
o Never take the car out of gear and coast down a hill. This may be extremely hazard- ous. Always leave the car in gear when moving.
o Do not "ride" the brakes. This can cause them to overheat and malfunction. Instead, when you are driving down a long hill, slow down and shift to a lower gear. When you do this, engine braking will help slow the car. o Slow down before shifting to a lower gear. Otherwise, the lower gear may not be en- gaged.
o Always use the parking brake. Do not de- pend on placing the transaxle in "P" to keep the car from moving.
o Exercise extreme caution when driving on a slippery surface. Be especially careful when braking, accelerating or shifting gears. On a slippery surface, an abrupt change in ve- hicle speed can cause the drive wheels to lose traction and the vehicle to go out of control.
DRIVING YOUR HYUNDAI
GOOD BRAKING PRACTICES
11
C130A01A-AAT
WARNING:
Nothing should be carried on top of the shelf panel behind the rear seat. If there were an accident or a sudden stop, such objects could move forward and cause damage to the vehicle or injure the occu- pants.
o After being parked, check to be sure the parking brake is not engaged and that the parking brake indicator light is out before driving away.
o Driving through water may get the brakes wet. They can also get wet when the car is washed. Wet brakes can be dangerous! Your car will not stop as quickly if the brakes are wet. Wet brakes cause the car to pull to one side. To dry the brakes, apply the brakes lightly until the braking action returns to normal, taking care to keep the car under control at all times. If the braking action does not return to normal, stop as soon as it is safe to do so and call your Hyundai dealer for assistance.
o Under some conditions your parking brake can freeze in the engaged position. This is most likely to happen when there is an accumulation of snow or ice around or near the rear brakes or if the brakes are wet. If there is a risk that the parking brake may freeze, apply it only temporarily while you put the gear selector lever in "P" (automatic) or in first or reverse gear (manual transaxle) and block the rear wheels so the car cannot roll. Then release the parking brake.
o Do not hold the vehicle on the upgrade with the accelerator pedal. This can cause the transmission to overheat. Always use the brake pedal or parking brake.
ANTI-LOCK BRAKE SYSTEM (ABS)
C120A02A-AAT (If installed)
The Anti-Lock Brake System (ABS) is designed to prevent wheel lock-up during sudden braking or on hazardous road surfaces. The ABS con- trol module monitors the wheel speed and con- trols the pressure applied to each brake. Thus, in emergency situations or on slick roads, ABS will increase vehicle control during braking.
NOTE: During ABS operation, a slight pulsation may be felt in the brake pedal when the brakes are applied. Also, a noise may be heard in the engine compartment while braking. These conditions are normal and indicate that the anti-lock brake system is functioning properly.
2 DRIVING YOUR HYUNDAI 12
o Don’t coast down hills with the car out of gear. This is extremely hazardous. Keep the car in gear at all times, use the brakes to slow down, then shift to a lower gear so that engine braking will help you maintain a safe speed. o Don’t "ride" the brake pedal. Resting your foot on the brake pedal while driving can be dangerous because it can result in the brakes overheating and losing their effectiveness. It also increases the wear of the brake com- ponents.
o If a tire goes flat while you are driving, apply the brakes gently and keep the car pointed straight ahead while you slow down. When you are moving slowly enough for it to be safe to do so, pull off the road and stop in a safe place.
o If your car is equipped with an automatic transaxle, don’t let your car creep forward. To avoid creeping forward, keep your foot on the brake pedal when the car is stopped.
o Use caution when parking on a hill. Engage the parking brake and place the gear selec- tor lever in "P" (automatic transaxle) or in first or reverse gear (manual transaxle). If your car is facing downhill, turn the front wheels into the curb to help keep the car from rolling. If your car is facing uphill, turn the front wheels away from the curb to help keep the car from rolling. If there is no curb or if it is required by other conditions to keep the car from rolling, block the wheels.
!
WARNING:
ABS will not prevent accidents due to im- proper or dangerous driving maneuvers. Even though vehicle control is improved during emergency braking, always main- tain a safe distance between you and ob- jects ahead. Vehicle speeds should always be reduced during extreme road condi- tions. The braking distance for cars equipped with an anti-lock braking system may be longer than for those without it in the following road conditions. During these conditions the vehicle should be driven at reduced speeds.
o Driving on rough, gravel or snow-cov-
ered roads.
o Driving with tire chains installed. o Driving on roads where the road surface is pitted or has different surface height.
The safety features of an ABS equipped vehicle should not be tested by high speed driving or cornering. This could endanger the safety of yourself or others.
TRACTION CONTROL SYSTEM (TCS)
C300A03Y-GAT (If installed)