- 1996 Chevrolet S10 Owners Manuals
- Chevrolet S10 Owners Manuals
- 2001 Chevrolet S10 Owners Manuals
- Chevrolet S10 Owners Manuals
- 1999 Chevrolet S10 Owners Manuals
- Chevrolet S10 Owners Manuals
- 1997 Chevrolet S10 Owners Manuals
- Chevrolet S10 Owners Manuals
- 1994 Chevrolet S10 Owners Manuals
- Chevrolet S10 Owners Manuals
- 2002 Chevrolet S10 Owners Manuals
- Chevrolet S10 Owners Manuals
- 2003 Chevrolet S10 Owners Manuals
- Chevrolet S10 Owners Manuals
- 2004 Chevrolet S10 Owners Manuals
- Chevrolet S10 Owners Manuals
- 2000 Chevrolet S10 Owners Manuals
- Chevrolet S10 Owners Manuals
- 1995 Chevrolet S10 Owners Manuals
- Chevrolet S10 Owners Manuals
- Download PDF Manual
-
piece of old carpet or a couple of burlap bags to help provide traction. Be sure you properly secure these items in your vehicle. Driving on Snow or Ice Most of the time, those places where your tires meet the road probably have good traction. However, if there is snow or ice between your tires and the road, you can have a very slippery situation. You’ll have a lot less traction or “grip” and will need to be very careful.
4-39
Whatever:the G-ondition -- smooth ice, packe.d, blowing or loose: snow -- drive with Cautibn. Accelerate gently. Try not to break the fragile. traction. If you accelerate t6o fait, the dr5v-e whee1.s will spin-and polish the -surface under the tires even more.. Your anti-lock brakes improve your vehicle’s stability when you,make- a hard stop on a slippery road. Even tho.ugh you have an anti-lock brxking system, you’ll’ want to begin stopping sooner tha-n you would on dry pavement. S,ee: “Anti-Lo-ck” in the Index.
Allow greater following distance :on any slippery road. Watch for dippery spots. The road might be fine until you hit a,spat.th&s covered. with ice. Qn an .otherwise clear road,: ice -patches may app-ear in shaded areas where the sun mn’t reach/ arou-nd clump>s of. trees, :behind buikdings under Sometiines the:surface of a curve air an overpa% may remain icy when the surrounding raxds are clear. If you see a-patch &ice ahead of YOLI-, brake:before you axe on it, Try notto brake while you’=re .actually on .the ice, .and avoid sadden st_e.Gring maneuvers.
bridges.
Wh8t’s:the worst time for this? “Wet-.ice.” Very cold snow or-ice-can be slick and hard to drive on. But wet ice c.m- be even m-ore. trouble be-cause -it ‘may .offer the 1-east iraction of all. You can get wet ice when it’s about fxce.zag C32”F; 0°C) .and fieeziag rain begins tQ fall. Try to avoid driving .on wet ice untG salt and sand crews can get there.
If You're Caught i.n a Blizzard
Tie B red cloth to your vehicle to alert police that you've been stopped by the snow. Put on extra clothing or wrap a blanket around you. Ityou have' no blankets or extra .clothing, make .body insulators fmm newspapers, burlap bags, rags , floor mats. -- anything you can wrap around yourself :or tuck under your clothng to keep w m .
If you are stoppcd by heavy snow, you could be in :a serious situat-ion. You should probably stay with your vehicle unless you h o w for sure th.at you are near help and you can hike thr0u.g-h the snow. Here.are. some things to-do. to: su-mrnoh help and keep yourself and your passengers safk;
.Turn on your hazaxl flashers.
You can ran the. engine to keep. warm, b.ut be cmeful.
. .
4-41
Snow can trap exhaust gases under yo.ur vehicle. This.can cause deadly CO (carbon rncmoxide) gas to get: inside. CO could overcome you and kill you. 'You can't .see it or smell it, so you might not know it is in your vehicle. Clear away snow from aruund the. base of your vehicle, especially any that is blocking your exhaust pipe. And check around again from time to time- to be.sure snow doesn't col1ect:there. Open a window just a, little on the side of the vehicle that% away froin the wind. This will help keep CO out.
Run your engine o111y as long as you h~ust. This s&veS- fu.eL When you run the engine, make it g . - a little faster than just idle. That is, push. the, accelerator..slightIy. This uses less fuel far the heat that .you get and it keeps- the. battery charg.ed. You willl neecia well-charged battery 'to restart the vehicle, and possibly for signaling later an with. your headamps.. Let the heatex run for a while. Then,. shut the-engine off and dose the window almost all the way to' p&erve the heat. Start the e.ngine again and repe.at .this only when you feel ceally qxkbmfortable from the cold. But. do it as little as possible, Preserve the fuel as- long- as you can. To help keep warm, you can get out of the vehicle. and do some .faidy vlgorous -exercises every half how os so until help comes.
Recreational Vehicle Towing (Four-wheel Drive With Manual Shift Transfer Case Only) 1 * Set the 1 2. Place an auromatic transmission in PARR (P) qr a
'king brake: firmly.
-manual transmis'siori in FIRST (1).
3. Firmly attach the vehicle .being towed to the 'to,w
vehick. Do not tow the. v&icle by the rear bumper bar. Refer to the hitch manufactu.rer's instructions.
4. Place the manual shift transfer case- shift lever in
'NEUTRAL (N).
Shifting the transfer case into NEUTRAL (N. an cause your vehicle to roll evenif the transmission is in PARK (P), for an automatic transmission, or if your vehicle is in gear, for a manual transmissi6n. You or othets could be injured. Make sure the-parking brake is firmly .set befbre you shift the transfer case into NEUTRAL (N).
5. Release the parking brake only after the -vehicle, being towed is firmly attache-d to the tow vehicie. 6; Ins-ert thei-gnitiaa key into the ignitim switch md
turn it one notch fixward of the LOCK position. This places the key in the OFF po'sitiofi; which 'ufilocks the steering column while preventing battexy draia. Unlocking the steering column will allow for proper rnovemcnt of the:front w'beel.s/tirr;s during towing.
R-ecre.ationa1 Vehicle Towing (Except Four-Wheel Drive With Manual Shift Transfer Case)
4-43
Load& Your Vehicle
Weight .Rating (GAWR). To find Qut the actual loads on your front and rear axles, you need to go to a we.igh station and weigh your-vehicle. Your dealer can help you with this. Be sure to spread out your load equally on bath sides of the centerline.. Never exceed the GVWR for your vehicle, or the GAWR hi either the front or rear axle. And, if you do have a heavy load, you- sho,uld spfead. it out. Similar appearing vehicles. may have. differeQt GVWRs and payloads. Please note the Certificatioflire. label sf your truck or consult your dealer for additional details.
The Certification/Tire.iabel is found on the driver's door edge, -above the door latch. The label shows the size of your original. tires and the inflation pressures needed to obtain the grass weight capacity of your vehicle. This is called the Gro-ss- Vehicle Weight Rating (GVWR). The GVWR includes the weight of the vehicle, all occupants, fuel, cargo aild trailer tongue weight, if pulling a-trailer. The C&tification/Tire. label also tells you the maximum weights for the front and-re,ar axl.es, called Grass Axle
In the.case of a gudden stop or collision, things carried in the bed of your truck could shift^ forward and come into the passenger area, injuring you and others. bed of your truck, you should rnake.su.re they are properly secured.
you put things in the
A CAUTION:
h CAUTION:
Do not load your vehicle any heavier than the GVWR, or either the maximum €ront .or rear GAWR. Ifyou do, parts on your vehicle can break, or it can change the way your- vehicle handles. These couId cause-you to lose control. Also, .overloading can shorten the life of your vehicle.
Using he-avier s.uspension comp'onents to get added durability might not change. your weight ratings. Ask your dealer to help you load your vehicle the right way.
I NOTICE.:
Your warranty does not cover-parts. or components that fail because of overloading.
Igs imide your vehicle. -- like suitcases, If you put t tools, p.ackages, ~r anything else -- they will go as fast as. ae. vehicle goes. 1f'yo.u have t~ st0.p or turn quickly, or if there is a crash, they'll keep going.
Things you pnt inside your vehicle can strike -and .injure people in-a- sudden stop or-turn-, 0r.m a. crash. 0. Put things in the cargo area .of your vehicle.
Try to spread the weight evenly. Never stack heavier things, like .suitcases.,. inside the vehickso that some of them are above the top.s'of 'the seats.
0- Don't leave 'an unsecured child restraint in
your vehicle.
@ When you carry something inside the vehicle, secure. it whenever yon can. +. Don't leave a seat-folded down mle!sS you
need tu.
There's also important loading information for off -road driving in this manual. See "Loading Your- Vehicle for Off-Road Driving" in the Index.
4-45
The payload capacity ;is- shown on the CertificatiodTire label. This is the maximum load cap.aeity that. Y;QU vehicle can- carry. Be- sure to includej the weight ~f the ‘occupants as part of your load.. If you a.dded any accemxies or equipment after your vehicle-left the factory, remember tQ sub&acJ the weight of these tla:ngs fi-om the payload. Your deal&- can help you. with this-. Add-on Equipment Wh-en you cary -rem-csivable items., y m may meid to put a limit on how many pe,ople you c,arry inside. your ve-hide. Be sure to weigh ycru’l; vehicle beWe you buy arid install .the new equipment.
NOTICE:
Your warranty due.m’t cover parts, or ,camp!on,ents that fai1,because of ow-rloading.
Truck-Camper Loading. In.forrnatbon This label is inside your glove box. It will tell you if your vehicle can ca.my a- slide-in camper, how much df a laad yo-ur vehicle can carry, and how to correctly spread out your I-oad. Also, it will help you match the right slide-in rcamper to your vehicle. When you c&ry a slide-in camper, the- total cargo load of -your vehicle is the weight of the Camper, plus @ evefything eke added to the- camper after-it left
the factory;
@ everything in the camper; and
all the people inside.
The Cargo Weight, Rating (CWR) is the maximum weight of; the -load ,your vehicle %.an carry. It doesn’t include the we?ght af the-people inside. But, yo~r.can figure about 150 lbs. (68, kg) for each. seating position. The total cargo load must r vehicle’s CWR.
be m ! than vour
Refer to the Truck-Camper Loading IDformation label in the gIove box for A and B dimensions. Use the rear edge-of the. load The recommended- location for the cargo center of gravity for the Cargo Weight Rating (C) is the p-oint where the mass of a body is concentrated and, if suspended at.that point, would balance the front and rear.
floor for measurement purposes.
4-47
Here is an example of proper truck and .carnper.rnatch;
Towing -a Trailer
11 you don’t use the correct equipment and. dr-ive pruperly, you can lose control when you pull a trailer. For ex.ample, if the trailer is too heavy, the brakes may not work well -- or, even at all. You; and your passengers could be seriously injured. Pull a trailer only if-you have followed ail tIie ste:ps in this sectiw. Ask your GM dealer for advice and information about towing a trailer with your vehicle.
NOTICE:
Pulling a: trailer improperly can damage your vehicle and result in costly repairs not covered by your warranty. To puli a trailer correctly, follow the advice in this part, and see your. GM dealer for important Information about towing a trailer with your vehicle.
4-49
If You Do Decide To Pull. A Trailer If you do, here are some imp-ortmt points:
'0 If you have- an automatic transsinission5. you can
use DRIVE (Dj (m,as you need to, a lower gear) when -towing a.tr-ailer. Operating your vehickin DRIVE (P) when towing a trail& will minimize. heat buildup a-nd extend the life of your transmission. If you have -a manual eansmission and Y Q U ' W ~ towing- a trailer, it-'s :better not to FIFTH (5) gear. Just drive in FOURTH (4). gear (or, as y-ou necd to, a 1Qwer ge.a).
' u s e
Three importmt considerations have to do. with weight:
the; weight Qf the- trailer,
0 the weight of the traiirer?tongne
and the weight on-your vehicle's tires.
Weight of the Trailer How he-avy can - a trail& safely be?' It depends on how yosll plan to use your rig. For example, speed, altitude, mad grades, outside -temp&ature and how much y a w vehicle is used to pull a trailer are -all important. An,d~, it can also depend an any .-special equipment that you have on your vehicle.
The follo-w%g chart shows haw much your trailer can weigh, based upon your: vehicle r n o . & l and. options. Axle Ratio Max. Trailer Wt. Vehicle 2,000.Il.?s. (90.8 kg) 2wD 2.2L Engine: 2,000 lbs. (908 kg:) 2wJ-J 5,000.lbs. (2 270 kg) 'VOREC"' 6,O.OO lhs. (2 724 kg) 4300, Auto. Trans.
3.73 4.10 3 . m 3.42
3.08
4,000 lbs. (1 g.16 kg)
4m "VORTEC" 4300 Auta:. Trans.
3.08 3 -42 3.73
4.,500 h s . (2 043 kg) 5,500 1b.s. (2 497 kg) $,5OOllbs.. (2 497 kg) 3,500 ibs. (I 589 kg,) 4,000, lbs. (1 8 1.6 kg) 4,500 lbs. (2 043 .kg)
M.ax-irnW trailer weight is c-alculated a s s u ~ q g :the driver and one. pesseiger are in the tow vehicle- and it has till ,the required traiiering equipment; The weight of additimal optional equipment, passieiigers- and cargo in the tow vehicle, must be sub,jxac.f,ed from the maximum trailer weight Two-wh&I-drive models with a. GVWR of 4,20ci lbs. (L9O7 kg) and. four-wheel-drive models w& .&e ZR2 suspen&an package are limited to a 2,@001bs. (908 kg) .trailer rating. YOU can .ask yaur dealer for our trailering information or advice, or you.,cm write us. at the address’listed in your Warranty and Owner Assis;taace. Information Booklet.. In Canada, write t~:
Weight of the Trailer Tongiue, The tongue load (A) of any trailer is- an important weight to. measure because it affects:the. total or.-gross wei.ght of your vehicle. The Gross Vehicle Weight (GVW) includes the curb weight of the vehcle, any cargo you may c.my in it, and the people who will be riding in the vehick. And..if you will tow a trailer, you must add the ton
Hitches. It’s important to have the correct hitch: -eq.uipn%ent. Cross&nds, large tru&s :gaing-by and mughmads are a few reasons why -you’ll need the-right hitch. Here -are. some rules to follow:
Total We-ight. .on Your Vehicle 9 s - Tires.
4-53
41.54
Following Distance stay at least twice as far behnd-the vehicle ahead-as YOU would when driving your vehicle without a trai1e.r. This Can help y.ou avoid situations that require heavy braking a ~ d
sudden turns.
You’ll need more passing distance-up ahead when you’re tawing a trailer. .And, .because you’re a good deal lmgei-,. you’11. need to go much farther beyond the passed,.vehicle, before. you. can rexurn tp your larrc. Backing Up Hold the. battom of the -steering w’heel with- one nand. Then, to move the- tr.ai1e.r to the left, just m Q ~ e to the left. To. move the trailer tof the-right, move your hmd.t.0 she right. Always back up d-owly possible, haveSorneone ,guide ycau.
that hmd
if
M.aking Turns
NOTICE:
Making very sharp turns while traileririg could cause the trailer to come in contact with the vehicle. Your vehicle could be damaged. Avoid 1nakin.g very sharp turns while trailering.
~~~~~
~~~~
Wkfm ‘Y6u’re turning with .a trauer, make wider turns than normal. Do this so your trailer won’t strike soft shoulders, curbs, road signs, trees .or other objects. Avoid jerky or sudden maneuvers. S,ignal well in advance.
4-55
you should use
If you have an.aut~~atic-transm~ssion, DRIVE (D) when towing a trailer. Operating your vehicle in DRIVE @) when towing a . trail& will heat:buiidup and merid the life af y.our M z e : transmissioil. Qr, if you have, a-manu-ai transmission, it’s better not to use FIFTH (S), just drive in FOURTH (4) (or, as you need to, a lower gew).
When. you tow a tixiilkr, y-our vehicle ha.s to’have extra wiring :and a- heavy-duty turn signal flasher. (included in the- optional trailering package). The arrows-on your instrument panel will flash whenever. you signal a turn 01- 1-me. change, Properly hooked .up, the &&la lamps will also flash, telling other drivers you’re about to :turn, change lanes or stop. When towing a:txailer, the. arrows. on your hstrument panel will flash for turm even if the bulbs on the trailer are burned out. Thus, you may think drivers behind you axe seeing your signal when they arenot. ICs important to check. occasionally to.be sure- the trider bulbs are. still working. Driving On .Grades Reduce speed and shiftlo dower. ge.ar. ,befure you start dawn B long -or steep downgrade. If-you do-n’t shift down, you might have to use your brakes w m u c h that they would get hot and no longer work weIl.
4-56
Parking on Hills You really should not park your vehicle, with a trailer attached, on a hll. If something goes wrong, your rig could start to move. People can be injured, and b.oth your vehicle and the trailer can be damaged. But if you ever have to park your rig on a hill, here’s how to do it: 1.
Apply your regulafbrakes, but don’t shift into PARK (P) yet, or into gear for a manual transmission. When parking uphill, turn your wheels away from the curb. When parking downhill, turn your wheels into the curb. Have someone place chocks under the trailer wheels. When the wheel chocks are in place, release the regular brakes until the chocks absorb the load. Reapply the regular brakes. Then apply your parking brake, and then shift into PARK (P), or REVERSE (R) for a manual transmission. If.you have a four-wheel-drive vehicle with a manual transfer case shift lever, be sure the transfer case is in a drive gear -- not in NEUTRAL (N). Release the regular brakes.
2. 3.
4.
5.
6.
It can be dangerous to get out of p u r vehicle if the shift lever is not fully in PARK (P) with the parking brake firmly set. Your vehicle can roll. If you have left the engine running, the vehicle can move suddenly. You or others could be injured. To be sure your vehicle won’t move, even when yoa’re on fairly level ground, use the steps that follow. If you have four-wheel drive with a manual transfer case shift lever and your transfer case is in NEUTRAL (N), your vehicle will be free to sure the transfer ca’se is in a drive gear -- not in roll, even if your shift lever is in PARK (P). So, be
NEUTRAL (N).
4-57
When You Are Re.ady .to Leave After Parking on a Hill 1. Apply your regular brakes and hold the pedal down
while you:
Start your engine; s.hift; int,o a.gear; and
.i Release tfie parking brake.
2. Let up dn the brake pedal. 3. .Drive slowly until the trailer- is ele-ar of-the chocks. 4. .Stop. and have someone pick up and store the chocks, Maintenance W-hen Trailer Towing Your vehicle will need service more. often when you're -pullilig'.a trailer. Swthe Maintenance Schedule 'for more on this. Things. that ar.e e.specizrlly import,at in trailer operation -axe automatic trmsrnission.fluid (don't overfill), engjne oil, axle lubricant, belt, cooling system and brake adjustment. Each of these is covered in this manual, and the Tndex- will help you find them. quickly. If you're traileriqg, i-t's a go0.d i,dea to review these sections before you start ,your trip ... Check periodicailp t6 see-.th-at all hitch nuts and bolts are -tight.
Trailer Wiring Harness, 'The -eight-wire harness is: stored under ysur vehicle along the rear frame crossmember. This hamess has a 30-amp feed wire with an inline fuse located by the .junction block. It has no.cmnecttor .and should he. wired by a qualified electrical technician. T.he .technician can use the fullowing c~lor:c.ode chart when connecting the -wiring harness IO yow trailer:
b NOTES.
4-60
Section 5 Problems on the Road
Here you'll:find.what ta do about some problems .that ciin "Ciel%af bfi the road.
5- 2 5-2 5-3 5-7 5-1 2
Hazard. Warning Flaihers. .Other Warning Devices Jump Starting Towing Your Vehicle Engine Overhearing
5-22 5-22 5-23 5-35 5-36
Engine Fan Noise Ita Tife Goes Flat Changirig x Flat 'Tire Compact Spare Tire (Tf Equipped) If You're Stuck: In Sand, Mud, Ice or Snow
Hazard Warning Flashe-rs
... .. . _. . . . , . . . . . . ,, n.....,.,.
Yom hazard warning flashers let you w a n others. They also kt police h o w you have. a-pmblem. Your front and rear turn signal lamp$ will flash on and off.
Press the button on -top -or the steering column all the wgy down to make your front and rear turn signal lamps. flash :on a d off.
Your hazard warnirrg flashers work no matter-what position your key is in, and even if the key isn't in. To turn off the flashers, pres the-button until the first click. and release.. When the hazard warning flashers are on, your turn signals won't work. ,The flashers -will stop if you step on the brake. Other Warning Devices If y b ~ &ry Pkflective triangles, .you can set one up at the side of the road about 300 feet (100 m) behind your vehicle.
Jump S t-arting. If your battery has run clown, you m.ay want to use another vehic1.e and some jumper cables to start your vehicle, But p1eas.e use the-folluwing steps to do it safely.
NOTICE:
Ignoring these steps could result in costly damage to your vehicle that wouldnlt b.e covered by your ww-ranty. Do not try to Start your vehicle by pushing or pulling it. This could damage your vehicle, even if you have. a m-mual transdssion. And if you have I an automatic transmis;sion, it: won’t start that way.
Batteries can hurt you. They can be dangerous because:
They contain.acid that can burn you. They contain gas that can explode or ignite. They corit&iu enough electricity to burn you.
If you don’t follow- these -steps exactly,-’some or all of-these things- can hurt you.
1. Check the other ve-hicle. 1.t must.have a 12-volt
battery with a neg,ative ground system.
I NOTICE: I€ the other system isn’t a l2-volt .systein with .a
negative ground, both vehicles, can role d-amaged.: I
NOTICE:
If you leave your radio on, it could be badly damaged. The repair wouldn't b-e covered by your warranty.
I€ your vehicle has air conditioning, the auxiliary electric fan under the. hood can start up even when- the engine- is not running and can injure you. Keep hands, clathhg and tools away'from any underhood electric fan.
5. Check that the jumper cables don’t have loose or
missing insulation. If they do, you could. get a shock. The-vehicles could be damaged too. Before you connect the cables, here are some- basic things you should know. Positive (+> will ga to positive (+) and negative (-) will go to a metal engine part. Don’t connect positive (+) to negative (-) or you’ll get a short that would damage the battery and maybe other parts too.
6. Connect the red
positive (+) cable to the positive (+) terminal of the vehicle with the dead btittery.
4. Open the hoods and locate the batteries. Find the positive (+) and negative (-) terminals on each battery.
cause battery
Using a match near .a battery can gas to explode. People have been hurt doing this, and some have been blinded. Use a flashiight if you need more light. Be sure the battery has enough water. You don’t need to add water to the Delco Freedom@ battery installed in every new GM vehicle. But if a battery has filler caps, be sure the right amount of fluid is there. .If it is‘low, add water to take care of that fist, If you don’t, explosive gas could be present. Battery fluid contains acid that can burn you. Don’t get it on you. If you accidentally get it in your eyes or on your skin, flush the place with water and get medical help immediately.
7. Don’t let the .other.end touch metal. Connect it- to the positive (+) terminal of the good battery.
8. Now connect the
black negative (-1 cable to the good battery’s negative (-> terminal. Don’t let the other end touch anything until the next step. The other end of the negative cable doesn’t go to the dead battery. It goes to.a heavy unpaiked ketal part on the engine .of the vehicle with the dead battery.
9. Attach the cable at least 18 inches (45 cm) away from the dead battery, but not near engine parts that move. The electrical connection is just as good there, but the chance of sparks getting -back to the battery is much less.
10. Now start the vehicle with the good battery and run
the engine for a while.
11. Try to start the vehicle with the dead battery. If it
won’t start after a few tries, make sure all connections are good. If it still won’t start, it probably needs service.
Fans or other moving engine parts can injure you badly. Keep your hands away from moving parts once the engines .are running.
5-6
1.2. Remove me cables in reversemder .to prevent
electrical shGrting. Take c.ae that they don’? touch each .other, or any other metal.
A. Heavy Metal Engine Part B. Good Battery C. Dead Battery
A vehicle can fall from a car carrier .i it isn't adequately secured. This can cause a .:collision9 serious personal injury and vehicle damage. The vehicle shouid.be tightly secured with chains or steel cables before it is transported. Dan% use substitutes (ropes, leather-straps, canvas webbing, etc.) that can be cut by sharp edges. underneath thedowed vehicle. Always use T-hooks inserted in the T=hook slots, Never use J-hooks. They will damage .drivetrain *and suspension components.
TO hdp avoid injury to you or! otfiws: * Never let passengers ride in a vehicle that is @ Never tow faster than safe or posted speeds. 0 Never taw "wish d.amage.d piarts not
being towed.
fully secured,
0 Never.@ under your vehicle after it has
been. I[i€ted by the tow truck. Always we s,eparate safety chains..on each .side -when towing a vehicle.
0 Newr use J-hooks. Use T-hooks instead.
When your vehicle is being towed,. h-ave the ignition key . md.& ;the OFF- position.. The ite,erin,g wliegl sli~ultl be. cla-mped in- a straightdahezd position witb a clamping &vice desi:ped for towing-service. DO fiat ust the vehicle's steering c.olumxz I-ock for this. The transmission should be in NEUTRAL (N) an-d the .transfer case, if you '31ave one, ShQuLd. be in 2HI. The p&ing.bm.ke shguld-.-lje seleased. If your vehicle has. a flqor mounted shifter and no .electrical power, the electrical.So1enoi.d lock must be .ovexKidd.m tu shi%t-.hm PARK (P> :to NEUTRAL (Nj. Follow -:these. step.8: 1. Push the'bme of the.'€e.ather shift leva boat forward
with your thumb.
3.
4.
5'.
'Move the solenoid. lever toward the driver's side to. m1oc.k it; 'While holding the solenoid lever in the unlock gosition, press the shift lever button and shift into NEUTRAL (N). Release the solenoid lever and snap the b.QgL.b.a& into place.
,... . .
Don't have your vehi-cle towed on th-e drive wheels unless you must. If -the Vehicle .must be towed--on. the drive wheels, be sure to follow the. sp.e.ad and distance restrictions Mer in this section oryour transmission will be damaged.. If these limitations must be exceeded, the0 the drive wheels have to b:e supported on .a dolly.
Front Towing; Tow.Limits. -- 35 rnph (56 k m h ) , 50 miles (-8O-km) lrehicles with fuur-whesl-drive with the electronic -transfercase o p t h must use a towing dolly under the mar whe& when towing from the fipnt.
NOTICE:
Do not tow with sling-type equipment or fascia/fog lamp damage will occur. Use wheel-lift or car-carrier equipment. Additional ramping may be. fequiped for car-earrier equipment. U k safety chains and wheel straps. Towing a vehicle over rough surfaces could damage a vehicle. Damage can occur from vehicle to ground or vehicle to wheel-lift equipment. To help avoid damage, instan a towing doIly and raise the vehicle until adequate clearance is obtained between the-ground and/or wheel-lift equipment. Do not attach winch cables or J-haoks to suspension components. when using;car-carrier eq-uipment. Always use T-hooks inserted in the T-hook-slots.
Rear Towing Tow Limits -- .35 mph (56 kwdh), 50 miles (SO kmj Vehicles with four-whe&dvive with EkctroHic transfer case option must use a towing, dolly under th.efron;t ~vheels when towing- frmn the reaz
NOTICE:
Do not tow with sling-type equipment or rear bumper valance damage will occur. Use wheel-lift , or car-carrier equipment. Additional rainping may be required for car carrier equipment. Use safety chains and wheel straps. Towing a vehicle over rough Surfaces could damage a vehicle. Damage can occur from vehicle to .ground or vehicle to wheel-lift eq-uipment. Ta help avoid darnage, install a towing dally and raise the vehicle until adequate clearance is obtained between the ground and/or wheel-lift equipment. Do not ,attach winch cables or J-hooks ta suspension components when using car-carrier equipment. Always use- T-hooks inserted in the T-hook slots.
5-11
Engine Overheating YQU will find a coolant temperature gage on your vehicle’s instrument paneI. ESteam Is Coming FroniYour Engine
5-12
Steam from an overheatdengine can burn y.ou badly, even if you just open the ho.od. Stay away from the engine if you see or hear steam toming from it. Just turn it off and get everyone away from the vehicle until it cools down. Wait until there is no sign of-steam or coolant before you open the hood. If you keep driving when your engine:is overheated, the liquids in it can catch.fire. You .or others could be badly burned. Stop your engine if it overheats,, and getmt of the vehicle until. the engine is cool.
NOTICE:
If your -engine catches fire. because you keep driving with no co.olant, your vehicle can b.e badly damaged. The costly repairs would..not. be c~overed by your warranty.
IfNo Steam Is Coming - . From Your Engine If y0.u get the overheat warning but s.ce or hear RO steam, the problem may not be too serious. Sometimes the engine can get a 1i.ttle too hot when yau: .O Climb a long hill OLI: a hot day. 0 S.top after high-speed driving. 0 Idle for long periods in traffic. e- Tow a trailer. See “Dfiving on Grades” in .the Index. If you get .the overheat warning with no sign of s-team; try this for a minute or so:- 1. If you have an air conditioner, turn it off. 2. Turn on your heater to full hot at the highest.$gm
speed and open the window as necessary.
3. 1% you’re in a. traffic jam, shift to NEUTRAL (N); otherwise, shift to the highest gear while driving -- AUTOMATlC OVERDRIVE (@) or DRIVE (D) far automatic transmissions.
If you n.0 longer have the overheat warniiqg,. you can drive. Just to besafe, driv.e slower for .about 10 minu.tes. If the warning does;n’.t come back. ofl, you can drive normdly.. If the warning c.aritinues-, pull OV&, stop, and p - ~ k y.Our- vehicle right hway. If there’s still no sign of steam, push the accelerator Uhtil the engine speed is about twice as fast-as normal idie speed. Bring the. engine speed back to- normal idle sped after two QP three minutes. Now:s.ye if the warning, stops. But &en-, if you still have the .warnhg-, twn qfl--fhc engine and get Gveryona .out af rhe whicle until it coois Eo wn.
When you decide it’s m€e to lift the, hood, here’s what you’ll see:
P- CAUTION:
If your vehicle. has air conditioning, the auxiliary electric fan under the hood can start up .even when the. engine is not running. and can injure you. Keep hands, clothing and tools away from any underhood .electric fan.
If the coolant inside the coolant recovery tank is boiling, don’t do anything else u,ntil it cools down.
A, Ccrolant R-ecovery Tank B. .Radiator Prmsure Cap C . Engine .Fan
5-14
1
heater and radiator noses, and other engine parts, can be. very hat. Don’t touch them. If you do,, you can be burned. Don’t run the engine if there is a leak. If you run the engine, it could lose all coolant. That could cause ,an engine fire, and you could be burned. Get any leak fixed before you drive the vehicle.
I NOTICE:
-.
Engine damage from running your ,engine without coolant isn’t covered by your warranty.
fine again, :See If there seems to be no leak, start the if the fan speed increases when idle sped is -doubled by pushing the -accelerator pedal down. If it doesn’t, your vehicle needs service. Turn off-the engine.
The coolant level should be at the ADD mark. If it isn’t, you may have, a-le-& in the mdiator hoses, heater hoses, radiator, water pump 01 the cdoling. system.
?mewbere else in
NOTICE:
In cold weather, water can freeze and crack.the engine, radiator, heater core and ather parts. Use the recommended coolant and the proper coolant mix.
How to, Add Csolsrnt to the Coolant Recovery Tank If you haven’t found a problem yet, but the coolmt level isn’t at ADD, add a :SO/SO mixture. of clean wnrer (prefer&bly .distilled) :and DEX-CC)OL@ (siljcate-frm) antifreeze at the coolant recovery tank. (See “Engine Coolant” in the Index for more information.)
r- Adding only plain water to your cooling system
can be da-ngerous. Plain water, or some other liquid like alcohol, can boil before the proper coolant mix win. Your vehicle’s coolant warning. system -is set.for the.pr0pe.r coolant mix. With plain water or the wrong-mix, your engine conld ,get too hQt but y.ou wouldn’t get the overheat warning. Your engine could catch fire and you or others could be burned. Use a 50/50 mix of clean water ana DEX=COOL@ coolant.
r You can be burned if you spill coolant on hot
engine parts. Coolant contains ethylene glycol and it will burn if the engine parts are hot enough. Don’t spill coolant on -a hot engine.
When the coolant in the coolant recovery tank is at ADD, start your vehicle. If the overheat warning continues, there’s one more thing you can try. You can add the. proper coolant .mix directly to the radi,ator, but be sure the cooling system is cool before you do it.
Steam and scalding Bquids from a hot cooling system can blow out and burn you badly. They are .under pressure, and if you turn the radiator
pressure cap -- even a little -- they can come out
at highspeed. Never turn the.cap when the cooling system, including: the radiator pressure cap, is hot. Wait for the cooling systemrand radiator pressure cap to cool if you ever have to turn. the pressure cap.
5-18
Wow .to Add Coolant to the Radiator
2. Then keep turning the pressur'e cap, but. now push
down as you turn it. Remove the pressure cap.
1. You can remove the pressure cap when the cooling
system, inchding the pressure cap and upper radiator hose, is no longer hot. Turn the-pressure cap slowly counterclockwise until'it first stops. (Don't press down while turning the pressure cap.) If you hear a hiss, wait for that to stop. A hiss means there is still some pressure left.
3. Fill the radiator with the proper DEX-cOOL@ co.olant mixture, up to the base of the filler neck.
4. Then fill the coolant recovery tank to the ADD mark. 5. Put the cap back on the coolant recovery tank, but
leave the pressure cap off.
5-20
6. Start the engine and let itrun until you can feel the upper radi:ator hose. getting hot. Watch out for the engine fan.
7 . By this time, the coolant level inside the filler neck may be lower. If .the level is lower, tidd more of the proper DEX-COOL@ coolant mixture through the filler neck until the level reach.es xh-e base af the filler neck.
8. Then replace the pressure cap, A,t any time during this procedure if coolant begins to flow aut of the filler ne.ck, reinstall the press-ure cap. B.e-sure the arro.ws on t.he pressure cap line up like this.
It’s unusual for a tire to “blow out’? while you’re driving, especially if you- maintain your tires properly. If-air goes out of.a..tire, it3 much more likely to le:& out sbwly. But if you should. ever have a “blowoilt,” hme are a few tips about what to expec~ -and what to do:
You.mhy alstt- hear this €annoise wheli ycju s.tart the :lutch disengages. engine. It will .go away as the fa
If a tire goes flat, avoid further tire and wheel damage by driving slowly to a level place. Turn on your hazard warning flashers.
Changing a tire can cause an injury. The vehicle can slip off the jack and roll over you or other people. You and they could be badly injured. Find a level place to change your tire. To help prevent the vehicle from moving:
I. Set the parking brake firmly. 2. Put an automatic transmission shift lever in PARK (PI or shift a manual transmission to FIRST (1) or REVERSE (R).
CAUTION: (Continued)
3. If you have a four-wheel-drive vehicle with a manual transfer case shift lever, be sure the transfer case is in a drive
gear -- not in NEUTRAL (N).
4. Turn off the engine. 5. Put the wheel blocks at the front and rear of the tire farthest away from the one being changed. That would be the tire on the other side of the vehicle, at the opposite end.
Removing the Spare.’Tire and Tools The jacking equipment you’I1 need. is .stored inside the plastic jack covef.which is behind the-fr-ont seats, -either on the center of the wall (extmded cab) ‘or ‘on the p-assenger’s side .of the wxll (regular cab).
The following steps will tell youhow to use the jack and change a tire.
This is the jack cover for the extended cab. The cover .for the re,gular cab is similar. To remove it, turn the phstic wing nu% counterclmkwis.e. Rem-ove the. J ac R cover.
Turn .the wi~%g imt. cwnterclockwise :and rem-ove the wheel blocks., jack and wheel wrench. Your spare tire is stored underneath the rear of your vehicle; See “Compact S-pare Tire” later in this section for more mformation- about the compact spare.
NOTICQ
Never remove or restow a tire frodto a stowage. psition under the vehicle while the .vehicle is suppiorted by .a jack+ Always tighten th.e tire fully against the: underside- of the vehicle when restowiqg.
. _.. - .
$ - E
Turn the wheel wrench c0unterclo'ckwiA-e t$ lower the .spare tire. Keep turning the wheel wrench irntil the spare tire can be pulled out from under .the vehicle. When the tire has been completely lowered, tilt the retainer at the end of the cable.,and pill it through the- wheel Gpening:. Puli the tire out from underthe vehicle.
To help avoid v.ehicle .damage, do not drive th-e vehicle before $he- cable is restored.
Pwf.the spare .tire nearae- flat tire.
The tools you'll be, wing include. the jack (A) and wheel wrench (€3). Your vehicle may also liava an optional hub, cap I:emov.d to-ol.
5-26
The optional hub cap removal tool is stowed with the jack. Position the hub cap removal tool i-n the notch and pull straight ,away from the wheel tQ avoid,p.otential damag,e TO the hubcap and wheel surface.
Remove. the hub cap. I€ you h v e an aluminum or plastic molded hGb :cap:, pry it off with the chisel .end of your wheel wrench. Some of the molded plastic hub caps. hme imitation wheel nuts -molded into them. The wheel wrench won’t the. fit these imitation nuts, SQ don’t try to remove them with the socket end of the’ wheel. wrench.
If you have individual wheel nut caps that cover nut, they must be- removed in order to get to the wheel nuts. Use the socket end of the wheel wrench to-rerno.ve
each
wheel nLlt
Your wheel nut. caps may attach your hub cap to the wheel, Remove these whe.el nut caps before you rake off the hub cap,
3. Fit the jack into the appropriate ho1.e nearest the
flat tire.
1. Using the wheel wrench, lomen all the wheel nuts.
Don't remove them yet.
2. Turn the jack handle clockwise slightly to raise the
jack lift head.
A. Front Frame Hole. B. Rear Frame Hole (ZR2) C. Spring Hanger Hole (Standard Pickups)
5-28
Getting under a vehicle when it is jacked up is dangerous. If the vehicle slips off the jack, you could be badly injured or killed. Never get under a vehicle when it is supported only by a jack.
I 1 NOTICE:
Raising your vehicle with the jack improperly positioned can damage the vehicle and even make the vehicle fall. To help avoid personal injury and vehicle damage, be sure to fit the jack 18t head into the proper location before raising your vehicle.
4. Raise the vehicle by turning the jack handle
clockwise. Raise the vehicle far enough off the ground so there is enough room for the spare tire to fit.
5. Remove all the wheel nuts and take off the flat-tire;
b. Remove any rust or dirt
from the wheel bolts, mounting surfaces and spare wheel.
Never use oil or grease on studs or nuts.. If you do, the nuts might come loose. Your wheel could fall off, causing a serious accident.
7 . Place the spare on the wheel mounting- surface. 8. Put the nuts on by
hand. Make sure. the c.one-shapd end is toward the wheel. Tighten each nut by hand untiI the- wheeI is held against the hub. If a nut can’t bel turned by hand,. us.e the wheel wrench. and see your deal.er as soon as possible.
Rust or dirt on the wheel, or on the parts to which it is fastened, can make the wheel nuts become loose after a t h e . Th-e wheel could come off.and cause an accident. When you change a wheel,-remove-.any rust or dirt from the places where the wheel attach.es to the vehicle. In an emergency, you can use a cloth or a paper towel todo this; but be sure to use a scraper or wire brush rater, if .you need to, to get all the rust or dirt off.
5-30
9. Lower the vehicle by turning the jack handle counterclockwise. Lower the jack completely.
10. Use the wrench.to
tighten the wheel nuts firmly in a crisscross sequence as shown.
5-31
I
Incorrect wheel nuts or imprdperly tightened wheel nuts can cause th,e-wheel to become loose and-even comeaff. This. could lead to 'an accident. F k swe'to use the corre-ct whee1 nuts. If p u have to .iiep-lsrC.e them, be sure. to get 'new GM origin.al equipment wheel nuts. Stop somewhere as soon as you can and have the nuts tightened with a torque wpsnch to 95 lb-ft (I30 Nmj.
Storing .a F1i ' or Spare .Tire and To& A CAUTION:
Storing a jack, a tire or other equipment In the passenger .compartment of the vehicle could .r.,sudden stop -or collision, loose cause injury. In equipment, could strike smneome. Stote all these in the proper place.
I NOTICE:
tiightened wheel nuts: can lead to Improperly brake - pulsatian-and r.otor damage. To avoid expe-nsive brake repairs; evenly tighten the wheel nuts in the proper sequence and to the proper tGrque s p e ~ ~ c i t i g n .
Don't use the existing hoist to store a tire with an ,aluminum wheel or it could &amage the wheel. Secure. the tire in the p i c h p bed.
Follow this diagram to store the underbody -mounted spare.
. A . . Wheel W m c h B. Hoi;$ Assembly C, Retainer D. Spring E. Tice E Valve stem (PoiritedD.own) G. Lower €3. R.aise
C..
D.. E. G. H, 1. J. Repl.ace the. j-ack cover, -if -you have one.
A. Wheel Wxensh 3. Bracket:
Compact Spare Tire (If Equippe.d) Although the compact spare-tire was fully inflated when your vehicle w.as new, it can lose air after a time. Check the. inflation pressure regularly. It should be 60 psi (420 kPa). After installing the compact spare on your vehicle, you should stop as 'soon as possible and 'm.ake-. sure your spare tire is cor-rec.tly inflated. The compact spare is made to perform well at speeds up to 65 :mph (I 05 krn/h) for distances up to 3,000 miles (5.000 km), so you can finish your trip and have your full-size tire repaired or replaceid where.you want. Of course, it's best to replace y0.w spare with a full-size tire as soon as you can. Your spare will last longer and be: in .good shape in case you-need it again.
I NOTICE:
When the compact 'spare: is installed, don't ta.ke your vehicle through an automatic car wash with guide rails, The compact spare can get caught on the rails; That can damage the tire and wheel, -and maybe other-parts of your vehicle.
A, Hub Cap Removal Tool (Some Mmiels) E. Cover (Extended Cab) %. Cover (Stand,ard Cab) D. Hub Cap Removal Tool (Some Models) E. B d t
Dan’t use your. campacl. spare .on othex vehicle-s, And don’t mix .yoat cumpact c spa^. tirem-wheel with :olher-whe;els-ar t k ~ . They won’t fit. Keep yirur. spare tire and its w h d together.
NOTICE.:
Tire chains: won’t - fit your xornpact .spare. Using .and can damage: th.em can damage.yaur ve~hicle the chains too-. Don’t use :tire chains an your CaPnpact.-spaPe.
If You’re .Stuck.: In Ice or Snow What: you d.on”t want to .do when yo.t~e vehcle is sty& i . ~ t.0 spin your wheels too fast. Tlie melhod known as ‘:rocking” can heIp you. g-et out whm you’re: stack, but you must use: caution.
explode.,. and you or oth-ers could be.injure& And, the tran3mission or other pqrts of the. .vehicle. cm. ,overheatc That :could cause an engine compartment fire :or other damage. When yo.u’re. .stuck, .spin the wheels as little-as passsble. Dan% spin the- wheels above 35 mph (55 kmh) as shown ‘on the speedometer.
NOTICE:
Spinning your wheels can destroy parts of your vehicle as we11 as the tires. If you spin the wheels too fast while shifting your transmission back and forth, you can destroy your- transmission.
For information about using tire chains on your vehicle, see “Tire Chains” in the Index. Rocking Your Vehicle To Get It Out First, turn your steering wheel left and right. That will ;clear the area around your front wheels. Then shift back ,;and forth between REVERSE (R) and a forward gear (or *with a manual transmission, between FIRST (1) or SECOND (2) and REVERSE(R)), spinning the wheels as little as possible. Release the accelerator pedal while you shift, and press lightly on the accelerator pedal when the transmission is in g,ear. If that doesn’t get you out after a few tries,. you may need to be towed out. Or, you c.an use.your recovery hooks if your vehicle. has ::them. IT you do need to be tawed out, see “Towing Your ”Vehicle” in the Index,.
U-sing the Recovery Hooks
Tour vihilfe may be equipped with recovery hooks. The recovery hooks are pmvided at the front of yo-ur vehicle. You may need to use them if you’re stuck off-road and need to be pulled to some place where you can wntinue driving.
5-37
____
The 'recovery hooks, when used, are under a lot of .force. Always p-ull the vehicle.straight out. Never pull on the hooks at a sideways angle. The'hooks could break off and you or others could be injured from the chain or cable snapping. back.
NOTICE:
Never use the recovery hooks to tow the vehicle. Your vehicle could be damaged and it would not be covered by warranty.
5-38
NOTES
.&
k% NOTES
5-40
Section 6 Service and. Appearance Care
Here:you will find inf6frriatisn about 'the care of your vehicle. This section begins with Service and fuel information,, and then it.shows how to check important fluid and lubriean~.Ievz=ls.. There vehicle, and a pmt devoteft to itsappearance c.are.
is a1s.o technical informatkm &;gut your
Fuel Fuels in Foreign Countrks Filling Your Tank Checking Things Ugdgr lhs Hood Engine Oil Air Cleaner Autam-atic Trans-missi-on Fluid.
Manual Transmission Fluid.. Hy.draulk Clutch Rear Axle Four-wheel Drive Engine' Coolant Radiator Pressare- Cap 'Thermg-sgat P6we.r. Steering Fluid
6-29 6-3.1 6- 3-5. 6 -3 5 -6-42 6-44 -6-53 6-53 6-57 6-6.1 6-62 '6-63 6-67 6-68 &'70
Windshield. Washer Fluid Brakes Battery Bulb Replacement Windshield; Wiper Blade Rephement Tires Appearance Care Cleaning the Inside of Your Vehicle Cleaning the Outside of Your Vehicle Appearance Care Materids C h a t Vehicle Identification Number (VIN) Electrical Sptem Replacement Bulbs Capacities -and Specificztions Air Conditioning Refrigerants
6" 1
Service Your GM dealer knows your vehicle best &nd wants you to be happy with k We hope you’ll gn t.0 your dealer for .dl,your Service needs. Yo,u’ll :get genuine GM parts and GM-tf&ed and supported s-ervick people. We hope you”11 want to keep your GM vehicle all GM. Genuine GM-parts have one of these marks:
Delco
Doing Your Own Service Work- If you want twdo some of your Q W ! ~ service work, ~0~1’11 wmt to get the proper GM Service Manual. It tells-you much mare about how to s-erv-ice your vehicle than thi,s manualscan. To order the proper service manual, see “Service and Owner Publications” in the Index.
Your vehicle has an air bag system. Behe. attempting to do your own service work, see “Servicing- You Air Bag-Equipp-ed Vehicle” in the Index. You should keep a record with all parts receipts -and list the rnile-age and-the date of any service work you perform. See-“Mainte,nance. Record” in the.Index,
You can be injured and your vehicle could be damaged ifyou try to do service work on a vehicle without knowing enough about it. @ Be sure you have sufficient knowledge,
experience, the proper replacement parts and tools before you attempt any vehicle maintetenance:’task. Be .sure to use the proper nuts, bolts and other fasteners. “English” and ‘‘m.etric’’ fasteners can be easily confused. If you ‘use the wrong fasteners, parts can later break or fall off, You could be hurt.
i in Foreign ,Countries
' . .~ %
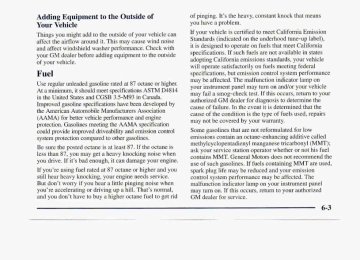
If-you pian on driving-in another country outside the United., States or Canada, .the proper fuel may be hard to find. Neveruse leaded gasoline or any other fuel not recommended in the previous. text on fuel. Costly repairs. caused by use of improper file1 w-oddn't be c.overed:'by your warranty. TQ check un fuel availability, ask an auto club, or contact a major oil company that does bt country.where you'I1 be driving. You can also write us &the following addressfor advice. Just tell us where. you're going and give your Vehicle Identification Number (VIN).
s in the
General Molars International Product Center 190.8 Colonel Sam Drive Oshawa, Ontario LlH SP7
I NOTICE:.
Your vehixle was xiat desigaed. for fk%I that contains me-thand. 'Don't use it. It can Corrode metal parts in your- fuel-system and also, damage phstie and rubb-er parts. -That damage wouldn't be covered under your warranty.
behind .a hiLged door on the driver’s side of your vehicle.
While refueling, hang the cap by the tether from the hook’on the filler door.
To take off the cap, turn it slowly to the left (counterclockwise). The cap has a spring in it; if you let go of the cap too soon, it will spring back to the right.
soline ne vapor is highly flammable. It bums
4- violently, and that can cause very bad injuries. Don’t smoke if you’re near gasoline or refueling your vehicle. Keep sparks, flames and smoking materials away from gasoline.
NOTICE:
for you. If you $-et
If y0.u need .a new cap, be sure to get the right type. Your dealer ean get. one the wrong type, itmay not fit properly. This-may cause your rnalfunctiori indicator lamp to li.ght and your fuel tank and emissions. system may be damaged. S;ee “Malfunction Indicator Lamp” in the Index.
Checking Things Under the Ho
To open the hood, first pull the handle- inside the vehicle on the lower left side of the instrument panel.
som-ething ignites it; y0.u could. be badly burned. Gasoline can spray out on you if you open the fuel fiIler cap too quickly. This spray can happen if your tank i s nearly full, and is more likely in hot weather. Open the fuel fiier cap slowly and wait for;ang ‘ShW’ noise to stop. Then unscte-w the cap all the way.
lam Vehicle” in- the Index.
Be- careful .not to spill gasolina. C1e.m gasoline from painted surfaces-as- S O O ~ as possible. Se-e “Clean-ing the Out; e o When y0.u put the cap back on, twn it to the right (clockwise) until you hear a cli.cking sound. Make sure you -fully install the cap. The-dia.gn
Then go to the front of the vehicle and release the secondary hood- release.
Things that burn can-get on hot engine parts and start a fire. These include liquids like gasoline, oil, coolant, brake fluid,. windshield washer and other fluids,-.and plastic or rubber. Yau or others could be burned. Be carefuL not to drop or spill things that will burn onto a hot engine.
Lift the hood, release the hood prop from its retainer .and put.the hood prop into the slot in the hood. You may have a lamp that comes on when you lift the hood.
6-7
When you.lift the hood, you’ll see these items on the 2.2L engine:
A. Coolant Recovery Tank B. Engine 011 Fill Cap and Dipstick C. Brake Master Cylinder D. Hydraulic Clutch Reservoi.r 6-8
E. Battery E Power Steering Reservoir G. Air Cleaner H. WindshieId Washer Fluid
When you lift the hood, you’ll see these items on the “VORTEC” 4300 engine:
A. Battery E. Coolant Recovery Tank C. Engine Oil Dipstick
D. Transmission Dipstick E. Engine Oil Fill F. Power Steering Reservoir
G. Brake Master Cylinder H. Air Cleaner I. Windshield Washer Fluid
Before cJosing the hood, he .sure- all the filler caps are on properly. Thin lift the hood to. relieve pressure !on the hood prop. Remove: the hood prop: from the slot in the hood and return the prop to Zts reta.iner. Then pull the hood down firmly to close. It wdl Iatch when dropped from 10 to 1.<2 inches (25 to- SO cm) without.pressing on th.e b o d -
It’s a good idea to Cheek your- engine ‘oil-every time :you get fuel. In order to get an accurate reading, the. o.iI must .be warm and th.e vehicle ‘mu.st be an level ground. The oil dipstick ,on the “VORTEC”4300eng~,eis a yellow ring.
6-10
The oil dipstick on the 2.2L engine is under the fill cap.
Checking Engine Oil Pull out the dipstick and clean it with a paper towel 01- cloth, then push it back in all the way. Remove it again, keeping the tip down, and check the level.
Turn off the engine and give the oil a few minutes to drain back into the oil pan. If you don’t, the oil dipstick might not show the actual level.
When to Add- Oil If the oil is at or below the ADD line, then .you’ll need to add at least one quart of oil. But- you m u t use the. right kind. This part explaimwhat k i r d o f ’ d to use. Fur crankcase capacity, see “Capacities and Specifications” in the Index.
What Kind of Oil to Use Oils recommended for your vehicle can be identified by looking. for the “S.tarburst” symbol. This symbol indicates that the oil has been certified by the ArneriGm Petroleum Institute- (API). Do no1 use any oil which doesmot carry this Starburst symbol.
NOTICE:
Don’t add too much oil. If your engine has. so. much dl that the oil-level gets above the cr8s.s-hatched area that shows the- proper operatiqg-rapgq, your engine cduld be damaged.
Be sure to fill it enough to~put the level somewhere in the proper operating range. Push the dipstick all the way back in when you’re though.
1 1
‘4
If you change your own oil, be sure you use oil that has the Starbursl s-yrnbol . o n the front of the oil container: If you have your oil changed for yo.u, be s.ure the oil put into your .engine is American Petr.oleum Institute certified for .gasoline engines.
You should also .use the proper viscosity oil for your vehicle., as shown in the fgliDwing chart:
RECOMMENDED SA€ VISCOSITY GRADE ENGINE OILS
FOR BEST FUEL ECONOMY AND COLD STARTING, SELECT THE LOWEST SAE VISCOSITY GRADE OIL FOR THE EXPECTEO TEMPERATURE RANGE.
LOOK
FOR THIS SYMBOL
HOT
WEATHER “F
“(
- + 3 - + 2 ‘7
+1 - $ 4
- - 7
+ 60
+ 40
+ 20
- - 1
8 -
I-
I- SI
SAE 5W-30 PREFERRED
COLD
WEATHER
DO NOT USE SAE 2OW-50 OR ANY OTHER GRADE OIL NOT RECOMMENDED
As shown in the chat, SAE 5W-30 is b.est for your vehicle. However, you can use SAE low-30 if it’s going to be 0°F (- 18 “C) or above. These- numbers on an oil container show i t s viscosity, or thickness. Do not’use other viscosity oils, such as SAE 20W-50.
I NOTICE:
Use only engine oil with the American Petroleum Institute Certified For Gasoline Engines “Starburst” symbol. Failure to use the recommended oil can result in engine damage not covered by your warranty.
GM Goodwrench’ oil meets all the requirements for your vehicle. If you are in an area where,the temperature falls below -20°F (-29°C)’ considerusing either an SAE 5W-30 synthetic oil or an SAE OW-30 oil. Both will provide easier cold starting and better protection for your engine at extremely low temperatures.
6-13
Driving undef these conditions causes eagineail to break down sooner. If' a.ny one of these is true for your vehicle, -then you need to .change, your oil and filter every 3,060..mil~s (3' 000 km] or 3 .months - whichever 0cc:U.rs first. If none of them i s true, use the lopg triplhighway maintenance schedule. Change. the bil-and filter every '7.,500 miles (1.2.5.00 km) or 1.2 months -- whicheve-r u.cc.urs first. Driving a vehicle with 3 fully warmqd engine under highway coridifians causeis engine oil- to break dawn dower.
Rem-ote Oil Filter (Four=Whe:el Drive) The access ,dcmx f m the ;re:mote:oil filter is in-the steering linkage shiqld as-sbrnbly h a t e d under the. r.adiator support. Twist the screw to unlock or lack the dom. Make sure 8 you open the door, it is securely closed. when you are finished.
-0
Most trip3 .are less. than 5 to 10 miles (8 to Xi km). This is particularly impgrtant when outsid.: tempemratures me below Freezing; Most trips include.-extensive idling (such .as fiequenr driving .in stopand-go traffic). YQU operate- yo.^ vehicle in dusty areas or a€f-roid fraquen-tly. You frkquently tow a'traila. The vehicle is .used for delivtyy ,service, police, taxi or other cornexcia1 application.
Did you know that used engine oil contains certain ,;elements that may .be.unhealthy for your skin and could even cause cancer? .Don’t let used ail stay an,yo.ur skln -for very hng. Clean your- s h n and nai1.s with ‘soap and water,.or a good hand cleaner. Wash 01 properly throw away clothing or rags containing used engine oil. (See the manufacturer’s warning-s tibout the use and disposal of- oil products.) Used oil can be a real threat. to the environment. If you change ydur owri oil, be sure to drain all- fre,e-flowing oil from the filter before disposal. Don’t ever dispose of oil by p.ut.ting it. in the trash, pouring it on the .ground, into, sewers., 01 into streams .or b0die.s of water. Instead, ,recycle it by taking it. to a place that collects used oil. If you have a problem propedy disposing .of your used oil, ask your dealer; a service station or a local recycling cen& for help.
Air Cleaner
VORTEC” 4300 Engine
To remove t.his air cleaner, remove the wing nut$ that hold the cover on, Remove the cover and lift out the air filter. Insert a new air filter, then replace the air cleaner-cover. Tighten the wing nuts to hold the cover in place.
To remove this air cleaner, .open both &mps and push the rear of:the air cleaner toward the rear of the engine compartment.
2.2L Engine
Insert a ne’w air filter. Then replace the air cleaner assembly, making certain the PCV air tube is properly -seate.d in the left-hand valve- cover and the clamps are securely fastened. Refer to- the M.aintenan.ce .Schedule to ‘determirre when to replace the ais- filter.. See “Scheduled Ma.intenance-Sel.vic.es” in the Index.
6-16
t CA . -
.-
Operating the engine with the air cleaner off can cause you or others to be burned. The air cleaner not only cleans the air, it stops. flame if -the engine backfires. If it isn’t there, and the engine backfires, you could be burned. Don’t drive with it off, and be careful working on the engine with the air cleaner off.
I NOTICE:
If the air cleaner is off, :a backfire can cause, a .dam-aging engine fire, And, dirt can easily get into your engine, which will damage it. Always have the air cleaner in place when you’re driving,
When to Check and Change .A goad time to check-your a0tomati.c transmission fluid level is when the en.gine .oil is chanzed, C.hange both the fluid an.d filter every 50,000-miles (8'3 000 km) if the vehicle is mainly driven under one or more of these conditions:
In heavy city traf€ic where the-outsi.de. temperature regularly reaches. 906F (.32'C) or higher. In hilly or mountainom terrain.
0 When doing frequent trailer towing. 0 Uses. such as found in taxi, police or delivery service. If you do not use your vehicle under any of the-se cqnditions, the fluid and filter do not require changing. See "Scheduled Maintenance Services" in the Index, How to Check B.eCanse this operation can be a little difficult, you may cho.Oge to have this dme at your GM de-alership Service Department
If you do it ywrsiAf, be sure to follow all the instruaims here, uryclu coukd get a false re.adirig on the dipstick.
NOTICE:
Too much or too little fluid can damage- your transmission, TQO much can mean that s.ome of the fluid could come out and fall on hot engine parts or exhaust system parts, starting a fire. Be sure to getan accurate reading if .you .check .your transmission fluid.
Wait &t least.30 minutes before checking the transmissioil fluid level if.you have been driving: * When ou&ide te:mperatures a r ~ above 9C>-'F (32 O C). 0 At high spe>ed fbr.quite-.a while. 0 Tn'heavy traffic -- especidly i n hot weather.
While pulling a. trailer:
To -get the right reading, the flui,d'should be at dermal operating temperature, which- is 1:80."F to 208°F (82QG to 33°C).
Get the vehicle warmed up by driving about IS miles (24 km) when outside trnperaturas aie above .50°F (1,O"C). Z:it's~c
10 .minLites. Then
Checking the Fluid Hot or Cold 0' Park your vehicle on a level place. Keep the
eng,ine rufinihg.;
@ With the: pai.king brake aplied,, pl,ace the shift h e r
in PARK (P). '
0 With yoL!'r foot on the br'zkelpedal, move the shift lever through each gear range, pausing for abaut three se.c-onds in each: range.. Then, PO-sition the..shift lever in PARK (P).
6-18
Then, without shutting off the engine, follow these steps:
1. Flip the handle up and then pull out the dipstick and
wipe it with a clean rag or paper towel.
2. Push it back in all the way, wait three seconds and
then pull it back out again,
3.
4.
Check both sides of the dipstick, and read the lower level. The fluid level must.be in the COLD area €or a cold check or in the ROT area or.cross-hatched area for a hot check. If the fluid level is in the acceptable range, push the dipstick back in all the way; then flip the handle down to .lock thedipstick. in place.
HOW to Add Fluid Referto- the. M-aintenance Schedule t~ dtztermirie. what kind of- tram~ssion fluid to. me. See “Recommended Fluids and Lubricants:” in. the Index. Add fluid only after checking tktrmsmission fluid HOT. (A COLD check i s used .only as a reference.) If the fluid levd is low, add Only enough of the proper flvid. to bring the le,vel up t.0 the HOT area fora hat check. It doesdt take much fluid, ,generally less than Qne pint (0.5 L). Don t ove.$ll.
NOTICE:
We recommend you use only fluid labeled DEXRON@-III, because. fluid with that label is made especidy for-. your automatic transmission. .Damage caused. by fluid other than DEXRON-111 is not covered by y.our new vehicle warranty.
After srddiag fluid-, recheck the fluid Ievel as described under “How to Check.” When the-correct fluid level Ls obtained, .push the dipstick back in all the way; then flip the handle down to lock the dipstick in place.
Manual TransmisSion Fluid
A good time to have it checked is when-the engine o i l is changed. However, the fluid in your manual transmission doesn’t require charging.. How to Check Because this operation can be a little difficult, you may choose to have this done at.you-r GM dealership Service Department. ‘If YOU do it yourself, be sure. to follow all the instructions here, or you could ge.t a false reading,
NOTICE:
Too much or too little-fluid can damage your transmission. Too much can mean that same: u1 the fluid could come; out and fall on hot engine. parts or exhaust system p-arts, starting a fire. Be sure to get an accurate reading if you check your tranqmission fluid.
%heck the fluid level only when your engine is .off, the vehi-dle is parked on a level place and the lrtrarrsI’nissionisCool e’nough for you torest your fingers :on the transmissision case. Then, follow these steps:
1. Remove the filler plug. 2. Check that the lubxicant level is up.to the bott,om ~f
the fill&- plug hdle.
5. I f ’ b - f l uid level is good,. install the plug a d b e . sur&.
it is .ft111y seated. F t h e fluid level is low, add more fluid as described in the next steps.
H-OW to Add Fluid Here’s how to add fluid. Refer-to the Mailiteaance Schedule to determine what kind of fluid to use. See “Recommended Fluid-s and Lubricants” in the Index. 1. Remove the filler plug. 2. Add fluid at the filler plug ho1.e. Add ~ n I y enough fluid to bring the fluid level up to th-e bottom of the filler plug- hole.
3. Install the filler plug. Be sure the plug is fully seated. Hydraulic Clutch The hydfaulic clutch system in your vehicle is self-adjusting. A slight amount of play (1/4 inch .to 1/2 inch or 6 rnm to 12 mm) in the p.edal is normal. It isn’t a gaod ‘idea to “top off” your -clutch..fluid,, Ad,dingfluid won’t correct a leak. A fluid loss in this system could indicate-a poblem. Have the :syste.m inspected and repaired.
-6-21
When to Check and What to Use
Rear Axle When to Check and Change Lubricant R.efer to the Maintenance Schedule to determine how often .to check the 1ubric.ant and when to chaage it. See “ScheduIed Maintenance Services” in the 1ndk.x. How to Check Lub.ricant
Refer to .the M-aintenance- Schedule, Owner Checks and Services, to determine. how often you: should check the fluid h e 1 in your clutch master cylinder reservoir and for the proper fluid. See “Owner Checks and Services” a d “Fkcommended Fluids and Lubricants” In the Index. How to Check The proper fluid should be addeif$the‘levei does not reach the battornof the diaphragm when it’s in place in the reservoir. See the instructions on the re-servoir cap.
6-22
If the level is below the bottom of.the filler plug hole, you’ll need to add s o m lubricant. Add enough lubricant to raise, the level to the bottom of the filler plug hole.
What to Use Refkr to the Mainteriance Schedule to determine- what kind of lubricant to use., See “Remmmended Fluids and Lubricants” in the Index. Four- Wheel Drive Most lubricant checks in this section also apply to four-wheel-drive vehicles. However, they have two additional systems that need lubrication. Transfer Case When to Check Lubricant Refer to the Maintenance Schedule to determine how often to check the lubricant. See “Periodic Maintenance Inspections” in the Index.
How to Check Lubrimnt
If the level is below the bottom of the. filler plug hole, you’ll need to add some lubricant. Add enough lubricant to raise the level to the bottom of the filler plug hole. What to Use Refer to the Maintenance Schedule to determine what kind of lubrican-t-to use. See “Recommended Fluids and Lubricants” in the Index.
Front Axle When to Check and Change Lubricant Referto the Maitltenance Schedule -to determine haw often to check the lubricant and when to change it. See “Scheduled Maintenance S-ervic-es” in the Index. HOW to Check Lubricant
If the 1ev.el is below -the bottom of the filler plug hole, youfll need to add some lubricant.
6-24
If the differential is at aperating temperature (warm), add enough lubricant to ,raise the level to the bottom of the filler plug hole, If the differe.ntia1 is. cold, add enough lubricant to raise- the level to 1/2 inch ( 12 mm) below the filler plug hole. What to Use Refer to the Maintenance Schedule to determirie what kind of lubricant to use. See “Recommended Fluids and Lubricants” in the Index. Engine C,oolant The cooling system in your vehicle is filled with DEX-COOL@ engine coolant. This coolant is designed to remain in your vehicle for:5 year$ or 150,000 miles (240 000 km), whicheveroccurs first, if you add only DEX-COOL@ extended life coolant. The fdIowing explains your .coaling system and how to If YQU have a problem with add coolant when it i s - 1 0 ~ ~ engine overheating, see “Engine Overheating’’ in the Index.
A :50/50 mixture of water and DEX-COOL@ coolant far your vehicle will:
Give freezing protection down to -34°F (-37°C). Give boiling protection up to-265'0F (129 "C).
0 Protect against rust and corrosion. 0 Help keep the proper engine temperature. 0 Let the w h g lights and gages work as they should.
NOTICE:
When adding. coolant, It is important that you use only DEX--COOL@ (s&ate-&ee) coolant. Tf co.olant other than DEX-COOL@ is added to the system, premature. engine, heater core or engine coolant will require change sdoner -- at radiator corrosion may result. In addition, the 30,000 miles (SO 000 km) .or 24 months, whichever occurs first. Damage caused by the use of coolant other than DEX=COOL@ is not covered by your new vehicle warranty.
W.hat to Use Use a mixture of one-half clean water (preferably distilled) and one-half DEX-COOL' coolant which won't damage aluminum parts. If YOU use this mixture, you don't need to add anything else.
Adding only plain water to your co ng system can be dangerous. Plain water, or some other Iiquid.like alcohol, can boil before the proper coolant mix will. Your vehicle's coolant warning system is set for the proper coolant mix. With plain water or the wrong mix, your engme could get too hot but you wouldn't get the overheat warning. Your engme c:onld catch -6re and you or others could be burned. Use a 50/50 mix of clean water and DEX=COOLQ coolant.
6-25
Checking Coolant
When your engine i.s cold, the coolant level should be at ADD, or a little higher. When your engine is warln, the level should be up to FULL H.OT, or a little higher.
NOTICE:
If you .use an improper coolant mix, your engine conld overheat and be badly damaged. The repair cost wouldn’t be covered by p u r warranty. Too much water in the mix can freeze and crack the engine, radiator, heater core and other parts.
If you have. to add. coolant more than four times a year, have your dealer check. your cooling system.
NOTICE:
If yon use. the proper coolant, you don’t have to add extra inhibitors or additives which claim to improve the system. These can be harmful.
6-26
.Add coolant mixture at the recovery tank; bdt be c-ap$ul riot to spill.it.
Y h a n be Bmmd. if fl~~splsill coolant OM hot engine parts. Coolant contains ethylene glycol, and it will b.urn if the -engine pafts are hot enoggh. D.on’t spill coolant-.on a hQt engine.,
Turning the radiator. pre$sare c&p when the engine and radiator are. hot can. allow steam and scalding liquids to.-blow out. and burn y,ou b-adly. With the coolant recovery tank, you will alm.ost Never turn the radiator? pressure cap -- even a neve-r have- t.0 add coolant at the radiator. little -- when the engine and radiator are hot.
6-27
Thermostat Engine coolant temperature is controlled by a thermostat in the engine coolant sys-tem. The. thermostat stops the flow of coolant through the radiator until the coolant reaches a preset temperature. Power Steering Fluid
NOTICE:
Your radiator cap is a 15 psi (105 kPa) pressure-type cap and must be tightly installed to prevent coolant loss and possible engine damage from overheating. Be sure the arrows on the cap line up with the overflow tub.e on the radiator filler neck.
6-28
When to Check Power $.teering Fluid It is not necessary to regularly check power steering fluid unless you suspect there is a le.& in the,system or y m hear an unusual noise. A fluid loss in this system could indicattt a problem. Have-the .-system inspecte.d and repaired. How To -Check Power Steering Fluid When the engine compartment is cool, wipe the cap and. the top of the-reservoir ciean,.then tms.crew the cap and wipe the dipstick .with a clean rag. Replace th.ccap tind completely :tighten .it. Then remove the cap again and look at the fluid level on the dipstick. The 1evel.sh.suld be between the- ADD and FULL mxks. For the 2.2L engine, the. fluid level should be at tbe C- mark. If rieCe;sssirfr, add m l y enou.gh fluid to bring the level up to the proper range.
TO determine what kind of fluid to use, E& “Recommended Fiuids and Lubricants” in the-:Index. Always use the proper fluid. Failure to use the proper fluid can-cmse leaks and damage hoses-and seals. Windshield Washer Flu,id What to Use When you need windshield washe? fluid, be sure to read the:maaufact-’s instructions before me. If you will be operating your vehicle in an area where. the. temperature may fall below freezing, use a fluid th-at has su.fficien.t protection against free2i.n.g.
6-2.9
.NOTIICE-:
When using concentrated washer fluid, follow the manufacturer’s instructions .for adding water. Don’t mix water with rea-dy-to-use washer to freeze. fluid. Water can cause- the soIution .and damage your washer fluid. tank .and other parts of the washer system. Also, water.doe-sn’t clean as well’aswasher fluid. Fill yourwasher fluid tank only thre-elquarters full-when it’s very cold. This alIows for expansion if freezing occurs, which codd damage: the tank if it is completely full. Don’t use radiator :antifreeze in your windshield washer. It can damage your washer system and paint.
Adding Washer Fluid
dpen the cap labeled WASHER FLUID ONLY with the washer synibol on it. Add washer fluid until the tank is full.
6-30
Brakes Brake Fluid
Your brake master cylinder reservoir is ha-e. It is filled with DOT-3 brake fluid. There .are only tw.0 reasons why the brake fluid level in the reservoir might go down. The first is that, the brak.e