- 2004 Chevrolet Cavalier Owners Manuals
- Chevrolet Cavalier Owners Manuals
- 2002 Chevrolet Cavalier Owners Manuals
- Chevrolet Cavalier Owners Manuals
- 2001 Chevrolet Cavalier Owners Manuals
- Chevrolet Cavalier Owners Manuals
- 2003 Chevrolet Cavalier Owners Manuals
- Chevrolet Cavalier Owners Manuals
- 1995 Chevrolet Cavalier Owners Manuals
- Chevrolet Cavalier Owners Manuals
- 1998 Chevrolet Cavalier Owners Manuals
- Chevrolet Cavalier Owners Manuals
- 1997 Chevrolet Cavalier Owners Manuals
- Chevrolet Cavalier Owners Manuals
- 2005 Chevrolet Cavalier Owners Manuals
- Chevrolet Cavalier Owners Manuals
- 1993 Chevrolet Cavalier Owners Manuals
- Chevrolet Cavalier Owners Manuals
- 1999 Chevrolet Cavalier Owners Manuals
- Chevrolet Cavalier Owners Manuals
- 2000 Chevrolet Cavalier Owners Manuals
- Chevrolet Cavalier Owners Manuals
- 1994 Chevrolet Cavalier Owners Manuals
- Chevrolet Cavalier Owners Manuals
- 1996 Chevrolet Cavalier Owners Manuals
- Chevrolet Cavalier Owners Manuals
- Download PDF Manual
-
brochure inside your owner information portfolio for full program details.
287 I . .
Customer Assistance Information
Most bulletins apply to conditions affecting a small number of cars or trucks. Your Chevrolet dealer or a qualified technician may have to determine if a specific bulletin applies to your vehicle.
4 Service Publicatz'ons Information on how to obtain Product Service Publications and Indexes as described below is applicable only in the fifty U.S. states (and the District of Columbia) and only for cars and light trucks with GVWR less than 10,000 pounds (4 536 kg). In Canada, information pertaining to Product Service Bulletins and Indexes can be obtained by writing to:
General Motors of Canada Limited Service Publications Department 1908 Colonel Sam Drive Oshawa, Ontario L1H 8P7
!88
Chevrolet regularly sends its dealers useful service bulletins about Chevrolet products. Chevrolet monitors product performance in the field. We then prepare bulletins for servicing our products better. Now, you can get these bulletins too. Bulletins cover various subjects. Some pertain to the proper use and care of your vehicle. Some describe costly repairs. Others describe inexpensive repairs which, if done on time with the latest parts, may avoid future costly repairs. Some bulletins tell a technician how to repair a new or unexpected condition. Others describe a quicker way to fix your vehicle. They can help a technician service your vehicle better.
Individual PSP’S If you don’t want to buy all the PSP’s issued by Chevrolet for all car or truck models in the model year, you can buy individual PSP’s, such as those which may pertain to a particular model. To do this, you will first need to see our index of PSP’s. It provides a variety of information. Here’s what you’ll find in the index and how you can get one:
What bu’ll Find in the Index A list of all PSPs published by Chevrolet in a model year (1989 or later). PSP’s covering all models of Chevrolet cars or light trucks (less than l0,OOO pounds (4 536 kg) G V W R ) are listed in the same index. Ordering information so you can buy the specific PSP’s you may want. Price information for the PSP’s you may want to buy.
How bu Can Get an Index Indexes are published periodically. Most of the PSPs which could potentially apply to the most recent Chevrolet models will be listed in the most recent publication for that model year. This means you may want to wait until the end of the model year before ordering an index, if you are interested in buying PSP’s pertaining to a current model year car or truck. Some PSP’s pertaining to a particular model year vehicle may be published in later years, and these would be listed in the later year’s index. When you order an index for a model year that is not over yet, we’ll send you the most recently published issue. Check the ordering form for indexes for earlier model years.
289 I . .
Customer Assistance Information
How You Can Get an Index (CONT.) Cut out the ordering form, fill it out, and mail it in. We will then see to it that an index is mailed to you. There is no charge for indexes for the 1989-1993 model years. Toll-F’ree Telephone Number If you want an additional ordering form for an index, just call toll-free and we’ll be happy to send you one. Automated recording equipment will take your name and mailing address. The number to call is 1-800-551-4123.
A Very Important Reminder These PSP’s are meant for technicians. They are not meant for the “do-it- yourselferl’ Technicians have the equipment, tools, safety instructions, and know-how to do a job quickly and safely.
Chevrolet Service Publications You can get these by using the order form. Chevrolet Division service manuals are intended for use by professional, qualified technicians. Attempting repairs or service without the appropriate training, tools, and equipment could cause injury to you or others and damage to your vehicle that may cause it not to operate properly.
190
1993 CHEVROLET SERVICE PUBLICATIONS ORDERING INFORMATION The following publications covering the operation in this book and mailino it with wur check, money order or credit card information to Helm, Incorporated (address listed below).
and servicing of pur vehicle can be purchased by filling out the Service Publications Order Form
CURRENT PUBLICATIONS FOR 1993 CHEVROLET CAVALIER
Number
PRODUCT SERVICE PUBLICATIONS
Product Service Publications (PSP’s), are bulletins, letters and articles published for trained dealer service personnel. See Service Publica- tions listed previously in this section. A cumulative index is published quarterly during the current model year. The indexes list all PSP’s published by Chevrolet in the model year.
Form
Price
Number PSP Index
Form PSPI-93 . . . . . . . . . . . . . . . . . . . . . . . . . . . . . . . PSPI-92 . . . . . . . . . . . . . . . . . . . . . . . . . . . . . . . . . . . . . . . . . . . . . . . . . . . . . . . . . . . . . . . . . . . . . . . . . . . . . . . . . . . . . . . . . . . . .
Year 1993 1992 1991 PSPI-91 1990 PSPI-90 NOfE: Form Numbers for individual Product Service Publications may be found in the PSP Index. Prices are $4.00 for for each additional PSP on the same order.
the first PSP and $2.00
Free Free Free Free
Price
PSP Bound Bulletin Book (Complete Year Bulletins) Form
Year Description Number
1991 All PSP’S . . . . . . . . . . . . . . . . . . . . .................... 1990 All PSP’S For subscription information call Helm, Incorporated.
PSP-91-4 PSP-90-4
40.00 40.00
SERVICE MANUALS
Service Manuals have the diagnosis, repair and overhaul information on engines, transmission, axle, suspension, brakes, electrical, steer- ing, body, etc. Model 1993 Chevrolet Cavalier *Please specify special body or engine types on order form. Write information in the Form Number column. For example: Turbo, Convertible.
. . . . . . . . . . . . . ST-366-93 $43.00
OWNER’S INFORMATION Owner publications are written directly for vide basic operational information about the vehicle. The Owner’s Manual includes the Maintenance Schedule for all models. 1993 Chevrolet Cavalier Owner’s Manual
Owners and intended to pro-
In Portfollo: Includes h ~ o l i o , Owner‘s Manualand Warranty Booklet. 1993 Chevrolet Cavalier In-Portfolio $15.00 Without Portfolio: Includes Owner‘s Manual. 1993 Chevrolet Cavalier Without Portfolio
. . . . . ,10222122
.lo202145
$11.00
CURRENT & PAST MODEL ORDER FORMS
Service Publications are available for current and vehicles. To request an order form, please specify year and model name of vehicle.
past model Chevrolet
Address all inquiries to: HELM, INCORPORATED
PO. Box 07130 Detroit, MI 48207
Credit Card Orders ONLY: 1-800-782-4356 For information and inquiries call: (313) 883-1430
291 ...
I
NOTE: Dealers and Companies please provide dealer or company name, and also the name of the person to whose attention the shipment should be sent. Order payable to For purchases outside U.S.A. please write to the above address for quotation.
(ATTENTION)
DAYTIME TELEPHONE NO. CODE
TOTAL MATERIAL purchasers add 4% sales tax Handling
Charge
Canadian Postage/ Handlina U S . Funds)
0 Check or Money Helm, Inc. (USA funds only - do not send cash.) 0 Mastercard TOTAL 0 VISA ~xpiration m m Account Number:
GRAND
Date molyr:
Check here if your billing address is different from your shipping
shown.
address
, .
$3.50 $6.50
ml
:Prices are subject to change without notice and without incurring Obligation. NOTE: All listed prices are quoted
Orders for Individual product service Pubfications cannot
may be found in the psp Index, Your be directed
be filled without the and are to indude $6.50 for additional postage and handling. Requests for InanUalS printed ,.
10 Canadian General Motors dealerships.
ch additionat psp costs $2.00,
PkaS8 allow adOqUat0 time for pOSml SOlVlCe.
(CUSTOMER SIGNATURE) in U.S. funds. Canadian residentsare to make checks payable in U.S. funds in French should
. r l I.
L.!
Index
Adding
Brake Fluid ............ .222. 252 Electrical Equipment .......... 247 Engine Coolant . . . . . . .217. 250. 252 Engine Oil ......... .206. 250. 252 Hydraulic Clutch Fluid . . . . .2l5. 252 Power Steering Fluid . .220. 251. 252 Transaxle Fluid Autornatic . . . . . . . . .213. 250. 252 Manual . . . . . . . . . . .2l5. 250. 252 Windshield Washer Fluid . . . . . . . 220 Air Cleaner Filter . . . . . . . . . .209. 256 Air Conditioner . . . . . . . . . . . . . . . . 107 Alcohol. Driving Under the Influence of . . . . . . . . . . . . . . . . . . 129 Alcohol in Gasoline . . . . . . . . . . . . . 198 Aluminum Wheels Cleaning . . . . . . . . . . . . . . . . . . . . 243 Removing ................... 186 Antenna ...................... 122 Antifreeze . . . . . . . . . . . . .216. 250. 252 Anti-Lock Brake System ......... 134 Warning Light . . . . . . . . . . . . . . . . 101 Appearance Care . . . . . . . . . . . . . . . 236 Ashtrays and Lighter . . . . . . . . . . . . . 87
Audio Systems . . . . . . . . . . . . . . . . . . 111 AM/FM Stereo Radio . . . . . . . . . . 112 AM/FM Stereo Radio with Cassette Player . . . . . . . . . . . . . . 113 AM/FM Stereo Radio with Compact Disc Player . . . . . . . . . . . . . . . . . 116 Care of Audio Systems . . . . . . . . . 121 Radio Reception. Understanding . . 121 Setting the Clock . . . . . . . . . . . . . . 111 Automatic Door Locks . . . . . . . . . . . 50 Automatic Lap-Shoulder Belt
(see Safety Belts) Automatic Transaxle Adding Fluid . . . . . . . . .213, 250, 252 Brake-Transaxle Shift Interlock . . . 61 Checking Fluid . . . . . . . . . . . . . . . 211 Shifting ...................... 60 Starting the Engine . . . . . . . . . . . . . 56
Battery ...................... 223 Jump Starting . . . . . . . . . . . . . . . . 164 Battery Warning . . . . . . . . . . . .167. 223 Battery Warning Light . . . . . . . . . . . 100
Blizzard. Caught In a . . . . . . . . . . . . 159 Block Heater. Engine . . . . . . . . .59. 208 Blowout. Tire . . . . . . . . . . . . . . . . . . 184 Brake Adjustment . . . . . . . . . . . . . . . . . . 137 Fluid . . . . . . . . . . . . . . . . . . .221. 252 Master Cylinder . . . . . . . . . . . . . . 221 Parking ...................... 66 Pedal Travel . . . . . . . . . . . . . . . . . 136 Rear ....................... -136 Warning Light . . . . . . . . . . . . . . . . 100 . . . 135 Wear Indicators-Front Brakes Brake System Warning Light . . . . . . 100 Brake-Transaxle Shift
Interlock . . . . . . . . . . . . . . . . . . . . . 61 Brakes. Anti-Lock . . . . . . . . . . . . . . 134 Braking ....................... 132 Braking In Emergencies . . . . . . . . . . 137 Braking Technique . . . . . . . . . . . . . . 132 Break-In. New Vehicle Normal Driving . . . . . . . . . . . . . . . 54
Buckling Up (see Safety Belts) Bulb Replacement
Headlight . . . . . . . . . . . . . . .224. 253 Taillight . . . . . . . . . . . . . . . .225. 253
295
Capacities & Specifications . . . . . . 250 Carbon Monoxide in Exhaust . . . . . . . . . . . . . . .70. 71. 159
Cassette Tape Player (see Audio Systems) Center Console Ashtray ........... 87 Center Passenger Position ......... 32 Chains. Tire .............. .192. 236 Changing a Flat Tire ............ 184 Charging System Warning Light . . . -100 “Check Engine” Light ........... 102 “Check Gages” Light ............ 103 Checking Brake Fluid . . . . . . . . . . . . . . . . . . 221 Engine Coolant ............... 217 Engine Oil Level ............. 205 Hydraulic Clutch .............. 215 Power Steering Fluid ........... 219 Safety Belt Systems . . . . . . . . . . . . 45 Transaxle Fluid Automatic . . . . . . . . . . . . . . . . . 211 Manual . . . . . . . . . . . . . . . . . . . 213 Checking Things Under the Hood . . . 201 Chemical Paint Spotting . . . . . . . . . 245 Child Restraints ................. 35 Children and Safety Belts ..... .33. 43
Cigarette Lighter ................ 87 Circuit Breakers 8z Fuses ........ 247 City Driving . . . . . . . . . . . . . . . . . . 149 Cleaner. Air . . . . . . . . . . . . . .209. 256 Cleaning Aluminum Wheels . . . . . . . . . . . . 243 Antenna .................... 122 Bumpers . . . . . . . . . . . . . . . . . . . . 242 Cassette Player . . . . . . . . . . . . . . . 121 Compact Discs ............... 122 Fabric . . . . . . . . . . . . . . . . . . . . . . 238 Glass ....................... 241 Inside of Your Chevrolet ....... 237 Instrument Panel ............. 240 Leather and Vinyl ............ 240 Outside of Your Chevrolet . . . . . . 241 Safety Belts ................. 240 ScotchgardTMFabric Protection . . 239 Special Problems ............. 239 Textured-Surhce Bumper Coven . . 242 Underbody Maintenance . . . . . . . 245 Warnings .. .236. 237. 238. 240. 243 Waxing ..................... 243 Weatherstrips . . . . . . . . . . . . . . . . 244 White Sidewall Tires . . . . . . . . . . 243 Windshield . . . . . . . . . . . . . . . . . . 241
Clock. Setting the ............... 111 Clutch. Hydraulic Adding Fluid . . . . . . . . . . . .215. 252 Checking Fluid .............. -215 Comfort Controls Air Conditioning System . . . . . . . 107 Climate Control System ........ 106 Ventilation ................... 110 Compact Disc Player (see Audio Systems) Compact Spare Tire ............. 191 Control of a Vehicle . . . . . . . . . . . . . 131 Convenience Net ................ 54 Convex Outside Mirror . . . . . . . . . . . 85 Coolant . . . . . . . . . . . . . . . . . . . . . . . 216 Checking & Adding .. .217. 250. 252 Low Coolant Warning Light . . . . . 97 Proper Mixture to Use ......... 216 Safety Warnings About . . . .174. 176. 177. 1781 179. 217. 218. 219
Temperature Gage . . . . . . . . . . . . . 97 Cruise Control . . . . . . . . . . . . . . . . . . 74 Cup Holder .................... 87 Curves. Driving on ............. 138 Customer Assistance Information ... 281
196
Daytime Running Lights ........ -80 Dead Battery: What to Do ........ 164 Defects. Safety (see Safety Defects) Defensive Driving .............. 128 Defogger. Rear Window . . . . . . . . . . 109 Defogging Your Windows .... .106. 109 Defrosting .................... 108 Dome Light .................... 82 Door Locks .................... 49 Downshifting . . . . . . . . . . . . . . .65. W4 Driver Position .................. 23 Driving ....................... 123 At Night .................... 143 City ........................ 149 Controlling a Skid ............. 142 Defensively ................. -128 Drunken .................... 129 Freeway .................... 150 Hill and Mountain ............ 154 In a Foreign Country . . . . . . . . . . 199 In Fog, Mist and Haze . . . . . . . . . 148 In the Rain .................. 145 Long Distance . . . . . . . . . . . . . . . . 152 Loss of Control . . . . . . . . . . . . . . . 142 On Curves . . . . . . . . . . . . . . . . . . . 138 Passing ..................... 140
Through Deep Standing Water .... 58 Winter Driving ............... 157 Drunken Driving ............... 129
Easy-Entry Seat ................ 15 Electrical Equipment. Adding ..... 247 Emergencies. Braking ........... 137 Emergencies on the Road . . . . . . . . . 164 Emergencies. Steering in . . . . . . . . . 139 Emergency Starting ............. 164 Emergency Towing .............. 169 Engine Block Heater . . . . . . . . .59, 208 Engine Coolant (see Coolant) Engine Coolant Temperature Warning Engine Identification ........ .56. 246 Engine Oil .................... 205 Additives ................... 207 Checking & Adding . . . . . . . . . . .205. 250. 252 Crankcase Capacity ........... 250 Disposing of Used Oil . . . . . . . . . 209 Energy Conserving . . . . . . . . . . . . 207 Filter . . . . . . . . . . . . . . . . . . .208. 256
Gage (see Coolant)
Pressure Gage ................. 99 Warning Light ................ 98 When to Change .............. 208 Engine Overheating ............. 174 Engine Specifications ............ 255 Engine, Starting ................. 56 Automatic Transaxle ........... 57 Manual Transaxle .............. 57 Ethanol in Gasoline ............. 198 Exhaust Dangerous Gas in . . . . . . . . . .70, 159 Parking with the Engine Running . . . . . . . . . . . . . . . . .68, 71 Expectant Mothers, Use of Safety Belts . . . . . . . . . . . . . . . . . . . 27 Expressway Driving . . . . . . . . . . . . . 150 Extender. Safety Belt ............ -44 Exterior Appearance
(see Appearance Care)
Fabric Cleaning (see Appearance Care) Fan Warnings .......... .166. 167. 175 Filling the Fuel Tank ....... .200. 251 Filter. Oil . . . . . . . . . . . . .208, 250. 256 Flashers, Hazard Warning . . . . . . . . 164
297 r
Flash-to-Pass ................... 81 Flat Tire ...................... 184 Flooded Engine ................. 58 Fluid Brake ................. .221. 252 Capacities ................... 250 Hydraulic Clutch . . . . . . . . . .2l5. 252 Power Steering ...... .219. 251. 252 Transaxle Automatic . . . . . . . . .211. 250. 252 Manual .......... .2l3. 250. 252 Windshield Washer ....... .220. 252 Fluids & Lubricants ............. 252 Fog. Driving in ................. 148 Folding Rear Seats ............... l5 Freeway Driving ................ 150 French Language Manual .......... 2 Fuel ......................... 197 Alcohol in Fuel . . . . . . . . . . . . . . . 198 Capacity . . . . . . . . . . . . . . . .197. 251 Exhaust Warnings .............. 70 Filling Your Tank . . . . . . . . .200. 251 Fuels with Alcohol . . . . . . . . . . . . 198 Gage ........................ 96 In Foreign Countries . . . . . . . . . . . 199 Requirements ................ 197
198
Fuse Usage ................... 248 Fuses & Circuit Breakers ......... 247
G a i e s Coolant Temperature ........... 97 Fuel ........................ 96 Oil Pressure .................. 99 Tachometer ................... 95 Gasoline ...................... 197 Gasoline Tank. -Filling Your ............. .200. 251 Gas Station Information .......... 304 Gear Positions
(see Shlfing the Transaxle)
Gearshift Lever (see Shifting the Transaxle) Glove Box .................... i., . 53 Graphic Equalizer (see Audio Systems)
Halogen Bulbs ........... .224. 253 Hazard Warning Flashers ........ -164 Head Restraints ................. 13
Headlight & Taillight. Removing and Replacing .......... .224. 225. 253 Headlights ..................... 78 Flash-to-Pass .................. 81 High-Low Beam Changer ........ 81 Instrument Panel Intensity Control . . . . . . . . . . . . . 81 “On” Reminder ............... 79 Replacement Bulb ... .224. 225. 253 Wiring ..................... 249 Heater (see Comfort Controls) Heater. Engine Block ........ .59. 208 High Beams ............... .81. 144 Highway Hypnosis .............. 153 Hill and Mountain Roads ......... 154 ........... .a. 155 Hills. Parking on Hood Release .................. 201 Engine .................... 174 Horn ......................... 72 Hot Engine. Safety Warnings . . . . . . . . . . . . . . . .174. 202 How to Use this Manual ........... 6 Hydraulic Clutch .......... .2l5. 252 Hydroplaning . . . . . . . . . . . . . . . . . . 147
Warning. Overheated
Ignition
Identification Number. Vehicle . . . . . . . . . . . . . . . . . .56. 246 Idling Your Engine . . . . . . . . . . . .68. 71 If You're Stuck: In Sand. Mud. Ice or Snow . . . . . . . . 192 Key ......................... 48 Key Release Button . . . . . . . . . . . . 55 Positions ..................... 55 Illuminated Entry System . . . . . . . . . . 50 Indicator Lights (see Warning Lights) Infant Restraint (see Child Restraints) Inflation. Tires . . . . . . . . . . . . . . . . . 230 Inside Rearview Mirror . . . . . . . . . . . 85 Instrument Panel . . . . . . . . . . . . . . . . 93 Instrument Panel Wming'Lights . . . . 96 Intermittent Windshield Wipers . . . . . 83
J ack.
185 Jump Starting . . . . . . . . . . . . . . . . . . 164
....................
K e y Release Button . . . . . . . . . . . . . 55 Keys .......................... 48
Lane Change Indicator . . . . . . . . . . . 73 Lap-Shoulder Safety Belt . . . . . . . . . . 23 Front ..................... 23. 27 Rear ........................ 28 Use by Children . . . . . . . . . . . .33. 43 Latches. Seatback . . . . . . . . . . . . . . . . 14 Liftgate Ajar Light . . . . . . . . . . . . . . . . . . . 102 Lock ........................ 52 Lock Release . . . . . . . . . . . . . . . . . 52 Safety Warning . . . . . . . . . . . . . . . . 52 Lighter ........................ 87 Lights Daytime Running Lights . . . . . . . . . 80 Dome/Map . . . . . . . . . . . . . . . . . . . 82 Flash-to-Pass . . . . . . . . . . . . . . . . . . 81 Headlights . . . . . . . . . . . . . . . . . . . 78 Instrument Panel Intensity Control . . . 81 Rear Compartment . . . . . . . . . . . . 82 Removing & Replacing Bulbs . . . . . . . . . . . .224, 225, 253 Replacement Bulbs . . . . . . . . . . . 253 Taillights . . . . . . . . . . . . . . .225. 253 Turn Signal . . . . . . . . . . . . . . . . . . 73 Warning Lights . . . . . . . . . . . . . . . 96 Loading Your Vehicle . . . . . . . .91. 227
Locks ......................... 49 Long Distance Driving . . . . . . . . . . 152 Low Battery . . . . . . . . . . . . . . . . . . . 164 Low Oil Pressure Warning . . . . . . . . 98 Luggage Carrier . . . . . . . . . . . . . . . . . 91
Maintenance Record . . . . . . . . . . . 279 Maintenance Schedule . . . . . . . . . . 259 Malfunction Indicator Lamp (Check Engine Light) . . . . . . . . . . 102 Manual Front Seat . . . . . . . . . . . . . . . 12 Manual Sunroof . . . . . . . . . . . . . . . . . 88 Manual Transaxle Adding Fluid . . . . . . . .215. 250, 252 Checking Fluid . . . . . . . . . . . . . . . 213 Shifting ..................... 64 Starting the Engine . . . . . . . . . . . . 56 Master Cylinder. Brake . . . . . . . . . . 221 Methanol in Gasoline . . . . . . . . . . . 198 Mileage Indicator
Mirrors
(see Odometer & Speedometer) Convex Outside . . . . . . . . . . . . . . . 85 Inside Manual Day/Night ....... 85
299 m
..
Index
Manual Adjust ................ 85 Manual Remote Control . . . . . . . . . 86 Mountain Driving . . . . . . . . . . . . . . . 154
Owner Checks & Services . . . . . . . . 271 Owner’s Manual. How to Use . . . . . . . 6
N e w Vehicle Break-In Requirements . . . . . . . . . . . . . . . . . 54 Night Driving . . . . . . . . . . . . . . . . . . 143
(see Fuel Requirements)
Octane Requirements Odometer & Speedometer . . . . . . . . . 94 Oil. Engine . . . . . . . . . . . . . . . . . . . 205 Pressure Gage . . . . . . . . . . . . . . . . . 99 Quality ..................... 206 Thickness . . . . . . . . . . . . . . . . . . . 207 Used Oil . . . . . . . . . . . . . . . . . . . -209 When to Add . . . . . . . . . . . . . . . . 206 When to Change . . . . . . . . . . . . . . 208 Oil Warning Light . . . . . . . . . . . . . . . 98 Operation of Lights . . . . . . . . . . . . . . 79 Outside Rearview Mirrors . . . . . . . . . 85 Overheated Engine . . . . . . . . . . . . . . 174 Overheated Engine Coolant Warning Gage . . . . . . . . . . . . . . . 97
E i n t Spotting. Chemical . . . . . . . . . 245 Park. Shifting Into . . . . . . . . . . . .60. 67 Parking On Hills . . . . . . . . . . . . . . . . .60. 155 Over Things That Burn . . . . . . . . . 70 Torque Lock . . . . . . . . . . . . .157. 251 With the Engine
(see Appearance Care)
Running . . . . . . . . . . . . . .60. 68. 71 Parking Brake . . . . . . . . . . . . . . . . . . 66 Passenger Belts (see Safety Belts) Passing . . . . . . . . . . . . . . . . . . . .77. 140 Polishing and Waxing Power Door Locks . . . . . . . . . . . . . . . 50 Power Steering Fluid . . . . .219. 251. 252 Power Windows . . . . . . . . . . . . . . . . . 72 72 Pregnancy. Use of Safety Belts During ...................... 27 Problems on the Road . . . . . . . . . . . 163 Publications (see Service Publications)
Switch .....................
Power Window Lock-out
(see Overheated Engine)
Radiator Overheating Radiator Pressure Cap . . . . . . . . . . . 219 Radio (see Audio Systems) Reading Light . . . . . . . . . . . . . . . . . . 82 Rear Safety Belt Comfort Guides .... 30 Rear Seat. Split Fold-Down . . . . . . . . 15 Rearview Mirrors . . . . . . . . . . . . . . . 85 Rear Window Defogger . . . . . . . . . . 109 Reclining Seatbacks . . . . . . . . . . . . . . 12 Replacement Bulbs . . . . . . . . . . . . . 253 Replacement Fuses . . . . . . . . . . . . -248 Replacement Parts . . . . . . . . . . . . . . 256 Replacement. Windshield Wiper . . . 227 Replacing Safety Belts . . . . . . . . . . . . 45 Replacing Tires . . . . . . . . . . . . . . . . 232 Replacing Wheels . . . . . . . . . . . . . . 234 Reporting Safety Defects . . . . . . . . . 286 . . . . . . . . . . . . . . . -35 Restraints. Child Road Signs .................... 124 Color ...................... 124 Shape ...................... 125 Symbols .................... 126 Traffic Lights . . . . . . . . . . . . . . . . 126 Your Own Signals . . . . . . . . . . . . . 127 . . . . . . . . 154 Roads. Hill and Mountain
Rocking Your Vehicle . . . . . . . . . . . . 193 Stuck. If You Are . . . . . . . . . . . . . 192 Roof Luggage Carrier . . . . . . . . . . . . . 91 Rotation. Tire . . . . . . . . . . . . . . . . . . 231
S afety Belts .................... 17 Adults ....................... 22 Automatic Lap-Shoulder Belt . . . . . 23 Care ....................... 240 Center Passenger Position . . . . . . . 32 Checking .................... 45 Children . . . . . . . . . . . . . . . . . .33. 43 Child Restraints . . . . . . . . . . . . . . . 35 Child Restraints-How to Install Them . . . . . . . . . . . . . . . . 35 Where to Put . . . . . . . . . . . . . . . . 35 Cleaning .................... 240 Driver Position . . . . . . . . . . . . . . . 23 Extender ..................... 44 How to Wear . . . . . . . . . . . . . . . . . 22 Passenger Belts . . . . . . . . . . . . . . . . 27 Pregnancy, Use During . . . . . . . . . . 27 Rear Safety Belts . . . . . . . . . . . . . . 28 Replacement . . . . . . . . . . . . . . : . . 45
Questions & Answers . . .21. 25. 44. 45
Child Restraints.
Right Front. Adult Passenger . . . . 27 Smaller Children and Babies . . . . . . . . . . . . . . . . . 34 TopStrap .................... 36 Torn . . . . . . . . . . . . . . . . . . . . . . . . 45 Twisted ..................... 26 Vehicles First Sold in Canada . . . . 23 Warning Light . . . . . . . . . . . . .18. 22 Why You Should Wear Safety Belts . . . . . . . . . . . . . . . . . 18 Safety Defects. Reporting . . . . . . . . 286 Scheduled Maintenance Services . . 262 Seat Belts (see Safety Belts) Seat Controls
Easy-Entry . . . . . . . . . . . . . . . . . . . 15 Manual 4-Way Adjustable . . . . . . . 14 Manual Front Seat . . . . . . . . . . . . . 12 Manual Reclining Seatback . . . . . . 12 Seat. Split Fold-Down Rear . . . . . . 15 Seats. Split Folding. Rear Wagon . . . . . . . . . . . . . . . . . 16 Seatback Latches . . . . . . . . . . . . . . 14 Service Parts Identification Label ...................... 246 Service Publications . . . . . . . . . . . . 288 Service Publications Order Form . . 291 Service Station Information . . . . . . 304
Setting the Clock . . . . . . . . . . . . . . . 111 Setting the Trip Odometer . . . . . . . . 95 Shift Light . . . . . . . . . . . . . . . . .65. 101 Shifting Into P (Park) . . . . . . . . . . . . 67 Shifting Out of P (Park) . . . . . . . . . . 69 Shifting the Transaxle Automatic Transaxle . . . . . . . . . . . 60 Manual Transaxle . . . . . . . . . . . . . 64 Signaling Turns . . . . . . . . . . . . .73, 127 Signs. Road . . . . . . . . . . . . . . . . . . . 124 Skidding ...................... 142 Snow or Ice. Driving On . . . . . . . . . 158 Snowstorm. If You’re Caught in a . . . . . . . . . . . . . . . . . . 159 Sound Equipment. Adding . . . . . . . . 111 Sound Systems (see Audio Systems) Spare Tire. Compact . . . . . . . . . . . . 191 Specifications & Capacities . . . . . . 250 Speed Control (see Cruise Control) Speedometer & Odometer . . . . . . . . . 94 Trip Odometer . . . . . . . . . . . . . . . . 95 Stains. Removing . . . . . . . . . . . . . . . 239 Starting Your Engine . . . . . . . . . . . . . 56 Automatic Transaxle . . . . . . . . . . . 57 Manual Transaxle . . . . . . . . . . . . . 57
Starting Your Vehicle if the Battery
is Dead (see Jump Starting)
30 I
Index
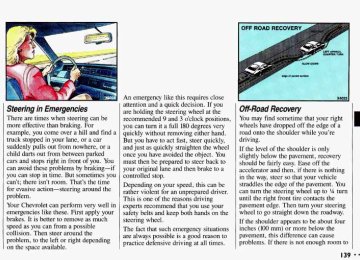
Steering
In Emergencies . . . . . . . . . . . . . . . 139 Off-Road Recovery . . . . . . . . . . . . 139 Tips ........................ 138 Steering Wheel. Tilt . . . . . . . . . . . . . . 73 Stereo Sound Systems (see Audio Systems) Storing Your Vehicle . . . . . . . . . . . . 223 Stuck. If You Are . . . . . . . . . . . . . . . 192 Sunroof ....................... 88 Sun Visors ..................... 86
Tachometer . . . . . . . . . . . . . . . . . . . 95 Taillight Bulb Replacement. . . .225. 253 Tape Player (see Audio Systems) Technical Facts & Specifications
Bulbs ...................... 253 Electrical Equipment. Add-on . . . 247 Fluid Capacities & Types . . .250, 252 Fuses & Circuit Breakers . . . . . . -247 Service Parts Identification Label ..................... 246 (VIN) . . . . . . . . . . . . . . . . . 56. 246 Temperature Gage . . . . . . . . . . . . . . . 97
Vehicle Identification Number
102
Theft ......................... 53 Thermostat .................... 219 Tilt Steering Wheel . . . . . . . . . . . . . . 73 Time. Setting the . . . . . . . . . . . . . . . . 111 Tires . . . . . . . . . . . . . . . . . . . . . . . . . 229 Buying New . . . . . . . . . . . . . . . . -232 Chains . . . . . . . . . . . . . . . . .192. 236 Flat. Changing . . . . . . . . . . . . . . . 184 Inflation .................... 230 Inspection & Rotation . . . . . . . . . . 231 Loading .................... 230 Pressure .................... 230 Quality Grading . . . . . . . . . . . . . . 232 Spare. Compact . . . . . . . . . . . . . . . 191 Tread Wear Indicators . . . . . . . . . -231 Wheel Alignment and Tire Balance . . . . . . . . . . . . . . . 234 Wheel Replacement . . . . . . . . . . . 234 When to Replace Wheels . . . . . . . 234 Winter Driving and Tires . . .157. 236 Top Strap ...................... 36 Torque Lock . . . . . . . . . . . . . . . . . . . 157 Towing a Trailer . . . . . . . . . . . . . . . . 161 Towing Your Chevrolet . . . . . . . . . . 169 Traffic Lights . . . . . . . . . . . . . . . . . . 126 Trailer Towing . . . . . . . . . . . . . . . . . 161
Transaxle. Automatic
(see Automatic Transaxle)
Transaxle. Manual
(see Manual Transaxle) Transmission. Automatic
(see Automatic Transaxle)
(see Manual Transaxle)
Transmission. Manual Trip Odometer . . . . . . . . . . . . . . . . . . 95 Trunk ......................... 51 Trunk Cargo Anchors . . . . . . . . . . 54 Trunk Convenience Net . . . . . . . . . 54 Trunk/Liftgate
Release, Lockout . . . . . . . . . . . . . 51 Turn Signal Indicator . . . . . . . . . . . . -73 Turn SignaYHeadlight Beam Lever . . . 73 Cruise Control . . . . . . . . . . . . . . . . 74 Headlight High/Low Beam . . . . . . 81 Turn & Lane Change Indicator . . . 73
Unleaded Gasoline . . . . . . . . . . . . . 197 Upholstery Care . . . . . . . . . . . . . . . . 238 Upshift Indicator Light . . . . . . . .65. 101 Urban Driving . . . . . . . . . . . . . . . . . 149
Vehicle Damage Warnings . . . . . . . . . 7 Vehicle Identification Number (VIN) .................. .56. 246 Vehicle Loading . . . . . . . . . . . . .91. 227 Vehicle Storage . . . . . . . . . . . . . . . . 223 Vehicles First Sold in Canada . . . . . . 23 Ventilation . . . . . . . . . . . . .106. 108. 110 VIN ...................... 56. 246 Visor Vanity Mirror . . . . . . . . . . . . . . 86
Wagon Folding Rear Seats . . . . . . . . . . . . . 16 Liftgate Ajar Light ............ 102 Liftgate Lock ................. 52 Liftgate Release Button ......... 52 Rear Compartment Light ........ 82 Roof Luggage Carrier . . . . . . . . . . . 91 Taillight Bulb Replacement . . .225, 253 Warning Flashers. Hazard . . . . . . . . 164
Warning Lights . . . . . . . . . . . . . . . . . 96 Anti-Lock Brake System . . . . . . . . 101 Battery ..................... lo0 Brake ...................... 100 Charging System .............. lo0 Check Coolant ................ 97 Check Engine ................ 102 Check Gages ................. 103 Liftgate Ajar . . . . . . . . . . . . . . . . . 102 Low Coolant .................. 97 Oil ......................... 98 Safety Belt ............... .18, 22 Upshift Indicator .......... .65, 101 Washer. Windshield . . . . . .84.220, 252 Weight Gross Axle Rating (GAWR) ..... 227 Gross Vehicle Rating (GVWR) . . . . . . . . . . . . . . . . . . 227 Tire Balance ................. 234
Wheel Alignment and
Wheel Covers. How to Remove .... 188 Wheel Nuts ................... 188 Wheel Nut Torque . . . . . . . . . .190. 251 Wheel Replacement . . . . . . . . . . . . . 234 Windows Power . . . . . . . . . . . . . . . . . . .72. 249 Standard ..................... 71 Windshield Washer ..... .84. 220. 252 Windshield Washer Fluid . . .84. 220. 252 Windshield Wipers . . . . . . . . . .83. 249 Cleaning .................... 241 Windshield Wiper Blade Replacement . . . . . . . . . . . . . . . . 227 Winter Driving . . . . . . . . . . . . . . . . 157 Driving On Snow or Ice . . . . . . . . 158 If Your Vehicle is Stuck in Deep Snow . . . . . . . . . . . . . . . . 160 Blizzard . . . . . . . . . . . . . . . . . . . 159 Wrecker Towing . . . . . . . . . . . . . . . 169
If You’re Caught in a
Service Station Information
wmusme\a wasner Iswu See Page 220
Battery /
The Delco Freedom@ battery needs no water. See Page 223
Transaxle Fluid /
Automatic: See Page 211 Manual: See Page 213
See Tire-Loading Information label on the driver’s door. See Page 230
e Tirt .
Compact Spare: 60 psi (42G &a) See Page 191
See Page 197
H
CHEVROLET
WE SUPPORT
VOLUNTARY TECHNICIAN CERTIFICATION THROUGH
National Institute for
AUTOMOTIVE
SERVICE
EXCELLENCE
C H E V R O L
C A V- A L
I E
f . .
1 9
O W N E R ‘ S
M A N U A L
0 Chevrolet Cavalier
I993 Owner’s Manual Table of Contents introduction How to Use this Manual . . . . . . . . . . . . 6 . .
. . i , . . . .
. . . . . . . 47 =
Part I Seats & Safety Belts , ‘ I Part 2 Features & Controls . . . . . Part 3 Part 4 Part 5 Part 6 Part 7 Part 8 Part 9
Comfort Controls & Audio Systems . . . I O! Your Driving and the Road . . , . . . . . . . . 123 I Problems on the Road. . . . . . . Service & Appearance Care . . . . . . . . . I95 Maintenance Schedule . . . . . . . . . . 259 r Customer Assistance Information . . . . . 281 I Index .................... 295 Service Station Information . . . . Last Page Second Printing .
Includes “Reporting Safety Defects” on page 286
10202145 B
. . .
Printed in USA
important Notes About this Manual Please keep this manual in your Chevrolet, so it will be there if you ever need it when you’re on the road. If you sell the vehicle, please leave this manual in it so the new owner can use it. This manual includes the latest information at the time it was printed. We reserve the right to make changes in the product after that time without further notice.
Note to Canadian Owners For vehicles first sold in Canada, substitute the name “General Motors of Canada Limited” for Chevrolet Motor Division whenever it appears in this manual. For Canadian Owners Who Prefer a French Language Manual Aux proprietaires canadiens: Vous pouvez vous procurer un exemplaire de ce guide en francais chez votre concessionaire ou au DGN Marketing Services Ltd., 1500 Bonhill Road, Mississauga, Ontario L5T 1C7.
Published by Chevrolet Motor Division
General Motors Corporation
The word Chevrolet, the Chevrolet emblem and the name Cavalier are registered trademarks of General Motors Corporation. The word Delco is a registered trademark of the General Motors Corporation.
@ Copyright 1992 General Motors Corporation, Chevrolet Motor Division. All rights reserved.
’ ,
. :
. >
The dynumic William C “Billy ’’ Durant shlfted gearsfram muking carriages to making cars, forming half the team that gave birth to Chevrolet.
Louis Chevrolet, the other half of the team, at the wheel of his experimental “Classic Six,” which enteredproduction in 1912. That year 2999 vehicles were produced.
In Januu y 1942, Chevrolet fictorics k were convirted to militaty production in an all-out @ort to achieve victory in Europe and the Pacific. . . but millions of Americans already owned a “Chevy.”
:re; d l
I and oflered a host
In 1932 Chevrolet introduced the Synchro-Mesh transmission of accessories- including such niceties as a clock!
, ,,-+---
The legacy of America’s favorite sportscar began in 1953, when 319 hand- assembled white Corvettes launched the
7 first use of aJiberglass body
in a
The 1957 Chevy started a romance with the American public-and was powered by an available fuel-injected V8.
60's automotive excitement included Chevrolet landmarks like the Corvette Sting Ray, the sporty Camuro, and powerplants like the legendary 327 V8.
Your new Chevrolet continues a tradition of quality and value.
m7
How to Use this Manual
Part 5: Problems on the Road This part tells you what to do if you have a problem while driving, such as a flat tire or engine overheating. Part 6: Service & Appearance Care Here the manual tells you how to keep your Chevrolet running properly and looking good. Part 7: Maintenance Schedule This part tells you when to perform vehicle maintenance and what fluids and lubricants to use. Part 8: Customer Assistance Information This part tells you how to contact Chevrolet for assistance and how to get service publications. It also gives you information on Reporting Safety Defects. Part 9: Index Here's an alphabetical listing of almost every subject in this manual. You can use it to quickly find something you want to read. Service Station Information This is a quick reference of service information. You can find it on the last page of this manual.
Using Your 1993 Chevrolet Owner's Manual Many people read their owner's manual from beginning to end when they first receive their new vehicle. This will help you learn about the features and controls for your vehicle. In this manual, you'll find that pictures and words work together to explain things quickly. There are nine parts with color-tabbed pages in this manual. Each part begins with a brief list of contents, so you can usually tell at a glance if that part contains the information you want. You can bend the manual slightly to reveal the color tabs that help you find a part.
Part 1: Seats and Safety Belts This part tells you how to use your seats and safety belts properly. Part 2: Features & Controls This part explains how to start and operate your Chevrolet. Part 3: Comfort Controls & Audio Systems This part tells you how to adjust the ventilation and comfort controls and how to operate your audio system. Part 4: Your Driving and the Road Here you'll find helpful information and tips about the road and how to drive under different conditions.
I
Satiety Warnings and Symbols You will find a number of safety cautions in this book. We use yellow and the word CAUTION to tell you about things that could hurt you if you were to ignore the warning.
L that could hurt you or other These mean there is somethiq ople.
In the yellow caution area, we tell you what the hazard is. Then we tell you what to do to help avoid or reduce the hazard. Please read these cautions. If you don’t, you or others could be hurt.
You will also find a red circle with a slash through it in this book. This safety symbol means:
Vehicle Damage Warnings Also, in this book you will find these blue notices:
NOTICE hese mean there is somct hese mean there is somct ould damage your vehicle.
Don’t Don’t do this Don’t let this happen
In the blue notice area, we tell you about something that can damage your vehicle. Many times, this damage would not be covered by your warranty, and it could be costly. But the notice will tell you what to do to help avoid the damage. When you read other manuals, you might see CAUTION and NOTICE warnings in different colors or in different words. In this manual, we’ve used the familiar words and colors that Chevrolet has used for years. You’ll also see warning labels on your vehicle. They use the same colors, and the words CAUTION or NOTICE.
7 .
How to Use this Manual
Vehicle Symbols These are some of the symbols you will find on your vehicle. For example, these symbols are used on an original battery:
These symbols are important for you and your passengers whenever your vehicle is driven:
Caution Possible Injury
Fasten Safety Belts
Door LocWUnlock
Protect Eyes by Shielding
Caustic Battery Acid Could Cause Burns
Avoid Sparks or Flames
Spark or Flame Could Explode Battery
These symbols have to do with your lights:
ai Master Lighting Switch
Turn Signal Direction
Hazard Warning Flashers
Headlight High Beam
Parking Lights
p i
These symbols are used on warning and Here are some other symbols you may indicator lights:
see:
Fuse - 1 Trunk Release
cc
These symbols are on some of your controls:
Windshield Wipers
Windshield Washer
Windshield Defroster
Engine Coolant Temperature
Battery Charging System
Fuel
Rear Window Defogger
Engine Oil Pressure
Ventilating Fan
Brake
Power Window
Anti-Lock Brakes
Lighter
Horn
Hood Release
wbl
(@I
Notes
.
H e r e YOU’II find information about the seats in your Chevrolet and how to use your safety belts properly . You can also learn about some things you should not do with safety belts .
Part I I
Seats & Safety Belts
Seats and Seat Controls . . . . . . . . . . . . . . . . . . . . . . . . . . . . . . . . . . . . . . . . . . . . . 12 SafetyBelts . . . . . . . . . . . . . . . . . . . . . . . . . . . . . . . . . . . . . . . . . . . . . . . . . . . . . . 17 How. to Wear Safety Belts Properly . . . . . . . . . . . . . . . . . . . . . . . . . . . . . . . . . . . . 22 DriverPosition . . . . . . . . . . . . . . . . . . . . . . . . . . . . . . . . . . . . . . . . . . . . . . . . . . . 23 Safety Belt Use During Pregnancy . . . . . . . . . . . . . . . . . . . . . . . . . . . . . . . . . . . . . 27 Right Front Passenger Position . . . . . . . . . . . . . . . . . . . . . . . . . . . . . . . . . . . . . . . 27 RearSeatPassengers . . . . . . . . . . . . . . . . . . . . . . . . . . . . . . . . . . . . . . . . . . . . . . . 28 Rear Safety Belt Comfort Guides . . . . . . . . . . . . . . . . . . . . . . . . . . . . . . . . . . . . . 30 Center Passenger Position . . . . . . . . . . . . . . . . . . . . . . . . . . . . . . . . . . . . . . . . . . . 32 Children . . . . . . . . . . . . . . . . . . . . . . . . . . . . . . . . . . . . . . . . . . . . . . . . . . . . . . . . . 33 Smaller Children and Babies . . . . . . . . . . . . . . . . . . . . . . . . . . . . . . . . . . . . . . . . . 34 Child Restraints . . . . . . . . . . . . . . . . . . . . . . . . . . . . . . . . . . . . . . . . . . . . . . . . . . . 35 LargerChildren . . . . . . . . . . . . . . . . . . . . . . . . . . . . . . . . . . . . . . . . . . . . . . . . . . . 43 SafetyBeltExtender . . . . . . . . . . . . . . . . . . . . . . . . . . . . . . . . . . . . . . . . . . . . . . . 44 Replacing Safety Belts After a Crash . . . . . . . . . . . . . . . . . . . . . . . . . . . . . . . . . . . 45
II m m
Seats & Safety Belts
Seats and Seat Controls This section tells you about the seats- how to adjust them-and also about reclining seatbacks and head restraints.
Reclining Front Seatback To adjust the seatback, lift the lever on the outer side of the seat and move the seatback to where you want it. Release the lever to lock the seatback. Pull up on the lever and the seat will go to an upright position. But don't have a seatback reclined if -Jour vehicle is moving.
Manual Front Seat IC" I , You can lose control of the - b vehicle if you try to adjust a manual driver's seat while the vehicle is moving. The sudden movement could startle and confuse you, or make you push a pedal when you don't want to. Adjust the driver's seat only when the vehicle is not moving.
Move the lever under the front seat to unlock it. Slide the seat to where you want it. Then release the lever and try tc move the seat with your body, to make sure the seat is locked into place.
I2
I
9u I l V l V
A Sitting in a reclined position when your vehicle is in motion can be
dangerous. Even if you buckle up, your safety belts can’t do their job
when you’re reclined like this. The shoulder belt can’t do its job because it won’t be against your body. Instead, it will be in front of you. In a crash you could go into it, receiving neck or other injuries. The lap belt can’t do its job either. In a crash the belt could go up over your abdomen. The belt forces would be there, not at your pelvic bones. This could cause serious internal injuries. For proper protection when the vehicle is in motion, have the seatback upright. Then sit well back in the seat and wear your safety belt properly.
Head Restraints Head restraints are fixed on some vehicles and adjustable on others. Slide an adjustable head restraint up or down so that the top of the restraint is closest to the top of your ears. This position reduces the chance of a neck injury in a crash. On some models, the head restraints tilt forward and rearward also.
13 D D
Seats & Safety Belts
You can lose control of the b vehicle if you try to adjust a
manual driver’s seat while the vehicle is moving. The sudden movement could startle and confuse you, or make you push a pedal when you don’t want to. Adjust the driver’s seat only when the vehicle is not moving.
Mama/ 4- Way Adjustab/e Driver’s Seat (OPTION) There are two levers at the front of the seat. The left lever adjusts the seat forward and back. The right lever adjusts the angle of the front of the seat. To Adjust the Seat’s Forward and Rearward Movement: Lift the left lever up and adjust the seat forward or back. Then release the lever and try to move the seat to be certain that it is locked in place. To Raise or Lower the Front of the Seat: Lift the right lever, and lean forward or backward.
...
14
I Front Seatback Latches
(2-DOOR MODELS) In 2-door models, the front seatback folds forward to let people get into the back seat. Your seatback will move back and forth freely, unless you come to a sudden stop. Then it will lock in place. There’s one time the seatback may not fold without some help from you. That’s if your vehicle is parked going down a fairly steep hill. To fold a front seatback forward, push the seatback toward the rear as you lift this latch. Then the seatback will fold forward. The latch must be down for the seat to work properly.
If the seatback isn’t locked, it
4 L could move forward in a sudden stop or crash. That could cause injury to the person sitting there. Always press rearward on the seatback to be sure it is locked.
Easy-Entry Seat (RS 2-DOOR AND 2-24 MODELS) The right front seat of your vehicle makes it easy to get in and out of the rear seat.
When you push down on the rear latch and tilt the right front seatback fully forward, the whole seat will slide forward. After someone gets into the rear seat area, move the right front seatback to its original position. Then move the seat rearward until it locks.
If an easyentry right front b seat isn’t locked, it can move.
In a sudden stop or crash, the person sitting there could be injured, After you’ve used it, be sure to push rearward on an easy-entry seat to be sure it is locked.
To get out, again tilt the seatback fully forward.
Split Fbld-Down Rear Seat (OPTION) To Open: Pull forward on the seat tab. To Close: Push the seatback up to its original position. Push seatback solidly up against the back plate to ensure inertial latch will hook.
Seats & Safety Belts
.-”_
To Lower the Split Folding Rear Seat: 1. There is a release lever on the side of
each seat. Pull the release lever forward and pull the seatback forward and down.
2. Push down on the filler panel and the
seatback so they lock into a level position.
Folding Rear Wagon Seats To add more cargo room, your rear seatback can be easily folded down. Be sure to check your seatback latches now and then by pushing the seatback back and forth. If they do not latch properly, have them checked by your dealer. Remember to keep safety belts clear of seat hinges and latches so they are not damaged when you raise and lower the seatback.
...
4
To Raise the Split Folding Rear Seat: 1. Push down on the edge of the
seatback and pull up the filler panel.
To Lower the One-Piece Rear Seat: 1. Pull down on the release lever located
on the right side of the seat.
2. Lift the seatback until it locks in place. Push back and forth on the seatback to be sure it is locked in place.
2. Pull the seatback forward and down. Once folded, the weight of the one- piece seatback will hold it down. To Raise the One-Piece Rear Seat: 1. Lift the seatback until it locks in place. Push back and forth on the seatback to be sure it is locked in place.
Safety Belts: They're For Everyone
This part of the manual tells you how to use safety belts properly. It also tells you some things you should not do with safety belts.
17 ...
Seats & Safety Belts
This figure lights up when you turn the key to Run or Start when your safety belt isn’t buckled, and you’ll hear a chime, too. It’s the reminder to buckle UP. n many states and Canadian provinces, le law says to wear safety belts. Here’s rhy: They work.
Safety Belts: Z7iey’re For Everyone (Cant.)
* Don’t let anyone ride where d they can’t wear a safety belt properly. If you are in a crash and you’re not wearing a safety belt, vour iniuries can be much worse. ?ou c 2 hit things inside the vehicle or be ejected from it. You can be seriously injured or killed. In the same crash, you might not be if you are buckled up. Always fasten your safety belt, and check that your passengers’ belts are fastened
properly
too.
... 18
You never know if you’ll be in a crash. If you do have a crash, you don’t know if it will be a bad one. A few crashes are very mild. In them, you won’t get hurt even if you’re not buckled up. And some crashes can be so serious, like being hit by a train, that even buckled up a person wouldn’t survive. But most crashes are in between. In many of them, people who buckle up can survive and sometimes walk away. Without belts they could be badly hurt or killed. After 25 years of safety belts in vehicles, the facts are clear. In most crashes buckling up does matter. . . a lot!
.
Why Safety Belts Work When you ride in or on anything, you go as fast as it goes. 1. For example, if the bike is going 10 mph (16 km/h), so is the child.
2. When the bike hits the block, it stops. But the child keeps going!
3. Take the simplest “car.” Suppose
it’s just a seat on wheels.
19 . . I
Seats & Safety Belts
Why Safety Belts Work (CONI:) 4. Put someone on it.
5. Get it up to speed. Then stop the
44car.” The rider doesn’t stop.
6. The person keeps going until stopped by something. In a real windshield.. . vehicle, it could be the
7. or the instrument panel.. . 20
8. or the safety belts!
With safety belts, you slow down as the vehicle does. You get more time to stop. You stop over more distance, and your strongest bones take the forces. That’s why safety belts make such good sense.
Here Are Questions Many People Ask About Safety Belts- and the Answers Q: Won’t I be trapped in the vehicle
after an accident if I’m wearing a safety belt?
A: You could be-whether you’re
wearing a safety belt or not. But you can easily unbuckle a safety belt, even if you’re upside down. And your chance of being conscious during and after an accident, so you can unbuckle and get out, is much greater if you are belted.
Q: Why don’t they just put in air
bags so people won’t have to wear safety belts?
A: ‘Air bags,’’ or Supplemental
Inflatable Restraint systems, are in some vehicles today and will be in more of them in the future. But they are supplemental systems only-so they work with safety belts, not instead of them. Every “air bag” system ever offered for sale has required the use of safety belts. Even if you’re in a vehicle that has “air bags,” you still have to buckle up to get the most protection. That’s true not only in frontal collisions, but especially in side and other collisions.
Q: If I’m a good driver, and I never
drive far from home, why should I wear safety belts?
A: You may be an excellent driver, but if you’re in an accident-even one that isn’t your fault-you and your passengers can be hurt. Being a good driver doesn’t protect you from things beyond your control, such as bad drivers. Most accidents occur within 25 miles (40 km) of home. And the greatest number of serious injuries and deaths occur at speeds of less than 40 mph (65 km/h). Safety belts are for everyone.
21
C b
I t s & Safety Belts
When the key is turned to Run or Start, W r n ~ ~ J $ ~ Safety Belt Warning Light
rw
a chime will come on for about eight seconds to remind people to fasten their safety belts, unless the driver’s safety belt is buckled. The safety belt light will also come on and stay on for about a minute. If the driver’s belt is chime nor the light will
buckled, neither the come on.
0 1’
comes on or stays on after the
\ If your safety belt light ever ont doors are closed and the iver’s belt is buckled, have your vehicle fixed. If you don’t, you might not have the protection you’d need crash.
in a
rn How to Wear Safety Belts Properly-Adults
This section is only for people of adult size.
I GAUIIUN
There are special things to know about s a k t y belts and children. And there are different des-fbr babies and smaller children. If a child will be riding in your Chwrolet, see the Index under Children and &f&y Belts. Fbllow those rules fix everyone’s protection.
First, you’ll want to know which restraint systems your vehicle has. We’ll start with the driver position.
Driver Position This section describes the driver’s restraint system.
Automatic Lap-Shoulder Belt This safety belt is called “automatic” because you don’t have to buckle up when you get into your vehicle.
Vehicles First Sold in Canada Was your Chevrolet first sold, when new, in Canada? (If it was, a sticker on the driver’s door will say “conforms to all applicable Canada motor vehicle. . . ” etc.) If so, then the rest of Part 1 does not apply to your vehicle. To learn how to use your safety belts, please read the Owner’s Manual Safety Belt Supplement. It comes with every new Chevrolet first sold in Canada.
23
Seats & Safety Belts
Automatic Lap-Shoulder Belt (CON 1) And you don't have to unbuckle when you get out. Just get into the vehicle. Then close and lock the door. Adjust the seat so you can sit up straight. (To see how, see the Index under Seat Controls.)
The lap belt should be worn as low on the hips as possible. In a crash, this applies force to the strong pelvic bones. And you'd be less likely to slide under the lap belt. If you slid under it, the belt would apply force at your abdomen. This could cause serious or even fatal injuries. The shoulder belt should go over the shoulder and across the chest. These parts of the body are best able to take belt restraining forces. The safety belt locks if there's a sudden stop or a crash.
It's possible that an automatic belt could keep you from fully opening a door. That can happen if the door was slammed shut very hard. Just close the door all the way, then slowly open it. If that doesn't fix it, then your Chevrolet needs service. We hope you'll always keep your automatic belt buckled. However, you may need to unbuckle it in an emergency.
To unbuckle the automatic belt, just push the button on the buckle.
To Reattach the Automatic Belt: 1. Close and lock the door. 2. Adjust the seat so you can sit up
straight. To see how, see the Index under Seat Controls.
3. Pick up the latch plate and pull the
belt across you. Don’t let it get twisted.
4. Push the latch plate into the buckle
until it clicks.
Q: What’s wrong with this? A: The shoulder belt is too loose. It
won’t give nearly as much protection this way.
A You can be seriously hurt if
your shoulder belt is too
loose. In a crash you would move forward too much, which could significantly increase injury. The shoulder belt should fit against your body.
25
Seats & Safety Belts
Automatic lapshoulder Belt (CONr.) Q: What’s wrong with this? A: The belt is buckled in the wrong
place. CAUTION
A You can be seriously injured if
your belt is buckled in the
wrong place like this. In a crash, the belt would go up over your abdomen. The belt forces would be there, not at the pelvic bones. This could cause serious internal injuries. Always buckle your belt into the buckle nearest you.
Q: What’s wrong with this? A: The shoulder belt is worn under the
arm. It should be worn over the shoulder at all times.
A You can be seriously injured if
you wear the shoulder belt under your arm. In a crash, your body would move too far forward, which would increase the chance of head and neck injury. Also, the belt would apply too much force to the ribs, which aren’t as strong as shoulder bones. You could alSQ severely injure internal organs like your liver or spleen.
Q: What’s wrong with this? A: The belt is twisted across the body.
‘Ab You can be seriously injured
a twisted belt. In a crash, you wouldn’t have the full width of the belt to take impact forces. If a belt is twisted, make it straight so it can work properly, or ask your dealer to fix it.
-
Safety Belt Use During Pregnancy Safety belts work for everyone, including pregnant women. Like all occupants, they are more likely to be seriously injured if they don’t wear safety belts. A pregnant woman should wear a lap- shoulder belt, and the lap portion should be worn as low as possible throughout the pregnancy. The best way to protect the fetus is to protect the mother. When a safety belt is worn properly, it’s more likely that the fetus won’t be hurt in a crash. For pregnant women, as for anyone, the key to making safety belts effective is wearing them properly.
Right Front Passenger Position The right front passenger’s safety belt works the same way as the driver’s safety belt. See the Index under Driver Position.
Adjust the seat so you can sit up straight. To see how, see the Index under Seat Controls. Move your seat far enough forward that your feet touch the part of the vehicle that is called the “toeboard” (A). That way you’d be less likely to slide under the lap belt in a crash.
27 8 8
Seats & Safety Belts
Rear Seat Outside Passenger Positions The positions next to the windows have lap-shoulder belts.
Rear Seat Passengers It’s very important for rear seat passengers to buckle up! Accident statistics show that unbelted people in the rear seat are hurt more often in crashes than those who are wearing safety belts. Rear passengers who aren’t safety belted can be thrown out of the vehicle in a crash. And they can strike others in the vehicle who are wearing safety belts.
Here’s How to Wear One Properly: 1 . Pick up the latch plate and pull the
belt across you. Don’t let it get twisted.
2. Push the latch plate into the buckle
until it clicks.
I b
3. To make the lap part tight, pull down on the buckle end of the belt as you pull up on the shoulder part.
If the belt stops before it reaches the buckle, tilt the latch plate and keep pulling until you can buckle it. If the belt is not long enough, see the Index under Safety Belt Extender. Make sure the release button on the buckle faces upward or outward so you would be able to unbuckle it quickly if you ever had to.
The lap part of the belt should be worn low and snug on the hips, just touching the thighs. In a crash, this applies force to the strong pelvic bones. And you’d be less likely to slide under the lap belt. If you slid under it, the belt would apply force at your abdomen. This could cause serious or even fatal injuries. The shoulder belt should go over the shoulder and across the chest. These parts of the body are best able to take belt restraining forces.
Seats & Safety Belts
?ear Seat Outside Passenger Dositions (CONT.) The safety belt locks if there's a sudden 'top or a crash.
CAUTION
A You can be seriously hurt if
your shoulder belt is too
loose. In a crash you would move forward too much, which could increase injury. The shoulder belt should fit against your body.
To unlatch the belt, just push the button on the buckle.
Rear Safety Belt Comfort Guides for Children and Small Adults Your vehicle may be equipped with rear shoulder belt comfort guides. This feature will provide added comfort for children who have outgrown child restraints, and for small adults. If your vehicle does not have comfort guides, you may ask your dealer to order and install them for you. The comfort guides pull the shoulder belts away from the neck and head.
. . I
I
2. Slide the guide under and past the belt.
The elastic cord must be under the belt. Then, place the guide over the belt, and insert the two edges into the slots of the guide.
of the belt
There is one guide for each outside passenger position in the rear seat. You will find them tucked in between the seat back and the interior body, about half-way down the edge of the seat back. Here is how you should install the comfort guides on the shoulder belts: 1. Pull the elastic cord out from
between the edge of the seat back and the interior body to remove the guide from its storage clip.
3. Be sure that the belt is not twisted
and it lies flat. The elastic cord must be under the belt and the guide on top.
31
Seats & Safety Belts
f-
Rear Safety Belt Comfort Guides for Children and Small Aduits (CONr.) 4. Buckle the belt around the child, and make sure that both the lap belt and the shoulder belt are secured properly. Make sure that the shoulder belt crosses the shoulder. See the Index under Safety Belts.
To remove and store the comfort guides, just perform these steps in reverse order. Squeeze the belt edges together so that you can take them out from the guides. Pull the guide upward to expose its storage clip, and then slide the guide onto the clip. Rotate the guide and clip inward and in between the seat back and the interior body, leaving only the loop of elastic cord exposed.
Center Passenger Position If your vehicle has a rear bench seat, someone can sit in the center position. When you sit in a center seating position, you have a lap safety belt, which has no retractor.
To make the belt longer, tilt the latch plate and pull it along the belt.