- 2015 Volvo V60 Owners Manuals
- Volvo V60 Owners Manuals
- 2016 Volvo V60 Owners Manuals
- Volvo V60 Owners Manuals
- 2014 Volvo V60 Owners Manuals
- Volvo V60 Owners Manuals
- 2012 Volvo V60 Owners Manuals
- Volvo V60 Owners Manuals
- 2013 Volvo V60 Owners Manuals
- Volvo V60 Owners Manuals
- 2011 Volvo V60 Owners Manuals
- Volvo V60 Owners Manuals
- Download PDF Manual
-
Speed limiter
(p. 213)
(p. 201), (p. 203)
(p. 205), (p. 215)
(p. 213), (p. 217), (p. 233)
(p. 195)
(p. 90), (p. 224), (p. 233), (p. 237), (p. 241), (p. 246)
(p. 217), (p. 224), (p. 233)
Windscreen sen- sor*, Camera sen- sor*, Laser sen- sor*
Auto Brake*, Dis- tance Warning* (Distance Alert), City SafetyTM, Collision warning system*
ABL system*
(p. 92)
Driver Alert Sys- tem*, Time for a break
Driver Alert Sys- tem*, Time for a break
(p. 236)
(p. 237)
Parking brake
(p. 302)
Rain sensor*
(p. 98)
* Option/accessory, for more information, see Introduction.
03
}} 75
03 Instruments and controls || Symbol Specification
See
Symbol Specification
Active high beam, AHB (Active High Beam)*
(p. 90)
Start/Stop*
(p. 296)
Engine block heater and pas- senger compart- ment heater* Service required
See
(p. 142)
Activated timer*
(p. 142)
Activated timer*
(p. 142)
Low battery
(p. 142)
Fuel filler flap, right-hand side
Gear shift indica- tor
(p. 309)
(p. 280)
Gear positions
(p. 281)
03
Start/Stop*
(p. 296)
Driver Alert Sys- tem*, Lane Depar- ture Warning (LDW), Lane Keeping Aid (LKA)
Driver Alert Sys- tem*, Lane Depar- ture Warning*
Driver Alert Sys- tem*, Lane Depar- ture Warning*
Recorded speed information*
Engine block and passenger com- partment heater*
(p. 237), (p. 241), (p. 246)
(p. 239)
(p. 241), (p. 246)
(p. 192)
(p. 142)
76
* Option/accessory, for more information, see Introduction.
Symbol Specification
See
Measuring the oil level
(p. 368)
Active Park Assist Pilot - PAP*
(p. 254)
Information symbols in the roof console display Symbol Specification
See
Seatbelt reminder
(p. 28)
Airbag, passenger seat, activated
Airbag, passenger seat, deactivated
(p. 32)
(p. 32)
Related information • Combined instrument panel - meaning of
indicator symbols (p. 68)
• Combined instrument cluster - meaning
of warning symbols (p. 70)
• Messages - handling (p. 110)
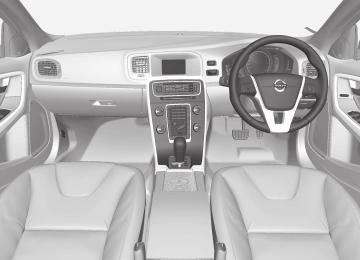
Volvo Sensus Volvo Sensus is the heart of your personal Volvo experience. It is Sensus that provides information, entertainment and functions to simplify your ownership.
When you are sitting in your car you want control, and in today's interconnected world, this includes information, communication and entertainment when it is most suitable for you. Sensus covers all our solutions that ena- ble connection* to the outside world, at the same time providing you with intuitive control over all the car's capabilities. Volvo Sensus combines and presents many functions in several of the car's systems on the centre console's display screen. With Volvo Sensus the car can be personalised by means of an intuitive user interface. Settings can be made in Car settings, Audio and media, Climate control, etc. With the centre console buttons and controls or the steering wheel's right-hand keypad*
03 Instruments and controls
functions can be activated or deactivated and many different settings can be made. With a press on MY CAR all settings related to the driving and control of the car are pre- sented, such as City Safety, locks and alarm, automatic fan speed, setting the clock, etc. With a press on the respective function *, NAV* and CAM* RADIO, MEDIA, TEL, other sources, systems and functions can be activated, e.g. AM, FM, CD, DVD*, TV*, Bluetooth®*, navigation* and park assist cam- era*. For more information about all functions/ systems, see the relevant section in the owner's manual or its supplement.
Overview
of the buttons both vary, depending on the equipment selected and the market.
Navigation* - NAV, see separate supple- ment (Sensus Navigation). Audio and media - RADIO, MEDIA, TEL*, see separate supplement (Sensus Info- tainment). Function settings - MY CAR, see MY CAR (p. 110). Internet-connected car - *, see sepa- rate supplement (Sensus Infotainment). Climate control system (p. 124).
Park assist camera* (p. 251) – CAM*.
03
Control panel in centre console. The figure is schematic - the number of functions and layout
* Option/accessory, for more information, see Introduction.
77
03 Instruments and controls
Key positions The remote control key can be used to set the vehicle's electrical system in different modes/ levels so that different functions are available; see Key positions - functions at different lev- els (p. 78).
03
the remote control key in the ignition switch.
2. Then press the remote control key in the
lock up to its end position.
IMPORTANT
Foreign objects in the ignition switch can impair the function or destroy the lock. Do not press in the remote control key incorrectly turned - hold the end with the detachable key blade, see Detachable key blade - detaching/attaching (p. 167).
Remove the remote control key Push the remote control key, allow it to eject, then pull it out from the ignition switch.
Key positions - functions at different levels To enable the use of a limited number of functions with the engine switched off, the car's electrical system can be set in 3 differ- ent levels - 0, I and II - with the remote con- trol key. This owner's manual describes these levels throughout using the denomination "key positions".
The following table shows the functions avail- able in each key position/level.
Ignition switch with remote control key extrac- ted/inserted.
NOTE
For cars with the Keyless* function the remote control key does not need to be inserted into the ignition switch but can be stored in e.g. a pocket. For more informa- tion on Keyless functions, see Keyless drive* (p. 170).
Insert the remote control key 1. Hold the end of the remote control key
with the detachable key blade and insert
78
* Option/accessory, for more information, see Introduction.
03 Instruments and controls
Level Functions
Level Functions
• Odometer, clock and tem- perature gauge are illumi- nated.
• Electrically operated seats
can be adjusted.
• The audio system can be
used for a limited time - see the Sensus Infotainment sup- plement.
• Sunroof, power windows, 12
V socket in the passenger compartment, navigation, phone, ventilation fan and windscreen wipers can be used.
II
• The headlamps come on. • Warning/indicator lamps illu-
minate for 5 seconds.
• Several other systems are
activated. However, electric heating in seat cushions and the rear window can only be activated after starting the engine.
This key position consumes a lot of current from the starter battery and should therefore be avoided!
Selecting key position/level • Key position 0 - Unlock the car - This
means that the car's electrical system is at level 0.
NOTE
To reach level I or II without starting the engine - do not depress the brake/clutch pedal when these key positions are due to be selected.
03
• Key position I - With the remote control key fully inserted into the ignition switch14
- Briefly press START/STOP ENGINE.• Key position II - With the remote control key fully inserted into the ignition switch14
- Give a long15 press on START/STOP ENGINE.• Back to key position 0 - To return to key
position 0 from position II and I - Briefly press on START/STOP ENGINE.
Audio system For information on audio system functions with remote control key removed, see the Sensus Infotainment supplement.
Starting and stopping the engine For information about starting/stopping the engine, see Starting the engine (p. 272).
Towing For important information about the remote control key during towing, see Towing (p. 323).
Related information • Key positions (p. 78)
14 Not required for cars with the Keyless* function. 15 Approx. 2 seconds.
* Option/accessory, for more information, see Introduction.
79
4. Push the seat forward so that the head restraint "locks" in under the glovebox.
Raising takes place in reverse order.
WARNING
Grasp the backrest and make sure that it is properly locked after being folded up in order to avoid personal injury in the event of sudden braking or an accident.
Related information • Seats, front - electrically operated*
(p. 81)
• Seats, rear (p. 82)
03 Instruments and controls
Seats, front The car's front seats have different setting options for optimum seating comfort.
03
WARNING
Adjust the position of the driver's seat before setting off, never while driving. Make sure that the seat is in locked posi- tion in order to avoid personal injury in the event of sudden braking or an accident.
Lowering the passenger seat backrest*16
Raise/lower the seat, pump up/down.
Forward/backward: lift the handle to adjust the distance to the steering wheel and pedals. Check that the seat is locked after changing position. Raise/lower* front edge of seat cushion, pump up/down. Adjust backrest rake, turn the wheel.
Change the lumbar support*, press the button. Control panel for power seat*, see Seats, front - electrically operated* (p. 81).
The passenger seat's backrest can be folded forward to make room for long loads.
Move the seat as far back/down as possi- ble. Adjust the backrest to an upright position.
Lift the catches on the rear of the back- rest and fold it forward.
16 Only applies to comfort seats.
80
* Option/accessory, for more information, see Introduction.
03 Instruments and controls
Seats, front - electrically operated* The car's front seats have different setting options for optimum seating comfort. The power seat can be moved forward/backward and up/down. The front edge of the seat cushion can be raised/lowered. The backrest angle and lumbar support* can be changed.
Power seat
object. If this should happen, set the car's electrical system in key position I or 0 and wait a short time before adjusting the seat again. Only one movement (forward/back/up/down/ inward/outward) can be made at a time.
Preparations The seat can be adjusted for a certain time after unlocking the door with the remote con- trol key without the key in the ignition switch. Seat adjustment is normally made in key position I and can always be made when the engine is running.
Seat with memory function*
Front edge of seat cushion up/down
Raise/lower seat
Seat, forward/backward
Backrest rake
Lumbar support* is adjusted inward and outward
The power seats have overload protection which is tripped if a seat is blocked by an
The memory function stores settings for the seat and the door mirrors.
Store setting
Memory button
Memory button
Memory button
Button for storing settings
1. Adjust the seat and the door mirrors. 2. Press and hold button M while pressing button 1, 2 or 3 simultaneously. Hold the buttons depressed until the acoustic sig- nal is heard and text is shown in the com- bined instrument panel.
The seat must be adjusted again before a new memory can be set. The setting for lumbar support is not stored.
Using a stored setting Press one of the memory buttons 1-3 until the seat and the door mirrors stop. If the button is released, the movement of the seat and door mirrors will be interrupted.
Key memory* in remote control key All remote control keys can be used by differ- ent drivers to store the settings for the driv- er's seat and door mirrors17, see Remote control key - personalisation* (p. 160).
17 Only if the car is equipped with power seat with memory and retractable power rearview and door mirrors. The setting for lumbar support is not stored.
* Option/accessory, for more information, see Introduction.
03
}} 81
03 Instruments and controls || Emergency stop If the seat accidentally begins to move, press one of the setting buttons for the seat or memory buttons in order to stop the seat. Restarting to reach the seat position stored in the key memory is performed by pressing the unlock button on the remote control key. The driver's door must then be open.
Seats, rear The rear seat backrest and the outer seat head restraints can be folded. The centre seat head restraint can be adjusted to suit the height of the passenger.
Head restraint, centre seat, rear
Manual lowering of the outer head restraints, rear seat
03
WARNING
Risk of crushing! Make sure that children do not play with the controls. Check that there are no objects in front of, behind or under the seat during adjustment. Ensure that none of the rear seat passengers is in danger of becoming trapped.
Heated seats For heated seats, see Heated front seats* (p. 131) and Heated rear seat* (p. 131).
Related information • Seats, front (p. 80) • Seats, rear (p. 82)
Adjust the head restraint according to pas- senger height so that the whole of the back of the head is covered if possible. Slide it up as required. To lower the head restraint again, the button (located in the centre between the backrest and head restraint, see illustration) must be pressed in while the head restraint is pressed down carefully.
Pull the locking handle closest to the head restraint to fold the head restraint forward. The head restraint is moved back manually until a "click" can be heard.
WARNING
The head restraints must be in locked position after being raised.
Lowering the rear seat backrest
IMPORTANT
There must be no objects on the rear seat when the backrest is to be folded down. The seat belts must not be connected either. Otherwise there is a risk of damag- ing the rear seat upholstery.
82
* Option/accessory, for more information, see Introduction.
The triple-section backrest can be folded in different ways.
NOTE
The front seats may need to be pushed forwards, and/or the backrests adjusted upwards, in order that the rear backrests can be fully folded forward.
• The left-hand section can be folded sepa-
rately.
• The centre section can be folded sepa-
rately.
• The right-hand section can only be folded
together with the centre section.
• If the entire backrest is to be folded then
the different sections should be folded separately.
03 Instruments and controls
NOTE
When the backrest has been raised, the red indicator should no longer be showing. If it is still showing then the backrest is not locked in place.
WARNING
Check that the backrests and head restraints in the rear seat are locked prop- erly after being folded up.
03
Electrical lowering of the rear seat's outer head restraints*
1. The remote control key must be in key
position II.
2. Press the button to lower the rear outer head restraints to improve rearward visi- bility.
If the centre backrest is being lowered - release and adjust the head restraint for the centre backrest, see the earlier sec- tion "Head restraint, centre seat, rear". The outer head restraints are lowered automatically when the outer backrests are lowered. Pull up the backrest's lock- while folding the backrest ing handle forward at the same time. A red indicator shows that the on the lock catch backrest is no longer locked in place.
NOTE
When the backrests have been lowered the head restraints must be moved for- ward slightly so as not to make contact with the seat cushion.
Raising takes place in reverse order.
* Option/accessory, for more information, see Introduction.
}} 83
03 Instruments and controls ||
WARNING
Do not lower the outer head restraints if there are any passengers using of the outer seats.
Steering wheel The steering wheel can be adjusted in differ- ent positions and has controls for horn and cruise control, as well as menu, audio and phone control.
Move the head restraint back manually until a click is heard.
Adjusting
03
WARNING
The head restraints must be in locked position after being raised.
Related information • Seats, front (p. 80) • Seats, front - electrically operated* (p. 81)
3. Push back the lever to fix the steering
wheel in place. If the lever is stiff, press the steering wheel lightly at the same time as you push the lever back.
WARNING
Adjust the steering wheel and fix it before driving away.
With speed related power steering* the level of steering force can be adjusted, see Adjust- able steering force* (p. 264).
Keypads* and paddles*
Adjusting the steering wheel.
Lever - releasing the steering wheel
Possible steering wheel positions
The steering wheel can be adjusted for both height and depth: 1. Pull the lever towards you to release the
steering wheel.
2. Adjust the steering wheel to the position
that suits you.
Keypads and paddles in the steering wheel.
Cruise control* (p. 198)
Adaptive cruise control - ACC* (p. 201)
84
* Option/accessory, for more information, see Introduction.
03 Instruments and controls
Paddle for manual gear changing in an automatic gearbox, see Automatic gear- box -- Geartronic* (p. 281) Audio and phone control, see supple- ment, Sensus Infotainment
Heating* of the steering wheel The steering wheel can be heated with elec- tric heating.
Function
Horn
approx. 10 °C. Activate/deactivate the func- tion in the menu system MY CAR (p. 110).
03
Horn. Press the centre of the steering wheel to sig- nal.
Related information • Heating* of the steering wheel (p. 85)
Button position may vary depending on equip- ment selected and market. Repeatedly press the button to switch between the following functions:
Function
Indicator
Switched off
Button lamp extinguished
Heating
Button lamp illuminated
Automatic steering wheel heating With activated automatic start of steering wheel heating, the heating of the steering wheel starts when the engine is started. Auto- matic start takes place when the car is cold and the ambient temperature is below
* Option/accessory, for more information, see Introduction.
85
03 Instruments and controls
Light switches The headlamp control activates and adjusts the external lighting. It is also used to adjust display and instrument lighting and mood lighting (p. 95).
Overview, light switches
03
Knob positions
NOTE
The same lamps are used for daytime run- ning lights and position/parking lamps front. The brightness is higher when the lamps are used as daytime running lights.
Posi- tion
Specification
Daytime running lightsA when the car's electrical system is in key position II or the engine is running. Main beam flash can be used.
Daytime running lights, posi- tion/parking lamps rear and side marker lamps when the car's electrical system is in key position II or the engine is run- ning. Position/parking lamps/side marker lamps when the car is parked. Main beam flash can be used.
Overview, light switches.
Thumbwheel for adjusting display and instrument lighting as well as ambient lighting* Button for rear fog lamp
Knob for daytime running lights and park- ing lamps Thumbwheel18 for headlamp levelling
18 Not available for cars equipped with active Xenon headlamps*.
86
* Option/accessory, for more information, see Introduction.
Posi- tion
Specification
Daytime running lights, posi- tion/parking lamps rear and side marker lamps in daylight when the car's electrical sys- tem is in key position II or the engine is running. Dipped beam and position/ parking lamps/side marker lamps in weak daylight or dark- ness, or when the rear fog lamp or windscreen wipers with con- tinuous wiping are activated. The tunnel detection (p. 89)* function is activated. The Active main beam (p. 90)* function can be used. Main beam can be activated when dipped beam is switched on. Main beam flash can be used.
Dipped beam and position/ parking lamps/side marker lamps. Main beam can be activated.
Posi- tion
Specification
Main beam flash can be used.
A Fitted in or under the front bumper.
03 Instruments and controls
Position/parking lamps Position/parking lamps are switched on with the headlamp control's knob.
mode is used
Volvo recommends that when the car is being driven, as long as traffic situations or weather conditions are unfavour- able for the Active main beam* function. Instrument lighting Different display and instrument lighting is switched on depending on key position; see Key positions - functions at different levels (p. 78). The display lighting is automatically subdued in darkness - the sensitivity is set with the thumbwheel. The intensity of the instrument lighting is adjusted with the thumbwheel. Headlamp levelling The load in the car changes the vertical align- ment of the headlamp beam, which could dazzle oncoming motorists. Avoid this by adjusting the height of the beam. Lower the beam if the car is heavily laden. 1. Leave the engine running, or have the
car's electrical system in key position I. 2. Roll the thumbwheel up/down to raise/
lower beam alignment.
Thumbwheel positions for different load cases.
Only driver
Driver and passenger in the front passen- ger seat Occupants in all seats
Occupants in all seats and maximum load in the cargo area The driver and maximum load in the cargo area
Cars with active Xenon headlamps* have automatic headlamp levelling and are there- fore not equipped with the thumbwheel.
Related information • Position/parking lamps (p. 87) • Daytime running lights (p. 88) • Main/dipped beam (p. 89)
Knob for headlamp control in the position for position/parking lamps.
Turn the knob to the position for (num- ber plate lighting is switched on at the same time). If the car's electrical system is in key position II or the engine is running then the daytime running lights switch on instead of the front position/parking lamps. When it is dark outside and the tailgate is opened the rear position/parking lamps illumi- nate to alert traffic behind. This takes place irrespective of what position the knob is in or what key position the car's electrical system is in.
* Option/accessory, for more information, see Introduction.
03
}} 87
03 Instruments and controls || Related information • Light switches (p. 86)
Daytime running lights With the knob for headlamp control in position, and the car's electrical system in key position II or the engine running, the daytime running lights are activated automatically in daylight.
Daytime running lights during the day. DRL
WARNING
This system help to save energy - it cannot determine in all situations when daylight is too weak or sufficiently strong, e.g. in mist and rain. The driver is always responsible for ensur- ing that the car is driven with the correct beam pattern for the traffic situation and in accordance with applicable traffic regula- tions.
Knob for headlamp control in AUTO position.
With the knob for headlamp control in position the daytime running lights (Daytime Running Lights - DRL) are activated automati- cally when the car is driven in daylight. A light sensor on the top of the instrument panel changes from daytime running lights to dipped beam at twilight or when daylight becomes too weak. Switching to dipped beam also takes place when the windscreen wipers or rear fog lamps are activated.
03
88
Tunnel detection* Tunnel detection changes the lighting from daytime running lights to dipped beam when the car is driven into a tunnel. Approx. 20 sec- onds after the car has left the tunnel, the light- ing returns to daytime running lights.
The tunnel detection function is available in cars with rain sensor*. The sensor detects the entrance to a tunnel and resets the lighting from daytime running lights to dipped beam. Approx. 20 seconds after the car has left the tunnel, the lighting returns to daytime running lights. If the car is driven into another tunnel within this time period then dipped beam is kept switched on. This avoids repeated changes to the car's lighting. Note that the headlamp control's knob must position for tunnel detection remain in to work.
Related information • Main/dipped beam (p. 89) • Light switches (p. 86)
19 When dipped beam is switched on.
03 Instruments and controls
Main/dipped beam With the knob for headlamp control in posi- and the car's electrical system in tion key position II or the engine running, the dipped beam is activated automatically in poor light conditions. With the knob for headlamp control in posi- dipped beam is always switched on tion when the engine is running or when key posi- tion II is active.
Stalk switch and knob for headlamp control.
Position for main beam flash
Position for main beam
Dipped beam With the knob in position, dipped beam is activated automatically at twilight or when
daylight becomes too weak. Dipped beam is also activated automatically if the windscreen wipers or rear fog lamps are activated.
dipped beam With the knob in position is always switched on when the engine is run- ning or when key position II is active.
Main beam flash Move the stalk switch gently towards the steering wheel to the position for main beam flash. Main beam comes on until the stalk switch is released.
19 or
Main beam Main beam can be activated when the knob is in position . Activate/deac- tivate main beam by moving the stalk switch towards the steering wheel to the end posi- tion and then releasing. Alternatively, the main beam can be deactivated by a light press of the stalk switch toward the steering wheel. When main beam has been activated the symbol illuminates in the combined
instrument panel.
Auxiliary lamps* If the car has auxiliary lamps, the driver can use the MY CAR menu system to choose whether they should be deactivated or
* Option/accessory, for more information, see Introduction.
03
}} 89
03 Instruments and controls || switched on/off simultaneously with the main beam20, see MY CAR (p. 110).
Related information • Active Xenon headlamps* (p. 92) • Active main beam* (p. 90) • Light switches (p. 86) • Headlamps - adjusting headlamp pattern
(p. 97)
• Tunnel detection* (p. 89)
03
Active main beam* Active main beam function is available with on/off functionality, or adaptive functionality, depending on headlamp variant. The function detects the headlamp beams from oncoming traffic or the rear lights of vehicles in front, and switches the lighting from main beam to dipped beam. Active main beam with adap- tive functionality only dims the part of the light beam that points directly to the vehicle. The lighting returns to main beam when the incoming light has stopped.
Active main beam - AHB Active main beam (Active High Beam - AHB) is a function which uses a camera sensor at the top edge of the windscreen to detect the headlamp beams from oncoming traffic or the rear lights of vehicles in front, and then switches from main beam to dipped beam. The function can also take streetlights into account. Car with halogen headlamps The lighting returns to main beam about a second after the camera sensor no longer detects the headlamp beams from oncoming traffic or the rear lights from vehicles in front. Car with active Xenon headlamps If the active main beam has the on/off func- tionality then the lighting returns to main
beam about a second after the camera sen- sor no longer detects the headlamp beams from oncoming traffic the rear lights of vehi- cles in front. If the active main beam has adaptive func- tionality then, unlike what happens during conventional dimming, the light beam contin- ues to illuminate with main beam on both sides of oncoming traffic or vehicles ahead - only the part of the light beam that points directly to the vehicle is dimmed.
Adaptive functionality: Dipped beam directly toward oncoming vehicles, but continued main beam on both sides of the vehicle. The lighting returns to full main beam about a second after the camera sensor no longer detects the headlamp beams from oncoming traffic or the rear lights from vehicles in front.
20 Auxiliary lamps must be connected to the electrical system by a workshop. Volvo recommends that you contact an authorised Volvo workshop.
90
* Option/accessory, for more information, see Introduction.
03 Instruments and controls
Activating/deactivating AHB can be activated when the headlamp (provided control's knob is in position that the function has not been deactivated in the menu system MY CAR, see MY CAR (p. 110)).
Stalk switch and knob for headlamp control in AUTO position. The function can start while driving in the dark when the car's speed is 20 km/h or higher. Activate/deactivate AHB by moving the left- hand stalk switch towards the steering wheel to the end position and then releasing. Deac- tivation when main beam is on means that the lights are reset directly to dipped beam. Car with analogue combined instrument panel
When AHB is activated the minates in the instrument's information dis- play.
symbol illu-
When main beam is switched on the symbol also illuminates in the combined instrument panel. This also applies for active Xenon headlamps if the main beam is partially dimmed, i.e. as soon as the light beam shines with slightly more than dipped beam. Car with digital combined instrument panel
When AHB is activated the symbol turns white in the instrument's information display. When main beam is activated, the symbol turns blue. This also applies for active Xenon headlamps if the main beam is partially dimmed, i.e. as soon as the light beam shines with slightly more than dipped beam. Manual operation
NOTE
Keep the windscreen surface in front of the camera sensor free from ice, snow, mist and dirt. Do not stick or attach anything to the windscreen in front of the camera sensor as this may reduce effectiveness or cause one or more of the systems dependent on the camera to stop working.
. The same
If the message Active main beam Temporary unavailable Switch manually is shown in the combined instrument panel's information display then you have to switch manually between main and dipped beam. However, the knob for headlamp control can still remain in position applies if the message Windscreen sensors blocked See manual and the symbol symbol goes out when are shown. The these messages are shown. AHB may be temporarily unavailable e.g. in situations with dense fog or heavy rain. When AHB becomes available again, or the wind- screen sensors are no longer blocked, the message extinguishes and the illuminates.
symbol
WARNING
AHB is an aid for using the optimum beam pattern when conditions are favourable. The driver always bears responsibility for manually switching between main and dipped beam when traffic situations or weather conditions so require.
IMPORTANT
Examples of when manual switching between main and dipped beam may be required:
03
}}}} 91
03 Instruments and controls || • In heavy rain or dense fog • In freezing rain • In snow flurries or slush • In moonlight • When driving in poorly lit built-up
areas
Active Xenon headlamps* Active Xenon headlamps are designed to pro- vide maximum illumination in bends and junc- tions and so provide increased safety.
Active Xenon headlamps ABL
03
• When the traffic ahead has weak light-
ing
• If there are pedestrians on or beside
the road
• If there are highly reflective objects
such as signs in the vicinity of the road • When the lighting from oncoming traf- fic is obscured by e.g. a crash barrier
• When there is traffic on connecting
roads
• On the brow of a hill or in a hollow • In sharp bends.
For more information on the limitations of the camera sensor, see Collision warning system* - camera sensor limitations (p. 231).
Related information • Main/dipped beam (p. 89) • Light switches (p. 86)
Headlamp pattern with function deactivated (left) and activated (right) respectively. If the car is equipped with active Xenon head- lamps (Active Bending Lights – ABL) the light from the headlamps follows the steering wheel movement in order to provide maxi- mum lighting in bends and junctions and so provide increased safety. The function is activated automatically when the car is started (provided that it has not been deactivated in the menu system MY CAR, see MY CAR (p. 110)). In the event of a fault in the function the
symbol illu-
21 Activated on delivery from the factory.
92
* Option/accessory, for more information, see Introduction.
minates in the combined instrument panel at the same time as the information display shows an explanatory text and a further illu- minated symbol.
Symbol Message
Specification
Headlamp system malfunc- tion Serv- ice required
The system is disengaged. Visit a workshop if the message remains. Volvo recommends that you contact an authorised Volvo workshop.
The function is only active in twilight or dark- ness and only when the car is moving. The function21 can be deactivated/activated in the menu system MY CAR, see MY CAR (p. 110). For headlamp pattern adjustment, see Head- lamps - adjusting headlamp pattern (p. 97).
Cornering lights* Active Xenon headlamps with the Active main beam function of the adaptive type (Active main beam with adaptive functionality) are equipped with cornering lights that temporar- ily illuminate the area diagonally in front of the car in the direction the steering wheel is turned in a sharp bend, or in the direction the direction indicators are being used. The function is activated when main beam or dipped beam is used and the car's speed is lower than approx. 30 km/h. In addition, both cornering lights are switched on as a supplement to the reversing lamp during reversing.
Related information • Main/dipped beam (p. 89) • Active main beam* (p. 90) • Light switches (p. 86)
03 Instruments and controls
Rear fog lamp When visibility is reduced by fog the rear fog lamp can be used so that other road users shall notice vehicles in front at an early stage.
NOTE
Regulations on the use of rear fog lamps vary from country to country.
Related information • Light switches (p. 86)
03
or
Button for rear fog lamp. The rear fog lamp can only be switched on when key position II is active or the engine is running and the headlamp control's knob is in position Press the button for On/Off. The rear fog lamp's indicator symbol in the com- bined instrument panel and the light in the button both illuminate when the rear fog lamp is switched on. The rear fog lamp is switched off automati- cally when the engine is switched off or when the headlamp control's knob is turned to position
or
* Option/accessory, for more information, see Introduction.
93
03 Instruments and controls
Brake lights The brake light automatically comes on during braking.
The brake light is switched on when the brake pedal is depressed. In addition, it is switched on when one of driving support systems Adaptive cruise control (p. 201), City Safety (p. 218) or Collision warning system (p. 225) brakes the car.
Related information • Foot brake - emergency brake lights and
automatic hazard warning flashers (p. 301)
03
Hazard warning flashers The hazard warning flashers warn other road users by means of all of the car's direction indicator lamps flashing simultaneously when this function is activated. When the hazard warning flashers are acti- vated both direction indicator symbols flash in the combined instrument panel.
vated automatically when the car is driven off again or the button is depressed.
Related information • direction indicators (p. 95) • Foot brake - emergency brake lights and
automatic hazard warning flashers (p. 301)
Button for hazard warning flashers. Press the button to activate the hazard warn- ing flashers. Both direction indicator symbols in the combined instrument panel flash when the hazard warning flashers are used. The hazard warning flashers are activated automatically when the car has been braked so suddenly that the emergency brake lights have been activated at a speed below 10 km/h. The hazard warning flashers remain on when the car has stopped and are deacti-
94
03 Instruments and controls
direction indicators The car's direction indicators are operated with the left-hand stalk switch. The direction indicator lamps flash three times or continu- ously, depending on how far up or down the stalk switch is moved.
The stalk switch remains in its position and is moved back manually, or automatically by the steering wheel movement.
Direction indicator symbols For direction indicator symbols, see Com- bined instrument panel - meaning of indicator symbols (p. 68).
Related information • Hazard warning flashers (p. 94)
Direction indicators.
Short flash sequence
Move the stalk switch up or down to the first position and release. The direction indicator lamps flash three times. The function can be activated/deactivated in the menu system MY CAR, see MY CAR (p. 110).
Continuous flash sequence
Move the stalk switch up or down to the outer position.
Interior lighting The passenger compartment lighting is acti- vated/deactivated with the buttons in the con- trols above the front seats and the rear seat.
03
Controls in roof console for the front reading lamps and passenger compartment lighting.
Reading lamp, left-hand side
Reading lamp, right-hand side
Interior lighting
All lighting in the passenger compartment can be switched on and off manually within 30 minutes from when: • the engine has been switched off and the car's electrical system is in key position 0
• the car has been unlocked but the enginehas not been started.
}} 95
03 Instruments and controls || Front roof lighting The front reading lamps are switched on or off by pressing the relevant button in the roof console.
Lighting in the cargo area The lighting in the cargo area is switched on and off respectively when the tailgate is opened or closed.
Rear roof lighting
03
Rear roof lighting. The lamps are switched on or off by pressing each respective button.
Courtesy lighting Courtesy lighting (and passenger compart- ment lighting) is switched on and off respec- tively when a side door is opened or closed.
Glovebox lighting Glovebox lighting is switched on and off respectively when the lid is opened or closed.
Vanity mirror lighting The lighting for the vanity mirror (p. 150) is switched on and off respectively when the cover is opened or closed.
Automatic lighting The switch for passenger compartment light- ing has three positions for the lighting in the passenger compartment: • Off – right-hand side pressed in, auto-
matic lighting deactivated.
• Neutral position – automatic lighting
activated.
• On – left-hand side pressed in, passenger
compartment lighting switched on.
Neutral position When the button is in neutral position the passenger compartment lighting is switched on and off automatically in accordance with the following. The passenger compartment lighting is switched on and remains on for 30 seconds if: • the car is unlocked with the remote con- trol key or key blade, see Remote control key - functions (p. 163) or Detachable key blade - unlocking doors (p. 167)
• the engine has been switched off and the car's electrical system is in key position 0.
96
* Option/accessory, for more information, see Introduction.
Passenger compartment lighting is switched off when: • the engine is started • the car is locked. The passenger compartment lighting comes on and remains on for two minutes if one of the doors is open. If any lighting is switched on manually and the car is locked then it will be switched off automatically after two minutes.
Mood lights* When the normal passenger compartment lighting is switched off and the engine is run- ning, a number of LEDs illuminate, including one in the ceiling lighting, in order to provide a low-light and enhance the mood while driv- ing. The light also makes it easier to see objects in storage compartments etc. during the darker hours of the day. This lighting goes out for a little while after the normal passen- ger compartment lighting when the car is locked. The brightness is controlled using the thumbwheel on the headlamp control (p. 86).
03 Instruments and controls
Home safe light duration Home safe lighting consists of dipped beam, parking lamps, lamps in the door mirrors, number plate lighting, interior roof lighting as well as courtesy lighting.
Some of the exterior lighting can be kept switched on to work as home safe lighting after the car has been locked. 1. Remove the remote control key from the
ignition switch.
2. Move the left-hand stalk switch toward
the steering wheel to the end position and release it. The function can be activated in the same way as with main beam flash; see Main/dipped beam (p. 89).
3. Get out of the car and lock the door. When the function is activated, dipped beam, parking lamps, door mirror lamps, number plate lighting, interior roof lamps and courtesy lighting are switched on. The length of time for which the home safe lighting should be kept on can be set in the menu system MY CAR, see MY CAR (p. 110).
Related information • Approach lighting (p. 97)
Approach lighting Approach lighting consists of parking lamps, lamps in the door mirrors, number plate light- ing, interior roof lighting as well as courtesy lighting.
Approach lighting is switched on with the remote control key, see Remote control key - functions (p. 163), and is used to switch on the car's lighting at a distance. When the function is activated with the remote control, the parking lamps, door mir- ror lamps, number plate lighting, interior roof lamps and courtesy lighting are switched on. The length of time for which the approach lighting should be kept on can be set in the menu system MY CAR, see MY CAR (p. 110).
Related information • Home safe light duration (p. 97)
03
Headlamps - adjusting headlamp pattern If the car is equipped with active Xenon head- lamps and has the Active High Beam function then the headlamp pattern must be reset when changing from right to left-hand traffic, and vice versa.
Active Xenon headlamps* No adjustment of the headlamp pattern is necessary for cars without the Active High Beam* function. The headlamp pattern is designed in such a way that oncoming traffic is not dazzled. Headlamp pattern adjustment is required for cars with Active High Beam. The car must be stationary with the engine running when the headlamp pattern is shifted between right and left-hand traffic. The headlamp pattern is changed in the menu system MY CAR, see MY CAR (p. 110).
Halogen headlamps No adjustment of the headlamp pattern is necessary. The headlamp pattern is designed in such a way that oncoming traffic is not dazzled.
* Option/accessory, for more information, see Introduction.
97
03 Instruments and controls
Wipers and washing Wipers and washers clean the windscreen and rear window. The headlamps are cleaned with high-pressure washing.
Windscreen wipers22
Intermittent wiping
Set the number of sweeps per time unit with the thumbwheel when intermittent wiping is selected.
Continuous wiping
The wipers sweep at normal speed.
03
The wipers sweep at high speed.
IMPORTANT
Before activating the wipers during winter ensure that the wiper blades are not frozen in, and that any snow or ice on the wind- screen is scraped away.
Windscreen wipers and windscreen washers.
IMPORTANT
Rain sensor, On/Off
Thumbwheel sensitivity/frequency
Windscreen wipers off
Move the stalk switch to position 0
to switch off the windscreen wipers.Single sweep
Raise the stalk switch and release to make one sweep.
Use plenty of washer fluid when the wipers are cleaning the windscreen. The wind- screen must be wet when the windscreen wipers are operating.
Service position wiper blade For cleaning the windscreen/wiper blades and replacement of wiper blades, see Wiper blades (p. 381) and Car wash (p. 404).
Rain sensor* The rain sensor automatically starts the wind- screen wipers based on how much water it
detects on the windscreen. The sensitivity of the rain sensor can be adjusted using the thumbwheel. When the rain sensor is activated a lamp in the button is illuminated and the rain sensor symbol instrument panel.
is shown in the combined
Activating and setting the sensitivity When activating the rain sensor, the car must be running or the remote control key in posi- tion I or II while the windscreen wiper stalk switch must be in position 0 or in the position for a single sweep. Activate the rain sensor by pressing the but- . The windscreen wipers make one ton sweep. Press the stalk switch up for the wipers to make an extra sweep. Turn the thumbwheel upward for higher sen- sitivity and downward for lower sensitivity. (An extra sweep is made when the thumb- wheel is turned upward.)
Deactivate Deactivate the rain sensor by pressing the button to another wiper program.
or move the stalk switch down
22 For replacing the wiper blades and service position wiper blades, see Wiper blades (p. 381). For filling washer fluid, see Washer fluid - filling (p. 383).
98
* Option/accessory, for more information, see Introduction.
The rain sensor is automatically deactivated when the remote control key is removed from the ignition switch or five minutes after the engine has been switched off.
IMPORTANT
The windscreen wipers could start and be damaged in an automatic car wash. Switch off the rain sensor while the car is in motion or when the remote control key is in position I or II. The symbol in the combined instrument panel and the lamp in the button go out.
Washing the headlamps and windows
Washing function.
03 Instruments and controls
Washing the windscreen Move the stalk switch toward the steering wheel to start the windscreen and headlamp washers. The windscreen wipers will make several more sweeps and the headlamps are washed once the stalk switch has been released.
Heated washer nozzles* The washer nozzles are heated automatically in cold weather to prevent the washer fluid freezing solid.
High-pressure headlamp washing* High-pressure headlamp washing consumes a large quantity of washer fluid. To save fluid, the headlamps are washed automatically at every fifth windscreen wash cycle.
Reduced washing If only approx. 1 litre of washer fluid remains in the reservoir and the message that you should fill the washer fluid is shown in the combined instrument panel, then the supply of washer fluid to the headlamps is switched off. This is in order to prioritise cleaning the windscreen and the visibility through it.
Wiping and washing the rear window
Rear window wiper – intermittent wiping
Rear window wiper – continuous speed
Press the stalk switch forward (see the arrow in the illustration above) to initiate rear win- dow washing and wiping.
NOTE
The rear window wiper is equipped with overheating protection which means that the motor is switched off if it overheats. The rear window wiper works again after a cooling period (30 seconds or longer, depending on the heat in the motor and the outside temperature).
* Option/accessory, for more information, see Introduction.
03
}} 99
03 Instruments and controls || Wiper – reversing Engaging reverse gear while the windscreen wipers are on initiates intermittent rear win- dow wiping23. The function stops when reverse gear is disengaged. If the rear window wiper is already on at con- tinuous speed, no change is made.
Power windows All power windows can be operated using the control panel for the driver's door - the con- trol panels for the other doors operate their respective power window.
03
NOTE
On cars with rain sensors, the rear wiper is activated during reversing if the sensor is activated and it is raining.
Related information • Washer fluid - filling (p. 383) • Washer fluid - quality and volume
(p. 426)
Driver's door control panel.
Switch for electric child safety locks* and disengaging rear power window buttons; see Child safety locks - electrical activa- tion* (p. 181). Rear window controls
Front window controls
WARNING
Check that no rear seat passengers are trapped when the windows are closed from the driver's door.
WARNING
Check that children or other passengers are not trapped if the windows are closed, even when the remote control key is used.
WARNING
If there are children in the car - remember to always switch off the power supply to the power windows by selecting key posi- tion 0 and then take the remote control key with you when leaving the car. For infor- mation on key positions - see Key posi- tions - functions at different levels (p. 78).
23 This function (intermittent wiping when reversing) can be deactivated. Visit a workshop. Volvo recommends that you contact an authorised Volvo workshop.
100
* Option/accessory, for more information, see Introduction.
03 Instruments and controls
Resetting If the battery is disconnected then the func- tion for automatic opening must be reset so that it can work correctly. 1. Gently raise the front section of the but-
ton to raise the window to its end position and hold it there for one second.
2. Release the button briefly. 3. Raise the front section of the button again
for one second.
WARNING
A reset must take place for pinch protec- tion to work.
03
Operating
Operating the power windows.
Operating without auto
Operating with auto
All power windows can be operated using the control panel for the driver's door - the con- trol panels for the other doors can only each operate their respective power window. Only one control panel can be operated at a time. In order for the power windows to be used, the key position must be at least I - see Key positions - functions at different levels (p. 78). The power windows can be operated for a few minutes after the engine has been switched off and after the remote control key has been removed - although not after a door has been opened. Closing of the windows is stopped and the window is opened if anything prevents its
movement. It is possible to override the pinch protection when closing has been interrupted, e.g. if there is ice forming. After two succes- sive closing interruptions the pinch protection will be forced and the automatic function deactivated for a short while, now it is possi- ble to close by continually holding the button pulled up.
NOTE
One way to reduce the pulsating wind noise when the rear windows are open is to also open the front windows slightly.
Operating without auto Move one of the controls up/down gently. The power windows move up/down as long as the control is held in position. Operating with auto Move one of the controls up/down to the end position and release it. The window runs automatically to its end position. Operating with the remote control key and central locking To remotely operate the power windows from the outside with the remote control key or from inside with central locking, see Remote control key (p. 159) and Locking/unlocking - from the inside (p. 176).
101
03 Instruments and controls
Door mirrors The door mirror positions are adjusted with the joystick in the driver's door controls.
03
Door mirror controls.
Adjusting 1. Press the L button for the left-hand door mirror or the R button for the right-hand door mirror. The light in the button illumi- nates.
2. Adjust the position with the joystick in the
centre.
3. Press the L or R button again. The light
should no longer be illuminated.
WARNING
Both mirrors are the wide-angle type to provide optimal vision. Objects may appear further away than they actually are.
Storing settings24
The settings for the rearview and door mirrors and the positions of the driver's seat can be stored for each remote control key in the car key memory*, see Remote control key - per- sonalisation* (p. 160).Angling the door mirror when parking24
The door mirror can be angled down for the driver to view the side of the road when park- ing for example. –Engage reverse gear and press the L or R button.
When reverse gear is disengaged the mirror automatically returns to its original position after approx. 10 seconds, or earlier by press- ing the button labelled L or R respectively.
Automatic angling of the door mirror when parking24
When reverse gear is engaged the door mirror is automatically angled down so that the driver can see the side of the road when parking for example. When reverse gear is disengaged the mirror automatically returns to its original position after a short time.The function can be activated/deactivated in the menu system MY CAR, see MY CAR (p. 110).
Automatic retraction when locking24
When the car is locked/unlocked with the remote control key the door mirrors are auto- matically retracted/extended. The function can be activated/deactivated in the menu system MY CAR, see MY CAR (p. 110).Resetting to neutral Mirrors that have been moved out of position by an external force must be reset electrically to the neutral position for electric retracting/ extending to work correctly: 1. Retract the mirrors with the L and R but-
tons.
2. Fold them out again with the L and R but-
tons.
3. Repeat the above procedure as neces-
sary.
The mirrors are now reset in neutral position.
Automatic dimming* For the door mirrors to be fitted with this function requires that the interior rearview mirror also has automatic dimming, see Rear- view mirror - interior (p. 104).
24 Only in combination with power seat with memory, see Seats, front - electrically operated* (p. 81).
102
* Option/accessory, for more information, see Introduction.
Retractable power door mirrors* The mirrors can be retracted for parking/driv- ing in narrow spaces: 1. Depress the L and R buttons simultane-
ously (key position must be at least I).
2. Release them after approximately
1 second. The mirrors automatically stop in the fully retracted position.
Fold out the mirrors by pressing down the L and R buttons simultaneously. The mirrors automatically stop in the fully extended posi- tion.
Home safe and approach lighting The lamp on the door mirrors illuminates when approach lighting (p. 97) or home safe lighting (p. 97) is selected.
Related information • Rearview mirror - interior (p. 104) • Windows and rearview and door mirrors -
heating (p. 103)
03 Instruments and controls
Windows and rearview and door mirrors - heating The defroster is used to quickly remove mist- ing and ice from the windscreen, rear window and door mirrors.
Heated windscreen*, rear window and door mirrors
See also Demisting and defrosting the wind- screen (p. 134). The door mirrors and rear window are demis- ted/defrosted automatically if the car is started in an outside temperature lower than +7 °C. Automatic defrosting can be selected in the menu system MY CAR, see MY CAR (p. 110).
03
Heating, windscreen
Heating, rear window and door mirrors
The function is used to remove ice and mist- ing from the windscreen, rear window and door mirrors. One press of the respective button starts the heating. The light in the button indicates that the function is active. Switch off the heating as soon as the ice/misting is cleared in order not to load the battery unnecessarily. How- ever, the function is switched off automati- cally after a certain time.
* Option/accessory, for more information, see Introduction.
103
03 Instruments and controls
Rearview mirror - interior The interior rearview mirror can be dimmed with a control in the mirror's lower edge. Alternatively, the rearview mirror dims auto- matically.
03
Control for dimming
Manual dimming Bright light from behind could be reflected in the rearview mirror and dazzle the driver. Use dimming with the dimming control when lights from behind are distracting: 1. Use dimming by moving the control in towards the passenger compartment.
2. Return to normal position by moving the
control towards the windscreen.
Automatic dimming* Bright light from behind is automatically dimmed by the rearview mirror. The control
for manual dimming is not available on mir- rors with automatic dimming. The rearview mirror contains two sensors - one forward facing and one rearward facing - that work together to identify and eliminate dazzling light. The forward facing sensor detects ambient light, while the rearward fac- ing sensor detects the light from vehicle headlights behind.
NOTE
If the sensors are obscured by e.g. parking permits, transponders, sun visors or objects in the seats or in the cargo area in such a way that light is prevented from reaching the sensors, then the dimming function of the interior rearview and door mirrors is reduced.
Only rearview mirror with automatic dimming can be equipped with compass (p. 104).
Related information • Door mirrors (p. 102)
Compass* The rearview mirror contains an integrated display that shows the compass direction in which the front of the car is pointing.
Operation
Rearview mirror with compass. The upper right-hand corner of the rearview mirror has an integrated display that shows the compass direction in which the front of the car is pointing. Eight different directions are shown with English abbreviations: N (north), NE (north east), E (east), SE (south east), S (south), SW (south west), W (west) and NW (north west). The compass is activated automatically when the car is started or when key position II is active, see Key positions - functions at differ- ent levels (p. 78). To deactivate/activate the compass - press in the button on the under-
104
* Option/accessory, for more information, see Introduction.
side of the mirror using a paper clip for exam- ple.
Calibration The compass may need calibrating to show the correct compass direction. The earth is divided into 15 magnetic zones. The compass should be calibrated if the car is moved across several magnetic zones. Proceed as follows to perform calibration: 1. Stop the car in a large open area free from steel structures and high-voltage power lines.
2. Start the car and switch off all electrical equipment (air conditioning, wipers, etc.) and ensure that all doors are closed.
NOTE
Calibration may fail or not start at all if electrical equipment is not switched off.
3. Hold the button on the underside of the rearview mirror depressed (use a paper clip or similar) for approx. 3 seconds. The number of the current magnetic zone is shown.
03 Instruments and controls
7. Cars with heated windscreen*: If the