- Download PDF Manual
-
13500 lb. (6124 kg)
USK65L-GKTZGA *1: The model code is indicated on the Certification Label. (P. 514) ■ Unbraked TWR* 1000 lb. (453 kg)
7000 lb. (3175 kg)
*: These models meet the tow-vehicle trailering requirement of SAE
International per SAE J2807.
275
2-5. Driving information
Trailer Tongue Weight
● A recommended tongue weight varies in accordance with the types
of trailers or towing as described below.
● To ensure the recommended values shown below, the trailer must
be loaded by referring to the following instructions. • Tongue Weight
The gross trailer weight should be distributed so that the tongue weight is 9% to 11%. (Tongue weight /Gross trailer weight x 100
= 9% to 11%)Gross trailer weight Tongue weight
If using a weight distributing hitch when towing, return the front axle to the same weight as before the trailer connection. If front axle weight cannot be measured directly, measure the front fender height above the front axle before connection. Adjust weight distributing hitch torque until front fender is returned to the same height as before connection. The gross trailer weight, gross axle weight and tongue weight can be measured with platform scales found at a highway weighing station, building supply company, trucking company, junk yard, etc.
276
2-5. Driving information
Hitch
Trailer hitch assemblies have different weight capacities. Toyota rec- ommends the use of Toyota hitch/bracket for your vehicle. For details, contact your Toyota dealer. ● If you wish to install a trailer hitch, contact your Toyota dealer. ● Use only a hitch that conforms to the gross trailer weight require-
ment of your vehicle.
● Follow the directions supplied by the hitch manufacturer. ● Lubricate the hitch ball with a light coating of grease. ● Remove the trailer hitch whenever you are not towing a trailer. After removing the hitch, seal any mounting hole in the vehicle body to prevent entry of any substances into the vehicle.
277
2-5. Driving information
Selecting trailer ball
Use the correct trailer ball for your application.
Trailer ball load rating Matches or exceeds the gross trailer weight rating of the trailer. Ball diameter Matches the size of the trailer coupler. Most couplers are stamped with the required trailer ball size.
Trailer class
Typical trailer ball size
IV
2 5/16 in.
II and III
2 in.
1 7/8 in.
Shank length Protrudes beyond the bottom of the lock washer and nut by at least 2 threads. Shank diameter Matches diameter size.
the ball mount hole
278
Positions for towing hitch receiver
2-5. Driving information
Hitch receiver pin hole posi- tion: 46.2 in. (1172.3 mm)
Connecting trailer lights
Use the wire harness stored in the rear end under the vehicle body.
4 pin connector
4 pin, 7 pin connectors
279
2-5. Driving information
■Service connector for towing brake controller (with towing package)
Your vehicle is equipped with a service connector for the trailer brake controller as shown. Access the service connector.
Remove the scuff plate. Remove the clip (screw type) and trim board.
Connecting and disconnecting a electronically modulated air suspension)
trailer
(vehicles with
If a height control system is installed in your vehicle, you have to con- nect and disconnect your trailer more carefully. ● Connecting
Set the height control of electronically modulated air suspen- sion system to N mode. Turn off the engine, or set the electronically modulated air suspension system to MAN. (manual). Connect the trailer. Turn the engine switch to the START position and start the engine. Press the height control mode select switch to cancel the MAN. (manual) condition that was set on Check that the MAN. indicator turns off. Set the height control of electronically modulated air suspen- sion system to N mode.
280
2
2-5. Driving information
● Disconnecting
Set the height control of electronically modulated air suspen- sion system to N mode. Set the electronically modulated air suspension system to MAN. (manual). Turn off the engine. Set the supporting leg of the trailer on the ground and raise the hitch by 4 in. (100 mm). Turn the engine switch to the START position and start the engine. Press the height control mode select switch to cancel the MAN. (manual) condition that was set on . Check that the MAN. indicator turns off. Wait until vehicle height is stabilized. Make sure the hitch is disconnected. If the hitch does not dis- connect, raise the hitch higher and repeat steps 2 through 7. Move the vehicle forward in LO mode where the hitch does not touch anything in N mode. Set the height control of electronically modulated air suspen- sion system to N mode.
281
2-5. Driving information
Trailer towing tips
Your vehicle will handle differently when towing a trailer. Help to avoid an accident, death or serious injury, keep the following in mind when towing: ● Speed limits for towing a trailer vary by state or province. Do not
exceed the posted towing speed limit.
● Toyota recommends that the vehicle-trailer speed limit is 65 mph (104 km/h) on a flat, straight, dry road. Do not exceed this limit, the posted towing speed limit or the speed limit for your trailer as set forth in your trailer owner’s manual, whichever is lowest. Instability of the towing vehicle-trailer combination (trailer sway) increases as speed increases. Exceeding speed limits may cause loss of con- trol.
● Before starting out, check the trailer lights, tires and the vehicle-
trailer connections. Recheck after driving a short distance.
● Practice turning, stopping and reversing with the trailer attached in an area away from traffic until you become accustomed to the feel of the vehicle-trailer combination.
● Reversing with a trailer attached is difficult and requires practice. Grip the bottom of the steering wheel and move your hand to the left to move the trailer to the left. Move your hand to the right to move the trailer to the right. (This is generally opposite to reversing without a trailer attached.) Avoid sharp or prolonged turning. Have someone guide you when reversing to reduce the risk of an acci- dent.
● As stopping distance is increased when towing a trailer, vehicle-to- vehicle distance should be increased. For each 10 mph (16 km/h) of speed, allow at least one vehicle and trailer length.
● Avoid sudden braking as you may skid, resulting in the trailer jack- knifing and loss of vehicle control. This is especially true on wet or slippery surfaces.
282
2-5. Driving information
● Avoid jerky starts or sudden acceleration. ● Avoid jerky steering and sharp turns, and slow down before mak-
ing a turn.
● Note that when making a turn, the trailer wheels will be closer than the vehicle wheels to the inside of the turn. Compensate by making a wider than normal turning radius.
● Slow down before making a turn, in crosswinds, on wet or slippery
surfaces, etc. Increasing vehicle speed can destabilize the trailer.
● Take care when passing other vehicles. Passing requires consider- able distance. After passing a vehicle, do not forget the length of your trailer, and be sure you have plenty of room before changing lanes.
● To maintain engine braking efficiency and charging system perfor- mance when using engine braking, do not use the transmission in D. Transmission shift range position must be in 4 in the S mode.
● Instability happens more frequently when descending steep or long downhill grades. Before descending, slow down and downshift. Do not make sudden downshifts while descending steep or long down- hill grades.
● Avoid holding the brake pedal down too long or applying the brakes too frequently. This could cause the brakes to overheat and result in reduced braking efficiency.
● Due to the added load of the trailer, your vehicle’s engine may overheat on hot days (at temperatures over 85°F [30°C]) when driving up a long or steep grade. If the engine coolant temperature gauge indicates overheating, immediately turn off the air condition- ing (if in use), pull your vehicle off the road and stop in a safe spot. (P. 504)
283
2-5. Driving information
● Always place wheel blocks under both the vehicle’s and the trailer’s wheels when parking. Apply the parking brake firmly, and put the transmission in P. Avoid parking on a slope, but if unavoid- able, do so only after performing the following: Apply the brakes and keep them applied. Have someone place wheel blocks under both the vehicle’s and trailer’s wheels. When the wheel blocks are in place, release the brakes slowly until the blocks absorb the load. Apply the parking brake firmly. Shift into P and turn off the engine. ● When restarting after parking on a slope:
With the transmission in P, start the engine. On vehicles with an automatic transmission, be sure to keep the brake pedal pressed. Shift into a forward gear. If reversing, shift into R. Release the parking brake and brake pedal, and slowly pull or back away from the wheel blocks. Stop and apply the brakes. Have someone retrieve the blocks.
284
2-5. Driving information
■Matching trailer ball height to trailer coupler height
No matter which class of tow hitch applies, for a more safe trailer hookup, the trailer ball setup must be the proper height for the coupler on the trailer.
Coupler Trailer ball
■Before towing
Check that the following conditions are met: ●Ensure that your vehicle’s tires are properly inflated. (P. 521) ●Trailer tires are inflated according to the trailer manufacturer’s recom-
mendation.
●All trailer lights work as required by law. ●All lights work each time you connect them. ●The trailer ball is set at the proper height for the coupler on the trailer. ●The trailer is level when it is hitched.
Do not drive if the trailer is not level, and check for improper tongue weight, overloading, worn suspension, or other possible causes.
●The trailer cargo is securely loaded. ●The rear view mirrors conform to all applicable federal, state/provincial or local regulations. If they do not, install rear view mirrors appropriate for towing purposes.
●Depress TOW/HAUL button (if equipped)
■AVS (adaptive variable suspension system) (if equipped)
The suspension can be switched for improvement in driveability. (P. 238)
285
2-5. Driving information
■Break-in schedule
If your vehicle is new or equipped with any new power train components (such as an engine, transmission, differential or wheel bearing), Toyota rec- ommends that you do not tow a trailer until the vehicle has been driven for over 500 miles (800 km). After the vehicle has been driven for over 500 miles (800 km), you can start towing. However, for the next 500 miles (800 km), drive the vehicle at a speed of less than 50 mph (80 km/h) when towing a trailer, and avoid full throttle acceleration.
■Maintenance
●If you tow a trailer, your vehicle will require more frequent maintenance due to the additional load. (See “Owner’s Warranty Information Booklet” or “Scheduled Maintenance Guide/Owner’s Manual Supplement”.)
●Retighten the fixing bolts of the towing ball and bracket after approxi-
mately 600 miles (1000 km) of trailer towing.
■If trailer sway occurs
One or more factors (crosswinds, passing vehicles, rough roads, etc.) can adversely affect handling of your vehicle and trailer, causing instability. ●If trailer swaying occurs:
• Firmly grip the steering wheel. Steer straight ahead.
Do not try to control trailer swaying by turning the steering wheel.
• Begin releasing the accelerator pedal immediately but very gradually to
reduce speed. Do not increase speed. Do not apply vehicle brakes.
If you make no extreme correction with the steering or brakes, your vehicle and trailer should stabilize. (if enabled, Trailer Sway Control can also help to stabilize the vehicle and trailer.) ●After the trailer swaying has stopped:
• Stop in a safe place. Get all occupants out of the vehicle. • Check the tires of the vehicle and the trailer. • Check the load in the trailer.
Make sure the load has not shifted. Make sure the tongue weight is appropriate, if possible.
• Check the load in the vehicle.
Make sure the vehicle is not overloaded after occupants get in.
286
2
2-5. Driving information
If you cannot find any problems, the speed at which trailer swaying occurred is beyond the limit of your particular vehicle-trailer combination. Drive at a lower speed to prevent instability. Remember that swaying of the towing vehicle-trailer increases as speed increases.
CAUTION
■Trailer towing precautions
●To tow a trailer safely, use extreme care and drive the vehicle in accor- dance with the trailer’s characteristics and operating conditions. Failure to do so could cause an accident resulting in death or serious injury. Vehicle stability and braking performance are affected by trailer stability, brake set- ting and performance, and the hitch. Your vehicle will handle differently when towing a trailer.
●Vehicles with electronically modulated air suspension: Set the vehicle height to the LO mode and turn off the rear height control air suspension when you connect a trailer, otherwise the vehicle height may change due to the automatic leveling function, and you may catch part of your body in the vehicle, resulting in an accident.
■To avoid accident or injury
●Do not exceed the TWR, unbraked TWR, GCWR, GVWR or GAWR. ●If the gross trailer weight is over 2000 lb. (907 kg), a sway control device
with sufficient capacity is required.
●If the gross trailer weight is over 5000 lb. (2268 kg), a weight distributing
hitch with sufficient capacity is required.
●Adjust the tongue weight within the appropriate range. Place heavier loads
as close to the trailer axle as possible.
●Do not exceed 65 mph (104 km/h), the posted towing speed limit or the speed limit for your trailer as set forth in your trailer owner’s manual, whichever is lowest. Slow down sufficiently before making a turn, in cross- winds, on wet or slippery surface, etc. to help avoid an accident. If you experience a vehicle-trailer instability from reducing a certain speed, slow down and make sure you keep your vehicle speed under the speed of which you experience the instability.
●Do not make jerky, abrupt or sharp turns.
287
2-5. Driving information
CAUTION
■To avoid accident or injury
●Do not apply the brakes suddenly as you may skid, resulting in jackknifing and loss of vehicle control. This is especially true on wet or slippery sur- faces.
●Do not exceed the trailer hitch assembly weight, gross vehicle weight,
gross axle weight and trailer tongue weight capacities.
●Do not use cruise control when towing. ●Slow down and downshift before descending steep or long downhill grades. Do not make sudden downshifts while descending steep or long downhill grades.
●Vehicle-trailer instability is more likely on steep long downhills. Before descending steep or long downhill grades, slow down and downshift. Do not make sudden downshifts when descending steep or long downhill grades. Avoid holding the brake pedal down too long or applying the brakes too frequently. This could cause the brakes to overheat and result in reduced braking efficiency.
●Do not tow a trailer when the temporary spare tire is installed on your vehi-
cle. ■Hitch
Trailer hitch assemblies have different weight capacities established by the hitch manufacturer. Even though the vehicle may be physically capable of towing a higher weight, the operator must determine the maximum weight rating of the particular hitch assembly and never exceed the maximum weight rating specified for the trailer-hitch. Exceeding the maximum weight rating set by the trailer-hitch manufacturer can cause an accident resulting in death or serious personal injuries.
■When towing a trailer
Toyota recommends trailers with brakes that conform to any applicable fed- eral and state/provincial regulations. ●If the gross trailer weight exceeds unbraked TWR, trailer brakes are required. Toyota recommends trailers with brakes that conform to all appli- cable federal and state/provincial regulations.
●Never tap into your vehicle’s hydraulic system, as this will lower the vehi-
cle’s braking effectiveness.
288
2-5. Driving information
CAUTION
■When towing a trailer
●Never tow a trailer without using a safety chain securely attached to both the trailer and the vehicle. If damage occurs to the coupling unit or hitch ball, there is danger of the trailer wandering into another lane.
NOTICE
■When installing a trailer hitch
Use only the position recommended by your Toyota dealer. Do not install the trailer hitch on the bumper; this may cause body damage.
■Do not directly splice trailer lights
Do not directly splice trailer lights. Directly splicing trailer lights may damage your vehicle’s electrical system and cause a malfunction.
289
2-5. Driving information Dinghy towing
Your vehicle is not designed to be dinghy towed (with 4 wheels on the ground) behind a motor home.
NOTICE
■To avoid serious damage to your vehicle
Do not tow your vehicle with four wheels on the ground.
290
2-5. Driving information
291
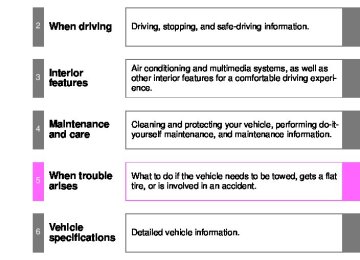
Interior features
3-1. Using the air conditioning
system and defogger Front air conditioning system ........................... 294
Rear air conditioning system ........................... 303
Rear window and outside rear view mirror defoggers ............ 307
Windshield wiper de-icer............................ 3093-2. Using the multimedia system
Multimedia system types .............................. 310
USB port/AUX port........... 311
Using the AUX port .......... 3123-3. Using the interior lights
Interior lights list ............... 313
• Personal/interior light main switch .................... 314
• Personal/interior lights ... 315
• Interior light .................... 316292
Interior features
3-4. Using the storage features
List of storage features .... 317
• Glove boxes................... 318
• Coin holder .................... 319
• Front console box .......... 320
• Card holder .................... 323
• Map holder..................... 324
• Pen holder ..................... 326
• Tissue pocket................. 327
• Rear console box........... 328
• Overhead console.......... 331
• Cup holders ................... 333
• Bottle holders................. 337
• Auxiliary boxes............... 3383-5. Using the other interior features Sun visors ........................ 340
Vanity mirrors................... 341
Clock ................................ 342
Outside temperature display............................ 343
Portable ashtray............... 345
Cigarette lighter................ 346
Conversation mirror ......... 347
Power outlets ................... 348
Seat heaters..................... 354
Seat heaters and ventilators ...................... 357
Armrests........................... 359
Rear side sunshades ....... 360
Assist grips....................... 362
Floor mat.......................... 363
Luggage compartment features.......................... 365
Garage door opener......... 370
Compass.......................... 376293
3-1. Using the air conditioning system and defogger Front air conditioning system
Airflow and outlets are automatically adjusted according to the tem- perature setting. Control panel
Windshield defogger
Driver’s side temperature control dial
Air conditioning ON/OFF switch Automatic mode
Fan speed control dial
Fan OFF switch
Outside air or recirculated air mode
Temperature control for rear passengers
Air outlet selection dial
Front passenger’s side temperature control dial
Simultaneous mode
Rear air conditioning ON/OFF switch
294
3-1. Using the air conditioning system and defogger
Display
Fan speed display Airflow display
Front passenger’s side temperature setting display
Driver’s side temperature setting display
Temperature setting display for rear passengers
Using the automatic mode
Press The air conditioning system will begin to operate. Air outlets and fan speed are automatically adjusted according to the temperature set- ting. Turn the temperature control dial clockwise (warm) or coun- terclockwise (cool). The temperature for the driver and passenger seat can be set sepa- rately.
■ Automatic mode indicator
If the fan speed setting or air flow modes are operated, the auto- matic mode indicator goes off. However, automatic mode for func- tions other than that operated are maintained.
295
3-1. Using the air conditioning system and defogger
Adjusting the settings
■ Adjusting the temperature setting
Turn the temperature control dial clockwise (warm) or counter- clockwise (cool). The air conditioning system switches between individual and
simultaneous modes each time
is pressed.
● Simultaneous mode (the indicator on
is on)
The driver’s side temperature control dial can be used to adjust the temperature for all seats.
● Individual mode (the indicator on
is off)
The temperature for the driver’s, front passenger’s and rear seats (P. 303) can be adjusted separately. Operate the pas- senger’s side or rear temperature controls to enter individual mode.
■ Adjusting the fan speed
Turn the fan speed control dial clockwise (increase) or counter- clockwise (decrease). The fan speed is shown on the display. (7 levels) Press
to turn the fan off.
296
3-1. Using the air conditioning system and defogger
■ Changing the air outlets
Turn the air outlet selection dial. The air outlets switch each time either side of air outlet selection dial is turned.
Air flow as shown according to the mode selected.
When the dial is set to flows to the upper body.
, air
When the dial is set to , air flows to the upper body and feet.
297
3-1. Using the air conditioning system and defogger
When the dial is set to flows to the feet.
, air
, air When the dial is set to flows to the feet and the wind- shield defogger operates.
Recirculated air mode will auto- matically switch to outside air mode.
■ Switching between outside air and recirculated air modes
Press
The mode switches between (recirculated air mode) each time the switch is pressed.
(outside air mode) and
Changing the rear seat settings
■ Adjusting the temperature setting
Press
to increase the temperature and
to decrease it.
The air conditioning system switches between individual and
simultaneous modes each time
is pressed.
298
3-1. Using the air conditioning system and defogger
Defogging the windshield
Press
The indicator comes on. The air conditioning system con- trol operates automatically. Recirculated air mode will auto- matically switch to outside air mode.
Adjusting the position and opening and closing the air outlets
Driver side outlets
Direct air flow to the left or right, up or down. Turn the knob to open or close the vent.
299
3-1. Using the air conditioning system and defogger
Passenger side outlets
Direct air flow to the left or right, up or down. Turn the knob to open or close the vent.
■Using the automatic mode
Fan speed is adjusted automatically in accordance with the temperature set- ting and ambient conditions. As a result, the following may occur. ●Immediately after the switch is pressed, the fan may stop for a while until
warm or cool air is ready to flow.
●Cool air may flow to the area around the upper body when the heater is
on.
■Using the system in recirculated air mode
The windows will fog up more easily if the recirculated air mode is used for an extended period.
■Switching between outside air and recirculated air modes
Recirculated air mode or outside air mode may be automatically switched in accordance with the temperature setting and the inside temperature.
300
3-1. Using the air conditioning system and defogger
■When the outside temperature exceeds 75F (24C) and the air condi-
tioning system is on ●In order to reduce the air conditioning power consumption, the air condi- tioning system may switch to recirculated air mode automatically. This may also reduce fuel consumption.
●Recirculated air mode is selected as a default mode when the engine
switch is in the ON position.
●It is possible to switch to outside air mode at any time by pressing
■Window defogger feature
Recirculated air mode may automatically switch to outside air mode in situa- tions where the windows need to be defogged.
■When outside temperature approaches 32F (0C)
The air conditioning system may not operate even when
is pressed.
■When the indicator on
flashes
and turn off the air conditioning system before turning it on
Press once more. There may be a problem in the air conditioning system if the indi- cator continues to flash. Turn the air conditioning system off and have it inspected by your Toyota dealer.
■Ventilation and air conditioning odors
●To let fresh air in, set the air conditioning system to the outside air mode. ●During use, various odors from inside and outside the vehicle may enter into and accumulate in the air conditioning system. This may then cause odor to be emitted from the vents.
●To reduce potential odors from occurring:
• It is recommended that the air conditioning system be set to outside air
mode prior to turning the vehicle off.
• The start timing of the blower may be delayed for a short period of time immediately after the air conditioning system is started in automatic mode.
301
3-1. Using the air conditioning system and defogger
CAUTION
■To prevent the windshield from fogging up
Do not use during cool air operation in extremely humid weather. The difference between the temperature of the outside air and that of the wind- shield can cause the outer surface of the windshield to fog up, blocking your vision.
NOTICE
■To prevent battery discharge
Do not leave the air conditioning system on longer than necessary when the engine is stopped.
302
3-1. Using the air conditioning system and defogger Rear air conditioning system
Airflow and outlets are automatically adjusted according to the tem- perature setting.
Automatic mode
Temperature setting display
Airflow control
Off
Temperature control for rear passengers
Fan speed control
■Button lock function
During Simultaneous mode (the indicator on tioning system buttons will be automatically locked. (P. 296)
is on), the rear air condi-
appears on the display when the buttons are locked.
To unlock the buttons, choose the Individual mode (the indicator on
is off). (P. 296)
303
3-1. Using the air conditioning system and defogger
Using the automatic mode
Press
The indicator comes on. The air conditioning system will operate, and air outlets and fan speed will be set automatically.
Press
to increase the temperature and
to
decrease it.
Adjusting the settings
■ Adjusting the temperature setting
Press
to increase the temperature and
to decrease it.
■ Changing the air outlets
Press the desired
or
Air flows as shown below according to the mode selected.
When
is pressed, air
flows to the upper body. The indicator comes on.
304
3-1. Using the air conditioning system and defogger
When
is pressed, air
flows to the upper body and feet. The indicator comes on.
When
is pressed, air
flows to the feet. The indicator comes on.
■ Adjusting the fan speed
Press the
(decrease increase) button.
The indicator comes on.
Press
to turn the fan off.
305
3-1. Using the air conditioning system and defogger
Adjusting the position and opening and closing the air outlets
Roof side outlets
Direct air flow to the left or right, up or down.
NOTICE
■To prevent battery discharge
Do not leave the air conditioning system on longer than necessary when the engine is stopped.
306
3-1. Using the air conditioning system and defogger Rear window and outside rear view mirror defoggers
These features are used to defog the rear window, and to remove raindrops, dew and frost from the outside rear view mirrors.
On/off
Press the button to turn on the rear window defogger. The indicator light will come on. The defogger will automatically turn off after 15 to 240 minutes. The operation time changes according to the ambient tem- perature and vehicle speed. Pressing the button again also turns the defogger off.
■The rear window and outside rear view mirror defoggers can be oper-
ated when ●The engine switch is in the ON position. ●The back window is completely closed.
■Outside rear view mirror defoggers (vehicles with outside rear view
mirror defoggers) Turning the rear window defogger on will turn the outside rear view mirror defoggers on.
: If equipped 307
3-1. Using the air conditioning system and defogger
CAUTION
■When the outside rear view mirror defoggers are on (vehicles with out-
side rear view mirror defoggers) Do not touch the rear view mirror surfaces, as they can become very hot and burn you.
308
3-1. Using the air conditioning system and defogger Windshield wiper de-icer
This feature is used to prevent ice from building up on the wind- shield and wiper blades.
On/off
Press the button to turn on the windshield wiper de-icer. The indicator light will come on. The windshield wiper de-icer will automatically turn off after 15 to 240 minutes. The opera- tion time changes according to the ambient temperature and vehicle speed. Pressing the button again also turns the defogger off.
■The de-icer can be operated when
●The engine switch is in the ON position. ●The back window is completely closed.
CAUTION
■When the windshield wiper de-icer is on
Do not touch the glass at the lower part of the windshield or to the side of the front pillars as the surfaces can become very hot and burn you.
: If equipped 309
3-2. Using the multimedia system Multimedia system types
Entune Audio Plus Refer to the “NAVIGATION SYSTEM OWNER’S MANUAL”.
Entune Premium Audio Refer to the “NAVIGATION SYSTEM OWNER’S MANUAL”.
310
: If equipped
3-2. Using the multimedia system USB port/AUX port
Connect an iPod, USB memory device or portable audio player to the USB port/AUX port as indicated below. Select “iPod”, “USB” or “AUX” on the “Select Audio Source” screen and the device can be operated via multimedia system.
Connecting using the USB port/AUX port
■ iPod
Open the cover and connect an iPod using an iPod cable.
Turn on the power of the iPod if it is not turned on.
■ USB memory
Open the cover and connect the USB memory device. Turn on the power of the USB memory device if it is not turned on.
■ Portable audio player
Open the cover and connect the portable audio player. Turn on the power of the portable audio player if it is not turned on.
CAUTION
■While driving
Do not connect a device or operate the device controls.
311
3-2. Using the multimedia system Using the AUX port
To use the AUX port, connect a portable player, then select “AUX” on the “Select Audio Source” screen.
Connecting a portable audio player
P. 311
■Operating portable audio players connected to the multimedia system The volume can be adjusted using the vehicle’s audio controls. All other adjustments must be made on the portable audio player itself.
■When using a portable audio player connected to the power outlet
Noise may occur during playback. Use the power source of the portable audio player.
CAUTION
■While driving
Do not connect a portable audio player or operate the device controls.
312
3-3. Using the interior lights Interior lights list
Your Toyota is equipped with an illuminated entry system to assist in entering the vehicle. Due to the function of the system, the lights shown in the following illustration automatically turn on/off accord- ing to whether the doors are locked/unlocked, whether the doors are opened/closed, and the engine switch position.
Outer foot lights (if equipped) Interior light (P. 316) Personal/interior lights (P. 315) Engine switch light Foot well lighting Door courtesy lights Ashtray lighting
313
3-3. Using the interior lights
Personal/interior light main switch
■To prevent the battery from being discharged
If the lights remain on when the door is not fully closed and the personal/inte- rior light main switch is in door position, the lights will go off automatically after 20 minutes. ■Customization
●That can be configured at Toyota dealer (vehicles without multi-informa-
tion display) Settings (e.g. The time elapsed before lights turn off) can be changed. (Customizable features P. 539) ●It is possible to change the settings (vehicles with multi-information dis-
play) (Feature customization P. 181)
Personal/interior light main switch
ON The personal/interior lights can- not be individually turned off. DOOR position The personal/interior lights come on when a door is opened. They turn off when the doors are closed. OFF The personal/interior lights and interior light can be individually turned on or off.
314
Personal/interior lights
■ Front Type A
Type B
■ Center Type A
On/off
On/off
On/off
3-3. Using the interior lights
Personal/interior lights
315
3-3. Using the interior lights
Type B
Personal/interior lights and interior light
On/off
On/off
DOOR position The interior light comes on when a back door is opened. It turns off when the door is closed. OFF ON
■ Rear
Interior light
316
3-4. Using the storage features List of storage features
Overhead console Glove boxes Auxiliary boxes Bottle holders Cup holders Rear console box (if equipped) Cup holder (if equipped) Front console box • Card holder • Map holder • Pen holder • Tissue pocket Map holder Coin holder (if equipped)
317
3-4. Using the storage features
CAUTION
Glove boxes
■Items that should not be left in the storage spaces
Do not leave glasses, lighters or spray cans in the storage spaces, as this may result in the following when cabin temperature becomes high: ●Glasses may be deformed by heat or cracked if they come into contact
with other stored items.
●Lighters or spray cans may explode. If they come into contact with other stored items, the lighter may catch fire or the spray can may release gas, causing a fire hazard.
Glove boxes
Upper glove box
Push the button.
Lower glove box
Unlock with the master key Lock with the master key
318
3-4. Using the storage features
Glove boxes and coin holder
Pull the lever up.
■Glove box light
The glove box light turns on when the tail lights are on.
CAUTION
■Caution while driving
Keep the glove box closed. In the event of sudden braking or sudden swerv- ing, an accident may occur due to an occupant being struck by the open glove box or the items stored inside.
Coin holder (if equipped)
Open the lid.
319
3-4. Using the storage features
CAUTION
■Caution while driving
Coin holder and front console box
Keep the coin holder closed. Injuries may result in the event of an accident or sudden braking.
Front console box
Pull the knob up and lift the lid.
320
3-4. Using the storage features
Front console box
■When using the front console box lid as an armrest
Pull the knob up and slide the lid forward. If necessary, the console box lid can slide forward. Pull the lid forward by grasping the front of the lid. When the lid is forward, it cannot be lifted.
■Tray in the front console box
The tray slides forward or backward. The tray can be removed.
321
3-4. Using the storage features
Front console box
The box can be removed. Hanging file folders can be hung on the rails when the box is removed.
CAUTION
■Caution while driving
Keep the console box closed. Injuries may result in the event of an accident or sudden braking.
322
Card holder
3-4. Using the storage features
Card holder
Pull the knob up and lift the lid.
CAUTION
■Caution while driving
Keep the console box closed. Injuries may result in the event of an accident or sudden braking.
323
3-4. Using the storage features
Map holder
Center console
Map holder
Push the tab down to release the lock. Remove the lid. Stow the lid.
CAUTION
■Caution while driving
Keep the console box closed. Injuries may result in the event of an accident or sudden braking.
324
3-4. Using the storage features
Map holder
Front console box
Pull the knob up and lift the lid.
CAUTION
■Caution while driving
Keep the console box closed. Injuries may result in the event of an accident or sudden braking.
325
3-4. Using the storage features
Pen holder
Pen holder
Pull the knob up and lift the lid.
CAUTION
■Caution while driving
Keep the console box closed. Injuries may result in the event of an accident or sudden braking.
326
Tissue pocket
3-4. Using the storage features
Tissue pocket
Pull the knob up and lift the lid.
CAUTION
■Caution while driving
Keep the console box closed. Injuries may result in the event of an accident or sudden braking.
327
3-4. Using the storage features
Rear console box (if equipped)
Upper box
Rear console box
Push the knob and lift the lid.
Lower box
Pull the knob up and lift the upper box.
328
3-4. Using the storage features
Rear console box
■The separator can be used at either of two positions shown in the illus-
tration
Change the separator position.
■The separator can be stowed
Stow the separator to the lid.
■Back side tray
Open the upper box to use the back side tray.
329
3-4. Using the storage features
Rear console box
■The inside tray can be removed
Pull the tray up.
■When closing the rear console box lid
Close the rear console box by lifting the grip on the inside of the upper box.
330
3-4. Using the storage features
Rear console box and overhead console
CAUTION
■Caution while driving
Keep the console box closed. Injuries may result in the event of an accident or sudden braking.
■When opening/closing the lower box
Be careful not to get your hands or feet caught between the lower box and the upper box. Failure to do so may result in serious injury.
■When opening the lower box
Make sure that the upper box is locked. Items stored inside may fall out and cause injury.
Overhead console
The overhead console is useful for temporarily storing sunglasses and similar small items.
Type A
Push the knob forward to open the console.
331
3-4. Using the storage features
Type B
Overhead console
Push the knob forward to open the console.
CAUTION
■Caution while driving
Do not leave the overhead console open while driving. Items stored in it may fall out and cause injury.
332
3-4. Using the storage features
Cup holders
Cup holders
Front
Front console box
Pull the lid down.
Rear
333
3-4. Using the storage features
Rear console box (if equipped)
Cup holders
Attach the separator when using either console box as a cup holder.
Both cup holders cannot be used at the same time.
■Removing the cup holder (front)
Push the tab down to release the lock. Remove the lid. Stow the lid.
334
3-4. Using the storage features
Cup holders
Pull the cup holder up.
■Removing the separator (rear console box)
Inside
Pull the separator up.
Outside
Pull the separator up.
335
3-4. Using the storage features
Cup holders
■The position of the separator can be changed (rear console box)
Inside
Outside
Change the separator position.
Change the separator position.
■The separator can be adjusted (rear console box)
Adjust the separator.
336
3-4. Using the storage features
Cup holders and bottle holders
CAUTION
■Items unsuitable for the cup holder
Do not place anything other than cups or aluminum cans in the cup holders. Other items may be thrown out of the holders in the event of an accident or sudden braking and cause injury. If possible, cover hot drinks to prevent burns.
■When not in use
Front console box and rear console box (inside) cup holder: Keep the cup holders closed. Injuries may result in the event of an accident or sudden braking.
NOTICE
■Before sliding the second center seat to the most forward position
(vehicles with bench type second seat) Ensure that the cup holder on the front console box is closed.
Bottle holders
Front
337
3-4. Using the storage features
Bottle holders and auxiliary boxes
Rear
NOTICE
■Items that should not be stowed in the bottle holders
Put the cap on before stowing a bottle. Do not place open bottles in the bot- tle holders, or glasses and paper cups containing liquid. The contents may spill and glasses may break.
Auxiliary boxes
Front
Press the knob then pull the lid down.
338
3-4. Using the storage features
Auxiliary boxes
Rear
Pull the lid up.
Rear console box (if equipped)
Pull the lever up to release the lock. Pull the handle.