- 2010 Mercedes-Benz R Class Owners Manuals
- Mercedes-Benz R Class Owners Manuals
- 2006 Mercedes-Benz R Class Owners Manuals
- Mercedes-Benz R Class Owners Manuals
- 2008 Mercedes-Benz R Class Owners Manuals
- Mercedes-Benz R Class Owners Manuals
- 2009 Mercedes-Benz R Class Owners Manuals
- Mercedes-Benz R Class Owners Manuals
- 2007 Mercedes-Benz R Class Owners Manuals
- Mercedes-Benz R Class Owners Manuals
- 2011 Mercedes-Benz R Class Owners Manuals
- Mercedes-Benz R Class Owners Manuals
- Download PDF Manual
-
Operation
Vehicle care products at an authorized Mercedes-Benz Center. Scratches, corrosive deposits, corrosion or damage due to negligent or incorrect care cannot always be removed or repaired with the vehicle-care products recommended here. In such cases it is best to seek aid at an authorized Mercedes-Benz Center. The following topics deal with the cleaning and care of your vehicle and give important “how-to” information as well as references to Mercedes-Benz approved vehicle-care products.
Power washer ! Follow the instructions provided by the
power washer manufacturer on maintaining a distance between the vehicle and the nozzle of the power washer. Never use a round nozzle to power-wash tires. The intense jet of water can result in damage to the tire. Always replace a damaged tire. Always keep the jet of water moving across the surface. Do not aim directly at electrical parts, electrical connectors, seals, or other rubber parts.
292
i Vehicles with KEYLESS-GO:
If a door handle is hit by a strong jet of water, and a SmartKey is within approximately 3 ft (1 m) of the vehicle, it could be inadvertently locked or unlocked.
Tar stains Quickly remove tar stains before they dry and become more difficult to remove. A tar remover is recommended.
Paintwork, painted body components ! Affixing stickers, magnets, adhesive tape
or similar materials to painted body components may damage the paintwork. Mercedes-Benz approved Paint Care should be applied when water drops on the paint surface do not “bead up”. This should normally be done every 3 to 5 months, depending on the climate and washing detergent used. Mercedes-Benz approved Paint Cleaner should be applied if the paint surface shows signs of embedded dirt (i.e. loss of gloss). Do not apply any of these products or wax if your vehicle is parked in the sun or if the hood is still hot.
X Use the appropriate MB-Touch-Up Stick for quick and provisional repairs of minor paint damage (i.e. chips from stones, vehicle doors, etc.).
Engine cleaning Prior to cleaning the engine compartment, make sure to protect electrical components and connectors from contact with water and cleaning agents. Corrosion protection, such as MB Anticorrosion Wax should be applied to the engine compartment after every engine cleaning. Before applying, all control linkage bushings and joints should be lubricated. The poly-V-belt and all pulleys should be protected from any wax.
Vehicle washing In the winter, thoroughly remove all traces of road salt as soon as possible. When washing the vehicle underbody, do not forget to clean the inner sides of the wheels. i Vehicles with KEYLESS-GO:
If a door handle is hit by a strong jet of water, and a SmartKey is within
approximately 3 ft (1 m) of the vehicle, it could be inadvertently locked or unlocked.
Hand-wash X Do not use hot water or wash your vehicle
in direct sunlight.
X Only use a soft, wet cloth or sponge to
clean the vehicle.
X Only use a mild vehicle wash detergent,
such as Mercedes-Benz approved Car Shampoo.
X Thoroughly spray the vehicle with a
diffused jet of water.
X Do not spray directly towards the
ventilation intake.
X Use plenty of water and rinse the sponge
and chamois frequently.
X Rinse with clean water and thoroughly dry
with a chamois. Do not allow cleaning agents to dry on the finish.
Automatic car wash You can have your vehicle washed in an automatic car wash from the start. Brushless car washes are preferable.
X To protect the filter system, activate the air recirculation mode using button : on the climate control panel.
! Do not clean your vehicle in an automatic
touchless car wash which uses caustic spray. Caustic spray will damage the paint or ornamental moldings.
If the vehicle is very dirty, prewash it before running it through the automatic car wash. ! Make sure the combination switch is set to wiper setting M. Otherwise, the rain sensor could activate and cause the wipers to move unintentionally. This may lead to vehicle damage. Due to the width of the vehicle, fold in exterior rear view mirrors prior to running the vehicle through an automatic car wash to prevent damage to the mirrors.
X When taking the vehicle through an automatic conveyor-type car wash: Make sure the automatic transmission remains in neutral position N. Observe instructions, see “Remaining in neutral position N” (Y page 137).
When leaving the automatic car wash, make sure the mirrors are folded out.
Operation
Vehicle care
After running the vehicle through an automatic car wash, wipe any wax off of the windshield and the wiper blade inserts. This will prevent smears and reduce wiping noise which can be caused by residual wax on the windshield.
Ornamental moldings X For regular cleaning and care of ornamental
moldings, use a damp cloth.
! Do not use chrome cleaner on ornamental moldings. Although ornamental moldings may have chrome appearance, they could be made of anodized aluminum that will be damaged when cleaned with chrome cleaner. Instead, use a damp cloth to clean those ornamental moldings. For very dirty ornamental moldings of which you are sure are chrome-plated, use a chrome cleaner. If in doubt whether an ornamental molding is chrome-plated, contact an authorized Mercedes-Benz Center.
293
Operation
Vehicle care Headlamps, brake lamps, tail lamps, side markers, turn signal lenses X Use a mild vehicle wash detergent, such as
Mercedes-Benz approved Car Shampoo, with plenty of water.
! Only use window cleaning solutions that
are suitable for plastic lamp lenses. Window cleaning solutions which are not suitable may damage the plastic lamp lenses of the headlamps. Therefore, do not use abrasives, solvents or cleaners that contain solvents.
Cleaning the Parktronic system sensors Parktronic system sensors are located in the front and rear bumper.
294
1 Parktronic system sensors in front
bumper
X Only clean sensors 1 by hand. X Use a mild vehicle wash detergent, such as
Mercedes-Benz approved Car Shampoo, with plenty of water and a soft, non- scratching cloth to clean sensors 1 on the bumpers.
! Applying strong pressure may damage
the sensor covers.
Cleaning the rear view camera lens
1 Camera lens X Only use clean water and a soft, non-
scratching cloth to clean camera lens 1. Be careful not to apply wax to camera lens 1 when waxing the vehicle. If necessary, remove the wax using the Mercedes-Benz approved Car Shampoo with plenty of water. ! Do not clean the camera and the area
around the camera Rwith a high-pressure cleaner Rwith a dry cloth and strong pressure Rwith aggressive cleaning agents You could otherwise damage the camera.
Cleaning the windows and the wiper blades ! Never open the hood when the wiper arms
are folded forward. G Warning! For safety reasons, switch off wipers and remove SmartKey from starter switch (vehicles with KEYLESS-GO: Make sure the vehicle’s on-board electronics have status 0) before cleaning the windshield and/or the wiper blades. Otherwise, the wiper motor could suddenly turn on and cause injury.
! Do not pull on the wiper blade inserts.
They could tear.
X Fold the wiper arms forward until they snap
into place.
X Clean the windshield and the wiper blade
inserts with a clean cloth and mild detergent solution.
X Use a soft, clean cloth and a mild window cleaning solution on all outside and inside glass surfaces. An automotive glass cleaner is recommended.
! Fold the windshield wiper arms back onto the windshield before turning the SmartKey in the starter switch or pressing the KEYLESS-GO start/stop button (vehicles with KEYLESS-GO). Hold on to the wiper when folding the wiper arm back. If released, the force of the impact from the tensioning spring could crack the windshield.
! To clean the window interior, do not use a dry cloth, abrasives, solvents or cleaners containing solvents. Do not touch the inside of the front, rear or side windows with hard objects such as an ice scraper or ring. Doing so may damage the windows.
Cleaning the panorama roof with power tilt/sliding panel The rear part of the tilt/sliding panel has a protective layer on the inside. X Use a soft, clean cloth and a mild window
cleaning solution. An automotive glass cleaner is recommended.
! Do not use a dry cloth, abrasives, solvents
or cleaners containing solvents. Do not
Operation
Vehicle care touch the protective layer with hard objects such as an ice scraper or ring. Never apply strong force and only use a soft, non- scratching cloth when cleaning the rear part of the tilt/sliding panel. Otherwise you may scratch or damage the protective layer.
Light alloy wheels If possible, clean wheels once a week. X Use Mercedes-Benz approved Wheel Care,
a soft bristle brush and a strong spray of water for cleaning the light alloy wheels.
! Only use acid-free cleaning materials.
Acid may cause corrosion or damage the clear coat.
! The vehicle should not be parked for an extended period of time immediately after it has been cleaned, especially not after the wheel rims have been cleaned with wheel rim cleaner. Wheel rim cleaners can lead to increased corrosion of the brake disks and brake pads. Non-approved wheel cleaners may also damage the wheel paint if the vehicle is not driven after cleaning.
295
Operation
Vehicle care
Therefore, the vehicle’s brake system should always be warmed-up before it is parked after cleaning. Drive your vehicle for several minutes to allow the brakes to dry. When applying Mercedes-Benz approved Tire Care and Mercedes-Benz approved Wheel Care products, take care not to spray them on the brake disks.
Plastic and rubber parts X Use a gentle dishwashing detergent or mild detergent for delicate fabrics as a washing solution.
X Wipe with a cloth moistened in a lukewarm
solution. The surface may temporarily change color. If this is the case, wait for it to dry. G Warning! Do not use cleaners or cockpit care sprays containing solvents to clean the cockpit or the steering wheel. Cleaners containing solvents will make the surface porous and vehicle occupants could suffer serious injuries from plastic parts coming loose in the event of air bag deployment.
! Do not use oil, wax or scouring agents.
Otherwise you may scratch or damage the surface.
Hard plastic trim items X Use Mercedes-Benz approved Interior Care on a soft, lint-free cloth and apply with light pressure.
COMAND display ! You must switch off the COMAND display
and allow it to cool prior to cleaning.
! Do not use any liquids or cleaning agents.
These can damage or even destroy the audio display screen.
X Use a standard microfiber cloth and apply
with light pressure.
Steering wheel X Wipe with a damp cloth and dry thoroughly
or clean with Mercedes-Benz approved Leather Care.
Carpets X Use Mercedes-Benz approved Carpet and
Fabric Care for cleaning the carpets.
Headliner X Use a soft bristle brush or a dry-shampoo
cleaner in case of excessive dirt.
Seat belts X Only use clear, lukewarm water and soap.
! The seat belts must not be treated with chemical cleaning agents. Do not dry the seat belts at temperatures above 176‡ (80†) or in direct sunlight. G Warning! Do not bleach or dye seat belts as this may severely weaken them. In a crash they may not be able to provide adequate protection.
Upholstery Using aftermarket seat covers or wearing clothing that have the tendency to give off coloring (e.g. when wet, etc.) may cause the upholstery to become permanently discolored. By lining the seats with a proper intermediate cover, contact-discoloration will be prevented.
296
G Warning! Only use seat or head restraint covers which have been tested and approved by Mercedes-Benz for your vehicle model. Using other seat or head restraint covers may interfere with or prevent Rdeployment of the front side impact air
bags
Rdeployment of the rear side impact air
bags
Ractivation of the active head restraints Contact an authorized Mercedes-Benz Center for availability.
Leather upholstery Please note that leather upholstery is a natural product and is therefore subject to a natural aging process. Leather upholstery may also react to certain ambient influences such as high humidity or high temperature by showing wrinkles for example. X Wipe leather upholstery with a damp cloth and dry thoroughly or clean with Mercedes- Benz approved Leather Care.
Operation
Vehicle care
! To avoid damage to leather upholstery:
RWipe with light pressure only. RDo not clean with abrasive cleaning
agents such as scouring milk or powder.
RDo not soak the leather upholstery.
As leather is a natural product, it could otherwise harden or become porous. RExercise particular care when cleaning
perforated leather as its underside should not become wet.
Chrome-plated exhaust tip Regular cleaning and care of chrome-plated exhaust tips will help to maintain their shine and the classy appearance. X Use Mercedes-Benz approved Chrome
Polishing Paste each time the vehicle has been washed, especially during the winter.
! Do not use alkaline cleaners such as
wheel cleaners as they could cause corrosion.
MB Tex upholstery X Use Mercedes-Benz approved Interior Care
onto a soft, lint-free cloth and apply with light pressure for cleaning the upholstery.
Wood trims X Only use water and a damp cloth to clean
wood trims in your vehicle.
! Do not use solvents like tar remover or wheel cleaner nor polishes or waxes as these may be abrasive.
297
298
Practical hints
Vehicle equipment ............................ 300
Where will I find ...? .......................... 300
Vehicle status messages in the multifunction display ....................... 305
What to do if … .................................. 340
Unlocking/locking manually ........... 353
Resetting activated head restraints 354
Replacing SmartKey batteries ......... 355
Replacing bulbs ................................. 356Replacing wiper blades .................... 363
Flat tire .............................................. 365
Bleeding the fuel system (diesel engine only) ....................................... 374
AdBlue® (diesel engine only) ........... 375
Battery ............................................... 378
Jump starting .................................... 380
Towing the vehicle ............................ 382
Fuses .................................................. 385299
Practical hints
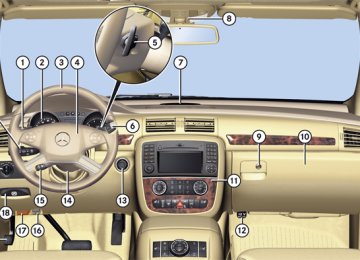
Where will I find ...? Vehicle equipment
i This Operator’s Manual describes all
features, standard or optional, potentially available for your vehicle at the time of purchase. Please be aware that your vehicle might not be equipped with all features described in this manual.
Where will I find ...? First aid kit i Check expiration dates and contents for
completeness at least once a year and replace missing/expired items.
The first aid kit is located in the space underneath the cargo compartment floor. To lift the cargo compartment floor, see “Vehicle tool kit” (Y page 301).
Vehicle tool kit The vehicle tool kit is located in the space underneath the cargo compartment floor. The vehicle tool kit includes: RAlignment bolt RCollapsible wheel chock RElectric air pump15
RFuse chart RJack RReversible ratchet for jack RTowing eye bolt RWheel wrench RSpare wheel bolts15
X Removing: Open the tailgate (Y page 90).Example illustration 1 First aid kit
15 Vehicles with spare wheel only. 300
Practical hints
Where will I find ...? X Engage securing hook 3 on upper cargo
compartment lip 5.
! With the cargo compartment cover blind
installed behind the third-row seats, disengage cargo compartment cover blind and flip it forward. Otherwise the strap of the securing hook could damage the cargo compartment cover blind.
! To prevent damage, always disengage the
securing hook from upper cargo compartment lip and lower the cargo compartment floor before closing the tailgate.
1 Cargo compartment floor, lowered 2 Floor handle X Push in floor handle 2 as indicated by
arrow.
X Lift cargo compartment floor 1 using floor
handle 2.
3 Securing hook X Release securing hook 3 (located below
the floor handle) from holder.
3 Securing hook 4 Cargo compartment floor, raised 5 Upper cargo compartment lip
301
Practical hints
Where will I find ...? Vehicles without spare wheel
1 Towing eye bolt 2 Alignment bolt 3 Wheel wrench 4 Reversible ratchet for jack 5 Fuse chart 6 Jack 7 Collapsible wheel chock
302
Vehicles with spare wheel
X Take the collapsible wheel chock from the
vehicle tool kit (Y page 300).
1 Wheel wrench 2 Electric air pump 3 Mounting direction indicator 4 Fuse chart 5 Alignment bolt 6 Collapsible wheel chock 7 Towing eye bolt 8 Spare wheel bolts 9 Storage well casing a Reversible ratchet for jack b Jack
Collapsible wheel chock The collapsible wheel chock serves to secure the vehicle, e.g. while changing a wheel.
1 Tilt the plates upward 2 Fold the lower plate outward 3 Insert the plate X Setting up: Tilt both plates upward 1. X Fold the lower plate outward 2. X Guide the tabs of the lower plate all the way
into the openings of base plate 3.
For information on where to place wheel chocks when changing a wheel, see “Lifting the vehicle” (Y page 366).
Jack G Warning! Only use the jack supplied with your vehicle to lift the vehicle briefly for wheel changes. If you use the jack for any other purpose, you or others could be injured, as the jack is designed only for the purpose of changing a wheel. When using the jack, observe the safety notes in the “Mounting the spare wheel” section and the notes on the jack.
X Take the jack from the vehicle tool kit
(Y page 300).
Practical hints
Where will I find ...? X Attach reversible ratchet 2 to jack 1 in such a way that the word UP can be seen. Before placing the jack back into the vehicle tool kit: X Fully collapse the jack (storage position). X Remove the reversible ratchet.
Spare wheel G Observe Safety notes, see
page 365.
i The R 320 BlueTEC does not have a spare
wheel.
The spare wheel is located in the space underneath the cargo compartment floor. X Removing: Open the tailgate (Y page 90). X Lift the cargo compartment floor
(Y page 301).
! To prevent damage, always disengage the
securing hook from upper cargo compartment lip and lower the cargo compartment floor before closing the tailgate.
X Remove the jack from the vehicle tool kit
(Y page 302).
303
Storage position X Take the reversible ratchet from the vehicle
tool kit.
Operational position 1 Jack 2 Reversible ratchet
Practical hints
Where will I find ...?
1 Retaining screw 2 Spare wheel 3 Storage well casing X Remove retaining screw 1 by turning it
counterclockwise.
i If retaining screw 1 does not come
loose, turn storage well casing 3 slightly counterclockwise. Retaining screw 1
should then come loose easily. X Turn storage well casing 3 byapproximately 180°. The electric air pump (Y page 302) points towards the rear.
X Remove storage well casing 3. X Remove spare wheel 2.
304
For information on mounting the spare wheel, see “Flat tire” (Y page 365).
Storing the spare wheel after use There are two guide pins in the spare wheel well that serve to hold the spare wheel in place.
1 Guide pins
1 Guide pins 2 Spare wheel X Place spare wheel 2 into the spare wheel
well. Make sure spare wheel 2 is placed precisely on guide pins 1.
X Place the storage well casing
(Y page 304) into the spare wheel. The electric air pump (Y page 302) must point to the rear.
X Turn the storage well casing by
approximately 180°. The electric air pump points in direction of travel.
i The storage well casing should now be
positioned according to the mounting direction indicators (Y page 302).
X Secure the spare wheel by turning the
retaining screw (Y page 304) clockwise.
X Place the jack into the storage well casing
(Y page 302).
Practical hints
Vehicle status messages in the multifunction display multifunction steering wheel. They are then stored in the Vehicle status message memory menu (Y page 151). Remember that clearing a message will only make the message disappear. Clearing a message will not correct the condition that caused the message to appear. G Warning! All categories of messages contain important information which should be taken note of and, where a malfunction is indicated, addressed as soon as possible at an authorized Mercedes-Benz Center. Failure to repair the condition noted may cause damage not covered by the Mercedes-Benz Limited Warranty, or result in property damage or personal injury. G Warning! No messages will be displayed if either the instrument cluster or the multifunction display is inoperative. As a result, you will not be able to see information about your driving conditions, such as speed or outside temperature, warning/indicator lamps, malfunction/ warning messages or the failure of any
Vehicle status messages in the multifunction display Notes Warning and malfunction messages appear in the multifunction display located in the instrument cluster. Certain warning and malfunction messages are accompanied by an audible signal. Address these messages accordingly and follow the additional instructions given in this Operator’s Manual. Selecting the Vehicle status message memory menu in the control system (Y page 151) displays both cleared and uncleared messages. High-priority messages appear in the multifunction display in red color. Certain messages of high priority cannot be cleared from the multifunction display using the reset button (Y page 143) or button j, k, · or è on the multifunction steering wheel. Other messages of high priority and messages of less immediate priority can be cleared from the multifunction display using the reset button (Y page 143) or button j, k, · or è on the
305
Practical hints
Vehicle status messages in the multifunction display systems. Driving characteristics may be impaired. If you must continue to drive, please do so with added caution. Contact an authorized Mercedes-Benz Center as soon as possible. Text messages
On the pages that follow, you will find a compilation of the most important warning and malfunction messages that may appear in the multifunction display.
For your convenience the messages are divided into text messages (Y page 306) and symbol messages (Y page 319).
Safety systems
Display messages
Possible cause/consequence
Possible solution
ABS, ESP Inoperative See Operator’s Manual
The brake system is still functioning normally but due to a malfunction, the ABS, the BAS and the ESP® are unavailable.
X Continue driving with added caution. Wheels
may lock during hard braking, reducing steering capability.
X Have the system checked at an authorized Mercedes-Benz Center as soon as possible.
Failure to follow these instructions increases the risk of an accident.
ABS, ESP Unavailable See Operator’s Manual
The self-diagnosis may not be completed yet.
The display will clear after driving a short distance at a vehicle speed of above 12 mph (20 km/h).
ABS
ABS
306
Vehicle status messages in the multifunction display
Practical hints
Display messages
Possible cause/consequence
Possible solution
ABS
ESP
ABS, ESP Unavailable See Operator’s Manual
The brake system still functions normally but due to insufficient power supply, the ABS, the BAS and the ESP® are unavailable.
Inoperative See Operator’s Manual
In addition, the yellow ESP® warning lamp v comes on. The brake system is still functioning normally but due to a malfunction the ESP® is unavailable. The ABS and the BAS may not be operational.
When the voltage is above the required value again, the ABS is operational again and the message should disappear. X If the message does not disappear: Have the system checked at an authorized Mercedes- Benz Center as soon as possible.
X Continue driving with added caution. X Have the system checked at an authorized Mercedes-Benz Center as soon as possible.
Failure to follow these instructions increases the risk of an accident.
307
Practical hints
Vehicle status messages in the multifunction display Display messages
Possible cause/consequence
Unavailable See Operator’s Manual
The brake system still functions normally but due to insufficient power supply the ESP® is unavailable.
Possible solution
X Continue driving with added caution. When the voltage is above the required value again, the ESP® is operational again and the message in the multifunction display should disappear. If the message in the multifunction display does not disappear: X Have the alternator and the battery checked. X Have the system checked at an authorized Mercedes-Benz Center as soon as possible.
Unavailable See Operator’s Manual
Unavailable See Operator’s Manual
If the yellow ESP® warning lamp v flashes while driving and this message appears, the 4-ETS has switched off to prevent overheating of the drive wheel brakes.
As soon as the brakes have cooled off, the 4-ETS switches on again. The message in the multifunction display disappears and the ESP® warning lamp v goes out.
The self-diagnosis might not be completed yet.
The display will clear after driving a short distance at a vehicle speed of above 12 mph (20 km/h).
ESP
ESP
ESP
308
Display messages
PRE-SAFE
Inoperative See Operator’s Manual
Vehicle status messages in the multifunction display
Practical hints
Possible cause/consequence
Possible solution
X Contact an authorized Mercedes-Benz Center
as soon as possible.
X Contact an authorized Mercedes-Benz Center
as soon as possible.
The PRE-SAFE® system itself has failed. All other occupant safety systems, such as the air bags, are still available.
If ESP® and PRE-SAFE® malfunction messages are displayed simultaneously, the PRE-SAFE® system has been deactivated as a result of these malfunctions. All other occupant safety systems, such as the air bags, are still available.
309
Practical hints
Vehicle status messages in the multifunction display Display messages
Possible cause/consequence
Front Passenger Airbag Enabled See Operator’s Manual
USA only: The front passenger front air bag is activated while driving even though a child, small individual, or object below the system’s weight threshold is on the front passenger seat, or the front passenger seat is empty. Objects on the seat or forces acting on the seat may make the system sense supplemental weight.
Possible solution
X Stop the vehicle in a safe location as soon as
possible.
X Engage the parking brake. X Switch off the ignition. X Open the front passenger door. X Remove child and child restraint from front
passenger seat and properly secure the child in rear seat employing the child restraint if necessary.
X Remove any other items from on and around the front passenger seat and make sure the parcel net on the back of the front passenger seat is empty.
X Make sure no objects which apply forces to the seat are present (e.g. objects such as books, briefcases etc. lodged behind or around the seat, head restraints pushing against roof etc.). The system may recognize such forces as supplemental weight and sense that an occupant on the front passenger seat is of a greater weight than actually present.
X Keep the seat unoccupied, close the front passenger door and switch on the ignition.
310
Vehicle status messages in the multifunction display
Practical hints
Display messages
Possible cause/consequence
Possible solution Monitor the 59 indicator lamp in the center console (Y page 54) and the multifunction display in the instrument cluster (Y page 30) for the following: With the seat unoccupied and the ignition switched on, Rthe 59 indicator lamp in the
center console should illuminate and remain illuminated, indicating that the OCS (Y page 51) has deactivated the front passenger front air bag.
Rthe message Front Passenger Airbag
Enabled See Operator’s Manual or the message Front Passenger Airbag Disabled See Operator’s Manual should not appear in the multifunction display at any time the seat is unoccupied. Wait at least 60 seconds for the system to complete the necessary check cycles and to make sure neither message appears in the multifunction display.
If above conditions are met, you can occupy the front passenger seat again. Depending on the front passenger classification sensed by the
311
Practical hints
Vehicle status messages in the multifunction display Display messages
Possible cause/consequence
Possible solution OCS, the 59 indicator lamp will remain illuminated or go out. If above conditions are not met, the system is not working properly. Have the system checked as soon as possible at an authorized Mercedes-Benz Center.
G Warning! If the 59 indicator lamp remains out even after performing the above corrective steps, do not have any children 12 years old and under and other small individuals use the front passenger seat until the system has been repaired.
312
Display messages
Front Passenger Airbag Disabled See Operator’s Manual
Vehicle status messages in the multifunction display
Practical hints
Possible cause/consequence
Possible solution
USA only: The front passenger front air bag is deactivated while driving even though an adult or someone larger than a small individual is occupying the front passenger seat. Forces acting on the seat may make the system sense a decrease in weight.
X Stop the vehicle in a safe location as soon as
possible.
X Engage the parking brake. X Switch off the ignition. X Have the front passenger vacate the seat and
exit the vehicle.
X Adjust the seat height to a higher position
(Y page 98).
X Make sure no objects which apply forces to the seat are present (e.g. objects such as books, briefcases etc. lodged underneath, behind or around the seat). Such forces may cause the system to sense that an occupant of a lesser weight than actually present is on the front passenger seat.
X Keep the seat unoccupied, close the front passenger door and switch on the ignition.
Monitor the 59 indicator lamp in the center console (Y page 54) and the multifunction display in the instrument cluster (Y page 30) for the following:
313
Practical hints
Vehicle status messages in the multifunction display Display messages
Possible cause/consequence
314
Possible solution
With the seat unoccupied and the ignition switched on, Rthe 59 indicator lamp in the
center console should illuminate and remain illuminated, indicating that the OCS (Y page 51) has deactivated the front passenger front air bag.
Rthe message Front Passenger Airbag
Enabled See Operator’s Manual or the message Front Passenger Airbag Disabled See Operator’s Manual should not appear in the multifunction display at any time the seat is unoccupied. Wait at least 60 seconds for the system to complete the necessary check cycles and to make sure neither message appears in the multifunction display.
If above conditions are met, you can occupy the front passenger seat again. Depending on the front passenger classification sensed by the OCS, the 59 indicator lamp will remain illuminated or go out. If above conditions are not met, the system is not working properly. Have the system checked as
Vehicle status messages in the multifunction display
Practical hints
Display messages
Possible cause/consequence
Possible solution soon as possible at an authorized Mercedes-Benz Center.
G Warning! If the 59 indicator lamp remains illuminated with an adult occupant on the front passenger seat even after performing the above corrective steps, do not have any passenger use the front passenger seat until the system has been repaired.
Driving systems
Display messages
Possible cause/consequence
Possible solution
Cruise Control
Inoperative
The cruise control is malfunctioning.
X Have cruise control checked at an authorized
Mercedes-Benz Center.
Cruise Control
- - - MPH (USA only) - - - Km/h (Canada only)
One of the activation conditions for cruise control has not been fulfilled. For example, you have attempted to set a speed below 20 mph (30 km/h).
X Drive faster than 20 mph (30 km/h), if the
situation allows, and set the speed.
X Check the activation conditions for cruise
control (Y page 164).
315
Practical hints
Vehicle status messages in the multifunction display Vehicle
Display messages
Possible cause/consequence
Possible solution
Depress brake
to shift out of P.
You have attempted to shift the automatic transmission into drive position D, reverse gear R or neutral position N without depressing the brake pedal.
X Depress the brake pedal.
Door Open
Vehicle Not In Park You have opened the driver’s door and the
automatic transmission is still in drive position D, reverse gear R or neutral position N.
X Before you leave the vehicle, make sure the automatic transmission is in park position P and the parking brake is engaged.
Drive to workshop
without shifting gears.
The automatic transmission cannot be shifted out of the current transmission position because of a malfunction.
If the automatic transmission is in drive position D: X Without shifting the automatic transmission out of drive position D, drive to an authorized Mercedes-Benz Center.
If the automatic transmission is set to position neutral position N, reverse gear R or park position P: X Do not drive. X Contact an authorized Mercedes-Benz Center
or call Roadside Assistance.
316
Vehicle status messages in the multifunction display
Practical hints
Possible cause/consequence
You have attempted to shift the automatic transmission into park position P although the vehicle was still in motion.
Possible solution
X Stop the vehicle.
Shift to P or N to start engine.
You have attempted to start the engine with the KEYLESS-GO start/stop button while the automatic transmission was in reverse gear R or drive position D.
X Shift the automatic transmission into park
position P or neutral position N. Make sure the brake pedal is depressed.
Possible cause/consequence
Possible solution
then restart Run Flat Indicator.
There has been a warning message about a loss in the tire inflation pressure and the Run Flat Indicator was not restarted yet.
X Make sure the correct tire inflation pressure is
set for each tire.
X Then restart the Run Flat Indicator
(Y page 262).
The Run Flat Indicator is malfunctioning. X Have the Run Flat Indicator checked at an
authorized Mercedes-Benz Center.
Display messages
Only shift to P when vehicle is at a standstill.
Tires
Display messages
Check tires,
Run Flat Indicator Inoperative
317
Practical hints
Vehicle status messages in the multifunction display Display messages
Possible cause/consequence
Tire Pressure
Check Tires
The Run Flat Indicator indicates that the pressure is too low in one or more tires.
Tire Pressure Monitor
Inoperative
The TPMS is malfunctioning.
Possible solution
X Carefully bring the vehicle to a halt, avoiding
abrupt steering and braking maneuvers. Observe the traffic situation around you.
X Check and adjust tire inflation pressure as
required (Y page 261).
X If necessary, change the wheel (Y page 365). X Restart the Run Flat Indicator after adjusting
the tire inflation pressure values (Y page 262).
X Have the TPMS checked at an authorized
Mercedes-Benz Center.
Tire Pressure Monitor
Inoperative No Wheel Sensors
There are wheels without appropriate wheel sensors mounted (e.g. winter tires).
X Have the TPMS checked at an authorized
Mercedes-Benz Center.
Tire Pressure Monitor
Currently Unavailable
The TPMS is unable to monitor the tire inflation pressure due to a nearby radio interference source or insufficient power supply.
X Have the appropriate wheel sensors installed
at an authorized Mercedes-Benz Center.
As soon as the causes of the malfunction have been removed, the TPMS becomes active again automatically after a few minutes driving.
318
Vehicle status messages in the multifunction display
Practical hints
G Warning! Do not drive with a flat tire. A flat tire affects the ability to steer or brake the vehicle. You may lose control of the vehicle. Continued driving with a flat tire will cause excessive heat build-up and possibly a fire. G Warning! Follow recommended tire inflation pressures. Do not underinflate tires. Underinflated tires wear excessively and/or unevenly, adversely affect handling and fuel economy, and are more likely to fail from being overheated. Do not overinflate tires. Overinflated tires can adversely affect handling and ride comfort, wear unevenly, increase stopping distance, and result in sudden deflation (blowout) because they are more likely to become punctured or damaged by road debris, potholes etc.
Symbol messages
Brake
Display messages 2 Brake Wear
Possible cause/consequence
Possible solution
The brake pads have reached their wear limit.
X Have the brake pads replaced as soon as
possible.
! Brake pad thickness must be visually inspected by a qualified technician at the intervals specified in the Maintenance Booklet.
319
Practical hints
Vehicle status messages in the multifunction display Display messages
Possible cause/consequence
EBV, ABS, ESP Inoperative See Operator’s Manual
The brake system is still functioning normally but due to a malfunction, the ABS, the BAS, the EBP and the ESP® are unavailable.
Possible solution
X Continue driving with added caution. Wheels
may lock during hard braking, reducing steering capability.
X Adjust driving to be consistent with reduced
braking responsiveness.
X Have the system checked at an authorized Mercedes-Benz Center as soon as possible.
Release Parking Brake
You are driving with the parking brake engaged.
X Release the parking brake.
Check Brake Fluid Level
There is insufficient brake fluid in the reservoir.
Risk of accident! X Stop the vehicle in a safe location or as soon
as it is safe to do so.
X Do not drive any further. X Contact an authorized Mercedes-Benz Center
or call Roadside Assistance.
Do not add brake fluid! This will not solve the problem.
(USA only) (Canada only)
(USA only) (Canada only)
(USA only) (Canada only)
320
Vehicle status messages in the multifunction display
Practical hints
G Warning! Driving with the message Check Brake Fluid Level displayed can result in an accident. Have your brake system checked immediately. Do not add brake fluid before checking the brake system. Overfilling the brake fluid reservoir can result in spilling brake fluid on hot engine parts and the brake fluid catching fire. You can be seriously burned.
! If you find that the brake fluid in the brake fluid reservoir has fallen to the minimum mark or below, have the brake system checked for
brake pad thickness and leaks.
Safety systems
Display messages L Tele Aid
Inoperative
1 Restraint Sys.
Malfunction Service Required
Possible cause/consequence
Possible solution
One or more main functions of the Tele Aid system are malfunctioning.
X Have the Tele Aid system checked at an
authorized Mercedes-Benz Center.
The system is malfunctioning.
X Drive with added caution to the nearest
authorized Mercedes-Benz Center and have the system checked immediately.
G Warning! In the event a malfunction of the SRS is indicated as outlined above, the SRS may not be operational. For your safety, we strongly recommend that you contact an authorized Mercedes-Benz Center immediately to have the system checked. Otherwise the SRS may not be activated when needed in an accident, which could result in serious or fatal injury, or it might deploy unexpectedly and unnecessarily which could also result in injury.
321
Practical hints
Vehicle status messages in the multifunction display Driving systems
Display messages n Level Selection
Not Permitted
n Vehicle Rising
Wait Briefly
n Stop Car Too Low
The vehicle level is too low.
You have driven off while the vehicle level was too low or the AIRMATIC is inoperative.
Possible cause/consequence
Possible solution
You are driving too fast for the desired vehicle level.
X Reduce vehicle speed and set the desired
vehicle level again (Y page 167).
X Wait until the message disappears from the
multifunction display.
The AIRMATIC should have raised the vehicle to the set level after a short while. While the message is displayed: X Avoid excessive steering maneuvers. The
fenders or tires could otherwise be damaged. Listen for scraping noises.
X Do not drive faster than 50 mph (80 km/h). If the message does not disappear from the multifunction display: X Have the system checked at an authorized
Mercedes-Benz Center.
X Do not drive faster than 50 mph (80 km/h). X Have the system checked at an authorized
Mercedes-Benz Center.
n Malfunction
The AIRMATIC is malfunctioning.
322
Display messages n Compressor Cooling
Down
Vehicle
Display messages
Vehicle status messages in the multifunction display
Practical hints
Possible cause/consequence
Possible solution
X Let the compressor cool down until the
message disappears. The selected level will be set once the compressor has cooled down.
You have selected a higher vehicle level. Due to frequent level changes within a short period, the compressor must cool down first. ! When the message Compressor
Cooling Down appears in the multifunction display, driving is still possible. Keep in mind that the ride height of the vehicle is not yet reached, so you can damage the underbody of the vehicle.
Possible cause/consequence
Possible solution
You are driving with the hood or the tailgate open.
You are trying to lock the vehicle with the KEYLESS-GO function with a door or the tailgate open.
X Close the hood or the tailgate.
X Close all doors and/or the tailgate.
You are driving with at least one door open.
X Close all doors.
323
Practical hints
Vehicle status messages in the multifunction display Display messages I Key Detected In
Vehicle
Possible cause/consequence
A SmartKey with KEYLESS-GO left in the vehicle was recognized while trying to lock the vehicle from the outside.
I Don’t Forget Your
Key
I Remove Key
This display appears for a maximum of 60 seconds if the driver’s door is opened with the engine turned off and no SmartKey in the starter switch. This message is only a reminder.
You have forgotten to remove the SmartKey.
I You need a new key. The SmartKey is malfunctioning. I Key Does Not Belong
The SmartKey in the starter switch does not belong to the vehicle.
to Vehicle
I Change Key Batteries
The batteries in the SmartKey with KEYLESS-GO are discharged.
324
Possible solution
X Take the SmartKey out of the vehicle.
X Take the SmartKey with you when leaving the
vehicle.
X Remove the SmartKey from the starter switch.
X Contact an authorized Mercedes-Benz Center.
X Find the SmartKey that belongs to the vehicle
to operate the vehicle.
X Replace the batteries (Y page 355).
Vehicle status messages in the multifunction display
Practical hints
Possible cause/consequence
Possible solution
Display messages I Key Not Detected
The SmartKey with KEYLESS-GO is not detected while the engine is running because the SmartKey is not in the vehicle.
I Key Not Detected
The SmartKey with KEYLESS-GO is not detected while the engine is running because there is strong radio-frequency interference.
I Key Not Detected
The SmartKey with KEYLESS-GO is momentarily not detected.
I Pull starting
button out then insert key.
t Bluetooth Ready
The SmartKey with KEYLESS-GO is permanently not detected.
The telephone has not yet been connected to the COMAND system via Bluetooth®.
X Stop the vehicle as soon as it is safe to do so. X Engage the parking brake. X Search for the SmartKey.
The vehicle cannot be locked centrally nor can the engine be started again after the engine is stopped.
X Stop the vehicle as soon as it is safe to do so. X Engage the parking brake. X Operate the vehicle with the SmartKey in the
starter switch.
X Change the position of the SmartKey in the
vehicle.
X Operate the vehicle with the SmartKey in the
starter switch if necessary.
X Operate the vehicle with the SmartKey in the
starter switch.
X Contact an authorized Mercedes-Benz Center.
X Connect the telephone to the COMAND system
via Bluetooth®.
325
Practical hints
Vehicle status messages in the multifunction display Display messages Possible cause/consequence W Top Up Washer Fluid The fluid level has dropped to
approximately 1/3 of total reservoir capacity.
Possible solution X Add washer fluid (Y page 251).
Engine
Display messages B Top Up Coolant See Operator’s Manual
Possible cause/consequence
The coolant level is too low.
Possible solution X Add coolant (Y page 251). X If you have to add coolant frequently, have the
cooling system checked at an authorized Mercedes-Benz Center.
G Warning! Do not spill antifreeze on hot engine parts. Antifreeze contains ethylene glycol which may burn if it comes into contact with hot engine parts. You could be seriously burned.
! Do not ignore the low engine coolant level warning. Extended driving with the message and symbol displayed may cause serious engine
damage not covered by the Mercedes-Benz Limited Warranty. Do not drive without sufficient amount of coolant in the cooling system. The engine will overheat causing major engine damage.
326
Display messages Ì Coolant
Stop car, switch engine off.
Vehicle status messages in the multifunction display
Practical hints
Possible cause/consequence
Possible solution
The coolant is too hot.
X Stop the vehicle immediately as soon as it is
safe to do so.
X Turn off the engine immediately. X Engage the parking brake. X Only start the engine again after the message disappears. You could otherwise damage the engine.
X Observe the coolant temperature in the
multifunction display.
X If the temperature rises again: Contact an
authorized Mercedes-Benz Center immediately.
During severe operation conditions and stop- and-go city traffic, the coolant temperature may rise close to 248‡ (120†).
G Warning! Driving when your engine is overheated can cause some fluids which may have leaked into the engine compartment to catch fire. You could be seriously burned. Steam from an overheated engine can cause serious burns which can occur just by opening the engine hood. Stay away from the engine if you see or hear steam coming from it. Stop the vehicle in a safe location away from other traffic. Turn off the engine, get out of the vehicle and do not stand near the vehicle until the engine has cooled down.
327
Practical hints
Vehicle status messages in the multifunction display ! The engine should not be operated with the coolant temperature above 248‡ (120†). Doing so may cause serious damage which is not
covered by the Mercedes-Benz Limited Warranty.
328
Display messages Ì Coolant
Stop car, switch engine off.
Vehicle status messages in the multifunction display
Practical hints
Possible cause/consequence
Possible solution
The poly-V-belt could be broken.
X Stop the vehicle immediately as soon as it is
safe to do so.
X Turn off the engine immediately. X Check the poly-V-belt. X If it is broken: Do not continue to drive.
Otherwise the engine will overheat due to an inoperative water pump which may result in damage to the engine. Contact an authorized Mercedes-Benz Center.
X If it is intact: Do not continue to drive the
vehicle with this message displayed. Doing so could result in serious engine damage that is not covered by the Mercedes-Benz Limited Warranty.
X Observe the coolant temperature in the
multifunction display.
X Drive to the nearest authorized Mercedes-Benz
Center immediately.
329
Practical hints
Vehicle status messages in the multifunction display Display messages Ì
Possible cause/consequence
The cooling fan for the coolant is malfunctioning.
The battery is no longer charging. Possible causes: Ralternator malfunctioning Rbroken poly-V-belt Ra malfunction in the electronic system
330
Possible solution
X Observe the coolant temperature in the
multifunction display. If the coolant temperature is below 248‡ (120†), you may continue driving to an authorized Mercedes-Benz Center.
X Avoid placing heavy loads on the engine (e.g. by driving uphill) as well as stop-and-go traffic.
X Have the fan replaced as soon as possible.
X Stop immediately in a safe location or as soon as it is safe to do so and check the poly-V-belt.
X If it is broken: Do not continue to drive.
Otherwise the engine will overheat due to an inoperative water pump which may result in damage to the engine. Contact an authorized Mercedes-Benz Center.
X If it is intact: Drive to the nearest authorized
Mercedes-Benz Center immediately. Adjust driving to be consistent with reduced braking responsiveness.
Vehicle status messages in the multifunction display
Practical hints
Possible cause/consequence
Possible solution
Display messages # Battery/Alternator
Stop Vehicle
The battery is defective.
X Stop the vehicle in a safe location or as soon
as it is safe to do so.
X Engage the parking brake. X Do not continue to drive. X Contact an authorized Mercedes-Benz Center.
X Check the engine oil level (Y page 249) and add
engine oil as required (Y page 250).
X If you must add engine oil frequently, have the
engine checked for possible leaks.
N Check engine oil
level at next refueling.
The engine oil level is too low.
If the message Check engine oil level at next refueling. appears while the engine is running and at operating temperature, the engine oil level has dropped to approximately the minimum level. The message will be stored in the vehicle status message memory after you have cleared it from the multifunction display.
Visually check for oil leaks. If there are no obvious oil leaks, drive to the nearest service station to refill your engine oil to the required level. For information on approved engine oils contact an authorized Mercedes-Benz Center or visit www.mbusa.com (USA only).
! Engine oil level warnings should not be
ignored. Extended driving with the symbol displayed could result in serious engine damage that is not covered by the Mercedes-Benz Limited Warranty.
331
Practical hints
Vehicle status messages in the multifunction display Display messages
Possible cause/consequence
Possible solution
The fuel level is low.
X Refuel at the next gas station.
¿
4 Reserve Fuel
4 Ultra Low-sulfur Diesel Fuel Only
4 Gas Cap Open
The fuel level has dropped below the reserve mark.
Vehicles with diesel engine only: The fuel level has dropped below the reserve mark.
A loss of pressure has been detected in the fuel system. The fuel cap may not be closed properly or the fuel system may be leaky.
ò Replace air filter
The air filter is clogged.
] Clean Fuel Filter
There is water in the fuel filter.
û Check Additive See Operator's Manual
The AdBlue® supply is almost depleted.
332
X Refuel at the next gas station.
X Refuel at the next gas station. X Only use commercially available vehicular
ULTRA-LOW SULFUR DIESEL FUEL (15 ppm SULFUR MAXIMUM).
X Check the fuel cap (Y page 245). X If it is not closed properly: Close the fuel cap. X If it is closed properly: Have the fuel system
checked at an authorized Mercedes-Benz Center.
X Have the air filter checked at an authorized
Mercedes-Benz Center.
X Have the water drained at an authorized
Mercedes-Benz Center as soon as possible.
X Have the AdBlue® tank refilled as soon as
possible (Y page 375). Contact an authorized Mercedes-Benz Center.
Display messages û Remaining Starts: 20
Practical hints
Vehicle status messages in the multifunction display
Possible cause/consequence
Possible solution
The AdBlue® supply has dropped to the minimum level.
X Have the AdBlue® tank refilled immediately
(Y page 375). Contact an authorized Mercedes-Benz Center.
i When the message Remaining
Starts: 20 appears in the multifunction display, you can start the engine 20 more times. If you do not add AdBlue®, the
engine cannot be started beyond that point. Therefore, fill the AdBlue® tank with approximately 1 gal (3.79 l) AdBlue® (corresponds to approximately 2 refill
containers AdBlue®) or have the AdBlue® tank filled at an authorized Mercedes-Benz Center. After AdBlue® was refilled, the engine can be started again.
Lamps
Display messages . Active Headlamps
Inoperative
. Reverse Lamp Left or Reverse Lamp Right
Possible cause/consequence
Possible solution
The active Bi-Xenon headlamp system is malfunctioning.
X Contact an authorized Mercedes-Benz Center
as soon as possible.
The left or right backup lamp is malfunctioning.
X Replace the bulb as soon as possible
(Y page 356).
. Brake Lamp Left or Brake Lamp Right
The left or right brake lamp is malfunctioning. A substitute bulb is being used.
X Replace the bulb as soon as possible
(Y page 356).
333
Practical hints
Vehicle status messages in the multifunction display Display messages . 3rd Brake Lamp
Possible cause/consequence
The high-mounted brake lamp is malfunctioning. This message will only appear if all LEDs have stopped working.
Possible solution
X Contact an authorized Mercedes-Benz Center
as soon as possible.
. Front Foglamp Left
or Front Foglamp Right
. Marker Lamp Front
Left or Marker Lamp Front Right
. Parking Lamp Front
Left