- 2007 Honda Civic Sedan Owners Manuals
- Honda Civic Sedan Owners Manuals
- 1997 Honda Civic Sedan Owners Manuals
- Honda Civic Sedan Owners Manuals
- 2013 Honda Civic Sedan Owners Manuals
- Honda Civic Sedan Owners Manuals
- 1999 Honda Civic Sedan Owners Manuals
- Honda Civic Sedan Owners Manuals
- 1992 Honda Civic Sedan Owners Manuals
- Honda Civic Sedan Owners Manuals
- 2012 Honda Civic Sedan Owners Manuals
- Honda Civic Sedan Owners Manuals
- 2006 Honda Civic Sedan Owners Manuals
- Honda Civic Sedan Owners Manuals
- 2004 Honda Civic Sedan Owners Manuals
- Honda Civic Sedan Owners Manuals
- 2000 Honda Civic Sedan Owners Manuals
- Honda Civic Sedan Owners Manuals
- 1993 Honda Civic Sedan Owners Manuals
- Honda Civic Sedan Owners Manuals
- 1995 Honda Civic Sedan Owners Manuals
- Honda Civic Sedan Owners Manuals
- 2005 Honda Civic Sedan Owners Manuals
- Honda Civic Sedan Owners Manuals
- 2008 Honda Civic Sedan Owners Manuals
- Honda Civic Sedan Owners Manuals
- 2010 Honda Civic Sedan Owners Manuals
- Honda Civic Sedan Owners Manuals
- 1998 Honda Civic Sedan Owners Manuals
- Honda Civic Sedan Owners Manuals
- 2003 Honda Civic Sedan Owners Manuals
- Honda Civic Sedan Owners Manuals
- 1994 Honda Civic Sedan Owners Manuals
- Honda Civic Sedan Owners Manuals
- 2011 Honda Civic Sedan Owners Manuals
- Honda Civic Sedan Owners Manuals
- 2001 Honda Civic Sedan Owners Manuals
- Honda Civic Sedan Owners Manuals
- 1996 Honda Civic Sedan Owners Manuals
- Honda Civic Sedan Owners Manuals
- 2002 Honda Civic Sedan Owners Manuals
- Honda Civic Sedan Owners Manuals
- 2009 Honda Civic Sedan Owners Manuals
- Honda Civic Sedan Owners Manuals
- Download PDF Manual
-
Always use the size and type of tires recommended in this owner’s manual.
303
uuChecking and Maintaining TiresuTire Rotation
Tire Rotation Rotating tires according to the maintenance messages on the information display*/ i-MID * helps to distribute wear more evenly and increase tire life.
■ Tires without rotation marks
Rotate the tires as shown here.
1Tire Rotation
Tires with directional tread patterns should only be rotated front to back (not from one side to the other). Directional tires should be mounted with the rotation indication mark facing forward, as shown below.
Front
FRONT
Direction Mark
■ Tires with rotation marks
Rotate the tires as shown here.
Front
304
* Not available on all models
Winter Tires If driving on snowy or frozen roads, mount all season marked M+S tires, snow tires, or tire chains; reduce speed; and maintain sufficient distance between vehicles when driving.
Be particularly careful when operating the steering wheel or brakes to prevent skidding.
Use tire chains, snow tires, or all season tires when necessary or according to the law.
When mounting, refer to the following points.
For winter tires: • Select the size and load ranges that are the same as the original tires. • Mount the tires to all four wheels. For tire chains: • Install them on the front tires only. • Because your vehicle has limited tire clearance, we strongly recommend using the
chains listed below:
Models with P195/65R15 tires Cable-type: SCC Radial Chain SC1030
Models with P205/55R16 tires Models with P215/45R17 tires Models with 215/45ZR17 tires Cable-type: SCC Radial Chain SC1032
• Follow the chain manufacturer's instruction when installing. Mount them astightly as you can.
• Check that the chains do not touch the brake lines or suspension. • Drive slowly.
uuChecking and Maintaining TiresuWinter Tires
1Winter Tires
3WARNING
Using the wrong chains, or not properly installing chains, can damage the brake lines and cause a crash in which you can be seriously injured or killed.
Follow all instructions in this owner's manual regarding the selection and use of tire chains.
NOTICE Traction devices that are the wrong size or improperly installed can damage your vehicle's brake lines, suspension, body, and wheels. Stop driving if they are hitting any part of the vehicle.
When tire chains are mounted, follow the chain manufacturer's instructions regarding vehicle operational limits.
If your vehicle is equipped with summer tires, be aware that these tires are not designed for winter driving conditions. For more information, contact a dealer.
305
Battery
Checking the Battery
Test Indicator window
Check the battery condition monthly. Look at the test indicator window and check the terminals for corrosion.
1Battery
3WARNING
The battery gives off explosive hydrogen gas during normal operation.
A spark or flame can cause the battery to explode with enough force to kill or seriously hurt you.
When conducting any battery maintenance, wear protective clothing and a face shield, or have a skilled technician do it.
WARNING: Battery post, terminals, and related accessories contain lead and lead compounds. Wash your hands after handling.
The test indicator's color information is on the battery.
When you find corrosion, clean the battery terminals by applying a baking powder and water solution. Clean the terminal with a damp towel. Cloth/towel dry the battery. Coat the terminals with grease to help prevent future corrosion.
If your vehicle's battery is disconnected or goes dead: • The audio system is disabled.
2 Reactivating the audio system P. 152
2 Entering the audio security code P. 152• The clock * resets.
2 Setting the Clock P. 98
• The navigation system * is disabled.
2 Refer to the navigation system manual
Charging the Battery Disconnect both battery cables to prevent damaging your vehicle's electrical system. Always disconnect the negative (–) cable first, and reconnect it last.
306
* Not available on all models
Remote Transmitter Care *
Replacing the Button Battery If the indicator does not come on when the button is pressed, replace the battery.
1Replacing the Button Battery
Keypad
Battery
Battery type: CR1616
1. Unscrew the cover with a small Phillips- head screwdriver. Press a button to pry open the transmitter.
NOTICE An improperly disposed of battery can damage the environment. Always confirm local regulations for battery disposal.
Replacement batteries are commercially available or at a dealer.
Screw
Tab
2. Open the keypad.
u Separate the inner cover from the
keypad by releasing the two tabs on the cover.
3. Make sure to replace the battery with the
correct polarity.
* Not available on all models
307
Heating and Cooling System*/Climate Control System* Maintenance
Dust and Pollen Filter* The heating and cooling system */climate control system * is equipped with a dust and pollen filter that collects pollen, dust, and other debris in the air. The Maintenance MinderTM messages will let you know when to replace the filter.
We recommend that you replace the dust and pollen filter sooner when using your vehicle in areas with high concentrations of dust.
1Dust and Pollen Filter *
If the airflow from the heating and cooling system */ climate control system * deteriorates noticeably, and the windows fog up easily, the filter may need to be replaced. Please contact a dealer for replacement.
308
* Not available on all models
Cleaning
Interior Care Use a damp cloth with a mixture of mild detergent and warm water to remove dirt. Use a clean cloth to remove detergent residue.
■ Cleaning Seat Belts Use a soft brush with a mixture of mild soap and warm water to clean the seat belts. Let the belts air dry. Wipe the openings of the seat belt anchors using a clean cloth.
Opening
Continued
1Interior Care
Do not spill liquids inside the vehicle. Electrical devices and systems may malfunction if liquids are splashed on them.
Do not use silicone based sprays on electrical devices such as audio devices and switches. Doing so may cause the items to malfunction or a fire inside the vehicle. If a silicone based spray is inadvertently used on electrical devices, consult a dealer.
Depending on their composition, chemicals and liquid aromatics may cause discoloration, wrinkles, and cracking to resin-based parts and textiles. Do not use alkali solvents or organic solvents such as benzene or gasoline.
After using chemicals, make sure to gently wipe them off using a dry cloth. Do not place used cloths on top of resin based parts or textiles for long periods of time without washing.
309
uuCleaninguInterior Care
■ Floor Mats*
Unlock
Lock
The driver’s floor mat hooks over the floor anchors, which keep the mat from sliding forward. To remove a mat for cleaning, turn the anchor knobs to the unlock position. When reinstalling the mat after cleaning, turn the knobs to the lock position.
Do not put additional floor mats on top of the anchored mat.
■ Maintaining Genuine Leather* Vacuum dirt and dust from the leather frequently. Pay close attention to the pleats and seams. Clean the leather with a soft cloth dampened with a 90% water and 10% neutral soap solution. Then buff it with a clean, dry cloth. Remove any dust or dirt on leather surfaces immediately.
1Floor Mats *
If you use any floor mats that were not originally provided with your vehicle, make sure they are designed for your specific vehicle, fit correctly, and are securely anchored by the floor anchors. Position the rear seat floor mats properly. If they are not properly positioned, the floor mats can interfere with the front seat functions.
310
* Not available on all models
Exterior Care Dust off the vehicle body after you drive. Regularly inspect your vehicle for scratches on painted surfaces. A scratch on a painted surface can result in body rust. If you find a scratch, promptly repair it.
■ Washing the Vehicle Wash the vehicle regularly. Wash more frequently when driving in the following conditions: • If driving on roads with road salt. • If driving in coastal areas. • If tar, soot, bird droppings, insects, or tree sap are stuck to painted surfaces.
■ Using an Automated Car Wash Fold in the door mirrors. Make sure to follow the instructions indicated on the automated car wash.
■ Using High Pressure Cleaners • Keep sufficient distance between the cleaning nozzle and the vehicle body. • Take particular care around the windows. Standing too close may cause water to
enter the vehicle interior. Do not spray water into the engine compartment.
uuCleaninguExterior Care
1Washing the Vehicle
Do not spray water into the air intake vents or engine compartment. It can cause a malfunction.
Air Intake Vents
Continued
311
uuCleaninguExterior Care
■ Applying Wax A good coat of automotive body wax helps protect your vehicle’s paint from the elements. Wax will wear off over time and expose your vehicle’s paint to the elements, so reapply as necessary.
1Applying Wax
NOTICE Chemical solvents and strong cleaners can damage the paint, metal, and plastic on your vehicle. Wipe up spills immediately.
■ Maintaining the Bumpers and Other Resin Coated Parts If you get gasoline, oil, engine coolant, or battery fluid on resin coated parts, they may be stained or the coating may peel. Promptly wipe it away using a soft cloth and clean water.
1Maintaining the Bumpers and Other Resin Coated Parts
Ask a dealer about the correct coating material when you want to repair the painted surface of the parts made of resin.
■ Cleaning the Window Wipe using a glass cleaner.
■ Maintaining Aluminum Wheels* Aluminum is susceptible to deterioration caused by salt and other road contaminants. Use a sponge and mild detergent to wipe away promptly. Be careful not to use harsh chemicals (including some commercial wheel cleaners) or a stiff brush. They can damage the clear coat of the aluminum alloy wheels that helps keep the aluminum from corroding and tarnishing.
1Cleaning the Window
Wires are mounted to the inside of the rear window. Wipe along the same direction as the wires with a soft cloth so as not to damage them.
312
* Not available on all models
Handling the Unexpected
This chapter explains how to handle unexpected troubles.
Tools
Types of Tools.................................. 314
If a Tire Goes Flat
Changing a Flat Tire......................... 315
Temporarily Repairing a Flat Tire....... 322Engine Does Not Start
Checking the Engine........................ 330
Jump Starting.................................... 331
Shift Lever Does Not Move.............. 334
OverheatingHow to Handle Overheating............. 335
Indicator, Coming On/Blinking
Fuses
Fuse Locations ................................. 341
Inspecting and Changing Fuses........ 343
Emergency Towing........................... 344If the Low Oil Pressure Indicator Comes On ............................................. 337
If the Charging System Indicator Comes On ................................................. 337
If the Malfunction Indicator Lamp Comes On or Blinks ................................... 338
If the Brake System Indicator Comes On.......339
If the EPS System Indicator Comes On.... 339
If the Low Tire Pressure/TPMS Indicator Comes On or Blinks........................ 340313
Tools
Models with compact spare tire Types of Tools
1Types of Tools
The tools were stored in the trunk.
Wheel Nut Wrench/
Jack Handle
Jack
Jack Handle Bar
314
If a Tire Goes Flat
Models with compact spare tire Changing a Flat Tire If a tire goes flat while driving, grasp the steering wheel firmly, and brake gradually to reduce speed. Then, stop in a safe place. Replace the flat tire with a compact spare tire. Go to a dealer as soon as possible to have the full-size tire repaired or replaced.
1. Park the vehicle on firm, level, and non-slippery surface and apply the parking
brake.
Automatic transmission models 2. Put the shift lever in (P. Manual transmission models 2. Put the shift lever in (R.
All models 3. Turn on the hazard warning lights and turn the ignition switch to LOCK (0.
1Changing a Flat Tire
Periodically check the tire pressure of the compact spare. It should be set to the specified pressure. Specified Pressure: 60 psi (420 kPa, 4.2 kgf/cm2)
When driving with the compact spare tire, keep the vehicle speed under 50 mph (80 km/h). Replace with a full-size tire as soon as possible.
The compact spare tire and wheel in your vehicle are specifically for this model. Do not use them with another vehicle. Do not use another type of compact spare tire or wheel with your vehicle.
Do not mount tire chains on a compact spare tire. If a chain-mounted front tire goes flat, remove one of the full-size rear tires and replace it with the compact spare tire. Remove the flat front tire and replace it with the full-size tire that was removed from the rear. Mount the tire chains on the front tire.
U.S. models Do not use a puncture-repairing agent on a flat tire, as it can damage the tire pressure sensor.
Continued
315
uuIf a Tire Goes FlatuChanging a Flat Tire
■ Getting Ready to Replace the Flat Tire
1Getting Ready to Replace the Flat Tire
1. Open the trunk floor lid.
NOTICE 2.4 ℓ engine models Do not mount the compact spare on the front. If mounted on the front, the compact spare, smaller in size than the normal tire, may damage the differential.
If either front tire goes flat, remove the rear tire on the same side, and mount the compact spare on the rear and the rear tire on the front.
Tool Case
2. Take the tool case out of the trunk. Take the jack and wheel nut wrench out of the tool case.
3. Unscrew the wing bolt, and remove the spacer cone. Then, remove the spare tire.
Spare Tire
4. Place a wheel block or rock in front and rear
of the wheel diagonal to the flat tire.
The tire to be replaced.
Wheel Blocks
316
5. Place the compact spare tire (wheel side up)
under the vehicle body, near the tire that needs to be replaced.
Models with 15 x 6J aluminum wheels 6. Remove the center cap from the wheel with
the jack handle bar.
All models 7. Loosen each wheel nut about one turn
using the wheel nut wrench.
uuIf a Tire Goes FlatuChanging a Flat Tire
Continued
317
uuIf a Tire Goes FlatuChanging a Flat Tire
■ How to Set Up the Jack
1. Place the jack under the jacking point
closest to the tire to be changed.
2. Turn the end bracket (as shown in the
image) clockwise until the top of the jack contacts the jacking point. u Make sure that the jacking point tab is
resting in the jack notch.
3. Raise the vehicle, using the jack handle bar and the jack handle, until the tire is off the ground.
318
Jack Handle Bar
Wheel Nut Wrench as Jack Handle
1How to Set Up the Jack
3WARNING
The vehicle can easily roll off the jack, seriously injuring anyone underneath.
Follow the directions for changing a tire exactly, and never get under the vehicle when it is supported only by the jack.
Do not use the jack with people or luggage in the vehicle.
Use the jack provided in your vehicle. Other jacks may not support the weight (“load”) or their shape may not match.
The following instructions must be followed to use the jack safely. • Do not use while the engine is running. • Use only where the ground is firm and level. • Use only at the jacking points. • Do not get in the vehicle while using the jack. • Do not put anything on top of or underneath the
jack.
uuIf a Tire Goes FlatuChanging a Flat Tire
■ Replacing the Flat Tire
Models with aluminum wheels 1. Remove the wheel nuts and flat tire.
1Replacing the Flat Tire
Do not over tighten the wheel nuts by applying extra torque using your foot or a pipe.
Wheel Cover
Models with wheel cover 1. Remove the wheel nuts, wheel cover, and
flat tire.
Models with wheel cover Do not attempt to forcibly pry the wheel cover off with a screwdriver or other tool. The wheel cover cannot be removed without first removing the wheel nuts.
All models 2. Wipe the mounting surfaces of the wheel
with a clean cloth.
3. Mount the compact spare tire. 4. Screw the wheel nuts until they touch the lips around the mounting holes, and stop rotating.
Continued
319
uuIf a Tire Goes FlatuChanging a Flat Tire
5. Lower the vehicle and remove the jack.
Tighten the wheel nuts in the order indicated in the image. Go around, tightening the nuts, two to three times in this order. Wheel nut torque: 80 lbf∙ft (108 N∙m, 11 kgf∙m)
■ Storing the Flat Tire
Wing Bolt Spacer Cone
For full- size tire
For compact spare tire
Models with aluminum wheels 1. Remove the center cap. All models 2. Place the flat tire face down in the spare tire
well.
3. Remove the spacer cone from the wing
bolt, flip it over, and insert it back on the bolt. Secure the flat tire with the wing bolt. 4. Securely put the jack and wheel nut wrench back in the tool case. Store the case in the trunk.
1Storing the Flat Tire
3WARNING
Loose items can fly around the interior in a crash and can seriously injure the occupants.
Store the wheel, jack, and tools securely before driving.
320
uuIf a Tire Goes FlatuChanging a Flat Tire
U.S. models ■ TPMS and the Spare Tire If you replace a flat tire with the spare tire, the low tire pressure/TPMS indicator comes on while you are driving. After driving for a few miles (kilometers), the indicator will start blinking for a short time and then stay on. CHECK TPMS SYSTEM appears on the i-MID, but this is normal.
1TPMS and the Spare Tire
The system cannot monitor the pressure of the spare tire. Manually check the spare tire pressure to be sure that it is correct.
Use TPMS specific wheels. Each is equipped with a tire pressure sensor mounted inside the tire behind the valve stem.
If you replace the tire with a specified regular tire, the warning message on the i-MID and the low tire pressure/TPMS indicator will go off after a few miles (kilometers).
321
uuIf a Tire Goes FlatuTemporarily Repairing a Flat Tire
Models with tire repair kit Temporarily Repairing a Flat Tire This vehicle is not equipped with a spare tire. If the tire has a large cut or is otherwise severely damaged, you will need to have the vehicle towed. If the tire only has a small puncture, from a nail for instance, you can use the temporary tire repair kit so that you can drive to the nearest service station for a more permanent repair.
If a tire goes flat while driving, grasp the steering wheel firmly, and brake gradually to reduce speed. Then stop in a safe place.
1. Park the vehicle on firm, level, and non-slippery surface and apply the parking
brake.
2. Put the shift lever in (P. 3. Turn on the hazard warning lights and turn the ignition switch to LOCK (0.
u When towing a trailer, unhitch the trailer.
■ Getting Ready to Temporarily Repair the Flat Tire
Pressure Gauge Sealant/Air Hose (Clear)
Tire Sealant Expiration Date Pressure Relief Button Instruction Manual
Air Only Hose (Black) SEALANT/AIR side
AIR ONLY side Inflator Switch
Repair Notification Label
Power Plug
Speed Restriction Label
Selector Switch
1Temporarily Repairing a Flat Tire
The kit should not be used in the following situations. Instead, contact a dealer or a roadside assistant to have the vehicle towed. • The tire sealant has expired. • More than two tires are punctured. • The puncture or cut is larger than 3/16 inch (4mm). • The tire side wall is damaged or the puncture is
outside the tire contact area.
When the puncture is:
Kit Use
Smaller than 3/16 inch
(4 mm)
Larger than 3/16 inch
(4 mm)
Yes
No
Contact Area
• Damage has been caused by driving with the tire
extremely under inflated.
• The tire bead is no longer seated. • The rim is damaged.
Do not remove a nail or screw that punctured the tire. If you remove it from the tire, you may not be able to repair the puncture using the kit.
NOTICE Do not use a puncture-repairing agent other than the one provided in the kit that came with your vehicle. If a different agent is used, you may permanently damage the tire pressure sensor.
322
uuIf a Tire Goes FlatuTemporarily Repairing a Flat Tire
1Getting Ready to Temporarily Repair the Flat Tire
When making a temporary repair, carefully read the instruction manual provided with the kit.
In cold temperatures, the sealant may not flow easily. In this situation, warm it up for five minutes before using.
1. Open the trunk floor lid.
2. Take the kit out of the case.
u Place the kit face up, on flat ground near
the flat tire, and away from traffic. Do not place the kit on its side.
Continued
323
uuIf a Tire Goes FlatuTemporarily Repairing a Flat Tire
■ Injecting Sealant and Air
Valve Cap
1. Remove the valve cap from the tire valve
stem.
Valve Stem
Sealant/Air Hose
2. Remove the sealant/air hose from the
packaging.
Sealant/Air Hose
3. Attach the sealant/air hose onto the tire
valve stem. Screw it until it is tight.
Valve Stem
324
1Injecting Sealant and Air
3WARNING
Tire sealant contains substances that are harmful and can be fatal if swallowed.
If accidentally swallowed, do not induce vomiting. Drink plenty of water and get medical attention immediately. For skin or eye contact, flush with cool water and get medical attention if necessary.
In cold temperatures, the sealant may not flow easily. In this situation, warm it up for five minutes before using.
The sealant can permanently stain clothing and other materials. Be careful during handling and wipe away any spills immediately.
uuIf a Tire Goes FlatuTemporarily Repairing a Flat Tire
4. Plug in the compressor to the accessory
power socket. u Be careful not to pinch the cord in a
door or window.
5. Start the engine.
u Keep the engine running while injecting
sealant and air. 2 Carbon Monoxide Gas P. 62
6. Turn the selector switch to SEALANT/
AIR.
1Injecting Sealant and Air
3WARNING
Running the engine with the vehicle in an enclosed or even partly enclosed area can cause a rapid build-up of toxic carbon monoxide.
Breathing this colorless, odorless gas can cause unconsciousness and even death. Only run the engine to power the air compressor with the vehicle outdoors.
SEALANT/AIR side
Pressure Gauge
7. Press the inflator switch to turn on the
compressor. u The compressor starts injecting sealant
and air into the tire.
8. When the sealant injection is complete,
continue to add air.
9. After the air pressure reaches 32 psi (220
kPa), turn off the kit. u To check the pressure, occasionally turn off the compressor and read the gauge.
ON
OFF
NOTICE Do not operate the tire repair kit compressor for more than 15 minutes. The accessory power socket and compressor can overheat and become permanently damaged.
Until the sealant injection is complete, the pressure shown on the pressure gauge will appear higher than actual. After the sealant injection is complete the pressure will drop and then begin to rise again as the tire is inflated with air. This is normal. To accurately measure the air pressure using the gauge, turn the air compressor off only after the sealant injection is complete.
If the required air pressure is not reached within 10 minutes, the tire may be too severely damaged for the kit to provide the necessary seal and your vehicle will need to be towed.
Continued
325
uuIf a Tire Goes FlatuTemporarily Repairing a Flat Tire
Sealant/Air Hose
Valve Stem
Repair Notification Label
10. Unplug the power plug from the accessory
1Injecting Sealant and Air
See a Honda dealer for a replacement sealant bottle and proper disposal of an empty bottle.
power socket.
11. Unscrew the sealant/air hose from the tire
valve stem. Reinstall the valve cap.
12. Press the pressure relief button until the
gauge returns 0 psi (0 kpa).
13. Apply the repair notification label to the
flat surface of the wheel. u The wheel surface must be clean to
ensure the label adheres properly.
■ Distributing the Sealant in the Tire
1. Apply the speed restriction label to the
location as shown.
2. Drive the vehicle for about 10 minutes.
u Do not exceed 50 mph (80 km/h).
3. Stop the vehicle in a safe place.
1Distributing the Sealant in the Tire
Stop and recheck the air pressure after every 10 minutes of driving as necessary until you reach the nearest service station where you should have the tire permanently repaired or replaced.
Speed Restriction Label
326
Air Only Hose
4. Recheck the air pressure using the air only
hose on the compressor.
5. Turn the selector switch to AIR ONLY.
u Do not turn the air compressor on to
check the pressure. 2 Inflating An Under-inflated Tire P. 328
6. If the air pressure is:
• Less than 19 psi (130 kPa):
Do not add air or continue driving. The leak is too severe. Call for help and have your vehicle towed. 2 Emergency Towing P. 344
• 32 psi (220 kPa) or more:
Continue driving for another 10 minutes or until you reach the nearest service station. Do not exceed 50 mph (80 km/h). uIf the air does not go down after the 10 minute driving, you do not need to check the pressure any more.
• Greater than 19 psi (130kPa), but less
than 32 psi (220 kPa): Turn the air compressor on to inflate the tire until the tire pressure reaches 32 psi (220 kPa). Then drive carefully for 10 more minutes or until you reach the nearest service station. Do not exceed 50 mph (80 km/h). uYou should repeat this procedure as long
as the air pressure is within this range.
7. Repackage and properly stow the kit.
Continued
uuIf a Tire Goes FlatuTemporarily Repairing a Flat Tire
1Distributing the Sealant in the Tire
3WARNING
Running the engine with the vehicle in an enclosed or even partly enclosed area can cause a rapid build-up of toxic carbon monoxide.
Breathing this colorless, odorless gas can cause unconsciousness and even death. Only run the engine to power the air compressor with the vehicle outdoors.
327
1Inflating An Under-inflated Tire
NOTICE Do not operate the temporary tire repair kit compressor for more than 15 minutes. The accessory power socket and compressor can overheat and become permanently damaged.
uuIf a Tire Goes FlatuTemporarily Repairing a Flat Tire
■ Inflating An Under-inflated Tire You can use the kit to inflate a non-punctured under-inflated tire. 1. Open the trunk floor lid.
2 Getting Ready to Temporarily Repair
the Flat Tire P. 322
2. Remove the kit from the case.
u Place the kit on flat ground near the tire
to be inflated, away from traffic.
3. Place the kit, face up, on flat ground near
the flat tire, away from traffic. Do not place the kit on its side.
4. Remove the air only hose from the kit. 5. Remove the valve cap.
Valve Cap
Air Only Hose
6. Attach the air only hose onto the tire valve
stem. Screw it until it is tight.
Valve Stem
Air Only Hose
328
uuIf a Tire Goes FlatuTemporarily Repairing a Flat Tire
7. Plug in the kit to the accessory power
socket. u Be careful not to pinch the cord in a
door or window.
8. Start the engine.
u Keep the engine running while injecting
air. 2 Carbon Monoxide Gas P. 62
AIR ONLY side
9. Turn the selector switch to AIR ONLY. 10. Press the inflator switch to turn on the kit. u The compressor starts to inject air into
the tire.
11. Inflate the tire to the specified air pressure.
ON
1Inflating An Under-inflated Tire
3WARNING
Running the engine with the vehicle in an enclosed or even partly enclosed area can cause a rapid build-up of toxic carbon monoxide.
Breathing this colorless, odorless gas can cause unconsciousness and even death. Only run the engine to power the air compressor with the vehicle outdoors.
12. Turn off the kit.
u Check the pressure gauge on the air
compressor.
u If overinflated, press the pressure relief
13. Unplug the kit from the accessory power
button.
socket.
14. Unscrew the air only hose from the tire
valve stem. Reinstall the valve cap.
15. Press the pressure relief button until the
gauge returns 0 psi (0 kpa).
16. Repackage and properly stow the kit.
Pressure Relief Button
329
Engine Does Not Start
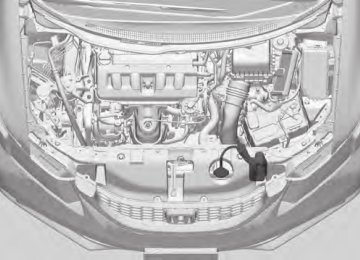
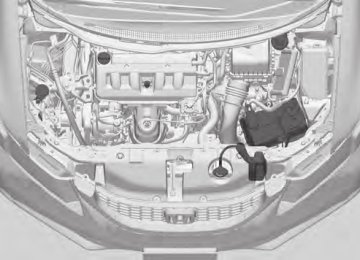
Checking the Engine If the engine does not start, check the starter.
1Checking the Engine
If you must start the vehicle immediately, use an assisting vehicle to jump start it.
2 Jump Starting P. 331
Starter condition
Starter doesn’t turn or turns over slowly. The battery may be dead. Check each of the items on the right and respond accordingly.
The starter turns over normally but the engine doesn’t start. There may be a problem with the fuse. Check each of the items on the right and respond accordingly.
Checklist
Check brightness of the interior light. Turn on interior lights and check brightness. ● If the interior lights are dim or do not come on at all
2 Battery P. 306
● If the interior lights come on normally
2 Fuses P. 341
Review the engine start procedure. Follow its instructions, and try to start the engine again.
2 Starting the Engine P. 223
Check the immobilizer system indicator. When the immobilizer system indicator is blinking, the engine cannot be started.
2 Immobilizer System P. 112
Check the fuel level. There should be enough fuel in the tank.
2 Fuel Gauge P. 77
Check the fuse. Check all fuses, or have the vehicle checked by a dealer.
2 Inspecting and Changing Fuses P. 343
If the problem continues:
2 Emergency Towing P. 344
330
Jump Starting
■ Jump Starting Procedure Turn off the power to electric devices, such as audio and lights. Turn off the engine, then open the hood. 1.8 ℓ engine models
1. Connect the first jumper cable to your
vehicle's battery + terminal.
2. Connect the other end of the first jumper
cable to the booster battery + terminal. u Use a 12-volt booster battery only.
3. Connect the second jumper cable to the
booster battery - terminal.
Booster Battery
2.4 ℓ engine models
Booster Battery
1Jump Starting
3WARNING
A battery can explode if you do not follow the correct procedure, seriously injuring anyone nearby.
Keep all sparks, open flames, and smoking materials away from the battery.
Securely attach the jumper cables clips so that they do not come off when the engine vibrates. Also be careful not to tangle the jumper cables or allow the cable ends to touch each other while attaching or detaching the jumper cables.
Continued
331
4. Connect the other end of the second
1Jump Starting
Battery performance degrades in cold conditions and may prevent the engine from starting.
jumper cable to the engine mounting bolt as shown. Do not connect this jumper cable to any other part.
5. If your vehicle is connected to another
vehicle, start the assisting vehicle's engine and increase its rpm slightly.
6. Attempt to start your vehicle's engine. If it
turns over slowly, check that the jumper cables have good metal-to-metal contact.
uuJump Startingu
1.8 ℓ engine models
2.4 ℓ engine models
332
■ What to Do After the Engine Starts Once your vehicle's engine has started, remove the jumper cables in the following order.
1. Disconnect the jumper cable from your vehicle's ground. 2. Disconnect the other end of the jumper cable from the booster battery -
terminal.
3. Disconnect the jumper cable from your vehicle's battery + terminal. 4. Disconnect the other end of the jumper cable from the booster battery +
terminal.
Have your vehicle inspected by a nearby service station or a dealer.
uuJump Startingu
333
Shift Lever Does Not Move
Automatic transmission models Follow the procedure below if you cannot move the shift lever out of the (P position.
■ Releasing the Lock
1. Set the parking brake. 2. Remove the key from the ignition switch. 3. Wrap a cloth around the tip of a small flat-
tip screwdriver. Put it into the shift lock release slot as shown in the image, and remove the cover.
Slot
Cover
4. Insert the key into the shift lock release slot. 5. While pushing the key down, press the shift lever release button and place the shift lever into (N. u The lock is now released. Have the shift
lever checked by a dealer as soon as possible.
Release Button
Shift Lock Release Slot
334
Overheating
How to Handle Overheating Overheating symptoms are as follows: • The high temperature indicator comes on or the engine suddenly loses power. • Steam or spray comes out of the engine compartment.
■ First thing to do 1. Immediately park the vehicle in a safe place. 2. Turn off all accessories and turn on the hazard warning lights.
u No steam or spray present: Keep the engine running and open the hood. u Steam or spray is present: Turn off the engine and wait until it subsides.
Then open the hood.
1How to Handle Overheating
3WARNING
Steam and spray from an overheated engine can seriously scald you.
Do not open the hood if steam is coming out.
NOTICE Continuing to drive with the high temperature indicator on may damage the engine.
Continued
335
uuOverheatinguHow to Handle Overheating
■ Next thing to do
MAX
MIN
Reserve Tank
1. Check that the cooling fan is operating and stop the engine once the high temperature indicator goes off. u If the cooling fan is not operating,
immediately stop the engine.
2. Once the engine has cooled down, inspect
the coolant level and check the cooling system components for leaks. u If the coolant level in the reserve tank is
low, add coolant until it reaches the MAX mark.
u If there is no coolant in the reserve tank, check that the radiator is cool. Cover the radiator cap with a heavy cloth and open the cap. If necessary, add coolant up to the base of the filler neck, and put the cap back on.
1How to Handle Overheating
3WARNING
Removing the radiator cap while the engine is hot can cause the coolant to spray out, seriously scalding you.
Always let the engine and radiator cool down before removing the radiator cap.
If the coolant is leaking, contact a dealer for repairs.
Use water as an emergency/temporary measure only. Have a dealer flush the system with proper antifreeze as soon as possible.
■ Last thing to do Once the engine has cooled sufficiently, restart it and check the high temperature indicator. If the high temperature indicator is off, resume driving. If it stays on, contact a dealer for repairs.
336
Indicator, Coming On/Blinking
If the Low Oil Pressure Indicator Comes On
■ Reasons for the indicator to come on Comes on when the engine oil pressure is low. ■ What to do as soon as the indicator comes on 1. Immediately park the vehicle in a safe place. 2. If necessary, turn the hazard warning lights on. ■ What to do after parking the vehicle 1. Stop the engine and let it sit for about one minute. 2. Open the hood and check the oil level.
u Add oil as necessary.
3. Start the engine and check the low oil pressure indicator.
u The light goes out: Start driving again. u The light does not go out within 10 seconds: Stop the engine and
contact a dealer for repairs immediately.
If the Charging System Indicator Comes On
■ Reasons for the indicator to come on Comes on when the battery is not being charged. ■ What to do when the indicator comes on Turn off the heating and cooling system */climate control system *, rear defogger, and other electrical systems, and immediately contact a dealer for repairs.
1If the Low Oil Pressure Indicator Comes On
NOTICE Running the engine with low oil pressure can cause serious mechanical damage almost immediately.
1If the Charging System Indicator Comes On
If you need to stop temporarily, do not turn off the engine. Restarting the engine may rapidly discharge the battery.
* Not available on all models
337
uuIndicator, Coming On/BlinkinguIf the Malfunction Indicator Lamp Comes On or Blinks
If the Malfunction Indicator Lamp Comes On or Blinks
■ Reasons for the indicator lamp to come on or blink • Comes on when there is a problem with the engine emissions control
system, or the fuel fill cap is missing, or loose.
• Blinks when engine misfiring is detected. ■ What to do when the indicator lamp comes on Avoid high speeds and immediately get your vehicle inspected at a dealer. ■ What to do when the indicator lamp blinks Park the vehicle in a safe place with no flammable items and wait at least ten minutes or more with the engine stopped until it cools.
1If the Malfunction Indicator Lamp Comes On or Blinks
NOTICE If you drive with the malfunction indicator lamp on, the emissions control system and the engine could be damaged.
If the malfunction indicator lamp blinks again when restarting the engine, drive to the nearest dealer at 31 mph (50 km/h) or less. Have your vehicle inspected.
■ Check/Tighten Fuel Cap Message ■ The message appears on when: An evaporative system leak is detected. This may be caused by the fuel fill cap being loose or not being installed.
■ What to do when the message appears: 1. Stop the engine. 2. Check that the fuel fill cap is fully installed.
u If not, loosen the cap, and then retighten it until it clicks at least once.
3. Drive for several days of normal driving.
u The message should go off.
■ When the malfunction indicator lamp comes on Malfunction indicator lamp comes on if the system continues to detect a leak of gasoline vapor. If this happens, check the fuel fill cap using the procedures described above.
338
uuIndicator, Coming On/BlinkinguIf the Brake System Indicator Comes On
If the Brake System Indicator Comes On
U.S.
Canada
■ Reasons for the indicator to come on • The brake fluid is low. • There is a malfunction in the brake system. ■ What to do when the indicator comes on while driving Press the brake pedal lightly to check pedal pressure. • If normal, check the brake fluid level the next time you stop. • If abnormal, take immediate action. If necessary, downshift the
transmission to slow the vehicle using engine braking.
1If the Brake System Indicator Comes On
Have your vehicle repaired immediately. It is dangerous to drive with low brake fluid. If there is no resistance from the brake pedal, stop immediately in a safe place. If necessary downshift the gears.
If the brake system indicator and ABS indicator come on simultaneously, the electronic brake distribution system is not working. This can result in vehicle instability under sudden braking. Have your vehicle inspected by a dealer immediately.
If the EPS System Indicator Comes On
■ Reasons for the indicator to come on • Comes on when there is a problem with the EPS system. • If you depress the accelerator pedal repeatedly to increase the engine
speed while the engine is idling, the indicator comes on, and sometimes the steering wheel becomes harder to operate.
■ What to do when the indicator comes on Stop the vehicle in a safe place and restart the engine. If the indicator comes on and stays on, immediately have your vehicle inspected by a dealer.
1If the EPS System Indicator Comes On
NOTICE If you repeatedly turn the steering wheel at an extremely low speed, or hold the steering wheel on the full left or right position for a while, the system heats up. The system goes into a protective mode, and limits its performance. The steering wheel becomes harder and harder to operate. Once the system cools down, the EPS system is restored. Repeated operation under these conditions can eventually damage the system.