- 1998 Buick Park Avenue Owners Manuals
- Buick Park Avenue Owners Manuals
- 2005 Buick Park Avenue Owners Manuals
- Buick Park Avenue Owners Manuals
- 1999 Buick Park Avenue Owners Manuals
- Buick Park Avenue Owners Manuals
- 2001 Buick Park Avenue Owners Manuals
- Buick Park Avenue Owners Manuals
- 2003 Buick Park Avenue Owners Manuals
- Buick Park Avenue Owners Manuals
- 2004 Buick Park Avenue Owners Manuals
- Buick Park Avenue Owners Manuals
- 1996 Buick Park Avenue Owners Manuals
- Buick Park Avenue Owners Manuals
- 1997 Buick Park Avenue Owners Manuals
- Buick Park Avenue Owners Manuals
- 2002 Buick Park Avenue Owners Manuals
- Buick Park Avenue Owners Manuals
- 1994 Buick Park Avenue Owners Manuals
- Buick Park Avenue Owners Manuals
- 2000 Buick Park Avenue Owners Manuals
- Buick Park Avenue Owners Manuals
- 1993 Buick Park Avenue Owners Manuals
- Buick Park Avenue Owners Manuals
- Download PDF Manual
-
Your exhaust system sounds strange or different. Your vehicle gets rusty underneath. Your vehicle was damaged in a collision. YQUS vehicle was damaged when driving over high points on the road or over road debris. Repairs weren’t done correctly. Your vehicle or exhaust system had been modified improperly.
If you ever suspect exhaust is coming into your vehicle:
Drive it only with all the windows down to blow out any CQ; and
Q Have your vehicle fixed immediately.
It’s better not to park with the engine running. 3118 if you ever have to, here are some things to know.
Idling the engine with the climate control system off could sallow dangerous exhaust into YOME- vehicle (see the earlier Caution under “Engine Exhaust”). Also, idling in a closed-in place can let deadly carbon momxide (CO) into your vehicle even if this can happen is a garage. Exhaust -- with the fan switch is at the highest setting. One place CO -- can come in easily. NEVER park in a garage with the engine running. Another closed-in @ace can be a blizzard. (See “Blizzard” in the Index.)
I& can be dangerous to get ut of your vehicle if the shift lever is not fully in PARK (PI with the parking brake firmly set. Your vehicle can roll. Don’t leave your vehicle when the engine is running unless you have to. If you’ve left the engine mnnhg, the vehicle can B P ~ Q V ~ suddenly. You or others could be injured. To be sure YOW vehicle won’t move, even when you’re OEI fairly level ground, always set your parking brake and move the shift lever to PARK (PI.
H701Iow the proper steps to be sure your vehicle won’t move. See “Shifting Into PARK (P)” in the Index. If YOU are parking on a hill and if you’re pulling a trailer, also see “Towing a Trailer” in the Index.
Switches on the driver’s m e s t conltrol.each of the windows while the ignition is on or retained accessory power is active. In addition, each passenger door has a switch for its own window.
2-33
The switch for the driver’s window has an express-down feature. Pull the switch back all the way, release it and the window will lower automatically. To stop the window from lowering, pull the switch again. To partially open the window, pull the switch back half way. When the switch is released, the window will stop moving. To raise the window, press and hold the switch forward.
Press the window lock switch on the driver’s armrest to disable d l passenger window switches, or just the rear passenger switches. The middle of the switch will light to indicate thc window lockout is active. The diver’s window corat.rds will slill be operable. This is a useful fwture when you have children as passengers.
Press the windcw lock switch a second time to ailow passengers to use their window controls again. The light in the center of the switch will go off to indicate that the feature is disabled. Vehicles are delivered programed to Bock out all passenger windows. If you have the optional D K , you can choose to lock out only the rea- windows. See “Personal Choice Features” or “Driver Information Center’’ in the Index for programming instructions. If you do not have the DIC feature, see your dealer if YOU choose to have this setting changed to lock out only the rear windows.
Nearly the entire surface of the center pad of the steering wheel is an active horn switch. Press anywhere on the pad to sound the horn.
A tilt steering wheel allows you to adjust the steering wheel before you drive.
You can also raise it to the highest level to give your legs more room when you exit and enter the vehicle. To tilt the wheel, hold the steering wheel and pull the lever toward you. Move the steering wheel to a comfortable position, then release the Iever to lock the wheel in piace.
. . . . .,.>:<<.: . . . . . . . .
The lever on the left side of the steering column includes YOGI-: e Turn Signal and Lane Change Indicator
Headlamp PIighLow Beam Changer
0 Windshield Wipers and Washer
Cruise Control Flash-to-Pass
pane! will flash in the direction cf the turn OF lane change. Hf your vehicle is equipped with the Head-Up Display (HUD), an mow will also a p e x in the display area to indicate the directim of the turn or lane change.
... . ....
The turn signal has two upward (for right) and two downward (for left) positions. These pcsitions aIbw you to signal a turn or m. Iarae change. To signal a m r n , move the lever all the way up or down. Wnen the turn is hished, the lever will return automatically.
E a bulb is burned out, replace it to help avoid itr~ accident. If the mows don’t go on at all when you signal a turn, check the €use (see “‘Fuses m d Circuit Breakers” in the Index) and f ~ r burned-out bulbs. If you have a trailer towing option with added wiring for the trailer lamps, the signal indicator will flash even if a turn signal bulb is burned aut. Check the front and r e a turn signal lamps regularly to make sure they are workirzg. Note: You do not need to add a different Basher.
If your turn signal is left on ~ C Z more than 3/4 of a mile (1.2 h), a chime will sound ai each flash of the turn signal. To turn df the chime, move the turn signal lever to the dTposition.
When the high beams are on, a light panel wiil ~ S Q
the instrdment be on. if
This feztuse lets you use your high-beam headlamps to signal a driver in front of you that you want to pass. It works even if your headamps xe 3ff. To use it, pull the turn signal lever toward you, but not so far that you hear a click. If your headlamps are off or on low beam, your high-beam headlamps will turn on. They’ll stay QPI as long as you hold the Iever toward you and the high-beam indicator on the dash will come on. Release the Iever to turn the high-beam headlamps off.
You can set the wiper speed for a long or short delay between wipes. This can be very useful in light rain OH snow. Turn the band to choose the delay time. The closer to LO, the shorter the delay between wipes. For steady wiping at low speed, turn the band away from you to the LO position. For high-speed wiping, turn the band further, io HI. To stop the wipers, move the band to OFF. Remember that damaged wiper biades may prevent you from seeing well enough to dive safely. TO avoid damage, be sure to clear ice and snow from the wiper blades before using them. Hf they're frozen to the windshield, carefully loosen or thaw them. If your blades become damaged, get s,ew blades or Made inserts. Heavy snow or ice can overload your wiper motor. A circuit breaker wid stcp rhe motor until it cools. CBeu away snow OF ice to prevent an overload.
L~
, . . .
. . ... . . . i. : . :.:. .:.
.e...
You control the windshield wipers by turning the band marked WIPER. For a siagle wiping cycle, turn the band to MIST. HoId it these until the wipers start, them let go. The wipers will stop after one cycle. If YOU want more cycles, hold the band on MIST longer.
band to a higher sensitivity level. An initial wipe occurs when you turn the ignition on as a reminder that the rain sense feature is active. The moisture-sensing wipers cperate in a deizy mode as well as a continuous low or high sped, depending on 5ie mount of moisture on the windshield and the. sensitivity setting. Tne IWST and wash cycles operate as nomd and =e not effected by the moisture-sensing function.
NOTICE:
.........
...
.............
The moisture-sensing system is activated by turning the wiper controi band to one of the five sensitivity levels within the DELAY area. The DELAY position closest ts OWMIST is the lowest sensitivity setting. This aiIows more water to coliect on the windshield between wipes.
It is important to note that the moisture-sensing delay wiping feature can be ovenidden at any time by manually turning the wiper band to LO OF WH speed. If the windshield on your vehicle ever needs replacement, make sure that the new windshieid is moisture-sensing delay compatible.
If your vehicle is equipped with a DE@, a WINDSHELD WASHER FLUID LOW message will appear on the display when the vehicle is low on washer fluid.
With cruise contrd, you can rnaintain a speed of about 25 mpk (40 k h ) OP more without keeping YQW foot on the accelerator. This can really help on long trips. Cmise control does not work at speeds below about 25 mph (40 krdh).
I
If your vehicle is ia cruise control when the optional traction control system begins to limit wheel spin, the cruise control will automatically disengage. (See "Traction Control System" in the Index.) When road conditions zilow YOS to safely use it again, you may turn the cmise control back QS.
.::.:.:.:> ...... ;:::::?. <:::::y::& :: ... ..:.. .......... ...
.-.z,-.-.
.*.:--.
. :.:.:".:"-. .................. 5.'. ..................... ......... :.:.:.:.x.:.>:...:. ..
2. Get
to the speed you want.
..........
3. Push in the SET button at the end of the lever and release it. Tne CRUISE light QII the
4. Thke your foot of€ the accelerator pedai.
......... ....... :.:<.:m,x..x.:.xe&%e& .................
..:,:? .‘:I .... ,:?
. .
e Use the accelerator
pedal to go XI a higher speed. Push the button at the end of the lever, then release the button and the accelerator Dedal.
0 iMove the cxtse switch
ON to WA. EsM it
there untii you reach a desired speed and then release the switch. To increase your speed in very small amounts, move the switch to WA for less than half a second an6 then release it.
Each time you cis this, your vehicle will go about B mph (1.6 k m h ) faster. The accelerate feature will only work after you have set the cruise controi speed by pusbing the SET button.
/
@ The headlamp switch is off and GD The transaxle is not in PARK (PI.
Whew it’s dark enough outside, your high-$em headlamps will change to low-beam headlamps at full brightness. The other lamps that turn with headlamps will also turn on. When it’s bright enough outside, the regular Imps will turn off, and your high-beam headlamps change to the reduced brightness Qf DWL.
your
To turn off all exterior lighting at night when YOU are parked, tlrm off the headlamps and move the twilight to the left into the detent in the slider sentinel ~ o n t d control. When released, the control will return to the Twilight Sentinel minimum delay position and the fights will turn off. As with any vehicle, YOU should turn on the regular headlamp system when YOU need it.
To operate this feature, slide the control to any position to vary the lamp timeout.
If you move the control a11 the way to MAX, your lamps will remain on for three minutes after you turn off your engine. If you move the control almost all the way in the other direction, so it’s just on, the I m p s will go off quickly when you turn off your engine. You c m set this delay time from only a few seconds to thee lminutes.
twilight sentinel and daytime running lamps work
Y Q U ~ with the Bight sensor on top of the instrument panel. Don’t cover it up- If you do it will read “dark” and the headlamps will come on.
This feature d.kows €os a three to five-second fade out of the courtesy lamps instead of inmediate turn off%.
This feature will only be activated when the security feedback feature is programmed to be in Modes 1,3 or 5 on the trmsmitter. Modes 0, 2 and 4 do not respond with exterior lights Washing when uirlocking the vehicle so perimeter lighting will nct be active. This feature can be programmed on or off for each transmitter. To turn the feature off: 1. Press and hold LOCK on the door lock switch QII
the door throughout this procedure. All doors will lock. 2. Press the instant d a m button on the transmitter to
enter tihe programming mode. Perimeter lighting remains on at this time and the ~ Q I X will chirp two times.
3. Press the instant alam button on fhe key transmitter
again. Perizneter lighting is disabled and the horn wiEI chirp one time.
4. Release the door lock switch. The perimeter iighting
feature is now off.
Pressing the UNLOCKbutton repeatedly may c a w the back-up lamps to turn on. To turn the feature on: I.
Press and hold LOCK on the door lock switch on the door throughout this procedure. A11 doors will Bock. Press the instant a l m button on the key transmieter to enter the programming mode. Perimeter lighting remains off at this time and the horn will chirp one time. Press the instant a l m button 0n the transmitter again. Perimeter lighting is now enabled and the horn will chirp two times. Release the door lock switch. The perimeter lighting feature is ~ Q W on.
2.
3.
4.
Perimeter iighting can also be activated through the optional Driver Infomation Center (DHC). See “Personal Choice Features” or “Driver Infomation Center” in the Index.
..-. . . . ....
inte~ior courtesy lamps will come do~r. They will turn off when you
To turn QHP a rear seat reading l a p , press the switch above that rear door. To turn cpff the reading l a p , press the switch again.
When you open the glove box, a lamp will on inside the glove box. This will automatically turn off when the glove box is closed.
This feature shuts off d l lamps that are left on for more than 144 minutes when the ignition is off. This will keep your battery from running down.
When you are sitting in a comfortable driving position, adjust the mimr SO you can see clearly behind your vehicle. Grip the mirror in the center to move it up OF down and side to side. The day/night adjustment dlows YOU Eo adjust the Ilnissoff to avoid glare from the kmps behind you. Pull the tab forward for daytime use; push it back for night use.
...... ...
....
.......... .... ...
.............. ...
The automatic minor has a time delay feature which prevents unnecessary switching from the night back to the day position. This delay prevents rapid changing of the mirror as you drive under lights and t3E.ough traffic.
.............................................................. ....................................................... ....................................
............................
:: ............
At night, when the glare is too high, the mirror will gradually daken to reduce glare (this change may take a few seconds). The mirror will return to its clex daytime state when t
glare is reduced. , ~
Ywr vehicle may have m electrochromic inside r~wview minor with a compass.
The mirrcpa: also includes m eight-point compass display in the upper right C Q H ~ W of the mirror face. m e n on, the compass automatically calibrates as the vehicle is driven. When cleaning the naimor, use a gaper towel or similar materid dampened with glass cleaner. Do not spray glass cleaner directly on the mirror as that may cause the liquid cleaner to enter the minor housing. Use a cotton swab and glass cleaner to clean the p h ~ t o c e ~ ~ s whew necessary.
When set in the JMIRROR position, this mirror automatically changes to reduce glare fkom headamps behind you. A time delay feature prevents rapid changing from the day to night positions while driving under lights and through traffic.
Press the COMPASS switch once to turn the compass on Or Sff.
if, after two SecoCds, the display does not show a cornpass heading ( “ N 9 for NQI-~K, ~ Q P example), there may be a strong magnetic field interfering with the compass. Such interference may be caused by a magnetic antenna ETP,QUYB~, magnetic note pad holder or a similar magcetic item.
m r
ine minor is set in zone eight upon leaving the k c t o r y It will be necessa-y tc adjust the compass to compensate for compzss variance if you live outside zone eight. Under certain circumstances, as during a long distance cross-country trip, it wiHi be necessary to adjust ~ Q I - compass variance. Compass variance is the difference between earth’s magnetic north and true geographic north. If not adjusted to account for compass variance, your compass could give false readings.
3. Press the COMPASS button on the bottom of the minor until the new zone number appears in the display. After you stop pressing the button, the display will shcw a compass direction within a few seconds. (This is the automatic calibration mode. Drive in a circle to calibrate the mirror. See “Compass Calibration” following.)
.QEbT&GR
shsuM ever appear in tire compass
If the letter T window, the mirror may need calibration. The mirror can be calibrated in one of two ways:
’
Drive the vehicle in circles at 5 mph (8 knm/ha) or less until the display reads a direction, OF
@ Drive the vehicle on your everyday routine.
E€ you have the optional BK fe'eaturc, the passenger's outside rerarview mir-ror a€ss includes a tilt-down feature that operates wlxn the shift lever is in REVERSE fR). When the vehicle is shifted out of REVERSE (Rj, :he passenger mirror will return to its original position after a five second delay. This deilry prevcnts moven~ent of the mirror if multiple gear transitions (reverse to drive to reverse) occur during a parailel parking maneuver. 'Fimis feature can be programed on or off though the Personal Choice selection mem. See '"Driver Information Center" or "Personal Choice Features" in the Index for programming instr~cbons. This feature assists the driver with improved rear obstacle detection.
Move the switch below the control to choose the right or left m i n r . If yoir place the switch in the center positicn, no movement of the mirror will occur. To adjust the minor, push the m o w control in the direction you want the minor to g ~ .
Your passenger's side mirror is convex. A convex mirror's surface is curved SO you can see more from the driver's seat.
I. Pusla the extended tab (above the GARAGE button)
or insert a screwdriver between the tab and outer edge of the cover. "he garage door opener cover will flip down.
I- i
N EAR
MULTIELMAC
SEARS SHlMA ' STANLEY STANLEY I STANLEY
I 9553708 1 RT-18
1050
1047
?076
3. Place the height adapters on the proper peg using the
suggested combinations or by lining up the height adapters and the transmitter button on your garage door opener.
,5
4. use &e Velcro@ found in the storage area
attach the garage door opener securely inside the console. Line up the transmitter button with the height adapters.
You may have a fold-down m e s t between the front seats that opens into a storage area. To open it, pull up QII the lever at the fiont edge. Inside are cupholders that can be rotated forward for use with the m e s t cover closed. There is also a removable coinholder and a storage area for cassette tapes and compact discs.
5. Close the cover and test the G-GE
button. If your garage door opener doesn’t work installed, try another combination.
afkr it is
YQW vehicle’s rear seat armrest may c ~ n t ~ n a two cuphokkrs. To access elhe cupholders, pull tke m e s t down from the rear seatback. Some models may also include a storage area inside the m e s t . To open it, pull up on the lever at the front edge of the armrest.
The console dso contains a removeable coinholder as well as storage for cassette tapes and compact discs.
Your vehicle is equipped with 2 rear storage m r e s t with a pass through feature that allows for tmnk access. Pull the rear armrest down, then push down on the trunk access panel latch to open the panel. To close, push the access panel until it Iatches.
YQUT vehicle has a convenience net. You'll see it just inside the bzck wall sf the trunk. Put small loads, like grocery bags, behind the net. It can help keep them from f'rrlling over during sharp turns or quick starts and stops. The net isn't for Earger, heavier loads. Store them in the m n k as far forwrtrd as you can. You can unhook the net so that it will lie flat when you're not using it.
The front ashtray may be removed for cleaning. To remove, grasp the sides and pull forward.
The rear ashtrays are located on each rear door panel. To remove the rear ashtray, open the lid and ease the ashtray Kpward until the edge can be grasped to pull the ashtray up and out.
1 NOTICE:
Don't put papers or other flammable things into your ashtrays. Hot cigarettes or other smoking materials could ignite them, causing a damaging fire.
Your vehicle has ifluraminated visor vanity mirrors. When you open the visor vanity mirror by prrlling up, the lamps turn on. The brightness of the l a p s can be adjusted by siiding the switch. Your vehicle may also have visor vanity nirrors for the rear seat passengers. T0 block out glare, swing down the visors. The larger visor can be removed from the center mot;nt and SUI moved to the side, while the auxiliary sun visor remains to Mock game from the front. The front side of the driver's sun visor also contains a pocket for map storage.
YQW vehicle may have one or two power outlets depending on the type of front seat YOU have. If your seat has a f~ld-down m e s t , the power crrtlet is f r ~ ~ t located in the center of the front seat bebw the cushion. If your vehicle has front bucket seats with a center console, you will find one outlet inside the storage compartment and the other OR the lower f r o ~ t edge of the console.
conveaience, y m will find a two-hanger
For ~ U I . capacity garment hook above each rear door near the reading laxps.
This system may be ordered if you have the optional fixed ce1Ma.r telephone. The following services are avdable 24 hours a day: 8 Roadside Service with Location
Emergency Services Button
8) Remote Door Unlock a Theft Detection/Noti€icatisn and Stolen-Vehicle
Tracking
8 Automatic Notification of Air Bag Deployment e Corrcierge/Customer Conveniences Services For more information, contact your dealer.
If you have the express-open ~ S ~ P Q U I Q ~ option, the switch is opr the roof between the sun visors. It will open the ~ S ~ T O F O O ~ when in retained accessory power or when the ignition is on.
'Ih close the glass panel,, press and hold the switch fwwad. The sunshade must be manually closed. Once the astroroof is closed, it can be opened to a vent position. Push the switch upward to vent. To close, pull the switch downward. The sunshade must be opened and closed manually for vent operation.
An assist strap over each rear door and the frorat passenger's door can be used to help you get in or out of your vehicle.
It will operate garage doors and gates, or other devices controlled by radio frequency such as ltnome/office lighting systems.
The transmitter will Hem and transmit the frequencies of most current transmitters and is powered by your vehicIe’s battery and charging system. This device complies with ?art B 5 of the FCC Rieles. Operation is subject to the following two conditions: (I 1 this device may not cause h m f u i interference, and ( 2 ) this device must accept any interference received, including interference that may cause undesired operation. This device c~mplies with RSS-218 of Industry Canada. Operation is subject to the following two conditions: ( i ) this device may not cause interference. and (2) this device must accept m y interference, including interference that may cause undesired operation of the device. Changes and modifications to this system by other than an authorized service hcility c~uhd void authorizization to rase this equipment.
Your vehide’s engine should be turned off while programming your transmitter. Fdlow these steps to program up to three channels:
2. HoId the end of your hand-held transmitter against
the bottom surface of the universal transmitter so that you can stir1 see the red light.
Note to Canadfiraa owners: During prograMng, your hand-heid transmitter may stop transmitting after one or two seconds. If you are programming from one of these transmitters, YOU should press and re-press the button on the hand-held transmitter every :WO seconds without ever releasing the button QII the universal t r a ~ n i ~ t e r . Release both buttons when the red light on the universal transmitter begins to flash rapidly.
Press and hold the appropriate button QHZ the universal transmitter. The red light comes on while the signal is being transmitted. Note that the ef€ective transmission range of the universal transmitter may differ from your hand-held trmsmitter and from one channel to another.
3.
4.
Decide which one of the three channels YOU want to program. Using both hands, press the hand-held transmitter bdtton and the desired button on the universal transmitter. Continue to hold both buttons though Step 4. Wold down both buttons until YQU see the red Bight QII the universal trmsmitter first flash S ~ O W ~ Y ,
If you have trouble programming the universal transmitter, make sure that YOU have followed the directions exactly as described and that the batteries in the hand-l.aeld transmitter are not dead. If you still cannot program it, rotate YQUT hand-held transmitter end over end and try again. n e universal transmitter may not be compatible with a limited number of dder installaaions due to legislated changes in transmission frequencies. If you cannot program the transmitter after repeated attempts, consult your dealer. Be s u e to keep your ~higind hmd-held transmitter in c s e you need t~ erase and reprogram the miversd transmitter.
2-68
You may WOW use either the universal transmitter or the hmd-held transmitter t~ open your garage door. If you still have diEiculty in programming and require assistance, please call your dealer.
Accessoiles for your universal transmitter are available from the manufacturer of the unit. Ilf you would Hike additional infomation, piease call 1-800-355-35 15.
To dete,mine if your garage door opener has this rolling code feature, press 2nd hold the appsoprizte button on the universal transmitter that was programmed. If the sed light flashes rapidly for one to two seconds, then turns solid, your garage door opener has this feature. To program a garage door opener with the rolling code feature, do the fdowirag: 8 .
Program your hand-heid transmitter to the universal transmitter by foilowing the steps provided under “’Programming the Transmitter” earlier. Loczte the training button on the garage door opener receiver. The exact location and coIor will vary among brands. Refer to your garage Coor opener irranufacturer’s owner’s manual to Iocate the training biataorz. Press the trainiEg button on the garage door opener receiver for one to two seconds. Retrrnr to your vehicle and press the programmed button on the universal transmitter until the red light Rashes rapidly (about two seconds). Release the button, then press it again to confirm it was programed to the garage door opener receiver.
2.
3.
4.
5 .
Your vehicle is equipped with one of the following instrument panel clusters. It includes indicator waning lights and gages that are explained on the following pages. Be sure to read about those that apply to the instrument cluster for your vehicle.
130 ' 140
Standard CEuster (United States version shown, Canada similar)
TEMPERATURE
Cluster With DIC (United States version shown, Canada similar)
The tachometer tells you how fast the engine is running. it displays engine speed in thousands sf ~ C V Q I U ~ ~ O I X per minute (rp”).
This part describes the warning lights and gages that may be on your vehicle. The pictures will help YOU locate them. Warning lights and gages can signal that something is wrong before it becomes serious enough to cause an expensive repair or replacement. Paying attention to your warning lights and gages coukl also save you or others from injury. Warning lights come on when there may be or is a problem with one of your vehicle’s hn~tions. As YOU will see in the details 010. the next few pages, some warning lights come on briefly when you start the engine just to let you know they’re working. If you are familiar with t i s section, YOU should not be alarmed when this happens. Cages can indicate when there may be or is a problem of your vehicle’s functions. Often gages and with warning lights work together to let you h o w when there’s a problem with your vehicle.
When one of the warning lights comes QII and stays on when you are driving, or when one of the gages shows there may be a problem, check the section that tells you what to do about it. Please follow this manual’s advice. Waiting to d~ repairs can be costly -- and even dangerous. So please get to h o w your warning lights and gages. They’re a big help. Your vehicle may also have a driver information system that works along with the warning lights and gages. See “Driver Information System” in the Index.
d Bel$ pj&&n(jgp Light
When eke key is turned to RUN or START, a chime will come on for about eight seconds to remind people to fasten their safety belts, unless the driver’s safety belt is already buckled.
The safety belt light will also come on md stay on for about 20 seconds, then it will flash for about 55 seconds. If the driver’s belt is already buckled, neither the chime nor the light will come on.
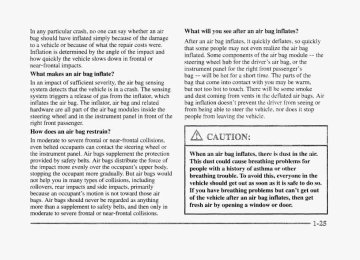
There is an air bag readiness light on the instrument panel, which shows AIR BAG. The system checks the air bag’s electrical system for rna’rfunctions. The light tells you if there is an electrical problem. The system check includes the air bag sensors, the air bag modules, the wiring and the crash sensing and diagnostic module. For more infomation on the air bag system, see “Air Bag” in the Index.
start your engine,
This light will come on when y ~ u and it will flash for a few seconds. Then the Eight should go out. This means the system is ready.
I€ the air bag readiness light stays on after you start the engine or comes QIT when you are driving, your air bag system may not work p~operly. Have your vehicle serviced right away. The air bag readiness light should flash for a few seconds when you turn the ignition key to RUN. If the light doesn’t come on then, have it fixed so it will be ready to w m you if there is a problem.
VOLT
you turn the hey to “‘en RUN, this light will come on briefly, to show the battery charging systeE is working.
When the light goes off and stays off, the charging system is working. Hf the light stays on, a chime will sound indicating you need service, and you should take your vehicle to the dealer at once. To save your battery until yo3 get there, turn off a%B accessories and turn off glow climate control system. When a luge number of electrical accessories me operating ir, the vehicle and the engine is left at an idle for aa extended period, the engine may idle at a higher RPM than noma1 to ensure the battery does not mn down. This may occur when several of the following are on: parking lamps, high-beam headlamps, rear window defogger, heated seats and engine cooling fans, etc. It may take longer for the rear window defogger to dear the glass, and the heated seats may not feel as warn as normal.
This light should come on whera YOU turn the key to RUN. If it doesn’t come ora then, have it fixed so Et will be ready to warn you if there‘s 2 problem.
With the anti-lock brake system, the Iight(s) will come on when you start your engine and may stay on for several seconds.
1 That’s BzorfnaI.
The anti-lock brake system warning light should come on briefly when YOU turn the ignition key to RUN. If the light doesn’t come on then, have it fixed SO it will be ready to w m you if there is a problem.
OFF
This warnirag light should come on briefly 2s you start the engine. If the warning iight doesn’t corne on then, have it fixed so it will be ready to warn you if there’s a problem.
If it stays on, or comes on when you’re driving, there may be a problem with your traction control system and your vehicle may need service. When this warning light is on, the system will not limit wheel spin. Adjust your dr;ivi3g accordingly. The traction control system w m i n g light may come on for the foIlowing reasons:
If yos turn the system off by pressing the button located on the end of the shift lever, the warning light will come on and stay on. To turn the system back on, press the button again. The warning light should go off. (See “Traction Control System” in the Index for more kf~m;ation.)
This gage neasrrres the temperature of your engine. If the pointer moves into the red area, your engine is ~ O O hot. A tenperatwe indicator Bight Wili turn on 2nd a chime wirl sound.
TEMPERATURE
If you have been operating your vehicle under noma1 driving conditions, and the temperature indicator fight turns on, you should pull off the road, stop your vehicle and turn off the engine as soon as possible.
8:.
f. ,fie
2s F‘fp&-!&g
-- -.- The following may prevent more serious damage to your vehicle:
Reducing vehicle speed. Avoiding hard accelerations.
e Avoiding steep uphill grades.
If YOU are towing a trailer, reduce the amount of cargo being hauled as soon as it is possible.
If the light stops flashing and remains on steady, see “If the Light Is On Steady” following. Sf the light continues to flash, when it is safe to do so, stop the vehicle. Find a safe place to park your vehicle. Turn the key off, wait at least IO seconds and restart the engine. If the light remains on steady, see “If the Light Is On Steady” following. If the light is still flashing, follow the previous steps, and drive the vehcle to your dealer or qualified service center €or service.
NOTICE:
If you keep driving your vehicle with this light on, after a whiie, your emission controls rnay not work as well, your fuel economy may not be as good and your engine may not PUR as smoothly. This could lead to costly repairs that may not be covered by p u r warranty.
This jight should corne on, as a check to show YOU it is working, when the ignition is on and the engine is not running. If the light doesn’t come on, have it repaired. This light will also come QII during ;I malfunction in one of ~ W O ways: 8 Light Flashing -- A misfire condition has been detected. A misfire increases vehicle emissions and may damage the emission controi system on your vehicle. Dealer or qualified service center diagnosis and service rnay be required.
@ Eight On Steady -- An emission control system malfunction has been detected on your vehicle. Dealer or qualified service center diagnosis and service may be required.
If so, be sure to he1 your vehicie with quality fuel (see "Fuel" in the Index). Poor fuel quality will cause your engine not to F J ~ as efficiently as designed. YQU may notice this as stalling after start-up, stalling when you pent the vehicle into gear, misfiring, hesitation on acceleration or stumbling on acceleration. (These conditions may go away once the engine is warned up. j This will be detected by the system and cause the light to turn OR. If you experience one or more of these conditions, chmge the fuel brand you use. It will n-ecpire at least one full tank of the proper fuel to tuna the light off. If none of the above steps hove lrirade the light turn off, have your dealer or qualified service center check the vehicle. Your dealer has the proper test equipment and diagnostic tools to fix any nnechanicai or electnictrl problems that may have developed.
If so, your electrical system may be wet. The condition will usually be cgrrected when the electrical system dries out. A few driving trips should turn the light off. Maw you recently changed brands of fuel?
could be a problem with your engine 0i1 pressure.
'
SERVICE VEHICLE SOON
non-emission related vehicle problems.
These problems may not be obvious and may affect vehicle performance or durability. Consult a qualified dealership for necessary repairs to maintain top vehicle performance. The light will come QIP briefly when your ignition is turned on to S ~ O W that it is workmg properly.
UNLEADED FUEL ONLY
&~(-&jJ?-% _. _- &SD&$V
7-
7:
_Y
\@+@--JQ) @ &-J~pp@.&)
y-
see things you need to see when it's dark outsside. Be sure to keep the HUD image dim and placed EQW
in YOUF field of view.
your irrstrumerat cluster.
If your vehicle is equipped with the Wead-Up Display (HUD), you can see some of the driver infomation that appears The infomation may be displayed in English or metric units and appears as a reflection ir, the windshield. The HLJD consists of the following information: 8 Speedometer Reading 0 Turn Signal Indicators 8 High-Beam Meadlamp Indicator @ Check Gages Message
The Z-:UD shows these images when they are lighted on tke instrument pamS cluster. Be sure to continue scanning your displays, controls and driving environment Just as you wouid in a vehicle without XUD. If you sever hook at your instrt.merit panel, you may got see something imgoI-aana, such as a warning light.
The brightness of the E3U.D image is determined by whether the headlamps are on or off, and where you have the HUD d i m e r control set.
2. Adjust the seat to p u r driving posielop~. Slide the
image height adjuster control d l the way up, raising the Enage as far as possible.
3. Now slide the image height adjuster C O I I ~ . ~ down SQ the image is as low as possible but still in full view. 4. Slide the d i m e r control d ~ w n w t ~ d until the HUD
image is no brighter than necessary.
Ymr vehicle may be equipped with a Driver Infolmntionz Center (DIC). The DIC will display information about how your vehicle is functioning, as well as warning messages if a system p r ~ b ' e e ~ ~ ~ is deteczed.
The fobwing buttons are on the DIC control panel which is located to the left of the steering column:
A I'iw is Mowr~, Sce "'%;USC:S and Circuit Breakers" in the Index.
Keep in mind that yorrr wincishield is part of the WUD system. If you ever have to have your windshield replaced, be sure to get one that is designed for WUD OF your HUD image may look bhrred or out of focus.
0 ODO/TRfB: Use this button to display your total and
trip miles.
e m L INFO: Press this button to display fuel infomation such as, fuel used, fuel range and fuel economy.
Q GAGE INFO: Use this button to display oil
pressure, oil Me, coolant temperature, tire pressure and battery infomation. RESET: ”his button, used dong with other buttons, will reset system functions.
@ ENGNET: Use this button to change the display between English and metric units. p@r@-jn& Choice gJ1c DispEay This feature allows two different drivers to store and recall their QWP~ preferred display mode. The personal choice settings displayed on the DIC are determined by the transmitter used t~ enter the vehicle. After the UNLOCK button of a remote keyless entry transmitter is pressed and the ignition is in RUN, the DIC will display the identified driver. The settings can also be changed by briefly pressing one of the MEMORY buttons located on the driver’s door.
The DIC can also be used to program the following personal choice features available with your vehicle: e Memory Seats
Memory Door Locks Security Feedback Delayed Locking
e Perimeter Lighting
Parallel Park Assist Mirror Window Lockout
See “Personal Choice Features” in the Index and “DIC later in this part. The Personal Choice Progran~ning’~ DIC is used to program infomation €or DWIVEiR #1 and DRIVER #2. The DIC will identify a person as UNKNOWN DRIVER if they are neither DRIVER #I nor DRIVER #2.
When this button is pressed, the display will show the total mileage, an;d Trip T or Trig 2 miles. Trip I and Trip 2 will display the miles traveled since the last reset. To reset the trig odometer, press the ODOKMP button until the trig miles are shown in the DIC display, then press the RESET button. The trip odometer will f~ow accumulate miles until the next reset.
Press the W E E button mtil
Average Fue% E C C D ~ Q ~ Y : the display shows FUEL ECONOMY AVERAGE. Average fuel economy is viewed as a long term approximation of your overall driving conditions. To learn the average fuel econcrny from a new starting point, press the RESET button while the average fuel economy is displayed in the D6C. F ~ S ~ U I & ~ I E Q U S Fuel ECQKIOH~~: until the display shows FUEL ECONOMY INST. Instantaneous fuel economy varies with your driving conditions, such as acceleration, braking and the grade of the road being traveled. The RESET button does not hnction in this mode.
Press the FUEL button
it ~hcre are no problems detected, the display will return [ t i h e mode selected by that driver the last time the ignition was turned off. 1 f 2 problem is detected, a diagnostic message will appear in the display. The following pages will show the messages you may see on the DIC display. The message center is continuously updated with the vehicle's performance status.
Fuel Range: Press the FUEL button until the display shows FUEL RANGE. The fuel range will calculate the remaining distance you can chive without refueling. This calculation is based on the average fuel economy for the last 25 miles (40.25 km) driven, and the fuel remaining in the fuel tank. The RESET button does not function in this mode. Fuel Used: Press the mTEk button until the display shows IFCTIEL USED. This display will show you how much fuel has been used since the last reset. TQ learn how much fuel is used from a new starting point, press the RESET button while the fbel used is displayed -h the DIC.
Oil Pressure: Press the GAGES button until OIL PRESSURE appears in the display. If there are no problems detected with the oil pressure, the display will show OIL PRESSURE NORMAL. If a low oil pressure condition is detected, the display will show OIL PRESSURE LOW. If you see the OIL PRESSURE LOW message, you could be low on oil or your oil is not going through the engine properly. See your dealer for service.
Coolant Temperature: Press the GAGES button until COOLANT TEMB appears in the display. If there are no problems detected with the temperature, C~C&4NI’ TEMP NORMAL will appear in the display. If the temperature is too high, COOLANT TEMP HOT will appear in the display. If you see the COOLANT TEMP HOT message, your engine is overheated. You should pull off the road, stop your vehicle and turn off your engine as soon as possible. This manual explains what to do. See “Engine Overheating” in the Index. Battery Volts: Press the GAGES button until the display shows BATTERY STAm. If the voltage is normal the display will show BATTERY STATE NORMAE. If the voltage drops below 10.5 volts, the display will show BATTERY STAm LOW. If the voltage is above 16 volts, the display will show BATTERY STATE HIGH. If the display shows the high or low message, you need to have your battery checked.
Oil Life Monitor (Index): Psess the GAGES button until OIL LIFE INDEX appears in the display. The OIL LEE INDEX NORMAL display will show an estimate of the oil’s remaining useful Me. When the oil life index is less than IO%, the display will show OIL LIFE INDEX CHANGE OIL. When you have the oil changed according to the maintenance schedule (see “Maintenance Schedule” in the Index), you will have to reset the oil We monitor. To do this, press and hold the RESET’ button for more than five seconds while the oil life index is being displayed on the DPC. The oil life will change to 100%. Tire Psessure Status: Press the GAGES button until ‘FWE IPWSSUWE appears in the display. TWE PRESSUWE NORMAL is displayed when the Check Tire Pressure System believes your ve~cle’s tire pressures are normal. If a potential tire pressure problem is detected, the display will show gIRE PRESSURE LOW CHECK TIRES. If you see the azRE PRESSURE LOW: CHECK TIRES message, you should s t ~ p as soon as you can and check all your tires for damage. (If a tire is flat, see ‘‘If a Tire Goes Flat” in the Index.) Also check the tire pressure in all four tires as soon as you can. See “Inflation - Tire Pressure” and “Check Tire Pressure System” in the Index.
mere are times when you will have to reset (calibrate) the Check Tire Pressure System. See “Check Tire Pressure System” in the Index. jJ&m&qgs sj& &ssag@j
in the D E
Other messages or warnings may appear display such as: 0 WINDSHIELD WASHER FLUID LOW ENG COOLANT LOW - CHECK LEVEL ENGINE OIL LOW - CHECK LEVEL
0 CHANGE ENGINE OIL SOON 0 TRACTION CONTROL SYSTEM ACTIVE 0 DOOR AJAR 0 TRUNKAJAR Pressing any of the DIC control buttons will remove the above messages or warnings from the DIC display.
The last driver number remembered by the DIC will show on the display each time the UNLOCK button on the same transmitter is pressed, and the ignition is turned OE. When you press UNLOCK en your transmitter, the DIC will automaticaihy change driver numbers 2nd the vehicle will recall the persod choice settings that were last made to correspond to your transmitter. if you unlock the vehicle using your door key instead sf your zransmitter, the DIC will not change drivers 2nd will recall the infomation from the last transmitter use or the last driver change using the men~ory seat controls. If this happens and you were not the last driver of the vehicle, simply press your correct driver number on the memory seat controls OH press the UNLOCK button on your transmitter.
The DIC can be used $0 program the following personal choice features available with your vehicle: @ Melnosy Seats
Memory Door Locks Security Feedback @ Delayed h c k i n g
See ‘‘Personal Choice Features” In the Index. T’ne DTC is used to program the personal choices of two drivers. The driver’s are recognized by DRIVER #I and DRIVER #2. You will k t the DIC know which driver you are by using your remote keyless entry transmitter or by pressing the appropriate memory seat control buttorm located on the driver’s door. The remote transmitter was pre-programmed to belong to DRIVER # 9 or DRIVER #2.
See the following steps for personab. choice progrinmrning instructions. 1 .
Turn the ignition on and keep the transaxle in PARK (P). h f o m the DIC which driver you are by pressing the UNLOCK button on your transmitter or the appropriate memory seat control. Press and hold the ENGMET button for five seconds. WELCOME TO BUICK OPTION FEATURE will appear in the display. T& next display will be your driver number. You are now in the sclection mode and the DIC is ready to program your personal choices in memory. Use the ENG/MET button PO sehect options. Use the RESET button t o save the selection and advance to the next option.
2.
3.
4.
Each feature that can be personalized will appear in the display. Once you have made ;1 selection for a feature, alae DEC will MOW on to the next pers~nal choice feature.
If YOU would like to exit the seiection mode without moving through each of the personal choice features, simply press a different button on the DIC or turn off the ignition. Whatever personal choices you made will still be retained, even without passing through each of the features. If you happen to move past a seiectiora YOU would like to make a personal choice for, press UNLOCK on your transmitter c)r press the appropriate driver r,umber on the seat control. This will return you to the beginning of the option feature programing mode.
The parakl park assist mirror, which tips the passenger mirror while the vehick is in REVERSE (W), can be made active or inactive through the DIC. %berm PARALLEL PARK-OFF-ON appears on the display, use the ENGMET button t~ toggle the arrow between O W and ON. When you have made your choice, press the RESET button to record your selection. For more idormation on this feature, see “Mirrors” in the Index.
8
If YOU choose EIGHTS for LOCK FEEDBACK and OFF for UNLOCK FEEDBACK, your exterior lamps wiEl flash when I o c h g your vehicle and you will receive no security feedback when unlocking your vehicle. Hf you choose LIGHTS for LOCK FEEDBACK and LIGHTS for UNLOCK FEEDBACK, your exterior lamps will flash when locking and when ur,Bocking your vehicle. If you choose LIGHTS + H O W for LOCK FEEDBACK and OFF for UNLCCK FEEDBACK, your exterior lamps will flash and the horn will chiq when locking your vehicle and you will receive no security feedback when unlocking your vehicle. Hf you choose LIGHTS + HORN for LOCK FEEDBACK and LIGHTS for UNLOCK FEEDBACK, your exterior lamps will flash and the horn will chirp when locking YQW vehicle and your exterior lamps will flash when unlocking your vehicle.
For more infomation on this feature, see ''Security Feedback" in the Index.
If you choose ON for LOCK FEEDBACK YOU will also wed to choose LIGHTS or LIGHTS + HORN. You can select the following modes:
If you choose O W for LOCK FEEDBACK and OW for UNLOCK FEEDBACK, you will receive no security feedback when locking or unlocking your vehicle. Hf p t l choose OFF for LOCK FEEDBACK and LIGHTS for UNLOCK FEEDBACK, you will receive no security feedback when locking your vehicle and the exterior lamps will flash when unlocking your vehicle.
pep&Q_@ier- L&.$%gqg When the UNLOCK button on the transmitter is pressed, the DRL lamps (high-beams at reduced intensity), parking lmps and back-up l a p s will turn on if it is dark enough according to the twilight sentinel. You can control activation of this feature by choosing OFF QI- ON when the PERIMETER LIGHTS choice is displayed on the DIC. Make your choice by pressing the ENG/M.ET button and record your choice by pressing the RESET button. NOTE: If you want to choose PERIMETER LIGHTS ON, you must also choose LIGMTS for UNLOCK FEEDBACK while making the security feedback choices. For more information on this feature, see “Perimeter Lighting” in the Index.
%fetnory Position: Choose ON when the SEAT RECALL choice appears, and then choose MEMORY when the RECALL POSITION choice appears.
0 Exit Position: Choose ON when the SEAT RECALL
choice appears, and then choose EXIT when the RECALL POSITION choice aslpears and your seat will move all the way down anh back for easy exit. ’ h e seat will also move when you enter the vehicle after unlocking it with a remote keyless entry transmitter. This will allow for easy entry as well.
f b r more information on this feature, see “Memory Scats” in the Index.
The number of passenger windows locked out by the WINDOW LQCK switch can be programmed through the DIC. If you choose ALL PASS, all three passenger window switches will be inactive when the WINDOW LOCK switch is enabled. If you choose MAR, only the two rear passenger window switches will be locked out when the WINDOW LOCK switch is enabled. To change modes: 1. Move the ~
OR the display betweer, ALL PASS
Q W
and REAR by pressing the ENGMET button. 2. Once you have made your selection, press the
RESET button. Your choice will be retained in memory.
For more information on this feature, see “Window Lock” in the Index.
In this section, you'll find out how to operate the comfort control and audio systems cffered with your whicle. Be sure to read about the particular systems supplied with your vehicle.
3-2 3-2
3-2 3-5 3-5 3 -6 3-7 3-8 3-8 3-9 3 -9
3- BO 3-10
::
C ~ m f ~ r ; t Cr>n:rols Personal Choice Comfort ControIs (If Equipped) Dud Automatic CornforTernp Clirnate Control ! Air Conditioning Heating VentiEation System Passenger Compartment Ais Filter Defogging and Defr'rosting Wear Window Defogger Passenger Climate Control Steering Wheel Controls fcr Climate Controi (If Equipped) Setting the Cbck AM-FM Stereo with Cassette Tape Player (.If Equipped)
::
5 3-14 ::
3-18
3-21
[ 3-27 ; 3-30 : : 3-30 : 3-33 3-34 :. 3-34 i 3-35 9 3-36 3-36
' M s section tells you how to operate your comfort ctrrtt.ro8s. Your comfort control system uses trxone-friendIy hi- B 348 refrigerant. With these systems, you can control the heating, cooling and ventilation in your vehicle. Your vehicle also has a flow-through ventilation system described Eater in this section.
This feature allows two different drivers to store and recall their own climate control settings for temperature, air delivery node, fan and passenger climate COXI~FO~ f d o m status. The Personal Choice settings recalled are determined by the transmitter used to enter the vehicle. After the UNLOCK button of a remote keyless entry transmitter is pressed, and the igrrition is in RUN, the climate control will adjust to the last settings of the identified driver. The settings can also be changed by briefly pressing one of the MEMORY seat switches located on the driver's door panel. When adjustments are made, the new settings are automatically saved for the driver.
Your vehicle has the dual automatic cornfortemp climate control system. The fdowing infomation tells you how 1: works. Yorr will hear a beep each time a button is pushed and a small light orr the button will indicate which buttons lire active. The lights are QIP ali buttons except E M P , FAN and AIR FLOW. The display will show f m speed, comfort level setting and a i r f ' ~ direction for a few seconds whenever any button, except for the rear defog, is pushed, and then it will display the outside temperature. The outside temperature reading is most accurate when the vehicle is movi~g. During stops, when drivkg slow, QF when the engine is first sta-ted after a short trip, the outside temperature reading can be affected by road or engine heat. In order to enswe proper automatic climate control operation, the outside temperature display may not update BS quickly as expected.
in cold weather, the system will delay turning t5 r e f anon high, to avoid blowing cold air. The Iength of the delay depends on the engine coolant temperature and the outside temperature. Pushing the FAN, AIR FLOW or FRONT buttons will override this delay, turn off the AUTO setting and change the fan speed.
You may also manually adjust the air delivery or fan speed. AIR FLOW This button is used to change the direction of the airflow. The airflow choices available are FLOOR, FLOOR-MID, MID and WINDSHIELD-FIBOR. If the systen is set for AUTO, pressing the AIR FLOW button will display the current airflow direction, the comfort setting and the fan speed. Press the AIR FLOW up or down button again to change the direction of the airflow.
is tuned on, It
OFF: If the passenger comfort C Q I I ~ ~ O ~ can be turned off by pressing the OW button once. Pressing the OFF button a second time wiil turn off the main system. Turning off the main system causes the fan to turn off and the airflow to be directed to the FLOOR. The system will still try to keep the interior of the vehicle at the previous chosen comfsrt settifig. The outside temperature will show on the display when the system is off. The ventilation system always allows fresh air t~ flow through your vehicle when the vehicle is moving even with the system in the OFF mode. VENT: The VENT button aEIows outside air to flow through your vehicle without the air conditioning compressor working. Selecting VENT and the AUTO button at the same time allows the system to contsoi automatically without the use of the ais: conditioning compressor or the use of the MCIRC mode. To turn off the VENT selection, push the VENT button again.
C: When RECIRC is selected, the system will limit the mount of outside air entering your vehicle. This is helpful when you are trying to cool the interior limit the mount of outside air of the vehicle quickly or entering your vehicle for some other reason. IIPlECmC and AUTO may be selected at the same time. The system will remain in RECRC until the ignition is tuned off. m e system will return back to the previousBy is w e d back on. M C R C selected mode when the car can be selected in dl manual airflow modes except FRONT defrost. RECRC cannot be selected with the
VENT button. 9 FRON* m s selec~on i~ used to dehst h e
windshield by directing the ~ tow& the widshield. If FRONT is selected while in the AUTO mode, the fan speed md the air temperature from the f i ~ n t defroster will vary. If a mmud fan speed setting is selected, the fan speed will remain at that selection until another fan speed selection is made or the AUTO mode is selected. To turn off FRONT', press the AUTO or AW mow bUttQn. FRONT defrost will work better if any ice QP snow is cleared from the hood a d the air inlet area between the base of the windshield and the hood.
. . . . . . . . . ...A,... .. .
TkntiIatioEs \rips @ Keep the hood md front air inlet free of ice, snow or such as leaves. The heater md
any other Q ~ S ~ I X C ~ ~ Q I I defroster will work better, reducing the chance of hgging YQW windows. Keep the air path under the front seats clear of objects. m s helps air to ckcukite throughout your vehicle.
Passenger compammezt. f i r ~ g & % Passenger compartment air, both outside air md recirculated air, is routed through a passenger compartment filter, which is part of a three piece filter system. The filter removes certain particles from the air, including pollen andl dust particles. Reductions in OW, which may QCCW more quickly in dusty areas, indicate that the filter needs to be replaced early.
The lines you see on the r e x window w m the glass. Press this button to start warming your Window.
The ffront seat passenger can control the air temperature in their seating area. This can be set up to 5 O F (- 15 O C> cooler or warmer than the primary setting. You can activate this featwe by sliding the lever located QIP the instrument panel toward warm or cool. If the passenger control has been turned on, it can be turned off by pressing the OFF button once. Pressing the OFF button a second time will turn off the main system.
"
Your DeBco Electronics audio system has been designed to operate easily and give years of listeing pleasmi. You will get the most enjoyment out of it if you acquaint yourself with it first. Find out what your Delco Electronics system can do and how to operate all its . controls, to be sure you're getting the most out of the?.. J advanced engineering that went into it. Setting &he Chock Press and hold and hold MIN until the correct minute appears. You may set the clock with the ignition off if YOU press RECALL fist and follow the same procedure described above.
until the correct how appears. Press
VOLUME: This h o b turns the system on and off anad controls the volume. To increase volume and turn the radio on, turn the knob to the right. Turn it to the left to decrease volume.
5;. Repeat :he steps for each p u s h b ~ t t ~ n . P SCAN: Press this button to :isten to each of your preset stations f ~ r a few seconds. The radio will go to the first preset station, stcp for a few seconds, then go on Fa the next ?reset station. Press P SCAN again to stop scanning. The radio will not stop at a preset if the station is weak.
BASS: Press this knob lightly so it extends. Tun the knob to increase or decrease bass. TREB: Press this knob lightly so it extends. Turn the knob to increase or decrease treble. If a station is weak or noisy, you may want to decrease the treble. Push these h o b s back into their stored positions when you're not using them.
BAL: Turn the control behind the upper knob to move the s o m i to the left or right speakers. The middle position balances the sound between the speakers. FADE: Turn the control behind the lower knob to move the sound to thc front or rear speakers. The middle position balmces the sound between the speakers. (..,I &F$i 7-. . The longer side with the tape visible should face to the right. If the ignition and the radio are on, the tape can be inserted and will begin playing. If you hear nothing or hear a garbled sound, the tape may not be in squarely. Press EJECT to remove the tape and start over.
&Lag 2 *." : : , 4 ~ y & ~ ~ $ ~
''-.:.:%.A L+&
L . .
V '
7:.
Mile the tape is playing, use the VOLUME, FADE, BAL, BASS and TBZEB controls just as you do for the radio. Other controk may have different functions when a tape is inserted. The display will show an m o w to show which side of the tape is playing. If you want to insert a tape when the ignition or radio is off, first press EJECT or RECALL. Note that the cassette tape adapter kits for portable compact disc players will work in your cassette tape player. Your tape bias is set automatical2y. If E and a number appear on the radio display, the tape won't play because of an error. e EdO: The tape is tight and the player can't turn the tape hubs. Remove the tape. Hold the tape with the open end down and try to turn the right hub to the left with a pencil. Turn the tape over and repeat. If the hubs do not turn easily, your tape may be damaged and shoutct not be used in the player. Try a new tape to make sure your player is working properly. Ell: The tape is broken. Try a new tape.
’If any enor occurs repeatedly OF- if an ~ K Q F can’t be corrected, please contact your dealer. If yocs radh disphys zn error number, write it dow3 and provide it to p u r dealer when reporting the problem. P W V (I): Press tkis brrtton to search the ~ I X V ~ Q U S selection on the tape. Your tape ;must have at least three seconds of silence between each selection for PREV to work. The sound will Pllute while seeking. NEXT (2): Press this button to search for the next selectioz on the tape. Your tape must have at Ieast three seconds sf silence between each selection for NEXT to work. The sound will mute while seekrrg.
EJECT: Press this button to remove rile tape. The radio will play.
44 (3): Press this button to reverse the tape rapidly. Press It again to return to playing speed. The radio will play while the tape reverses.
,, (4): Press this button to advmce quickly IS another
pap; of the tape. Press the buttcm again to return to playing speed. The radio will play whiie the tape advances.
RECALL: Press this button briefly to recall the station being played or to display the clock. To change whzt is normally shown on the display (station OH time), press this button until you see the display you want, then hold the button until the display flashes. If you press the button when the ignition is oE, the clock will show for a few seconds. -2 p&Ij%p
2 Sf-&.on
y:...,
- 0
__ . . . ... .,. . .
to switch between AlM, FMl
AM-FM: Press this b l ~ t t ~ n and FM2. The display shows your selection. 'TUNE: Press the up or down m o w to choose radio stations. SEEK: Press Lie up or down m c w to go to the next 5igher ar lower station and stay there. The sound will mute while seeking. SCAN: Tress one of the SEEK arrows for two seconds and SCAN will appear 011. the display. Use SCAN to listen to stations for a few seconds. The radio will go to a station, stop €or a few seconds, then go on to the next station, Press one of the SEEK buttons again to s t ~ p scanning, The sound will mute while scanning.
.E yeu want to insert a tape wher?, the igrrition or radio is of?, first press EJECT or RECALL. Note that the cassette tape adapter kits for pomhle compact disc players will \work in your cassette tape player. Your tape bias is set mtornatica18y. If‘ E and a number appear ~ s , the radio display, the tape won’t play because sf an ~ I T Q ~ .
e? If any error occurs repeatedly or if an enor can’t be corrected, please csntsct your dealer. If your rzdio displays an error number, write it down and provide it to your dealer when reporting the problem.
PREV (I): Press this button to search for the previous selection on the tape. Your tape must have at least three seconds of silence between each selection for PREV to work. The SQU~C!. wili mute while seeking. NEXT (2): Press this button to search for the next selection on the tape. Your tape must have at least three seconds of silence between each selection for NEXT to work. The sound will mute while seeking. The SEEK up and down mows will also find the previous and next selections on the tape. 44 (3): Press this button to reverse the tape rapidly. Press it again KI return to playing speed. The rzdbo will play while the tape reverses. bb (4): Press this 5 ~ i t c n to advance quickly tc another part off the tape. Press the button again to return to playing speed. The radio will play while the tape advances. SIDE (5): Press this button to change the side of the tape that is playing.
(6): Press this button to reduce background noise.
The double-D symbol wiEI appear on the display.
6.
NEXT (2): Press this button to go to the next track. HE you hold the button or press it more than once, the pkyer will c~ntinane I T I G V ~ I I ~ forward through the disc. The sourpd wiiB mute whiie seeking. The SEEK down and up im-ows will also find the previous and next selections on the disc. 44 (3): Press and hold this button to quickly reverse within a track. You will ilea sound.
playing. Press it again within five seconds to see how long it has been playing. TQ change what is normally shown on the display (track or elapsed time), press the button until YOU see the display YOU want, then hold the button until the display Washes. AM-FM: Press this button to play the radio when a disc is in the player. SOURCE: Press this button to change to the disc fbnction when h e radio is on. When a disc is inserted, the disc will play until YOU press AA4-m. Then the disc will stop playing and the radio will play. Press SOURCE again to play a disc again. CD PLAY will show on the display. EJECE Press this button to ~ ~ X I I Q V ~ will. play. I% you turn off the ignition or radio with a disc in the player, it will stay in the player. m e n YOU turn on the ignition OF system, the disc will start playing where it stopped, if it was the last-selected audio source.
the disc. The EXI~O
P!aying til8 Radio VOLUME: Press this h o b to turn the system on md OB. To increase volume, turn the knob to the right. Turn it to the left to decrease VO~UIIE.
3-21
RECALL: Press this button briefly to recal! the statim being played or to display the clock. To change what Is EomalEy shown on the display (station or time), press the RECALL butttorn until yon see the display YSU want. then hold the RECALL button until the display flashes. If you press the button when the ignition is off, the c k ~ k wiEI show for 8 Eew seconds.
AM-FM: Press this button to switch between AM, FME. and FM2. The display shows your selection. TUNE: Press the up OF down m o w to choose s a d i ~ stations. SEEK: Press the up or down arrow to go to the next higher or lower station and stay there. The sound will mute while seeking. SCAN: Press one sf the SEEK mows for EWO seconds and SCAN wiPB appear on the display. Use SCAN to listen to stations for a few seconds. The radio wiIB go to 2 stzti~n, stop for a few seconds, the^ go on to the next station. Press one of the SEEK mows again to stop scanning. Tie sound will mute while scanning.
f . Turn the radio on. 2. Press AIM-FM to select the band.
4. Press TONI2 tc select the set*iing YSU prefer. 5. Press an@ hodd m e of the six numbered buttons. The sound will mute. When it returns, release the button. Whenever you press that cumbered button, the station you set will return and the tone you selected will be automatically selected for that button.
6. Repeat the steps E x e3ch pushb~tton. P SCAN: Press this button BQ Bisten to each of your preset stations for a fcw seconds. The radio will go to the first preset station, stop for a €ew seconds, then go on to the next preset statim. Press P SCAN again to stop scanning. If a preset station has we& reception, the radio will not stop at the preset station.
3-22
....._.
BASS: Press Clis knob lightly so it extends. Turn the knob to increase or decrease bass. TREB: Press this knob iightly so it extends. Turn the knob to increase GT decrease treble. If a sf~tiarn is we& or noisy, you may want to decrease the treble. Push these knobs back into their stored positions when YcLl’re H1Qt Using eheEi. TONE: This feature allows you to choose preset bass and treble equalization settings designed for ciassical, pop, rock, jazz, talk and ccuntrylwestem stations. CLASS will appear on the display when you firsst press TONE. Each time you press it, mother setting v d l appear on the clispiay. Press it agsn after C 22 W appears a~td MANUAL will appear. Tone corntrol wiil return to the BASS and TREE3 knobs. Also, if YSU use the BASS and T W B knobs, control will retwn to them and MANUAL will appear.
P ~ s h these knobs back into their stored positions wher, you’re not using them.
If YQU want to insert a tape when the ignition or radio is off, first press EJECT or RECALL.
dour tape bias is set automaticaliy. If E and a number appear on the radio display, the tape won’t play because of an error. 0 El& The tape is tight and the player can’t turn the tape hubs. Remove the tape. Hold the tape with the open end down and try to turn the right hub to the left with a pencil. Turn the tape over and repeat. If the hubs do not turn easily, your tape may be damaged and should not be used in the player. Try 2 new tape to make sure your player is working properly.
@ Ell: The tape is broken. Try a new tape. Hf m y emor occurs rcpestedly or if ;UI enor can’t be corrected, picase contact your dealer. If your radio displays 211 error trunmber, write it down md provide it to your dealer when reporting the problem. PWEV (1): Press this button to search for the previous selection on the tape. Your tape must have at least three seconds of silence between each selection for PREV to work. The sound will mute while seeking. NEXT 42): Press this button to search for the next selection on the tape. Your tape must have at least three seconds of silence between each selection for NEXT to work. The sound will mute while seeking.
..
Tine SEEM down md up mows will also find the previous and next selections ow the tape. 44 (3): Press this button to reverse the tape rapidly. Press it again to return to playing speed. The radio will play while the tape reverses.
(4): Press this button to advance quickly to another
part of the tape. Press the button again to return to playing speed. The radio will play while the tape advacces. SIDE (5): Press this button to change the side of the tape that is playing. RAND (6): Press this button to reduce background noise. The double-D symbol will appear in the display. Dolby Noise Reduction is mankafactrrred under a license from Dolby Laboratories Licensing Corporation. Dolby and the double-l) symbol are trademarks of Dolby Laboratories Licensing Corporation. SOURCE: Press this button to change to the tape or disc function when the radio is on. If both a tape and a disc ape installed, the system will first go to tape play; TAPE SIDE and an arrow will appear on the display. If SOURCE is pressed again, the system will go to disc play; CD PLAY will appear on the display.
EJEC’E The system has two EJECT buttons. Press the button near the CD slot t~ remove a disc. Press the button near the tape slot to remove a tape and the radio will play. CLN: E this message appears on the display, the cassette tape player needs to be cleaned. It will still play tapes, but you should clean it as S Q O ~ as possible to prevent damage to the tapes and player. See “Care of Your Cassette Tape Player” in the Endex. After you clean the player, press and hold EJECT for five seconds to reset the CLN indicator. The radio will display --- to show the indicator was reset. YQW cassette tape player automatically reduces background noise from tapes encoded with Dolby NIX. YOU may turn Dolby off by pressing the number six preset. Playbg a c@mpact Disc Insert a disc partway into the slot, label side up. The player will pull it in. The disc should begin playing. If you want to insert a CD while the igition or the radio is off, first press EJECT or =CALL.
If you’re driving on a very rough road or if it’s very hot, the disc may not play and an ~ E Q P code may appear on the display. When things get back to no~lmal, tbe disc should play. If the disc comes out, it could be hat: @ E20: “he disc is upside down. e E20: It is &dy, @ E2& TFhePe’S $00 KlIUCh IIIQiStWe ill h e 8k. (wait If any enor QCCU~S repeatedly or if an error can’t be corrected, please contact your dealer. If your radio displays an error number, write it down md provide it to your dealer when reporting the problem.
about an hour and try again.)
or wet.
(1): PSeSS this button t0 g 0 to the Still% of the
current track, if more than eight seconds have played. E YOU hold the button or press it more than once, the player will continue moving back through the disc. The sound will mute while seeking. NEXT (2): Press this button to go to the next lXXk. If you hold the button or press it more than once, the player will c ~ n t h u e moving h w a d through the disc. The sound will mute while seeking. The SEEK down md up mows will also find the previous and next selections on the disc.
44 (3): Press and hold this b ~ t t ~ n within a track. You will h e x sound.
to quickly reverse
3-26
W~th the optional compact disc changer, you can play up to 12 discs C Q I I ~ ~ ~ U Q U S ~ ~ . played using the trays supplied in the magazine. The small discs (8 cm) can be played only with specially designed trays.
N o m d size discs may be
You must first load the magazine with discs before you can play a compact disc. Each of the 12 trays holds one disc. Press the buttton on the back of the magazine and pull gently ora one of the trays. Load the trays from bottom to top, placing a disc on the tray label side down.
Once you have loaded the discs in tbe magazine, slide open the door of the compact disc (CD) changer. Wash the magazine into the changer in the direction of the mow marked on t ~ p of the magazine.
A11 of the CD functions a-e cantrolled by the radio buttons except fc~r ejecting the magazine. Whenever a CD magazine with discs is Ioaded in the changer, the compact disc S ~ I I I ~ Q ~ will appea on the radio display. If the CD changer is checking the magazine for CDs, the compact disc symbol will flash on the display until the changer is ready to gray. when a CD begins playing, the disc and track number will be displayed. The disc numbers %e listed 03 the front of the magazine.
If E and a number appear on the display, an error has occm-ed and the compact disc temporarily cannot play. Tie CD changer will send an error message to the receiver to indicate:
E30: Disc Loaded Incorrectly (Label Side Up)
To eject the magazine from the player, slide ;he CD changer door all the way open. The magazine will automaticalfry eject. Remember to keep the door closed whenever possible to keep dirt and dust from getting inside the changer.
If the error occurred while trying to play a CD in the compact disc player or changer, the following conditions may have caused the -Tor:
The road is too rough. The disc should play when the road is smoother. The disc is dirty, scratched, wet or upside down.
8 me air is very humid. If so, w& about an hour and
try again.
@ The CD changer door is open. Completely close the
door to restore noma1 operation.
@ An empty magazine is inserted in the CD changer. Try the magazine again with a disc loaded on one of the trays.
If any error occurs repeatedly or if an error cannot be corrected, please contact your dealer. If your radio displays an emor number other than the error codes listed previously, write it down and provide it to your dedes when reporting the problem.
PREV (I): Press this button to go to the start of the current track, if more than eight seconds have played. If you hold the button or press it more than once, the player will continue moving back through the disc to the previous track. The sound will mute whiIe seeking. NEXT (2): Press this button to go to the next track on the disc. E you hold the button or press it more than once, the player will continue moving forwad through h e disc to the next track. The sound wili mute while seeking. 44 (3): Press and hold this button to quickly reverse within a track. You will hear sound.
bb (4): Press and hold this button to quick!y advance within a track. You will hear S Q U ~ . SIDE (5): Press this button to select the next disc in the magazine. Each time you press SIDE, the disc number on the radio display will go to the next available CD. If a CD cannot be played, its number will be skipped when selecting discs while using the SIDE button. RAND (6): Press this button to enter the random play rnode.RAND will appear an the display. While in this mode, tracks and discs will &e played in random order. Press the button again to turn off the random feature and return to noma1 operation. RECALL: Press this button to see what track is currently playing. Press RECALL again within five seconds to see how long the track has been playing. EL TM will appear on the display when in elapsed time mode. When a new track starts to play, the track number will also appear. Press RECALL a third time and the time of day will be displayed. SOURCE: Press this button to play a CD if YQU have a magazine loaded in the changer and the radio is playing. To return to the radio while a CD is playing, press AM-FM. You can also press this button to switch between a cassette tape, CD or the CD changer if a11 three are loaded.
radio settings for AM 2nd FM
With this feature, your vehicle wGl recall the latest radio settings as adjusted the last time your vehicle was operated. This feature allows two different drivers to store and recall their Q W ~ presets, last tuned station, volume, tone and audio source (radio, cassette or CD). The settings recaiied by the radio are determined by which transmitter (i'I'' or "2") was used to enter the vehicle. The number on the back of the transmitter corresponds to driver I. or to driver 2. After the UNLOCK button is pressed orr the transmitter and the ignition is i n RUN. the radio settings will azmtsmaticalEy adjust to where dzey were last set by the identified drivcr. ?he settings can also be changed by briefly pressing one of' the MELMORY seat brattoas ( I or 2) located on the driver's door. Wlzen chsnges are made, the new settings will be saved for the driver.
THEFTLOCK'" is designed to discourage theft of your radio. It works by using a secret code to disable ail radio functions whenever battery power is removed. If THEFTLOCK is active, the TXEFTLBCK indicator wili3 Eash when fie ignition is off. The THEFTLOCK featwe for the radio nay be used 01- ignored. If igrP,ored, the system plays normai!y and the radio is not protected by the feature. If THEFTLOCK is activated, your r d i o will not operate if stolen. W k n THEmLBCK is activated, :he radio wilS display LOC to indicate a locked cenditiora anytime battery power is removed. If your battery loses power b r any reason, you ness8 rrnlock the radio with the secret code before it will operate.
1
A .
2. 3. 4.
9. Press AM-FM and this time the display will S ~ O W
SEC f~ ?et YOG h o w that your radio is secure.
Enter your secret code as ~ Q ~ H O W S ; pause no more than 15 seconds between steps: 1. 2. 3.
LOC appears when the igr,ition is on. Press MfN and 880 will appear on the display. Press MHN again to make the fast two digits agree with your code. Press HRS to ~nake the first one or two digits agree with your code. Press AM-FM after you have confimed that the code matches the secret code you have writ’een down. The display will show SEC, indicating the radio is ~ Q W operable and secure.
4.
5.
HE you er,ter the wrong code eight times, INQP will appear on the display. Ygu will have t~ wait an hour with the ignition on before you can try again. When you try again, you will O ~ Y (eight tries per chance) to enter the correc: code before INOP appears. If you lose or forget your code, contact your dealer.
have three more chances
Enter yorer secret code as ~OIEQWS; pause no more than 15 seconds between steps:
1 1. 2. 3.
4. 5.
6.
7.