- 1998 Buick Park Avenue Owners Manuals
- Buick Park Avenue Owners Manuals
- 2005 Buick Park Avenue Owners Manuals
- Buick Park Avenue Owners Manuals
- 1999 Buick Park Avenue Owners Manuals
- Buick Park Avenue Owners Manuals
- 2001 Buick Park Avenue Owners Manuals
- Buick Park Avenue Owners Manuals
- 2003 Buick Park Avenue Owners Manuals
- Buick Park Avenue Owners Manuals
- 2004 Buick Park Avenue Owners Manuals
- Buick Park Avenue Owners Manuals
- 1996 Buick Park Avenue Owners Manuals
- Buick Park Avenue Owners Manuals
- 1997 Buick Park Avenue Owners Manuals
- Buick Park Avenue Owners Manuals
- 2002 Buick Park Avenue Owners Manuals
- Buick Park Avenue Owners Manuals
- 1994 Buick Park Avenue Owners Manuals
- Buick Park Avenue Owners Manuals
- 2000 Buick Park Avenue Owners Manuals
- Buick Park Avenue Owners Manuals
- 1993 Buick Park Avenue Owners Manuals
- Buick Park Avenue Owners Manuals
- Download PDF Manual
-
in the plastic trim
panel to position the jack head. You’ll find the word JACK and an amow stamped into the plastic near each notch. Position the jack under the vehicle and raise the jack head until it fits firmly against the sheet metal next to the word JACK. Do not raise the vehicle yet. Put the compact spare tire near you.
.... -..:::q . .. 1.. ... , . , ._.. : ,.. , . ... . . ..
Raising your vehicle with the jack improperly positioned can damage the vehicle and even make the vehicle fall. To help avoid personal injury and vehicle damage, be sure to fit the jack lift head into the proper lo~ation before raising the vehicle.
5. Raise the vehicle by rotating the wheel wrench to the right in the jack. Raise the.vehicle far enough off the ground so there is enough room for the spare tire to fit.
6. Remove all she wheel nuts and take off the flat tire.
7 . Remove my rust or Girt
from the wheel bolts, aoundng surfaces and spare wheel.
Never use oil or grease on studs OF nubs. If yon do, the nuts might come EOQS~. YQUF wheeI could fajI off, causing a serious accident.
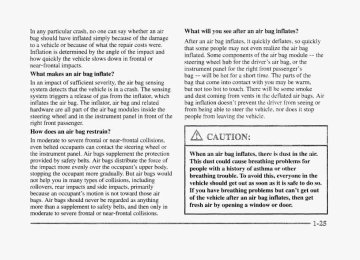
CAUTION:
Rust or dirt on the wheel, OB" on the parts to which it is fastened, can make the wheel nuts become Boose dter a time. The wheel could come off and cause an accident. When YOU change a wheel, remove any rust or dirt from the places where the wheel attaches to the vehicle. In an emergency, you can use a cloth or a paper dowel to do this; but be sure to use a scraper or wire brush later, if you need to, to get all the rust or dirt off.
10. Using the wheel
wrench, tighten the wheel nuts f d y in a
9. Lower the vehicle by rotating the wheel wrench to
the left. Lower the jack completely.
Incorrect wheel nuts or improperly tightened wheel nuts can cause the wheel to become ~cocpse and even come off. This could lead to an accident. Be sure to use the correct wheel nuts. If you have to replace them, be sure to get new GM original equipment wheel nuts. Stop somewhere as soon as you can and have the nuts tightened with a torque wrench to PO0 lb-ft (140 Nem).
7
SPARE TIRE COVER A
\.
iR
The compact spue tire is for temporaw use only. Replace the compact spare tire with a ?dl-size tire as soon as you can. See "Compact Spare Tire" later in this section.
‘Fire chains won’t fit your compact spare. Using them caw damage your vehicle and can damage the chains too. Don’t use tire chains on your eomp?act spare.
j NOTICE:
Spinning your wheeEs can destroy parts sf your vehicle as well as the tires. If YOU spin the wheels &OO fast while shifting your transaxle back and forth, you can destroy your tramaxle.
~~~~
FOP information about using tire chains on ycur vehicle, see “Tire Chains” in the Index.
6-2 6- 3 4-9 6-12 4-17 6- 19 4-20 6-23 5-27 6-28 6-29 4-32 6-33 6-45 6-46
Service Fuel Checking Things Under the Hood Engine Oil Air Cleaner Supercharger Oil Automatic Transaxle Fluid Engine Coolant Radiator Bressure Cap VVindskieTd Washes Fluid Br&es 3 attery Bulb Replacement Windshield Wiper Blade Replacement Tires
Appearance Care Cleaning the Inside QE Y(.w VehicEe Cleaning the Outside of Your Vehicle Underbody Maintenance Chemical Paint Spotting Appearance Care Materials Chart Vehicle icientifkation Number (VIN) Electrical System Removing the Rear Seat Cushion Replacement Bulbs Capacities and Specifications Air Conditioning Re€rigerants Engine Specifications Vehicle Dimensions Normal Maintenance Replacement 'Parts
Your dealer knows your vehicle best and wants you to be happy with it. We hope you’II go to your dealer €or all your service needs. You’ll get genuine GM parts and GM-trained and supported service people. We hope you’ll want to keep your GM vehicle all GM. Genuine GM parts have one of these marks:
Genuine
Your vehicle has an air bag system. Before attempting to do your own service work, see “Servicing Your Air Bag-Equipped Vehicle” in the Index. You should keep a record with a111 parts receipts and list the mileage and the date of any service work you perform. See “Maintenance Record” in the Index.
The 8th digit sf your vehicle identification number (Vm) shows the code lettee for your engine. You will find the VIN at the top left of your instmment panel. (See “Vehicle Identifkation Number’’ in the Endex.) If you have the 3800 engine (VIN Code use regula unleaded gasoline rated at 87 octane or higher. If you’re using fuel rated at the recommended octane or higher and you hear heavy knocking, your engine needs service. But don’t worry if YOU hear a little pinging noise when you’re accelerating or driving up a hill. That’s normal, and YOU don’t have to buy a higher octane fuel to get rid of pinging. It’s the heavy, constant knock that means you have a problem. If you have the 3800 Supercharged engine (VHN Code I), use premium unleaded gasoline rated at 91 octane or higher. With the 3800 Supercharged engine, in an emergency, you may be able to use a lower QC~XE -- as low as 87 -- if heavy knocking does not occur. If you are using 91 cx higher octane unleaded gasoline and YOU hear heavy knocking, your engine needs service.
6-3
Things you might add to the outside of your vehicle can affect the airdaow around it. This may cause wind noise and affect windshield washer performance. Check with your dealer before adding equipment to the outside of your vehicle.
!F your vehicle Is certified to meet California Emission Sbmdirrds (indicated the underhood emission control idxl), it is designed to ogerate on heEs that meet C”a1Efornia specificztions. If such fuels are not available states adopting California e:raissions standads, your
i~hicfe will operate satisfactorily on fuels meeting fktPeral specifications, but emission control system ;?crt’om.srmmce may be afiected. The maTfunctian indicator Fmrp OR your instrument panel may turn on and/or your v & k k may fail a smog-check test. If this occurs, return t o y w r nlrtEnorlzed Buick dealer Ear diagnosis to
To provide ckaner air, a11 gasdines in the United States are now required to c~ntain ~ddifves that will help ?revent deposits from forming in y o u erz.gine and fuel system, allowing your emission control system to function properly. Therefore, you s h d d sot have to add anything to the fuel,. In addition, gasdines containir,g oxygenates, such as ethers and ethanol, and reformulated gasolines may be available in your area to help clean the air. General Motors recommends that you use these gasolines if they comply with the specifications described edier.
Fuels iB Foreign c@n&+@s If yon plan on driving in another country outside the United States or Canada, the proper fuel may be hard to find. Never ease Headed gasoline or any other fuel not recommended in the previous text on &el. Costly repairs caused by use of improper fuel wouldn’t be covered by your wappanty. To check on fuel availability, ask ann auto club, or contact a major oil company that does business in the country where you’ll be driving. You can also write us at the following address for advice. Just tell us where you’re going a d give your Vehicle Identification Number (VIN).
General Motors Overseas Distribution Corporation 1908 Colonel Sam Drive Oshawa, Ontario LIH 8P7
The cap is behind a hinged door on the driver’s side of your vehicle.
When you put the cap back on, turn it to the right until you hear a clicking sound. Make sure you fully install the cap. The diagnostic system can determine if the fuel cap has been left off or improperly installed. This would allow fuel to evaporate into the atmosphere. See “Malhnctiom Indicator L a p ” in the Index.
NOTICE: If you need a new cap, be sum to get the right type. Your dealer can get one for you. If YQU get the wrong type, it may not $it properly. This may cause youp: malfunction indicator lamp to light and YOU^ fuel tank and emissions system may be damaged. see “Malfunction hdicatos Earnp’’ in the Index.
Things that bum can get on hot engine parts and start a fire. These include liquids like gasoline, oil, coolant, brake fluid, windshield washer and other fluids, and plastic ~r rubber. YQU OF others could be burned. Be careful not to drop or spill things that will bum onto a hot engine.
A. Battery B. Radiator Pressure Cap C. Engine Oil Dipstick D. Engine Oil Fill Cap
@. Wmcishield Wisher Fluid Reservoir H. Engine C d m t Recovery Tank I. Air Cleaner
Your vehicle may have 2 3800 Sqercharged engine. Supercharging, rather than turbocharging, emphasizes smooth, refined power. The supercharger is a device which is designed to pump more ais into the engine than it would normally use. This air mixed with fuel creates increased engine power. Since the supercharger is a pump and is driven from an engine accessory drive belt, iwreased pressure is available at all driving conditions. The Powertrain Control Module (PCM) works with a vacuum control to regulate the increased pressure required during specific driving conditions. When this increased pressure or boost is not desired, such as during idling and light tfarsttIe cruising, the excess air that the supercharger is pumping is routed through a bypass. AB1 sf these controk working together provide high performance character and fuel efficiency in the 3800 V6 Supercharged engine. The power steering pump and reservoir are mounted on the rear (driver’s side) sf the engine biock. See “Maintenance Schedule” in the Index for when you should check the fluid.
ENGINE OIL LOW CHECK LEVEL
HMBHBMrn
Ef you have the Driver Infcmation Center, an ENGINE OIL LOW-CHECK LEVEL message will appear when the engine oil is approximately I quart (fL) Isw. 1 1 the message is displayed, check the dipstick level and add oil as needed.
7r
Oils recommended for your vehicle can be identified by looking for the '"Starburst" symbol. Vas symbol indicates that the 0iI has been certified by the American Petroleum Institute (AH). Do not use any oil whch does not c m y this Starburst symbd.
If you change your own oil, be sure you use oil that has the Starburst symbol on the front of the oil container. If you have your oil changed for you, be sure the 02 put into your engine is American Petroleum Institute certified f ~ r gasoline engines.
You should also use the prcper viscosity oil for your vehicle, as shown in the following chart:
oil dipstick. Be sure to fill it enough tc put the Bevel somewhere in the proper operating range. Push the dipstick all the way back in when you're through.
I
- + 3 8
; +27
If any one of these is true for you, use the short tripkity maintenance schedule:
Most trips are less than 5 to 13 miles (8 to I 6 km). This is particularly important when outside temperatures are below freezing. Most trips include extensive id1ir.g (such as frequent $riving in stop-and-go traffic). Most trips are though dusty areas. You frequently tow a trailer or use a carrier on top of your vehicle. The vehicle is used for delivery service, police, taxi or other commercial application.
Driving under these conditions causes engine oil to break down sooner. Hf any m e of these is true for your vehicle, then YOU need to change your si1 and filter every 3,000 miles (5 000 km) or 3 months -- whichever occurs k t . the Index. 1
(See Engine Oil Life Monitor (Index) in
If none of them is true, use the %ong triphighway maintenance schedule. Change the oil and filter every 7,500 miles (12 500 km) or 12 months -- whichever occurs h t . Driving a vehicle with a fully warmed engine under highway conditions causes engine oil to $re& down dower.
Did you know that used engine oil contains certain ekmer,ts that may be unhealthy for your skin and csdd even cause cancer? Don’t let used oil stay on your skin for very iong. Clean your skin and nails with soap and water, or a good hznd cleaner. Wash or properly throw away clothing or rags containing used engine oil. (See the manufacturer’s warnings about the use and disposal of oil products.) Used oil can be a real t-heat to the environment. If you change your own oil, be sure to drain all free-flowing oil from the filter before disposal. Don’t ever dispose of oil by putting it in the trash, pouring it on the ground, into sewers, or into streams or bodies of water. Instead, recycle it by taking it to a place that coilects used oil. If you have a problem properly disposing of your used oil, ask your dealer, a service station or a local recycling center for kelp.
I
Remove the wing nuts on the air cleaner housing cover.
... .. .. ..
2. Remove the air intake hose that snaps over the
bottle body by pulling the hose upward and away from the throttle body. As YOU are detaching the hose, remove ahe air cleaner housing cover by pulling upward and remarc%.
3. Replace the air filter. 4. Reattach the air intake hose. 5. Reinstall the air cleaner housing cover. Refer to the Maintenance Schedule to determine when to replace the air filter. See “Scheduled Maintenance Services” in the Index.
Operating the engine with the air cleaner off can cause you or others to be burned. The air eleaner not only cleans the air, it stops flame if the engine backfires. 1% it isn’t there, and the engine backfires, you could be burned. Don’t drive with it off, and be careful working on %he engine with the air cleaner off.
If the air cleaner is off, a backfire can cause a damaging engine fire. And, dirt cars easily get into your engine, which will damage it. Always have the air cleaner in place when you’re driving.
Check oil only when the engine is cold. Allow the engine to cool two to three hours after running.
I. Clean tke area around the oil fill plug before
removing it.
2. Remove the G ~ H fill plug wing a 3/26 inch
Allen wrench.
3. The oil level is correct when it just reaches efre
bottom of the threads of the inspection hole. 4. Replace the oil plug with the O-ring in place.
Torque to 88 b i n ( IO N-m).
A good time to check your automatic transaxle fluid level is wherr the engine oil is changed. Change both the fluid a.nd filter every 50,000 miles (83 080 Ian) if the vehicle is mainly driven rander one or more of these conditions: 8 In heavy city traffic where the outside temperature
regularly reaches 90°F (32°C) or higher.
0 Uses such as found in taxi, police QT delivery service. If you do not use your vehicle under any sf these conditions, the fluid and filter do not reqwie changing. See “Scheduled Maintenance Services” in the Index.
Because this operation can be a little difficult, you may choose to have this done set your 3uick dealerslug Service Department. If you do it yourself, be s u e to follow all the instructions here, OT you could get a false reading on the dipstick.
Wait at Beast 30 minutes before checking the transaxle fhid lwei if you have been driving: 8 When outsiOe temperatures are above 90°F ( 3 ~ e>. @ At high speed for quite a while. e In heavy traffic -- especiaily in hot weather. 8 While gulling a trailer.
m 0 -
Then, without shutting off the engine, follow these steps:
............. .............
1. The transaxle fluid
dipstick top is a round, red loop and is next to the brake master cylinder behind the engine block. Pull out the dipstick and wipe it with a clean rag or paper towel.
2. Push it back in all the way, wait thee seconds and
then pull it back out again.
3. Check both sides of the dipstick, and read the
lower level. The fluid 'level must be in the cross-hatched area.
4. If the fluid level is in the acceptable range, push
the dipstick back in a11 the way.
Refer to the Maintenance Schedule to determine what kind of transaxle fluid to use. See “Recommended Fluids md Eubricmts” in the Index. If the fluid level is low, add only enough of the proper fluid to bring the level into the cross-hatched area on the dipstick. I. Pull out the dipstick. 2. Using a long-neck funnel, add enough fluid at the
dipstick hole to bring it to the proper level. It doesn’t take much fluid, generally less than one pint (0.5 L). Don’t ove@Zl.
3. After adding fluid, recheck the fluid level ips
described under “How to Check.”
4. When the correct fluid level is obt.ained, push the
dipstick back in dl the way.
The cooling s stem in your vehicle is filled with DEX-COOL engine coolant. This coolant is designed to remain in your vehicle for 5 years or 150,000 miles (240 MI0 h) whichever occurs first, if you add only DEX-COOL“ extended life coolant, The following explains your coding system and how to add coolant when it is low. If YOU have a problem with engine overheating, see “Engine Overheating” in the Index. A 50/50 mixture of water and DEX-COOL’ coolant will:
Give freezing protection down to -34°F (-37°C). Give boiling protection up to 265 OF 129 ” C ) . Protect against rust and corrosion. Help keep the proper engine temperature. Let the warning lights and gages work as they should.
NOTICE:
When adding coolant, it is importrant that you use O ~ Y DEX-CQOE~ (sficate-free) C O Q I ~ ~ . If coolant other than DEX-COOL is added to the system, premature engine, heater core or -- at radiator corrosion may result. Hw addition, the engine coolant will require change S Q B ~ ~ F 30,000 d e s (50 000 b) or 24 months, whichever occurs first. Damage caused by the use of coolant other than DEX-COOL@ is not c~vemdl by your new vehicle warranty.
Use a mixture of one-half clean water (preferably distilled) and one-half DEX-COOL’ coolant which won’t damage aluminum pats. If you use this mixture, YOU don’t need to add anything else.
Adding only plain water to your cooling system can be dangerous. Blain water, or some other liquid like alcohol, can boil before the proper coolant mixture will. Your vehicle’s C Q O ~ ~ warning system is set for the proper c ~ ~ l m t mixture. With plain water or the wrong mixture, your engine could get too hot but you wouldn’t get the overheat warning. Your engine could catch fire and yon or others could be burned. Use a 50/50 mixture of clean water and DEX-CBOL@ codant.
6-24
The csdant recovery tank is located QII the @river's side of the engine compartment.
1
f ENG. COOLANT LOW
CHECK LEVEL
Turning the radiator pressure cap when the engine and radiator are hot can allow steam and scalding liquids to blow out and burn yon badly. With the codant recovery tank, you will Never turn the radiator pressure cap -- even a almost never have f O add coolant at the radiator. little -- when the engine sand radiator are hot.
You can be burned if you spill cooiant QPB hot engine parts. Coolant contains ethylene glycol, and it will burn if the engine parts are hot enough. Don't spill coolant on a hot engine.
prevent coolant loss and possible engine damage
filler neck.
When you replace your radiator pressure cap, an A C ~
;trolled by a themosta .t
in
When the engine compartment is cool, wipe the cap and the top of the reservoir clean, then unscrew the cap and wipe the dipstick with a clean rag. Replace the cap and completely tighten it. Then remove the cap again and Book at the fluid level on the dipstick. The level should be at the FTLL COLD mark. If necessary, add Q ~ Y to the mark.
enough fluid to bring the level up
at to use
To determine what kind of fluid to use, see “Recommended Fluids and Lubricants” in the Index. Always use the proper fluid. Failure to use the proper fluid can cause leaks and damage hoses and seals.
What to use When you need windshield washer fluid, be sure to read the manufacturer’s instructions before use. If you will be operating your vehicle in an area where the temperature may fall below keezing, use a fluid that has suffkient protection against freezing.
The windshield washer fluid reservoir is located by the coolant recovery tank on the driver’s side of the engine compartment. Open the cap labeled WASHER washer fluid until the tank is full.
ONLX Add
Your brake master cylinder reservoir is here. It is filled with DOT-3 brake fluid. There are only two reasom why the brake fluid level in the reservob might go down. The first is that the brake fluid goes ~ Q W to an acceptable Bevel during n W g wear. When new linings are put in, the fluid level goes back up. The other reason is that fluid is Bedung out of the brake system. If it is, you ~ h ~ ~ l d have YQW brake system fixed, since a leak means that sooner or later YQIX brakes won't work w d , or won't work at all.
brake
So, it isn‘t a good idea to “top oft“ your brake fluid. Adding brake fluid won’t correct a leak. If YOU add fluid when your linings are worn, then you’ll have loo much fluid when you get new brake linings. You shouki add (or remove) brake fluid, as necessary, only when work is done on the brake hydraulic system.
When you do need brake fluid, use only DOT-3 brAe fluid -- such as Delco Supreme II@ (GM Part No. 12377967). Use new brake fluid from a sealed container only. Always clean the brake fluid reservoir cap and the mea around the cap before removing it. This will help keep dirt from entering the reservoir.
~~
~~
With the wrong kind of fluid in your brake system, your brakes may not work well, or they may not even work at all. This could cause a
1 crash. Always use the proper brake fluid.
When your Srake fluid falls to a low level, your brake warning light will come on. A chime will sound if you try to drive with this warning light on. See “Brake System Waning Eight” in the Index.
NOTICE:
Using the wrong fluid can badly damage brake system parts. For example, just a few drops of minerallbased oil, such as engine oil, in your brake system can damage brake system parts so badly that they’ll have to be replaced. Don’t let someone gut in the wrong kind of fluid. If you spill brake fluid OEI your vehicle’s painted surfaces, the paint finish can be damaged. Be careful not to spill brake fluid on your vehicle. If you do, wash it off immediately. See “Appearance Case” in the Index.
Your vehicle has four-wheel disc brakes. Disc brake pads have built-in wear inchcators &at make a high-pitched warning sound when the brake pads are worn and new pads are needed. The sound may come and go or be heard all the time your vehicle is moving (except when you are pushing on the brake pedal firmly).
The brake wear warning sound means that soon your brakes won’t work well. That could lead to an accident. When you hear the brake wear warning sound, have your vehicle serviced.
NOTICE:
Continuing to drive with worn-out brake pads could result in costly brake repair.
Some driving conditions or climates may cause a brake squeal when the brakes are first applied or lightly applied. This does not mean something is wrong with your brakes. Properiy torqued whee! nuts irre necessary to heIp prevent brake pulsation. When tires are rotated, inspect brake pacts for wear and evenly torque wheel nuts in the proper sequence to GM specifications. Brake linings should always be replaced 2s complete axle seis. See "Brake System Inspectioc" in Section 7 of this nanuai under Part C "Periodic Maintecance Inspections."
Every time you apply the brakes, with or wiFhcut the vehicle moving, your brakes adjust for wear.
a modem vehicle is complex. Tie braking system Its many parts have to be of top quality and work weII together if the vehicle is io lxwe reakly good braking. Your vehicle \vas designed and tested with top-quality GM brake puts. When you replace parts of your braking system -- for example, when your brake k i n g s wear down and you have to Rave new ones put irn -- be sure you get new approved GM replacement parts. If YOQ don't, your brakes may no ionger work properly. For example, if someone puts in brake linings that are wrong for your vehicle, the balance between your front and r e x brzkes can change -- for the worse. The braking performance you've come to expect c m change in many other ways if someone ~ d t s brake parts.
in the wrong replacement
Every new Buick has an ACIMCQ ~ r e e d c m ~ battery. You never have to add water to one of these. W e n it's time for a new battery, we recommend m ACDelco Freedom battery. Get one that has the replacement mrnber shown cn the original battery's label.
If you're not going to drive your vehicle for 25 days or mcre, remove the black, negative (-) cable from the battery. This will help keep your battery from running down.
Bse$tesies have acid that can burn you and gas that can explode. You ran be badly hurt if JW.I aren't careful. See "Jump Starting" in the Index for tips on working around a battery without getting hurt.
Halogen bulbs have pressurized g;as inside and can burst if YOU drop or scratch the bulb. You or others could be injured. Be sure to read and follow the instructions on the btrbb package.
Contact yoirr dealer to I e m how to prepzre your vehicle for longer storage periods. Also, for your audio system, see 'Theft-Deterrent Feature" in the Index.
........... .......... ...........
.... q::z;*:
, ..
... ............ .... ....... ....... .... ..... . . , .. , ...
Each headlamp is amached by thumb screws.
1. Remove the thumb screws by turning them to
the left.
3. Remove the bulb socket by turning it onequarter of a tuna to the left, while pressing it firmly, then pull it out. Note: YQU can use pliers to remove the bulb socket if you are unable to do Et by hand.
' .
2. Pull the headlamp away from the car.
4. Remove the wire connector from the bulb by
lifting the E Q C ~ tab a d pulling it away from the plastic base.
The fiont turn signal bulbs can be accessed by removing the headlamp assembly as described in the previous procedure.
Once the headlamp assembly has been removed, reach down from the top of the vehicle and, while pressing the lock tab on the socket, turn the socket onequarter of a turn and pull it out.
5. Reverse the above steeps to reassemble ahe Bamp
assembly. When reassembling the lamp, make sure to align the pin at the outboapd edge of the headlamp assembly to the plastic retainer at the outboard edge of the vehicle.
Remove the old bulb by pulling it straight out of the socket. Replace the bulb md turn the bulb assembly back into place.
o There s h ~ d d not be any C S ~ Q or loading of the
vehicle, except it should have 2 full tank of gas and m e person or 160 Ibs. (75 kg) on the driver’s seat.
@ Tires should be properly inflated.
Rock the vehicle to stabilize the suspension.
ff ysbts vehicle is damaged in m accident and the headamp ain seems to be affected, see your dealer. Headlamps s n damaged vehicles may require recttiibration of the horizontal aim by your dealer. To check the ala,
The vehicle should aot have any snow, ice OK- a u d attache6 to it.
For the vertical. adjustment, state inspection stations generally wiJl allow a reading of plus 0.76 degrees or minus 0.76 degrees from the center of the bubble.
...... ...... ...... ......
It is recommended that the upper limit not exceed plus 0.4 degrees from the center of the bubble. Other drivers may flash their high beans at you if your adjustment is much above plus 0.4 degrees.
The headlamp aiming device is under the hood, directly behind the headlamps. If you find that the headlamp aiming needs adjustment, follow these steps: Stat with the vertical headlamp aim. Adjustment screws can be tanned with an E8 Torn@ socket or TI5 Tom screwdriver.
1. Check the vertical aim for each headlamp (A). The vehicle must be on a Bevel surface. Turn the vertical aiming screw (B) until the bubble in the level is lined up with the 0 (zero).
For the type of buib to use, see "Replacement Bulbs" in the Index.
2. Unhook the cargo net
from the cargo net retainer and remove the retainer by turning it tc the left.
3. Pull back the trunk trim panel.
4. Beneath the trim panel are three nuts that secure the taillamp assembly. Remove these nuts with a BO mm wrench. Remove the nuts from only the side you want to access. The turn signal and a stoplamp can now be accessed.
5. Pull the t ~ i l l m p assembly away from the vehicle.
6. Remove the bulb socket assembly by turning the socket one-quarter of a t u n to the l e k and
7. Once the socket has been removed, pull the bulb straight out to remove it from the socket.
8. Reverse the above steps to replace the
taiUamp assembly.
Turn lamps, stoplamps and back-up bulbs are located bekind the taillamp assembly along the trunk lid. The following instructions explain how to access these bulbs.
1. There are four studs
located at the edge of the trunk lid. Remove the protective vinyl caps from the studs.
3. Next, there are eight fasteners along the top of tame
trunk lid (four on each side), holding the trunk trim in place. Remove these fasteners.
6-42
. ..
4. Hold the treEnk trim back to expose the three mnaining
nuts holding the taillamp assembly in place.
5. From inside the tmnk compment, use a 10 mppl
wrench to remove the nuts from the studs.
7.
IC.,. . - -.- .
8. Once the socket has been removed, pull the bulb straight out to remove it from the socket.
9. Reverse the above steps
to replace the
taillamp assembly.
-44
Xeplacement blades come in digerent types and are removed in different ways. To replace the wiper blade assembly: 1. Position the wipers on the windshield in the “mid’’
wipe position.
2. Lift the windshield wiper m away from the
windshield. Note: The windshieid wiper does not have a ’;ocking upright positior~ feature.
3.
4. 5.
Push the tab OR the wiper biade assembly 2nd pull the assembly dcwn enough to release it from the “U” hooked end of the wiper m. Slide the assembly away from the a m . Replace the blade. TQ reinstall the wiper blade assembly, slide it, over the wiper m to engage the “U” hooked end QII the wiper blade assembly. Full up on the assembly to lock it into place.
For the correct windshield wiper blade replacement length and type, see “Nomal Maintenance Replacement Parts’’ in the Index.
.:. ._ $.Q-..l, 77; I. li- Lfa Your new vehicle comes with high-quality tires made by a leading tire manufacturer. If you ever Rave questions about YQW tire warranty md where to obtain service, see your Buick Wmmty booklet for details.
The Tire-Loading Infamation label, which is located on the rear edge of the driver’s door shows the correct inflation pressures for your tires when they’re cold. “CoId” means your vehicle has been sitting for at least three hours OH driven no more than 1 mile (1.6 km).
Cheek
Use a good quality pocket-type gage t~ check tire pressure. You can’t tell. if your tires a e properly inflated simply by looking at them. Radial tires may lo& properly inflated even when they’re underinnflated. Be sure to put the valve caps back on the valve stems. They help prevent leaks by keeping O U ~ dirt md moisture. pgessnre sy$&ekB @f Eqa@p&) (?-&e& The check tire pressure system can de& you to a large change in the pressure of one tire. The system won’t alert you before you chive that a tire is low or flat. You must begin driving before the system will work properly. The TIRE PRESSURE LOW CHECK TIRES message will appear on the Driver h f ~ ~ ~ ~ ~ a t i ~ n Center (DK) if pressure in one tire becomes at least 10 psi (69 Wa) lower or higher than the other thee tires. The check tire pressure system won’t alert you if more than one tire is Bow or high, or if the system is not calibrated properly. It also won’t tell YOU which tire is Bow or high. E the anti-lock brake system waning light comes on, the check tire pressure system may not be working properly. See your deder for service. (Also, see “Anti-hck Brake System Wzming Light” in the Index.)
The check tire pressure system detects differences in tire rotation speeds that are caused by changes in tire pressure. The system can alert you about a OW tire -- but it doesn’t replace normal tire maintenance. See “Tires” in the Index. When the TIRE PRESSURE LOW: CWECK TIRES message appears on the Driver Information Center, you should stop as soon as YOU can and check all your tires for damage. (If a tire is flat, see ‘‘If a Tire Goes Flat” in the Index.) Also check the tire pressure in all four tires as SOOIZ 2s you can. See “Inflati~n-Tire Pressure” in the Index. Any time you adjust tire’s pressure or have one or more tires repaired or replaced, you’ll need to reset (calibrate) tE-ae check tire pressure system. YOU’BI a~so Reed to reset the system whenever you rotate the tires, buy new rim, install or remove the compact spare, and whenever the vehicle‘s battery has been disconnected. Don’t reset the check tire pressure system without first correcting the cause of the problem and checking and adjusting the pressure in all four tires. If you reset the system when the tire pressures are incorrect, the check tire presswe system will not work properly and may ~ Q B alert you when a tire is Bow or high.
To reset (calibrate) the system:
3. Press and hold the CIC RESET button for a b u t five seconds. After five seconds, the display will show TIRE PRESSUFE RESET. Hf T I E PRESSURE RESET does not appear on the display after about five seconds, see your dealer for service. After you release the DIC RESET button, TIRE PRESSURE NORMAL will appear on the display.
The system completes the calibration process during driving. During the first 10 to 25 miles ( I5 to 40 kw) of drivhg, the system will not alert you if a tire is high or SOW. After 25 to EOO miles (40 to 160 h>, the system will oniy alert YOU about pressure differences of 12 psi (85 Wa) or more. After about 100 miles (160 h) of driving, the system will alert you if one tire is I O psi (69 kPaj different from the other thee tires.
After the tires have been rotated, adjust the Eront and rear inflation pressures as shown on the Tire-Loading Information label. Make certain that all wheel nuts are properly tightened. See "Wheel Nut Torque" in the Index.
W e n rotating your tires, always use the correct rotation pattern shown here.
One way to tell when it’s time for new tires is to check the treadwear inciicatdlrs, which will appear when y Q x tires have only 1/16 inch (H .e mm) car less of tread remaining.
8 The tread or sidewall is cracked, cut or snagged deep
enough to show cord OF fabric.
If you ever replace YOUF tires with those not having a TPC Spec number, make sure they are the s m e size, load rmge, speed rating and ~ O I - L S ~ I U C ~ ~ Q ~ type (bias, bias-beited or radial) as your original tires.
m~
U~ffJrpx Qna&y K&-&&qg The following infomation relates to the system developed by the United States National Highway Traffic Safety'Administration, which grades tires by treadwear, traction and temperature pedommce. (This applies only to vehicles sold in the 'United States.) The grades are molded on the sidewalls of most passenger car tires. The Uniform Tire Quality Grading system does not apply to deep tread, winter-type S ~ Q W tires, space-saver or temporary use spare tires, tires with nominal rim diameters of 10 to 12 inches (25 to 30 cm), or to some limited-production tires. IVhile the tires available on Generd Motors passenger cars and light trucks may vary with respect to these grades, they must also confom to Federal safety requirements and additional General Motors Tire Performance Criteria ( P C ) standards.
''I+he brcadwear grade is a comparative rating based Q ~ Z t tze wcx rate of the tire when tested under controlled conditions on a specified government test course. For example, a tire graded 150 would wear one m d a M f (I U2) times as well on the government course :H tire graded 100. The relative performance of tires depends upon the actual conditions of their use, however, and may depart significantly from the norm tErrc to variations in driving habits, service practices and differences in road characteristics and climate.
'The traction grades, from highest to !owest, are A, 3, and C, and they represent the tire's ability to stop ora wet pavement as measured mder controlled conditions on specified government test surfaces of asphalt 2nd concrete. A tire marked &: may have poor traction performance. Warning: The traction grade assigned to this tire is based on braking (straight alead) traction tests and does not ifgcllude cornering (turning) traction.
heat and its ability to dissipate heat when tested under controlled csndidsns on a specified indoor laboratory test wheel. Sustained high temperature can cause the material of the tire to degenerate and reduce tire life, and excessive ternperaFure can lead to sudden fire faifwe. The grade C corresponds to a level of pedomance which ail passenger c x tires must meet e~nder the Federal Motor Vehicle Safety Stmda-d No. i09. Grades B asci A represent higher levels of perhmance an the laboratory test wheel than the minimum required by law.
The wheels OR your vehicle were aligned and balanced careEulIy at the factory to give you the longest tire life acd best overall performance. Scheduled wheel alignment and wheel balancing are not needed. However, if you notice unusual tire wear or your vehicle pulling G R ~ way OF the other, the akignment may need to be reset. If YOU notice your vehicle vibrating when driving on a smooth road, your wheels may need to be rebalaaaced.
-.- ,. sed 7-h $.-&&&c,:&,~
=- ‘ 0
. -.‘?3. r ?;%;?e&
.-
.%
how far it’s been driven. It could fail suddenly and cause an accident. If you have to replace a wheel, use a new GM original equipment wheel.
:-.-%
iCI?&?,S
NOTICE:
Use tire chains only where Begal and only when YOU must. Use only SAE Class “S” type chains that are the proper size for your tires. Install them on the front tires and tighten them as tightly as possible with the ends securely fastened. Drive slowly and follow the chain manufacturer’s instructions. If you can hear the chains contacting your vehicle, stop and retighten them. If the contact continues, slow down until it stops. Driving too fast or spinning the wheels with chains on will damage your vehicle.
L A
&&@L@-~anp~ calTe Remember, cleaning products can be hazardous. Some are toxic. Others can burst into flame if yor: strike a match or get them on a hot part of the vehicle. Some are dangerous if you breathe their fumes in a closed space. When you use anything from a cormtair,er to clean your vehicle, be sure to follow the manufacturer’s warnings and instructions. And always open your doors or windows when you’re cleaning the inside. Never use these to clean your vehicle:
Gasoiine Benzene Naphtha Carbon TetracMoride Acetone Paint Thinner Turpenfirre Lacquer Thinner Nail Polish Remover
They can a11 be hazardous -- some more than others -- and they can all damage your vehicle, too.
Don’t use any of these unless this manual says you can. In many uses, these will damage your vehicle:
Alcohol Laundry Soap Bleach
@ Reducing Agents
Use a vacuum cleaner often to get rid of dust and loose dirt. Wipe vinyl, leather, plastic and painted surfaces with B clean, damp cloth. Your deaier has two cleaners, Multi-Purpose Interior Cleaner and Capture Non-Solvent Dry Spot and Soil Remover for cleaning fabric and carpet. They will clean normal spots and stains very well. You can get GM-approved cleaning products from your dealer. (See “Appearance Care and Materials” in the Index.) Here are some cleaning tips:
Always read the instructions 011 the cleaner label. Clean up stains as soon as you can -- before they set. Carefully scrape off any excess stain.
0 Use a clean cloth or sponge, and change to a clean area often. A soft brush may be used if stains are stubborn.
0 If a ring forms after spot cleaning, clean the entire
area immediately or it will set.
Vacuum and brush the area to remove any loose dirt. Always clean a whoie trim panel or section. Mask surrounding trim along stitch or welt lines. lwix powdered cleaner fobwing the directions on the container label to f ~ m Use suds only and apply with a clean sponge. Don’t saturate the material and don’t nab it roughiy. As S O Q ~ as you’ve cleaned the section, use a sponge *is remove the suds. Wipe cleaned area with a clean, damp towel or cloth. Wipe with a clean cloth and let dry.
thick suds.
1 1. 2.
3.
4.
5.
6. 7.
I. Carefirlly scrape off excess stain, then sponge the
soiled area with CQOI water.
2. If a stain remains, folkow the multi-purpose interior
cleaner instructions described earlier.
3. If an odor lingers after cleaning vomit or urine, treat the area with a waterbaking soda solution: I teaspoon (5 ml) of baking soda to B cup (250 ml> of l u k e w m water.
4. Let dry. Stains caused by candy, ice cream, mayonnaise, chili sauce and unknown stains can be removed as follows: I. Carefully scrape off excess stain. 2. First, clean with cool water and ailow to
dry completely.
3. If a stain remains, follow instructions €or
Multi-Purpose Interior Cleaner.
Use warm water and a clean cloth. @ Rub with a clean, damp cloth to remove dirt. You
may have to do it more than once. Things Hike tar, asphalt and shoe polish will stain if you don't get them off quickly. Use a clean cloth and a vinylAeather cleaner. See p u r dealer for this produce.
Use a so€t cloth with lukewarm water and a mild soap or saddle soap and wipe dry with a soft cloth. Then, let the leather dry naturally. Do not me heat to dry. e For stubborn stains, use a leather cleaner. See your
dealer for this product.
0 Never rnse oils, varaishes, solvent-based or abrasive cleaners, furniture polish or shoe polish on leather.
0 Soiled or stained leather S ~ Q U M be cleaned
immediately. If dirt is allowed to work into the finish. it can harm the leather.
Vacuum around a speaker cover gently, so that the speaker won't be damaged. Clean spots with just water and miid soap.
I 9 TQ :.. f-7 &kgL&
fl.<: >&7;L&T'
'2 m
-B&t.:
Keep kclts clem and dry.
might not he dole to provide adequate protection. C k r n safety helis only with mild soap and lukewarm wttter.
t.,LGaL&p tz&gs
& % *
fiTY4"cx<..
". --
u, i-.
~,u&k-*,pq
Glass sirodd be clculcd o.Aen. GM Glass Cleaner (GM Part No. 1050427) or a Liquid household glass cleaner will remove tzosrnal tobucco smoke and dust films on interior glass. Don't use abrasive cleuners on glass, because they may cause scratches. Avoid placing decals on the inside rear window, since they may have to be scraped off later. If abrasive cleaners are used on the inside of the rear window, an electric defogger element may be damaged. Any temporary license should not be attached across the defogger grid.
If the windshield is not clear after using the windshield washer, or if the wiper blade chatters when running, wax, sap or other materid may be on the blade or windshield. Clean the outside of the windshield with GM Windshield Cleaner, Bon AmiB Powder (non-scratching glass cleaning powder), GM Bart No. 10500 1 I. The windshield is clean if beads do not form when you rinse it with water. Grime from the windshield will stick to the wiper blades and affect their performance. Clean the blade by wiping vigorously with a cloth soaked in full-strength windshield washer solvent. Then rinse the blade with water. Check the wiper blades and clean them as necessary; replace blades that look worn.
Silicone grease on weatherstrips will make them last longer, seal better, and not stick or squeak. Apply silicone grease with a clean cloth at least every six m~ntias. During very cold, damp weather more frequent application may be required. (See “Reccmmended Fluids and %ubricants” in the Index.)
The paint finish on your vehicle provides beauty, depth of color, gloss retention 2nd durability.
The best way to preserve your vehicle’s finish is to keep it dean by washing it sften with Imkewm cr cold water. Dor~’: wash your vehicle in the direct rays of the sun. h n ’ t use strong soaps or chemical detergents. Use liquid hand, dish cx car washing (mild detergent) soaps. You can get GM-approved cleaning products from your dealer. (See “Appearance Care and Materials” in the Index.) Don’t use cleaning agents that are petroleum based, or that contain acid or abrasives. ALE cleaning
agents shoer%d be ilushed promptly 2nd not ahwed to dry on the surface, or they couid stain. Dry the finish with a soft, clean chamois or an AI-cotton towel to avoid surface scratches and water spotting. High pressure car washes may cause water to enter your vehicle.
OccasicsnaI waxing or mild polishing of your vehicle by hand may be necessary to remove residue from the paint finish. You can get GtM-approved cleaning products from your dealer. (See “Appearance Care and Materiais” in the Index.) Your Buick has a “basecoat/cEearcoat” paint finish. The clearcoat gives more depth and gloss to the colored basecoat. Always use waxes and polishes that are non-abrasive and made for a basecoatklearcoat paint finish.
I NOTICE:
I wax may then be
- I
appied.
rinsing thoroughly, dry with a soft dean towel. A
Machine compounding or aggressive polishing on a basecoatklearcoat paint finish may dull the finish or leave swirl marks.
Foreign materials such as calcium chloride and other wheel, salts, ice melting agents, road oil and tar, tree sap, bird droppings, chemicals from industrial chimneys, etc., can damage your vehicle’s finish if they remain on painted that surfaces. Wash the vehicle as soon as possible. If necessary, use non-abrasive cleaners ihat are marked safe for painted surfaces to remove foreign matter. Exterior painted surfaces are subject to aging, weather and chemical fallout that can take their toll over a period of years. You can help to keep the paint finish looking new by keeping your vehicle garaged or covered whenever possible.
Keep your wheels clean using a soft clean cloth with mild soap and water. Rinse with clean water. After
The surface of these wheels is similar to the painted surface of your vehicie. Don’t use strong soaps, chemicals, abrasive polishes, abrasive cleaners or abrasive cleaning brushes OR them because you could damage the surface. You may use chrome polish on chrome wheels, but avoid any painted surface of the and buff off immediately after application.
Don’t take your vehicle through an automatic car wash
has silicon carbide tire cleaning brushes. These brushes can also damage the surface of these wheels.
To clean your tires, use a stiff brush with a tire cleaner.
I NOTICE:
When applying a tire dressing always take care to wipe off any overspray or splash from all painted surfaces on the body or wheels of the vehicle. Petroleum-based products may damage the paint finish.
If your vehicle is damaged and requires sheet metal repair or replacement, make sure the body repair shop applies anti-corrosion material to the parts repaired or replaced to restore corrosion protection.
Any stone chips, fractures or deep scratches in the finish should be repaired right away. Bare metal will corrode quickly and may develop into a major repair expense. Minor chips and scratches can be repaired with IOUCR-UP materials available from your dealer or other service outlets. Larger areas of finish damage can be corrected in your dealer's body and paint shop.
Chemicals used €or ice and snow removal and dust control can collect on the underbody. If these are not removed, accelerated corrosion (rustj can occur on the underbody parts such as fuel lines, frame, floor pan and exhaust system even though they have corrosion protection.
At least every spring, Rush these materials from the underbody with plain water. Clean any areas where mud and other debris can collect. Dirt packed in ciosed areas of the frame should be loosened before being flushed. Your dealer or an underbody car washing system can do this for you.
Some weather and atmospheric conditions can create a chemical fallout. Airborne pollutants can fail upon and attxk painted surfaces on your vehicle. This damage can take two forms: blotchy, ringlet-shaped discolorations, and small irregular dark spots etched into the paint surface. Although no defect in the paint job causes this, Buick will repair, at no charge to the owner, the surfaces of new vehicles damaged by this fallout condition within I 2 months or 12,000 miles (20 000 km) of ourchase, whichever C C C U ~ S first.
1 8 02. (0.237 L)
1052918""
1052925
I Protects ieather, wood, acrylics, Plexiglas w , plastic,
mbber and vinvl
C1em.s carpets, seats, interior trim. door panels
and floor mats
Multi-Purpose interior
Cleaner
I U 1 ENGINE A
SAMPLE4UXWM072675
I E! I
f 1 ASSEMBLY
CbDE A MODEL YEAR
PLANT
This is the legal identifier for your vehicle. It appears on a plate in the front comer of the instrument panel, on the driver's side. You can see it if you look through the windshield from outside your vehicle. The VIN also appears on the Vehicle Certification and Service Parts labels and the certificates of title and registration.
Be sure that this label is not removed from the vek-rlc?~.
NOTICE:
Don’t add anything electrical to your vehicle unless you check with your dealer first. Some electrical equipment can damage your vehicle and the damage wouldn’t be covered by your warranty. Some add-on electrical equipment can keep other components from working as they should.
Your vehicle has an air bag system. Before attempting to add anything electrical to your vehicle, see “Servicing Your Air Bag-Equipped Vehicle” in the Index.
To check ;he fuses in this underhood fuse center, mrn the knob to the left and remove the cover. There is a chart inside the cover that explains the features and controls governed by each fuse and relay.
The wiring circuits in your vehicle are potected from short circuits by a combination of fuses and circuit breakers. This greatly reduces ?;he chance of damage caused by electrical problems. Look at the silver-cobred band inside the fuse. If the band is broken or melted, replace the fuse. Be sure you replace a bad fuse with a new one of the identical size and rating. Tlere are three fase blocks in your vehicle: the Instrument Pace1 Fuse Block located under the instrument panel, the Underhood Fuse Block located QTP the passenger's side engine compartment and the Xear Fuse Block, located under the rear seat.
I .
2.
3.
4.
Remove the two 7 mm screws located aIsng the front edge of the panel. Lower the hush panel. The fuse block is a rectangular covered box iocated on the far right side under the instrument panel. Remove the cover. Now you can see the hses 2nd replace them. Place the wide end of the h e puller over the plastic end of the f;crse. Squeeze the ends over the fuse and pull it out.
5 . Spare fuses are located in the enpty slots shown OR the foliowing chat. When finished, repiace the hush panei. Replace lamps, connectors, and HVAC duct temperature sensors if they were removed.
Fuse ELC
ABS HVAC
CR CON" HUD CSTWSBM
LB PK E
LP PK R
RUN wsw EMPTY RFARSEN B/U LP
Usage HVAC Rat Bk Mtrs, EkC Sensor, EEC Sensor (R Bec) Anti-Lock Brake System Moduie KVAC Main Con Head, HVAC Programmer, HPC Stepper Motor CR, Cruise Switch HUD Switch, HUD DispIay WVAC i'rograrnrner, IPC (Cluster), SBM (275 to LCM) (1 135 to BTSH SL) Underhood LP, L PUSide M k , L PK/Turn Lmp, SBM, L Tail Sig Lmp, L Tail Stop Lmp, L Rear Side Mks Rt PWSide Mkr imp, Rt PwTFurn Lamp, Wt TaiUSign Lamp, Rt TaiUStoplarnp, R: Rear Sidemarker, Stopflail Lamp, Tail/Sig Lamp, License Lamp, RFA Run/Acsry Wiper Motor Not Used Wiper Switch, Wa, Rain Sense E/C Minor, Back-up Lamps
(G)
Fuse SBM PASSMOL N C IGN SEN
Usage Intr Lamps PDM Module HVAC Motor, HVAC Mix Motors EC Mirror, Driver HTS Seat, Rear Defog Relay, MEM Module, Cool LVL Sensor, Pass Heated Seat
7 37 38 40
42
Position Circuitry Not Used RFA, SBM, IPC, LCM Turn Signal, Hazard Switch R e Oxygen Sensor, Post Oxygen Sensor
Ignition Module Rt Hi Beam Not Used Lt Hi Beam Not Used Rt Low Beam Lt Low Beam
Position
32 33 34 35 36 37 as 39 40 41 42 43 44
TQ Rear BEC-Seats To HP BEC ‘“Run” Starter Welays High Speed Fan Rly
21 22 23 24 2% 26 24
29 30 31
6-68
Welay--Tgn Relay--Worn ReTay--Cooling Fan #2 ReTay--Theft 1
6
(7)
Not Used
16 17
20
Fuel Door Re1 Sol, Tmnk Re1 Relay, DLC
Position Circuitry
21
Not Used
26 27 28
at .Rear cig Les E& Rear Cig Ltr RFA, Mem Seat Module, Driver Seat Switch
1. Pull up on the front of the cushion to release the
front hooks.
2. Pull the cushion up and out toward the front of
the vehicle.
To Reinst.4 the Rear Seat Cwhicban
cushion. To help avoid damage to the fuse center, be careful when removing or reinstalling the seat cushion.
4. Check to make sure the safety belts are properly
routed and that no p~rtion of any safety belt is trapped under the seat. Also make sure the seat cushion is secured.
EXTERIOR Headlamp
BBJIAB
High-Beam . . . . . . . . . . . . . . . . . . . . . . . . . . . 9005 . . . . . . . . . . . . . . . . . . . . . . . . . . . Zow-Beam 9006 ParWTum, Front . . . . . . . . . . . . . . . . . . . . . . . . . 3057 Back-up . . . . . . . . . . . . . . . . . . . . . . . . . . . . . . . 3057 Tai1Rtu-n . . . . . . . . . . . . . . . . . . . . . . . . . . . . . . . 3057 TaiVStQp . . . . . . . . . . . . . . . . . . . . . . . . . . . . . . . 3857
For service information on other bulbs, contact your dealer’s service department.
A safety belt that isn’t properly routed through the seat cushion or is twisted won’t provide the protection needed in a crash. If the sa€ety beit hasn’t been routed through the seat cushion at all, it won’t be there to work for the next passenger. The person sitting in that position couId be badly injured. After reinstalling the seat cushion, always check to be sure that the safety belts are properly routed and are not twisted.
I.
2.
3.
Buckle the center passenger position safety beE:, then route the safety belts though the proper slots in the seat csshion. Don’t let the safety belts get twisted. Slide the rear of the cushion up and under the seatback so the rear locating guides hook into the wire loops on the back frame. With the seat cushion lowered, push rearward and then press down on the seat cushion until the spring locks on both ends engage.
The following approximate capacities are given in English and metric conversions. Please refer to “Recommended Fluids and Lubricants” in the Index for more information. Automatic Transaxle AT (Overdrive) Pan Removal and Replacement . . . . . . . . . . . . . . . . . . . . . . . . . . . . . . . . . . . . . . . . . . . . . . . . . . . 6 quarts (5.6 L) After Complete Overhaul . . . . . . . . . . . . . . . . . . . . . . . . . . . . . . . . . . . . . . . . . . . . . . . . . . . . . . 1 I quarts (10.4 E) When draining or replacing torque convertep; nzore fluid may be needed. Belt Tensions Automatically controlled by a Self-Tension idler pulley. Tension adjustment should never be necessary. Cooling System . . . . . . . . . . . . . . . . . . . . . . . . . . . . . . . . . . . . . . . . . . . . . . . . . . . . . . . . . . . . . Engine Crankcase Oil change with filter change . . . . . . . . . . . . . . . . . . . . . . . . . . . . . . . . . . . . . . . . . . . . . . . . . . . 4.5 quarts (4.3 L) FuelTank . . . . . . . . . . . . . . . . . . . . . . . . . . . . . . . . . . . . . . . . . . . . . . . . . . . . . . . . . . . . . . . . 18SgaIlons(70L) Power Steering PumpOnly . . . . . . . . . . . . . . . . . . . . . . . . . . . . . . . . . . . . . . . . . . . . . . . . . . . . . . . . . . . . . . . . . . . . . 1pint(OSE) Complete System . . . . . . . . . . . . . . . . . . . . . . . . . . . . . . . . . . . . . . . . . . . . . . . . . . . . . . . . . . . . 1 1/2 pints (0.7 L) Tire Pressure See the Tire-Loading Information label on the rear edge of the driver’s door. WheelNutTorque . . . . . . . . . . . . . . . . . . . . . . . . . . . . . . . . . . . . . . . . . . . . . . . . . . . . . . . . 1001b-ft(140N-m) R-134a Air Conditioning . . . . . . . . . . . . . . . . . . . . . . . . . . . . . . . . See refrigerant charge label under the hood. NOTE: All capacities are approximate. When adding, be sure to fill to the appropriate level, as recommended in this manual.
13 quarts (12.3 k)
Not all air conditioning refrigerants are the same. If the air conditioning system in your vehicle needs is used. If refrigerant, be sure the proper refrigerant you’re not sure, ask your dealer.
3800 Engine
Engine K ............................... VIN Engine Code .............................. Type ....................................... V6 .............................. V6 3.8L ............................ .3.8%, Displacement ................................ 9:4: 1 ............................ Compression Ratio ........................... 8 5 : 1 205 .............................. Horsepower ................................. 240 1-6-5-4-3-2 ...................... Firing Qrder ............................. Thermostat Temperature Specification ........ 195°F (91°C) .....................
1-6-5-4-3-2 195°F (91°C)
3800 Supercharged Engine
jL2Q
e. ,.',
&g&ze & y g g s G y y 1
The 3800 (L36) engine uses an engine accessory belt. This diagram shows the features connected by the belt routing. See "Maintenance Schedule" in the Index for when to check the belt.I'
c/
Qverall Length . . . . . . . . . . . . . . . . . 206.8 inches (525.3 cm) Width . . . . . . . . . . . . . . . . . . . 74.7 inches ( B 89.7 cm) Height . . . . . . . . . . . . . . . . . . . 58.8 inches (147.6 cm) Wheelbase . . . . . . . . . . . . . . B 13.8 inches (289.1 cm) Front Tread ............... 62.7 inches (159.3 cm) Rear Tread . . . . . . . . . . . . . . . 62.3 inches (158.2 cm) ".. - ?$ ~ 17. ~ ~ ~ ~ j a - a e e ~ ~ ~ ~ ~ ~ ~ _L Air Cleaner Element . . . . . . . . . . AC Type A- 1096C Engine Oil Filter . . . . . . . . . . . . . . . . AC Type PF-47 Fuel Filter .................... AC Type GF-627 Spark Plugs . . . . . . . . . . . . . . . . . . . AC Type 41-921 Gap: 0.060 inch (. 152 crn)
~ ~ 4 a ~ ~ . ~ e n a ~ ~ ~ ~
, ..-. yay&
'..
T:.
Windshield Wiper Blades Type ............................ Hook Style Length . . . . . . . . . . . . . . . . . . . . . 22 inches (56 cm) Passenger Compartment Air Filter (HVAC air filter) . . . . . GM Part No. 52472175
A. Power Steering B. Generator C . Air Conditioning
D. Crank E. Coolant Pump E Tensioner
The Supercharged 3800 engine uses two accessory drive belts. One belt drives the generator, power steering pump, coolant pump surd air conditioning compressor. The second belt drives the superchwger. Each belt has its own tensioner mi idler pulley. See ‘‘Maintenance Schedule” in the Index for when to check h e accessory drive belts and supercharger oil level. Have your dealer check the oil level in the supercharger.
1. Front Belt 2. Back Belt A. Generator B. Power Steering
C. Crank D. Supercharger E. Coolant Pump IF. Air Conditioning
7- 2 7-3 7-4 7-4 7-4 7-3 1 7-3 1
Introduction How This Section is Organized Bart A: Scheduled Maintenance Services Using Your Maintenance Schedule Selecting the Right Schedule Part B: Owner Checks and Services At Each Fuei Fill
At Least oncc a h4onth At Least Twice a Year At Least Once a Year Part C: Periodic Maintenance hspections Part D: Recommended Fluids and Lubricants Part E: Maintenance Record
I IMPORTANT*
KEEP ENGINE OIL AT THE PROPER RECOMMENDED
LEVEL ANI) CHANGE AS.
Have you puschased the GM Prwotectiorz Plan? The Plan supplements ~ o u s new vehicle war{-unties. See your Warranty und Owner AssistaPzce booklet, or your Buick deuler.for details.
Jr
ceep yor vehicle in good working condition, but &o helps the environment. AEB reconirnended maintenance procedures are important. Improper vehicle maintenance can even affect the quality of the air we breathe. Improper fiuid Ievels or the wrong tire infiation can increase the level of emissions from your vehicle. To help protect our environment, and to keep your vehicle in good condition, please maintain your vehicle properly.
.:
-1
Lj
AT’.
. _ y
0 C.
---
>. --o.-.-G+. 7 . .
v.:fi.::+ C&,hAkLA.d&
&-2cbisn Tq L L
12‘3\+7 p The remainder of this section is divided into five p m s : ”Part A: Scheduled Maintenance Services” shows what to have done and how oftec. Some of these services can be complex, so unless you are technically qualified and have the necessary equipnent, you should let your dealer’s service department or another qualified service center do these jobs.
Performing maintenance work on a vehicle can be dangerous. In trying to do some Jobs, you can be seriously injured. Do your own maintenance work O ~ Y if you have the required know-how and the proper tools and equipment for the job. If you have any doubt, have a qualified technician do the work.
If you are skilled enough to do some work on your vehicle, you will probably want to get the service information. See “Service and Owner Publications” in the Index.
“Part 8: Owner Cheeks and Services” tells you what should be checked and when. It also explains what YOU can easily do to help keep your vehicle in good condition. “Part C: Periodic Maintenance Inspections” explains important inspections that your deater’s service department or another quaiifled service center should perfom. “Part D: Recommended Fluids and Llph~ricipn~’’ lists some recommended products to hcBp keep your vehicle properly maintained. T’kzesc 19n~lucts, or their equivalents, should be used wlacikct. you do the work yourself or have it done. “Past E: Maintenance Record’’ provides a,place for you to record the ~naintcrrance performed on your vehicle. Whenever any n:aintcnancc is performed, be sure to write it down i n Ffris part. ’ h i s will help you determine when your next nraintenance should be done. In addition, it is ;L good idca to keep your maintenance receipts. They may be rleedcd to qualify your vehicle for warranty repairs.
The proper fluids and lubricants to use are listed in Part D. Make sure whoever services your vehicle uses these. All parts should be replaced and a 1 necessary repairs done before you or anyone else drives the vehicle. These schedules are for vehicles that:
cany passengers and cargo within recommended limits. You will find these limits on your vehicle’s Tire-Loading Information label. See “Loading Your Vehicle” in the Index. are driven on reasonable road surfaces within legal driving limits. use the recommended fuei. See “Fuel” in the Index.
First you’ll need to decide which of the two schedules is right for your vehicle. Here’s how to decide which schedule to follow:
We at General Motors want to kelp you keep your vehicle ia good working condition. But we don’t know exactly how you’ll drive it. You may drive very short distances only a few times a week. Or you may drive long distances aEB the time in very hot, dusty weather. You may use your vehicle in making deliveries. Or YOU may drive it t o work, to do errands or in many other ways. Because of all thc different ways people use their vehicles, maintenance rreeds vary. You may even need more frequent checks and repiacements than you’ll find in the schedules in this section. So please read this section and note how you drive. If you have any questions on how to keep your vehicle in good condition, see your Buick dealer. This part tells you the maintenance services you should have done and when you should schedule them. If you go to your dealer for your service needs, you’ll know that GM-trained and supported service people will perform the work using genuine GM parts.
i ~~ Follow the Short Trip/City Maintenance Schedule if any one of these conditions is true for your vehicle:
Most trips are less than 5 to 10 miles (8 to I6 km). This is particularly important when outside temperatures are below freezing. Most trips include extensive idling (such as frequent driving in stop-and-go traffic). Most trips are through dusty areas. You frequently tow a trailer or use a carrier on tog of your vehicle. If the vehicle is used for delivery service, police, taxi or other commercial application.
One of the reasons you should follow this schedule if you operate your vehicle under any of these conditions is that these conditions cause engine oil to break down soonep:
r--- ShQTt 7&+p/cigy & $ - ~ ~ y & Every 3,000 Miles (5 000 km): Engine Oil md Filter
Change (or 3 months, whichever occurs first).
..
Every 6,000 Miles (10 000 km): Chassis Lubrication (or 6 mo-nth, whichever occurs first). Tire Rotation.
I -
Every 12,000 Miles (20 000 km): Passenger
Compartment Air Filter Replacement.
Every 15,000 Miles (25 000 km): Air Cleaner Filter
Inspection, if driving in dusty conditions.
Every 30,000 Miles (50 000 km): Air Cleaner Filter Replacement. Fuel Tank, Cap and Lines Inspection. Supercharger Oil Check (or every 36 months, whichever occurs first) (3.8L Code I engine only).
Every 50,000 Miles (83 080 km): Automatic Transaxle
Service (severe conditions only).
Every 60,000 Miles (100 000 km): Engine Accessory
Drive Belt Inspection.
Every 100,000 Miles (166 000 km): Spark Plug Wire
Inspection. Spark Plug Replacement.
Every 150,000 Miles (240 000 km): Cooling System
Service (or every 60 months, whichever occurs first).
These intervals only summarize maintenance services. Be sure to follow the complete maintenance schedule on the following pages.
R P I -3
Follow this maintenance schedule only if none of the conditions from the Short Trip/City Maintenance Schedule is true. Do not use this schedule if the vehicle is used for trailer towing, driven in a dusty area or used of€ paved roads. Use the Short TripKity schedule for these conditions. Driving a veizicie with a,fulky warnzed engine oil to utzckQ~ hig/wctv cwatclition.,s causm C ~ I ~ ~ J W brcnk down S ~ O M ~ G P :
Every 7,500 Miles (12 500 km): Engine Oil and Filter Change (or every 12 months, whichever occurs first). Chassis Lubrication (or every 22 months, whichever occurs first). Tire Rotation.
Every 15,000 Miles (25 000 km): Passenger
Compartment Air Filter Replacement.
Every 30,000 Miles (50 000 km): Supercharger Oil
Check (or every 36 months, whichever occurs first) (3.8L Code I engine only). Air Cleaner Filter Repiacernent. Fuel Tank, Cap a d Lines Inspection.
Every 50,000 Miles (83 000 km): Automatic Transaxle
Service (severe conditi~ns oniy).
Every 60,QOO Miles (100 000 km): Engine Accessory
Drive Belt Inspection.
Every 100,000 Miles (166 QOO km): Spark Plug Wire
Inspection. Spark Plug Replacement.
Every 150,000 Miles (240 000 km): Cooling System
Service (or every 60 months, whichever occurs first).
These intervals only summarize maintenance services. Be sure to follow the complete maintenance schedule on the following pages.
m. B he services shown in this schedule up to IOO,QQ0 miles ( 166 000 am) should be performed after 100,800 miles ( I. 66 008 km) at the same intervals. The services shown at 150,000 miles (240 GOO km) shouid be performed at the same interval after 150,000 riles (240 000 km). See “Owner Checks and Services” m d “Periodic Maintenance inspections” following.
* The U.S. Environmental Protection Agency or the
California Air Resources Boxd has determined that the failure to perform this maintenance item will not nuIli€y the elmission wmanty or limit recall liability prior to the completion of the vehicle’s useful life. We, however, urge that ail recommended maintenance services be performed at the indicated intervals and the maintenance be recorded. # Lubricate the transaxle shift linkage, parking brake cable guides and the underbody contact points and linkage.
* If your vehicle has an Engine Oil Life Monitor (Index), the monitor will show you when to change the oil -- usually between 3,000 miles ( 5 CIOC) k n ) and 7,500 miles ( 12 500 lmj since your last oil change. Under severe conditions, the indicator may come on before 3,000 wiles (5 000 h). Never drive your vehicle more than 7,500 miles (12 508 am> or i 2 months, (whichever occurs first), without an oil change. Tne system won‘: detect dust in thc oil. So if you drive in a dusty area be sure to change p u r oil every 3,000 miles (5 008 km) or sooner if: the CHANGE OIL message appears. Remember to reset the Oil Life ‘Monitor when the oil has been changed. For more information, see “Engine Oil Life ,Monitor (Index)” in the Index. + A good time to check your brakes is during tire rotation. See “Brake System Inspection” under “Periodic Maintenance Inspections” in Part C of this schedule.
I
0 Lubricate chassis components (OF every 6 months, whichever occurs first).
(See footnote At.) Rotate tires. See “Tire Inspection and Rotation” in the Index for proper rotation pattern 2nd additional infomation. (See footnote +.)
0 Change engine oil and filter ( ~ r every 3 months, whichever occurs first).
ABFZ Emission Control Service. (See footnote *.)
1 DATE
MILEAGE
B DATE
DATE
SERVICED B Y
0 Rotate tires. See “Tire Inspection and Rotation” in the Index for p~oger
rotation pattern and additional information. (See footnote 9.)
.&:$ p&g& L G $-$fi&?
2- uc,* s : , f
+q,(G$. a
g.: &:&
d2q Cl Chasge engine oil and filter (or every 3 months, whichever occurs first). El Inspect air cleaner filter if you are driving in dusty conditions. Replace
An Emission Control Sewice. (See footnote *.)
c ’i ,i