- Download PDF Manual
-
in more frequent fluid and filter changes. Refer to “Fluids, Lubricants, and Genu- ine Parts” in “Maintaining Your Vehicle” for fur- ther information.
544 MAINTAINING YOUR VEHICLE Fluid Level Check If equipped with a dipstick, use the following procedure. If your vehicle has a capped dipstick tube, it is sealed and should not be tampered with. Your authorized dealer has the proper tools to ensure that the fluid level is set properly. The fluid level should be checked when the engine is fully warmed up and the fluid in the transmis- sion is at normal operating temperature. Operation of the transmission with an improper fluid level will greatly reduce the life of the transmission and of the fluid. Check the fluid level whenever the vehicle is serviced. Fluid Level Check – 42RLE/545RFE Check the fluid level while the transmission is at normal operating temperature 82°C (180°F). This occurs after at least 15 miles (25 km) of driving. At normal operating temperature the fluid cannot be held comfortably be- tween the fingertips.
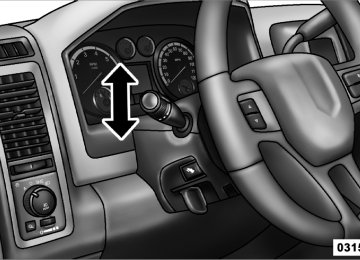
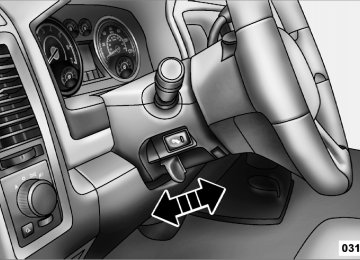
To check the automatic transmission fluid level properly, the following procedure must be used: 1. Operate the engine at idle speed and normal operating temperature. 2. The vehicle must be on level ground. 3. Fully apply the parking brake and press the brake pedal. 4. Place the shift lever momentarily into each gear posi- tion ending with the lever in PARK. 5. Remove the dipstick, wipe it clean and reinsert it until seated. 6. Remove the dipstick again and note the fluid level on both sides. The fluid level should be between the “HOT” (upper) reference holes on the dipstick at normal operat- ing temperature. Verify that solid coating of oil is seen on both sides of the dipstick. If the fluid is low, add as
required into the dipstick tube. Do not overfill. After adding any quantity of oil through the oil fill tube, wait a minimum of two minutes for the oil to fully drain into the transmission before rechecking the fluid level. If it is necessary to check the transmission below NOTE: the operating temperature, the fluid level should be between the two “COLD” (lower) holes on the dipstick with the fluid at approximately 70°F (21°C) (room tem- perature). If the fluid level is correctly established at room temperature, it should be between the “HOT” (upper) reference holes when the transmission reaches 180°F (82°C). Remember it is best to check the level at the normal operating temperature.
MAINTAINING YOUR VEHICLE 545
CAUTION!
Be aware that if the fluid temperature is below 50°F (10°C) it may not register on the dipstick. Do not add fluid until the temperature is elevated enough to produce an accurate reading.
7. Check for leaks. Release parking brake. To prevent dirt and water from entering the transmission after checking or replenishing fluid, make certain that the dipstick cap is properly reseated. It is normal for the dipstick cap to spring back slightly from its fully seated position, as long as its seal remains engaged in the dipstick tube. Automatic Transmission Fluid and Filter Change Refer to “Maintenance Schedule” or further information. If the transmission is disassembled for any NOTE: reason, the fluid and filter(s) should be changed.
546 MAINTAINING YOUR VEHICLE It is important that proper lubricant is used in the transmission. Refer to “Fluids, Lubricants, and Genuine Parts” in “Maintaining Your Vehicle” for further information. Special Additives Automatic Transmission Fluid (ATF) is an engineered product and its performance may be impaired by supple- mental additives. Therefore, do not add any fluid addi- tives to the transmission. The only exception to this policy is the use of special dyes to aid in detecting fluid leaks. In addition, avoid using transmission sealers as they may adversely affect seals. Appearance Care and Protection from Corrosion
Protection of Body and Paint from Corrosion Vehicle body care requirements vary according to geo- graphic locations and usage. Chemicals that make roads passable in snow and ice, and those that are sprayed on trees and road surfaces during other seasons, are highly
corrosive to the metal in your vehicle. Outside parking, which exposes your vehicle to airborne contaminants, road surfaces on which the vehicle is operated, extreme hot or cold weather and other extreme conditions will have an adverse affect on paint, metal trim, and under- body protection. The following maintenance recommendations will enable you to obtain maximum benefit from the corrosion resistance built into your vehicle. What Causes Corrosion? Corrosion is the result of deterioration or removal of paint and protective coatings from your vehicle. The most common causes are: • Road salt, dirt and moisture accumulation. • Stone and gravel impact. • Insects, tree sap and tar.
• Salt in the air near seacoast localities. • Atmospheric fallout/industrial pollutants. Washing • Wash your vehicle regularly. Always wash your ve- hicle in the shade using MOPAR威 Car Wash or equiva- lent, or a mild car wash soap and rinse the panels completely with clear water. • If insects, tar or other similar deposits have accumu- lated on your vehicle, use MOPAR威 Super Kleen Bug and Tar Remover or equivalent to remove. • Use a high quality cleaner wax, such as MOPAR威 Cleaner Wax or equivalent to remove road film, stains and to protect your paint finish. Take care never to scratch the paint.
MAINTAINING YOUR VEHICLE 547
• Avoid using abrasive compounds and power buffing that may diminish the gloss or thin out the paint finish.
CAUTION!
• Do not use abrasive or strong cleaning materials such as steel wool or scouring powder which will scratch metal and painted surfaces. • Use of power washers exceeding 1,200 psi (8 274 kPa) can result in damage or removal of paint and decals.
Special Care • If you drive on salted or dusty roads or if you drive near the ocean, hose off the undercarriage at least once a month.
548 MAINTAINING YOUR VEHICLE
• It is important that the drain holes in the lower edges of the doors, rocker panels and trunk be kept clear and open. • If you detect any stone chips or scratches in the paint, touch them up immediately. The cost of such repairs is considered the responsibility of the owner. • If your vehicle is damaged due to a collision or similar cause which destroys the paint and protective coating, have your vehicle repaired as soon as possible. The cost of such repairs is considered the responsibility of the owner. • If you carry special cargo such as chemicals, fertilizers, de-icer salt, etc., be sure that such materials are well packaged and sealed. • If a lot of driving is done on gravel roads, consider
mud or stone shields behind each wheel.
• Use MOPAR威 Touch Up Paint or equivalent on scratches as soon as possible. Your authorized dealer has touch up paint to match the color of your vehicle.
Wheel and Wheel Trim Care All wheels and wheel trim, especially aluminum and chrome-plated wheels should be cleaned regularly with a mild soap and water to prevent corrosion. To remove heavy soil and/or excessive brake dust, use MOPAR威 Wheel Cleaner or equivalent or select a nonabrasive, non-acidic cleaner. Do not use scouring pads, steel wool, a bristle brush, or metal polishes. Only MOPAR威 or equivalent is recommended. Do not use oven cleaner. Avoid automatic car washes that use acidic solutions or harsh brushes that may damage the wheels’ protective finish.
with a clean, dry towel.
Stain Repel Fabric Cleaning Procedure – If Equipped Stain Repel seats may be cleaned in the following man- ner: • Remove as much of the stain as possible by blotting • Blot any remaining stain with a clean, damp towel. • For tough stains, apply MOPAR威 Total Clean or equivalent, or a mild soap solution to a clean, damp cloth and remove stain. Use a fresh, damp towel to remove soap residue. • For grease stains, apply MOPAR威 Multi-Purpose Cleaner or equivalent to a clean, damp cloth and remove stain. Use a fresh, damp towel to remove soap residue. • Do not use any harsh solvents or any other form of
protectants on Stain Repel products.
MAINTAINING YOUR VEHICLE 549
Interior Care Use MOPAR威 Total Clean or equivalent to clean fabric upholstery and carpeting. Use MOPAR威 Total Clean or equivalent to clean vinyl upholstery. MOPAR威 Total Clean or equivalent is specifically recom- mended for leather upholstery. Your leather upholstery can be best preserved by regular cleaning with a damp soft cloth. Small particles of dirt can act as an abrasive and damage the leather upholstery and should be removed promptly with a damp cloth. Stubborn soils can be removed easily with a soft cloth and MOPAR威 Total Clean or equivalent. Care should be taken to avoid soaking your leather upholstery with any liquid. Please do not use polishes, oils, cleaning fluids, solvents, detergents, or ammonia-based cleaners to clean your leather upholstery. Application of a leather condi- tioner is not required to maintain the original condition.
550 MAINTAINING YOUR VEHICLE
WARNING!
Do not use volatile solvents for cleaning purposes. Many are potentially flammable, and if used in closed areas they may cause respiratory harm.
Cleaning Headlights Your vehicle is equipped with plastic headlights and fog lights (if equipped) that are lighter and less susceptible to stone breakage than glass headlights. Plastic is not as scratch resistant as glass and therefore different lens cleaning procedures must be followed. To minimize the possibility of scratching the lenses and reducing light output, avoid wiping with a dry cloth. To remove road dirt, wash with a mild soap solution fol- lowed by rinsing. Do not use abrasive cleaning components, solvents, steel wool or other aggressive material to clean the lenses.
Glass Surfaces All glass surfaces should be cleaned on a regular basis with MOPAR威 Glass Cleaner or any commercial household-type glass cleaner. Never use an abrasive type cleaner. Use caution when cleaning the inside rear win- dow equipped with electric defrosters or the right rear quarter window equipped with the radio antenna. Do not use scrapers or other sharp instruments which may scratch the elements. When cleaning the rearview mirror, spray cleaner on the towel or rag that you are using. Do not spray cleaner directly on the mirror. Cleaning Plastic Instrument Cluster Lenses The lenses in front of the instruments in this vehicle are molded in clear plastic. When cleaning the lenses, care must be taken to avoid scratching the plastic.
1. Clean with a wet soft rag. A mild soap solution may be used, but do not use high alcohol content or abrasive cleaners. If soap is used, wipe clean with a clean damp rag. 2. Dry with a soft tissue. Seat Belt Maintenance Do not bleach, dye or clean the belts with chemical solvents or abrasive cleaners. This will weaken the fabric. Sun damage can also weaken the fabric. If the belts need cleaning, use a mild soap solution or lukewarm water. Do not remove the belts from the car to wash them. Replace the belts if they appear frayed or worn or if the buckles do not work properly. Dry with a soft tissue.
MAINTAINING YOUR VEHICLE 551
Spray-On Bedliner – If Equipped During ownership, the shine and luster of the Spray-On Bedliner can fade from oxidation, road dirt, heavy-duty hauling and hard water stains. Weathering and UV exposure will lead to fading, dulling, and loss of gloss over time. To help maintain the appearance of your Spray-On Bedliner, the manufacturer recommends you periodically rinse all loose dirt from your truck bed and clean your twice per year using the MOPAR威 truck at Spray-On Bedliner Conditioner available at your local authorized dealer. To help maintain the appearance of your Spray-On Bedliner, follow the steps below: 1. Rinse your truck bed out with water to remove any loose dirt and debris.
least
552 MAINTAINING YOUR VEHICLE 2. Mix a mild soap or detergent with water with a soft cloth or brush. 3. Rinse bedliner with water. 4. Once dry, apply a small amount of MOPAR威 Spray-On Bedliner Conditioner to a moist towel or sponge and wipe over the entire surface of the truck bedliner.
WARNING!
Do not use silicon-based protection products to clean your bedliner. Silicon-based products can become slippery and may result in personal injury.
Spray-On Bedliners are chemically-resistant to many different types of chemicals (including gasoline, oil, hydraulic fluids) for short periods of time. If a spill occurs on your Spray-On Bedliner, rinse the truck out as soon as possible to avoid permanent damage.
it
Repairing the Spray-On Bedliner While extremely tough, is possible to damage a Spray-On Bedliner. One common condition is when loading a heavy pallet and dragging that pallet across the floor of the bed. If a nail or sharp point is exposed under the weight of the pallet a scratch or tear is possible. While not covered by your new vehicle warranty, a cosmetic fix to cover the metal exposed by the scratch is required. To repair a tear or gouge, follow the directions provided in the MOPAR威 Quick Repair Kit.
FUSES
Totally Integrated Power Module The totally integrated power module (TIPM) is located in the engine compartment near the battery. This center contains cartridge fuses and mini fuses. A description of each fuse and component may be stamped on the inside
cover, otherwise the cavity number of each fuse is stamped on the inside cover that corresponds to the following chart.
Totally Integrated Power Module (TIPM)
Cavity Cartridge
J01
J02
J03
J04
J05
J06
J07
Fuse 40 Amp Green 30 Amp Pink 30 Amp Pink
25 Amp Natural 25 Amp Natural 40 Amp Green
30 Amp Pink
MAINTAINING YOUR VEHICLE 553
Mini Fuse
Description
Trailer Tow
Electric Brake
Diesel Powertrain Control Module – If Equipped Driver Door Node
Passenger Door Node
Antilock Brakes Pump/Stability Con- trol System Antilock Brakes Valve/Stability Con- trol System
554 MAINTAINING YOUR VEHICLE
Cavity Cartridge
J08
J11
J13
J14
J15
J17
Fuse 40 Amp Green 30 Amp Pink 60 Amp Yellow
20 Amp Blue 30 Amp Pink 40 Amp Green
Mini Fuse
Description
Power Seat
Drivetrain Control Module Streaming Video Module/Video Sys- tem 3 Module/Video System 2 Module/ DISP/DVD Trailer Tow Lamps/ Park Lamps IGN RUN Rear De- froster Starter Motor Sole- noid
J18
J19
J20
J21
J22
M1
M5
Cavity Cartridge
Mini Fuse
Description
Fuse 20 Amp Blue
60 Amp Yellow 30 Amp Pink 20 Amp Blue 25 Amp Natural
15 Amp Blue 25 Amp Natural
Powertrain Control Module Transmission Range Rad Fan Motor HI/ Rad Fan Motor Low Front Wiper Ground/ Low/High Front Washer Control
PWR Batt – Sunroof Module Sw Stop Switch Lamp
115V AC Inverter
Cavity Cartridge
Fuse
M6
M7
M8
M9
M10
M11
M12
Mini Fuse 20 Amp Yellow
20 Amp Yellow 20 Amp Yellow 20 Amp Yellow 20 Amp Yellow
10 Amp Red 30 Amp Green
Description
Power Outlet #1 (Ci- gar Lighter)/Rain Snsr Power Outlet #2
Front Heated Seat & Steering Wheel Rear Heated Seats
Hands Free Module/ Vanity Lamp/ Universal Garage Door Opener Module Climate Control Sys- tem Radio/Amplifier
MAINTAINING YOUR VEHICLE 555
Cavity Cartridge
Fuse
M13
Mini Fuse 20 Amp Yellow
M14
M15
M16
20 Amp Yellow 20 Amp Yellow
10 Amp Red
Description
Main #2 Instrument Cluster/Wireless Con- trol Module/ITM/ Siren/Multifunction Switch (Steering Col- umn Module) Back Up Camera (Do- mestic Only) Power Seat Module(s)/Audio Telematics/Daytime Running Lights Relay/Instrument Cluster/Transfer Case Module Airbag Module
556 MAINTAINING YOUR VEHICLE
Cavity Cartridge
Fuse
M19
M20
M21
M22
M23
M25
M26
Mini Fuse 25 Amp Natural 15 Amp Blue
20 Amp Yellow 10 Amp Red 10 Amp Red 20 Amp Yellow
10 Amp Red
Description
Cavity Cartridge
Fuse
Automatic Shutdown 1 and 2
Instrument Cluster Interior Lighting /Sw Steering Wheel/Sw Bank Automatic Shutdown Horns (Low/High) – Right Horns (Low/High) – Left Fuel Pump Motor/ Diesel Lift Pump – If Equipped SpareM27
M28
M29
M30
M32
M33
M34
Mini Fuse 10 Amp Red 15 Amp Blue 10 Amp Red 15 Amp Blue 10 Amp Red 10 Amp Red 10 Amp Red
Description
Ignition Switch
Powertrain Control Module Tire Pressure Monitor
J1962 Diag Connector
Airbag Module
Powertrain Control Module Park Assist Module/ Climate Control Sys- tem Module/IR Sensor/Compass Module
Cavity Cartridge
Fuse
M35
M36
M37
M38
Mini Fuse 15 Amp Blue 20 Amp Yellow 10 Amp Red
25 Amp Natural
Description
LH Front & Rear Parklamps Power Outlet
Antilock Brakes/ Stability Control Sys- tem Module/ Stoplamp Switch All Door Lock &Un- lock
MAINTAINING YOUR VEHICLE 557
CAUTION!
• When installing the totally integrated power mod- ule cover, it is important to ensure the cover is properly positioned and fully latched. Failure to do so may allow water to get into the totally integrated power module and possibly result in a electrical system failure. • When replacing a blown fuse, it is important to use only a fuse having the correct amperage rating. The use of a fuse with a rating other than indicated may result in a dangerous electrical system over- load. If a properly rated fuse continues to blow, it indicates a problem in the circuit that must be corrected.
558 MAINTAINING YOUR VEHICLE VEHICLE STORAGE If you are storing your vehicle for more than 21 days, we recommend that you take the following steps to mini- mize the drain on your vehicle’s battery: • Disconnect the Ignition-Off Draw (IOD) fuse located in the Integrated Power Module, located in the engine compartment. The IOD cavity includes a snap-in re- tainer that allows the fuse to be disconnected without removing it from the fuse block. • As an alternative to the above steps you may discon- • Any time you store your vehicle or keep it out of service (i.e., vacation) for two weeks or more, run the air conditioning system at idle for about five minutes in the fresh air and high blower setting. This will ensure adequate system lubrication to minimize the possibility of compressor damage when the system is started again.
nect the negative cables from both batteries.
NOTE: • When reinstalling the IOD fuse push firmly until fully seated; the gauges in the instrument cluster will do a full sweep when the ignition switch is turned to the RUN position. This is a normal condition. • When the vehicle is shipped from the factory, the IOD fuse is in the up or extracted position. If the radio, interior lamps, keyless entry or other features do not work with the key OFF, check the position of the fuse (or check to see if the fuse is blown) to ensure that it is fully seated. When the IOD fuse is extracted, the instrument cluster in the odometer window will dis- play ⬙NO FUSE.”
REPLACEMENT BULBS
LIGHT BULBS – Interior Bulb No. Overhead Console Lamps . . . . . . . . . . . . . . . TS 212-2
Dome Lamp . . . . . . . . . . . . . . . . . . . . . . . . . . . 7679
NOTE: For lighted switches, see your authorized dealer for replacement instructions. All of the inside bulbs are brass or glass-wedge base. Aluminum base bulbs are not approved.LIGHT BULBS – Exterior Bulb No. Backup. . . . . . . . . . . . . . . . . . . . . . . . . . . . . . . . 921
Center High Mounted Stop Lamp (CHMSL) . . . . . 921
Fog Lamp . . . . . . . . . . . . . . . . . . . . . . . . . . . . . 9145
Dual Headlamp . . . . . . . . . . . . . . . . . . . . . . . . . H13
Quad Headlamp – Low Beam . . . . . . . . . . . . . . . H11
Quad Headlamp – High Beam . . . . . . . . . . . . . . 9005
Side Marker (Dual Headlamp) . . . . . . . . . . . . . 3157KMAINTAINING YOUR VEHICLE 559
Side Marker (Quad Headlamp). . . . . . . . . . . . 3157NA Rear License Plate Lamp . . . . . . . . . . . . . . . . . . . 194
Rear Cargo Lamp . . . . . . . . . . . . . . . . . . . . . . . . 921
Rear Tail/Turn and Stop. . . . . . . . . . . . . . . . . . 3157K Cab Roof Marker Lamps . . . . . . . . . . . . . . . . . 194NA Rear Lamp Bar ID Marker Lamp. . . . . . . . . . . . . . 194
Side Marker Lamps (Dual Rear Wheels) . . . . . . . . 194BULB REPLACEMENT
Dual or Quad Headlamp/Front Park and Turn Signal — If Equipped
1. Open the hood. 2. Disconnect and isolate the negative battery cable. 3. Remove the four plastic push-in fasteners that secure the upper radiator seal to the grille support and both fender ledges.
560 MAINTAINING YOUR VEHICLE 4. Remove the two plastic push-in rivets that secure the upper radiator seal to the radiator. 5. Remove the upper radiator seal from the vehicle. 6. Remove the two headlamp assembly attachment screws.
7. Reach into the front wheel house ahead of the front wheel, remove the fastener, and lift the cover over the access hole in the front of the wheel house splash shield. Access to the rear of the lamp can be gained through this access hole. 8. Reach through the access hole of the wheel house splash shield and lift the slide lock upward far enough to disengage it from the lock post on the back of the front lamp unit housing.
MAINTAINING YOUR VEHICLE 561
10. Disconnect the wiring harness connectors from the bulb socket. 11. Replace bulb(s) as necessary.CAUTION!
• Do not contaminate the bulb glass by touching it with your fingers or by allowing it to contact other oily surfaces. Shortened bulb life will result. • Always use the correct bulb size and type for replacement. An incorrect bulb size or type may overheat and cause damage to the lamp, the bulb socket, or the lamp wiring.
NOTE: There are access covers over both headlamp bulb access holes in the quad front lamp unit housing (if equipped). These covers MUST be reinstalled after the bulb has been replaced.
9. Remove the headlamp assembly. Grasp the outboard edge of the lamp and pull it straight forward to disen- gage the ball stud from the plastic grommet.
Rear Tail/Stop, Turn Signal and Backup Lamps
1. Remove the two screws that pass through the bed sheetmetal.
562 MAINTAINING YOUR VEHICLE Fog Lamps
1. Reach under and behind the front bumper to access the back of the front fog lamp housing. 2. Disconnect the fog lamp wiring harness connector from the fog lamp bulb. 3. Rotate the bulb counterclockwise 1⁄4 turn to unlock the bulb from the housing. 4. Pull the bulb straight out from the housing.
CAUTION!
Do not contaminate the bulb glass by touching it with your fingers or by allowing it to contact other oily surfaces. Shortened bulb life will result.
2. Pull the outboard side of the lamp rearward far enough to unsnap the two receptacles on the outboard side of the lamp housing from the two plastic snap post retainers in the outer box side panel.
MAINTAINING YOUR VEHICLE 563
3. Disconnect the wiring harness connectors from the bulb socket. 4. Rotate the bulb socket counterclockwise 1/4 turn to unlock it from the housing. 5. Pull the bulb straight out of the socket.CAUTION!
Do not contaminate the bulb glass by touching it with your fingers or by allowing it to contact other oily surfaces. Shortened bulb life will result.
6. Reverse the procedure to install the bulb and housing. 7
564 MAINTAINING YOUR VEHICLE Center High-Mounted Stoplamp (CHMSL) With Cargo Lamp
1. Remove the two screws holding the housing/lens to the body as shown.
3. Turn the desired bulb socket 1⁄4 turn and remove the socket and bulb from housing. 4. Pull the desired bulb straight from the socket.
2. Separate the connector holding the housing and wir- ing harness to the body.
MAINTAINING YOUR VEHICLE 565
• Inside Bulb: Center High-Mounted Stop Lamp 5. Reverse the procedure for installation of bulbs and housing. Cab Top Clearance Lamps — If Equipped
1. Remove the two screws from the top of the lamp.
CAUTION!
Do not contaminate the bulb glass by touching it with your fingers or by allowing it to contact other oily surfaces. Shortened bulb life will result. • Outside Bulbs: Cargo Lamps
566 MAINTAINING YOUR VEHICLE 2. Rotate the socket 1⁄4 turn and pull it from the lamp assembly.
3. Pull the bulb straight from it’s socket and replace.
Rear Lamp Bar ID Marker (Dual Rear Wheels) — If Equipped
1. Loosen the two screws and the housing to gain access to the bulb sockets.
MAINTAINING YOUR VEHICLE 567
2. Turn the socket 1⁄4 turn counterclockwise to access the bulb. 3. Pull the bulb straight out from the socket. 4. Reverse the procedure for installation of the bulbs and housing.568 MAINTAINING YOUR VEHICLE Side Marker Lamps (Dual Rear Wheels) — If Equipped
1. Push rearward on the side marker lamp assembly. 2. Pull the entire assembly from the fender. 3. Turn the socket 1⁄4 turn counterclockwise and remove from assembly to access the bulb. 4. Pull the bulb straight out from socket. 5. Reverse the procedure for installation of the bulbs and housing.
FLUID CAPACITIES
Fuel (Approximate) 1500 Regular Cab Shortbed/Crew Quad Cab Models 1500 Regular Cab Longbed/Crew Quad Cab Models (Optional) 2500/3500 Shortbed Models 2500/3500 Longbed Models Engine Oil with Filter 3.7L Engine (SAE 5W-20, API Certified) 4.7L Engine (SAE 5W-20, API Certified) 5.7L Engine (SAE 5W-20, API Certified) 5.7L Engine (SAE 5W-30, API Certified). For 2500/ 3500 trucks operating under a gross combined weight rating greater than 14,000 lbs (6 350 kg).
U.S.
26 Gallons
32 Gallons
34 Gallons 35 Gallons
5 Quarts 6 Quarts 7 Quarts 7 Quarts
MAINTAINING YOUR VEHICLE 569
Metric
98 Liters
121 Liters
129 Liters 132 Liters
4.7 Liters 5.7 Liters 6.6 Liters 6.6 Liters
570 MAINTAINING YOUR VEHICLE
Cooling System 3.7L Engine (MOPAR威 Antifreeze/Coolant 5
Year/100,000 Mile Formula or equivalent) 4.7L Engine (MOPAR威 Antifreeze/Coolant 5
Year/100,000 Mile Formula or equivalent) 5.7L Engine — 1500 Models (MOPAR威 Antifreeze/ Coolant 5 Year/100,000 Mile Formula or equivalent) 5.7L Engine — 2500/3500 Models (MOPAR威 Antifreeze/Coolant 5 Year/100,000 Mile Formula or equivalent) 5.7L Engine — 2500/3500 Models w/Heavy Duty (MOPAR威 Antifreeze/Coolant 5 Year/100,000 Mile Formula or equivalent)U.S.
14 Quarts
14 Quarts
16 Quarts
Metric
13 Liters
13 Liters
15 Liters
18.7 Quarts
17.7 Liters
19.2 Quarts
18.2 Liters
FLUIDS, LUBRICANTS AND GENUINE PARTS
MAINTAINING YOUR VEHICLE 571
Engine Component Engine Coolant
Engine Oil
Engine Oil – For 2500/3500 trucks operat- ing under a gross combined weight rating greater than 14,000 lbs/(6,350 kg.) Engine Oil Filter Spark Plugs – 3.7L Engine Spark Plugs – 4.7L Engine
Spark Plugs – 5.7L Engine Fuel Selection – 3.7L and 4.7L Engines Fuel Selection – 5.7L Engine
Fluid, Lubricant, or Genuine Part MOPAR威 Antifreeze/Coolant 5 Year/100,000 Mile Formula HOAT (Hybrid Organic Additive Technology) or equivalent. Use API Certified SAE 5W-20 Engine Oil, meeting the requirements of Chrysler Material Standard MS-6395. Refer to your engine oil filler cap for correct SAE grade. Use API Certified SAE 5W-30 Engine Oil, meeting the requirements of Chrysler Material Standard MS-6395. Refer to your engine oil filler cap for correct SAE grade. MOPAR威 Engine Oil Filter or equivalent. ZFR6F-11G (Gap 0.043 in [1.09 mm]) Upper Bank — FR8TE2 (Gap 0.039 in [.99 mm]) Lower Bank — FR8T1332 (Gap 0.051 in [1.30 mm]) LZFR5C–11 (Gap 0.043 in [1.09 mm]) 87 Octane 87 Octane Acceptable - 89 Octane Recommended
572 MAINTAINING YOUR VEHICLE Chassis Component Automatic Transmission
Transfer Case
Transfer Case – NVG 246 Only Front Axle – 1500 Four-Wheel Drive Models Rear Axle – 1500 Models
Front and Rear Axle – 2500/3500
Models Brake Master CylinderPower Steering Reservoir
Fluid, Lubricant, or Genuine Part MOPAR威 ATF+4威 Automatic Transmission Fluid or equivalent licensed ATF+4威 product. MOPAR威 ATF+4威 Automatic Transmission Fluid or equivalent licensed ATF+4威 product. MOPAR威 NVG 246 Automatic Transmission Fluid or equivalent. GL-5 SAE 75W-90 (MS-9763) or equivalent.
MOPAR威 Synthetic Gear Lubricant SAE 75W-140 (MS-8985). Limited-Slip Rear Axles require the addition of 118 ml (4 oz.) MOPAR威 Limited Slip Additive or equivalent. Synthetic, GL-5 SAE, 75W-90 or equivalent. Limited-Slip 10.5/11.5 inch Rear Axles Limited slip additive is not required. MOPAR威 DOT 3 and SAE J1703 or equivalent. If DOT 3 brake fluid is not available, then DOT 4 is acceptable. Use only recommended brake fluids. MOPAR威 Power Steering Fluid +4, MOPAR威 ATF+4威 Automatic Trans- mission Fluid or equivalent licensed ATF+4威 product.
MAINTENANCE SCHEDULES
CONTENTS
䡵 Emissions Control System Maintenance . . . . . . 574
䡵 Maintenance Schedule . . . . . . . . . . . . . . . . . . 574▫ Required Maintenance Intervals . . . . . . . . . . 576
M
574 MAINTENANCE SCHEDULES EMISSIONS CONTROL SYSTEM MAINTENANCE The Scheduled Maintenance services listed in bold type must be done at the times or mileages specified to ensure the continued proper functioning of the emissions control system. These and all other maintenance services in- cluded in this manual, should be done to provide best vehicle performance and reliability. More frequent main- tenance may be needed for vehicles in severe operating conditions, such as dusty areas and very short trip driving. Inspection and service should also be done anytime a malfunction is suspected. NOTE: Maintenance, replacement or repair of the emis- sions control devices and systems on your vehicle may be performed by any automotive repair establishment or individual using any automotive part that has been certified pursuant to U.S. EPA or in the State of Califor- nia, California Air Resources Board regulations.
Information Center
MAINTENANCE SCHEDULE The oil change indicator system will remind you that it is time to take your vehicle in for scheduled maintenance. On Electronic Vehicle (EVIC) equipped vehicles, “Oil Change Required” will be dis- played in the EVIC and a single chime will sound, indicating that an oil change is necessary. On Non-EVIC equipped vehicles, “Change Oil” will flash in the instrument cluster odometer and a single chime will sound, indicating that an oil change is necessary. Based on engine operation conditions the oil change indicator message will illuminate. This means that ser- vice is required for your vehicle. Have your vehicle serviced as soon as possible, within the next 500 miles (805 km).
NOTE: • The oil change indicator message will not monitor the time since the last oil change. Change your vehicle’s oil if it has been six months since your last oil change even if the oil change indicator message is NOT illuminated. • Change your engine oil more often if you drive your • Under no circumstances should oil change intervals exceed 8,000 miles (13 000 km) or six months, which- ever comes first.
vehicle off-road for an extended period of time.
Your authorized dealer will reset the oil change indicator message after completing the scheduled oil change. If a scheduled oil change is performed by someone other than your authorized dealer, the message can be reset by referring to the steps described under “Electronic Vehicle Information Center (EVIC)/Oil Change Required” in
MAINTENANCE SCHEDULES 575
“Understanding Your Instrument Panel” or under “In- strument Cluster Description/Odometer/Trip Odom- eter” in “Understanding Your Instrument Panel” for further information. At Each Stop for Fuel • Check the engine oil level about five minutes after a fully warmed engine is shut off. Checking the oil level while the vehicle is on level ground will improve the accuracy of the oil level reading. Add oil only when the level is at or below the ADD or MIN mark. • Check the windshield washer solvent and add ifrequired.
Once a Month • Check tire pressure and look for unusual wear or
damage.
M
576 MAINTENANCE SCHEDULES
as required.
• Inspect the battery and clean and tighten the terminals • Check the fluid levels of the coolant reservoir, brake master cylinder, and transmission and add as needed. • Check all lights and other electrical items for correct
operation.
At Each Oil Change • Change the engine oil filter. • Inspect the brake hoses and lines.
CAUTION!
Failure to perform the required maintenance items may result in damage to the vehicle.
Required Maintenance Intervals
** Vehicles built with the 4.7L engine are NOTE: equipped with sixteen spark plugs. One set is located on the top of the engine under the coils and the second set is located on the side of the engine. The spark plugs located under the coils are a standard plug and must be changed every 48,000 miles (78 000 km). The spark plugs located on the side of the engine are a premium plug and must be changed every 96,000 miles (156 000 km).
8,000 Miles (13,000 km) or 6 Months Maintenance Service Schedule ❏ Change the engine oil and engine oil
filter.
❏ Rotate the tires, rotate at the first sign of
irregular wear, even if it occurs before 8,000 miles (13 000 km).
❏ Lube the front drive shaft fitting (2500/3500 (4x4) models only).
MAINTENANCE SCHEDULES 577
16,000 Miles (26,000 km) or 12 Months Maintenance Service Schedule ❏ Change the engine oil and engine oil filter. ❏ Rotate the tires, rotate at the first sign of irregular wear, even if it occurs before
16,000 miles (26 000 km).
❏ If using your vehicle for any of the following: Dusty or off-road conditions. Inspect the
engine air cleaner filter; replace if necessary.
❏ Lube the front drive shaft fitting (2500/3500 (4x4) models only). ❏ Inspect the brake linings, replace if necessary. ❏ Inspect the CV joints. Perform the first inspection at 16,000 miles (26 000 km) or
12 months.
❏ Inspect exhaust system. Perform the first inspection at 16,000 miles (26 000 km) or
12 months.
❏ Inspect the front suspension, tie rod ends and boot seals for cracks or leaks and all parts for
damage, wear, improper looseness or end play; replace if necessary.
Odometer Reading
Repair Order #
Date
Dealer Code
Odometer Reading
Repair Order #
Date
Dealer Code
Signature Authorized Chrysler Dealer
Signature Authorized Chrysler Dealer
M
578 MAINTENANCE SCHEDULES
24,000 Miles (39,000 km) or 18 Months Maintenance Service Schedule ❏ Change the engine oil and engine oil
filter.
❏ Rotate the tires, rotate at the first sign of
irregular wear, even if it occurs before 24,000 miles (39 000 km).
❏ Lube the front drive shaft fitting (2500/3500 (4x4) models only).
❏ Inspect the CV joints. ❏ Inspect exhaust system. ❏ Inspect the front and rear axle fluid,
change if using your vehicle for police, taxi, fleet, off-road or frequent trailer towing.
32,000 Miles (52,000 km) or 24 Months Maintenance Service Schedule ❏ Change the engine oil and engine oil filter. ❏ Rotate the tires, rotate at the first sign of irregular wear, even if it occurs before
32,000 miles (52 000 km).
❏ Replace the engine air cleaner filter. ❏ Replace the spark plugs (3.7L and 5.7L Engines). ❏ Lube the front drive shaft fitting (2500/3500 (4x4) models only). ❏ Adjust parking brake on vehicles equipped with four-wheel disc brakes. ❏ Inspect the transfer case fluid. ❏ Inspect the brake linings, replace if necessary. ❏ Inspect the front suspension, tie rod ends and boot seals for cracks or leaks and all parts for
damage, wear, improper looseness or end play; replace if necessary.
Odometer Reading
Repair Order #
Date
Dealer Code
Odometer Reading
Repair Order #
Date
Dealer Code
Signature Authorized Chrysler Dealer
Signature Authorized Chrysler Dealer
40,000 Miles (65,000 km) or 30 Months Maintenance Service Schedule ❏ Change the engine oil and engine oil
filter.
❏ Rotate the tires, rotate at the first sign of
irregular wear, even if it occurs before 40,000 miles (65 000 km).
❏ Lube the front drive shaft fitting (2500/3500 (4x4) models only).
MAINTENANCE SCHEDULES 579
48,000 Miles (78,000 km) or 36 Months Maintenance Service Schedule ❏ Change the engine oil and engine oil filter. ❏ Rotate the tires, rotate at the first sign of irregular wear, even if it occurs before
48,000 miles (78 000 km).
❏ If using your vehicle for any of the following: Dusty or off-road conditions. Inspect the
engine air cleaner filter; replace if necessary.
❏ Replace the top row of spark plugs (4.7L Engine). ** ❏ Lube the front drive shaft fitting (2500/3500 (4x4) models only). ❏ Inspect the brake linings, replace if necessary. ❏ Inspect the CV joints. ❏ Inspect exhaust system. ❏ Inspect the front suspension, tie rod ends and boot seals for cracks or leaks and all parts for
damage, wear, improper looseness or end play; replace if necessary.
❏ Inspect the front and rear axle fluid, change if using your vehicle for police, taxi, fleet,
off-road or frequent trailer towing.
Odometer Reading
Repair Order #
Date
Dealer Code
Odometer Reading
Repair Order #
Date
Dealer Code
Signature Authorized Chrysler Dealer
Signature Authorized Chrysler Dealer
M
580 MAINTENANCE SCHEDULES
56,000 Miles (91,000 km) or 42 Months Maintenance Service Schedule ❏ Change the engine oil and engine oil
filter.
❏ Rotate the tires, rotate at the first sign of
irregular wear, even if it occurs before 56,000 miles (91 000 km).
❏ Lube the front drive shaft fitting (2500/3500 (4x4) models only).
Odometer Reading
Repair Order #
Date
Dealer Code
Signature Authorized Chrysler Dealer
MAINTENANCE SCHEDULES 581
64,000 Miles (104,000 km) or 48 Months Maintenance Service Schedule ❏ Change the engine oil and engine oil filter. ❏ Rotate the tires, rotate at the first sign of irregular wear, even if it occurs before 64,000 miles (104 000 km). ❏ Replace the engine air cleaner filter. ❏ Replace the ignition cables (3.7L Engine). ❏ Replace the spark plugs (3.7L and 5.7L Engines). ❏ Lube the front drive shaft fitting (2500/3500 (4x4) models only). ❏ Inspect the brake linings; replace if necessary. ❏ Adjust parking brake on vehicles equipped with four-wheel disc brakes. ❏ Change the automatic transmission fluid and filter(s) if using your vehicle for any of the following: police, taxi, fleet, or frequent trailer towing. ❏ Change the transfer case fluid if using your vehicle for any of the following: police, taxi, fleet, or frequent trailer towing. ❏ Inspect the front suspension, tie rod ends and boot seals for cracks or leaks and all parts for damage, wear, improper looseness or end play;
replace if necessary.
Odometer Reading
Repair Order #
Date
Dealer Code
Signature Authorized Chrysler Dealer
M
582 MAINTENANCE SCHEDULES
72,000 Miles (117,000 km) or 54 Months Maintenance Service Schedule ❏ Change the engine oil and engine oil
filter.
❏ Rotate the tires, rotate at the first sign of
irregular wear, even if it occurs before 72,000 miles (117 000 km).
❏ Lube the front drive shaft fitting (2500/3500 (4x4) models only).
❏ Inspect the CV joints. ❏ Inspect exhaust system. ❏ Inspect the front and rear axle fluid,
change if using your vehicle for police, taxi, fleet, off-road or frequent trailer towing.
80,000 Miles (130,000 km) or 60 Months Maintenance Service Schedule ❏ Change the engine oil and engine oil filter. ❏ Rotate the tires, rotate at the first sign of irregular wear, even if it occurs before
80,000 miles (130 000 km).
❏ If using your vehicle for any of the following: Dusty or off-road conditions. Inspect the
engine air cleaner filter; replace if necessary.
❏ Lube the front drive shaft fitting (2500/3500 (4x4) models only). ❏ Flush and replace the engine coolant if not done at 104,000 miles (169 000 km). ❏ Inspect the brake linings, replace if necessary. ❏ Inspect the front suspension, tie rod ends and boot seals for cracks or leaks and all parts for
damage, wear, improper looseness or end play; replace if necessary.
Odometer Reading
Repair Order #
Date
Dealer Code
Odometer Reading
Repair Order #
Date
Dealer Code
Signature Authorized Chrysler Dealer
Signature Authorized Chrysler Dealer
88,000 Miles (143,000 km) or 66 Months Maintenance Service Schedule ❏ Change the engine oil and engine oil
filter.
❏ Rotate the tires, rotate at the first sign of
irregular wear, even if it occurs before 88,000 miles (143 000 km).
❏ Lube the front drive shaft fitting (2500/3500 (4x4) models only).
Odometer Reading
Repair Order #
Date
Dealer Code
Signature Authorized Chrysler Dealer
MAINTENANCE SCHEDULES 583
M
584 MAINTENANCE SCHEDULES
96,000 Miles (156,000 km) or 72 Months Maintenance Service Schedule ❏ Change the engine oil and engine oil filter. ❏ Rotate the tires, rotate at the first sign of irregular wear, even if it occurs before 96,000 miles (156 000 km). ❏ Replace the engine air cleaner filter. ❏ Replace the ignition cables (4.7L Engine). ❏ Replace the top row and side row of spark plugs (4.7L Engine). ** ❏ Replace the spark plugs (3.7L and 5.7L Engines). ❏ Inspect and replace PCV valve if necessary. † ❏ Lube the front drive shaft fitting (2500/3500 (4x4) models only). ❏ Adjust parking brake on vehicles equipped with four-wheel disc brakes. ❏ Inspect the transfer case fluid. ❏ Inspect the brake linings, replace if necessary. ❏ Inspect the CV joints. ❏ Inspect exhaust system. ❏ Inspect the front suspension, tie rod ends and boot seals for cracks or leaks and all parts for damage, wear, improper looseness or end play;
replace if necessary.
❏ Inspect the front and rear axle fluid, change if using your vehicle for police, taxi, fleet, off-road or frequent trailer towing.
Odometer Reading
Repair Order #
Date
Dealer Code
Signature Authorized Chrysler Dealer
104,000 Miles (169,000 km) or 78 Months Maintenance Service Schedule ❏ Change the engine oil and engine oil
filter.
❏ Rotate the tires, rotate at the first sign of
irregular wear, even if it occurs before 104,000 miles (169 000 km).
❏ Lube the front drive shaft fitting (2500/3500 (4x4) models only).
❏ Flush and replace the engine coolant if
not done at 60 months.
MAINTENANCE SCHEDULES 585
112,000 Miles (182,000 km) or 84 Months Maintenance Service Schedule ❏ Change the engine oil and engine oil filter. ❏ Rotate the tires, rotate at the first sign of irregular wear, even if it occurs before
112,000 miles (182 000 km).
❏ If using your vehicle for any of the following: Dusty or off-road conditions. Inspect the
engine air cleaner filter; replace if necessary.
❏ Lube the front drive shaft fitting (2500/3500 (4x4) models only). ❏ Inspect the brake linings, replace if necessary. ❏ Inspect the front suspension, tie rod ends and boot seals for cracks or leaks and all parts for
damage, wear, improper looseness or end play; replace if necessary.
Odometer Reading
Repair Order #
Date
Dealer Code
Odometer Reading
Repair Order #
Date
Dealer Code
Signature Authorized Chrysler Dealer
Signature Authorized Chrysler Dealer
M
586 MAINTENANCE SCHEDULES
120,000 Miles (195,000 km) or 90 Months Maintenance Service Schedule ❏ Change the engine oil and engine oil filter. ❏ Rotate the tires, rotate at the first sign of irregular wear, even if it occurs before
120,000 miles (195 000 km).
❏ Lube the front drive shaft fitting (2500/3500 (4x4) models only). ❏ Inspect the CV joints. ❏ Inspect exhaust system. ❏ Inspect the front and rear axle fluid, change if using your vehicle for police, taxi, fleet,
off-road or frequent trailer towing.
❏ Change the automatic transmission fluid and filter(s). ❏ Replace the accessory drive belt(s).
Odometer Reading
Repair Order #
Date
Dealer Code
Signature Authorized Chrysler Dealer
128,000 Miles (208,000 km) or 96 Months Maintenance Service Schedule ❏ Change the engine oil and engine oil filter. ❏ Rotate the tires, rotate at the first sign of irregular wear, even if it occurs before
128,000 miles (208 000 km).
❏ Replace the engine air cleaner filter. ❏ Replace the ignition cables (3.7L Engine). ❏ Replace the spark plugs (3.7L and 5.7L Engines). ❏ Lube the front drive shaft fitting (2500/3500 (4x4) models only). ❏ Adjust parking brake on vehicles equipped with four-wheel disc brakes. ❏ Change the transfer case fluid. ❏ Inspect the brake linings, replace if necessary. ❏ Inspect the front suspension, tie rod ends and boot seals for cracks or leaks and all parts for
damage, wear, improper looseness or end play; replace if necessary.
MAINTENANCE SCHEDULES 587
136,000 Miles (221,000 km) or 102 Months Maintenance Service Schedule ❏ Change the engine oil and engine oil
filter.
❏ Rotate the tires, rotate at the first sign of
irregular wear, even if it occurs before 136,000 miles (221 000 km).
❏ Lube the front drive shaft fitting (2500/3500 (4x4) models only).
Odometer Reading
Repair Order #
Date
Dealer Code
Odometer Reading
Repair Order #
Date
Dealer Code
Signature Authorized Chrysler Dealer
Signature Authorized Chrysler Dealer
M
588 MAINTENANCE SCHEDULES
144,000 Miles (234,000 km) or 108 Months Maintenance Service Schedule ❏ Change the engine oil and engine oil filter. ❏ Rotate the tires, rotate at the first sign of irregular wear, even if it occurs before
144,000 miles (234 000 km).
❏ If using your vehicle for any of the following: Dusty or off-road conditions. Inspect the
engine air cleaner filter; replace if necessary.
❏ Replace the top row of spark plugs (4.7L Engine). ** ❏ Lube the front drive shaft fitting (2500/3500 (4x4) models only). ❏ Inspect the brake linings, replace if necessary. ❏ Inspect the CV joints. ❏ Inspect exhaust system. ❏ Inspect the front suspension, tie rod ends and boot seals for cracks or leaks and all parts for
damage, wear, improper looseness or end play; replace if necessary.
❏ Inspect the front and rear axle fluid, change if using your vehicle for police, taxi, fleet,
off-road or frequent trailer towing.
152,000 Miles (247,000 km) or 114 Months Maintenance Service Schedule ❏ Change the engine oil and engine oil
filter.
❏ Rotate the tires, rotate at the first sign of
irregular wear, even if it occurs before 152,000 miles (247 000 km).
❏ Lube the front drive shaft fitting (2500/3500 (4x4) models only).
Odometer Reading
Repair Order #
Date
Dealer Code
Odometer Reading
Repair Order #
Date
Dealer Code
Signature Authorized Chrysler Dealer
Signature Authorized Chrysler Dealer
† This maintenance is recommended by the manufacturer to the owner, but is not required to maintain emissions warranty.
WARNING!
• You can be badly injured working on or around a motor vehicle. Do only service work for which you have the knowledge and the right equipment. If you have any doubt about your ability to perform a service job, take your vehicle to a competent mechanic. • Failure to properly inspect and maintain your vehicle could result in a component malfunction and effect vehicle handling and performance. This could cause an accident.
MAINTENANCE SCHEDULES 589
IF YOU NEED CONSUMER ASSISTANCE
CONTENTS
䡵 Suggestions For Obtaining Service For Your
Vehicle. . . . . . . . . . . . . . . . . . . . . . . . . . . . . . 593
▫ Prepare For The Appointment . . . . . . . . . . . 593
▫ Prepare A List . . . . . . . . . . . . . . . . . . . . . . 593
▫ Be Reasonable With Requests . . . . . . . . . . . . 593
. . . . . . . . . . . . . . . . . 593
▫ Chrysler Group LLC Customer Center . . . . . 594
▫ Chrysler Canada Inc. Customer Center . . . . . 594
▫ In Mexico Contact . . . . . . . . . . . . . . . . . . . . 594䡵 If You Need Assistance
▫ Customer Assistance For The Hearing Or
▫ Service Contract
Speech Impaired (TDD/TTY) . . . . . . . . . . . . 595
. . . . . . . . . . . . . . . . . . . . . 595
䡵 Warranty Information . . . . . . . . . . . . . . . . . . 596
䡵 MOPAR威 Parts . . . . . . . . . . . . . . . . . . . . . . . 596
䡵 Reporting Safety Defects . . . . . . . . . . . . . . . . 596▫ In The 50 United States And Washington,
D.C. . . . . . . . . . . . . . . . . . . . . . . . . . . . . . . 596
▫ In Canada . . . . . . . . . . . . . . . . . . . . . . . . . 597592 IF YOU NEED CONSUMER ASSISTANCE 䡵 Publication Order Forms 䡵 Department Of Transportation Uniform Tire
. . . . . . . . . . . . . . . . 597
Quality Grades . . . . . . . . . . . . . . . . . . . . . . . . 598
▫ Treadwear . . . . . . . . . . . . . . . . . . . . . . . . . 599▫ Traction Grades . . . . . . . . . . . . . . . . . . . . . 599
▫ Temperature Grades . . . . . . . . . . . . . . . . . . 599SUGGESTIONS FOR OBTAINING SERVICE FOR YOUR VEHICLE
Prepare For The Appointment If you’re having warranty work done, be sure to have the right papers with you. Take your warranty folder. All work to be performed may not be covered by the warranty. Discuss additional charges with the service manager. Keep a maintenance log of your vehicle’s service history. This can often provide a clue to the current problem. Prepare A List Make a written list of your vehicle’s problems or the specific work you want done. If you’ve had an accident or work done that is not on your maintenance log, let the service advisor know. Be Reasonable With Requests If you list a number of items and you must have your vehicle by the end of the day, discuss the situation with
IF YOU NEED CONSUMER ASSISTANCE 593
the service advisor and list the items in order of priority. At many authorized dealers, you may obtain a rental vehicle at a minimal daily charge. If you need a rental, it is advisable to make these arrangements when you call for an appointment.IF YOU NEED ASSISTANCE The manufacturer and its authorized dealers are vitally interested in your satisfaction. We want you to be happy with our products and services. Warranty service must be done by an authorized dealer. We strongly recommend that you take the vehicle to an authorized dealer. They know your vehicle the best, and are most concerned that you get prompt and high quality service. The manufacturer’s authorized dealers have the facilities, factory-trained technicians, special tools, and the latest information to ensure the vehicle is fixed correctly and in a timely manner.
594 IF YOU NEED CONSUMER ASSISTANCE This is why you should always talk to an authorized dealer’s service manager first. Most matters can be re- solved with this process. • If for some reason you are still not satisfied, talk to the general manager or owner of the authorized dealer- ship. They want to know if you need assistance. • If an authorized dealership is unable to resolve the concern, you may contact the manufacturer’s customer center.
Any communication to the manufacturer’s customer cen- ter should include the following information: • Owner’s name and address • Owner’s telephone number (home and office) • Authorized dealership name • Vehicle Identification Number (VIN)
• Vehicle delivery date and mileage Chrysler Group LLC Customer Center P.O. Box 21–8004
Auburn Hills, MI 48321–8004
Phone: (866) 726–4636
Chrysler Canada Inc. Customer Center P.O. Box 1621
Windsor, Ontario N9A 4H6
Phone: (800) 465–2001
In Mexico contact: Av. Prolongacion Paseo de la Reforma, 1240
Sante Fe C.P. 05109
Mexico, D. F. In Mexico City: 5081-7568
Outside Mexico City: 1-800-505-1300Customer Assistance For The Hearing Or Speech Impaired (TDD/TTY) To assist customers who have hearing difficulties, the manufacturer has installed special TDD (Telecommuni- cation Devices for the Deaf) equipment at its customer center. Any hearing or speech impaired customer, who has access to a TDD or a conventional teletypewriter (TTY) in the United States, can communicate with the manufacturer by dialing 1–800–380–CHRY. Canadian residents with hearing difficulties that require assistance can use the special needs relay service offered by Bell Canada. For TTY teletypewriter users, dial 711
and for Voice callers, dial 1 800 855-0511 to connect with a Bell Relay Service operator. Service Contract You may have purchased a service contract for a vehicle to help protect you from the high cost of unexpected repairs after the manufacturer’s New Vehicle Limited Warranty expires. The manufacturer stands behind onlyIF YOU NEED CONSUMER ASSISTANCE 595
the manufacturer’s service contracts. If you purchased a manufacturer’s service contract, you will receive Plan Provisions and an Owner Identification Card in the mail within three weeks of the vehicle delivery date. If you have any questions about the service contract, call the manufacturer’s Service Contract National Customer Hot- line at 1-800-521-9922 (Canadian residents, call 1-800-485- 2001). The manufacturer will not stand behind any service contract that is not the manufacturer’s service contract. It is not responsible for any service contract other than the manufacturer’s service contract. If you purchased a ser- vice contract that is not a manufacturer’s service contract, and you require service after the manufacturer’s New Vehicle Limited Warranty expires, please refer to the contract documents, and contact the person listed in those documents.596 IF YOU NEED CONSUMER ASSISTANCE We appreciate that you have made a major investment when you purchased the vehicle. An authorized dealer has also made a major investment in facilities, tools, and training to assure that you are absolutely delighted with the ownership experience. You’ll be pleased with their sincere efforts to resolve any warranty issues or related concerns.
WARNING!
Engine exhaust, some of its constituents, and certain vehicle components contain, or emit, chemicals known to the State of California to cause cancer and birth defects, or other reproductive harm. In addi- tion, certain fluids contained in vehicles and certain products of component wear contain, or emit, chemi- cals known to the State of California to cause cancer and birth defects, or other reproductive harm.
WARRANTY INFORMATION See the Warranty Information Booklet, located on the DVD, for the terms and provisions of Chrysler Group LLC warranties applicable to this vehicle and market.
MOPAR姞 PARTS MOPAR威 fluids, lubricants, parts, and accessories are available from an authorized dealer. They are recom- mended for your vehicle in order to help keep the vehicle operating at its best.
REPORTING SAFETY DEFECTS