- Download PDF Manual
-
deflated (flat) tire. A flat tire greatly impairs steering and braking response, and can lead to complete loss of control over the vehicle. Avoid overloading the vehicle so that the permitted load on the tires is not exceeded. Overloading causes over- heating and damage inside the tires. The ultimate result can assume the form of a sudden air loss. Unusual vibrations encountered during normal vehicle operation can indicate a flat tire or some other vehicle malfunc- tion. The type of problem can be caused by contact with curbs, etc. This is also true for irregularities in the vehicle's handling characteristics, such as a pronounced tendency to pull to the left or right. Should this occur, respond by immediately reducing your speed.
Tire replacement
111n
To maintain good handling and vehicle response, use only tires of a single tread configuration from a single manufac- turer. BMW tests and approves wheel and tire combinations, refer to page 116.
DOT Quality Grades Tread wear Traction AA A B C Temperature A B C
All passenger vehicle tires must conform to Federal Safety
Requirements in addition to these grades.<
Tread wear The tread wear grade is a comparative rating based on the wear rate of the tire when tested under controlled condi- tions on a specified government test course. For example, a tire graded 150 would wear one and one-half (1g) times as well on the government course as a tire graded 100. The relative performance of tires depends upon the actual condi- tions of their use, however, and may depart significantly from the norm due to variations in driving habits, service practices and differences in road char- acteristics and climate.
112nTire replacement
Traction The traction grades, from highest to lowest, are AA, A, B and C. Those grades represent the tire's ability to stop on wet pavement as measured under controlled conditions on speci- fied government test surfaces of asphalt and concrete. A tire marked C may have poor traction performance.
The traction grade assigned to this tire is based on straight-
ahead braking traction tests, and does not include acceleration, cornering, hydroplaning, or peak traction charac- teristics.<
Uniform Tire Quality Grading Quality grades can be found where applicable on the tire sidewall between tread shoulder and maximum section width. For example: Tread wear 200 Traction AA Temperature A
Do not use retreaded tires as this could negatively affect driving
safety. This is due to the possible varia- tions in casing structures and, in some cases, to their extreme age, factors which can lead to a decrease in their durability.<
Temperature The temperature grades are A (the highest), B and C, representing the tire's resistance to the generation of heat and its ability to dissipate heat when tested under controlled condi- tions on a specified indoor laboratory test wheel. Sustained high temperature can cause the material of the tire to degenerate and reduce tire life, and excessive temperature can lead to sudden tire failure. The grade C corresponds to a level of performance which all passenger vehicle tires must meet under the Federal Motor Vehicle Safety Standard No. 109. Grades B and A represent higher levels of performance on the laboratory test wheel than the minimum required by law.
The temperature grade for this tire is established for a tire that is
properly inflated and not overloaded. Excessive speed, under-inflation, or excessive loading, either separately or in combination, can cause heat buildup and possible tire failure.<
Tire replacement
Tire rotation
113n
Tire age The date on which the tire was manu- factured is indicated by the code on the sidewall: DOT ... 2501 indicates that the tire was manufactured in week 25 of 2001. BMW recommends the replacement of all tires when the tires are no more than 6 years old, even if a tire usage of 10 years is possible. Spare tires over 6 years old should be used only in case of emergency. A tire of this age should be replaced by a new tire immediately, and should not be fitted together with new tires.
Between the axles Tread wear at the front and rear axle is different and will vary according to indi- vidual driving conditions. In the interest of safety and optimal vehicle response, we advise against rotating tires from front to rear and vice versa. If rotating the tires between the axles is under consideration for economic reasons, the costs for remounting the wheels must be calculated against any savings which might result from the anticipated extension in tire life. Rota- tion should always be carried out at short intervals, with a maximum of 3,000 miles (5,000 km). Consult your BMW center for more information.
Should you decide to rotate the tires, it is essential to comply with the following: Rotate wheels on the same side of the vehicle only, otherwise braking effi- ciency and road grip could be adversely affected. Following rotation, correct the tire infla- tion pressure.
If tires with different sizes are mounted on the front and rear
axles (refer to the information beginning on page 116), the wheels may not be rotated from one axle to the other.<
114nWheel and tire combinations
The right choice
Use only wheels and tires approved by BMW for the corre- sponding vehicle model, as otherwise the tires may make contact with the body as the result of tolerances despite the same nominal size being used, resulting in serious accidents. If non- approved wheels and tires are used, BMW cannot evaluate their suitability, and therefore cannot be held liable for driving safety.< For wheel and tire specifications approved by BMW, refer to the informa- tion beginning on page 116.
The correct wheel and tire combi- nation affects different systems such as ABS and ASC+T/DSC*. The function of these systems is impaired if improper wheel and tire combinations are used. For this reason, use only tires of the same manufacture and tread configura- tion. In the event of a flat tire, for example, remount the approved wheel and tire combination as soon as possible.<
205/60 R 15 91 H
Codes on tires and wheels The code on the tires has the following meaning. Codes on radial tires: Example: Nominal width in mm Aspect ratio in % Belt rating ID code for radial tires Wheel diameter in inches Load rating (not on ZR tires) Speed rating (before R on ZR tires)
The speed rating indicates the approved maximum speed for the tire. Summer tires: S = up to 112 mph (180 km/h) = up to 118 mph (190 km/h) H = up to 130 mph (210 km/h) V = up to 149 mph (240 km/h) W = up to 167 mph (270 km/h) Y = up to 186 mph (300 km/h) ZR = over 149 mph (240 km/h)
All season and winter tires: Q M+S = up to 100 mph (160 km/h) T M+S = up to 118 mph (190 km/h) H M+S = up to 130 mph (210 km/h) Codes on light-alloy wheels: Example: Rim width in inches Code letter for flange type Symbol for full-drop center rim Rim diameter in inches Hump on the 2 rim shoulders
x 15 H 2
Protect valve inserts against dirt by using screw-on valve caps. Dirt in the valve inserts frequently causes a slow loss in tire pressure.
Storage Store tires in a cool, dry place, protecting them against light whenever possible. Protect the tires against contact with oil, grease and fuel.
Special features of winter tires
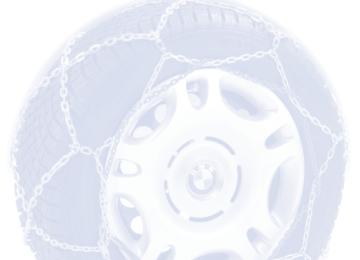
Snow chains*
115n
Tire condition, tire pressure Once the tire wears to below 0.16 in (4 mm), winter tires display a percep- tible decrease in their ability to cope with winter driving conditions, and should be replaced in the interest of safety. Comply with the specified tire inflation pressures – and be sure to have the wheel and tire assemblies balanced every time you change the tires.
BMW narrow-link snow chains are intended for mounting in pairs at the rear wheels only. Comply with all manu- facturer's safety precautions when mounting the chains. Do not exceed a speed of 30 mph (50 km/h) while driving with mounted snow chains.
Choosing the right tire BMW recommends winter tires (M+S radial tires) for operation under inclement winter driving conditions. While so-called all season tires (M+S designation) provide better winter trac- tion than summer tires with the load ratings H, V, W, Y and ZR, they gener- ally do not achieve the performance of winter tires. In the interests of sure tracking and safe steering response, mount winter tires which are made by the same manufac- turer and which have the same tread configuration at all four wheels.
Comply with recommended speed
Never exceed the maximum speed for which the winter tires
are rated. Unprofessional attempts by laymen to service tires can lead to damage and accidents. Have this work performed by skilled professionals only. Any BMW center has the required technical knowledge and the proper equipment and will be happy to assist you.<
116nApproved wheel and tire specifications
BMW tests certain tire brands for each tire size, classifies them as road-safe and approves them. Consult your BMW center for more information. Observe any regulations applicable in the country of use, e.g. requiring entry in the vehicle documents.
Tire specifications
Z3 roadster 2.5i Summer 225/50 R 16 92 V 225/50 ZR 16
Front: 225/45 ZR 17
Rear: 245/40 ZR 17
Winter (M+S) 205/60 R 15 91 Q/T/H 205/55 R 16 91 Q/T/H 225/50 R 16 92 Q/T/H225/45 R 17 91 Q/T/H
Spare tire T 115/90 R 16 92 M
Suitable for snow chains
Steel wheel
Light-alloy
(rim)
wheel
– –
–
–
– –
6.5Jx15
7Jx16
– –
7Jx16
7.5Jx17
8.5Jx177Jx15
7Jx16
7.5Jx17
8Jx173.00Bx16
–
Use the spare wheel only for short distances (to reach the nearest BMW center, for instance). Due to the altered handling characteristics, do not exceed a maximum speed of 50 mph (80 km/h). Mounting snow chains on the spare tire is not possible. Be sure that all tires are properly inflated, refer to page 27.
The use of rims and lug bolts that do not meet the specifications of the original factory-installed equipment will affect the safe operation of your vehicle and may cause an accident and personal injury. Never mix tires of different design, such as steel-belted radials with bias-belted or bias-ply tires etc. Mixing tire types will adversely affect road-holding and can lead to loss of vehicle control.<
Approved wheel and tire specifications
117n
BMW tests certain tire brands for each tire size, classifies them as road-safe and approves them. Consult your BMW center for more information. Observe any regulations applicable in the country of use, e.g. requiring entry in the vehicle documents.
Z3 roadster 3.0i, Z3 coupe 3.0i Summer 225/50 R 16 92 V 225/50 ZR 16
Front: 225/45 ZR 17
Rear: 245/40 ZR 17
Winter (M+S) 205/55 R 16 91 Q/T/H 225/50 R 16 92 Q/T/H225/45 R 17 91 Q
Spare tire T 115/90 R 16 92 M
– –
–
–
– –
7Jx16
– –
7Jx16
7.5Jx17
8.5Jx177Jx16
7.5Jx17
8Jx173.00Bx16
–
Use the spare tire only for short distances (to reach the nearest BMW center, for instance). Due to the altered handling characteristics, do not exceed a maximum speed of 50 mph (80 km/h). Mounting snow chains on the spare tire is not possible. Be sure that all tires are properly inflated, refer to page 27.
The use of rims and lug bolts that do not meet the specifications of the original factory-installed equipment will affect the safe operation of your vehicle and may cause an accident and personal injury. Never mix tires of different design, such as steel-belted radials with bias-belted or bias-ply tires etc. Mixing tire types will adversely affect road-holding and can lead to loss of vehicle control.<
118n
Hood
Do not work on your vehicle without appropriate skills. Always
switch off the engine and allow it to cool down before working in the engine compartment. Always disconnect the battery before working on any electrical systems or equipment, especially when these are located within the engine compartment. Comply with all appli- cable instructions and warnings. If you are not familiar with all guidelines, have the work performed by your BMW center. Otherwise, safety hazards for vehicle occupants and other road users may occur as a result of improper handling of components and mate- rials.<
To release Pull the lever located under the left- hand side of the instrument panel.
To open Grasp the hood on both sides on the level of the latch (arrow 1); press the latch upward and simultaneously lift the hood with both hands.
Hood
To close Allow the hood to fall from a height of about 12 in (30 cm) so that it audibly engages.
To avoid injuries, be sure that the travel path of the hood is clear when it is closed, as with all closing procedures. If it is determined that the hood is not completely closed while driving, stop immediately and close it securely.<
119n
120nEngine compartment – Z3 roadster 2.5i, 3.0i, Z3 coupe 3.0i
Engine compartment – Z3 roadster 2.5i, 3.0i, Z3 coupe 3.0i
121n
1 Engine oil dipstick 123
2 Brake fluid reservoir,the illustration shows the reservoir for Z3 roadster 3.0i, Z3 coupe 3.0i 126
3 Fuse box 156
4 Coolant expansion tank 125
5 Engine oil filler neck 123
6 Reservoir for windshield and headlamp* washer fluid 1227 Auxiliary terminal for jump-starting –
negative terminal 158
8 Auxiliary terminal for jump-starting –
positive terminal 158
122nFluids for the washer systems
Washer nozzles
Antifreeze agent for the washer systems is flammable. For this
reason, keep it away from sources of flame and store it only in its original container. Store it so that it is inacces- sible to children. Comply with the instructions on the containers.<
Windshield washer system Windshield: The spray from the nozzles should be directed so as to ensure effective cleaning, even at high speeds. If necessary, correct the adjustment with a needle, or have the adjustment made by your BMW center. Rear window – Z3 coupe only: Have this system adjusted by your BMW center as required.
Headlamp washer system* Have this system adjusted by your BMW center as required.
Headlamp* and windshield washer system Capacity: approx. 5.3 US quarts (5.0 liters). Fill with water and – if required – with an antifreeze agent (according to the manufacturer's recommendations).
We recommend that you mix the washer fluid before adding it to
the reservoir.<
Engine oil
123n
To check oil level 1. Park the vehicle on a level surface 2. Switch the engine off after it has
reached normal operating tempera- ture
3. After approx. 5 minutes, pull the dipstick out and wipe it off with a clean lint-free cloth, paper towel, or similar material
4. Push the dipstick carefully all the way
into the guide tube and pull it out again
5. The oil level should be between the
two marks on the dipstick.
As with fuel economy, oil consumption is directly influenced by your driving style and vehicle operating conditions.
The space between the two marks on the dipstick corresponds to approx. 1.1 US quarts (1 liter). Do not fill beyond the upper mark on the dipstick. Excess oil will damage the engine.
To add oil While you should wait until the level has dropped to just above the lower mark before adding oil, you should never allow the oil level to fall below this mark.
BMW engines are designed to operate without oil additives; the use of additives could lead to damage in some cases. This also applies to the manual and automatic transmission, the differential and the power steering system.<
Viscosity – ratings Viscosity is the oilflow rating as estab- lished in SAE classes. The selection of the correct SAE class depends on the climatic conditions in the area where you drive your BMW.
Approved oils are in SAE classes 5W-40 and 5W-30.<
These oils may be utilized in all ambient temperatures.
124nEngine oil
Specified engine oils The quality of the engine oil which is selected has critical significance for the operation and service life of an engine. Based on extensive testing, BMW has approved only certain engine oils. Use only approved "BMW High Perfor- mance Synthetic Oil". If you are unable to obtain "BMW High Performance Synthetic Oil", you can add small amounts of synthetic oil in between oil changes. Only use oils with the API SH specification or higher.
Ask your BMW center for details concerning the specific "BMW High Performance Synthetic Oil" or "synthetic oils" which have been approved.<
You can also call BMW of North America at 1-800-831-1117 or visit this website: www.bmwusa.com to obtain this information.
Engine oil
Coolant
125n
Comply with the applicable envi- ronmental laws regulating the
disposal of used oil.<
Recommendation: have the oil changed by your BMW center only.
Continuous exposure to used oil has caused cancer in laboratory
testing. Any skin areas that come in contact with oil should thus be thor- oughly washed with soap and water. Store oil, grease, etc., out of reach of children. Comply with warning labels and information on containers. If you use SAE 15W-40 engine oil in low temperatures (below +14 7/–10 6), the engine may become difficult to start. Special engine oils individually approved by BMW are preferred for use in your engine. Please contact your BMW center for details.<
Do not add coolant to the cooling system when the engine is hot. If
you do, escaping coolant can cause burns. To avoid the possibility of damage later on, do not use anything other than factory-approved, nitrite and amino- free extended-duty antifreeze with corrosion inhibitor which can be used with aluminum radiator cores. Your BMW center is familiar with the approved specifications. Antifreeze and anti-corrosion agents are hazardous to health. Store them in their original containers. Keep the containers tightly closed and out of reach of children. Extended-duty antifreeze with corro- sion inhibitor contains the flammable substance ethylene glycol. For this reason, do not spill extended-duty anti- freeze with corrosion inhibitor on hot engine components. If you do, it could be ignited and cause burns.<
Comply with the applicable envi- ronmental laws regulating the
disposal of extended-duty antifreeze with corrosion inhibitor.<
Checking coolant level Correct coolant level when the engine is cold (approx. +68 7/+20 6): Unscrew the cap from the expansion tank. The coolant level is correct when the upper end of the red float is at least even with the upper edge of the filler neck (refer to the arrow in the illustra- tion), but no more than 0.8 in (2 cm) above it – that is, up to the second mark on the float (refer also to the schematic diagram next to the filler neck).
126nCoolant
Brake fluid
To add coolant Wait until the engine cools before removing the cap from the expansion tank. The needle of the coolant gauge in the instrument cluster must be located in the blue field; otherwise, there is a danger of scalding. 1. Turn the cap slightly counterclock- wise in order to allow accumulated pressure to escape, then open
2. If the coolant is low, slowly add coolant until the correct level is reached – do not overfill.
The coolant is a mixture of water and extended-duty antifreeze with corrosion inhibitor. Always maintain the prescribed all-season 50:50 mixture ratio for year-round protection against internal corrosion. No other additives are required. Replace the coolant regularly. Refer to the Service and Warranty Information Booklet (US models) or the Warranty and Service Guide Booklet (Canadian models).
Z3 roadster 2.5i
Z3 roadster 3.0i, Z3 coupe 3.0i
If the warning lamp for the brake hydraulic system comes on: The brake fluid level is too low, refer also to the instructions on page 104. For adding brake fluid or for deter- mining and correcting the cause of brake fluid loss, consult your BMW center. Your BMW center is familiar with the specifications for factory- approved brake fluids (DOT 4).
Brake fluid loss may result in extended brake pedal travel. If this occurs, refer to the notes on page 104.
Brake fluid is hygroscopic, that is, it absorbs moisture from the air
over time. In order to ensure the operating safety and reliability of the brake system, have the brake fluid changed every two years by a BMW center, refer also to the Service and Warranty Information Booklet (US models) or the Warranty and Service Guide Booklet (Canadian models).
Brake fluid
Vehicle Identification
127n
Brake fluid is hazardous to health and will damage the vehicle's paint. You should always store it in its original container and in a location which is inaccessible to children. Avoid brake fluid spills. Do not fill brake fluid beyond the "MAX" level in the reservoir. The brake fluid could ignite upon contact with hot engine parts and cause serious burns.<
Comply with the applicable envi- ronmental laws regulating the
disposal of brake fluid.<
The Vehicle Identification Number is located in the engine compartment below the windshield and on the top of the instrument panel.
128n
The BMW Maintenance System
The BMW Maintenance System includes the Engine Oil Service as well as Inspections I and II. Determining the maintenance intervals according to the actual loads on the vehicle covers every kind of operating situation. However, since oil deteriorates over time regardless of use, even those who drive only short distances – signifi- cantly less than 6,200 miles (10,000 km) annually – should have the engine oil changed regularly. Refer to the Service and Warranty Information Booklet (US models) or to the Warranty and Service Guide Booklet (Canadian models).
Service Interval Display Advanced technology is employed to calculate the optimal maintenance intervals, which are then indicated in the Service Interval Display. While conventional systems rely solely on distance traveled to determine when service is due, the BMW Maintenance System considers the actual conditions under which the vehicle operates. From the point of view of maintenance, 62,000 miles (100,000 km) accumulated in short-distance urban driving are not the equivalent of the same distance covered at moderate speeds in long- distance highway travel. In response to this fact, the BMW Maintenance System monitors operating conditions as the basis for determining the optimum service intervals for your indi- vidual vehicle.
The BMW Maintenance System has been designed as a reliable means of providing maximum driving and oper- ating safety – and as cost-effectively as possible for you. Please keep in mind that regular main- tenance is not only necessary for the safety of your vehicle, but also plays a significant role in maintaining the resale value of your vehicle.
The BMW Maintenance System
129n
Service and Warranty Information Booklet (US models)/Warranty and Service Guide Booklet (Canadian models) For detailed information on required maintenance items and the work involved, please refer to the Service and Warranty Information Booklet (US models) or to the Warranty and Service Guide Booklet (Canadian models). Depending upon operating conditions, it may be advisable to have the body checked for damage from rocks or gravel as a precaution against rust.
Have your BMW center perform the maintenance and repair.
Your BMW center is always informed on the latest maintenance work and repair techniques and is equipped with the required special tools. In addition, checking parts known from experience to be subject to wear is a permanent part of the maintenance specifications. Be sure that all maintenance work is confirmed in the Service and Warranty Information Booklet (US models) or the Warranty and Service Guide Booklet (Canadian models). These entries will constitute your proof that the vehicle has received regular maintenance. They are also required for warranty claims.<
Do not make modifications of any kind to the individual components or system wiring. These include the upholstered covers on the steering wheel hub, in the instrument panel and in the side trim panels of the doors. Never apply adhe- sive materials to these components or cover or modify them in any way. Do not attempt to disassemble the steering wheel itself. To ensure compliance with applicable safety regulations, have the airbag generators disposed of by a BMW center only. Unprofessional attempts to service the system could lead to failure in an emer- gency or undesired airbag activation, either of which could result in personal injury.<
130nAirbags
1 Front airbags on the driver and
passenger side
2 Side airbags on the driver and
passenger side
Important safety notices
Do not attempt to remove the gas generators of the airbag restraint
system from the vehicle or to disas- semble them. Have inspection and service proce- dures performed by specially-trained personnel only. If the airbag restraint system malfunc- tions, is deactivated or triggered as a response to an accident, have the system repaired by a BMW center only.
Storing your vehicle
If you intend to store the vehicle for longer than three months, have the maintenance operations described on this page performed.<
Preparation for storage Have the following operations performed by your BMW center: 1. Clean and apply a rust-proofing agent or other treatment to the engine, engine compartment, under- carriage, axles and major compo- nents in accordance with approved repair procedures. Wash the vehicle, clean the interior and treat painted and chromed parts. Clean the rubber seals around the hood, luggage compartment and doors
2. Change the engine oil and oil filter
with the engine at operating temper- ature. As an additional corrosion protection measure, an anticorrosive agent can be added to the engine in accordance with the manufacturer's instructions
3. Check the coolant level and concen-
tration and top up if necessary
4. Check the fluid level of the wind-
shield washer fluid reservoir; top up if necessary
During storage Recharge the battery every six months. If it is not recharged, it will not be serviceable. Every time the battery is discharged, especially over extended periods, its service life is reduced.
131n
Removing the vehicle from storage Recharge the battery if the "Magic Eye" turns black, refer to page 154. Then have Inspection I performed by your BMW center, including a brake fluid replacement if necessary, refer to the Service Manual.
Storing your vehicle
5. Fill the fuel tank completely to
prevent the formation of condensa- tion
6. Increase the tire inflation pressure to
51 psi (350 kPa).
Before parking the vehicle for storage 1. Dry the parking brake and footbrake by brake applications to prevent the brake rotors and drums from corroding
2. Park the vehicle in a covered, dry,
and well-ventilated room. Place the transmission in 1st gear or set the selector lever to the "P" position. Chock the wheels to prevent the vehicle from rolling if necessary. Do not set the parking brake
3. Remove the battery, charge it
completely and store it in a cool (but frost-free) room
Z3 roadster: 4. Remove the hardtop* and store it
separately, refer to page 109
5. Close the convertible top.
132n
Technical modifications
California Proposition 65 Warning
Any BMW center will be happy to advise you concerning the advisability, legal implications and factory recom- mendations for technical modifications to the vehicle. For this purpose, the BMW center will require the Vehicle Identification Number. The engine number is also required in some instances.
California laws require us to state the following warning:
Engine exhaust, some of its constituents, and certain vehicle components contain or emit chemicals known to the State of California to cause cancer and birth defects or other reproductive harm.<
Light-emitting diodes (LEDs) Light-emitting diodes installed behind translucent lenses serve as the light source for many of the controls and displays in your vehicle. These LEDs are similar to conventional laser tech- nology.
Do not remove the protective lens and avoid staring directly at the unfiltered beam for extended periods (several hours), since inflammation of the iris could result.<
133n
When the filler cap is not properly tightened, the OBD system can
detect the vapor leak and the indicator will light up. If the filler cap is subse- quently tightened, the indicator should go out within a few days.<
OBD interface socket
Access to the interface socket for the Onboard Diagnostic system (OBD): Lift off the side cover in the center console on the passenger's side (arrow). The purpose of the OBD system is to ensure proper operation of the emis- sion control system throughout the vehicle's lifetime by monitoring emis- sion-related components and systems for deterioration and malfunction.
An illuminated indicator informs you of the need for service, but not of the need to stop the vehicle. However, the systems should be checked by your BMW center at the earliest possible opportunity. Under certain conditions, the indicator will blink or flash. This indicates a rather severe level of engine misfire. When this occurs, you should reduce speed and consult the nearest BMW center as soon as possible. Severe engine misfire over only a short period of time can seriously damage emission control components, especially the catalytic converter.
"Service Engine Soon" warning lamp for Canadian models.
134n
Replacement procedures: Onboard tool kit 136
Windshield wiper blades 136
Lamps and bulbs 137
Master key with batterylamp 143
Remote control 144
Wheel change 146
Battery 153
Fuses 156In case of electrical malfunction: Power convertible top 157
Fuel filler door 157Assistance, giving and receiving: Jump-starting 158
Towing the vehicle 159135n
Overview
Controls and features
Operation, maintenance
Owner service procedures
Advanced technology
Technical data
Index
Repairs
136n
Onboard tool kit
Windshield wiper blades
The onboard tool kit is located in the luggage compartment, under the floor mat. Z3 coupe: Grasp the floor mat by the straps on the left and right. Pull it upward and remove it. Z3 roadster: Lift the floor mat from the rear by the strap and fold it forward.
Front 1. Position the wipers vertically. To do this, switch on the wipers and switch off the ignition when the wipers are approximately vertical
2. Raise the wiper arm completely 3. Press the spring retainer (arrow) and extract the blade, pulling toward the wiper arm
4. Insert a new wiper blade and apply
pressure until you hear it engage.
Rear window wiper – Z3 coupe Follow the same procedure as described for changing the front wiper blades, except that the wiper does not have to be positioned vertically.
Fold the wipers back onto the window before you turn the igni-
tion key to position 1 or 2.<
Use only wiper blades which have been approved by BMW.<
Lamps and bulbs
The lamps and bulbs make essential contributions to the safety of your vehicle. Therefore, comply fully with the following instructions during bulb replacement. If you are not familiar with any of the procedures, consult your BMW center.
Do not touch the glass portion of a new bulb with your bare hands since even small amounts of impurities burn in to the surface and reduce the service life of the bulb. Use a clean cloth, paper napkin, or a similar mate- rial, or hold the bulb by its metallic base.<
A replacement bulb set is available from your BMW center.
Before working on the electrical system, switch off the electrical
accessory you are working on or disconnect the cable from the negative terminal of the battery. Failure to observe this precaution could result in short circuits. To prevent injuries and damage, comply with any instructions provided by the bulb manufacturer.<
The illustration depicts the right side of the engine compartment.
1 High beams HB3 bulb, 65 watts
2 Low beams HB4 bulb, 55 watts
The bulb is pressurized. There- fore, wear safety glasses and protective gloves. Failure to comply with these precautions could result in physical injury if the bulb breaks.<
137n
1. Turn the bulb holder with the bulb to
the left and remove toward the rear
2. Pull off the plug 3. Push the new bulb holder with the bulb into the plug – ensure proper locking
4. Reinstall in reverse order.
When cleaning the headlamps, please observe the following:
> Do not wipe dry (this causes
scratches) and never use abrasives or strong solvents to clean the covers > Remove dirt and contamination (such as insects) by soaking with BMW Car Shampoo and then rinsing with plenty of water
> Always use a deicer spray to remove
accumulated ice and snow – never use a scraper.<
138nLamps and bulbs
Position lamps 5 watt bulb 1. Using your fingertip, press forward
on the rear edge of the lamp (arrow) and remove
2. Turn the bulb holder with the bulb to the right and remove it from the lamp
3. Pull the bulb out of the socket and
Front turn signals 21 watt bulb 1. Turn the bulb holder with the bulb to
the left and remove toward the rear
2. Applying light pressure, turn the bulb to the left. Remove and exchange the bulb
3. Insert the bulb holder and turn to the
Side turn signals 5 watt bulb 1. Use finger pressure against the front
edge of the lamp (arrow) to press it toward the rear for removal
2. Turn the bulb holder with the bulb to the right and remove it from the lamp
3. Pull the bulb out of the socket and
replace
4. Install in the reverse order.
right as far as possible.
replace
4. Install in the reverse order.
Lamps and bulbs
139n
Z3 roadster
Z3 roadster
Front fog lamps* H1 bulb, 55 watts 1. Unclip the plastic cover (on the
inside of the lamp) with a screwdriver 2. Loosen two screws, tilt the fog lamp
outward and remove it
3. Release the plastic cap on the back
of the fog lamp and remove it
4. Remove the plug