- Download PDF Manual
-
The system automatically switches down from level 3 to level 2 after approximately eight minutes.
The system automatically switches down from level 2 to level 1 after approximately ten minutes.
The system automatically switches off approximately 20 minutes after it is set to level 1.
X Make sure that the SmartKey is in position
1 or 2 in the ignition lock.
X Make sure that the SmartKey is in position
2 in the ignition lock.
X To switch on: press button : repeatedly
until the desired ventilation level is set.
i You can open the side windows and the
sliding sunroof using the "Convenience opening" feature (Y page 96). The seat ventilation of the driver's seat automatically switches to the highest level.
X To switch on: press button : repeatedly
X To switch off: press button : repeatedly
until the desired heating level is set.
until all the indicator lamps go out.
X To switch off: press button : repeatedly
until all the indicator lamps go out.
114 Steering wheel
Problems with the seat ventilation
i Other topics:
The seat ventilation has switched off prematurely. The vehicle's electrical system voltage is too low because too many electrical consumers are switched on.
REASY-ENTRY/EXIT feature
(Y page 115)
Rstoring settings (Y page 118)
Roperating the on-board computer
X Switch off electrical consumers which you
(Y page 375)
do not need, such as the rear window defroster or interior lighting.
Steering wheel
Important safety notes
G WARNING Do not adjust the steering wheel while driving. Adjusting the steering wheel while driving could cause the driver to lose control of the vehicle.
The electrical steering wheel adjustment feature can be operated at any time. Therefore, do not leave children unattended in the vehicle, or with access to an unlocked vehicle. A child's unsupervised access to a vehicle could result in an accident and/or serious personal injury.
Adjusting the steering wheel
Steering wheel heating
Switching on/off
The steering-wheel heating heats the leather areas of the steering wheel.
X Make sure that the SmartKey is in position
2 in the ignition lock.
X To switch on/off: turn the lever in the
direction of arrow : or ;. Indicator lamp = lights up or goes out.
Vehicles without KEYLESS-GO: when you remove the SmartKey from the ignition lock, the steering wheel heating is deactivated.
Vehicles with KEYLESS-GO: when you switch off the ignition and open the driver's door, the steering wheel heating is deactivated.
i The steering wheel heating is deactivated
when the temperature in the vehicle interior is higher than 86 ‡ (30 †).
: To adjust the steering wheel position
i The steering wheel heating is switched off
(fore-and-aft adjustment)
; To adjust the steering wheel height
automatically after about 24 minutes.
Steering wheel
115
EASY-ENTRY/EXIT feature
Position of the steering wheel and the
driver's seat when the EASY-ENTRY/
Important safety notes
EXIT feature is active
The EASY-ENTRY/EXIT feature makes getting in and out of your vehicle easier.
The steering wheel tilts upwards and the driver's seat moves backwards if you:
You can activate and deactivate the EASY- ENTRY/EXIT feature using COMAND (Y page 266).
G WARNING You must make sure no one can become trapped or injured by the moving steering wheel and driver's seat when the EASY- ENTRY/EXIT feature is activated.
To stop steering wheel and seat movement, do one of the following:
Rremove the SmartKey from the ignition lock
Ropen the driver's door when the SmartKey is in the ignition lock or KEYLESS-GO is in position 1
i The steering wheel only moves upwards if
it has not already reached the upper end stop. The driver's seat only moves backwards if it is not already in the rearmost position.
Rmove the seat adjustment switch.
Position of the steering wheel and the
Rmove the steering column adjustment
driver's seat for driving
switch.
Rpress one of the memory function position
buttons or memory button M.
Do not leave children unattended in the vehicle, or with access to an unlocked vehicle. Children could open the driver's door and unintentionally activate the EASY-ENTRY/ EXIT feature. This could result in an accident and/or serious personal injury.
G WARNING Let the system complete the adjustment procedure before setting the vehicle in motion. All steering wheel adjustment must be completed before setting the vehicle in motion. Driving off with the steering wheel still adjusting could cause the driver to lose control of the vehicle.
! Do not activate the EASY-ENTRY/EXIT
feature, if the seat backrest is reclined too far backwards. This can damage the front or rear seats. You must first move the backrest to a vertical position.
If you insert the SmartKey into the ignition lock with the driver's door closed, depending on the setting, the position of the steering wheel and the driver's seat will be changed to the previously set position.
The last position of the steering wheel or seat is stored if:
Rthe ignition is switched off or
Rthe setting is stored with the memory
function.
Crash-responsive EASY-EXIT feature
If the crash-responsive EASY-EXIT feature is triggered in an accident, the steering column will move upwards when the driver's door is opened. This occurs irrespective of the position of the SmartKey in the ignition lock. This makes it easier to exit the vehicle and rescue the occupants.
The crash-responsive EASY-EXIT feature is only operational if the EASY-EXIT/ENTRY feature is activated in the on-board computer.
116 Mirrors
Mirrors
Exterior mirrors
Folding the exterior mirrors in or out
electrically
Adjusting the exterior mirrors
G WARNING Exercise care when using the passenger-side exterior rear view mirror. The mirror surface is convex (outwardly curved surface for a wider field of view). Objects in mirror are closer than they appear. Check your interior rear view mirror and glance over your shoulder before changing lanes.
The exterior mirrors are automatically heated if the rear window defroster is switched on and the outside temperature is low.
X Make sure that the SmartKey is in position
1 or 2 in the ignition lock.
X Press button ; for the right-hand exterior
mirror or button = for the left-hand exterior mirror. The indicator lamp lights up in the button that has been pressed.
X Press adjustment button : up, down, to
the left or right until you have adjusted the exterior mirror to the correct position. You should have a good overview of traffic conditions.
X Make sure that the SmartKey is in position
1 or 2 in the ignition lock.
X Briefly press button :.
Both exterior mirrors fold in or out.
i Make sure that the exterior mirrors are always folded out fully while driving. They could otherwise vibrate.
Folding the exterior mirrors in or out
automatically
When the "Automatic mirror folding" function is activated in COMAND (Y page 266):
Rthe exterior mirrors fold in automatically as
soon as you lock the vehicle from the outside.
Rthe exterior mirrors fold out again
automatically as soon as you unlock the vehicle and then open the driver's or front- passenger door.
i If the exterior mirrors have been folded in
manually, they do not fold out.
Exterior mirror out of position
If an exterior mirror has been pushed out of position, proceed as follows:
X Press the mirror-folding button
(Y page 116) repeatedly until you hear the mirror engage in position. The mirror housing is engaged again and you can adjust the exterior mirrors as usual (Y page 116).
Automatic anti-glare mirrors
G WARNING If incident light from headlamps is prevented from striking the sensor in the rear-view mirror, for instance, by luggage piled too high in the vehicle, the mirror's automatic anti- glare function will not operate.
Incident light could then blind you. This may distract you from the traffic conditions and, as a result, you may cause an accident.
The rear-view mirror and the exterior mirror on the driver's side automatically go into anti- glare mode if the ignition is switched on and incident light from headlamps strikes the sensor in the rear-view mirror.
The mirrors do not go into anti-glare mode if reverse gear is engaged or the interior lighting is switched on.
Parking position for the exterior
mirror on the front-passenger side
Setting and storing the parking position
You can position the front-passenger side exterior mirror in such a way that you can see the rear wheel on that side as soon as you engage reverse gear. You can store this position.
Mirrors
117
X Make sure that the vehicle is stationary and
that the SmartKey is in position 2 in the ignition lock.
X Press button = for the exterior mirror on
the front-passenger side.
X Engage reverse gear.
The exterior mirror on the front-passenger side moves to the preset parking position.
X Use adjustment button ; to adjust the exterior mirror. You should see the rear wheel and the curb in the exterior mirror. The parking position is stored.
i If you shift the transmission to another position, the exterior mirror on the front- passenger side returns to the driving position.
i You can also store the parking position
using memory button M :.
X Make sure that the SmartKey is in
position 2 in the ignition lock.
X With the exterior mirror on the front-
passenger side activated, use adjustment button ; to adjust the exterior mirror. You should see the rear wheel and the curb in the exterior mirror on the front-passenger side.
X Press memory button M : and one of
the arrows on adjustment button ; within three seconds. The parking position is stored if the exterior mirror does not move.
If the mirror moves out of position, repeat the steps.
118 Memory function
Calling up a stored parking position
Rdriver's side: steering wheel position
Rdriver's side: position of the exterior
mirrors on the driver's and front-passenger sides
X Adjust the seat (Y page 108).
X On the driver's side, adjust the steering
wheel (Y page 114) and the exterior mirrors (Y page 116).
X Briefly press the M memory button and
then press storage position button 1, 2 or 3 within three seconds until you hear an acknowledgment tone. The settings are stored in the selected storage position.
Calling up a stored setting
X Press and hold the relevant storage
position button 1, 2 or 3 until the seat, steering wheel and exterior mirrors are in the stored position.
i If you release the storage position button, the seat, steering wheel and mirror setting functions stop immediately. The multicontour seat setting or lumbar support adjustment is still carried out.
setting
X Turn the SmartKey to position 2 in the
ignition lock.
X Adjust the exterior mirror on the front- passenger side with the corresponding button (Y page 116).
X Engage reverse gear.
The exterior mirror on the front-passenger side moves to the stored parking position.
The exterior mirror on the front-passenger side moves back to its original position:
Ras soon as you exceed a speed of 9 mph
(15 km/h)
Rabout ten seconds after you have
disengaged reverse gear
Rif you press button ? for the exterior
mirror on the driver's side
Memory function
Storing settings
G WARNING Do not activate the memory function while driving. Activating the memory function while driving could cause the driver to lose control of the vehicle.
With the memory function, you can store up to three different settings, e.g. for three different people.
The following settings are stored as a single memory preset:
Rseat, backrest, head restraint position and
contour of the backrest in the lumbar region
Ractive multicontour seat: activated/
deactivated
Rmulticontour seat: the side bolsters of the
seat cushion and the backrest as well as the contour of the backrest in the lumbar and shoulder regions
Useful information ............................ 120
Introduction ...................................... 120
At a glance ......................................... 122
System settings ................................ 147
Navigation ......................................... 154
Telephone .......................................... 197
Audio .................................................. 215
Video .................................................. 244
Rear Seat Entertainment System .... 251
Vehicle ............................................... 265
119
120
Introduction
Useful information
i This Operator's Manual describes all models and all standard and optional equipment of your vehicle available at the time of publication of the Operator's Manual. Country-specific differences are possible. Please note that your vehicle may not be equipped with all features described. This also applies to safety- related systems and functions.
i Please read the information on qualified
specialist workshops (Y page 31).
Introduction
Operating safety
Important safety notes
G WARNING Vehicles with HYBRID: ensure that you read the "HYBRID" supplement. You may otherwise fail to recognize dangers.
G WARNING Making alterations to electronic components can cause malfunctions.
Radio, satellite radio, amplifier, DVD changer, navigation module, phone and voice control are networked. If one component is not functional or if it has been incorrectly removed/replaced, this could impair the operation of other components.
This could seriously jeopardize the operational safety of your vehicle.
We recommend that you always have maintenance work on electronic components carried out at an authorized Mercedes-Benz Center.
G WARNING In order to avoid distraction which could lead to an accident, the driver should enter system settings while the vehicle is at a standstill, and
operate the system only when permitted by road, weather and traffic conditions.
Bear in mind that at a speed of just 30mph (approximately 50km/h), your car covers a distance of 44feet (approximately 14m) every second.
COMAND supplies you with information to help you select your route more easily and guide you conveniently and safely to your destination. For safety reasons, we encourage the driver to stop the vehicle in a safe place before answering or placing a call, or consulting the COMAND screen to read navigational maps, instructions, or downloaded information.
G WARNING While the navigation system provides directional assistance, the driver must remain focused on safe driving behavior, especially attention to traffic and street signs, and should utilize the system's audio cues while driving.
The navigation system does not supply any information on stop signs, yield signs, traffic regulations or traffic safety rules. Their observance always remains in the driver's personal responsibility. DVD maps do not cover all areas nor all routes within an area.
G WARNING This equipment complies with FCC radiation exposure limits set forth for uncontrolled equipment and meets the FCC radio frequency (RF) Exposure Guidelines in Supplement C to OET65.
This equipment has very low levels of RF energy that is deemed to comply without maximum permissive exposure evaluation (MPE). But it is desirable that it should be installed and operated with at least 8 inches (20 cm) and more between the radiator and a person's body (excluding extremities: hands, wrists, feet and legs.)
Declarations of conformity
Vehicle components which receive and/
or transmit radio waves
USA only: The wireless devices of this vehicle comply with Part 15 of the FCC Rules. Operation is subject to the following two conditions: 1) These devices may not cause harmful interference, and 2) These devices must accept any interference received, including interference that may cause undesired operation.
Changes or modifications not expressly approved by the party responsible for compliance could void the user’s authority to operate the equipment.
Canada only: The wireless devices of this vehicle comply with Industry Canada license- exempt RSS standard(s). Operation is subject to the following two conditions: (1) These devices may not cause interference, and (2) These devices must accept any interference, including interference that may cause undesired operation of the device.
Correct use
Observe the following information when using COMAND:
Rthe safety notes in this manual
Rnational road traffic regulations
i Work improperly carried out on electronic
components or systems (e.g. radio, DVD changer) and associated software could cause them to cease functioning. Even systems that have not been modified could be affected because the electronic systems are connected. Electronic malfunctions can seriously jeopardize the operational safety of your vehicle.
i Therefore, have all work on or
modifications to electronic components carried out at a qualified specialist workshop.
i Protection against theft: this device is
equipped with technical provisions to
Introduction 121
protect it against theft. You can obtain further information about protecting against theft from a qualified specialist workshop.
Function restrictions
For safety reasons, some COMAND functions are restricted or unavailable while the vehicle is in motion. You will notice this, for example, because you will not be able to select certain menu items. In some cases, COMAND will also display a message to this effect.
To protect the integrated hard drive against damage, COMAND deactivates it at very high temperatures. The following functions will be temporarily unavailable:
Rnavigation
Rthe Voice Control System
Rthe address book
RMUSIC REGISTER
122 At a glance
At a glance
COMAND operating system
Overview
Function
: COMAND display
; COMAND controller and
function buttons
= Telephone keypad
Page
126
122
124
Components of COMAND
COMAND consists of:
Rthe COMAND display/SPLITVIEW
Rthe DVD changer
Rthe COMAND controller
Rthe COMAND function buttons
Rthe telephone keypad
Rconnections in the glove box (USB, additional USB, jack plug and iPod® connection)
Ra remote control for the front passenger
and for use with the Rear Seat Entertainment System
Rtwo sets of cordless headphones for the
Rear Seat Entertainment System
Rcordless headphones for the front
passenger
Rtwo screens (Rear Seat Entertainment
System)
RCD/DVD drive (Rear Seat Entertainment
System)
Raudio/video connections on the screen
(Rear Seat Entertainment System)
Raudio/video connections on the drive (Rear
Seat Entertainment System)
You can use COMAND to operate the following main functions:
Rthe navigation system
Rthe audio function with radio and satellite radio modes, disk (audio CD/DVD and MP3
mode), memory card (MP3 mode), MUSIC REGISTER, Bluetooth® audio, Media Interface and audio AUXRthe telephone and the address book
Rthe video function with video DVD and
video AUX modes
Rthe system settings
You can call up the main functions:
Rusing the corresponding function buttons
or
Rusing the main function bar in the COMAND
display
COMAND controller
You can use the COMAND controller to select the menu items in the COMAND display.
You can call up menus or lists, scroll through menus or lists and exit menus or lists.
At a glance 123
i You can also exit a menu by sliding XVY
or ZVÆ the COMAND controller.
X To switch to the basic display: press and
hold back button :. COMAND changes to the basic display of the current operating mode.
Function buttons
The COMAND function buttons allow you to select a main function directly.
: Function button for roller sunblind
; Function button for radio and CD/DVD or
SD card
= Back button
? Lumbar support/multicontour seat
A Function button for telephone and
navigation system
B On/off button for COMAND
C Volume control
D Programmable button (Y page 124)
Example:
X To select the radio or CD menu
directly: press R button ; once or twice.
The COMAND controller can be:
Rpressed briefly or pressed and held W
Rturned clockwise or counter-clockwise
cVd
Rslid left or right XVY Rslid forwards or back ZVÆ Rslid diagonally aVb
In the instructions, operating sequences are described as follows:
X Press the R button.
Audio mode is activated.
X Select Audio by sliding VÆ and turning cVd the COMAND controller and press W to confirm. The audio menu appears.
Back button
: Back button
X To exit the menu: press back button :
briefly. COMAND changes to the next higher menu level in the current operating mode.
cVd the COMAND controller and press W to confirm.
X Select System and press W to confirm. X Select Favorites Button and press W to
confirm. The list of predefined functions appears. The # dot in front of the list entry indicates the current setting.
X To change the setting: turn cVd the
COMAND controller and select the desired function.
X To store the setting and exit the menu:
press W the COMAND controller.
Telephone keypad
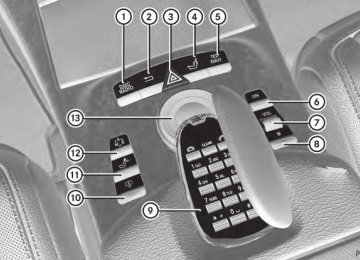
: Telephone keypad
; Folding cover
124 At a glance
Assigning the programmable button
(favorites)
: Programmable button
You can assign the following predefined functions to the h programmable button:
RECO: you can activate or deactivate the ECO
start/stop function.
RMassage, Driver's Seat: you can switch the massage function for the driver's seat on and off.
RMassage, Front Passenger's Seat:
you can switch the massage function for the front-passenger seat on and off.
RMassage, Driver's and Front
Passenger's Seat: you can switch the massage function for the driver's and front- passenger seats on and off.
RDisplay OFF: you can switch the
COMAND display off or on.
RTow-away Alarm: you can arm or
deactivate the tow-away alarm.
RInterior Motion Sensor: you can arm or
deactivate the interior motion sensor.
RTow-away Alarm and Interior Motion Sensor: you can arm or deactivate the tow- away alarm and the interior motion sensor.
RRepeat Navigation Command: you can
have the most recent recommendation by the navigation system repeated.
X To assign the programmable button:
select Vehicle by sliding VÆ and turning
At a glance 125
COMAND display
Display overview
The COMAND display shows the function currently selected and its associated menus. The COMAND display is divided into several areas.
The radio display is shown in the example.
: Status bar
; To call up the audio menu
= Main function bar
? Display/selection window
A Radio menu bar
B Air-conditioning function bar
Status bar : shows the current settings for radio and telephone operation.
The main functions navigation, audio, telephone and video feature additional menus. This is indicated by triangle ;. The following table lists the available menu items. Main function bar = allows you to call up the desired main function.
In the example, the Audio main function is set to radio mode and display/selection window ? is active. Radio menu bar A allows you to operate the radio functions. The air-conditioning functions can be operated in air-conditioning function bar B.
Menu overview
The table lists the menus available after calling up the main navigation, audio, telephone, video or system function in the main function bar.
126 At a glance
Navi
Mode
Audio
Telephone
Video
Vehicle
FM/AM radio
Video DVD
ECO
Map orientation
Sat radio
AUX
Video off
Point of interest symbols on the map
Disc
Traffic symbols on the map
Memory card
Text information on map
MUSIC REGISTER
O Topographical map
Media Interface
O City view
USB
O Freeway information
Rear
O Volume reduction AUX
SIRIUS service
Audio off
Map version
Multicontour seat/lumbar settings
Rear window blind
EASY-ENTRY/ EXIT system
Exterior lighting delayed switch-off
Interior lighting delayed switch-off
Ambient lighting
O Automatic mirror fold-in function
O Locator lighting
O Automatic locking
O Interior motion sensor
O Tow-away alarm
O Trunk lid opening height restriction
SPLITVIEW
SPLITVIEW allows you to simultaneously use different COMAND functions on the front- passenger side and on the driver's side.
Depending on the viewing angle of the display (from the driver's seat or from the front- passenger seat), you will see two different displays.
For example, the "Navi" function can be used from the driver's side while the "Video" function is used on the front-passenger side.
Use the remote control to operate COMAND from the front-passenger side with SPLITVIEW.
Please bear the following in mind
RYour vehicle may be equipped with
SPLITVIEW, depending on its date of production. The use of SPLITVIEW is currently not permitted in the following states: AL, AZ, CO, IL, LA, MA, MD, NH, PA, VA, VT, WA, WI, and WV or in the Canadian provinces of Manitoba, Newfoundland, New Brunswick, and Prince Edward Island. It is the driver's responsibility to observe ALL regional legally prescribed regulations. If your vehicle is registered in a state or province in which SPLITVIEW is not approved, this function must be deactivated. Please contact an authorized specialist dealer to check whether SPLITVIEW is approved in your state or province.
RVolume adjustment for the cordless
headphones can be carried out on the headphones. Before putting on the headphones, make sure that the volume has not been set too high.
RThe remote control can be used for the
volume adjustment of corded headphones.
At a glance 127
RThere must be intervisibility between the
headphones and the display so that COMAND can optimally transmit music and speech via the infrared signal on the front- passenger's headphones. For this reason, please also observe that the headphones have left and right sides, and use them correctly.
ROnly entertainment functions, i.e. audio
and video, can be used separately via SPLITVIEW.
RThe multifunction steering wheel can only be used for functions which relate to the driver's side.
Switching SPLITVIEW on/off
X To switch on SPLITVIEW: select
Vehicle from the main function bar by turning cVd the COMAND controller and press W to confirm. The "Vehicle" menu appears.
RYou can only use media from the driver's
X Select SPLITVIEW ON.
and front-passenger sides separately if the media are from different sources. Example: on the driver's side, an audio CD is being played by the DVD changer. This means that on the front-passenger side, the DVD changer cannot be used to play a different disc type, for instance a video DVD. However, other media can be used at the same time on the front-passenger side, including radio, memory card, MUSIC REGISTER, Media Interface, USB or AUX.
SPLITVIEW symbol : appears in the display, and display ; switches to SPLITVIEW OFF.
X To switch off SPLITVIEW: select
Vehicle from the main function bar by turning cVd the COMAND controller and press W to confirm. The "Vehicle" menu appears.
X Select SPLITVIEW OFF.
Display ; switches to SPLITVIEW ON.
RIf you use the same medium on both sides, settings for this medium can be carried out from either side.
i If COMAND has already been switched
on, you can also use the remote control to
128 At a glance
switch SPLITVIEW on and off (Y page 129).
Swiveling
The SPLITVIEW screen remains on for approximately 30 minutes after the SmartKey has been turned to position 0 in the ignition lock. After this time or after the SmartKey has been removed, the settings on the front- passenger side are saved for approximately 30 minutes longer. After this period, reactivation on the front-passenger side means that the settings from the driver's side will be used.
Cordless headphones for the front
passenger
There are different cordless headphones for the front passenger and the rear compartment.
: To swivel the display to the left
; To swivel the display to the right
Setting the brightness
: Brightness of the instrument cluster
lighting
; Brightness of the COMAND display
Brighter or dimmer:
X Turn control : or ; clockwise or counter-
clockwise.
i If Night View Assist Plus is activated, only the brightness of the multifunction display is adjusted with control :.
Display design
When the default settings are selected, the display automatically switches between day design and night design.
You can change these settings using COMAND (Y page 147).
The cordless headphones for the front passenger can be identified by SPLITVIEW symbol : on the headband.
The cordless headphones for the front passenger cannot be used in the rear compartment. Equally, the headphones for the rear compartment cannot be used by the front passenger.
Swiveling the COMAND display and
setting the brightness
You can swivel the COMAND display5. The buttons are located beside the COMAND display.
5 Not with SPLITVIEW.
Cleaning instructions
! Do not touch the COMAND display. The
display has a very sensitive high-gloss surface; there is a risk of scratching. If you have to clean the screen, however, use a mild cleaning agent and a soft, lint-free cloth.
The display must be switched off and have cooled down before you start cleaning. Clean the display screen, when necessary, with a commercially available microfiber cloth and cleaning agent for TFT/LCD displays. Then, dry the surface with a dry microfiber cloth.
Avoid using alcoholic thinners, gasoline or abrasive cleaning agents. These could damage the display surface. Do not apply pressure to the display surface when cleaning it, as this could cause irreversible damage.
Remote control
Overview
At a glance 129
= To select the screen for remote control
operation (COMAND, SPLITVIEW, L REAR and REAR R can be selected)
? To select a menu or menu item
A To confirm a selection or setting
B Mute
C To adjust the volume (for corded
headphones only)
D COMAND: to set the station, skip track, fast forward/rewind, for example. Rear Seat Entertainment System: skip track, fast forward/rewind
E COMAND: to select a station from
presets, select a track, enter directly, enter a phone number, for example. Rear Seat Entertainment System: to select a track, enter directly
F To exit a menu (back)
X Point the remote control at the
corresponding screen and execute the functions by pressing the corresponding buttons.
You can use the remote control to operate the COMAND display, SPLITVIEW and either one of the rear-compartment screens.
i The remote control's function may be
restricted depending on the angle at which it is pointed at the respective screen.
Selecting the screen for the remote
control
X Turn thumbwheel = until the desired
display is highlighted in the window.
Switching the screen on/off (Rear Seat
Entertainment System only)
If the SmartKey is in the ignition lock in position 0 or 1 or if the SmartKey is not in the ignition lock, the rear screens will switch off after 30 minutes. Before the screens switch off, they show a message to this effect.
You can switch the screens back on. However, this will discharge the starter battery.
: To switch the screen on/off (Rear Seat
Entertainment System only)
; To switch the button lighting on/off
130 At a glance
X Point the remote control at the rear- compartment screen which has been selected for remote operation.
X Press button : on the remote control.
The respective rear screen switches on or off.
i You can only switch the screens on using
the remote control if the ignition is switched on.
Switching the button lighting on/off
X Press button ; on the remote control. Depending on the previous status, the button lighting is switched on or off.
i If you do not use the remote control for
about 15 seconds, the button lighting switches off automatically.
Mute
X Press button B on the remote control.
The sound is switched on/off.
Adjusting the volume
This function is available for SPLITVIEW and for the Rear Seat Entertainment System in conjunction with corded headphones. X Press one of buttons C on the remote
control. The volume of the currently selected audio or video source changes.
For COMAND, you can also adjust the volume for phone calls and navigation messages.
Selecting a menu/menu item and
confirming your selection
X Press the =;9: buttons to select the menu/menu item and press the 9 button to confirm.
At a glance 131
Functions with the E and F button
You can use the remote control to execute the same functions as the COMAND control panel.
Mode
Function
Audio mode
Selects a station using the station search function (Ypage 216)
Selects a track by skipping to a track (Y page 229)
Fast forward/rewind (Y page 230)
Video mode
Selects a scene or chapter (video DVD mode) (Y page 247)
Fast-forward/rewind (video DVD mode) (Y page 247)
Functions of the number keypad
You can use the remote control to execute the same functions as the COMAND control panel.
Mode
Function
Audio mode
Selects stations via the station presets (Y page 216)
Sets stations by entering the frequency manually (Y page 217)
Stores stations manually (Y page 217)
Selects a track (Y page 229)
Selects a data medium via the media list (Y page 228)
Telephone mode
Telephone number entry (Y page 204)
Character entry
Enters characters (direct entry) (Y page 134)
Operating COMAND
Selecting a main function
Initial situation
You would like to change from the telephone menu to the vehicle settings, for example. X Slide ZV the COMAND controller and
switch to the main function bar.
X Select Vehicle in the main function bar by turning cVd the COMAND controller and press W to confirm. The "Vehicle" menu appears.
: "Vehicle" menu
; Display/selection window
132 At a glance
Calling up the menu of a main function
Selecting a menu item
: To call up the audio menu
; Main function bar
If one of the main functions navigation, audio, telephone or video is switched on, triangle : appears next to the entry. You can now select an associated menu.
The following example illustrates how to call up the audio menu. X Press the R function button.
or X Select Audio in the main function bar by sliding ZV the COMAND controller and press W to confirm. The Audio menu appears.
The following example describes how to select astation from the station presets in radio mode.
X Press the R function button. X Select Presets by sliding VÆ and turning
cVd the COMAND controller and press W to confirm. The station preset memory appears.
: Selection bar
X Select a station by turning cVd the COMAND controller and press W to confirm. The station is set.
Example of operation
Initial situation
You would like to switch from the vehicle function to the radio function and select a station from the station list, for example.
The following operating example describes how to:
Rcall up the audio function
Rswitch on radio mode
: Current audio operating mode
Rset a station.
; Main function bar
= Audio menu
The # dot indicates the current audio mode.
X Select another audio mode, e.g. Radio, by turning cVd the COMAND controller and press W to confirm.
At a glance 133
Calling up the audio function X Select Audio in the main function bar by
sliding ZV and turning cVd the COMAND controller and press W to confirm. The basic display of the current audio operating mode, e.g. audio CD, appears.
: Current audio operating mode
; Main function bar
= Audio menu
X Press W the COMAND controller and
confirm Radio. The radio basic display appears with the waveband last selected.
Switching to radio mode
Option 1
X Press the R function button.
The radio display appears.
i Repeated pressing of this function button
switches between radio and the most recently active audio source.
Option 2
X Select Audio again by sliding ZV the
COMAND controller and press W to confirm. The Audio menu appears.
X To set the station: if the display/selection
window is activated in the radio display, turn cVd or slide XVY COMAND controller.
Entering characters in navigation mode
(entering a city)
General information
Character entry is explained in the following sections using NEW YORK as an example for entering a city.
If you want to use the address entry menu (Y page 157) to enter a city, a street or a house number, for example, COMAND provides either a list with a character bar (option 1) or a selection list (option 2).
134 At a glance
You can enter the characters using either the character bar or the number keypad. In the selection list, you select an entry to copy it to the address entry menu.
Option 1: city list with character bar
X Call up the city list with character bar
(Y page 157). The alphabetically sorted city list shows the first available entries.
Entering characters using the character
bar
X Select N by turning COMAND controller
D Currently selected character
E Character bar
F To cancel an entry
G List
The list G shows all available town names beginning with N. The list entry that is best suited to previous user entries is always highlighted in the first position =, NANTICOKE in the example.
All characters that have been entered are displayed in black, the letter N in the example :. The letters that are added automatically by COMAND are displayed in gray ;, ANTICOKE in the example. Character bar E shows the letters still available for selection in black C. These can be selected; in the example, the letter O is highlighted D. Which characters remain available depends on the characters already entered by the user and on the data stored in the digital map. Characters that are no longer available are shown in gray B.
cVd and confirm with W.
X Select E, W, space, Y in order and confirm
each with W.
: N character entered by user ; ANTICOKE characters automatically
Entering characters using the number
added by COMAND
keypad
= List entry that most closely resembles the
current entry by the user
? To switch to the selection list
A To delete an entry
B Characters not currently available
C Characters currently available
X Press the telephone keypad's number key
p twice in quick succession, to enter the letter N. The character appears at the bottom of the display when the key is pressed. The first available letter is highlighted.
At a glance 135
You see which characters you can enter with that key. Each time the key is pressed, the next character is selected. Example: key p:
Rpress once = M
Rpress twice = N
Rpress three times = O
It is also possible to switch the city list to the selection list at any time during character input.
X Slide W the COMAND controller
repeatedly until the city list appears as a selection list.
or
X Wait until the character display goes out.
The entries matching your input are shown in the list.
X Select¬ in the character bar by turning
cVd the COMAND controller and press W to confirm.
X Enter E, W, space, Y with the corresponding
Option 2: city list as selection list
keys.
i The space is entered using number key
9.
Further functions in the list with
character bar X To delete characters: select F by sliding
VÆ and turning cVd the COMAND controller and press W to confirm.
X To delete an entry: select F and press and hold W the COMAND controller until the entire entry has been deleted.
X To switch the character set: select
B and press W to confirm.
X To cancel an entry: select the & symbol in the bottom left of the character bar and press W to confirm.
or X Press the % back button.
The address entry menu appears.
X To accept the first list entry: press and hold W the COMAND controller until the address entry menu appears. The accepted list entry is shown there.
Calling up the list as a selection list
Select the desired city from the selection list.
If there are several entries for a city or if several cities of the same name are stored, then ¬ is highlighted in the character bar.
X Press W the COMAND controller.
COMAND either shows the selection list automatically or you can call up the selection list from the list with character bar.
The example shows the selection list after the city NEW YORK has been entered. The entry is highlighted automatically.
X Confirm NEW YORK with COMAND
controller W. The address entry menu appears. You can now enter a street, for example.
136 At a glance
i You will find further information in the
Entering characters
"Destination entry" section (Y page 157).
Entering characters in the address and
the phone book
Introduction
The following section describes how to enter characters in the phone book/address book when creating a new entry.
Creating a new entry in the phone book
X Call up the input menu with data fields
(Y page 210).
The example describes how to enter the surname Schulz. X Select S by turning cVd and sliding ZVÆ
the COMAND controller and press W to confirm. S is entered into the data field. All characters are shown in black and can always be selected in the character bar.
The character bar offers characters corresponding to the respective data field (letters or digits).
Phone book: input menu with data fields : Selected data field with cursor
; Character bar
: To switch the character bar to upper-
case/lower-case letters
; To switch the character bar from upper/
lower-case letters to digits
= To change the language of the character
Creating a new entry in the address book
bar
X Call up the input menu with data fields
? To delete a character/an entry
(Y page 210).
Input menu with data fields : Selected data field with cursor
; Character bar
X Select c and confirm by pressing W the
COMAND controller. The letter c is added to S in the data field.
X Repeat the process until the name has
been entered in full.
X To enter a phone number: select the
digits one by one in the corresponding data field by turning cVd and sliding ZVÆ the COMAND controller and press W to confirm.
Switching data fields
If you want to enter a first name after you have entered a surname, for example, proceed as follows to switch between the data fields:
Option 1
X Select 4 or 5 in the character bar and
press W to confirm. The input menu shows the data field selected.
At a glance 137
X To change the language of the
character bar: select B and press W to confirm.
X Select the language by turning cVd the
COMAND controller and press W to confirm.
X To reposition the cursor within the data
field: select 2 or 3 and press W to confirm.
: Cursor in the next data field
; To store an entry = 4 and 5 icons to select adata field
Option 2
X Slide ZV the COMAND controller repeatedly until the character bar disappears.
X Select the data field by sliding ZVÆ and
press W to confirm.
Storing an entry
X Select¬ in the character bar by turning
cVd the COMAND controller and press W to confirm. The entry is stored in the address book.
Further functions available in the
character bar
X To switch the character bar to upper/
lower-case characters: select * or E and press W to confirm.
X To switch the character set: select
p and press W to confirm. The character set switches between upper/lower-case letters and digits.
: Cursor (repositioned) ; 2 and 3 icon to reposition the cursor
X Delete the character/entry (Y page 211).
Basic functions of COMAND
Switching COMAND on/off
X Press the u function button on the
center console.
i If you switch off COMAND, playback of
the current audio or video source will also be switched off. You cannot switch off COMAND while making a call via COMAND.
You can also make phone calls using the buttons on the multifunction steering wheel when COMAND is switched off (Y page 375).
138 At a glance
Switching the sound on or off
Adjusting the volume
Switching audio and video sources on/off X Press the8 button on the multifunction
steering wheel. The sound from the respective audio or video source is switched on or off. i When the sound is off, the system
displays the , symbol in the status line. When you change the audio or video source, or adjust the volume, sound automatically switches on again.
i Even if the sound is switched off, you will
still hear traffic and navigation system announcements.
Switching off traffic and navigation
announcements completely X Traffic announcements: press the 8
button until the . message disappears from the status bar of the display. A confirmation tone sounds.X Navigation announcements: during an
announcement, press the 8 button on the multifunction steering wheel.
Switching traffic and navigation
announcements on again
X Traffic announcements: press and hold
down the8 button until the . display appears in the status bar. A confirmation tone sounds.
X Navigation announcements: select the y symbol in the navigation menu bar and press W to confirm.
i The navigation announcements are
activated again if you switch COMAND off and on again or start a new route guidance.
Adjusting the volume for the audio or
video source
X To adjust: turn thumbwheel :.
or X Press the W or X button on the
multifunction steering wheel. The volume of the currently selected audio or video source changes.
You can also adjust the volume for the following:
Rtraffic announcements
Rnavigation announcements
Rphone calls
Rthe Voice Control System (see the separate
operating instructions)
Adjusting the volume for navigation
announcements
During a navigation announcement:
X Turn thumbwheel :.