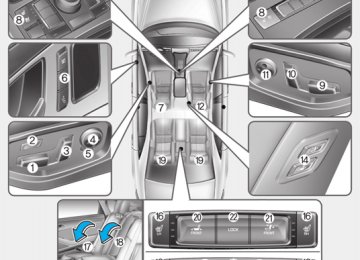
- Download PDF Manual
-
Face-Level (B, D, F)
Floor & Defrost (A, C, D, E)
Air flow is directed toward the upper body and face. Additionally, each outlet can be controlled to direct the air discharged from the outlet.
Most of the air flow is directed to the floor and the windshield with a small amount directed to the side window defrosters.
Bi-Level (B, C, D, E, F)
Floor-Level (A, C, D, E)
Air flow is directed towards the face and the floor.
Most of the air flow is directed to the floor, with a small amount of the air being directed to the windshield and side window defrosters.
3-154
■ Type A
■ Front
Also, you can adjust the direction of air delivery from these vents using the vent control lever as shown.
■ Type B
ODH043089
■ Rear
ODH043090
ODH043149
ODH043162
Defrost-Level (A) Most of the air flow is directed to the windshield with a small amount of air directed to the side window defrosters.
Instrument panel vents The outlet vents can be opened or closed separately using the thumb- wheel. To close the vent, rotate it left (Rear : down) to the maximum posi- tion. To open the vent, rotate it right (Rear : up) to the desired position.
3-155
Adjusting the driver and passenger side temperature individually (Type A) • Press the “SYNC” button again to adjust the driver and passenger side temperature individually. The illumination of button turns off.
• Operate the driver side tempera- ture control knob to adjust the driv- er side temperature.
• Operate the passenger side tem- perature control knob to adjust the passenger side temperature.
Convenient features of your vehicle
Temperature control
■ Type A
■ Front
■ Rear
ODH043085
Turn the temperature control knob to set the desired temperature. Rear is independently controlled regardless of “SYNC” function.temperature adjustment
3-156
ODH043091
ODH043092
Adjusting the driver and passenger side temperature equally (Type A) • Press the “SYNC” button to adjust the driver and passenger side tem- perature equally. The passenger side temperature will be set to the same temperature as the driver side temperature.
• Turn the driver side temperature control knob. The driver and pas- senger side temperature will be adjusted equally.
Adjusting temperature and mode of the driver & passenger side individ- ually (Type B) • Press the “SYNC” button again to adjust the temperature and mode of the driver & passenger side indi- vidually. The illumination of button turns off.
• Operate the driver side tempera- ture control knob to adjust the driv- er side temperature.
• Operate the driver side mode selection button to adjust the direc- tion of the driver side air flow.
• Operate the passenger side tem- perature control knob to adjust the passenger side temperature.
• Operate the passenger side mode selection button to adjust the direc- tion of the passenger side air flow.
Temperature conversion If the battery has been discharged or disconnected, the temperature mode display will reset to Centigrade. This is a normal condition. You can switch the temperature mode between Centigrade to Fahrenheit as follows; - Automatic climate control system
While pressing the OFF button, press the AUTO button for 3 seconds or more. The display will change from Centigrade to Fahrenheit, or from Fahrenheit to Centigrade. - “User setting mode” in the cluster : You can change the temperature unit in the “Other features - Temperature unit”
■ Type B
ODH043150
Adjusting temperature and mode of the driver & passenger side equally (Type B) • Press the “SYNC” button to adjust the temperature and mode of the driver & passenger side equally. The passenger side temperature and mode selection will be set to the same as the driver side.
• Turn the driver side temperature control knob. The driver and pas- senger side temperature will be adjusted equally.
• Press the driver side mode selec- tion button. The driver and passen- ger mode will be adjusted equally.
3-157
Convenient features of your vehicle
Air intake control
■ Type A
Recirculated air position
With the recirculated air position selected, air from the passenger compart- ment will be drawn through the heating system and heated or cooled according to the function selected.
Outside (fresh) air position
■ Type B
ODH043093
■ Type A
With the outside (fresh) air position selected, air enters the vehicle from outside and is heated or cooled accord- ing to the function selected.
■ Type B
✽ NOTICE Prolonged operation of the heater in the recirculated air position (with- out air conditioning selected) may cause fogging of the windshield and side windows and the air within the passenger compartment may become stale. In addition, prolonged use of the air conditioning with the recirculated air position selected will result in excessively dry air in the passenger compartment.
ODH043151
This is used to select the outside (fresh) air position or recirculated air position. To change the air intake control posi- tion, push the control button.3-158
WARNING
• Continued climate control system operation in the recir- culated air position may allow humidity to increase inside the vehicle which may fog the glass and obscure visibility.
• Do not sleep in a vehicle with the air conditioning or heating system on. It may cause seri- ous harm or death due to a drop level and/or body temperature.
in the oxygen
• Continued climate control sys- tem operation in the recirculat- ed air position can cause drowsiness or sleepiness, and loss of vehicle control. Set the air intake control to the outside (fresh) air position as much as possible while driving.
Fan speed control
Air conditioning
ODH043096
The fan speed can be set to the desired speed by pushing the fan speed control button. The higher the fan speed is, the more air is delivered. Pressing the OFF button turns off the fan.ODH043097
Push the A/C button to turn the air conditioning system on (indicator light will illuminate). Push the button again to turn the air conditioning system off.3-159
Convenient features of your vehicle
OFF mode
Climate information screen selection button
ODH043098
Push the OFF button of the front to turn off the air climate control system. However, you can still operate the mode and air intake buttons as long as the Engine Start/Stop button is in the ON position.ODH043099
To change the screen into the climate information screen, push the button.System operation Ventilation 1. Set the mode to the position. 2. Set the air intake control to the
outside (fresh) air position.
3. Set the temperature control to the
desired position.
4. Set the fan speed control to the
desired speed.
Heating 1. Set the mode to the position. 2. Set the air intake control to the
outside (fresh) air position.
3. Set the temperature control to the
desired position.
4. Set the fan speed control to the
desired speed.
5. If dehumidified heating is desired, turn the air conditioning system on. • If the windshield fogs up, set the position.
mode to the
or
3-160
Operation Tips • To keep dust or unpleasant fumes from entering the vehicle through the ventilation system, temporarily set the air intake control to the recirculated air position. Be sure to return the control to the fresh air position when the irritation has passed to keep fresh air in the vehicle. This will help keep the driv- er alert and comfortable.
• Air for the heating/cooling system is drawn in through the grilles just ahead of the windshield. Care should be taken that these are not blocked by leaves, snow, ice or other obstructions.
• To prevent interior fog on the wind- shield, set the air intake control to the fresh air position and fan speed to the desired position, turn on the air conditioning system, and adjust the temperature control to desired temperature.
Air conditioning HYUNDAI Air Conditioning Systems are filled with refrigerant*. 1. Start the engine. Push the air con-
ditioning button.
2. Set the mode to the position. 3. Set the air intake control to the out- side air or recirculated air position. 4. Adjust the fan speed control and temperature control to maintain maximum comfort.
* : Your vehicle is filled with R-134a or R-1234yf according to the regula- tion in your country at the time of producing. You can find out which air conditioning is applied your vehicle at the label inside of the engine room. Refer to chapter 8 for more detail location of air conditioning refrigerant label.
refrigerant
CAUTION
• The refrigerant system should only be serviced by trained and certified technicians to insure proper and safe operation.
• The refrigerant system should be serviced in a well-ventilated place.
• The air conditioning evapora- tor (cooling coil) shall never be repaired or replaced with one removed from a used or sal- vaged vehicle and new replace- ment MAC evaporators shall be certified (and labeled) as meet- ing SAE Standard J2842.
3-161
• Operating the air conditioning sys- tem in the recirculated air position provides maximum cooling, how- ever, continual operation in this mode may cause the air inside the vehicle to become stale.
• During cooling operation, you may occasionally notice a misty air flow because of rapid cooling and humid air intake. This is a normal system operation characteristic.
Convenient features of your vehicle
✽ NOTICE • When using the air conditioning system, monitor the temperature gauge closely while driving up hills or in heavy traffic when out- side temperatures are high. Air conditioning system operation may cause engine overheating. Continue to use the blower fan but turn the air conditioning system off if the temperature gauge indi- cates engine overheating.
• When opening the windows in humid weather air conditioning may create water droplets inside the vehicle. Since excessive water droplets may cause damage to electrical equipment, air condi- tioning should only be used with the windows closed.
3-162
Air conditioning system operation tips • If the vehicle has been parked in direct sunlight during hot weather, open the windows for a short time to let the hot air inside the vehicle escape.
• Use air conditioning to reduce humidity and moisture inside the vehicle on rainy or humid days.
• During air conditioning system operation, you may occasionally notice a slight change in engine speed as the air conditioning com- pressor cycles. This is a normal system operation characteristic.
• Use the air conditioning system every month only for a few minutes to ensure maximum system per- formance.
• When using the air conditioning system, you may notice clear water dripping (or even puddling) on the ground under the passenger side of the vehicle. This is a normal sys- tem operation characteristic.
Climate control air filter
Outside air
Recirculated
air
Blower
Heater core
Climate control
air filter
Evaporator
core
1LDA5047
The climate control air filter installed behind the glove box filters the dust or other pollutants that come into the vehicle from the outside through the heating and air conditioning system. If dust or other pollutants accumulate in the filter over a period of time, the air flow from the air vents may decrease, resulting in moisture accu- mulation on the inside of the wind- shield even when the outside (fresh) air position is selected. If this hap- pens, we recommend that the cli- mate control air filter be replaced by an authorized HYUNDAI dealer.✽ NOTICE • Replace the filter according to the
Maintenance Schedule. If the car is being driven in severe conditions such as dusty, rough roads, more frequent climate con- trol air filter inspections and changes are required.
• When the air flow rate suddenly decreases, we recommend that the system be checked by an author- ized HYUNDAI dealer.
Air Conditioning refrigerant label ■ Example
ODH044365R
ODH043366
❈ The actual Air Conditioning refrig- erant label in the vehicle may differ from the illustration.3-163
Convenient features of your vehicle
Each symbols and specification on air conditioning refrigerant label means as below ;
1. Classification of refrigerant 2. Amount of refrigerant 3. Classification of Compressor lubri-
cant
You can find out which air condition- ing refrigerant is applied your vehicle at the label inside of the engine room. Refer to chapter 8 for more detail location of air conditioning refrigerant label.
3-164
Checking the amount of air conditioner refrigerant and compressor lubricant When the amount of refrigerant is low, the performance of the air con- ditioning is reduced. Overfilling also has a bad influence on the air condi- tioning system. Therefore, if abnormal operation is found, we recommend that the sys- tem be inspected by an authorized HYUNDAI dealer.
WARNING
Vehicles equipped with R-134a* Because the refriger- ant is at very high pressure, the air con- ditioning system should only be serv- iced by trained and certified technicians. It is important that the correct type and amount of oil and refrigerant is used. Otherwise, it may cause damage to the vehicle and personal injury.
WARNING
Vehicles equipped with R-1234yf* B e c a u s e the refriger- ant is mildly inflamma- ble and at very high pressure, the air condi- tioning system should only be serviced by trained and certified technicians. It is important that the correct type and amount of oil and refrigerant is used. Otherwise, it may cause damage to the vehicle and personal injury.
* : Your vehicle is filled with R-134a or R-1234yf according to the reg- ulation in your country at the time of producing.
WINDSHIELD DEFROSTING AND DEFOGGING
WARNING
or
Windshield heating Do not use the posi- tion during cooling operation in extremely humid weather. The difference between the tempera- ture of the outside air and the windshield could cause the outer surface of the windshield to fog up, causing loss of visibility. In this case, set the mode selection to the position and fan speed control to the lower speed.
• For maximum defrosting, set the temperature control to the extreme right/hot position and the fan speed control to the highest speed.
• If warm air to the floor is desired while defrosting or defogging, set the mode to the floor-defrost position.
• Before driving, clear all snow and ice from the windshield, rear win- dow, outside rear view mirrors, and all side windows.
• Clear all snow and ice from the hood and air inlet in the cowl grill to improve heater and defroster effi- ciency and to reduce the probability of fogging up the inside of the wind- shield.
To defog inside windshield
■ Type A
■ Type B
ODH043100
1. Set the fan speed to the desiredposition.
2. Select desired temperature. 3. Press the defroster button ( 4. The air conditioning will turn on according to the detected ambient temperature and outside (fresh) air position will be selected auto- matically.
).
3-165
Convenient features of your vehicle
If the air conditioning and outside (fresh) air position are not selected automatically, adjust the correspon- ding button manually. If the posi- tion is selected, lower fan speed is adjusted to a higher fan speed.
3-166
To defrost outside windshield
Auto defogging system
■ Type A
■ Type B
ODH043101
1. Set the fan speed to the highestposition.
2. Set the temperature to the extreme
hot (HI) position.
).
3. Press the defroster button ( 4. The air conditioning will turn on according to the detected ambient temperature and outside (fresh) air position will be selected auto- matically.
ODH043086
Auto defogging reduces the possibil- ity of fogging up the inside of the windshield by automatically sensing the moisture of inside the windshield. The auto defogging system operates when the climate control system is on.✽ NOTICE The auto defogging system may not operate normally, when the outside temperature is below -10 °C.
This indicator illuminates when the auto defogging system senses the mois- ture of inside the wind- shield and operates.
■ Type A
If more moisture is in the vehicle, higher steps operate as follow.
Step 1 : Operating the air conditioning Step 2 : Outside air position Step 3 : Blowing air flow toward the
windshield
Step 4 : Increasing air flow toward
the windshield
■ Type B
ODH043145L
ODH043141L
Auto defogging system ON/OFF If your vehicle is equipped with the auto defogging system, it is automat- ically activated when the conditions are met.
However, if you would like to cancel the auto defogging system, turn off the Auto defogging function in the AVN climate monitor. If the battery has been disconnected or discharged, it resets to the auto defogging status.
✽ NOTICE If the A/C off is manually selected while the auto defogging system is on, the auto defogging indicator will blink 3 times to give notice that the A/C off can not be selected.
CAUTION
Do not remove the sensor cover located on the upper end of the driver side windshield glass. Damage to the system parts could occur and may not be cov- ered by your vehicle warranty.
3-167
Convenient features of your vehicle
CLIMATE CONTROL ADDITIONAL FEATURES (IF EQUIPPED) Cluster ionizer When the Engine Start/Stop button is in the ON position, the clean air function turns on automatically. Also, the clean air function turns off automatically, when the Engine Start/Stop button is in the OFF posi- tion.
Smart ventilation When driving and the heater and air conditioning system is off, the smart ventilation system maintains pleas- ant indoor aerial environment by controlling the temperature, humidity and CO2 of interior. “SMART VENTILATION ON” mes- sage is displayed on the AVN climate monitor for 5 seconds when the smart ventilation system operates.
Smart ventilation system ON/OFF
■ Type A
■ Type B
ODH043166L
ODH043167L If you would like to cancel the smart ventilation system, turn off the Smart ventilation in the AVN climate monitor.
3-168
Rear climate system ON/OFF ■ Type A
CO2 control auto air conditioner ■ Type A
You can turn on or off the CO2 control function as below. 1. Start the engine. 2. While pressing the driver mode selection button, press the air intake control button(Recirculated air) at least 4 times within 2 seconds.
■ Type B
ODH043168L
■ Type B
ODH043142L
ODH043169L If you would like to cancel the rear climate system, turn off the rear cli- mate in the AVN climate monitor.
ODH043143
When driving, the auto air condition- er controls CO2 concentration and maintains pleasant air in a vehicle. When the system controls CO2, the symbol ( ) displays in the AVN monitor.3-169
Center console storage
Rear console storage
ODH043357
ODH043358
To open : Press the button (1).
To open : Press the button (1).
Convenient features of your vehicle
STORAGE COMPARTMENT
WARNING
Never store cigarette lighters, propane cylinders, or other flammable/explosive materials in the vehicle. These items may catch fire and/or explode if the vehicle is exposed to hot tem- peratures for extended periods.
WARNING
ALWAYS keep the storage com- partment covers closed secure- ly while driving. Items inside your vehicle are moving as fast as the vehicle. If you have to stop or turn quickly, or if there is a crash, the items may fly out of the compartment and may cause an injury if they strike the driver or a passenger.
CAUTION
To avoid possible theft, do not leave valuables in the storage compartments.
3-170
Glove box
Sunglass holder (if equipped)
ODH043103
To open: Press the cover and the holder will slowly open. Place your sunglasses in the compartment door with the lenses facing out. To close: Push back into position. Make sure the sunglass holder is closed while driving.
ODH043104
The glove box can be locked and unlocked with the mechanical key (1).To open: Pull the lever (2).
WARNING
ALWAYS close the glove box door after use. An open glove box door can cause serious injury to the pas- senger in an accident, even if the passenger is wearing a seat belt.
WARNING
• Do not keep objects except sunglasses inside the sun- glass holder. Such objects can be thrown from the holder in the event of a sudden stop or an accident, possibly injuring the passengers in the vehicle. • Do not open the sunglass holder while the vehicle is moving. The rear view mirror of the vehicle can be blocked by an open sunglass holder.
• Do not put the glasses forcibly into a sunglass holder. It may cause personal injury if you try to open it forcibly when the glasses are jammed in holder.
3-171
Convenient features of your vehicle
INTERIOR FEATURES Ashtray (if equipped)
ODH044105N
To open cover: Press the cover and it will slowly open.
To clean the ashtray: The plastic receptacle should be removed by lifting the plastic ashtray receptacle upward and pulling it out.
3-172
Cup holder
■ Front
WARNING
Ashtray use Putting lit cigarettes or matches in an ashtray with other com- bustible materials may cause a fire.
■ Rear
ODH043106
ODH043107
Front To open the cover: Press the cover and it will slowly open.
Rear To open the cover: Press the button and it will slowly open.
WARNING
• Avoid abrupt starting and braking when the cup holder is in use to prevent spilling your drink. If hot liquid spills, you could be burned. Such a burn to the driver could cause loss of vehicle control result- ing in an accident.
• Do not place uncovered or unsecured cups, bottles, cans, etc., in the cup holder containing hot liquid while the vehicle is in motion. Injuries may result in the event of sud- den stop or collision.
• Only use soft cups in the cup holders. Hard objects can injure you in an accident.
WARNING
Sunvisor
Keep cans or bottles out of direct sun light and do not put them in a hot vehicle. It may explode.
CAUTION
• Keep your drinks sealed while driving to prevent spilling your drink. If liquid spills, it may get into the vehicle's electrical/electronic system and damage electrical/elec- tronic parts.
• When cleaning spilled liquids, do not dry the cup holder at high temperature. This may damage the chrome part of the cup holder.
ODH043359
To use a sunvisor, pull it downward. To use a sunvisor for a side window, pull it downward, unsnap it from the bracket (1) and swing it to the side (2). To use the vanity mirror, pull down the sunvisor and slide the mirror cover (3). Adjust the sunvisor forward or back- ward (4) as needed. Use the ticket holder (5 and 6) to hold tickets.3-173
Convenient features of your vehicle
✽ NOTICE Close the vanity mirror cover securely and return the sunvisor to its original position after use.
WARNING
For your safety, do not block your view when using the sunvi- sor.
Power outlet (if equipped)
■ Front
WARNING
Avoid electrical shocks. Do not place your fingers or foreign objects (pin, etc.) into a power outlet or touch the power outlet with a wet hand.
CAUTION
■ Rear
ODH043154L
• Do not put several tickets in the ticket holder at one time. This could cause damage to the ticket holder.
• Avoid putting a plastic card such as a credit card in the ticket holder located in the outside of the sunvisor. This could cause damage to the plastic card.
3-174
ODH043110
The power outlet is designed to pro- vide power for mobile telephones or other devices designed to operate with vehicle electrical systems. The devices should draw less than 180
W(Watt) with the engine running.CAUTION
To prevent damage to the Power Outlets : • Use the power outlet only when the engine is running and remove the accessory plug after use. Using the accessory plug for prolonged periods of time with the engine off could cause the battery to discharge. • Only use 12V electric acces- sories which are less than 180
W(Watt) in electric capacity.• Adjust the air-conditioner or heater to the lowest operating level when using the power outlet.
• Close the cover when not in
use.
(Continued)
(Continued) • Some electronic devices can cause electronic interference when plugged into a vehicle’s power outlet. These devices may cause excessive audio static and malfunctions in other electronic systems or devices used in your vehicle. • Push the plug in as far as it will go. If good contact is not made, the plug may overheat and the fuse may open.
• Plug in battery equipped elec- trical/electronic devices with reverse current protection. The current from the battery may flow into the vehicle's electri- cal/electronic system and cause system malfunction.
Clock
ODH043111
You can set the clock by using the AVN (Audio or Navigation). For more details, please refer to the Multimedia System Manual or DIS Navigation System Manual that was supplied with your vehicle.WARNING
Do not adjust the clock while driving. You may lose your steering control and cause an accident that results in severe personal injury or death.
3-175
Convenient features of your vehicle
Clothes hanger (if equipped)
■ Type A
WARNING
Bag hanger (if equipped)
Do not hang other objects except clothes. In an accident it may cause vehicle damage or personal injury.
ODH043113
Pull the strap (1) to hang a bag on the hook (2). Fold the hook when not in use.■ Type B
ODH043112
ODH043353
To hang items, pull the hanger down. (Type A) These hangers are not designed to hold large or heavy items.3-176
Floor mat anchor(s) (if equipped)
OVI043427
ALWAYS use the Floor Mat Anchors to attach the front floor mats to the vehicle. The anchors on the front floor carpet keep the floor mats from sliding forward.(Continued) IMPORTANT - Your vehicle was manufactured with driver's side floor mat anchors that are designed to securely hold the floor mat in place. To avoid any interference with pedal opera- tion, HYUNDAI recommends that the HYUNDAI floor mat designed for use in your vehicle be installed.
WARNING
The following must be observed when installing ANY floor mat to the vehicle. • Ensure that the floor mats are securely attached to the vehi- cle's floor mat anchor(s) before driving the vehicle.
• Do not use ANY floor mat that cannot be firmly attached to the vehicle's floor mat anchors. • Do not stack floor mats on top of one another (e.g. all-weath- er rubber mat on top of a car- peted floor mat). Only a single floor mat should be installed in each position.
(Continued)
3-177
Convenient features of your vehicle
Rear curtain (if equipped)
■ Front
Side curtain (if equipped)
ODH043116
To use the side curtain: 1. Lift the curtain by the hook (1). 2. Hang the curtain on both sides of
the hook.
■ Rear
ODH043114
ODH043115
To raise and lower the rear curtain, press the button.3-178
ODH043354
The rear curtain will be lowered auto- matically when you shift the shift lever into R (Reverse) and raised automatically when you shift the shift lever from R (Reverse) into P (Park). After the rear curtain is lowered by shifting into R (Reverse), if you drive more than 20 km/h (12 mph) with the shift lever in D (Drive), the rear cur- tain will be raised automatically.CAUTION
Do not apply excessive force while operating the rear curtain. This could cause damage to the rear curtain.
Luggage net holder
CAUTION
• Always hang both sides of the curtain on the hook. This could cause damage to the side curtain if only one side of the curtain is hooked.
• Do not let any foreign material get in between the vehicle and side curtain. The side curtain may not be lifted up.
WARNING
Avoid eye injury. DO NOT over- stretch the luggage net. ALWAYS keep your face and body out of the luggage net’s recoil path. DO NOT use the luggage net when the strap has visible signs of wear or damage.
ODH043362
To keep items from shifting in the trunk, you can use the 4 holders located in the trunk to attach the luggage net. Make sure the luggage net is securely attached to the holders in the trunk. If necessary, we recommend that you contact an authorized HYUNDAI dealer to obtain a luggage net.3-179
Multimedia System
Multimedia system.................................................4-2
AUX, USB and iPod® port ...............................................4-2
Antenna ...............................................................................4-3
Steering wheel audio control ........................................4-4
Audio / Video / Navigation system (AVN) ..................4-5
Bluetooth® Wireless Technology hands-free............4-6Multimedia System
MULTIMEDIA SYSTEM Detailed information about the multi- media system (AV or AVN) is described in a separately supplied manual.
✽ NOTICE • If you install an aftermarket HID headlamp, your vehicle’s audio and electronic device may mal- function.
• Prevent chemicals such as per- fume, cosmetic oil, sun cream, hand cleaner, and air freshener from contacting the interior parts because they may cause damage or discoloration.
AUX, USB and iPod® port ■ Front
✽ NOTICE When using a portable audio device connected to the power outlet, noise may occur during playback. If this happens, use the power source of the portable audio device.
❈ iPod® is a trademark of Apple Inc.
■ Rear (if equipped)
ODH043121L
ODH043170
You can use an AUX port to connect audio devices and an USB port to plug in an USB and also in an iPod® port. (Rear Multimedia jack : USB only)4-2
Antenna
CAUTION
CAUTION
• Do not clean the inside of the rear window glass with a cleaner or use a scraper to remove foreign deposits as this may cause damage to the antenna elements.
• Avoid adding metallic coat- ings such as Ni, Cd, and so on. These can degrade the receiv- ing AM and FM broadcast sig- nals.
• To prevent damage to the rear glass antenna, never use sharp instruments or window cleaner containing abrasives to clean the window. Clean the inside surface of the rear glass window with a piece of soft cloth.
• When putting a sticker on the inside surface of the rear win- dow, be careful not to damage to the rear glass antenna.
• Do not put sharp instruments nearby the rear glass antenna. • Tinted rear window may affect the proper functioning of the antenna.
ODH043117
Shark fin antenna (1) (For Europe,if equipped) The shark fin antenna will receive the transmit data. (for example : GPS and DAB signal)
Glass antenna (2) Your vehicle uses a glass antenna to receive both AM and FM signals.
4-3
If the SEEK/PRESET lever is moved up or down, it will function in the fol- lowing modes.
RADIO mode It will function as the PRESET STA- TION UP/DOWN button.
MEDIA mode It will function as the TRACK UP/ DOWN button.
Multimedia System
Steering wheel audio control
■ Type A
VOLUME (VOL + / - ) (1) • Move the VOLUME lever up to
increase volume.
• Move the VOLUME lever down to
decrease volume.
) (2)
SEEK/PRESET ( If the SEEK/PRESET lever is moved up or down and held for 0.8 second or more, it will function in the follow- ing modes.
RADIO mode It will function as the AUTO SEEK select button. It will SEEK until you release the button.
MEDIA mode It will function as the FF/REW button.
■ Type B
ODH043118L
ODH043118
The steering wheel audio control but- ton is installed for your convenience.CAUTION
Do not operate audio remote control buttons simultaneously.
4-4
MODE (3) Press the MODE button to select Radio, XM, Disc, or AUX.
Audio / Video / Navigation system (AVN) ■ Front (AV or AVN, Monitor)
■ Rear remote switch
MUTE ( • Press the MUTE button to mute the
) (4)
sound.
• Press the MUTE button again to
activate the sound.
✽ NOTICE Detailed information is described in a separately supplied manual.
■ Center console panel (if equipped)
Detailed information for the AVN sys- tem is described in a separately sup- plied manual.
ODH043119/ODH043120/ODH043144
4-5
Multimedia System
Bluetooth®Wireless Technology hands-free
(1) Call / Answer button (2) Call end button (3) Microphone
information
Detailed the Bluetooth® Wireless Technology hands-free is described in the manu- al supplied separately.
for
ODH043122
ODH043123
You can use the phone wirelessly by using the Bluetooth® Wireless Technology.4-6
Driving your vehicle
Before driving.........................................................5-4
Before entering the vehicle ...........................................5-4
Before starting...................................................................5-4
Engine Start/Stop button................................................5-5
Automatic transmission.......................................5-11
Automatic transmission operation .............................5-11
Parking...............................................................................5-17
Good driving practices...................................................5-17
All wheel drive (AWD) .........................................5-19
Using All Wheel Drive (AWD) .......................................5-19
Emergency precautions.................................................5-21
Braking system ...................................................5-23
Power brakes ..................................................................5-23
Disc brakes wear indicator ..........................................5-24
Foot parking brake ........................................................5-24
Electric parking brake (EPB)........................................5-26
AUTO HOLD .....................................................................5-31
Anti-lock Brake System (ABS) ....................................5-35
Electronic Stability Control (ESC)................................5-37
Hill-Start Assist Control (HAC) ...................................5-40
Emergency Stop Signal (ESS) .....................................5-41
Good braking practices..................................................5-42
Drive mode integrated control system .............5-43
Electronic control suspension (ECS).................5-45
ECS malfunction indicator.............................................5-45Autonomous emergency braking (AEB) ............5-46
AEB operation..................................................................5-47
To cancel the AEB ..........................................................5-48
Malfunction indicator.....................................................5-49
Cruise control .......................................................5-51
Cruise control operation................................................5-51
Advanced smart cruise control system ............5-55
To convert to cruise control mode.............................5-56
Smart cruise control speed ..........................................5-56
Cancelled automatically .................................................5-59
Smart cruise control vehicle-to-vehicle distance.....5-61
Sensor to detect distance to the vehicle ahead.....5-63
Limitations of the system .............................................5-65
Lane departure warning system (LDWS) .........5-70
LDWS operation...............................................................5-71
Warning indicator ..........................................................5-72
Lane keeping assist system (LKAS)..................5-74
LKAS operation................................................................5-75
LKAS malfunction............................................................5-80
LKAS function change ..................................................5-81
Blind spot detection system (BSD) ...................5-83BSD (Blind Spot Detection) / LCA (Lane Change Assist).............................................5-84
RCTA (Rear Cross Traffic Alert) ..................................5-87Special driving conditions...................................5-91
Hazardous driving conditions.......................................5-91
Rocking the vehicle ........................................................5-91
Smooth cornering ...........................................................5-92
Driving at night................................................................5-92
Driving in the rain ...........................................................5-93
Driving in flooded areas................................................5-93
Winter driving.......................................................5-94
Snow or icy conditions ..................................................5-94
Winter precaution ...........................................................5-97
Vehicle weight ......................................................5-99
Overloading.......................................................................5-99
Trailer towing .....................................................5-100WARNING
Carbon monoxide (CO) gas is toxic. Breathing CO can cause unconsciousness and death. Engine exhaust contains carbon monoxide which cannot be seen or smelled.
Do not inhale engine exhaust. If at any time you smell engine exhaust inside the vehicle, open the windows immediately. Exposure to CO can cause unconsciousness and death by asphyxiation.
Be sure the exhaust system does not leak. The exhaust system should be checked whenever the vehicle is raised to change the oil or for any other purpose. If you hear a change in the sound of the exhaust or if you drive over something that strikes the underneath side of the vehicle, we recommend that the exhaust system be checked as soon as possible by an authorized HYUNDAI dealer.
Do not run the engine in an enclosed area. Letting the engine idle in your garage, even with the garage door open, is a hazardous practice. Run the engine only long enough to start the engine and to move the vehicle out of the garage.
Avoid idling the engine for prolonged periods with people inside the vehicle. If it is necessary to idle the engine for a prolonged period with people inside the vehicle , be sure to do so only in an open area with the air intake set at "Fresh" and fan control set to high so fresh air is drawn into the interior.
Keep the air intakes clear. To assure proper operation of the ventilation system, keep the ventilation air intakes located in front of the windshield clear of snow, ice, leaves, or other obstructions.
If you must drive with the trunk open: Close all windows. Open instrument panel air vents. Set the air intake control at "Fresh", the air flow control at "Floor" or "Face", and the fan control set to high.
5-3
Before starting • Make sure the hood, the trunk, and the doors are securely closed and locked.
• Adjust the position of the seat and
steering wheel.
• Adjust the inside and outside
rearview mirrors.
• Verify all the lights work. • Fasten your seatbelt. Check that all passengers have fastened their seatbelts.
• Check the gauges and indicators in the instrument panel and the mes- sages on the instrument display when the Engine Start/Stop button is in the ON position.
• Check that any items you are car- rying are stored properly or fas- tened down securely.
WARNING
To reduce the risk of SERIOUS INJURY or DEATH, take the fol- lowing precautions: • ALWAYS wear your seat belt. All passengers must be prop- erly belted whenever the vehi- cle is moving. For more infor- mation, refer to “Seat Belts” in chapter 2.
• Always drive defensively. Assume other drivers or pedestrians may be careless and make mistakes.
• Stay focused on the task of driving. Driver distraction can cause accidents.
• Leave plenty of
space between you and the vehicle in front of you.
Driving your vehicle
BEFORE DRIVING Before entering the vehicle • Be sure all windows, outside mir- ror(s), and outside lights are clean and unobstructed.
• Remove frost, snow, or ice. • Visually check the tires for uneven
wear and damage.
• Check under the vehicle for any
sign of leaks.
• Be sure there are no obstacles behind you if you intend to back up.
5-4
WARNING
NEVER drink or take drugs and drive. Drinking or taking drugs and driving is dangerous and may result in an accident and SERI- OUS INJURY or DEATH. Drunk driving is the number one contributor to the highway death toll each year. Even a small amount of alcohol will affect your reflexes, percep- tions and judgment. Just one drink can reduce your ability to respond to changing conditions and emergencies and your reac- tion time gets worse with each additional drink. Driving while under the influ- ence of drugs is as dangerous or more dangerous than driving under the influence of alcohol. (Continued)
Engine Start/Stop button
(Continued) You are much more likely to have a serious accident if you drink or take drugs and drive. If you are drinking or taking drugs, don’t drive. Do not ride with a driver who has been drinking or taking drugs. Choose a designated driver or call a taxi.
ODH053001
Whenever the front door is opened, the Engine Start/Stop button will illu- minate and will go off 30 seconds after the door is closed.WARNING
To reduce risk of serious injury or death, NEVER allow children or any person who is unfamiliar with the vehicle to touch the Engine Start/Stop button or related parts. Unexpected and sudden vehicle movement can occur.
5-5
(Continued) • NEVER reach through the steering wheel for the Engine Start/Stop button or any other control while the vehicle is in motion. The presence of your hand or arm in this area may cause a loss of vehicle control resulting in an accident.
Driving your vehicle
WARNING
WARNING
To turn the engine off in an emergency: Press and hold the Engine Start/Stop button for more than two seconds OR Rapidly press and release the Engine Start/Stop button three times (within three seconds). If the vehicle is still moving, you can restart the engine without depressing the brake pedal by pressing the Engine Start/Stop button with the shift lever in the N (Neutral) position.
• NEVER press
the Engine Start/Stop button while the vehicle is in motion except in an emergency. This will result in the engine turning off and loss of power assist for the steering and brake systems. This may lead to loss of direc-