- Download PDF Manual
-
” “
58
UTILITY
RECREATIONAL TOWING (BEHIND MOTORHOME, ETC.) Two-Wheel Drive and All-Wheel Drive
• Recreational towing (with all four wheels on the ground, or using a tow dolly) is NOT
ALLOWED. The only acceptable method for towing this vehicle (behind another vehicle) is on a vehicle trailer with all four wheels OFF the ground. CAUTION!
Towing this vehicle in violation of the above requirements can cause severe transmission and/or transfer case damage. Such damage is not covered by the New Vehicle Limited Warranty.
59
SRT8
AUTOSTICK® Steering Wheel Mounted Paddle Shifters Or Console Mounted Shifter
• AutoStick® is a driver-interactive transmission feature that offers manual gear shifting to provide you with more control of the vehicle. AutoStick® allows you to maximize engine braking, and improve overall vehicle performance.
• This system can also provide you with more control during passing, city driving, cold
slippery conditions, mountain driving, trailer towing, and many other situations.
Operation • When the shift lever is in the DRIVE position, the transmission will operate automatically,
shifting between the five available gears. To engage AutoStick®, simply move the shift lever to the right or left (+/-) while in the DRIVE position, or press one of the steering wheel mounted shift paddles (+/-). When AutoStick® is active, the current transmission gear is displayed in the Electronic Vehicle Information Center (EVIC) portion of the instrument cluster. In AutoStick® mode, the transmission will shift when manually selected by the driver (using the shift lever, or the shift paddles), unless an engine lugging or overspeed condition would result. It will remain in the selected gear until another upshift or downshift is chosen, except as described below: • The transmission will automatically downshift as the vehicle slows (to prevent engine
lugging) and will display the current gear.
• The transmission will automatically downshift to first gear when coming to a stop. • You can start out in first or second gear. Tapping (+) (at a stop) will allow starting in
second gear. Starting out in second gear is helpful in snowy or icy conditions.
• The system will ignore attempts to upshift at too low of a vehicle speed. • Transmission shifting will be more noticeable when AutoStick® is engaged. To disengage AutoStick® mode, hold the shift lever to the right or press and hold the (+) shift paddle until “D” is once again displayed in the instrument cluster. You can shift in or out of the AutoStick® mode at any time without taking your foot off the accelerator pedal. • An “UPSHIFT” message will appear in the Electronic Vehicle Information Center
(EVIC) portion of the instrument cluster when using AutoStick®, to alert the driver to upshift to the next gear. The “UPSHIFT” message will appear when approaching the maximum engine speed.
Auto • This is the default position when vehicle ignition is first turned on. This mode will give a sporty, but comfortable ride. Within this mode, the suspension will adapt to the vehicle inputs, including vehicle speed, steering inputs, braking and acceleration.
• If AutoStick® is engaged while in “Auto” mode, the transmission will automatically shift up
if maximum engine speed is reached.
• Heavily pressing the accelerator pedal may generate an automatic downshift for
improved acceleration.
• This mode should be used for most driving situations.
60
Sport
SRT8
• This mode is driver selectable when the vehicle is placed in SPORT mode (press the CONTROLS button and then the SPORT button on the display screen). This mode will set suspension for maximum performance handling and is intended for spirited driving.
• If AutoStick is engaged while in “Sport” mode, the transmission will remain in the selected gear even when maximum engine speed is reached.
• Engine overspeed protection is achieved
through fuel cut off at or near redline.
• This mode will provide aggressive shifting
and is intended for spirited driving.
NOTE: The SPORT setting will provide a firmer ride. WARNING!
Do not downshift for additional engine braking on a slippery surface. The drive wheels could lose their grip and the vehicle could skid, causing a collision or personal injury.
PERFORMANCE FEATURES Electronic Vehicle Information Center (EVIC)
or DOWN
• The EVIC can be used to view or change the following Performance Features. Press button until the UP System Setup displays, then press the button. Scroll through the SELECT settings using the UP or DOWN buttons. button to change Press the SELECT the setting. Press the BACK button to scroll back to a previous menu or sub menu.
• 0-60 mph (0-100 km/h) • Braking Distance • 1/8 Mile • 1/4 Mile
• Instantaneous G-Force • Peak G-Force • Digital Speedometer
61
SRT8
0-60 mph (0-100 km/h) • When selected, this screen displays the time it takes for the vehicle to go from 0 to
60 mph (0 to 100 km/h) within 10 seconds.
Braking Distance • When selected, this screen displays the vehicle's braking distance and the speed at which
the brake pedal was depressed.
1/8 Mile, 1/4 Mile • When selected, this screen displays the time it takes the vehicle to travel 1/8 mile
(1/4 mile) within 30 seconds and the vehicle's speed when it reaches 1/8 mile (1/4 mile).
Instantaneous G-Force • When selected, this screen displays the current G-Force (lateral and longitudinal) along
with a friction circle that displays the directions of the forces.
Peak G-Force • When selected, this screen displays all four G-Force values (two lateral and two
longitudinal).
Uconnect Touch SRT8 Performance Features
• To access the SRT8 Performance Features, touch the “More” soft-key then touch the
“SRT” soft-key. Press the UP or DOWN soft-key to cycle through the features. Press the feature soft-key to select that feature.
• The Performance Page include the following:
• Timers • Engine Values • Digital Gauge Displays • 0-60 mph (0-100 km/h) • Braking Distance
• 1/8 Mile • 1/4 Mile • Instantaneous G-Force • Peak G-Force • Digital Speedometer
Timers 0-60 mph (0-100 km/h), 1/8 Mile, 1/4 Mile
• When selected, this screen displays the time it takes for the vehicle to go from 0 to
60 mph (0 to 100 km/h), 1/8 mile or 1/4 mile.
Braking Distance
• When selected, this screen displays the vehicle's braking distance and the speed at which
the brake pedal was depressed.
G-Force • When selected, this screen displays all four G-Force values (two lateral and two
longitudinal) as well as steering angle.
62
SRT8
Gauges 1
• Oil Temperature • Oil Pressure • Battery Voltage Gauges 2
• Coolant Temperature • Oil Temperature • Transmission Temperature • Intake Air Temperature • Oil Pressure • Battery Voltage Engine • When selected, this screen displays miles per hour (mph), horsepower (hp), torque(ft/lb), oil pressure (psi) and gear selector values.
Handling • When selected, this screen displays peak g-force, instantaneous g-force, steering and yaw
angles.
Options • When selected, this screen allows you to choose a standard or customize display for your
SRT home page.
SPORT
Sport Mode
• To access the Sport Mode, touch the “Controls” soft-key then touch the “Sport” soft-key.
When SPORT mode is enabled, a flag will light up in the instrument cluster.
• This mode provides performance based tuning with improved handling through an
electronic controlled dampening system. This system reduces body roll and pitch in many driving situations including cornering, acceleration and braking.
WARNING!
Measurement of vehicle statistics with the Performance Features is intended for off-highway or off-road use only and should not be done on any public roadways. It is recommended that these features be used in a controlled environment and within the limits of the law. The capabilities of the vehicle as measured by the performance pages must never be exploited in a reckless or dangerous manner, which can jeopardize the user’s safety or the safety of others. Only a safe, attentive, and skillful driver can prevent accidents.
63
WHAT TO DO IN EMERGENCIES
24-HOUR TOWING ASSISTANCE • Dial toll-free 1-800-521-2779 or 1-800-363-4869 for Canadian residents. • Provide your name, vehicle identification number and license plate number. • Provide your location, including telephone number, from which you are calling. • Briefly describe the nature of the problem and answer a few simple questions. • You will be given the name of the service provider and an estimated time of arrival. If you feel you are in an “unsafe situation”, please let us know. With your consent, we will contact local police or safety authorities.
INSTRUMENT CLUSTER WARNING LIGHTS
- Electronic Stability Control (ESC) Activation/Malfunction Indicator
Light
• The “ESC Activation/Malfunction Indicator Light” in the instrument cluster will come on
when the ignition switch is turned to the ON/RUN position. It should go out with the engine running. If the “ESC Activation/Malfunction Indicator Light” comes on continuously with the engine running, a malfunction has been detected in the ESC system.
• If this light remains on after several ignition cycles, and the vehicle has been driven several miles (kilometers) at speeds greater than 30 mph (48 km/h), we recommend you drive to the nearest service center and have the vehicle serviced immediately. - Tire Pressure Monitoring System (TPMS) Light • Each tire, including the spare (if provided), should be checked monthly, when cold and
inflated to the inflation pressure recommended by the vehicle manufacturer on the vehicle placard or tire inflation pressure label. (If your vehicle has tires of a different size than the size indicated on the vehicle placard or tire inflation pressure label, you should determine the proper tire inflation pressure for those tires.)
• As an added safety feature, your vehicle has been equipped with a Tire Pressure
Monitoring System (TPMS) that illuminates a low tire pressure telltale when one or more of your tires is significantly under-inflated. Accordingly, when the low tire pressure telltale illuminates, you should stop and check your tires as soon as possible, and inflate them to the proper pressure. Driving on a significantly under-inflated tire causes the tire to overheat and can lead to tire failure. Under-inflation also reduces fuel efficiency and tire tread life, and may affect the vehicle’s handling and stopping ability.
• IF THE LIGHT STARTS FLASHING INDICATING A LOW TIRE PRESSURE, ADJUST THE AIR PRESSURE IN THE LOW TIRE TO THE AIR PRESSURE SHOWN ON THE VEHICLE PLACARD OR TIRE INFLATION PRESSURE LABEL LOCATED ON THE DRIVER'S DOOR. NOTE: AFTER INFLATION, THE VEHICLE MAY NEED TO BE DRIVEN FOR 20 MINUTES BEFORE THE FLASHING LIGHT WILL TURN OFF.
64
WHAT TO DO IN EMERGENCIES
• Please note that the TPMS is not a substitute for proper tire maintenance, and it is the driver’s responsibility to maintain correct tire pressure, even if under-inflation has not reached the level to trigger illumination of the TPMS low tire pressure telltale.
• Your vehicle has also been equipped with a TPMS malfunction indicator to indicate when the system is not operating properly. The TPMS malfunction indicator is combined with the low tire pressure telltale. When the system detects a malfunction, the telltale will flash for approximately one minute and then remain continuously illuminated. This sequence will continue each time the vehicle is restarted as long as the malfunction exists.
• When the malfunction indicator is illuminated, the system may not be able to detect or
signal low tire pressure as intended. TPMS malfunctions may occur for a variety of reasons, including the installation of replacement or alternate tires or wheels on the vehicle that prevent the TPMS from functioning properly. Always check the TPMS malfunction telltale after replacing one or more tires or wheels on your vehicle, to ensure that the replacement or alternate tires and wheels allow the TPMS to continue to function properly.
NOTE: Tire pressures change by approximately 1 psi (7 kPa) per 12° F (7° C) of air temperature change. Keep this in mind when checking tire pressure inside a garage, especially in the Winter. Example: If garage temperature is 68°F (20°C) and the outside temperature is 32°F (0°C), then the cold tire inflation pressure should be increased by 3 psi (21 kPa), which equals 1 psi (7 kPa) for every 12°F (7°C) for this outside temperature condition.
CAUTION!
The TPMS has been optimized for the original equipment tires and wheels. TPMS pressures and warning have been established for the tire size equipped on your vehicle. Undesirable system operation or sensor damage may result when using replacement equipment that is not of the same size, type, and/or style. Aftermarket wheels can cause sensor damage. Do not use tire sealant from a can, or balance beads if your vehicle is equipped with a TPMS, as damage to the sensors may result.
- Engine Temperature Warning Light • This light warns of an overheated engine condition. • If the light turns on or flashes continuously while driving, safely pull over and stop the vehicle. If the A/C system is on, turn it off. Also, shift the transmission into NEUTRAL and idle the vehicle. If the temperature reading does not return to normal, turn the engine off immediately.
• We recommend that you do not operate the vehicle or engine damage will occur. Have
the vehicle serviced immediately.
WARNING!
A hot engine cooling system is dangerous. You or others could be badly burned by steam or boiling coolant. You may want to call an authorized service center for service if your vehicle overheats.
65
WHAT TO DO IN EMERGENCIES
BRAKE- Brake Warning Light • The Brake Warning light illuminates when there is either a system malfunction or the
parking brake is applied. If the light is on and the parking brake is not applied, it indicates a possible brake hydraulic malfunction, brake booster problem or an Anti-Lock Brake System problem.
• Please have your vehicle serviced immediately.
WARNING!
Driving a vehicle with the red brake light on is dangerous. Part of the brake system may have failed. It will take longer to stop the vehicle. You could have a collision. Have the vehicle checked immediately.
- Malfunction Indicator Light (MIL)
• Certain conditions, such as a poor fuel quality, etc., may illuminate the MIL after engine start. The vehicle should be serviced if the light stays on through several typical driving cycles. In most situations, the vehicle will drive normally and not require towing.
• If the MIL flashes when the engine is running, serious conditions may exist that could lead to immediate loss of power or severe catalytic converter damage. We recommend you do not operate the vehicle. Have the vehicle serviced immediately. - Electronic Stability Control (ESC) OFF Indicator Light • This light indicates the Electronic Stability Control (ESC) is off.
- Charging System Light
• This light shows the status of the electrical charging system. If the charging system light remains on, it means that the vehicle is experiencing a problem with the charging system. • We recommend you do not continue driving if the charging system light is on. Have the
vehicle serviced immediately.
- Oil Pressure Warning Light
• This light indicates low engine oil pressure. If the light turns on while driving, stop the
vehicle and shut off the engine as soon as possible. A chime will sound for four minutes when this light turns on.
• We recommend you do not operate the vehicle or engine damage will occur. Have the
vehicle serviced immediately. - Anti-Lock Brake (ABS) Light • This light monitors the Anti-Lock Brake System (ABS). • If the light is not on during starting, stays on, or turns on while driving, we recommend
you drive to the nearest service center and have the vehicle serviced immediately.
66
WHAT TO DO IN EMERGENCIES
- Electronic Throttle Control (ETC) Light • This light informs you of a problem with the Electronic Throttle Control (ETC) system. • If a problem is detected, the light will come on while the engine is running. Cycle the ignition when the vehicle has completely stopped and the shift lever is placed in the PARK position; the light should turn off.
• If the light remains lit with the engine running, your vehicle will usually be drivable;
however, see an authorized service center immediately. If the light is flashing when the engine is running, immediate service is required and you may experience reduced performance, an elevated/rough idle or engine stall and your vehicle may require towing. - Air Bag Warning Light • If the light is not on during starting, stays on, or turns on while driving, have the vehicle
serviced by an authorized service center immediately.
SERVICE AWD SYSTEM Message
• If the SERVICE AWD SYSTEM warning message appears after engine start up, or
during driving, it means the AWD system is not functioning properly. We recommend you do not operate the vehicle. Have the vehicle serviced immediately.
SPORT
Sport Mode
• This light will illuminate when the sport mode is selected. This mode provides
performance based tuning.
Oil Change Indicator Message • If an “oil change” message (shown as Oil Change Due) appears and a single chime
sounds, it is time for your next required oil change.
Resetting The Light After Servicing Vehicles Equipped With Keyless Enter-N-Go • Without pressing the brake pedal, push the ENGINE START/STOP button and cycle the
ignition to the ON/RUN position (Do not start the engine.)
• Fully depress the accelerator pedal, slowly, three times within 10 seconds. • Without pressing the brake pedal, push the ENGINE START/STOP button once to
return the ignition to the OFF/LOCK position. Vehicles Not Equipped With Keyless Enter-N-Go • Turn the ignition switch to the ON/RUN position (Do not start the engine.) • Fully depress the accelerator pedal, slowly, three times within 10 seconds. • Turn the ignition switch to the OFF/LOCK position.
67
WHAT TO DO IN EMERGENCIES
IF YOUR ENGINE OVERHEATS • In any of the following situations, you can reduce the potential for overheating by taking
the appropriate action.
• On the highways — slow down. • In city traffic — while stopped, place the transmission in NEUTRAL, but do not increase
engine idle speed.
NOTE: There are steps that you can take to slow down an impending overheat condition: • If your air conditioner (A/C) is on, turn it off. The A/C system adds heat to the engine
cooling system and turning the A/C off can help remove this heat.
• You can also turn the temperature control to maximum heat, the mode control to floor and the blower control to high. This allows the heater core to act as a supplement to the radiator and aids in removing heat from the engine cooling system.
CAUTION!
Driving with a hot cooling system could damage your vehicle. If the temperature gauge reads 240°F (116 °C) or greater pull over and stop the vehicle. Idle the vehicle with the air conditioner turned off until the pointer drops back into the normal range 200–230°F (93–110°C). If the pointer remains at 240°F (116°C) or greater and you hear a chime, turn the engine off immediately and call for service.
WARNING!
You or others can be badly burned by hot engine coolant (antifreeze) or steam from your radiator. If you see or hear steam coming from under the hood, do not open the hood until the radiator has had time to cool. Never try to open a cooling system pressure cap when the radiator or coolant bottle is hot.
68
WHAT TO DO IN EMERGENCIES
JACKING AND TIRE CHANGING Jack Location/Spare Tire Stowage
• The jack and spare tire are both stowed under an access cover in the trunk. Follow these
steps to access the jack and spare tire.
NOTE: The spare tire must be removed in order to access the jack.
1. Open the trunk. 2. Lift the access cover using the pull strap. To hold the cover up and into place, hang the hook that is located on the end of the strap over the trunk upper weather strip located in the channel below the rear window.
69
WHAT TO DO IN EMERGENCIES
3. Remove the fastener securing the spare tire.
4. Remove the spare tire. 5. Remove the fastener securing the jack. 6. Remove the scissors jack and lug wrench from the spare wheel as an assembly. Turn the jack screw to the left to loosen the lug wrench, and remove the wrench from the jack assembly.
Preparations For Jacking
1. Park the vehicle on a firm, level surface as far from the edge of the roadway as possible.
Avoid icy or slippery areas.
2. Turn on the Hazard Warning flasher. 3. Set the parking brake. 4. Place the shift lever into PARK. 5. Turn OFF the ignition.
70
WHAT TO DO IN EMERGENCIES
Block the front and rear of the wheel diagonally opposite of the jacking position. For example, if changing the right front tire, block the left rear wheel. NOTE: Passengers should not remain in the vehicle when the vehicle is being jacked.
Jacking And Changing A Tire
1. Remove the spare tire, jack, and lug
2.
wrench. If equipped with aluminum wheels where the center cap covers the lug nuts, use the lug wrench to pry the center cap off carefully before raising the vehicle.
3. Before raising the vehicle, use the lug
wrench to loosen, but not remove, the lug nuts on the wheel with the flat tire. Turn the lug nuts counterclockwise one turn while the wheel is still on the ground.
4. Place the jack underneath the lift area that is closest to the flat tire. Turn the jack screw
clockwise to firmly engage the jack saddle with the lift area of the sill flange.
5. Raise the vehicle just enough to remove
the flat tire and install the spare tire.
71
WHAT TO DO IN EMERGENCIES
6. Remove the lug nuts and tire. 7. Mount the spare tire.
NOTE:
• For vehicles so equipped, do not attempt to install a center cap or wheel cover on the compact spare.
• Refer to “Compact Spare Tire” and to
“Limited-Use Spare” under “Tires—General Information” in “Starting and Operating” in the Owner's Manual on the DVD for additional warnings, cautions, and information about the spare tire, its use, and operation. Install the lug nuts with the cone shaped end of the lug nut toward the wheel. Lightly tighten the lug nuts.
8.
9. Lower the vehicle to the ground by
turning the jack handle counterclockwise.
10. Finish tightening the lug nuts. Push
down on the wrench while at the end of the handle for increased leverage. Tighten the lug nuts in a star pattern until each nut has been tightened twice. The correct tightness of each lug nut is 110 ft/lb. (150 N·m). If in doubt about the correct tightness, have them checked with a torque wrench by your authorized dealer or at a service station.
11. Stow the jack, tools and flat tire. Make sure the base of the jack faces the front of the
vehicle before tightening down the fastener.
Road Tire Installation
1. Mount the road tire on the axle. 2.
Install the remaining lug nuts with the cone shaped end of the nut toward the wheel. Lightly tighten the lug nuts.
3. Lower the vehicle to the ground by turning the jack handle counterclockwise. 4. Finish tightening the lug nuts. Push down on the wrench while at the end of the handle
for increased leverage. Tighten the lug nuts in a star pattern until each nut has been tightened twice. The correct tightness of each lug nut is 110 ft/lbs (150 N·m). If in doubt about the correct tightness, have them checked with a torque wrench by your authorized dealer or service station.
5. After 25 miles (40 km) check the lug nut torque with a torque wrench to ensure that all
lug nuts are properly seated against the wheel.
72
WHAT TO DO IN EMERGENCIES
CAUTION!
Do not attempt to raise the vehicle by jacking on locations other than those indicated in the Jacking Instructions for this vehicle.
WARNING!
• Do not attempt to change a tire on the side of the vehicle close to moving traffic. Pull far
enough off the road to avoid the danger of being hit when operating the jack or changing the wheel.
• Being under a jacked-up vehicle is dangerous. The vehicle could slip off the jack and fall on you. You could be crushed. Never put any part of your body under a vehicle that is on a jack.
• Never start or run the engine while the vehicle is on a jack. If you need to get under a
raised vehicle, take it to a service center where it can be raised on a lift.
• The jack is designed to be used as a tool for changing tires only. The jack should not be used to lift the vehicle for service purposes. The vehicle should be jacked on a firm level surface only. Avoid ice or slippery areas.
• A loose tire or jack thrown forward in a collision or hard stop could endanger the
occupants of the vehicle. Always stow the jack parts and the spare tire in the places provided.
• Carefully follow these tire changing warnings to help prevent personal injury or damage
to your vehicle:
before raising the vehicle.
• Always park on a firm, level surface as far from the edge of the roadway as possible
• Turn on the Hazard Warning flasher. • Block the wheel diagonally opposite the wheel to be raised. • Set the parking brake firmly and set an automatic transmission in PARK; a manual
transmission in REVERSE.
• Do not let anyone sit in the vehicle when it is on a jack. • Do not get under the vehicle when it is on a jack. • Only use the jack in the positions indicated and for lifting this vehicle during a tire
change.
• If working on or near a roadway, be extremely careful of motor traffic. • Raising the vehicle higher than necessary can make the vehicle less stable. It could slip off
the jack and hurt someone near it. Raise the vehicle only enough to remove the tire. • To avoid the risk of forcing the vehicle off the jack, do not fully tighten the wheel nuts until the vehicle has been lowered. Failure to follow this warning may result in personal injury.
• A loose tire or jack thrown forward in a collision or hard stop could endanger the
occupants of the vehicle. Always stow the jack parts and the spare tire in the places provided.
(Continued)
73
WHAT TO DO IN EMERGENCIES
WARNING! (Continued)
• The limited-use spare tires are for emergency use only. Installation of this limited-use
spare tire affects vehicle handling. With this tire, do not drive more than 60 mph (100 km/h). Keep inflated to the cold tire inflation pressure listed on either your tire placard or limited-use spare tire and wheel assembly. Replace (or repair) the original tire at the first opportunity and reinstall it on your vehicle. Failure to do so could result in loss of vehicle control.
BATTERY LOCATION • The battery is stored under an access cover in the trunk. Remote battery posts are located
on the right side of the engine compartment for jump-starting.
JUMP-STARTING
• If your vehicle has a discharged battery it can be jump-started using a set of jumper cables and a battery in another vehicle or by using a portable battery booster pack. • Jump-starting can be dangerous if done
improperly so please follow the procedures in this section carefully. NOTE: When using a portable battery booster pack follow the manufacturer’s operating instructions and precautions.
Preparations for Jump-Start
• The battery is stored under an access cover in the trunk. Remote battery posts are located
on the right side of the engine compartment for jump-starting.
NOTE: The remote battery posts are viewed by standing on the right side of the vehicle looking over the fender.
• Set the parking brake, shift the automatic transmission into PARK and turn the ignition to
OFF.
• Turn off the heater, radio, and all unnecessary electrical accessories. • If using another vehicle to jump-start the battery, park the vehicle within the jumper
cables reach, set the parking brake and make sure the ignition is OFF.
74
WHAT TO DO IN EMERGENCIES
Jump-Starting Procedure
• Connect the positive (+) end of the jumper cable to the remote positive (+) post of the
discharged vehicle.
• Connect the opposite end of the positive (+) jumper cable to the positive (+) post of the
booster battery.
• Connect the negative end (-) of the jumper cable to the negative (-) post of the booster
battery.
• Connect the opposite end of the negative (-) jumper cable to the remote negative (-) post
of the vehicle with the discharged battery.
• Start the engine in the vehicle that has the booster battery, let the engine idle a few
minutes, and then start the engine in the vehicle with the discharged battery. Once the engine is started, remove the jumper cables in the reverse sequence:
• Disconnect the negative (-) jumper cable from the remote negative (-) post of the vehicle
with the discharged battery.
• Disconnect the negative end (-) of the jumper cable from the negative (-) post of the
booster battery.
• Disconnect the opposite end of the positive (+) jumper cable from the positive (+) post of
the booster battery.
• Disconnect the positive (+) end of the jumper cable from the remote positive (+) post of the
discharged vehicle.
• If frequent jump-starting is required to start your vehicle you should have the battery and
charging system inspected at your authorized dealer. CAUTION!
• Do not use a portable battery booster pack or any other booster source with a system
voltage greater than 12 Volts or damage to the battery, starter motor, alternator or electrical system may occur.
• Failure to follow these procedures could result in damage to the charging system of the
booster vehicle or the discharged vehicle.
• Accessories that can be plugged into the vehicle power outlets draw power from the
vehicle’s battery, even when not in use (i.e., cellular phones, etc.). Eventually, if plugged in long enough, the vehicle’s battery will discharge sufficiently to degrade battery life and/or prevent the engine from starting.
WARNING!
• When temperatures are below the freezing point, electrolyte in a discharged battery may freeze. Do not attempt jump-starting because the battery could rupture or explode and cause personal injury. Battery temperature must be brought above freezing point before attempting a jump-start.
(Continued)
75
WHAT TO DO IN EMERGENCIES
WARNING! (Continued)
• Take care to avoid the radiator cooling fan whenever the hood is raised. It can start
anytime the ignition switch is on. You can be injured by moving fan blades.
• Remove any metal jewelry, such as watch bands or bracelets, that might make an
inadvertent electrical contact. You could be severely injured.
• Batteries contain sulfuric acid that can burn your skin or eyes and generate hydrogen gas
which is flammable and explosive. Keep open flames or sparks away from the battery. • Do not allow vehicles to touch each other as this could establish a ground connection
and personal injury could result.
battery explosion.
• Failure to follow this procedure could result in personal injury or property damage due to
• Do not connect the cable to the negative post (-) of the discharged battery. The
resulting electrical spark could cause the battery to explode and could result in personal injury.
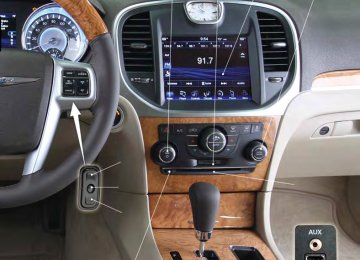
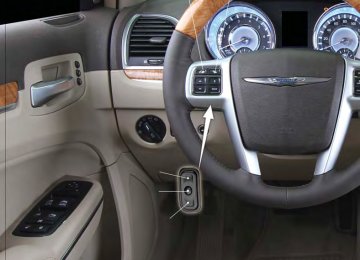
SHIFT LEVER OVERRIDE
• If a malfunction occurs and the shift lever
cannot be moved out of the PARK position, you can use the following procedure to temporarily move the shift lever: • The shift lever override port is located in the storage bin to the right of shift lever.
• Firmly set the parking brake. • Turn the ignition switch to the ACC or
ON position without starting the engine. • Press and maintain firm pressure on the
brake pedal.
• Using a screwdriver or similar tool, press and hold the override tab through the access
port on the center console.
• Move the shift lever into the NEUTRAL position. • The vehicle may then be started in NEUTRAL. • Reinstall the override cover.
MANUAL PARK RELEASE — 8 SPEED TRANSMISSION (3.6L Engine) • If a malfunction occurs and the shift lever cannot be moved out of the PARK position,
you can use the following procedure to temporarily move the shift lever: • Remove the console storage bin to access the Manual Park Release lever.
76
WHAT TO DO IN EMERGENCIES
• Using a small screwdriver or similar tool,
fish the tether strap up through the opening in the console base.
• Insert the screwdriver into the slot in the
center of the lever, and disengage the spring steel lever locking tab by pushing it to the right.
• While holding the locking tab in the
disengaged position, pull the tether strap to rotate the lever up and rearward, until it locks in place in the vertical position. The vehicle is now out of PARK and can be towed. Release the parking brake only when the vehicle is securely connected to a tow vehicle.
To Reset The Manual Park Release:
• Push the latch (at the base of the lever, on
the rear side) rearward (away from the lever) to unlatch the lever.
• Rotate the Manual Park Release lever
forward and down, to its original position, until the locking tab snaps into place to secure the lever.
• Pull up gently on the tether strap to confirm that the lever is locked in its stowed position.
• Tuck the tether strap into the base of the console. Reinstall the console storage bin.
WARNING!
Always secure your vehicle by fully applying the parking brake, before activating the Manual Park Release. Activating the Manual Park Release will allow your vehicle to roll away if it is not secured by the parking brake or by proper connection to a tow vehicle. Activating the Manual Park Release on an unsecured vehicle could lead to serious injury or death for those in or around the vehicle.
77
WHAT TO DO IN EMERGENCIES
78
WHAT TO DO IN EMERGENCIES
FREEING A STUCK VEHICLE • If your vehicle becomes stuck in mud, sand or snow, it can often be moved by a rocking motion. Turn your steering wheel right and left to clear the area around the front wheels. Then, move the shift lever back and forth between REVERSE and DRIVE. Using minimal accelerator pedal pressure to maintain the rocking motion, without spinning the wheels, is most effective.
NOTE: Control
If your vehicle is equipped with Electronic Stability Control (ESC) or Traction
, turn the system off before attempting to “rock” the vehicle.
CAUTION!
• When “rocking” a stuck vehicle by moving between REVERSE and DRIVE, do not spin
the wheels faster than 15 mph (24 km/h), or drivetrain damage may result.
• Revving the engine or spinning the wheels too fast may lead to transmission overheating and failure. It can also damage the tires. Do not spin the wheels above 30 mph (48 km/h) while in gear (no transmission shifting occurring).
WARNING!
Fast spinning tires can be dangerous. Forces generated by excessive wheel speeds may cause tire damage or failure. A tire could explode and injure someone. Do not spin your vehicle's wheels faster than 30 mph (48 km/h) when you are stuck. Do not let anyone near a spinning wheel, no matter what the speed.
79
WHAT TO DO IN EMERGENCIES
EVENT DATA RECORDER (EDR) • This vehicle is equipped with an event data recorder (EDR). The main purpose of an
EDR is to record, in certain crash or near crash-like situations, such as an air bag deployment or hitting a road obstacle, data that will assist in understanding how a vehicle’s systems performed. The EDR is designed to record data related to vehicle dynamics and safety systems for a short period of time, typically 30 seconds or less. The EDR in this vehicle is designed to record such data as: • How various systems in your vehicle were operating; • Whether or not the driver and passenger safety belts were buckled/fastened; • How far (if at all) the driver was depressing the accelerator and/or brake pedal; and, • How fast the vehicle was traveling. • These data can help provide a better understanding of the circumstances in which crashes
and injuries occur.
NOTE: EDR data are recorded by your vehicle only if a non-trivial crash situation occurs; no data are recorded by the EDR under normal driving conditions and no personal data (e.g. name, gender, age, and crash location) are recorded. However, other parties, such as law enforcement, could combine the EDR data with the type of personally identifying data routinely acquired during a crash investigation.
• To read data recorded by an EDR, special equipment is required, and access to the
vehicle or the EDR is needed. In addition to the vehicle manufacturer, other parties such as law enforcement, that have the special equipment, can read the information if they have access to the vehicle or the EDR.
80
MAINTAINING YOUR VEHICLE
OPENING THE HOOD
• Pull the hood release lever located on the
instrument panel, below the headlight switch.
• Raise the hood and locate the safety catch lever, in the middle of the hood opening.
• Move the safety latch while lifting the
hood at the same time.
WARNING!
Be sure the hood is fully latched before driving your vehicle. If the hood is not fully latched, it could open when the vehicle is in motion and block your vision. Failure to follow this warning could result in serious injury or death.
81
MAINTAINING YOUR VEHICLE
FUEL DOOR RELEASE
• The fuel door release button is located in
the driver's door map pocket.
• Push the button once and release to open
the fuel door.
Fuel Door Emergency Release
• To manually open the fuel door, remove
the cover and pull the release cable located in the trunk.
82
MAINTAINING YOUR VEHICLE
Emergency Refueling
• A funnel is provided (located in the trunk in the spare tire area) to open the flapper door to allow for emergency refueling with a gas can.
To avoid fuel spillage and overfilling, do not “top off” the fuel tank after filling.
CAUTION!
WARNING!
• Never have any smoking materials lit in or near the vehicle when the fuel door is open or
the tank is being filled.
• Never add fuel when the engine is running. This is in violation of most state and federal
fire regulations and may cause the “Malfunction Indicator Light” to turn on.
• A fire may result if gasoline is pumped into a portable container that is inside of a vehicle.
You could be burned. Always place gas containers on the ground while filling.
83
MAINTAINING YOUR VEHICLE
84
MAINTAINING YOUR VEHICLE
85
MAINTAINING YOUR VEHICLE
86
MAINTAINING YOUR VEHICLE
—
—
—
—
—