- Download PDF Manual
-
interventions. The system intervenes by brak- ing until you actively take over.
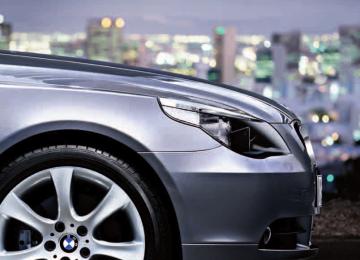
Radar sensor
Heavy rain, dirt, snow and ice may impair the system's ability to detect preceding vehicles. If necessary, clean the radar sensor at the front of the car, beneath the bumper. Take particular care when removing snow and ice. If the sensor is not correctly aligned, Active Cruise Control cannot be activated.
Vehicles pulling out
If a vehicle pulls out in front of you, e.g. after overtaking, the system will not identify the vehi-
69
g
cle until it has moved entirely into the same lane as your car.
If a vehicle ahead suddenly swerves into your lane, the system may not always be able to maintain the selected distance automat- ically. The same applies to high differences between your speed and that of preceding vehi- cles, e.g. when rapidly approaching a truck. Once the system has established that a vehicle is indeed in front of you, it will indicate that you must brake and/or manoeuvre the car yourself. You will need to intervene to avoid the risk of an accident.<
Bends in the road
decelerates in such a situation, the accelerator can be used briefly to counteract this effect. When the accelerator is released again, the sys- tem will resume control of the car's speed.
Your responsibility Your actions have priority at all times. When you press the accelerator pedal while driving with Active Cruise Control, the automatic braking function will be temporarily interrupted. When the accelerator is released, the desired speed is re-established or the selected distance from the vehicle in front taken into account.
Do not leave your foot on the accelerator pedal, and make sure that no objects
such as floor mats are resting on the accelerator pedal, otherwise the system will not be able to brake the car.<
If the desired speed selected is excessive for a bend, the system will reduce the speed while the car is taking the bend. However, it is unable to anticipate how sharp a bend in the road is. You should therefore select an appropriate speed before entering a bend. Due to the wheel sensor's restricted range, the situation may arise where a preceding vehicle may not be detected on a bend in the road, or detected very late.
When your car is approaching a bend, in view of its curvature the system may respond tempo- rarily to vehicles in the other lane. If your car
70
Everything under control
Odometer, outside temperature display, clock
Revolution counter
1 Time, outside temperature and date 2 Distance recorder – odometer – and trip dis-
tance recorder 3 Press the knob:
> Reset trip distance recorder with the
ignition switched on
> With the ignition switched off, displaying
time, outside temperature display and distance recorder for a short time
The outside temperature and time of day are displayed following radio readiness. To call up the date: Press the CHECK button on the flashing turn indicator lever, see page 77. Setting the time and date, see page 79. You can alter the unit of measurement 6 or 7 on the control display, see Units of measure- ment on page 81.
Outside temperature warning Once the display shows a temperature of below +36/377, a signal sounds and a warning lamp comes on. There is an increased risk of ice.
Ice can still form even at temperatures above +36/377. You should therefore drive carefully over bridges and shaded roads; otherwise there is an increased risk of acci- dent.<
The white striped advance warning zone, arrow 1, changes depending on the engine temperature. As the engine temperature increases, the advance warning zone reduces in size accordingly. Avoid engine speeds in the advance warning zone if possible. You must avoid engine speeds in the red warn- ing zone, arrow 2. In this zone the fuel supply is interrupted to protect the engine.
Coolant temperature Should the coolant and therefore the engine become too hot, a warning lamp will come on. In addition, a message will appear on the control display. Checking coolant level, see page 188.
71
l
Energy control
Computer
Displays in the instrument cluster
To access the information, press the BC button on the flashing turn indicator lever following radio readiness. The following items of information are dis- played in the order listed: > Range > Average speed > Average fuel consumption
Range This display indicates how far the car can prob- ably be driven on the fuel remaining in the tank. The distance is calculated on the basis of the way the car has been driven over the past 30 km, approx. 20 miles.
If the range is below 50 km, approx. 30 miles, refuel the car, otherwise the
engine's functions are not assured and damage may occur.<
Average speed The calculation of average speed ignores any stationary periods where the engine was switched off. To reset the average speed: press the BC but- ton on the flashing turn indicator lever for approx. 2 seconds.
Shows the momentary fuel consumption. This enables you to check how economical and envi- ronmentally friendly your current driving style is.
Fuel gauge
Fuel tank capacity: approx. 70 litres, approx. 15.4 gal. Notes on refuelling, see page 180. If the car is at an angle for some time, for exam- ple on a long mountain road, the value in the dis- play may fluctuate to some extent.
Reserve Once the fuel level has fallen to the reserve zone, a message appears on the control display for a short time and the remaining operating range is displayed on the computer. If the remaining range is less than approx. 50 km, approx. 30 miles, the message is displayed per- manently on the control display.
If the range is below 50 km, approx. 30 miles, refuel the car, otherwise the
engine's functions are not assured and damage may occur.<
72
Average fuel consumption The average fuel consumption is calculated for the period since the engine was last started. You can have the average fuel consumption for two different distances displayed on the control display, see Displays on the control display or Journey computer* further below. To reset the average consumption: press the BC button on the flashing turn indicator lever for approx. 2 seconds.
Displays on the control display You can also call up the computer via iDrive, principle see page 14. 1. Press the
button.
The start menu is called up.
2. Move the controller to the right to call up
"Navigation". On cars without navigation system*: Call up "OBC".
3. Select "On-board Info" and press the con-
troller.
> Estimated arrival time:
> Enter a distance manually in the compu-
ter, see further below.
> Enter a destination in the navigation sys-
tem*, see page 134.
> Range > Distance from destination:
> Enter a distance manually in the compu-
ter, see further below.
> Enter a destination in the navigation sys-
tem*, see page 134.
> Average speed > Average fuel consumption
Resetting values You can reset the values for average speed and average consumption: 1. Select the respective menu item and press
the controller.
2. Press the controller again to confirm your
selection.
Entering distance manually 1. Select "Distance to dest." and press the
controller.
4. Select "Computer" and press the control-
ler.
2. Turn the controller to set the distance to the
destination. You may need to overcome a slight resistance if you wish to enter a rela- tively high difference.
3. Press the controller to adopt the setting. The distance is automatically preset during route guidance by the navigation system*.
73
l
Journey computer* The journey computer is suitable e.g. for a holi- day trip. 1. Call up the start menu. 2. Call up "Navigation".
On cars without navigation system*: call up "OBC".
3. Select "On-board Info" and press the con-
troller.
4. Select "Journey computer" and press the
controller.
1. Move the controller to the right to switch to the assistance window and press the con- troller.
2. Select "Computer" or "Journey computer". 3. Press the controller.
> Departure time > Journey time > Distance covered > Average speed > Average fuel consumption To start, stop or reset all values in the journey computer: 1. Select "Set" and press the controller. 2. Select the desired menu item. 3. Press the controller.
Display options You can have the computer or the journey com- puter displayed in the assistance window.
Service requirements
The distance remaining to the next service and its date are displayed briefly when the ignition is switched on.
The extent of service work required can be read out from the remote control by
your BMW Service Advisor.<
74
Further information You can have further information on the scope of maintenance displayed on the control dis- play, see page 14. 1. Call up the start menu. 2. Press the controller to call up the menu. 3. Select "Service" and press the controller. 4. Select "Service requirements" and press
the controller.
5. Select "Status" and press the controller.
Symbols
No servicing is currently needed.
Servicing or an inspection required by law is due soon. Please arrange a Service
appointment.
Servicing is overdue.
Entering dates of statutory emissions tests and vehicle inspections* Make sure that the date on the control display is always set correctly, see page 80, otherwise the Condition Based Service CBS cannot func- tion correctly. 1. Call up the start menu. 2. Press the controller to call up the menu. 3. Select "Service" and press the controller. 4. Select "Service requirements" and press
the controller.
5. Select "Status" and press the controller. 6. Select "Stat. exhaust. insp." or "Stat. vehi-
cle insp." and press the controller.
A list of selected maintenance routines and inspections required by law is displayed. You can call up more information on each entry: Select the entry and press the controller.
7. Select "Schedule date for service" and
press the controller. The month is selected. 8. Turn the controller to make the adjustment.
To exit the menu: Select the
arrow and press the controller.
75
l
9. Press the controller to adopt the setting.
The year is selected.
10. Turn the controller to make the adjustment. 11. Press the controller to adopt the setting.
The date input is memorised.
To exit the menu: Select the
arrow and press the controller.
Check Control
Principle The Check Control monitors car functions and alerts you to any faults in the systems moni- tored. The system alerts you by means of indi- cator or warning lamps in the instrument clus- ter, possibly accompanied by an acoustic signal, and text messages at the bottom of the control display.
Indicator and warning lamps
Indicator and warning lamps may light up in a variety of colours and combinations both in the panel 1 and in the display 2.
means that a Check Control message has
been issued. The symbol remains visible even if the Check Control message disappears again
76
after a short time. The warning lamp signals and text messages are memorised and can be called up again subsequently, see also page 77.
Explanatory text messages
Text messages appearing at the lower edge of the control display explain the meaning of the indicator and warning lamps that have come on.
You can subsequently call up additional infor- mation for most Check Control messages, e.g. the cause of a malfunction and what action is required on your part, see below. If action is required as a matter of urgency, this information is flashed up as soon as the accom- panying lamp comes on. Exit the displayed information: Select the
arrow and press the controller.
Order of importance of Check Control messages Important Check Control messages remain until the faults in question have been rectified. These messages cannot be deleted. If several faults occur at the same time, they are dis- played in succession. Less important messages disappear after approx. 20 seconds, but they remain memo- rised.
4. Select "Check Control messages" and
press the controller.
To hide these Check Control messages: Press the CHECK button on the flashing turn indicator lever.
Displaying memorised Check Control messages 1. Press and hold down the button:
The first message stored is displayed.
5. Select a text message and press the con-
troller.
2. Press the button:
Every time you press the button, another message is displayed.
Displaying further information subsequently iDrive concept, see page 14. button. 1. Press the
The start menu is called up.
2. Press the controller to call up the menu. 3. Select "Service" and press the controller.
To exit the display: Select the
arrow and press the controller.
Displaying the urgency of malfunctions
Depending on the equipment specification, the following symbols are displayed alongside the Check Control messages in the memory:
There are no malfunctions in the systems monitored. There are malfunctions in the systems monitored. Supplementary information is given on the control display for certain malfunctions.
77
l
The symbols also show the service require- ments status, see page 74.
Messages displayed at end of a journey Malfunctions which have been indicated during a journey are displayed again when you switch off the ignition. You can call up the messages again provided the display has not yet gone out. Press CHECK button for approx. 2 seconds. If there are sev- eral messages, press the CHECK button as many times as necessary. The display goes out > Automatically after a short time > If you press the CHECK button again for
approx. 2 seconds
5. Select the speed and press the controller. 6. Turn the controller to adjust the limit. You may need to overcome a slight resistance if you wish to enter a relatively high differ- ence.
7. Press the controller to adopt the setting.
The limit is automatically switched on.
Memorising actual speed as limit value Select "Accept current speed" and press the controller. The actual speed is memorised as the limit value.
Activating limit Select "On" and press the controller.
The limit is automatically switched on.
Stopwatch* iDrive concept, see page 14. 1. Call up the start menu. 2. Call up "Navigation".
On cars without navigation system*: call up "OBC".
3. Select "On-board Info" and press the con-
troller.
4. Select "Stopwatch" and press the control-
ler.
Speed limit* You can enter a speed at which you are to be alerted by means of a Check Control message. You can use this feature e.g. to ensure that you do not exceed the speed limit in a built-up area. A renewed reminder of this speed limit will not be given unless you have undercut it by at least 5 km/h, approx. 3 mph, in the meantime.
Displaying, setting or altering limit iDrive concept, see page 14. 1. Call up the start menu. 2. Call up "Navigation".
On cars without navigation system*: call up "OBC".
3. Select "On-board Info" and press the con-
troller.
4. Select "Limit" and press the controller.
Starting, stopping or resetting > Select "Start" and press the controller. The
stopwatch starts at the time displayed.
> Select "Reset" and press the controller.
The stopwatch is reset and starts again if it was running previously.
78
> Select "Stop" and press the controller.
3. Turn the controller until "Display settings"
Timekeeping is stopped.
is selected and press the controller.
Taking an intermediate time reading Select "Interm. time" and press the controller. The intermediate reading is displayed below the current time display.
You can also call up other functions at any time while the stopwatch is running. The
stopwatch continues to run in the back- ground.<
Settings on the control display iDrive concept, see page 14. 1. Press the
button once or twice until
the start menu is displayed.
Setting time 1. You may need to move the controller for- ward once to switch to the first field from the top.
2. Press the controller to call up the menu.
2. Turn the controller until "Clock" is selected
and press the controller.
79
l
3. Turn the controller until "Set time" is
selected and press the controller.
Adjusting settings 1. Turn the controller to set the hour and press
the controller.
2. Turn the controller to set the minutes and
press the controller.
The system accepts the new time.
Switching on hour signal* Shortly before the hour, three signal tones will be emitted. Select "Hour memo" and press the controller.
The hour signal is switched on.
Setting the time format 1. Select "Time format" and press the control-
ler.
2. Select the desired format and press the
controller.
The setting is saved for the remote control cur- rently in use.
Setting date 1. Select "Date" and press the controller.
2. Select "Set date" and press the controller. The first part of the date setting is selected, in this example the day.
3. Turn the controller to make the adjustment. 4. Press the controller to adopt the setting.
The next part of the time setting is selected. 5. Complete the setting. Once the setting has
been completed, the date is memorised.
Altering the date format 1. Select "Date format" and press the control-
ler.
2. Select the desired format and press the
controller.
The setting is saved for the remote control cur- rently in use.
Brightness of the control display The brightness is automatically adjusted to ambient light conditions. However, you can adjust the basic setting. 1. Select "Brightness" and press the control-
ler.
2. Move the controller to the right if necessary,
to call up "Display Offset".
3. Turn the controller until the desired setting
is obtained.
The setting is saved for the remote control cur- rently in use.
80
Units of measurement You can alter the units of measurement for fuel consumption, distance, temperature and pres- sure. 1. Select "Units" and press the controller.
2. Select the desired menu item and press the
controller.
3. Select the desired unit of measurement and
press the controller.
The settings are saved for the remote control currently in use.
Language of the control display 1. Select "Languages" and press the control-
ler.
2. Select "Text language" and press the con- troller. You can alter the language of the dis- play texts.
3. Select the desired language and press the
controller.
The setting is saved for the remote control cur- rently in use.
81
Technical features for driving comfort and safety
Park Distance Control PDC*
Switching on manually
Principle PDC assists you when manoeuvring into a parking space. Audible signals and a visual display* indicate that you are approaching an object in front of or behind your car. Four ultra- sonic sensors in each bumper measure the dis- tance from it. The sensors cover a range of approx. 2 m or 7 ft. An acoustic warning does not sound, however, until an object is approx. 60 cm or 2 ft or closer to the front sensors or rear corner sensors, and approx. 1.5 m or 5 ft or closer to the rear centre sensors.
PDC is a parking aid which is capable of registering objects approached at low speed, as is usually the case when the car is being parked. Avoid approaching an object rap- idly, otherwise the system may be unable to alert you in sufficient time in view of the physical principles involved.< If the car is towing a trailer, the rear sensors will be unable to supply meaningful signals. They therefore do not come on.
Automatic activation With the engine running or the ignition switched on, the system is activated automatically after approx. 1 second when you engage reverse gear or move the selector lever to position R. Wait briefly before starting to drive, to allow the system to become active.
82
Press the button, the LED comes on.
Switching off manually Press the button again; the LED goes out. Once you have driven approx. 50 m, approx. 165 ft, or travelled at a speed of more than approx. 30 km/h, approx. 20 mph, the system is deactivated and the LED goes out. Switch the system on again manually as necessary.
Audible warning signals The fact that you are approaching an object is indicated by an intermittent warning signal for the part of the car in question. For instance, if an object is identified to the rear left of the car, the warning signal sounds at the rear left loud- speaker. The closer the car approaches the obstruction, the more rapid the sequence of signals. When the distance from a detected object is less than approx. 30 cm, approx. 1 ft, the signal becomes continuous. An intermittent tone is interrupted after approx. 3 seconds: > If you remain in front of an object that was detected by only one of the corner sensors
> If you are driving parallel to a wall
Malfunction The LED in the button flashes and a message appears on the control display. PDC has failed. Have the system checked. As a precautionary measure, keep the sensors clean and free from ice, so that they always operate reliably. Do not spray for any length of time with high-pressure cleaning equipment, and keep cleaning jets at least 10 cm, approx. 4 in, away from the sensors.
PDC with optical warning* You can have the fact that you are approaching an object indicated on the control display. Objects that are further away from the car will appear on the control display before an audible warning signal is given. iDrive concept, see page 14. 1. Call up the start menu. 2. Press the controller to call up the menu. 3. Select "Vehicle settings" and press the
controller.
4. Select "PDC" and press the controller.
5. Select "Monitor on" and press the control-
ler.
The PDC image is switched on.
The display is shown on the control display as soon as PDC is activated. The setting is saved for the remote control cur- rently in use.
System limits
PDC is no substitute for your personal assessment of obstructions. The sensors have certain dead areas in which objects cannot always be detected. In addition, the identifica- tion of objects may not be possible if the physi- cal limits of the ultrasonic measuring principle are exceeded, for instance with trailer noses and hitches, and thin or wedge-shaped objects. Low objects already indicated, such as a kerb, may enter the sensors' dead areas before a continuous audible signal is given. Higher, pro- truding objects, such as ledges, may not be detectable. Loud sound sources outside or inside the car can drown out the PDC signal.<
Driving stability control systems Your BMW has a number of systems that help to maintain the car's stability even in adverse driving conditions.
Anti-lock Brake System ABS ABS prevents the wheels locking when the brakes are applied. The car can consequently still be steered even when the brakes are applied hard. This increases active driving safety. ABS is ready to operate each time the engine is started. Safe braking see page 124.
Cornering Brake Control CBC When the brakes are applied while cornering when changing lanes, the car's stability and steering characteristics are further enhanced.
Electronic Brake Force Distribution The system regulates the braking pressure on the rear wheels in order to stabilise the braking behaviour.
83
Dynamic Brake Control DBC If the brake is pressed down rapidly, this system automatically boosts the braking force to a maximum and thus helps to keep the braking distance as short as possible when a full brake application is made. It also makes full use of the advantages offered by ABS. Maintain pressure on the brake during the entire brake application. If the brake is released, DBC will be switched off.
Dynamic Stability Control DSC DSC prevents the driving wheels losing traction when you pull away from rest or accelerate. DSC also recognises unstable driving condi- tions, for example if the rear of the car is about to swerve or if momentum is acting at an angle past the front wheels. In such instances, DSC helps to keep the car on a stable course, subject to the limits imposed by the basic laws of dynamics, by reducing the engine output and applying the brakes to individual wheels. DSC is ready to operate each time the engine is started.
Not even DSC can overcome the laws of physics. It is therefore the driver's
responsibility to adopt a suitable driving style in every situation. Do not undermine the addi- tional safety afforded by this system by taking driving risks.<
Deactivating DSC
enhancing intervention will now take place. Intervention by the active steering*, which pro- motes stability, is likewise deactivated, see page 88. A message appears on the control display: Please also observe the supplementary infor- mation given there. In the interests of dynamic stability, activate DSC again as soon as possible.
Activating DSC Press the button; the indicator lamp in the instrument cluster goes out.
Indicator lamps
If the indicator lamp is flashing: DSC is regulating the propulsive and braking forces.
If the indicator lamp is on: DSC is deactivated.
Dynamic Traction Control DTC DTC is a version of DSC that has been traction- optimised for particular operating conditions, e.g. driving on roads where the snow has not been cleared. The system assures maximum traction, but with reduced dynamic stability. You should therefore drive with caution. In the following exceptional situations it may be best to activate DTC for a short time: > When driving uphill on snow-covered roads,
in slush or on unploughed, snow-covered roads
> For rocking the car out of a hollow or start-
ing in deep snow or on a loose surface
> When driving with snow chains*
Hold the button pressed until the DSC indicator lamp in the instrument cluster remains on per- manently, but for no longer than approx.10 sec- onds. Both Dynamic Traction Control DTC and DSC are deactivated. No stabilising or traction-
84
Activating DTC
Press the button; the DTC indicator lamp in the instrument cluster comes on.
Deactivating DTC Press the button again; the DTC indicator lamp in the instrument cluster goes out.
Indicator lamps
If the indicator lamp is flashing: DTC is regulating the propulsive and braking forces. If the indicator lamp is on: DTC is activated.
xDrive 525xi, 530xi, 530xd xDrive is the four-wheel-drive system of your BMW. The combined effect of xDrive and DSC further optimises traction and driving dynamics. The four-wheel-drive system xDrive distributes the torque flow variably to the front and rear wheels in accordance with the driving situation and the condition of the road surface.
Hill Descent Control HDC 525xi, 530xi, 530xd
Principle HDC reduces the car's speed when driving down steep inclines and thus makes your BMW even easier to control in such conditions. The car will then move at about twice walking pace, without your having to regulate its speed. HDC can be activated at speeds of less than approx. 35 km/h, approx. 22 mph. When the car starts to travel downhill, its speed of below
approx. 35 km/h, approx. 22 mph, is automati- cally reduced to about twice walking pace, approx. 12 km/h, approx. 7 mph, and this speed is then maintained. You can alter this speed within the range of about 5 km/h and 25 km/h, approx. 3 mph and 16 mph, by accelerating or braking. You can specify a target speed within the same range by using the cruise control lever.
Activating HDC You can activate HDC: > With the programmable buttons on the
steering wheel, see page 51
> Via iDrive iDrive concept, see page 14. 1. Call up the start menu. 2. Press the controller to call up the menu. 3. Select "Vehicle settings" and press the
controller.
4. Select "HDC" and press the controller.
5. Select "HDC on" and press the controller. The HDC display in the instrument cluster appears. If the car is braked automatically, a message appears on the control display for about 20 sec- onds.
Deactivating HDC With the programmable buttons in the steering wheel or via iDrive; the HDC display goes out. At above approx. 60 km/h, approx. 37 mph, HDC is deactivated immediately, and about 10 seconds after the ignition has been switched off.
85
Malfunction
The warning lamp lights up and a mes- sage appears on the control display: the system is faulty. Have the system
checked as soon as possible.
If there is a malfunction, reduce your speed accordingly, particularly on bends.
The car will lean over further when cornering and under the influence of cross-winds, and the suspension response will be noticeably softer when cornering. If a message instructing you to stop the car appears on the control display, pull over as soon as possible and switch off the engine. In this instance, the oil level in the reservoir may have fallen below the minimum level, possibly due to a leak in the hydraulic system. Do not drive the car any further; contact BMW Service instead.<
Touring: self-levelling suspension
Malfunction
If the warning lamp for self-levelling suspension lights up yellow and a mes- sage appears on the control display:
the self-levelling suspension is faulty. Stop the car and check it. If the body is distinctly lower at the back than at the front, and possibly standing at an angle, for instance lower at the left than at the right, take the car to the nearest BMW Serv- ice or to a workshop that operates to BMW specifications and has suitably trained person- nel. Drive cautiously while the car is in this con- dition. The car's ground clearance is reduced and its ride comfort below the usual standard. Even if the car's suspension level is normal, take it to the nearest BMW Service or to a workshop that operates to BMW specifications and has suitably trained personnel if a fault is indicated.
Using HDC Manual transmission: Use HDC in low gears and when reversing. Automatic transmission: HDC can be used in any transmission speed.
Displays in the instrument cluster
1 Display of target speed 2 HDC display
Malfunction If the HDC display goes out while HDC is in operation or does not come on: HDC is temporarily unavailable due to the high temperature of the brakes.
Dynamic Drive*
Principle Dynamic Drive minimises side tilt of your car and optimises dynamic stability when cornering or taking evasive action. Dynamic Drive is based on active stabilisers on the front and rear axles. Depending on the driv- ing situation, the suspension response is sporty when cornering and relaxed when driving straight ahead. The system constantly acts within a fraction of a second while the car is on the move. The system is ready to operate each time the engine is started.
86
Run Flat Indicator RPA
Initialising the system
Principle The Run Flat Indicator monitors the pressures in the four tyres fitted to the wheels while the car is being driven. The system reports any sig- nificant loss of pressure in one tyre in relation to another. If a tyre loses pressure its rolling radius changes, and this in turn alters the speed of rotation. This change is detected and reported as tyre failure.
Operating requirements To ensure that tyre failure can be reported reli- ably, the system must have been initialised while the tyre pressures are correct.
The system has to be reinitialised every time tyre pressures are corrected, after
each change of a wheel or tyre, and after a trailer has been attached or detached.<
System limits
The Run Flat Indicator is unable to warn the driver of sudden, severe tyre damage
caused by external factors, nor can it identify the gradual loss of pressure that will inevitably occur in all four tyres over a lengthy period of time.< In the following situations, the system could be slow to respond or operate incorrectly: > If the system has not been initialised > When driving on snow-covered or slippery
surfaces
> When driving with an enthusiastic style,
causing the driven wheels to spin, high lat- eral acceleration
> When driving with snow chains* The Run Flat Indicator is unable to function if the compact wheel* is fitted.
Initialising is completed by driving the car; this process can be interrupted at any time. Initialising resumes automatically when you continue your journey. Do not initialise the system while driving with snow chains* or a compact wheel* fitted to the car.< iDrive concept, see page 14. button. 1. Press the
The start menu is called up.
2. Press the controller to call up the menu. 3. Select "Vehicle settings" and press the
controller.
4. Select "RPA" and press the controller.
5. Start the engine but do not drive off yet. 6. Select "Set tyre pressure" and press the
controller.
7. Select "Yes" and press the controller.
8. Drive off.
The message "Initialising..." is displayed.
Initialising is completed during the journey. The control display then shows "Status: RPA active" again.
87
3.
Indication of a flat tyre