Post Topic
|
Post #1
 22nd March 2006 - 12:25 AM 22nd March 2006 - 12:25 AM
|
|---|---|
|
Hi all. Well here is another of the many DIY mods I love to do, but this is one of the first I have properly documented for a while  Anyone who has worked on an EFI Corolla (or possibly some other models?) would have no doubt noticed the crappy location of the factory fuel filter. Not only that, its connected by 2 bolts, which on some models are very difficult to access. Also, being a solid metal filter with a built in bracked, and connectors, it is also an expensive part should you need to replace it. So I started scheming a way to make life alot easier come service time, and to also save myself a few dollars. Here is what I came up with after some quick searching on the web!  What You Will Need To Buy: * Ryco Z200 Fuel Filter (Standard filter for a VS Statesman/SS Commodore, so if it can withold the pressure and flow of a V8, I think it can handle the fuel requirements of my SP 4AGE!) * 300mm (Had to buy per foot, only needed about 100mm) EFI Hose (7.5mm is perfect for the Z200 inlet/outlet hoses) * 4 x EFI Hose Clamps (Only need 3, but you might ruin one) 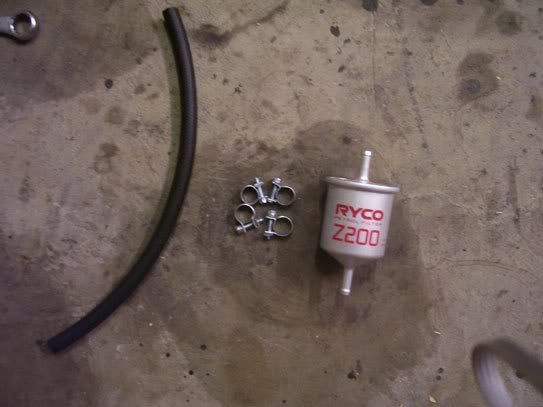 What You May Need: * Various Spanners - 15mm, 17mm, 10mm * Water Spray (for washing petrol spills away) * Towel (soaking up water and cleaning fuel away) * Scissors * Torch * Stanley Knife * Fire Extinguisher * Flathead Screwdriver * Small container 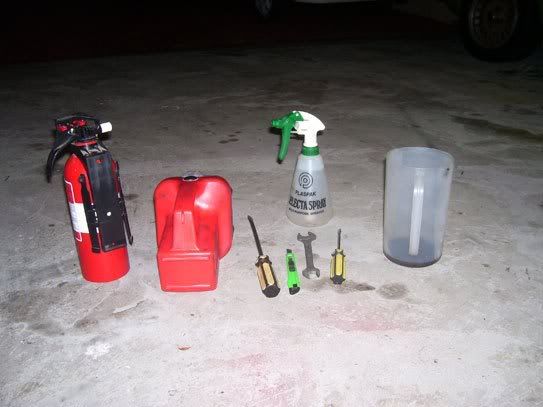 1. First, you will need to locate either the fuel pump harness, or simply disconnect the EFI/Fuel Pump fuses from the fuse box 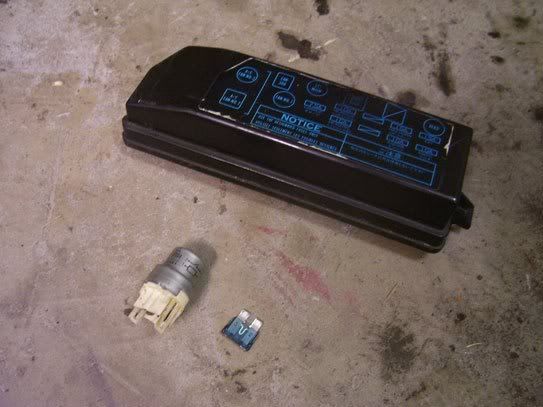 2. Next, turn the starter key over, and hold it for about 5 secs to relieve the fuel pressure from the lines (the car should kick over, but not start. If it starts, let it run until it stalls) 3. Then you should disconnect the battery. Don't want any sparks while your playing with fuel! 4. Now you should remove the air intake pipe and top of the airbox, to give a clear space to the filter 5. Using your 17mm spanner, loosen the top nut on the filter, and put the small container under it to catch the dripping fuel. Pull the hose away and put it to the side. 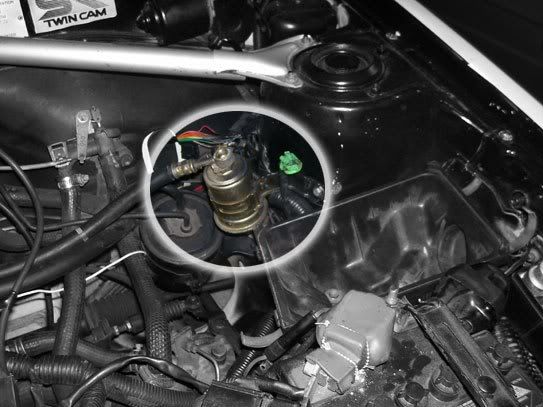 6. Grab the 15mm spanner now, and loosen the tricky nut on the underside of the filter, making sure you don't bend the metal fuel lines while trying to get a good angle. 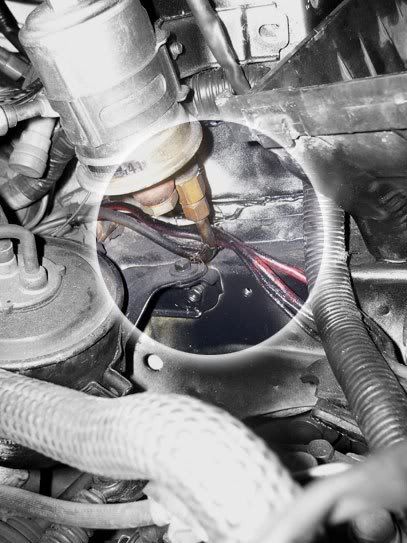 7. Once again, use the small container to collect the dripping fuel as you pull the filter off, and drop the filter in the container. In my case, the filter fuel was pitch black with little chunks! Mustn't have been changed in a while...  8. Now you should have a nut sitting on a metal fuel line (filter feed), which will have to stay on there. The end of the metal line is barbed, which is very useful for me. Otherwise you may need to flare the end of the metal line to make sure the clamp doesn't slip off later. 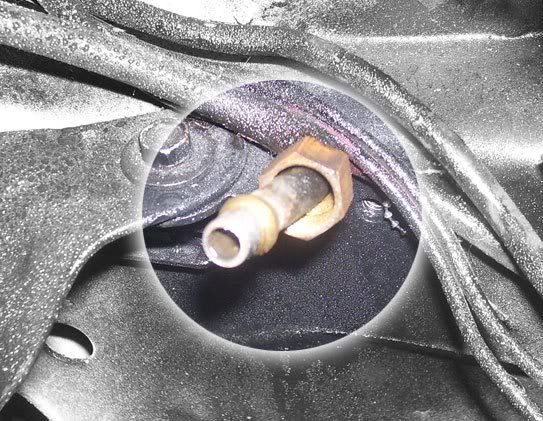 9. Next, grab the hose you put aside in step 5, and neatly cut the metal connector off with a stanley knife or scissors (through the rubber EFI line). This will be the connection to the outlet of the fuel filter. 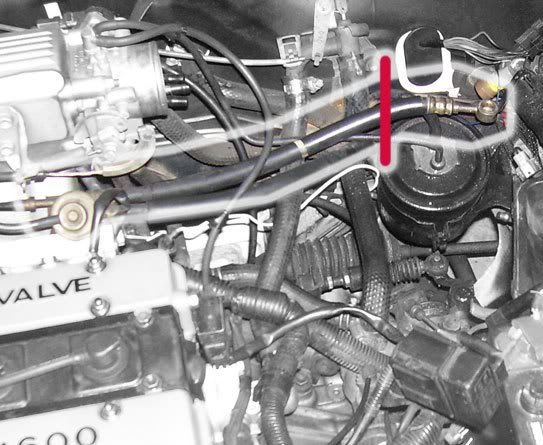 10. Then, you should grab your new EFI hose, and push it over the barb shown in Step 8. It should be fairly tight, which is what you want. Pick up a EFI hose clamp, and slide it down the hose, and over the barb (now inside the hose). Once it clears the barb, tighten the screw until the clamp is firmly grasping the EFI hose. 11. Almost there, now it is as simple as grabbing your Ryco filter, and turn the filter so the FLOW arrow is displaying flow towards the fuel rail. Firstly, join the outlet side of the filter to the fuel rail hose (the Step 9 hose), after putting a clamp over the hose. Then tighten it as in Step 10. Now, cut the new EFI hose to a suitable length so it will reach the inlet to the filter, then chuck a clamp over it and secure it to the 'Inlet' side of the filter. It should look like this: 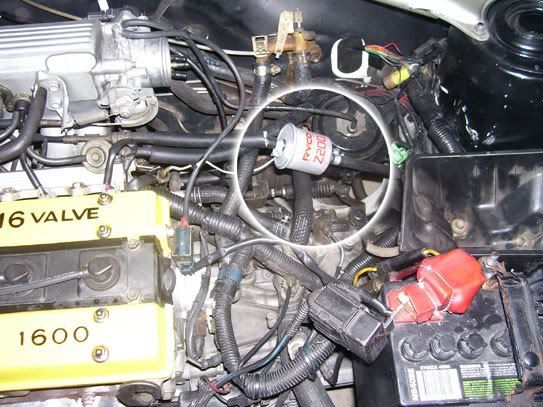 12. All done! After the install, start putting everything back together, BUT not before making sure the clamps are all tight, and the setup is looking reliable. If it looks good, connect the intake pipe back on to the Throttle Body, and finally put the fuses back in. Using your water spray, spray a mist over the areas where fuel may have spilled a bit, and then use the towel to soak up any excess fluids. Finally, connect the battery. The filter is highlighted by the red circle: 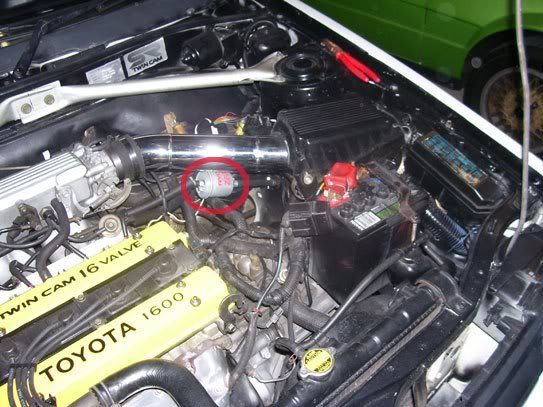 13. Here comes the moment of truth. Given my history of having my car burn down in flames as I was driving, I was prepared should a fire start for some reason. With the extinguisher ready (make sure its suitable for Fuel fires), I turned the ignition to on, but not as to kick the starter motor over. This should purge the fuel into the fuel rail, ready to be sprayed into the engine. 14. With hand on the key, kick the motor over, giving it a slight push on the accelerator to ensure it flows some fuel into the engine. Once the engine starts, grab your Torch, and shine it on the fuel filter, watching for any leaks that may occur. (Naturally, I had no leaks since I'm so awesome ) After a few minutes, turn the car off and you are now done!As you can see, the filter itself is now clearly in sight, making future servicing of the part very easy! Otherwise, you're mechanic will thank you, if you don't do your own services  The best part? In total, it came to a total cost of around $15, with the fuel filter only costing $10 from Global Auto Spares, South Tweed. Another DIY project completed, and more knowledge learnt to help in the future Hope it may help someone, and it can be used in a variety of applications.Thanks, Mitchell.  |
|


|
|
mazdaguy01
Post #2
Brilliant idea mate. Ill go do the same to mine soon when I change my fuel reg. God I dont even know where my fuel filter is. |
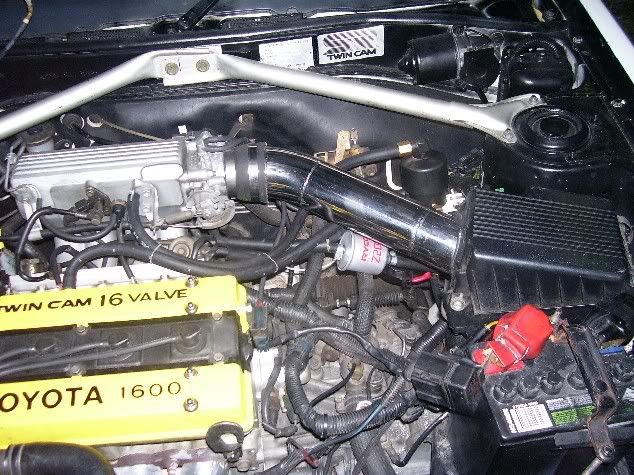
|---|

-
Member Login
If you have a BoostCruising account enter your user name and password into the yellow box.
Alternatively, you can quickly login with Facebook.
If you don't have an account create one below.
Create Account -

Login using your Facebook account!
1 User(s) are reading this topic (1 Guests and 0 Anonymous Users)
0 Members:
Loading...
x